Medical cannabis can be reproduced (propagated) sexually or asexually. Seeds are the product of sexual propagation; stem cuttings (aka clones*) are the result of asexual or vegetative propagation. In its simplest form, taking a stem cutting involves cutting a growing branch or branch tip, placing the cut end into a growing medium, and keeping it moist until roots grow. Medical cannabis gardeners commonly refer to a “clone” as a branch of a cannabis plant that has been cut off and rooted.
*Technically, cloning is taking one cell of a plant and promoting its growth into a plant; it shares the same DNA and is effectively a copy of the donor (mother) plant.
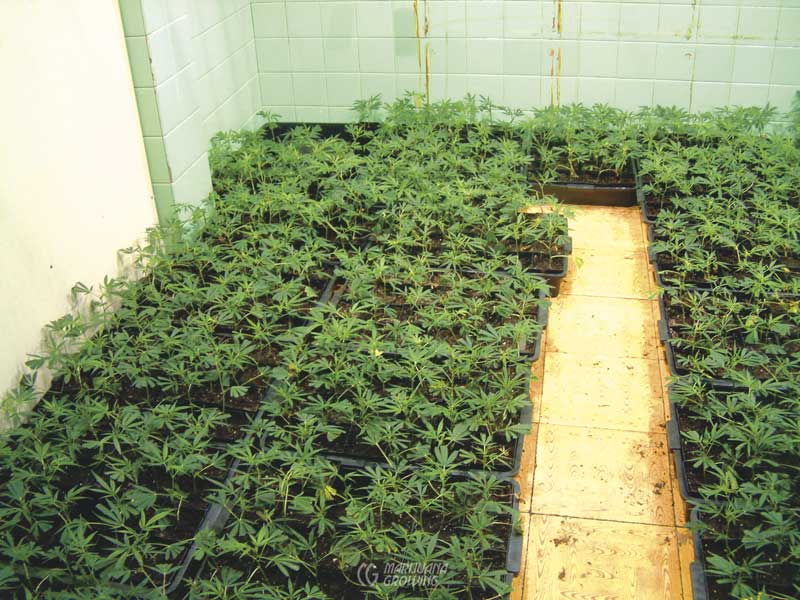
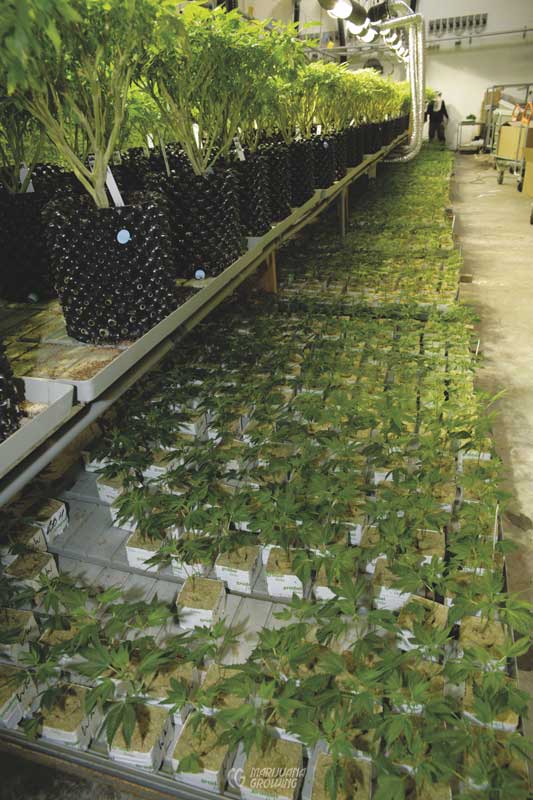
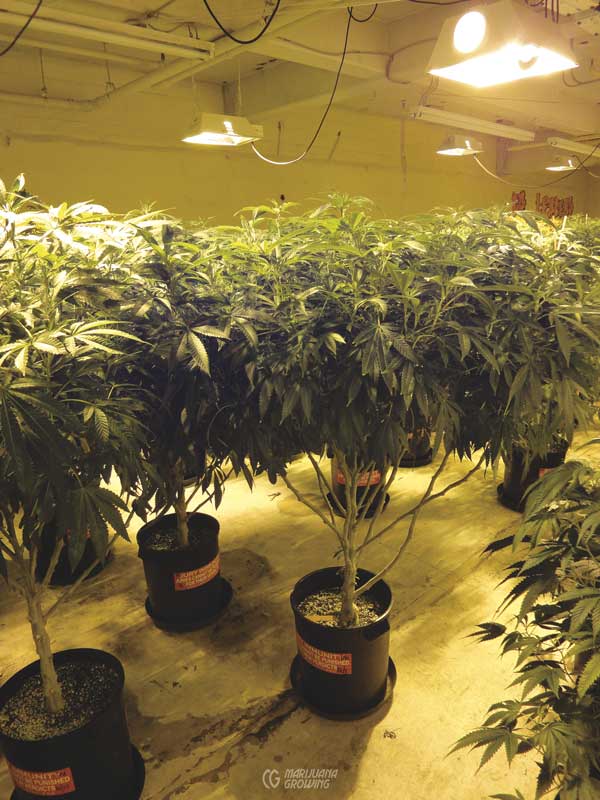
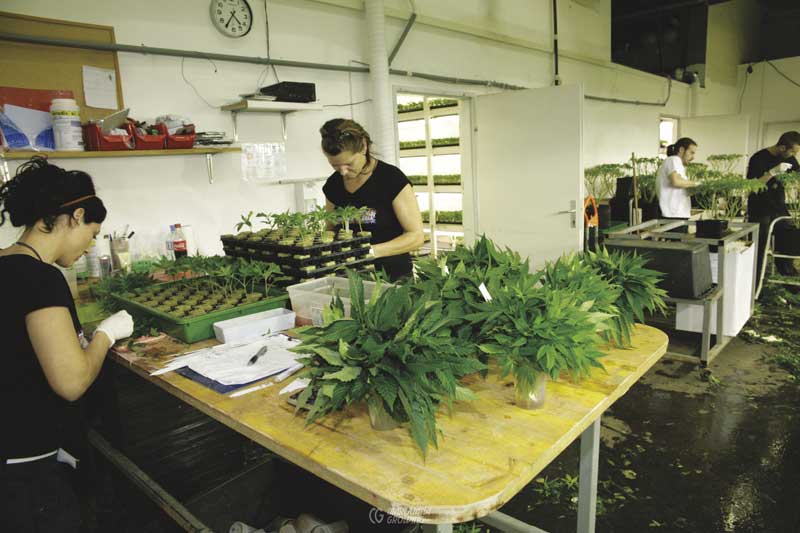
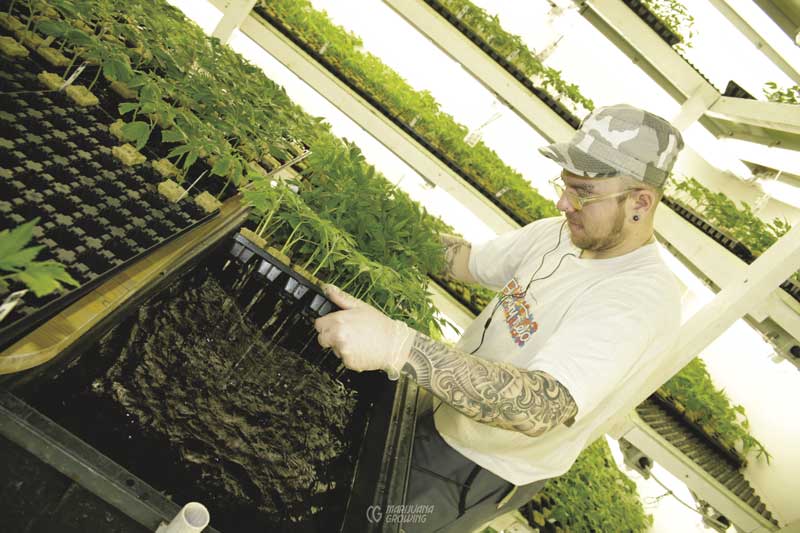
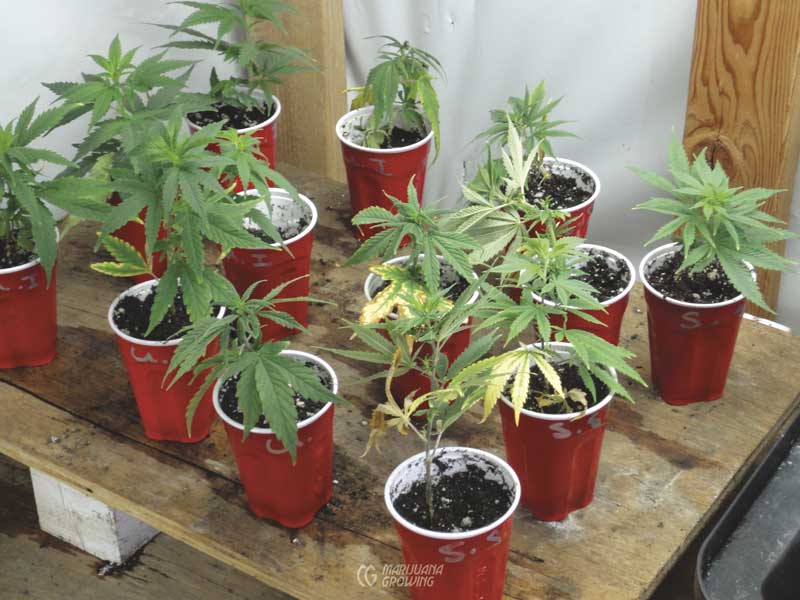
Clones are taken from desirable females called mother plants. Once rooted, clones are transplanted and moved into an indoor vegetative room, greenhouse, or outdoors. Crops of clones are most often induced to flower with a 12/12- hour day/night schedule and harvested about 2 months later. Short crops of clones in small containers are much easier to move and maintain than big plants in large containers, whether grown indoors, outdoors, or in a greenhouse.
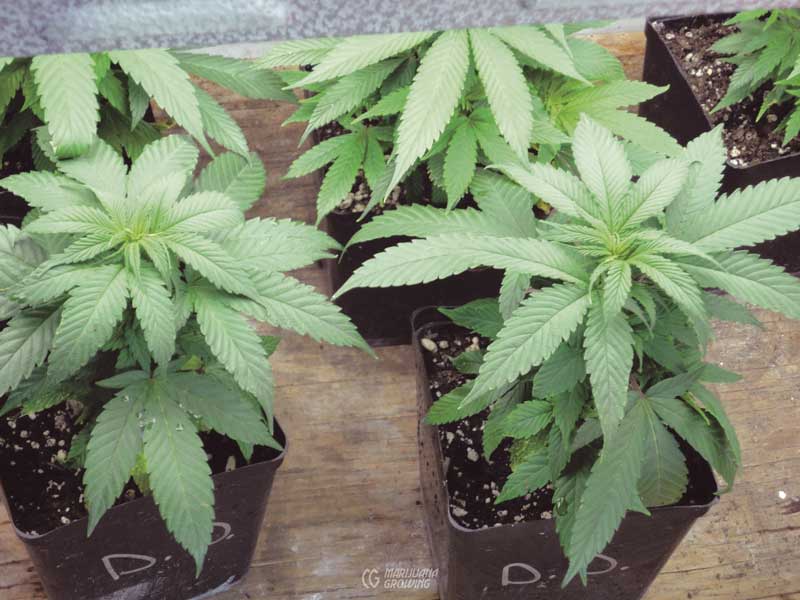
Healthy “clones” are the mainstay of most cannabis gardens.
Well-illuminated, healthy clones are fast-growing, and develop more quickly than fungus and spider mites can reproduce. By the time such pests and problems take hold, healthy plants are well on their way to maturity.
Strong, healthy, cannabinoid-potent females make good mothers. Weak plants that are susceptible to disease and pest attacks over time make poor mothers, even though they might exhibit strong genetic qualities. Such mothers tend to lose strength and often contract low levels of diseases that they pass on to clones.
| CLONES | |
| Advantages | Disadvantages |
| all female | can carry undetectable diseases |
| exact replica of mother | genetic instability maintained |
| consistent growth | not F1 hybrids – less vigor |
| less time to harvest than seeds | difficult for some gardeners to root |
| flower-ready (competent buds) | difficult to find locally and legally |
Growing a strong, healthy mother plant is the first step to producing strong, healthy cuttings.
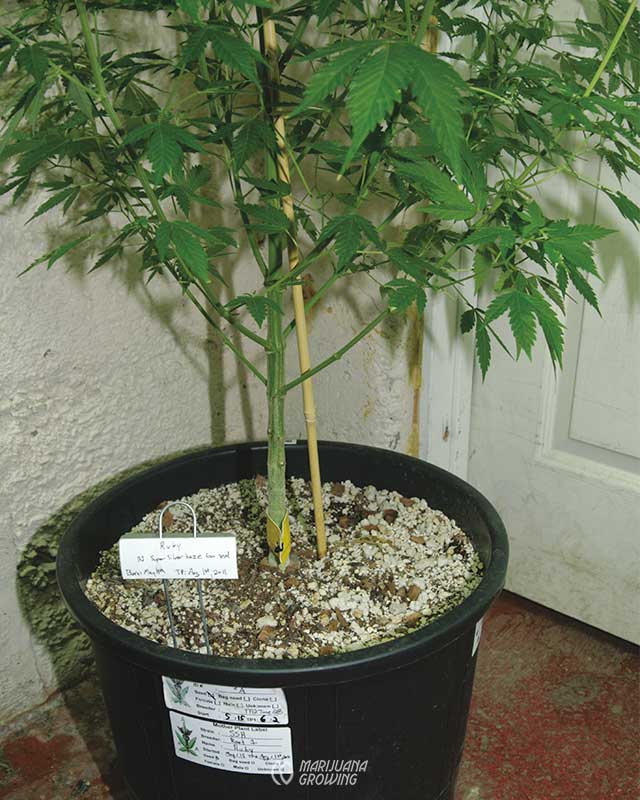
Label all mothers and corresponding clones.
Mother Plants
Mother plants are selected for desirable medicinal qualities. Cannabinoid and terpene content are more important than harvest weight. The most robust mother plants are taken from superior F1 hybrid females. See chapter 3, Medical Cannabis Varieties, for more information.
All cannabis plants can be cloned, regardless of age or growth stage. However, autoflowering plants complete their life cycle in less than 90 days and make very short-term mothers. It is time-consuming to re-vegetate plants that flowered before clones were taken. Clones taken from flowering plants root quickly but require a month or longer to revert to vegetative growth. See “Cloning a Flowering Female”.
Take clones from mother plants that are at least 2 months old. If taking clones from seedlings, wait until male or female pre-flowers are easily visible with the naked eye. Clones taken from female plants cloned before they have expressed sex may dawn male flowers or develop poorly when induced to flower with a 12/12-hour day/night photoperiod.
Mother plants are most resilient when grown from F1 hybrid seeds. Most often clones are taken from other clones. There are countless examples of gardeners who made clones of clones from the same variety more than 20 times. That is, clones (C-1) were taken from the original female grown from seed. These clones were grown in the vegetative stage, and clones (C-2) were taken from the first clones (C-1). Blooming was induced in (C-1) 2 weeks later and (C-2), grown in the vegetative stage.
One or two large female plants can be the source of many clones!
Then, clones (C-3) were taken from the second clones (C-2). This same growing technique is still going on with clones of clones well past (C-20) and there has been no apparent breakdown in the clone’s potency or vigor. However, mothers that are weak may suffer stress or contract disease such as powdery mildew will produce weak clones. Weak and diseased mothers should be banished from the garden, container and all.
A female plant will reproduce 100 percent females, all exactly like the mother except for phenotype deviation*. When grown in the exact same environment, clones from the same mother usually look alike. But the same clones subjected to distinct environments in different garden rooms will often look different.
*Since we do not have enough research on cannabis, we must look at other plants for information. The Bradford pear for instance, arose from a genetic difference in the bud. The new shoot had better pears, and new trees were made from them. They are not always complete to form older DNA that has been acted on, and an established phenotype. A true clone made from a single cell was used to make a big group, carry all identical but new DNA, and a cursory but malleable phenotype.
Once a plant grown from seed has designated sex (male or female), and it receives any other necessary trigger temperature, light cycle, etc.—it is biologically “competent,” ready to enter the flowering growth stage. See “Florigen” in chapter 8, Flowering, for more information.
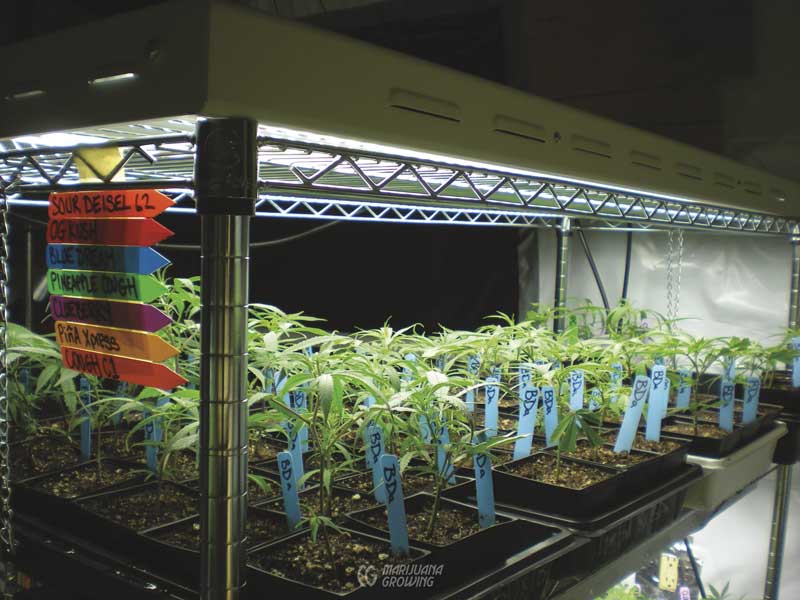
Keep several mother plants in the vegetative growth stage for a consistent source of cloning stock. Start new mothers from seed every 6 to 12 months. Give mother plants 18 to 24 hours of light per day to maintain rapid growth.
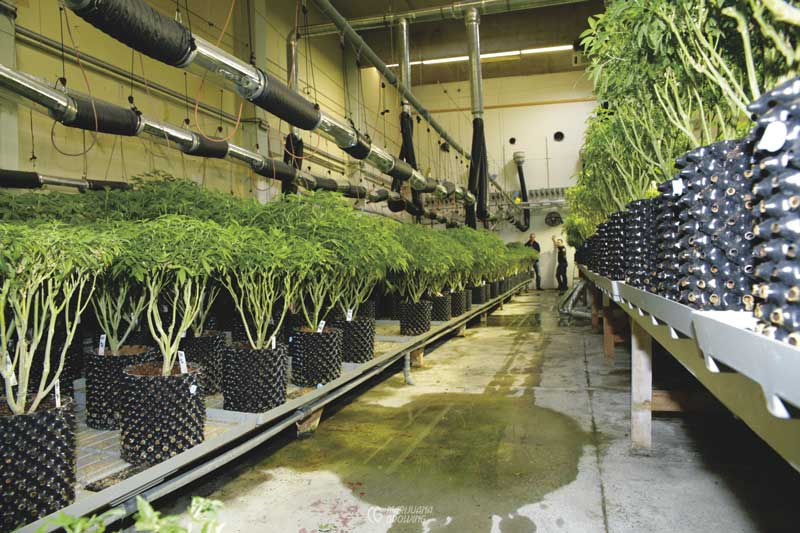
Transplant old mother plants into the outdoor garden. Once mother plants are 6 to 12 months old they are usually potbound and prone to pest and disease attacks. Move old mother plants outdoors in the early spring for a spring crop, or plant them for a fall crop. Once mothers have hardened-off and acclimated to the outdoor climate, Mother Nature takes over!
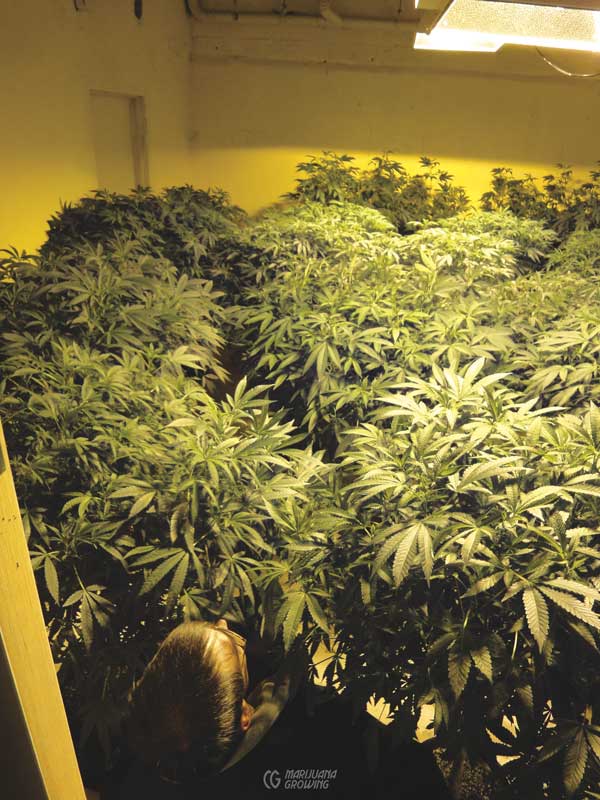
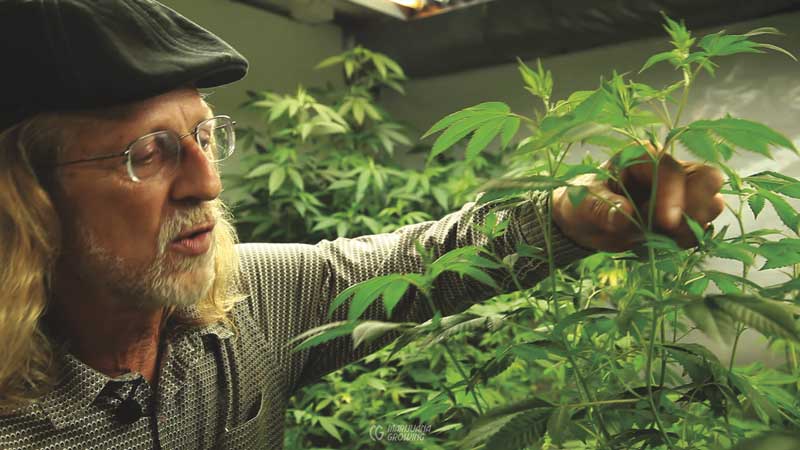
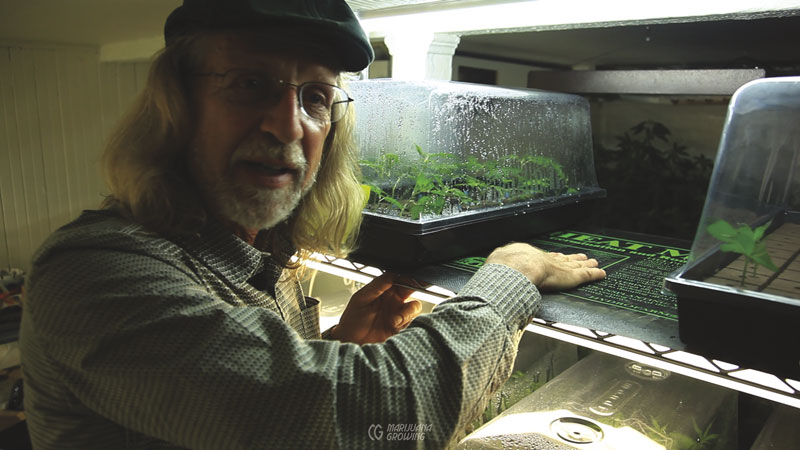
Richard Lee, founder of Oaksterdam University, inspects a roomful of mother plants.
Preparing to Clone
Cloning is the most traumatic incident cannabis plants can experience, aside from harvest. Clones go through an incredible transformation when they change from a severed green growing tip to a rooted plant. Their entire chemistry changes; the stem that once grew leaves must now grow roots in order to survive. Clones are at their most fragile point in life just after being cut.
While rooting, clones require a minimum of nitrogen but increased levels of phosphorus to promote root growth. Sprays should be avoided during rooting, as they compound cloning stress. Given good instruction and a little experience, most gardeners achieve a consistent, 100 percent clone survival rate.
Large cuttings having large, starch-filled stems will grow roots more slowly than will small clones with small stems. The excess starch in moist substrate also attracts diseases. Thin-stemmed clones have fewer reserves (accumulated starch), but they only need enough reserve energy to initiate root growth.
Small clones with a few leaves need less moisture and will root faster than big cuttings with many leaves. At first leaves contain moisture, but after a few days the stem is no longer able to supply enough moisture to the leaves, and the clone suffers stress. A small amount of leaf space is all that is necessary for photosynthesis to supply enough energy for root growth.
Weak mothers that are susceptible to disease and pest attacks make poor clones, even though they may initially exhibit strong genetic qualities.
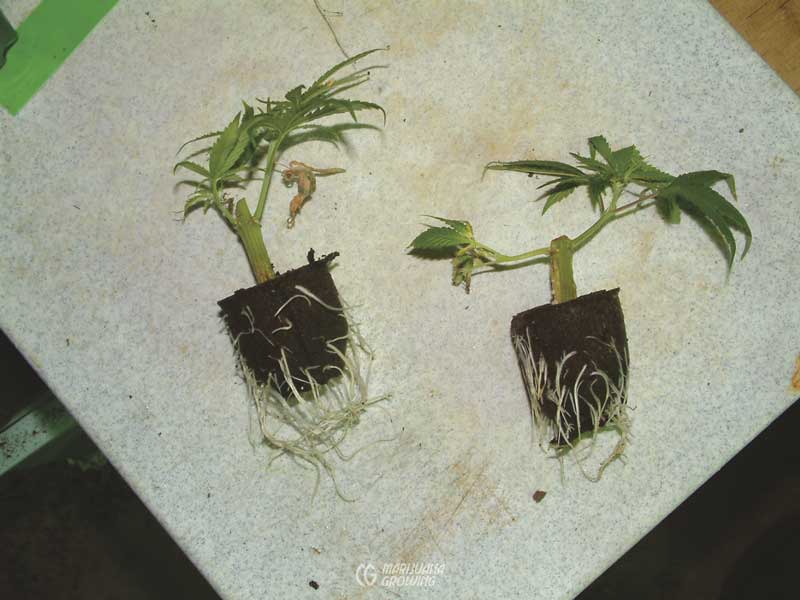
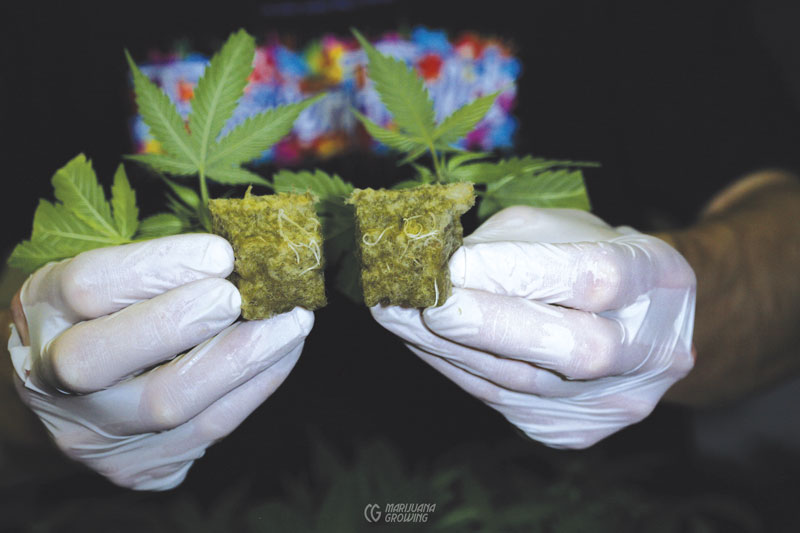
Clones below are exact genetic replicas of mother plants above. Each mother’s cell carries a DNA blueprint of itself. Radiation, chemicals, disease, and poor cultural practices can damage this DNA. Unless damaged, the DNA remains intact.
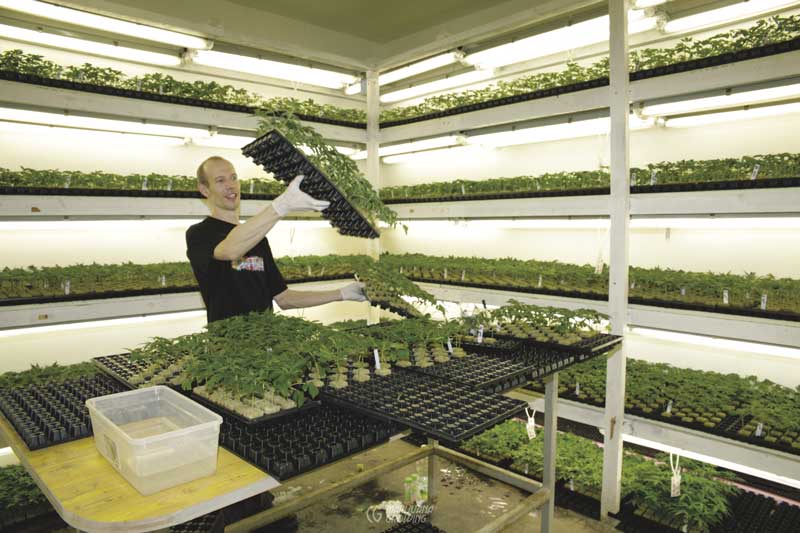
These mother plants provided hundreds of clones, and were finally moved outdoors and harvested in the fall.
Integrity in Parents
1. Maintain 18-to-24-hour day photoperiod
2. Keep plants healthy
3. Grow for 6 to 12 months
4. Repot as needed
Easy-to-clone plants
Look for plants that dawn small (rootlet) nubs (primordia) near the base of the trunk. Such plants tend to strike roots exceptionally fast. Most ‘Skunk’ and indica varieties grow roots easily.
Difficult-to-clone plants
Ruderalis crossed with indica or sativa varieties are autoflowering and do not make suitable mother plants.
Outdoor varieties with a slight tendency to pre-sex (designate sex) in an 18-hour photoperiod include: ‘Early Girl’, ‘Early Skunk’, and many others. Check with seed companies for details. But early flowering does not always exclude them as mother plants.
Clones taken from weak, leggy mother plants most often produce weak, leggy clones. Harvested plants that have been induced back into vegetative growth can also produce weak clones if not fully reverted.
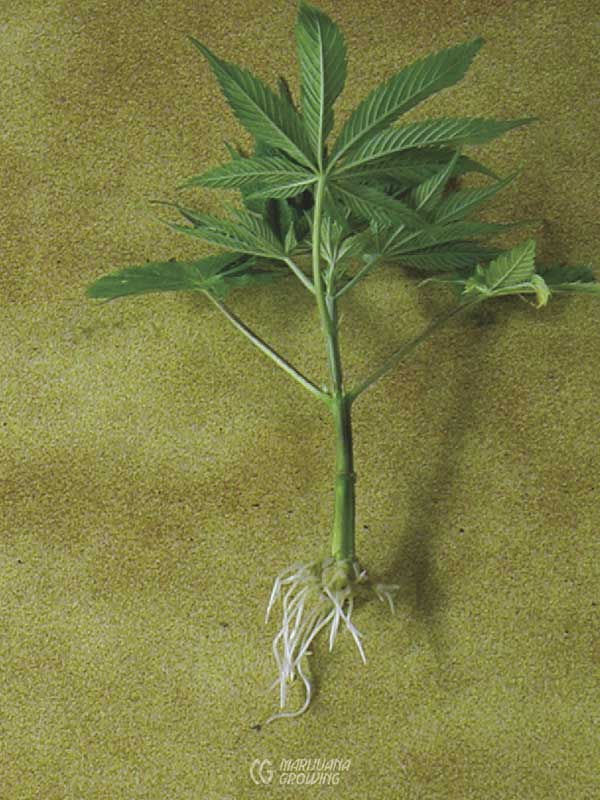
Big, healthy growth like this makes excellent clones.
All of these stems were cut on an angle so that more interior stem surface is exposed. This is where many roots will grow.
These clones were just taken and still need to get used to their new environment. When they grow roots, these clones will look much stronger.
Precautions
Clones root well within a slightly acidic pH range of 5.5 to 6.6. Aeroponic clone gardens normally do best with a pH of 5.4 to 5.6. Most diseases grow poorly below these pH levels. Always make sure there is plenty of air in the rooting medium to stimulate root growth.
Do not kill clones with kindness and fertilizer. At best, giving clones an excess dose of fertilizer causes rooting to be delayed. In fact, a dose of ammonium nitrate, a common salt-based fertilizer, will actually stop root hairs from growing.
Inexperienced gardeners and diseased plants cause most clone-rooting problems. Weak plants that lack vigor provide slow-rooting, weak clones. Poor growing conditions also affect the strength of clones.
See “Dip Plants in Miticide” in chapter 6, Vegetative Growth. Watch out for miticidal dips that coat leaves too heavily. The dip should cover well enough to protect plants with insecticidal and fungal properties, yet allow stomata to breathe.
If a spider mite infestation occurs, many gardeners destroy infested clones and start over with clean clones. Others spray with aerosol pyrethrum or another organic miticide. Remember, all pesticides—natural or not—are phytotoxic. Spraying cuttings is a bad idea in general, including antidesiccant sprays. Sprays clog stomata and can impair root growth in clones. If you must use sprays, use natural organic sprays, apply them when it is cool, and keep their use to a minimum. See “Sprays and Spraying” in chapter 24, Diseases & Pests.
| AVERAGE ROOT GROWTH FOR CANNABIS CLONE | ||
| Action | Cut from Young | Cut from Old |
| cell division starts | day 4 | day 6 |
| first root nubs form | day 6 | day 10 |
| roots start to grow | day 7 | day 20 |
| enough roots to transplant | day 14 | day 28 |
| This table shows average times for roots to grow from the stem. Note: Clones taken from younger growth root faster than those taken from older growth. | ||
Keep a clean room! Leaves on the floor should be cleared away 3 or 4 times daily.
Transplant clones before they become rootbound!
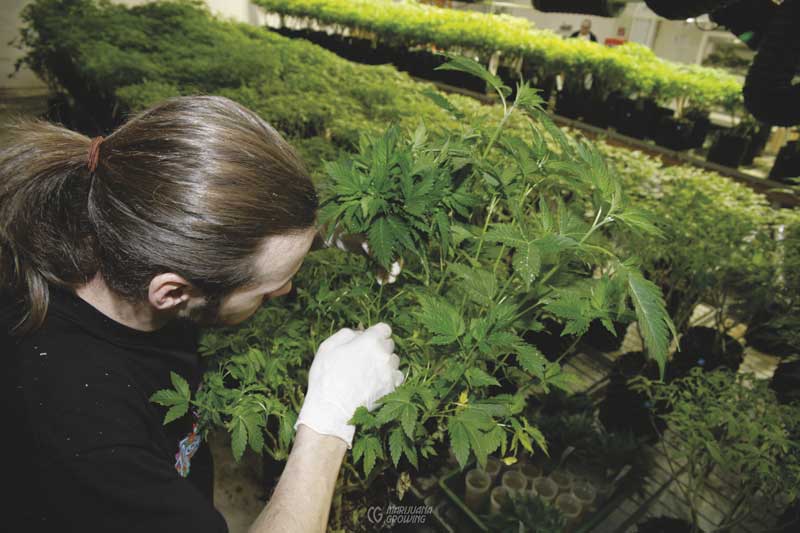
Richard Lee, Oaksterdam University, inspects clones in a spotless clone room.
The roots on this clone are circling the container and the roots near the center are already turning dark, signifying overwatering and pending death. Do not overwater clones. Keep the medium evenly moist but do not let it get soggy. Any kind of stress disrupts plants and slows rapid growth. Different mediums need distinct watering schedules. Rockwool holds water for a long time, while peat pellets need watering more often. Clones are tender; they have a small developing root system and need extra vigilance now.
Keep the cloning area clean. Do not take clones where fungus spores and diseases are hiding! Pythium flourishes in high temperatures and excessive moisture. Powdery mildews prefer cool moist conditions. Spider mites, whiteflies, and thrips love weak, tender clones. Remove infested clones from the cloning room. Cooler, humid conditions, 65°F to 78°F (18°C–25°C), inhibit most mite reproduction and avert infestations. But cool, humid conditions may increase chances of specific fungal attacks.
Root-Inducing Hormones
Root-inducing hormones may help speed cannabis root development. Most often, root-inducing hormones are used to help strike roots on woody plants that are not for human consumption. Medical gardeners avoid dangerous synthetic rooting hormones (IBA and NAA*) altogether and wait a few days longer for roots to grow. Use an aero-cloner or deep water cloner (aka DWC or bubble cloner) to expedite root growth. Using just plain water under proper conditions, roots will strike on 80 to100 percent of clones only 1 to 3 days later than when hormones are employed. Root-inducing hormones also have less effect when all the conditions are just right and roots are naturally ready to grow.
*IBA (Indole-3-butyric acid, 3-indolebutyric acid, indolebutyric acid) is synthetic and classified by the EPA as an agricultural chemical and pesticide. It is also a mutagenic, able to cause mutation. NAA (1-naphthalenaecetic acid) is a synthetic product registered under the EPA as a pesticide.
Two main hormones stimulate undifferentiated growth: 1-naphthalenaecetic acid (NAA) and indolebutyric acid (IBA). Most commercial rooting hormones contain one or both of the synthetic ingredients IBA and NAA. Many root-inducing hormones also contain a fungicide to help prevent pathogens, including damping-off. Read the labels carefully for root-inducing hormones. When purchasing, search for value. Products contain different concentrations of IBA and NAA. Commercial products hold their ingredients in a powder, liquid, or gel form.
When the stem of a cutting develops roots, it must transform from producing green stem cells to manufacturing undifferentiated cells (callus) and, finally, to fabricating root cells. Once undifferentiated, cells quickly transform into root cells.
As soon as cuttings are taken, clones start dispatching natural rooting hormones to the wound; these hormones arrive in full force in about a week. The artificial rooting hormone fills the need until natural hormones take over. See chapter 22, Additives, for more information on root-inducing hormones.
NOTE: If exceeded in concentration or duration, IBA applications impair root formation
Rooting hormones are available in liquid, gel, or powder form. Liquid forms are easy to dilute. Gel-holding hormones are easy to keep consistent and are simple for novice gardeners to use. Powder forms are the choice of most professional gardeners because they are inexpensive, consistent, and cause no problems. Natural root-inducing products such as willow water are in liquid form and are used over the long term. Do not apply rooting liquids, gels, or powders, above soil line, or excess stem swelling could occur aboveground.
Liquid rooting hormones are easy to dilute and mix in different concentrations. Gardeners mix the most dilute concentration for softwood cuttings. Apply any rooting hormone containing IBA only once. Do not exceed concentration or dip duration. Give cuttings a 5- to 15-second dip in concentrated solutions of IBA and NAA. With a quick dip, stems evenly absorb the 500- to 20,000-ppm concentrated hormone.
Root-inducing gels are easy to use and most practical for small amounts of cuttings. Gels are not water-soluble. Once applied, gels hold and stay with the stem longer than liquids or powders. However, the cut end of a clone stem often develops fungal infections.
Rooting powders often contain mixture of talc and IBA and/or NAA and are less expensive than liquids or gels. Many professional cannabis gardeners prefer to make their cuttings with powder because it is so consistent and is easier to contain than liquids or gels. To avoid contamination, pour a small amount into a separate container, and throw away any excess.
Damping-off (in this case, Botrytis cinerea) has infected these unhappy clones. They must be tossed out, and the clone area must be scrubbed down with bleach.
To apply, roll the moistened stem of the cutting in the powder. Apply a thick, even coat. Tap or lightly scrape excess powder off the cutting; excess hormones can hinder root growth. In the rooting medium, make a hole bigger than the stem. If the hole is too small, the rooting powder gets scraped off upon insertion.
Some gardeners soak their cuttings in a dilute solution (20–200 ppm IBA and/ or NAA) for 24 hours. But I have seen few gardeners use this time-consuming technique, and I am not sure if it is more beneficial than dipping stems.
Willow (tree) water induces roots. The substance in willow trees that promotes rooting is unknown, but repeated experiments have proven that willow water promotes about 20 percent more roots than plain water. This willow water can be mixed with commercial rooting hormones for improved results.
To make willow water rooting compound, find any willow tree and remove some of this year’s branches that are about one and a half inches in diameter. Remove the leaves, and cut the branches into 1-inch lengths. Place 1-inch willow sticks on end, so that a lot of them fit in a water glass or quart jar. Fill the jar with water, and let it soak for 24 hours. After soaking, pour off the willow water, and use it for rooting hormone. Soak cannabis clones in the willow water for 24 hours, and then plant them in rooting medium. If using a commercial liquid rooting hormone, substitute the willow water in place of regular water in the mix.
Rooting Hormones
Hormex is an IBA-based powder available in 6 different strengths ranging from 1000 ppm to 45,000 ppm.
Rhizopon AA (Rhizopon B.V.) is an IBA powder is from Hortus USA, the world’s largest company devoted to the research and manufacture of rooting products. Products are available in both powder form and water-soluble tablets in strengths from 500 to 20,000 ppm.
To determine rooting hormone concentration, multiply the manufacturer’s listed percentage by 10,000 (e.g., a product with 0.9 percent IBA contains 9000 ppm IBA.
Warning! Root-inducing hormone products containing IBA and IAA are not recommended for use with edible plants. Root-inducing hormones should not be used to grow medical cannabis. Read label carefully before deciding to use these or any products.
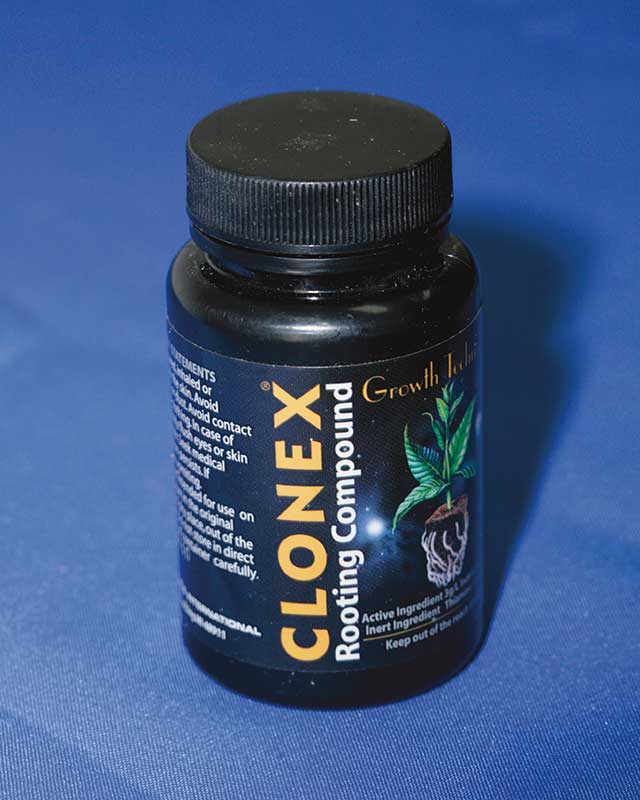
Clonex cloning gel is a blend of vitamins, minerals, and antimicrobial agents, 0.3 percent (3000 ppm) IBA. Gel seals cutting tissues, thus reducing chance of infection and embolisms.
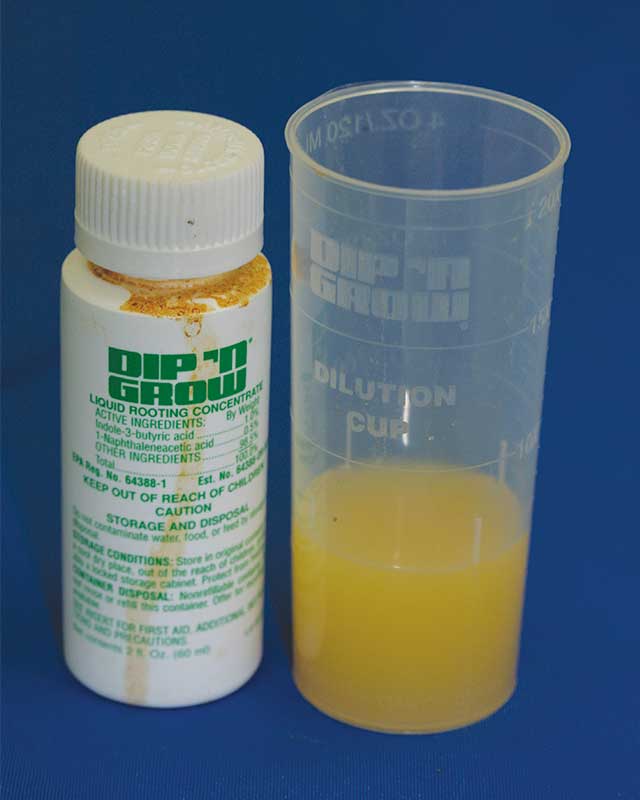
Dip-N-Grow IBA, NAA, antibacterial. Cost is one penny per 100 cuttings.
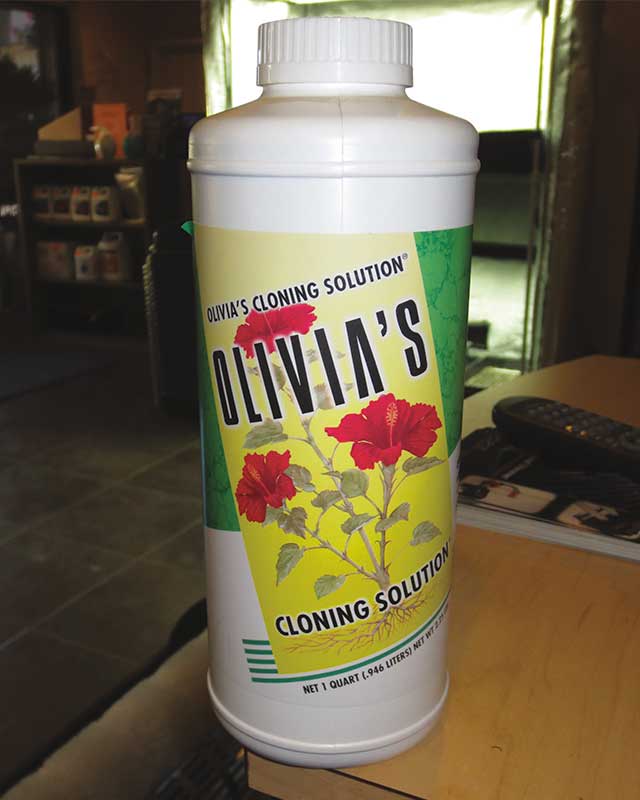
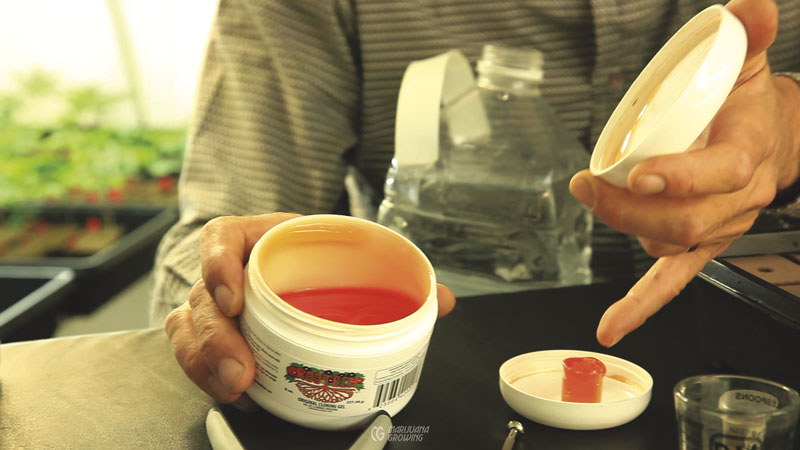
Olivia’s rooting hormone is one of the many root-inducing hormones available today.
Several commercial products contain Trichoderma bacteria or mycorrhizal fungi, both of which help plants grow bigger, stronger, and faster.
Coconut milk contains the cytokinin zeatin (see chapter 22, Additives) and encourages clone root growth. Mix equal parts coconut milk, grated coconut meat, and clean hot water in a blender and blend until smooth. Use to water clones.
Before Starting
Taking clones, or cuttings, is the most efficient, productive means of cannabis propagation for many indoor, greenhouse, and outdoor medical cannabis gardeners. Once desirable female plants have been distinguished and selected, branch tips and branches can be cut and rooted.
Disinfect all tools and working surfaces to kill bacteria, fungi, viruses, and other diseases already present. Sterilize a sharp scissors, razor, or razor blade by dipping in alcohol, vinegar, or bleach (5 to 10 percent solution) or by heating with a torch. Wash your hands thoroughly beforehand. Make sure to have all cloning supplies within arm’s reach— rooting cubes, rooting hormone, razor or scissors, humidity dome, etc.—before you start to take clones.
An extract of weeping willow tree water will promote rooting.
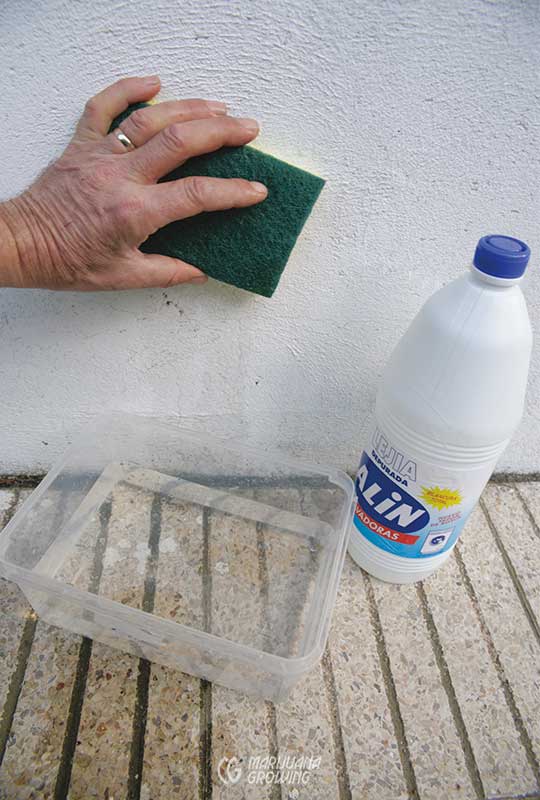
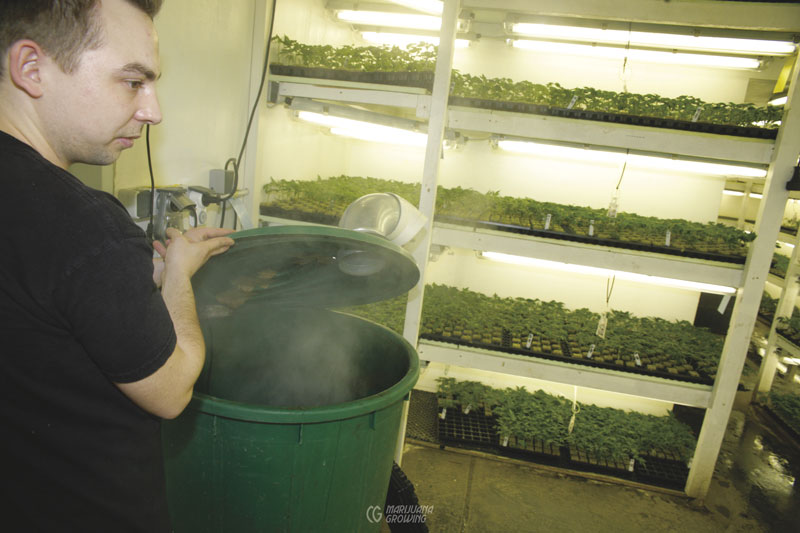
Mix a mild bleach solution to clean and disinfect all garden room surfaces.
To avoid problems:
Keep the work area clean. Wash work surfaces and tools before starting.
Have grow medium ready.
Prepare mother plant in advance.
Take clones with clean (sterile) instruments.
Store cut clones in water.
Insert (stick) cutting in growing medium or aeroponics system.
Place clones under humidity dome/tent.
Carefully monitor grow medium moisture levels and humidity.
Watch for root growth.
Transplant when roots emerge from root cube or medium.
Harden-off by gradually exposing cuttings to their new environment.
Cloning: Step-by-Step
Step One: Choose a strong, healthy, desirable mother plant that is at least 2 months old. If a variety is difficult to clone, leach the soil with 2 gallons (7.6 L) of water for each gallon (3.8 L) of soil every morning for a week before taking clones. Drainage must be good. Or mist leaves heavily with plain water every morning. Both practices help wash out nitrogen. Do not fertilize mother plant while leaching the growing medium.
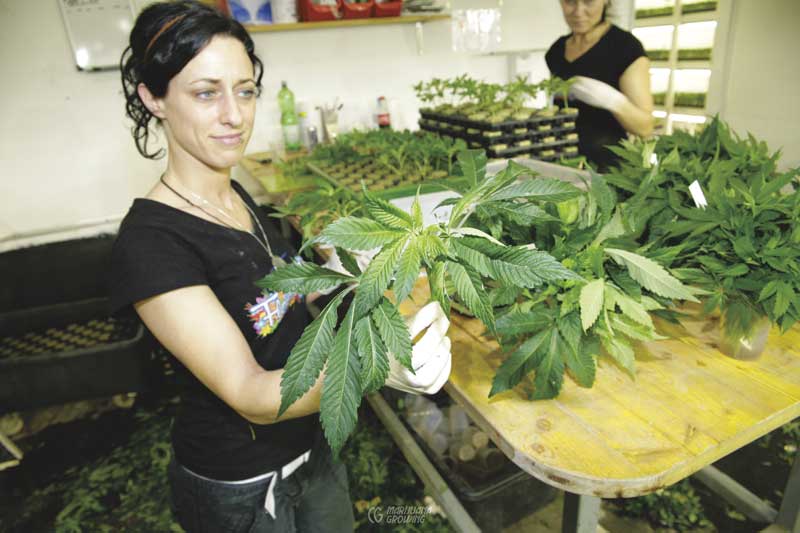
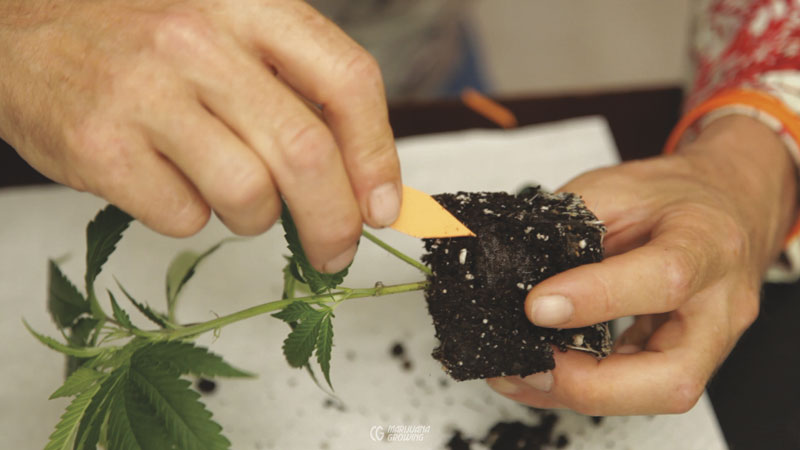
When taking clones, begin by choosing a strong, healthy, genetically desirable mother plant. Use a sharp, sterile blade to perform the actual cutting.
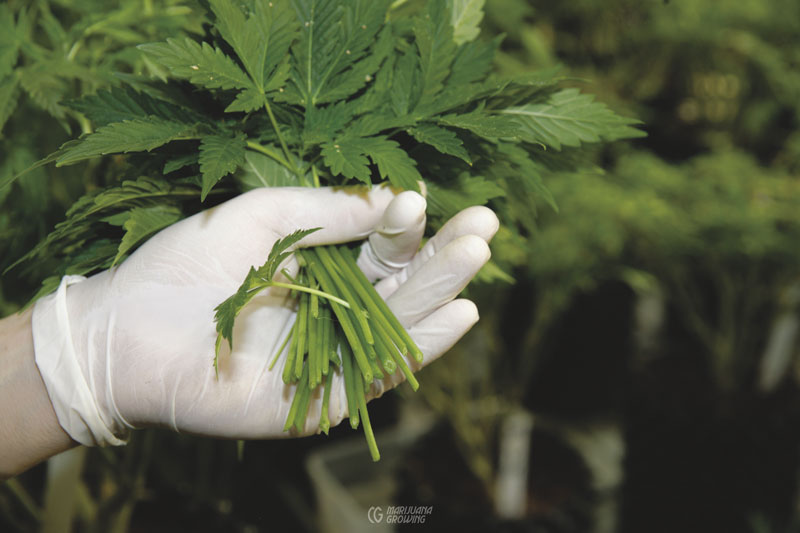
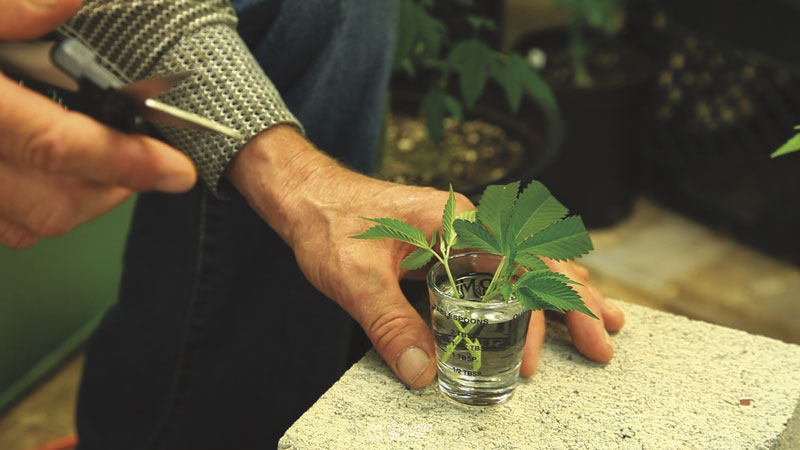
Step Two: With a sharp, sterile blade, make a clean 45-degree cut across firm, healthy 0.125- to 0.25-inch-wide (ap¬prox. 3–6 mm) branches, 2 to 4 inches (5.1–10.2 cm) in length. Take care not to smash the end of the stem when making the cut. Trim off 2 or 3 sets of leaves and growth nodes so the stem can fit into the soil. There should be at least 2 sets of leaves above the soil line and 1 or 2 sets of trimmed nodes below the ground. When cutting, make the slice halfway between the sets of nodes. Immediately place the cut end in water. Store cut clones in water while cutting more clones.
Oasis is a favorite of many gardeners.
Make sure to remove the plastic netting around Jiffy pellets before transplanting.
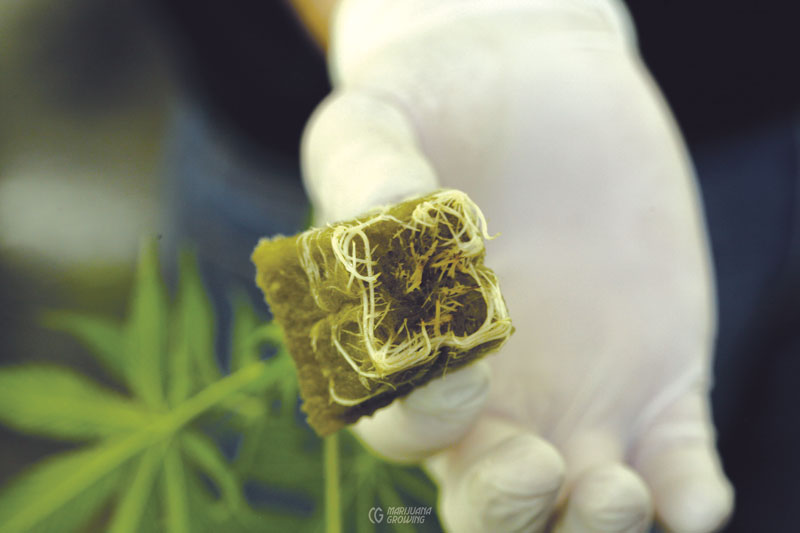
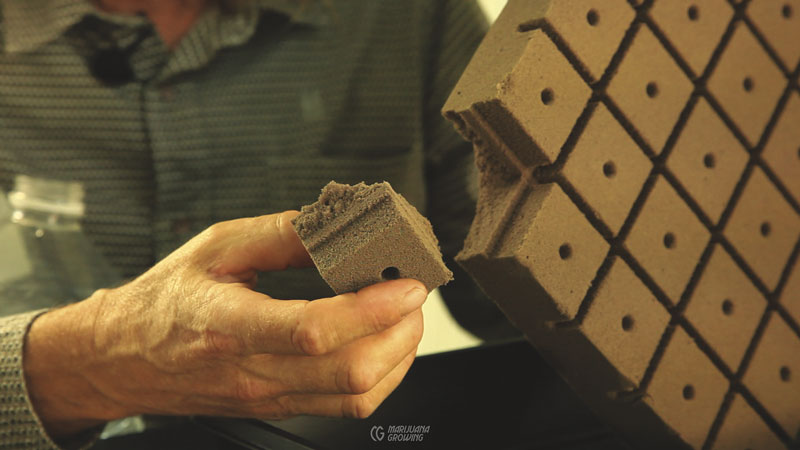
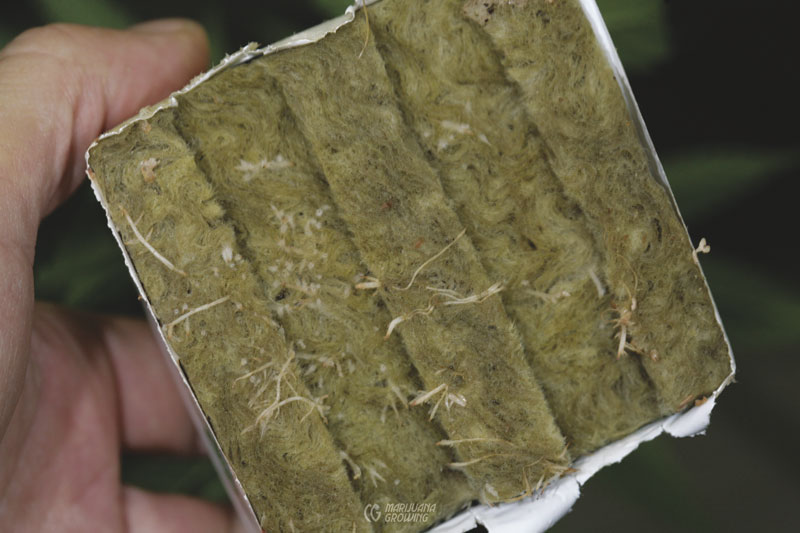
Rockwool cubes are super convenient, hold a lot of air when wet, and serve as a container.
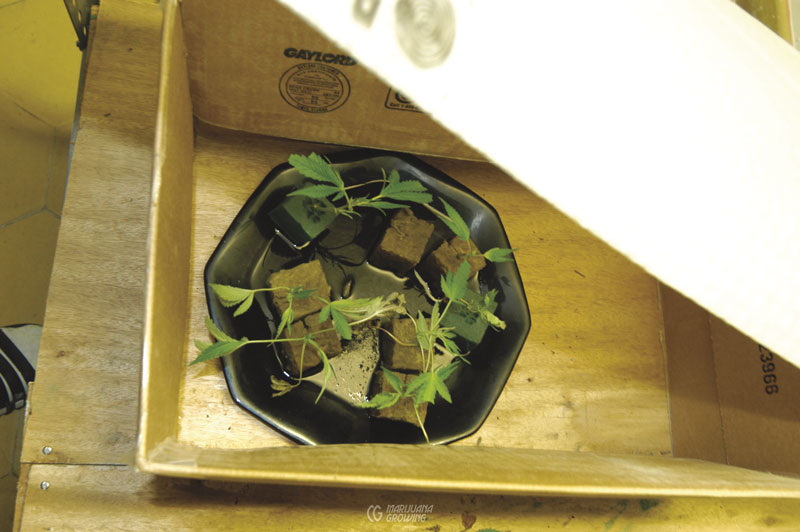
Step Three: Oasis, Jiffy, and Rockwool rooting mediums are convenient and easy to maintain and transplant. All have different moisture- and air-holding abilities.
Place a tray containing rooting cubes or plugs into a standard nursery rooting flat or strong plastic tray. Fill rockwool tray with water having a pH of 5.5 to 6.5.
Fill small containers or nursery flats with fine perlite/vermiculite, soilless mix, or fine potting soil. Saturate the substrate with water. If none exist, make holes through three-fourths of the rooting cube for inserting clone stems. Use an unsharpened pencil, a chopstick, or a nail to make a hole in the rooting medium—a little larger than the stem. The hole should stop about one-half inch (1.3 cm) from the bottom of the container to allow for root growth.
This rooting hormone gel is color-coded.
Step Four: Use a rooting hormone, and mix (if necessary) just before using. For liquids, use the dilution ratio for soft¬wood cuttings. Swirl each cutting in the hormone solution for 5 to 10 seconds. Place each cutting in a hole in the root¬ing medium. Gently pack rooting medium around the stem. Gel and pow¬der root hormones require no mixing; dip stems in gels as per instructions, or roll the stem in the powder. When plant¬ing, take special care to keep a solid layer of hormone gel or powder around the stem when gently packing soil into place.
Watering a tray of clones is as easy as dipping them in a tank of nutrient solution.
Step Five: Lightly water until the surface is evenly moist. Keep cuttings evenly moist at all times! Clones have no roots to bring water to leaves. Water arrives from leaves and the cut stem until roots can supply it. If clones dry out they will wilt and die. Water as needed to keep growing medium evenly moist, but do not let substrate get soggy, or clone stems will soon contract pathogens, rot, and die.
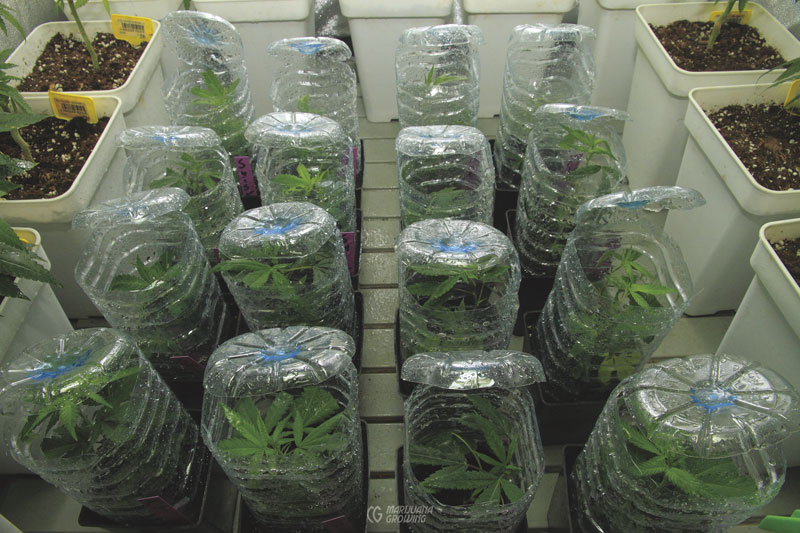
A humidity generator releases moist air into the cloning room to increase the humidity to above 90 percent for the first few days after cloning.
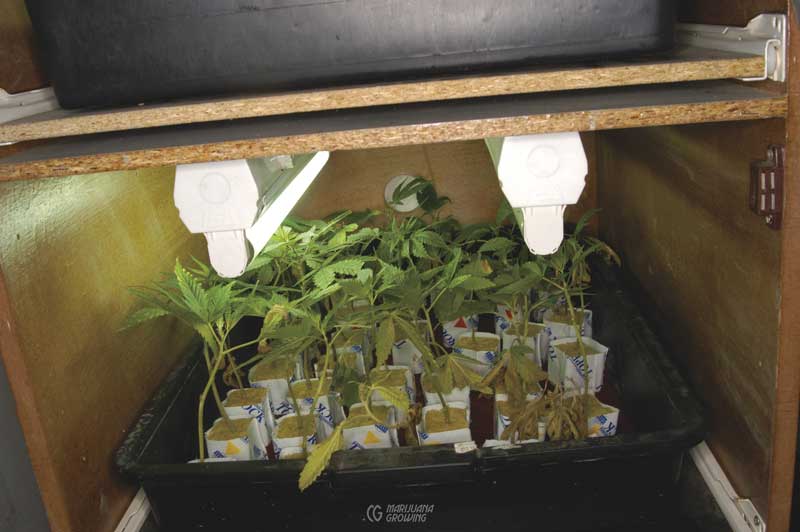
Step Six: Clones root fastest with low levels of light for 18 to 24 hours daily. If clones must be placed under an HID, set them on the perimeter of the garden so they receive less-intense light, or shade them with a cloth or screen. A fluorescent tube 6 inches (15.2 cm) above clones or a 400-watt metal halide 4 to 6 feet (1.2–1.8 m) away supplies the perfect amount of light for clones to root. Cool white fluorescents (or a combination of warm white and cool white) are excellent for rooting clones.
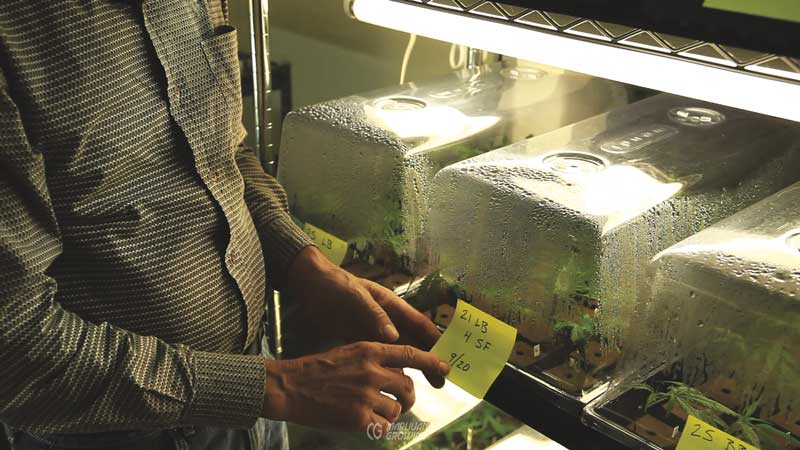
These clones were taken on August 20. The date was recorded on the Post-it note.
Step Seven: Clones root fastest when humidity levels are 90 to 100 percent during the first 2 days and gradually reduced to 80 to 85 percent during the following week. A humidity tent will help keep humidity high. Purchase a premade cloning dome or construct a humidity tent out of plastic bags, rigid plastic, or glass. Remember to leave openings for air to flow in and out so little clones can breathe. If practical, mist clones several times a day as an alternative to the humidity tent. Remove any sick, rotting, or dead foliage.
Cut leaves in half to lower transpiration surface and to keep them from overlapping. Moisture that could foster fungus is often trapped between overlapping leaves. Keep grow medium evenly moist so there is enough moisture to keep tender cuttings alive.
Cut clones can be held in a glass of water. Cutting leaves in half decreases the amount of fluids necessary to support life. Roots must regrow to support new life.
Heating pads add extra warmth in cool garden rooms.
Step Eight: Clones root faster when the growing medium is a few degrees warmer than the ambient air temperature. A warmer substrate increases underground chemical activity, and lower air temperature slows transpiration. For best results, keep the rooting medium at 75°F to 80°F (23.9°C–26.7°C). Growing medium temperatures above 85°F (29.4°C) will cause damage. Keep the air temperature 5 to 10 degrees (Fahr¬enheit) cooler than the substrate. A warmer growing medium coupled with cooler ambient temperature slows diseases and conserves moisture. Misting clones with water also cools foliage and slows transpiration to help traumatized clones retain moisture unavailable from nonexistent roots. Put clones in a warm place to adjust air temperature, and use a heating pad, heating cables, or an incandescent lightbulb below rooting cuttings.
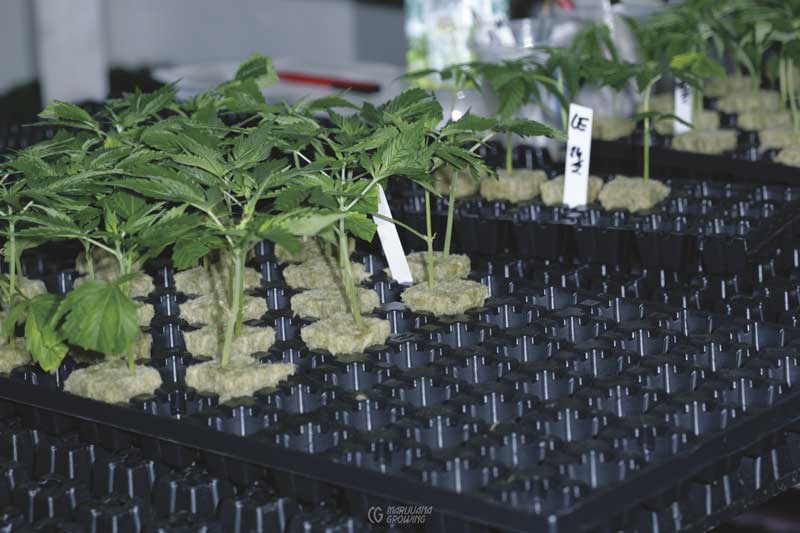
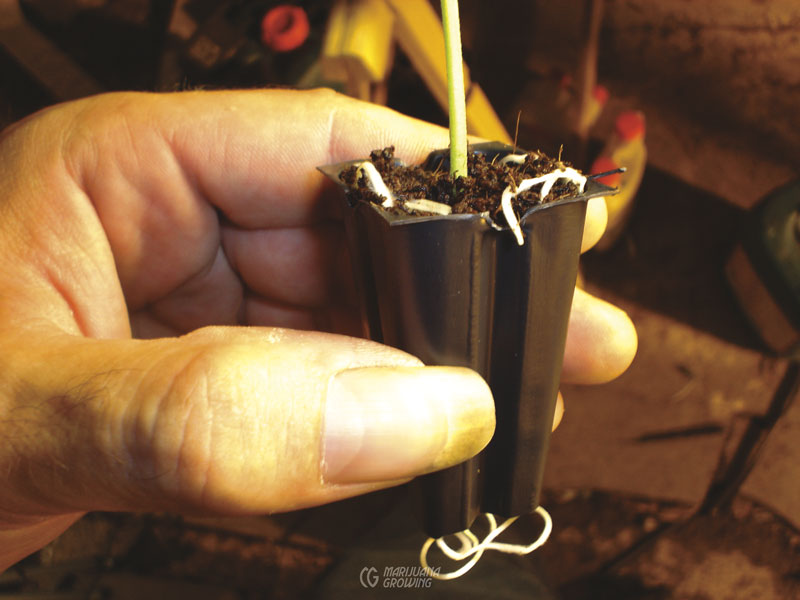
Clones are ready to transplant when roots show out the bottom of rooting flats.
Step Nine: Some cuttings may wilt but then regain rigidity in a few days. Clones should look close to normal by the end of the week. Cuttings that are still wilted after seven days may suffer from pathogens such as rot and damping-off, or may root so slowly they never catch up with others. Cull sick clones. Put healthy, slow-rooting clones back into the cloning chamber to grow more roots.
The roots on these clones are perfect for transplanting. They are white, strong, and healthy.
Step Ten: In 1 to 3 weeks, cuttings should be rooted. Signals that they have rooted include: yellow leaf tips, roots growing out drain holes, and vertical growth of the clones. To check for root growth in flats or pots, carefully remove a root ball and clone to see if it has good root development. For best results, transplant clones when roots have just started to break through the growing medium. If you wait until a dense root system is growing out the sides and bot¬tom of rooting cubes, some roots will be dead. Clones transplant best when roots have just started to grow beyond the walls of rooting cubes.
Note the tips of these roots are turning dark, signifying too much moisture and the beginning of rot. This clone must be transplanted immediately to avoid further rot.
Cull sickly clones. Weak clones will always grow poorly and will often spread pests and diseases to the rest of the garden.
Individual clones can be covered with plastic containers to keep humidity high.
These well-cared-for clones have been transplanted to larger containers and have resumed growth. Soon each will be transplanted to its final container.
Caring for Clones
Cuttings always look strong and healthy right after you take them. About 5 or 6 days later, leaves may start to change color. Leaves stay small and often turn a deeper shade of green. After about a week, lower leaves may start to yellow if their nutrient levels dissipate.
A week after being taken, a clone’s belowground stem will develop stubby callused roots called primordia. The primordia are semitransparent to white, and should look healthy. The clone will produce very little green growth during this process. Leaves and the severed stem now supply fluids for the clone. Once the root and vascular transport system is in place and working properly, roots are able to supply water and nutrients. Clones then start vegetative growth.
Any sign of slime, pests, or diseases means there are problems. Root damage due to lack of oxygen or overwatering will kill thin, hairlike roots. They will turn brown from rot or shrivel when dry. Once damaged, roots remain damaged. New roots must grow to replace damaged roots. Cull slow-growing clones that have damaged roots. Some gardeners let clones with desirable genetic qualities root longer and will transplant them when adequate roots develop.
Clone foliage can lose much of its protective waxy coating when pampered indoors. Now leaves and stems are very tender and supple. They will need to be transplanted and hardened-off before moving to another location.
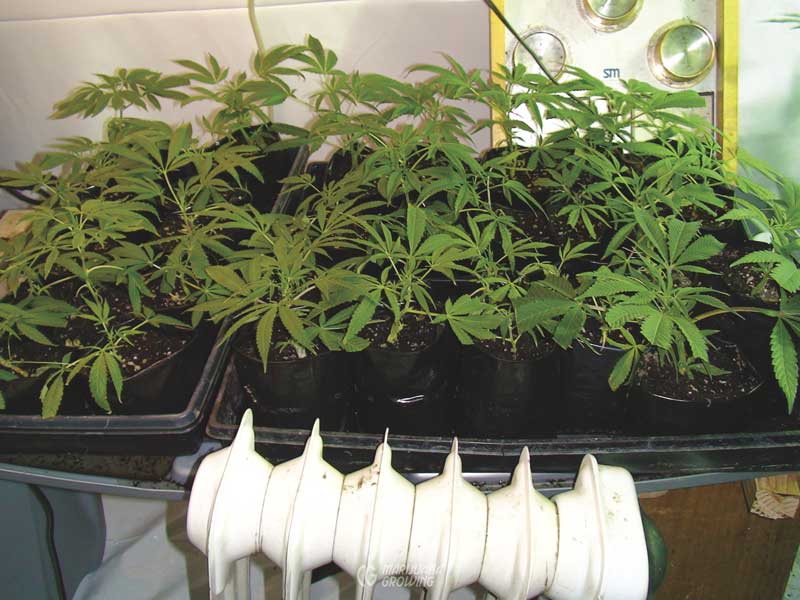
Rooting clones need progressively more light as they grow. Move the light source closer to clones once roots form. Fertilize with a mild organic fertilizer solution when all clones have started vegetative growth.
Transplant only the strongest well-rooted clones. Slow-rooting clones should be kept in the cloning chamber or culled out. Do not move clones into bright light until they have fully developed root systems. Once transplanted, clones are ready to harden-off.
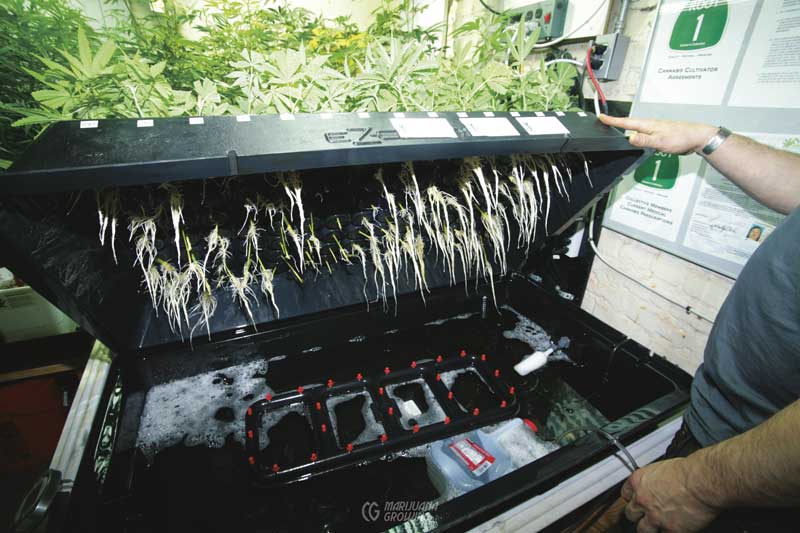
An aero-cloner consists of a chamber with small spray nozzles inside. The stems and roots are bathed in a 100 percent–humidity root zone environment. Water is pumped under pressure and atomized into the air or dispersed as a spray via nozzles. Clones strike roots nearly as well when water is not atomized. Clones root incredibly quickly in this system.
Harden-off strong clones by moving them into a brighter garden room. Make sure they have adequate air ventilation and circulation. Some gardeners “pre-grow” clones in a small vegetative room before introducing them to the flowering room or moving them into a greenhouse or a protected outdoor location.
Set up a vegetative pre-growing area that is lit with HID or bright compact fluorescent lighting for the rooted clones. Place them in this area to let them grow for the first week or two of vegetation.
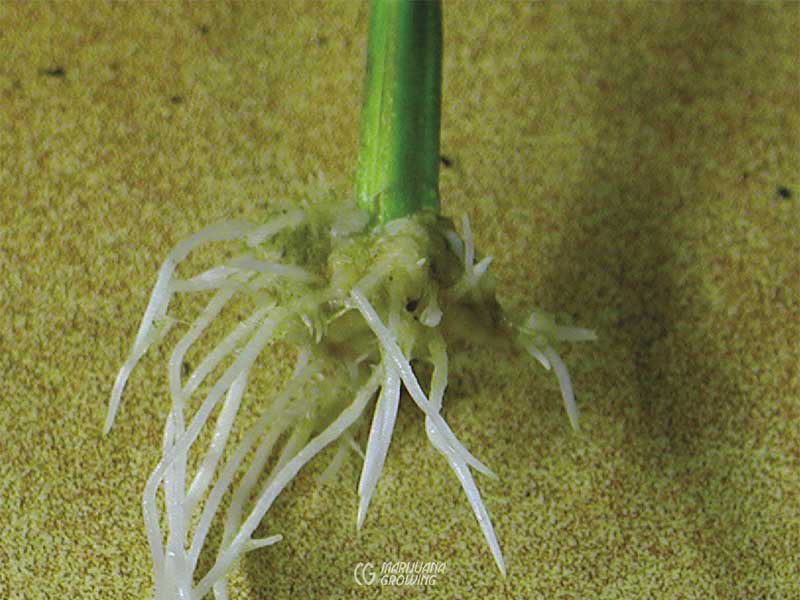
Strong, white roots on this clone have initiated from the callus on the cut stem.
This area needs to be just big enough to accommodate plants from the time they are a few inches tall until they are about a foot tall and ready to be moved into the flowering room. Such a small room is a very efficient use of space, light, and electricity.
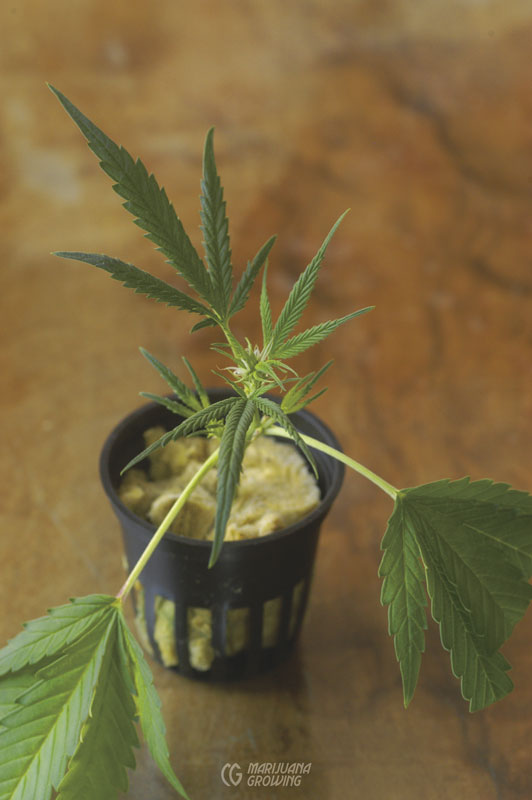
Transplant clone when roots have outgrown the container. This clone could have been transplanted a few days earlier.
Cloning Techniques
Aero-cloner
Aeroponic cloners are the most efficient cloners I have seen. We built one about 30 years ago. Since then, several commercial models have become available. They are perfect for gardeners wanting to produce many densely rooted cuttings quickly and efficiently. Cuttings grow a mass of roots in seven to ten days and can be transplanted into hydroponic growing mediums or soil. Aero-cloners are somewhat labor intensive. Clones must be taken, rooted, and transplanted carefully. Producing clones for small gardens is best accomplished in rooting cubes.
Scraping the Stem
Always cut stems at a 45º angle when taking cuttings. Very lightly scraping away the outer layer of the stem to expose only the cambium layer below allows hormones to concentrate where roots start, and causes many roots to grow there. Splitting the clones’ stem exposes more surface area to grow roots. Both practices increase the number of healthy roots, but rooting time is longer.
After the cutting has been trimmed and scraped, dip the bare stem into a rooting hormone. Now it is ready to “stick” into the substrate. First a heavy callus develops, from which prolific roots grow. Roots will take longer to strike, 10 to 14 days, but they will grow much more densely.
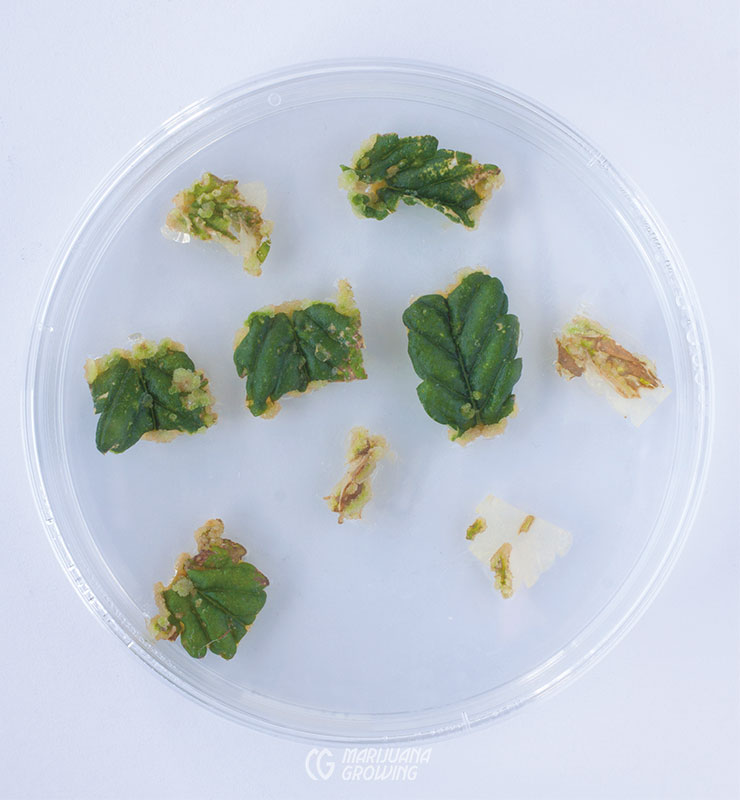

Left to right: Leaves are cut into small pieces and set in a specific agar solution where the green leafy growth changes to white callus – undifferentiated growth.
Callus (undifferentiated growth) has clearly formed and roots are ready to form.
Air Layering
LAir layering is seldom used by medical cannabis gardeners, except with the most difficult-to-root clones. It is interesting but normally unnecessary. Cannabis cuttings strike roots easily. The classic book Marijuana Botany, by Robert C. Clarke, has a good section with accurate drawings on air layering.
Micropropagation
Micropropagation of cannabis is possible. This form of cannabis propagation is relatively simple in theory, but application takes long-term perseverance, professional knowledge, and proper management. Micropropagation makes sense only if reproducing thousands of identical clones.

From top: Lightly scraping the stem causes a larger callus to form.
More roots grow from a large callus at the end of the stem.
From top: The stems on these clones were scraped lightly before applying a root-inducing hormone.
This little clone has so many roots that they are growing out the top and bottom of the container!
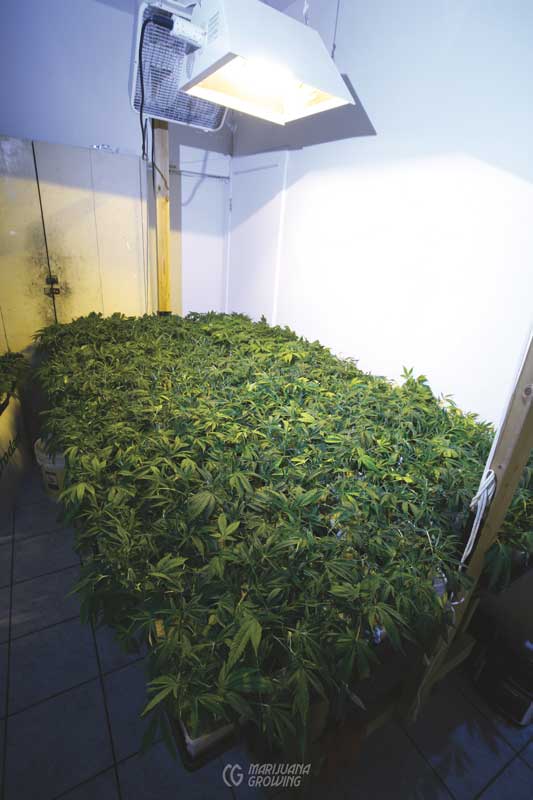
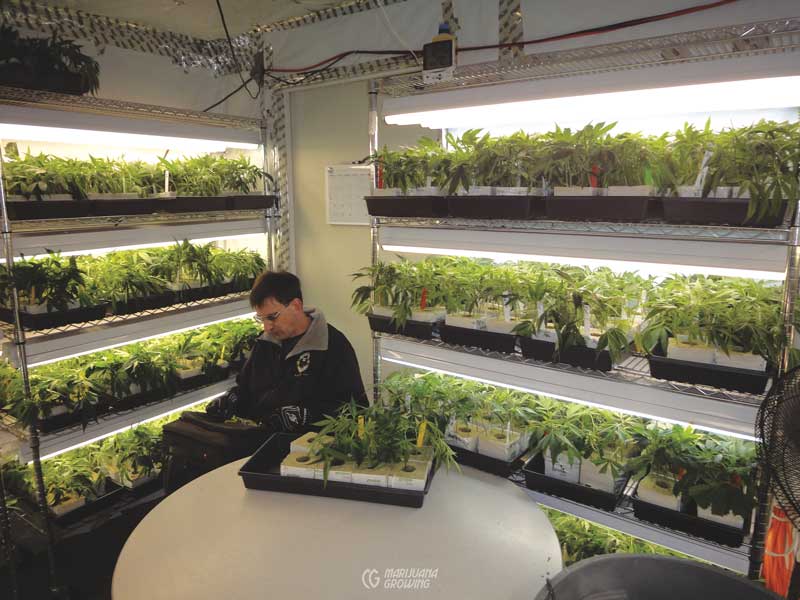
Root clones under fluorescent, CFL, or metal halide lights. This single 1000-watt metal halide is illuminating hundreds of clones.
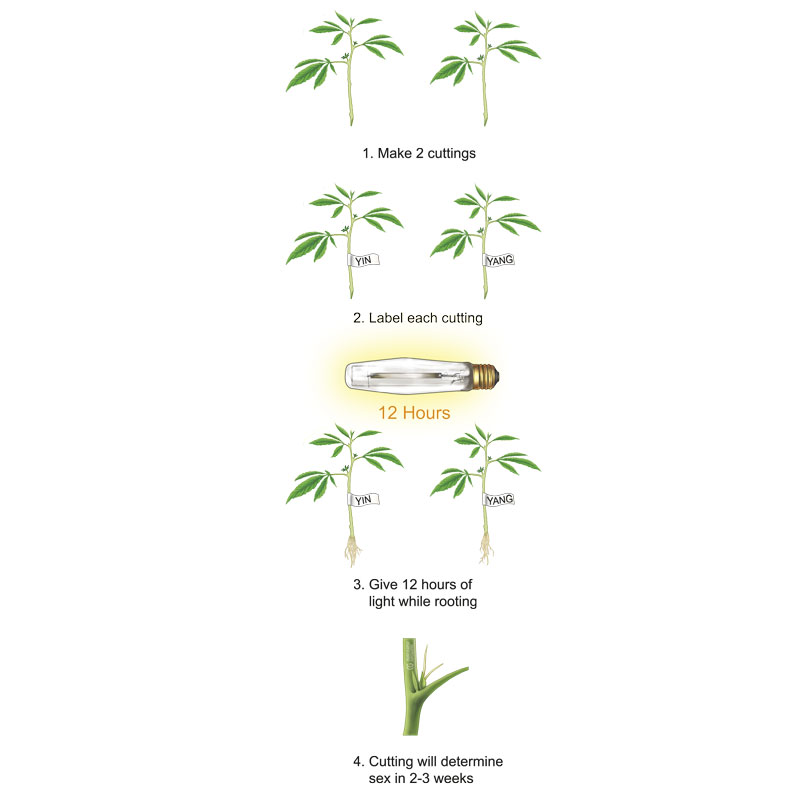
Cloning for Sex
Determine plant sex accurately, 100 percent of the time, by “cloning for sex.” To clone for sex, take two cuttings (in case one dies) from each parent plant in question. Use waterproof labels and an indelible marker to identify sets of clones and corresponding parents.
Keep parents under 18 to 24 hours of light. Give rooting clones a 12-hour light/dark regimen. Set them in a shady spot in the flowering room, set up a small 12-hour day/night cloning room or set them in a ventilated closet or under a light-tight cardboard box so they receive 12 hours of uninterrupted darkness.
Unless there is a problem, clones will show sex within two weeks. Cull all males except those used for breeding. Take clones from desirable female plants. Let little females continue to flower.
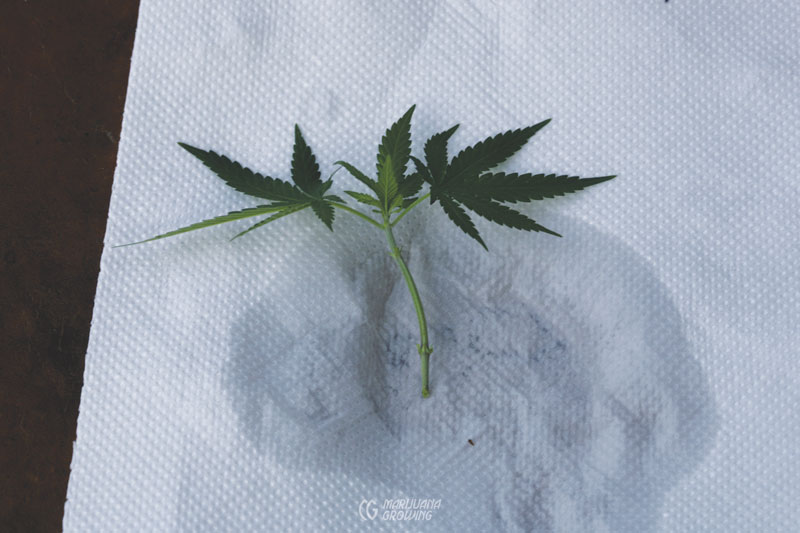
Wrap clones in a moist paper towel for storage and transport.
Cloning a Flowering Female
Taking cuttings from flowering plants and inducing vegetative growth can take two months or longer. Females early in the flowering stage produce better cuttings, and their roots grow more quickly. Harvested plants are slower to revert back into vegetative growth. Once a plant reaches the senescence point, growth hormones have dissipated. Furthermore, powerful flowering hormones must be reversed, and rooting hormone signals must be sent. Now is the time to give plants 18 to 24 hours of light to signal them to revert to vegetative growth.
Weak rejuvenated clones often have irregular branching and occasionally flower prematurely or when suffering stress. Foliage and flower buds are more prone to pest and disease attacks too.
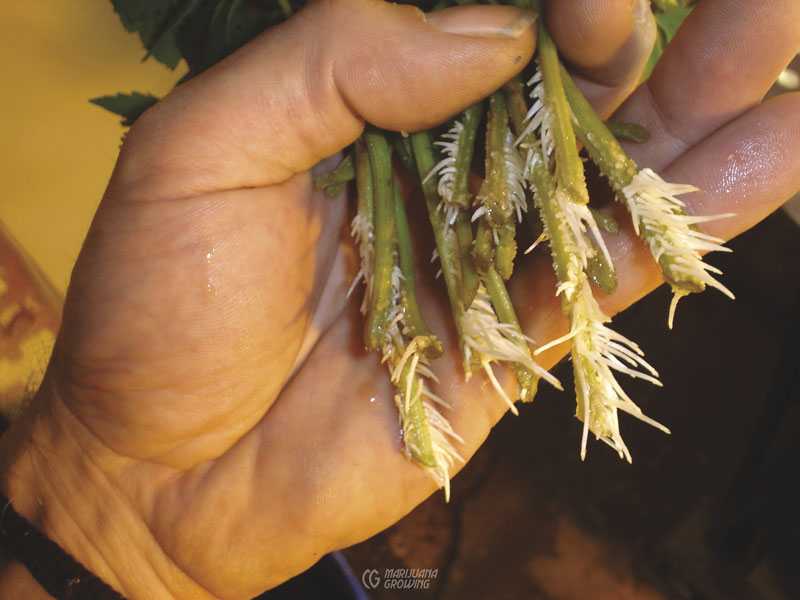
Weak favorite flowering harvested plants can be cloned, but results are not always the best. To clone a harvested female, cut from the lower green branches that have the most vegetative growth. Cut a 3-to-6-inch-long (7.6–315 cm) stem. Trim off flowers and lower leaves. Keep several green leaves and bud. If leaves have yellowed substantially or are diseased, survival chances diminish exponentially.
Revegetated clones that are weak tend to have an irregular branching pattern and sometimes flower prematurely or when stressed. In addition, foliage and flower buds are more prone to pest and disease attacks.
Storing Clones
To store cuttings for later use, wrap recently cut, trimmed, unrooted stems in a damp cloth or paper towel. Put the wrapped clones into a plastic bag and store in the refrigerator. On a daily basis, remove the water that condenses inside the bag in the cool refrigerator. Keep the temperature above 40°F (4.4°C). Temperatures below this level may cause plant cells to rupture. Cuttings should last in the refrigerator for about 3 weeks if they get out to have a daily dose of light.