Hydroponic gardening is cultivating plants without soil, typically in an inert growing medium. “Container culture” is very similar to hydroponics but uses soil, soilless mix, or some other growing medium that is not inert, that is, the growing medium reacts chemically. Hydroponic and container culture gardening are often confused; container culture is often called hydroponics. I believe that the confusion arises for two simple reasons: gardeners who use the term do not understand the difference, and “hydroponics” sounds so much cooler than “container culture”!
Hydroponics has been a buzzword that alludes to higher production and scientific superiority, something special that is new—bigger and better. The misused word hydroponic has also spawned other terms that are invented to distinguish one “unique” product from another. My current favorite terms are ultraponics and fishponics.
Hydroponic gardens are more technical in nature and require precise measurements and monitoring for high performance. Setting up a hydroponic garden is often more expensive and relies most often on man-made, processed chemicals and electrical power.
Hydroponics and container culture are practical for gardeners who cannot grow outdoors and are limited to an indoor or greenhouse space. Changing and working with soil is inconvenient for many apartment and home dwellers. Household electricity seldom fails, and the small gardens can be monitored easily. Indoor gardens are full of life and provide a “breath of fresh air” during long winter months, too.
Greenhouse setups range from inexpensive to expensive, depending upon the degree of sophistication. Greenhouse dynamics—size, heating, cooling, and so forth—can also be more demanding than growing indoors. Outdoor hydroponic gardens are less common and not practical because dirt and dust can easily pollute the garden. Where electricity is not readily available, container gardens can be maintained with battery-powered irrigation controllers and dust and pollutants filtered easily.
Mother plants grow longer and are best suited to large hydroponics or container culture container gardens, which allow room for root development. The mother plant’s root system is easier to control in individual containers, and she is able to produce hundreds of clones during her lifetime. Mother plants need a large root system to take in nutrients in order to keep up with the demanding growth and clone-production schedule.
Hydroponics is not as forgiving as container gardens using soil, soilless mix, coco, and so forth. Soil and soilless mixes not only provide “terra firma” to anchor plants, they also buffer water imbalances and hold air and nutrients well.
Gardens with more components have more to go wrong. Complicated high-tech gardens often require more time and management. Even simple gardens rely on electricity to operate a pump and timer. If the electricity goes out and the pump stops, or even if it only malfunctions, plant growth is impaired. A lack of water for a few hours is long enough to cause damage to plants. Irrigation emitters can clog; pH can climb or plunge, and EC levels can change rapidly. All of these “hydroponic” variables can cause more problems than when growing in container gardens using soil or soilless mix, etc., that provide a buffer or safety zone to hold water and oxygen.
Rule of Thumb: The more parts in a garden, the more there is to malfunction.
Environmentally conscious gardeners select hydroponic fertilizers with an eye on their budgets. Manufacturers consistently dilute nutrient formulas in water to increase profits—often exponentially. Shipping excess water is expensive, costing more fossil fuel and increasing the garden’s carbon footprint. Purchasing nutrients in a dry form is less expensive and lowers the environmental impact.
Advantages
- no soil necessary
- water can be reused
- complete control of nutrient levels
- clean environment—no dirt!
Disadvantages
- no soil in hydroponics to buffer
problems - disease can spread through entire
crop quickly - large carbon footprint from manufacturing
of components and transport
to stores - water can be recirculated with the
wastes of the plant
Contrary to popular belief, hydroponically grown cannabis does not grow faster or produce heavier harvests. Scientific research (not funded by commercial interests) since the mid 1950s shows no significant difference between container-grown crops in soil, soilless mix, etc., and hydroponically grown crops. Work by D. R. Hoagland and D. I. Arnon in the first half of last century failed to prove that there was an increase in potential yields from growing hydroponically. They described the first nutrient solution to use for hydroponics, still in use today. To date no one has been able to refute this, and it remains a referenced work.
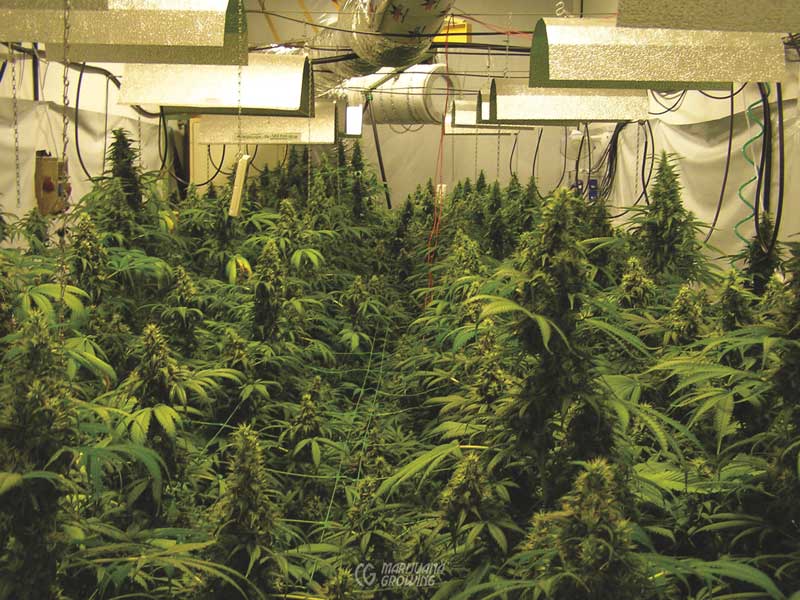
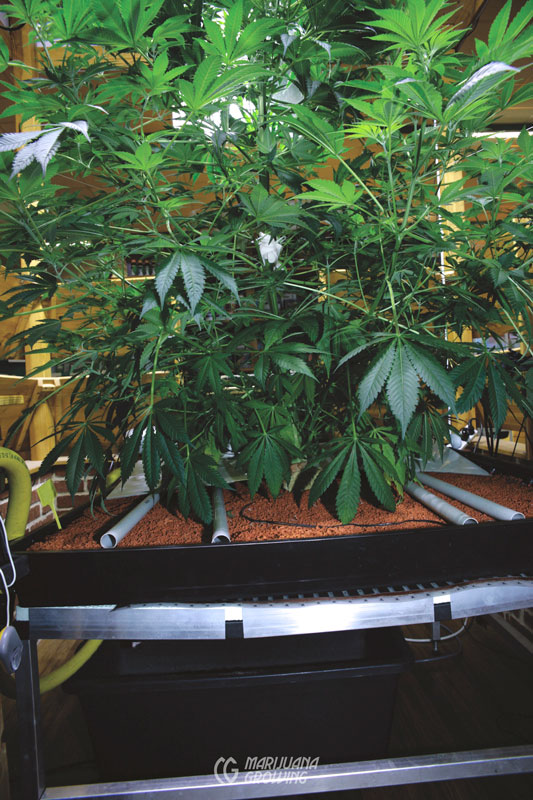
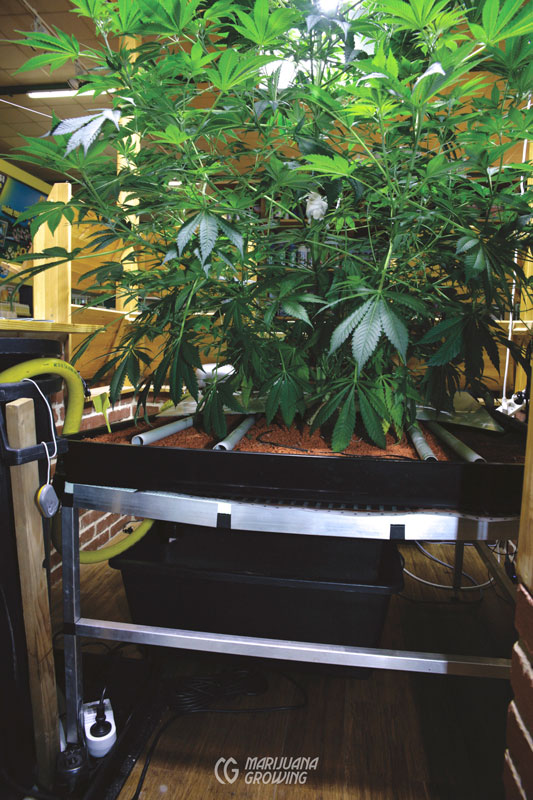
A properly managed rockwool top-feed garden such as this one, from Trichome Technologies, is super productive.
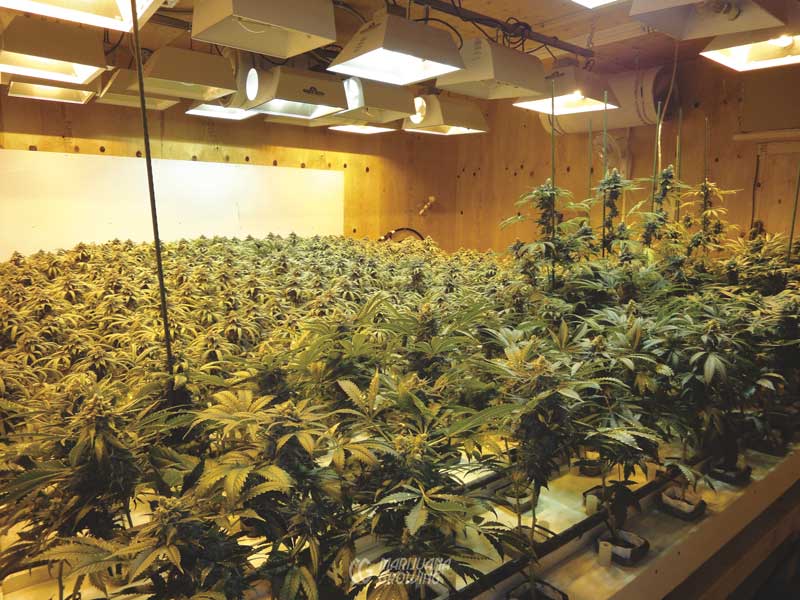
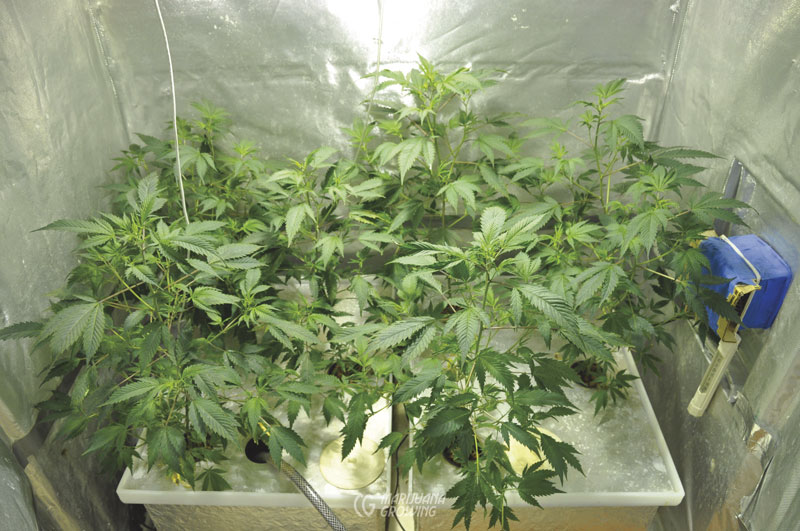
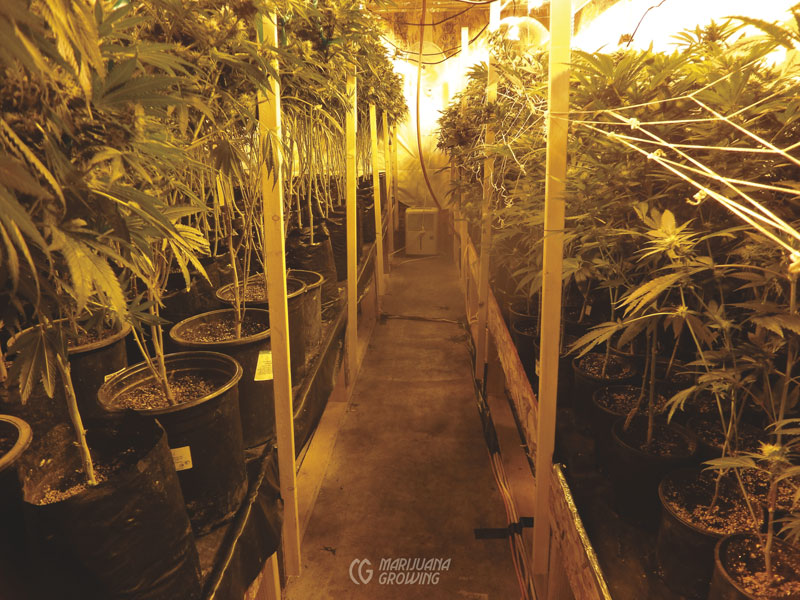
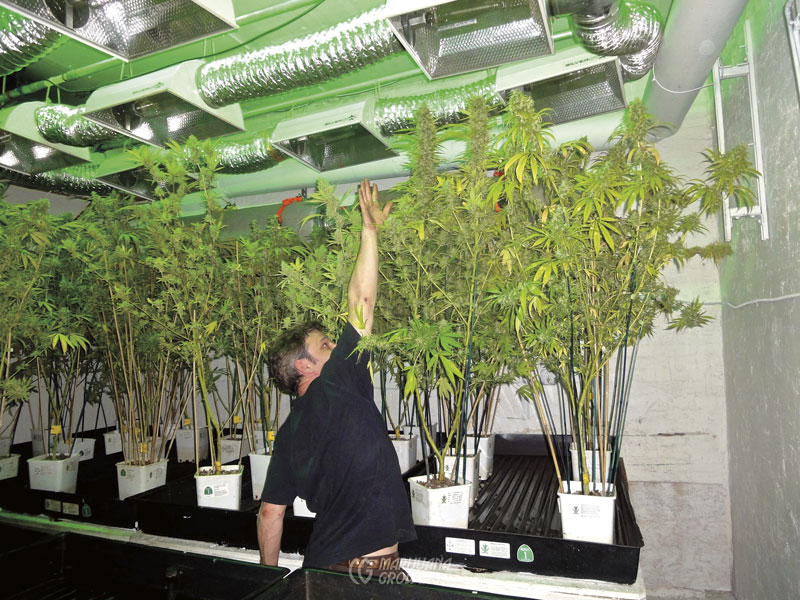
Healthy container gardens like this one are irrigated automatically. Penetrating the foliage in this garden is difficult and could break branches.
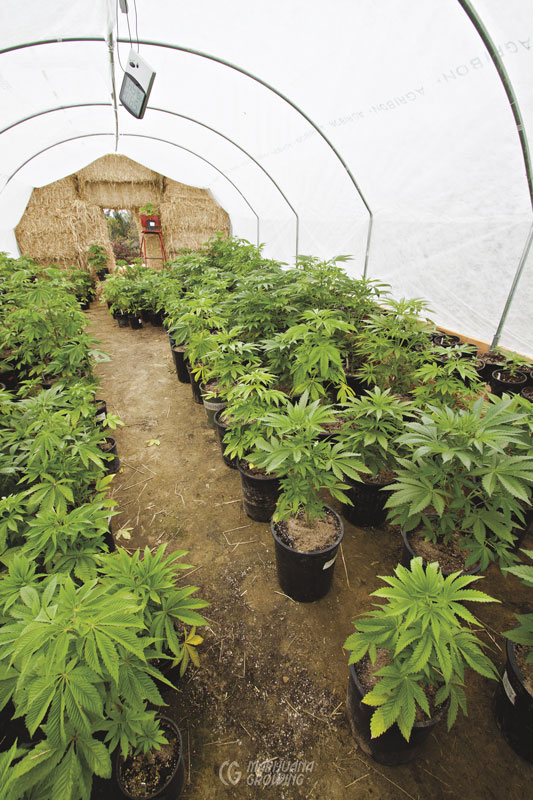
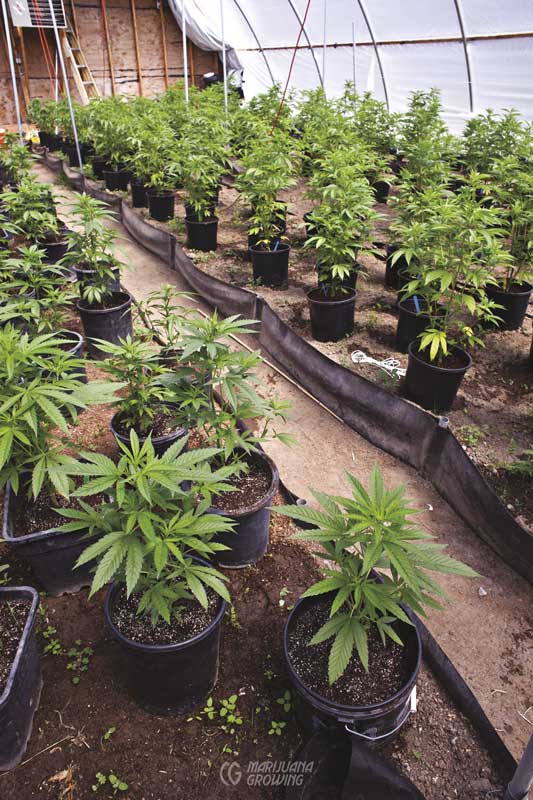
A small hoop greenhouse like this is easy to manage when growing medical cannabis in individual containers.
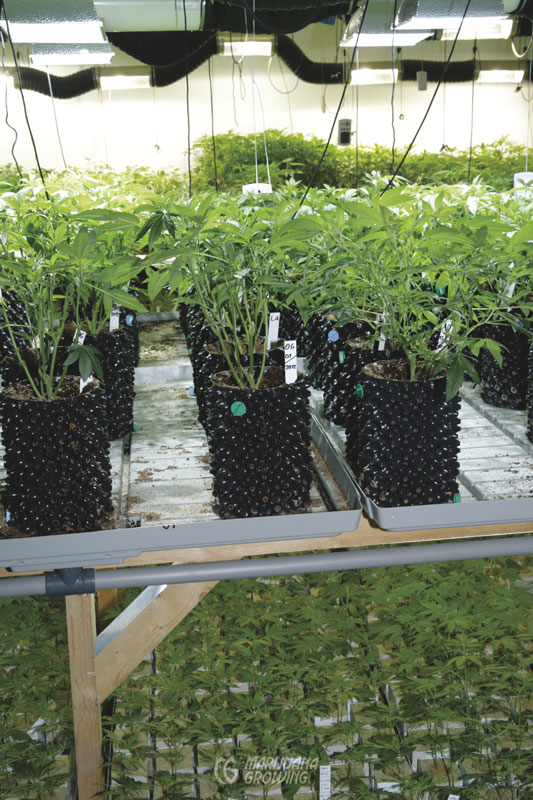
Air root–pruning containers are available that encourage more dense root growth.

These little seedlings are being hardened-off to transplant outdoors. They are watered from the top with a water wand that has an aerating nozzle.
Container Culture and Hydroponics
Solution Culture
Cannabis grown in hydroponic solution culture gardens does not use growing medium. However, plants in some gardens are started in a small net pot in a handful of substrate. Examples of solution culture include aeroponics, bubbleponics, deep water culture (DWC), deep flow technique (DFT), nutrient film technique (NFT), and raft solution culture. These gardens require an electric pump that must function 24 hours a day to operate nutrient-solution drippers, emitters, air (oxygen) diffusers, misting nozzles, often with a good filter to ensure debris-free solution.
Media Culture
Media-based hydroponics uses an inert substrate such as rockwool or expanded clay pellets. The inert substrate does not react chemically with nutrients. Container culture employs substrate such as soilless mix, or coco coir that is not inert and will react chemically with the nutrient solution. The substrate, whether inert or not, serves multiple functions— to anchor plants and to hold air, water, and nutrients for root uptake. The media also holds precious oxygen that is essential for rapid nutrient uptake. Ideal growing mediums hold plenty of air (oxygen) and nutrient solution at the same time. Soilless mix and coconut coir are two of the most popular growing mediums used in container culture. Rockwool and expanded clay are the most common substrates found in hydroponics. Nutrient solution is delivered to the media via flood-and-drain, top-feed, or passive wicking that relies on capillary action.
In container culture and many types of hydroponics, the supply of oxygen in growing media can be maximized, which in turn allows properly grown plants with healthy roots to take in peak levels of nutrients. However, in “solution culture” it is very difficult, if not impossible, to consistently achieve the same oxygen levels as in properly aerated growing media. Fine-tuned nutrient solutions can steer plants to grow less leafy vegetative foliage and more dense flower buds.
Properly mixed and applied hydroponic nutrients—chemical salts diluted in water—are able to supply exact element levels so that roots have access to them and the possibility of taking them in at maximum capacity. Aerated nutrient solution is absorbed, wicked up from the growing medium, or it passes over roots, later draining off. The oxygen in solution, around roots or trapped in the soilless medium, speeds nutrient uptake. Organic nutrients—natural elements and compounds—are more difficult to control in container culture than their chemical counterparts. In nature these nutrients are often bound in complex living chemical compounds that are difficult to measure accurately.
Regardless of the nutrient-solution application method, nutrient solutions are either run-to-waste (RTW) and not reused, or they are recirculated and used again and again rather than being discarded after one use. Recirculating systems have the added complication of concentrating the nutrient solution and the accumulation of plant wastes— broken roots, leaves, and so forth.
Nutrients are diluted in water in a “soil solution” or in an inert medium “hydroponic solution.” In soil, soilless mix, coco coir, etc., there is a naturally occurring ratio of oxygen to nutrient solution. However in hydroponics using rockwool, expanded clay pellets, or other inert ingredients, this ratio must be “manufactured.” And in any hydroponic garden where roots are covered with nutrient solution all the time, oxygen is contingent upon oxygenating the solution artificially, and it is very easy to screw it up.
Oxygen is pulled or moves into the soil, soilless mix, etc., or dissolves hydroponic solution where it can move into the roots. If the roots dry out, oxygen movement becomes restricted, especially if it drops below the critical oxygen pressure (COP) (amount of O2 dissolved into solution). In cannabis, COP is the point where respiration is first slowed from a lack of oxygen at about 20 mg/L*. The root tips are very active and have relatively high energy requirements, almost as high as humans but below the COP this activity slows.
*Plant Physiology, 3rd ed., by Lincoln Taiz and Eduardo Zeiger, (Sunderland, MA: Sinauer Associates, Inc., 2002).
At maximum levels of stirring, the amount of dissolved oxygen will be barely enough to keep up with O2 utilization, and to get as close to 60 ppm as possible, oxygen must be diffused into the solution, typically with an electric air pump.
In the older root zones this lack of oxygen becomes an issue earlier at lower rates. Since their uptake is reduced to 10 percent of the tips’ uptake, the cores can become anoxic (severely deficient in oxygen) or hypoxic (oxygen deficiency causing a very strong drive to correct the deficiency), killing the roots or affecting performance. The best way to achieve maximum aeration is not by growing in deep water that covers roots all the time, but by allowing dry time for the roots; because at this time, the solution on the root surface is still dissolving O2 at higher levels when the air moves in and the water is gone. No extra aeration is needed other than stirring the nutrient reservoir. The amounts of oxygen needed by the root system will be absorbed at the root surface as well.
Solution Culture
aeroponics
bubbleponics
deep water culture (DWC)
deep flow technique (DFT)
nutrient film technique (NFT)
raft solution culture—passive
Media Culture
ebb-and-flow (flood-and-drain)
hydro-organic
top-feed—containers and slabs
run-to-waste (RTW)
wick—passive
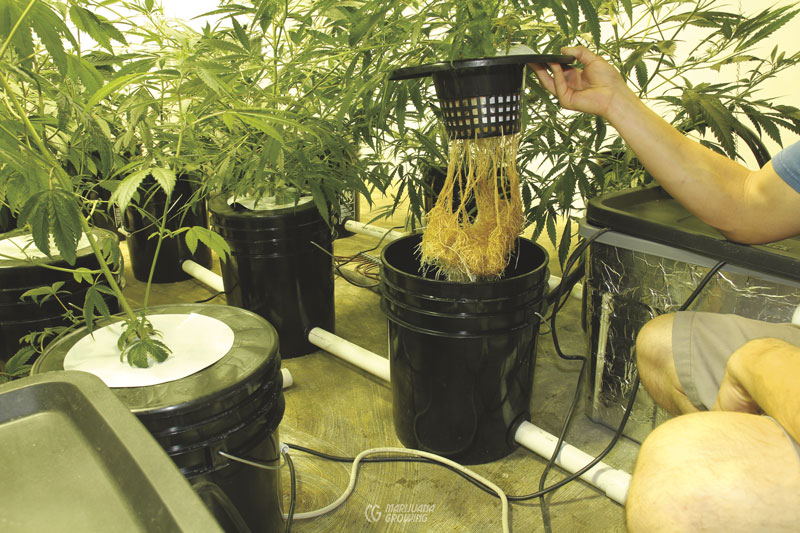
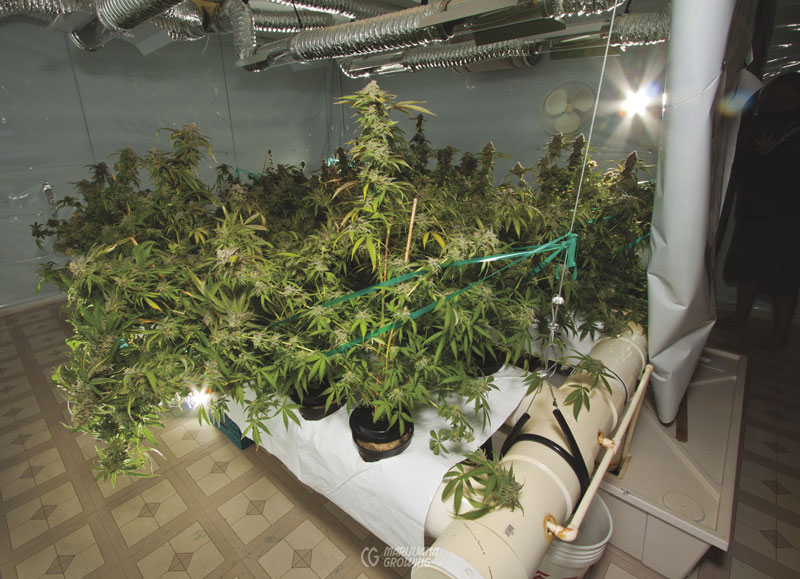
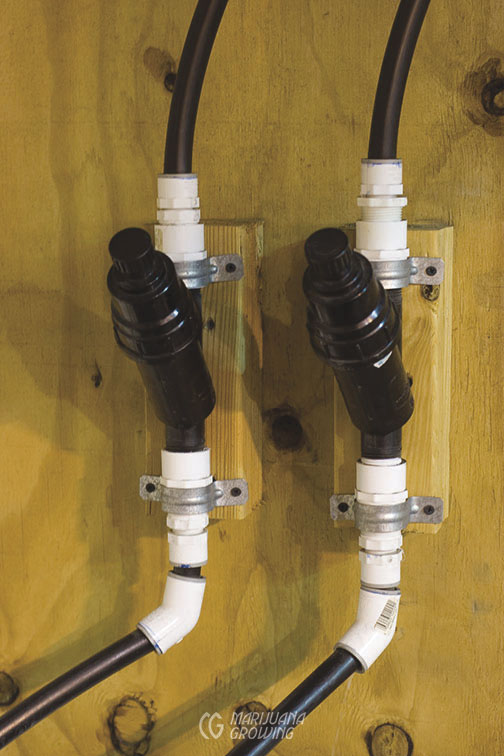
This hydroponic garden is made from 5-gallon (18.9 L) containers connected together with half-inch (1.3 cm) tubing.
Nutrient solution floods into the garden bed to irrigate. The nutrient solution pulls more oxygen into the moist rockwool cubes when it drains.
Aeroponic Gardens
Aeroponic gardens are true to their name. Plants grow in a chamber of air and nutrients. Roots are suspended in a dark growth chamber without growing medium and continually or at regular intervals misted with a fine oxygen-rich nutrient solution. Medical cannabis gardeners use efficient aeroponic gardens to root cuttings, but seldom for vegetative or flowering. Since cuttings grow with no media attached, they can be transplanted into solution or media hydroponic gardens as well as soil. However, damage to minuscule root hairs is impossible to avoid.
The origin of aeroponics dates back to the first half of the 20th century; the first patent was issued in 1985 to Richard Stoner. In fact, the first cannabis aeroponic clone garden that I saw was in the mid-1980s, and it was very similar to Stoner’s. It was homemade. Aeroponics makes control of conditions in the root zone much easier in hot climates than with conventional hydroponics. Often fatal nutrient-solution stagnation, waterlogging, and oxygen starvation are easier to control with aeroponics. The temperature inside the root chamber is easy to control, which is essential for avoiding pathogens and keeping adequate oxygen available. Properly designed and maintained, an aeroponic clone garden will yield a profuse, strong, and healthy root system.
Root systems of small seedlings and clones thrive in net pots specifically designed for aeroponic gardens. Clone roots strike (initiate) and seedling roots grow down from net pots into the dark, humid, nutrient-and-oxygen-rich environment. Regular misting in the 100 percent humid atmosphere prevents tender clones from drying out, all the while speeding root development. The totally dark chamber stops algae growth as root growth thrives.
Solution droplets of less than 30 microns tend to form a fog that humidifies the air but is not easily absorbed by roots. Larger, 30- to 100-micron droplets are more readily absorbed by roots. Droplets of greater than 100 microns precipitate from the air too quickly for root absorption.
The opening on a 30-micron (0.018 inch [0.046 mm]) nozzle is very small, clogs easily, and must be kept super clean. Use reverse osmosis water and low nutrient levels (about 10 percent strength), and maintain pump pressure to keep nozzles free of debris. Using a pre-pump filter and inline filter helps to remove debris and keep nozzles clean. Avoid or heavily filter any additives or nutrients containing organic matter.
Both continual and intermittent operation work well and achieve the same results—as long as the proper environment is maintained. Forcing solution through a 30-micron nozzle requires more pressure and a stronger, more expensive fitting and pump, which are also more costly to operate. If growing in large aeroponic gardens, electricity consumption becomes expensive; intermittent misting will save money. Use a timer that will cycle mist for one to two minutes, and then turn off for up to five minutes, 24 hours a day, to save resources.
Temperatures are easy to control in any climate in an insulated root chamber.
Simply heat or cool the nutrient solution before misting roots to bring the root zone temperature to the desired level. Avoid disease by keeping temperatures below 72°F (22°C) and regularly inspect roots for signs of discoloration, rot, and lack of fine root hairs.
Simple, small aeroponic gardens that pump nutrient solution up from the reservoir located below the root chamber are best suited to clone rooting and seedling growth. These gardens are less expensive than larger gardens with a separate reservoir and rooting chamber designed to grow mature plants. Gardens with a separate reservoir are less likely to clog as mature roots grow into the nutrient solution.
Aeroponic gardens are easy to construct, but fine-tuning a homemade unit could kill a few crops of clones before success is achieved. The basics are simple: the unit must be light- and watertight, and mist from nozzles must be of the proper size and delivered under adequate pressure.
EC and pH considerations for aeroponic gardens are the same as for any hydroponic garden. But aeroponic gardens require greater attention to detail. There is no growing medium to act as a water/ nutrient bank, and if the electricity goes out, the pump fails, or the nozzles clog, roots will soon dry out, killing tender root hairs. The whole root begins to die, starting at the tip.
There are several variations of aeroponic gardens including the Ein Gedi method, aero-hydroponics, and air-dynaponics.
Aeroponic gardens that throw 30- to 50-micron droplets promote fast root growth.
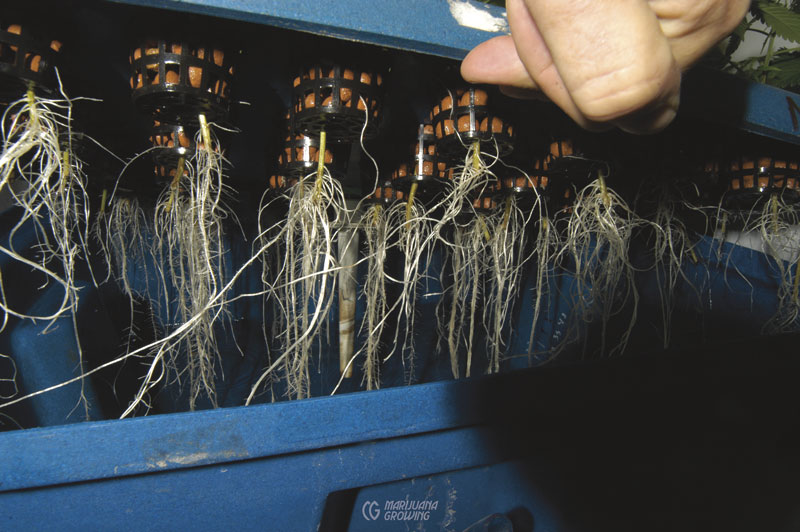
Root growth is phenomenal in an aeroponic clone machine.
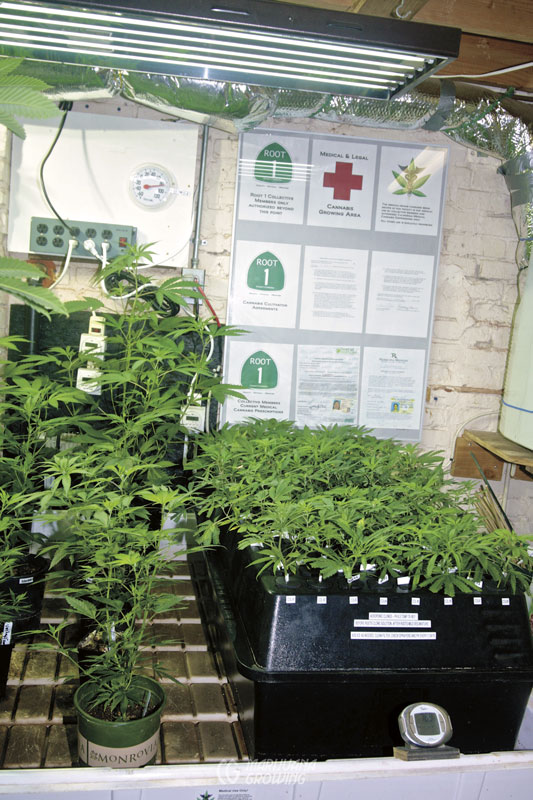
The aeroponic clone garden on the right is in front of medical cannabis prescriptions that certify patients.
Deep Water Culture (DWC)
Deep water culture (DWC) is simple and inexpensive. This low-maintenance method is typically employed by casual medical gardeners who want to grow a few plants in a small area. Seedlings and clones are held in net pots full of expanded clay pellets, rockwool, or a similar growing medium. Six-inch (15.3 cm) net pots are most common for single 5-gallon (18.9 L) containers. Smaller 2-inch (5.1 cm) net pots are often used for multiple plants in the same container. The net pots are nestled in a plastic lid that covers the reservoir. Roots dangle into a somewhat dilute (75 percent concentration) nutrient solution that is aerated with an air stone and pump. Feeder roots absorb nutrients and water from the solution in the oxygenated environment. The simple design requires no timer for the air pump that runs 24 hours a day.
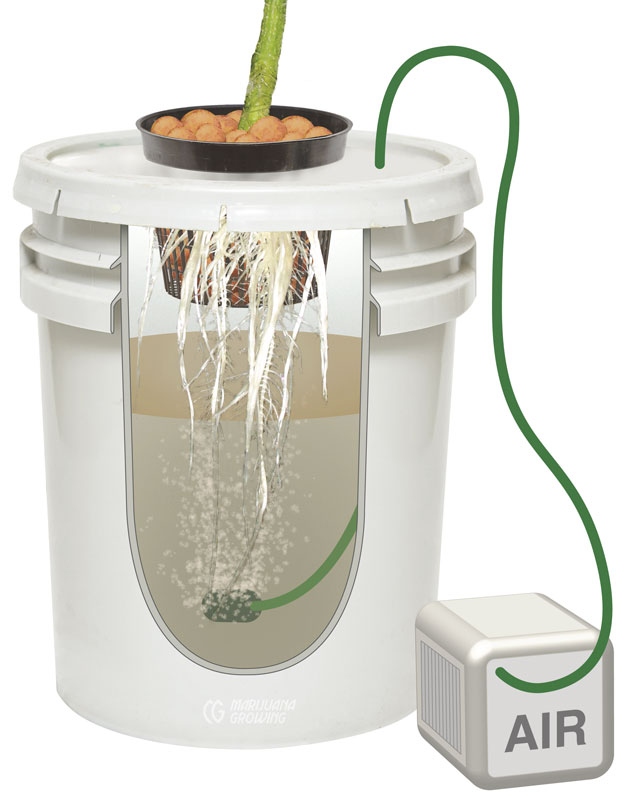
A closed DWC system is completely self-contained.
Closed or self-contained, recirculating DWC gardens stand alone with the reservoir directly under the net pot containing the plant. Closed gardens are perfect for gardeners who want to grow a few plants. The gardens also work well for large mother plants and to contain any waterborne diseases. The pH, EC, and solution must be checked for each individual reservoir. Nutrients, pH up, pH down, and any other additives must also be added to each container.
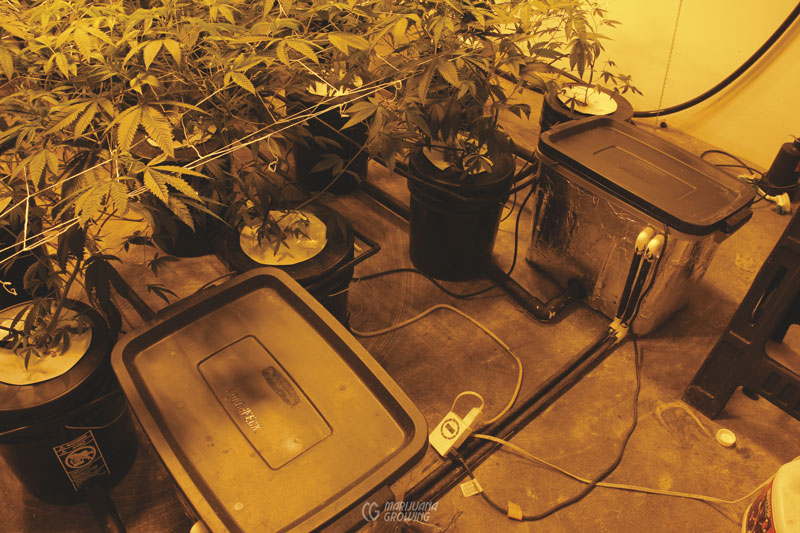
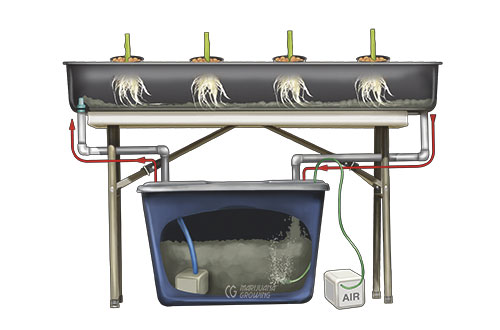
Multi-unit recirculating gardens are more complex, with a central reservoir connected by tubing to several container/ reservoirs. A central air pump aerates nutrient solution in each container via a manifold connected to air tubes that are in turn connected to an oxygen diffuser in each container. Although the garden has more complex plumbing, the pH, EC, nutrients, and other additives can be controlled from a central reservoir.
The levels of all reservoirs—central and all container/reservoirs—seeks the same solution level. Simply check the reservoir level to learn the level of all the others. Use a Mariotte’s bottle or a float valve to automatically maintain the solution level.

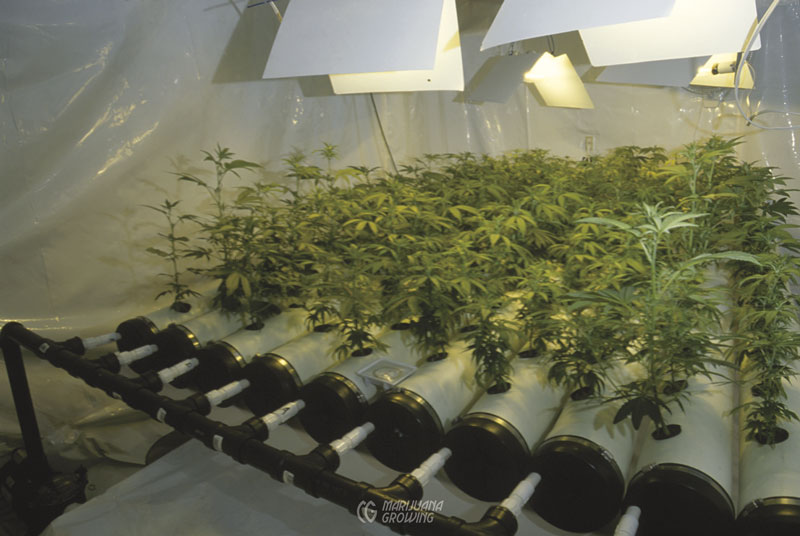
The nutrient solution flows to all containers in this recirculating DWC garden.
The air pump must supply each 5-gallon (18.9 L) reservoir with at least 1.3 gallons per minute (4.9 LPM) to ensure that adequate oxygen is available to roots. Less than this amount will deprive roots of oxygen, slow nutrient uptake, and open the door to cultural problems, pests, and diseases.
Set the air pump above the reservoir so that water will not siphon back through the air pump and destroy it if electricity goes out or the pump malfunctions.
Caution! Do not keep air pumps inside CO2-rich garden rooms or greenhouses, or the extra CO2 will drive the pH downward as the conjugate acid of the carbonate base or upward as the conjugate base of the carboxyl acid. (It really depends on many factors.)
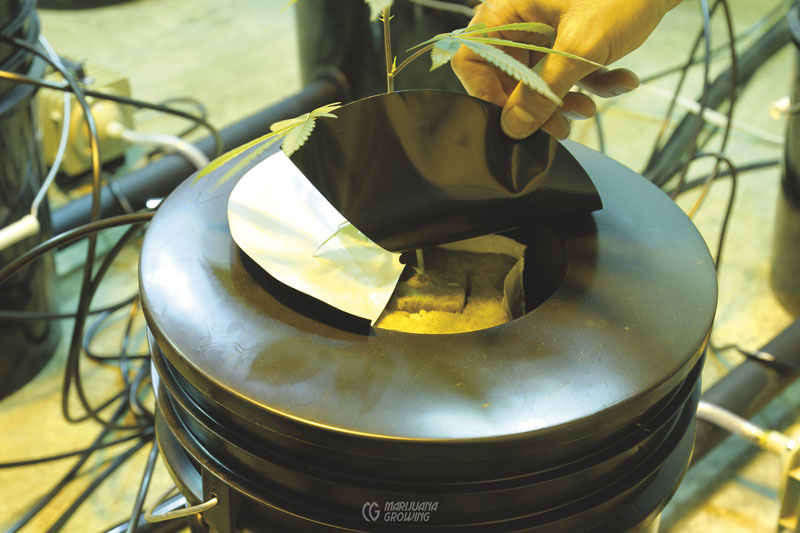
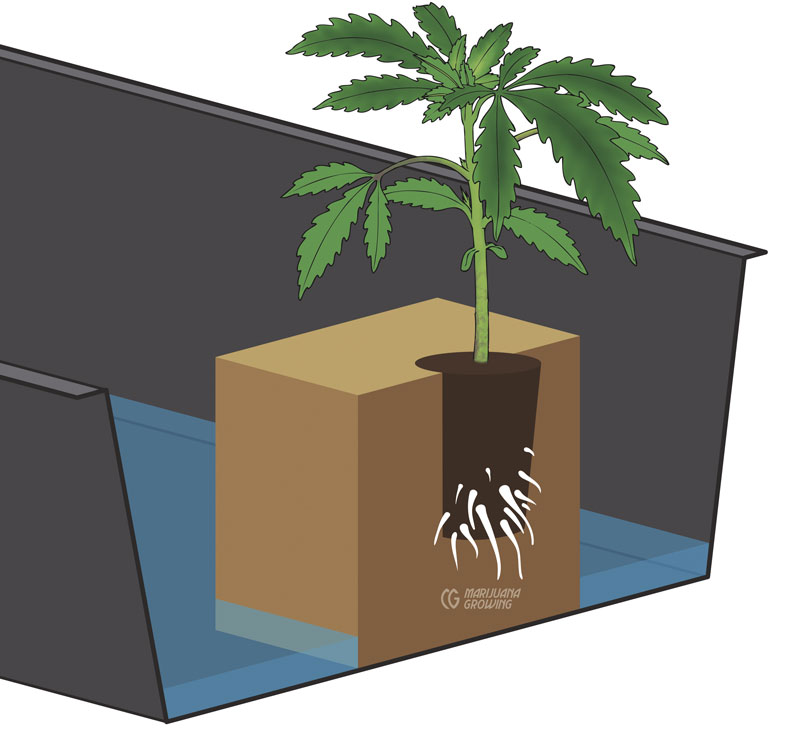
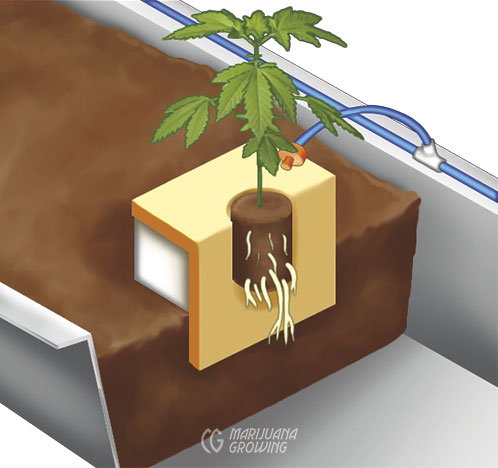
This plant is irrigated from above. The rockwool holds the plant, and the roots grow down into the water about an inch (2.5 cm) below the rockwool. (MF)
Roots are bathed in nutrient-rich aerated solution in DWC. (MF)
Bubbleponics and Raft or Pond Culture
Bubbleponics and raft or pond culture, are a variation of DWC. In bubbleponics the nutrient solution is delivered via top-feed nozzles or spaghetti tubes to a small amount of growing medium that holds the plant in place. The nutrient solution is allowed to percolate down through the growing medium before falling back into the aerated reservoir and recirculated. Bubbleponic gardens require two pumps, one to deliver nutrient solution, and an air pump attached to an air stone or other diffuser to aerate the nutrient solution.
A (submersible) pump lifts nutrient solution to the top of a discharge tube connected to a top-feed irrigation system. Nutrient solution is delivered to individual plants and cascades down, wetting roots and splashing into the (self-contained) reservoir below, which in turn increases dissolved oxygen in the solution.
In raft or pond solution culture, plants are placed in a sheet of buoyant plastic that is floated on the surface of the nutrient solution. Roots are always submerged in artificially aerated nutrient solution.
Transplant Clones or Seedlings
Fill with nutrient solution until the bottom inch of the 6-inch (15.2 cm) net pot is covered. Avoid filling to the level of the stem to prevent stem rot and other diseases. Hand irrigation may be necessary for the first few days if capillary action does not wick nutrients upward to roots. After the roots grow through the net pot, lower the level of the nutrient solution to about 2 inches (5.1 cm) below the net pot. An external dark-green translucent “drain tube” on reservoirs will indicate solution level.
The nutrient solution tends to stay the same temperature as the room unless it is cooled slightly. Insulating and placing it on a cold floor will help keep solution cool. Always aim for the ideal nutrient temperature range 55°F–65°F (12.8°C–18.3°C) to prevent disease and increase dissolved oxygen (DO) in solution. Change nutrient solution at the first sign or suspicion of problems— solution discoloration, pH fluctuation, or a change in EC.
Top off nutrient solution with plain water daily. Change the reservoir every week to ensure proper nutrient levels. Changing the solution can be a bit of a job. If the reservoir has a drain plug, the solution can be drained and replaced weekly without removing the plant. This will help minimize salt buildup too. With no drain plug, the plant has to be removed from the container/reservoir and placed in another container. The air stone must be removed and the solution dumped. Dump old nutrient solution that is full of nitrates, sulfates, phosphates, and so forth, in the outdoor garden rather than down household drains. The container/ reservoir must be completely cleaned and refilled with fresh nutrient solution. Many deep water culturists dilute nutrient solution to 75 percent strength to safeguard against overdose. Always run EC at lower levels in DWC gardens. Check with fertilizer manufacturers for recommendations.
Outdoors, the container/reservoir must be shielded or insulated so that direct sunlight does not cause the temperature inside to climb beyond 70°F (21.1°C). Outdoor gardens also need an overflow drainage hole in the side of the reservoir to prevent rainwater from diluting solution or causing it to overflow.
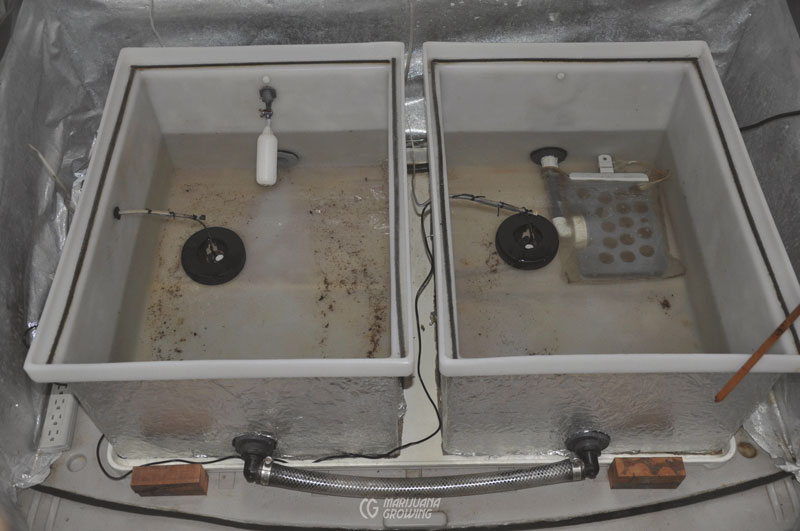
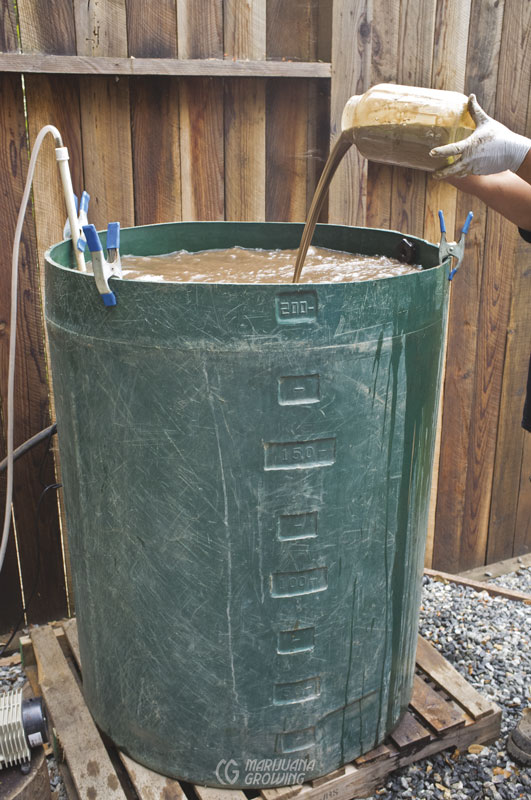
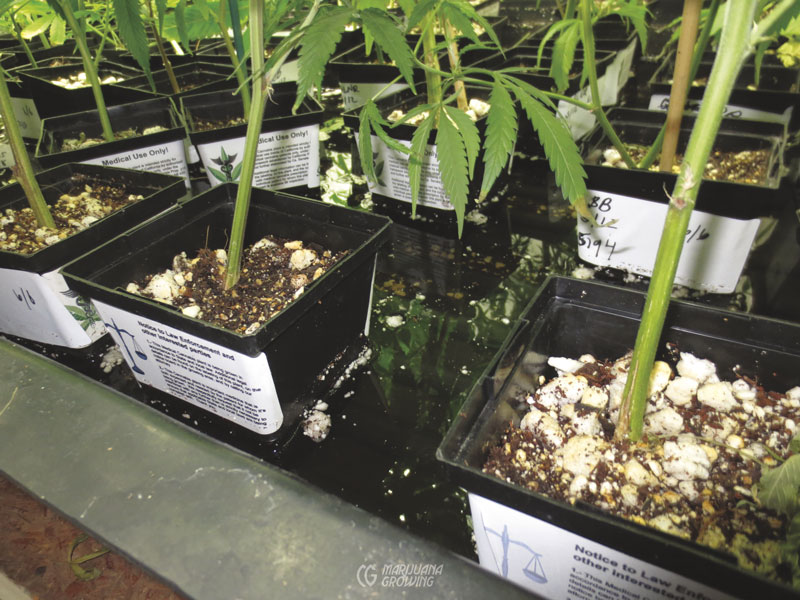
The grow tanks are set up and filled with nutrient solution.
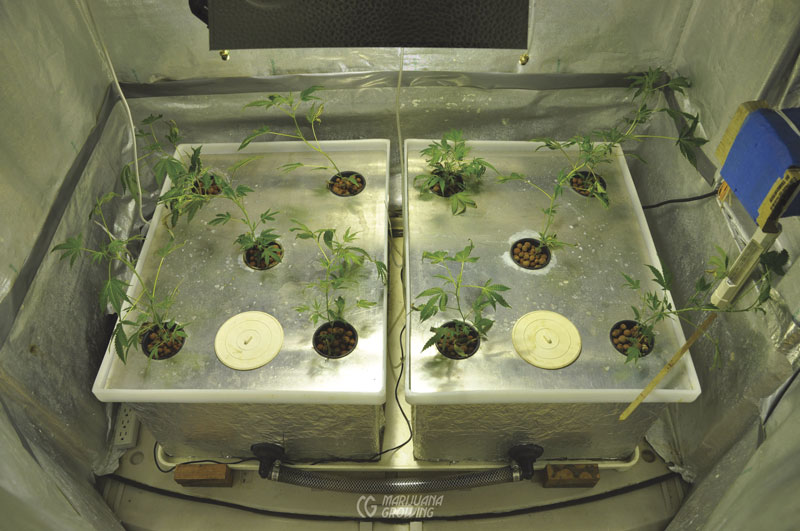
The little plants are set in the beds on top in net pots full of expanded clay pellets. Roots hang down into the aerated solution.
One week later, the same clones look a lot stronger and healthier, but they have not completely recovered from the transplanting.
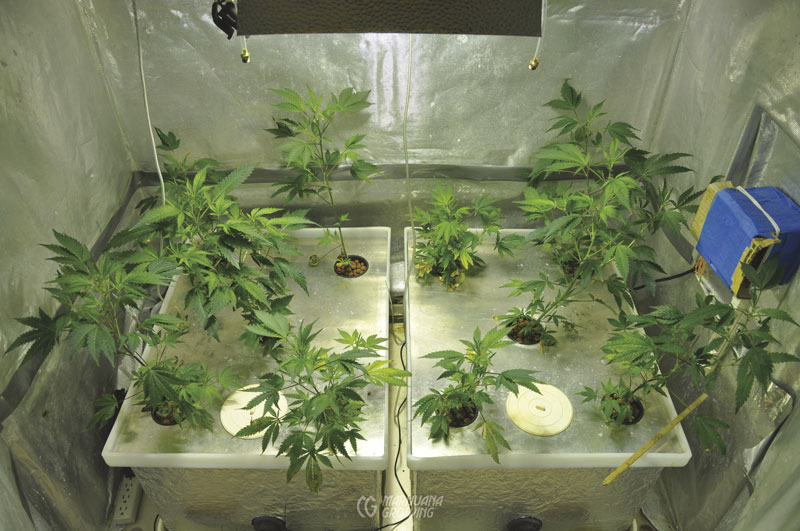
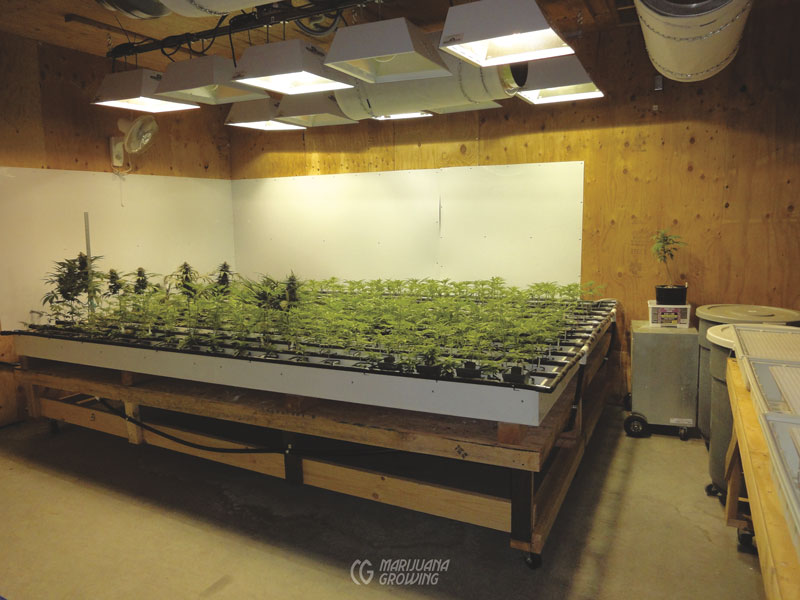
Two weeks later, the garden looks like it is thriving, and plants have put on growth.
The harvest from a small garden is small but enough to sustain many medical cannabis gardeners until the next crop.
Nutrient Film Technique (NFT)
Deep Flow Technique (DFT)
Deep flow technique is similar to NFT except roots in gulleys are submerged with 1 to 2 inches (2.5–5.1 cm) of nutrient solution. Make sure nutrient solution is well aerated and flows quickly enough through tubes and gulleys to maintain adequate oxygen levels for roots. Check the temperature in different parts of the tubes to ensure that it does not climb above 70°F (21.1°C) and holds at least 8 ppm of dissolved oxygen.
The nutrient film technique (NFT) was developed by Allen Cooper from England in the 1960s. Cooper introduced the garden to the world in his book, The ABC of NFT. NFT hydroponic gardens are most suitable for short-term crops with a compact root system including predominantly indica and ruderalis varieties that are harvested in 3 to 4 months. When grown too long, extensive cannabis root systems tend to block solution flow in gulleys.
The system supplies aerated nutrient solution to plants with roots held in gulleys. Seedlings or cuttings in small net pots full of substrate with strong root systems are placed on capillary matting located on the bottom of a covered channel or gulley. Capillary matting takes the place of a growing medium, stabilizes nutrient-solution flow, and holds roots in place. The nutrient flow can also be intermittent when used with a base like sand or perlite. Plastic tubes or sleeves are available that can be filled and laid on the ground as well. Well-aerated nutrient solution flows down the gulley, over and around the roots, and back to the reservoir. Irrigation is constant—24 hours a day. Roots receive plenty of oxygen and are able to absorb a maximum of nutrient solution. Gulleys must have the proper incline, volume, and flow of nutrient solution for a successful crop. NFT gardens must be fine-tuned to perform well.
Gulleys or channels are covered to keep humidity high in the root zone. A white exterior reflects light and the interior can be painted black to keep roots in the dark and stop algae growth. Roots that are completely submerged have less access to oxygen in the air compared to oxygen available in the nutrient solution. Maintain a thin layer, 0.4 to 0.8 inches (10.2–20.3 mm) of nutrient solution to allow for adequate air absorption. Roots submerged in turbulently flowing nutrient solution are intermittently exposed to humid air.
Capillary matting under rockwool cubes holds roots, air, and nutrient solution.
Nutrient solution is pumped from the reservoir into gulleys via a manifold and tubing at the upper end. The table is set up on a slope with a 1:50 fall in 12 feet. For example, if the bed is 50 inches (127 cm) long, the fall is 1 inch in 50 inches, or 1 centimeter in 50 centimeters. The incline helps solution flow that in turn compensates for surface, while avoiding both accumulation and waterlogging the roots. As a general guide, flow rate should be 0.5 GPM (1.9 LPM) at planting. After plants are established, flow rates for each gulley should be at least 0.25 GPM (0.9 LPM) and can be a maximum of twice this amount. Beyond this, extreme nutrient uptake problems can occur.
Gulley length should be less than 40 feet (12.2 m) to avoid slow growth. Oxygen in solution is frequently adequate, but nitrogen can become depleted at the low end of gulleys. Longer runs require meticulous leveling of gulleys to avoid high and low spots that expose roots too much or cause puddles. Double reinforced bottoms make gulleys durable and rigid when supporting large plants, large root systems, and large volumes of nutrient solution. Some NFT gulleys have ribs below to provide support and prevent warping and movement. The ribs also function as drainage channels and direct nutrient solution evenly along the bottom of the gulley.
A good filter will prevent debris from blocking gulleys, supply tubes, and pumps. NFT gardens have very little buffering against interruptions in the flow caused by plumbing blockages, power outages, and so on. In the absence of a growing medium, roots must be kept perfectly moist by the nutrient solution at all times. If a pump fails, roots dry and die. If the garden dries out for a day or longer, small feeder roots will die and grave consequences will result. Problems occur quickly in NFT gardens, and decisive corrective action is necessary. This garden is not recommended for new growers.
Place a filter on the pipe that returns nutrient solution to keep the reservoir clean. Organic garden filters may clog and need cleaning more often. Use 0.25-inch (6.35 mm) microtube feeders so that small chunks of debris pass right through. Filters on pressurized lines create backpressure, which causes pumps to strain and pump efficiency to diminish, consequently a more powerful pump is necessary.
NFT gardens are very easy to clean and lay out after each crop. However, only gardeners with several years of experience should try an NFT garden.
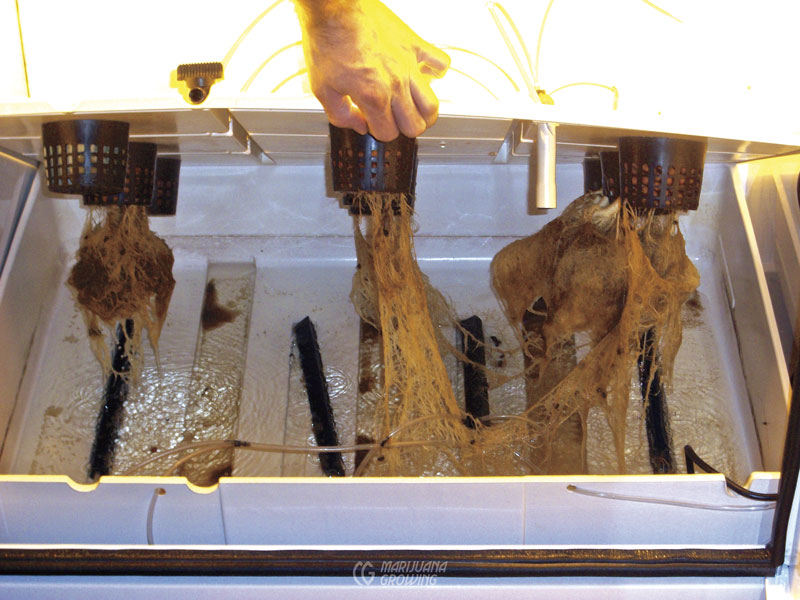
A big, healthy, white root system is a sign that there is enough dissolved oxygen in solution. Note that some of these roots are discolored and only a few roots are strong and white. This root system does not receive enough dissolved oxygen. (MF)
Nutrient solution in the tubes is kept about 6 inches (15.2 cm) deep. The nutrient solution is constantly moving and being aerated as it moves around roots.
NFT gardens were more popular 15 years ago than they are today.
Transplant Clones or Seedlings, and Grow
Start clones and seedlings in small 2-inch (5.1 cm) net pots full of rockwool or substrate that does not shed debris to clog the irrigation system. Or cut large holes in small pots for an inexpensive alternative to net pots. The small pots must permit unrestricted root expansion when growing into gulleys. Do not grow clones and seedlings in soil or media that will shed debris. And do not try to wash media from root mass with cold water. This will severely damage roots, compound transplant shock, and slow their establishment in gulleys. Plants started in soil or messy substrate should be lightly shaken to remove “debris” and then be transplanted. This will lessen damage from the move substantially. Install a temporary filter such as a nylon stocking or something similar at the end of channels to catch debris.
Set small pots in gulleys so that they remain stable while roots are establishing. Keeping clones and seedlings firmly in channels with no vertical movement will reduce transplant shock and speed root growth. Movement of plants can cause damage to roots, which causes stress and possible root disease. Often the first signs include leaf tip burn and slow growth. Even minimal transplant shock will slow growth for several days.
Problems
Most hydroponic garden problems are solved by keeping the garden and surrounding area clean, and by controlling the nutrient solution’s dissolved oxygen levels, EC, and pH, and temperature in the reservoir and gulleys. See sections on each for specific information.
Broken or discolored roots found in reservoirs and filters indicate problems from disease, pests, oxygenation, heat, nutrients, and so on. More broken and discolored roots signify a bigger problem. Check for slow nutrient flow and stagnation. Both conditions can cause waterlogged roots. Make sure that gulleys and the entire system are as light-tight as possible to discourage algae growth.
An excellent troubleshooting guide can be found at www.amhydro.com.
The ridges in each gulley bottom direct water and help add rigidity and stability.
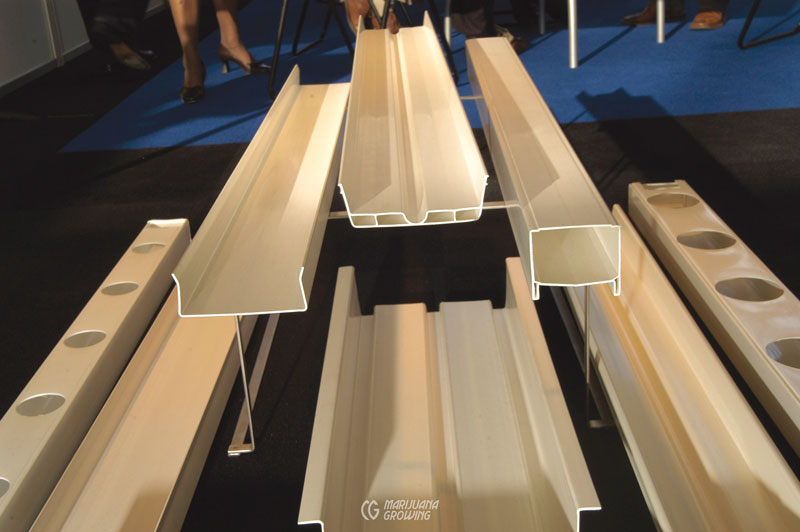
There are many different styles of gulleys for NFT gardens.
Good filters that are easy to access and clean are essential for NFT gardens.
Roots quickly grow into the main growing medium.
Hydro-Organic
Hydro-organic (aka organoponic) is growing in an inert medium fertigated with a soluble organic nutrient solution. When somebody talks about hydro-organics, they probably mean organic container culture. Organic fertilizers are most often defined as containing substances with a carbon molecule or a natural unaltered substance such as ground-up minerals. Many of the nutrients must be “processed” by microorganisms and be chelated before they are available to plants. These gardens can be top-feed, flood-and-drain, or wick. Refer to those specific sections in this chapter for more information.
Organic nutrients require places to collect. The concept is similar to buffering a video online. Without a place to accumulate, the rate of mineralization will not keep up with need. Much of the released nutrients would be used up by the microlife in the soil, or “volatized.” Other major issues arise with macro‑nutrients—most notably, P and Ca. It is impossible to grow 100 percent organic cannabis in hydroponics. There must be sources and pools where nutrients accumulate at appropriate levels. Oxygen is also required to break down organic complexes as well as the appropriate varieties and numbers of microflora to be effective.
Dedicated gardeners spend the time and trouble it takes to grow organically because the natural nutrients bring out a sweet organic taste in flower buds. Indoor and outdoor crops grown in les than 90 days do not have time to wait for organic nutrients to be broken down. Organic nutrients must be soluble and readily available for short-term cannabis crops to benefit.
An exact balance of organic nutrients can be achieved with experimentation and attention to details. Even when you buy ready-mixed commercial fertilizers like BioCanna or Earth Juice, you will need to try different feeding amounts and schedules to get the exact combination to grow a top-quality harvest. Always check with manufacturers for recommendations.
Taking an accurate EC reading or mixing the exact amount of a specific nutrient is very difficult in organic hydroponics. Chemical fertilizers are easy to measure out and apply, and it is easy to give plants the specific amount of fertilizer in each stage of growth.
Organic nutrients have a complex structure, and measuring content is difficult. Organics are difficult to keep stable, too. Some manufacturers with products such as BioCanna have managed to stabilize their fertilizers. When buying organic nutrients, always buy from the same supplier, and find out as much as possible about the source from which the fertilizers were derived. Always use fertilizers well before the expiration date.
Combine premixed soluble organic fertilizers with other organic ingredients to make your own blend. Experiment to find the perfect mix for the cannabis varieties being grown. Adding too much fertilizer can make the substrate toxic, binding nutrients to the point that they become unavailable. Foliage and roots burn when buildup is severe.
Soluble organic fertilizers are more difficult to overapply, yet they are also difficult to leach from the growing medium. And when overapplied, soluble organic fertilizers are more likely to cause symptoms that are hard to read. For example, too much bone meal causes a pH imbalance of the growing medium that manifests as leaf burn. Fertilizer recirculating systems are the trickiest to control. When the microbial life is off balance by a small amount and the conversion of released ammonium to nitrate is slowed, it causes a buildup to toxic levels.
Chelates and Nutrients
Mix seaweed with macronutrients and secondary nutrients to make a hydro-organic fertilizer. The amount of primary and secondary nutrients is not as important as the mélange of trace elements that are in an available form in the seaweed. Major nutrients can be applied via soluble fish emulsion for nitrogen, while phosphorous and potassium can be supplied by bat guano, bone meal, and manures. More and more organic gardeners are adding growth stimulators such as humic acid, Trichoderma, bacteria, and various hormones.
Minerals such as silica, nickel, cobalt, and selenium are not essential for plant growth but have the ability to enhance growth and development. They are needed in minute quantities and are provided via the contaminants in the water supply and fertilizer. Add humic and fulvic acids (available in mineral soils) to the hydroponic garden and soilless container gardens. Fulvic acid, a humic acid, is yellow in color and soluble. Humic acids are most effective as additives to the soil to help build soil and stimulate plant growth.
Humic acids have an important ability as chelating agents—they are, in fact, excellent in this role as they are strong enough to protect micronutrients but weak enough to release the micro‑elements to plants when required. Fulvic acid is particularly good for this role of natural chelation, because it has the ability to enter the plant and move throughout its tissue. In organic production gardens where synthetic chelation agents such as EDTA cannot be used, addition of humic acid appears to be the ideal way of ensuring that micronutrients remain available to the plant through a more natural form of chelation.
Organic nutrients are typically processed by microorganisms before plants can take them up. Humic acids promote the conversion of many elements into a form available to plants. Adding humic acids promotes microbial growth, helps decompose minerals and organic matter, and makes different elements available to plants. Iron would usually be supplied in a chelated compound. In an organic garden, fulvic acid is used instead. Humic and fulvic acids accelerate cell division and increase the rate of development and the length of root systems.
Hydro-organic gardens combine principles of hydroponics and organic gardening.
A dirty reservoir causes nonstop problems!
Hydro-organic nutrient mixes are heavier, requiring a stronger pump and heavy-duty filters.
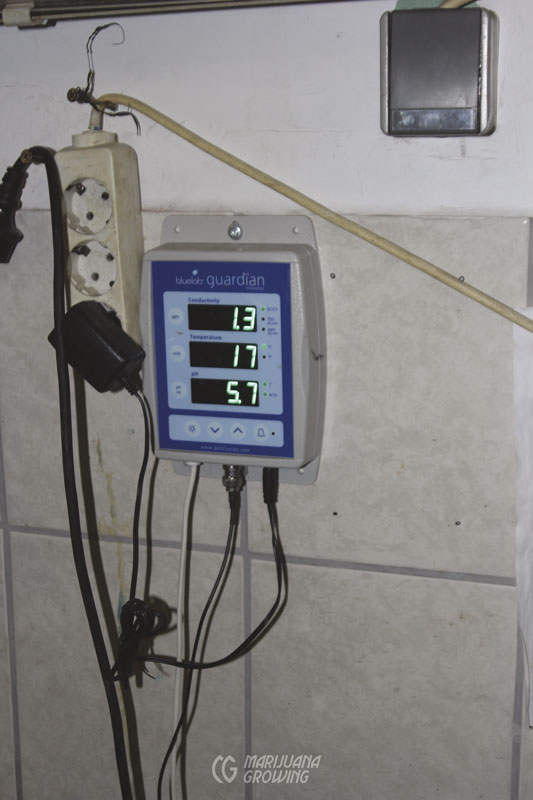
A constant-readout monitor/controller for nutrient solution takes the guesswork out of nutrient formula delivery.
Ebb-and-Flow Gardens
Ebb-and-flow (aka flood-and-drain) gardens are low-maintenance, simple, and inherently efficient by design. This is often the easiest and most cost effective hydroponic or container culture garden for indoor and greenhouse cannabis cultivation, whether growing just a few plants in a small area or a large garden.
Individual plants in pots or rockwool cubes are set on a special table with drainage channels and sides, a growing bed that can hold up to 4 inches (10.2 cm) of solution. The nutrient solution is pumped into the table or growing bed. The rockwool blocks or containers are flooded up through an inlet from the bottom, which pushes the old, oxygen-poor air out. Once the nutrient solution reaches a set level, an overflow pipe drains the excess back to the reservoir. At the end of the irrigation cycle, the pump is turned off and the solution drains and draws new, oxygen-rich air into the growing medium. The aerated substrate is just what roots need to take in nutrients at a rapid rate. A maze of drainage channels in the bottom of the table directs runoff solution back to the catchment tank or reservoir. This cycle is repeated several times a day. Ebb-and-flow gardens are ideal for growing clones, seedlings, and short plants in a sea of green (SOG) garden.
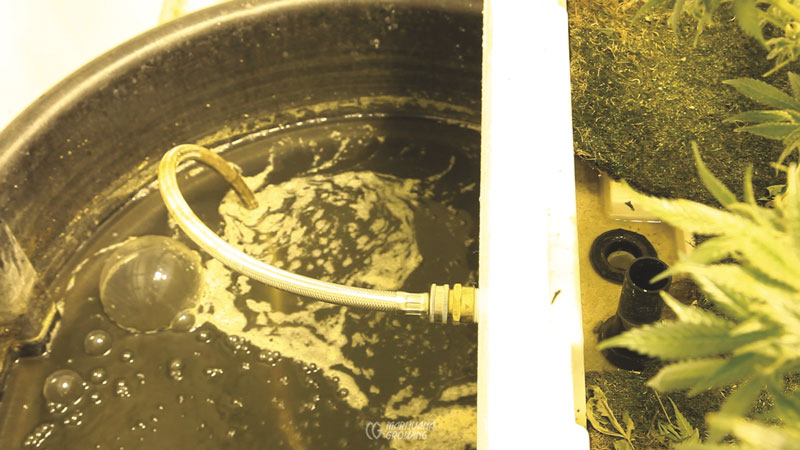
This ebb-and-flow garden has an air stone to increase nutrient-solution aeration.
Ebb-and-Flow Tables
Nutrient solution is pumped up into the bed via an inlet fixture and evacuated out the same inlet/drain. There is only one entrance and exit to clog, leak, or otherwise malfunction. Delivering nutrient solution via more than one outlet compounds problems every time a new emitter is added. An overflow fitting guarantees the nutrient solution will reach a specific level and not spill over the top of the table. Excess solution drains back into the reservoir via the overflow fitting. The solution is aerated when it cascades from the drain hole in the table into the reservoir below.
Ebb-and-flow tables or growing beds are designed to hold up to 4 inches (10.2 cm) of solution and let excess water flow freely away from the growing medium and roots. Nutrient solution is pumped up into the bed, filling it in 5 to 10 minutes. It should take about 8 minutes for a 350 GPH pump to fill a 4 × 8-foot (1.2 × 2.4 m) table with 40 gallons (151.4 L) of solution 2 inches (5.1 cm) deep. The solution is moved relatively slowly, and a low-volume 350 GPH (1325 LPH) pump is adequate (see “Nutrient-Solution Pumps”) These gardens are fairly quiet and use less power than some other setups.
The bed should drain faster than it takes to fill. Total fill-and-drain time cannot exceed 20 minutes or roots will be deprived of oxygen too long and will drown, rot, and attract problems. Passive drainage requires a large tube (at least 2 inches [5.1 cm]) to allow solution to drain rapidly. Complete and speedy drainage is essential so that the growing medium pulls fresh air into the growing medium and root zone. Excess solution sitting in substrates after irrigation does not allow adequate oxygen to enter. Slow suffocation occurs when nutrient solution does not drain completely. The surface of the growing media must also dry out completely to help prevent algae growth and fungus gnat infestations. Avoid algae growth on substrate surface by covering to exclude light. Remove any debris—dead leaves, organic matter, and so forth—from the surface of the growing medium to deter pests and diseases. Keep clean, pest-and-disease-free medium enclosed in plastic until it is used.
The table must be sturdy enough to hold a volume of water. For example, a 4 × 8-foot (1.2 × 2.4 m) table that is 2 inches (5.1 cm) full holds 40 gallons (151.4 L) of solution that weighs 240 pounds (108.9 kg).
When flooded with 1 to 2 inches (2.5– 5.1 cm) or more of nutrient solution, the growing medium wicks up the solution into the freshly aerated medium. Tables with drain channels require deeper flooding, up to 4 inches (10.1 cm), to compensate for channels. Homemade tables with no drain channels require shallower levels. But such tables could also allow pools of stagnant water if not perfectly flat and with an adequate incline.
Adjustable-height legs, similar to those found on a washing machine, work well to support ebb-and-flow garden beds. Individual legs can be adjusted to dial in the slope of a garden bed table. Allow enough incline so that solution drains readily but not so much slope that plants at the high end do not receive enough solution. An 8-foot-long table should have a slope of about 0.5 to 0.75 inch (about 1.3–1.9 cm). Growing beds longer than 10 feet (3 m) drain slowly, and solution stays on the beds longer than roots are able to use it.

Roots grow out drainage holes but stop growing when they come in contact with air between irrigation cycles.
Each bed in this flood-and-drain garden is controlled by timers that can be seen at the end of the aisle.
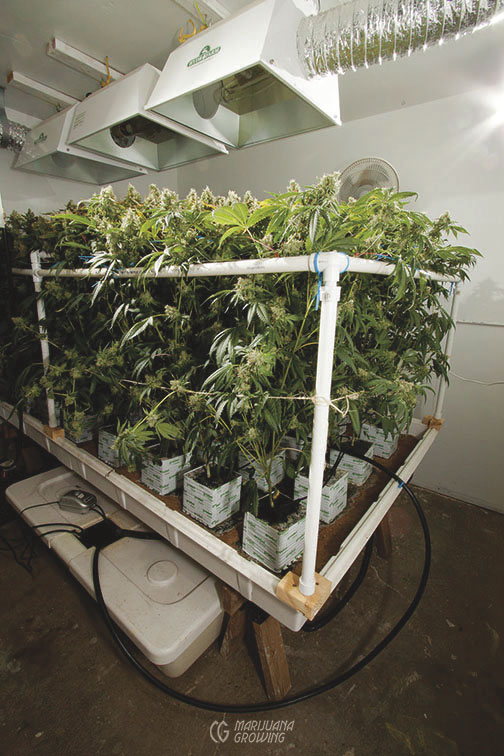
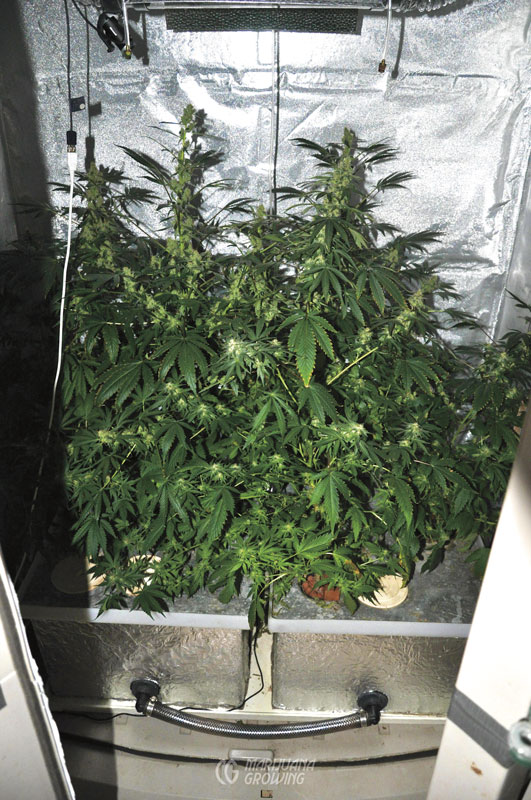
These plants grew for about a week too long and needed to be pruned from below. But as you can see, the buds on the top of the plant are at least 2 feet (61 cm) long.
Growing Mediums
Growing medium must wick solution up and must also hold plenty of air. For example, a 4-inch (10.2 cm) rockwool cube flooded with 1 inch (2.5 cm) of solution wicks up about 3 inches (7.6 cm) into the cube. Growing mediums must provide adequate capillary action for water uptake and movement. Rockwool, soilless mix, and coco are the preferred growing mediums for ebb-and-flow gardens. However, some people do use expanded clay pellets and irrigate deeper and more often.
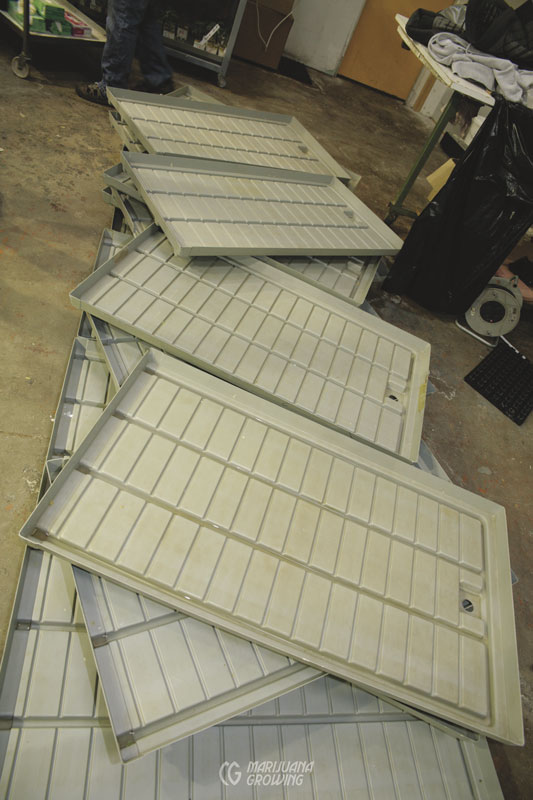
Flood-and-drain tables are scrubbed down by hand and disinfected between crops.
Plants wick up nutrient solution in the ebb-and-flow tables.
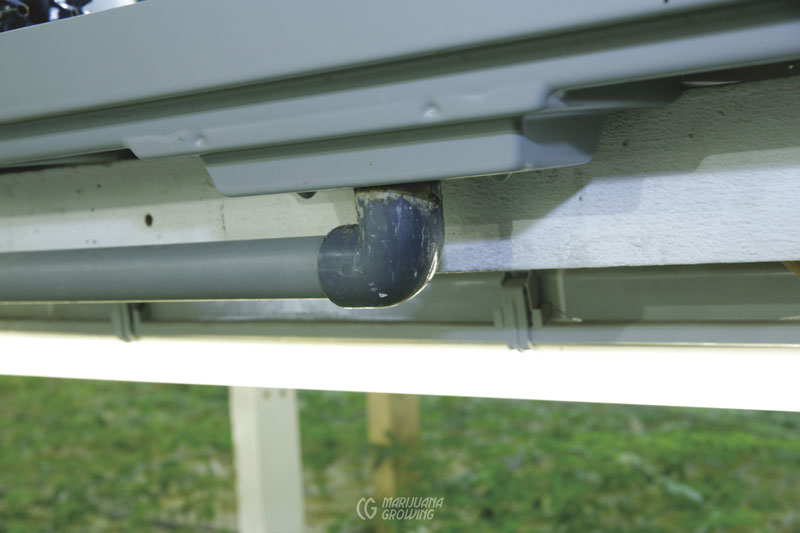
Drains should be efficient and simple to clean.
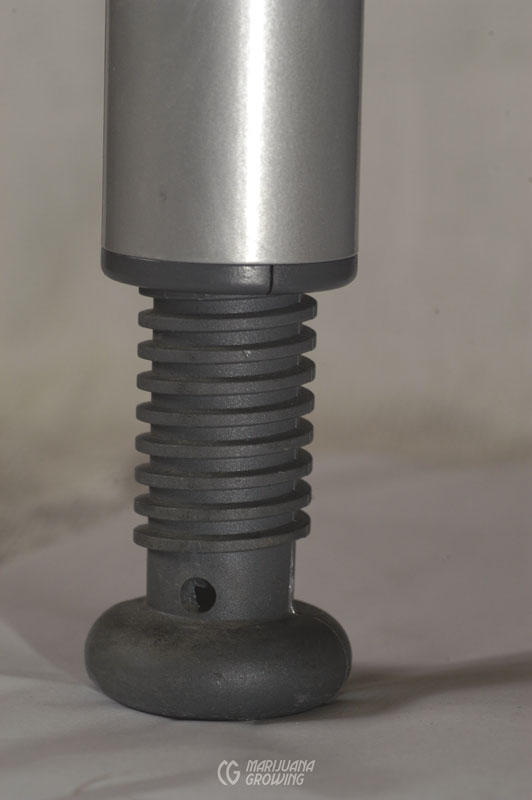
Adjustable legs make it easy to level and add an incline to a growing table.
Irrigation
Flood the table with 1 to 2 inches (2.5–5.1 cm) of solution to ensure even nutrient-solution distribution. Avoid lightweight mediums such as perlite that may cause containers to float and fall over. A large volume of water is necessary to fill the entire table. Make sure the reservoir has enough solution to flood the reservoir and still retain an absolute minimum of 50 percent extra to allow for daily evaporation. Before introducing plants, calculate the amount of solution needed to flood the table. Also calculate the size of reservoir needed. Use the tables at right as a guideline.
| TABLE | GALLONS FOR | RESERVOIR | GALLONS FOR | RESERVOIR |
| Size (ft) | 1-inch Depth | Size (gal) | 2-inch Depth | Size (gal) |
| 1 × 2 | 1.25 | 2.5 | 2.5 | 5 |
| 2 × 2 | 2.5 | 5 | 5 | 10 |
| 2 × 3 | 3.75 | 7.5 | 7.5 | 15 |
| 2 × 4 | 5 | 10 | 10 | 20 |
| 3 × 3 | 5.62 | 11.24 | 11.24 | 22.48 |
| 3 × 4 | 7.5 | 15 | 15 | 30 |
| 3 × 5 | 9.4 | 18.8 | 18.8 | 37.6 |
| 3 × 6 | 11.3 | 22.6 | 22.6 | 45.2 |
| 4 × 4 | 10 | 20 | 20 | 40 |
| 4 × 5 | 12.5 | 25 | 25 | 50 |
| 4 × 6 | 15.6 | 31.2 | 31.2 | 62.4 |
| 4 × 7 | 17.5 | 35 | 35 | 70 |
| 4 × 8 | 20 | 40 | 40 | 80 |
| 4 × 9 | 22.5 | 45 | 45 | 90 |
| 4 × 10 | 25 | 50 | 50 | 100 |
| TABLE | CUBIC LITERS FOR | RESERVOIR | CUBIC LITERS FOR | RESERVOIR |
| Size (cm) | 3-cm Depth | Size (L) | 6-cm Depth | Size (L) |
| 30 × 60 | 5400 | 5.4 | 10.8 | 21.6 |
| 60 × 60 | 10800 | 10.8 | 21.6 | 43.2 |
| 60 × 90 | 16200 | 16.2 | 32.4 | 64.8 |
| 60 × 120 | 21600 | 21.6 | 43.2 | 86.4 |
| 90 × 90 | 24300 | 24.3 | 48.6 | 97.2 |
| 90 × 120 | 32400 | 32.4 | 64.8 | 129.6 |
| 90 × 150 | 40500 | 40.5 | 81 | 162 |
| 90 × 180 | 48600 | 48.6 | 97.2 | 194.4 |
| 120 × 120 | 43200 | 43.2 | 86.4 | 172.8 |
| 120 × 150 | 54000 | 54 | 108 | 216 |
| 120 × 180 | 64800 | 64.8 | 129.6 | 259.2 |
| 120 × 210 | 75600 | 75.6 | 151.2 | 302.4 |
| 120 × 240 | 86400 | 86.4 | 172.8 | 345.6 |
| 120 × 270 | 97200 | 97.2 | 194.4 | 388.8 |
| 120 × 300 | 108000 | 108 | 216 | 432 |
To check the moisture level, saturate substrate with nutrient solution. Weigh rockwool containers or blocks when saturated, and weigh them again a few hours to a day later to check the amount or percentage of water used. For example, a block that weighs 4 ounces (11.8 cl) when saturated will weigh 2 ounces (5.9 cl) when 50 percent of the nutrient solution has been used. Check with the grow medium or substrate manufacturer for recommendations on moisture content and irrigation frequency.
To learn the amount of solution a grow medium contains, weigh it when saturated and after squeezing lightly. Water rockwool when it is 50 percent dry. Remember, rockwool holds a lot of moisture and air, even when saturated. Irrigation frequency and volume change substantially when temperatures go down and light is lacking. Overwatering is much more likely when temperatures cool. Do not let nutrient solution stand on the table for more than 20 minutes. Submerged roots drown in the depleted oxygen environment.
Flooding garden beds is the easiest and most efficient form of irrigation.

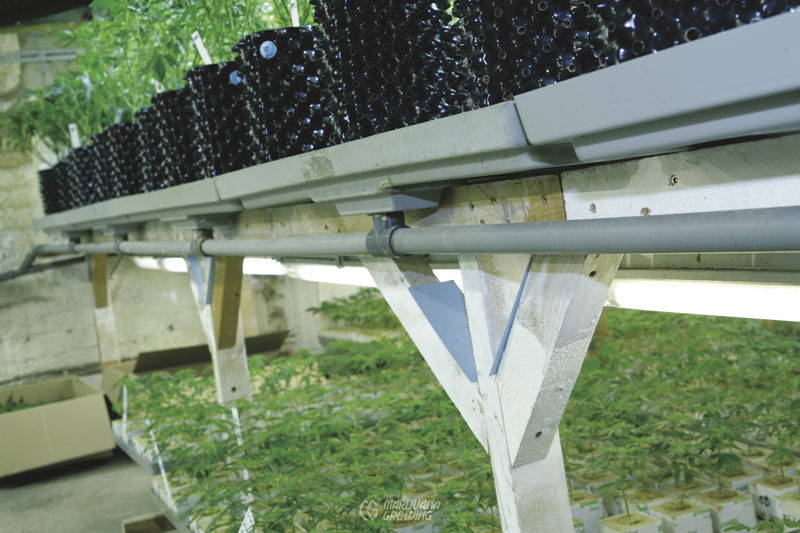
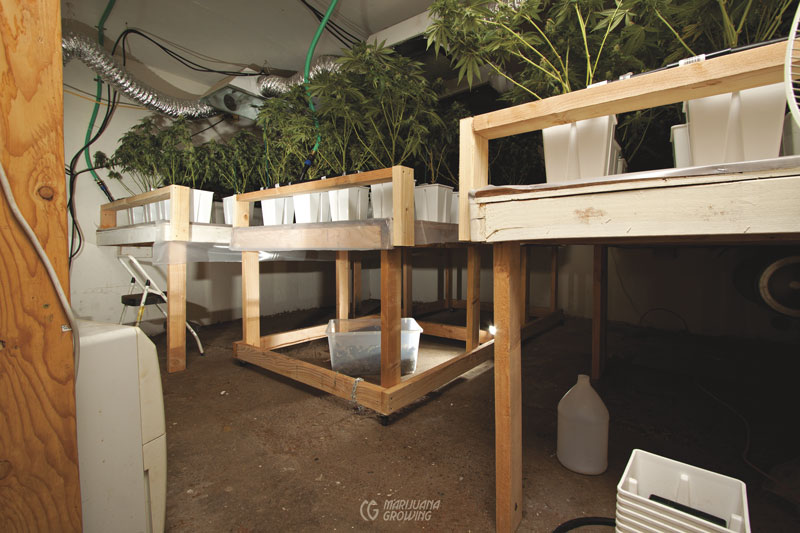
Steel tables with wooden supports bear all the weight of the growing table. The tables are equipped with wheels so an aisle can be opened between them.
Ebb-and-Flow Irrigation Guidelines
1. Rockwool cubes: 3 times @ 10 minutes
2. Soilless mix: 3 times @ 10 minutes
3. Expanded clay: 6 times @ 10 minutes
4. Lava rock: 12 times @ 10 minutes
Note: Lower the EC to between 600 and 800 ppm when increasing feeding frequency. It is easy to burn plants when irrigation frequency increases.
The first cycle should start first thing in the morning and be followed by cycles 2 to 4 hours apart. The irrigation schedule will fluctuate depending upon variables such as temperature, humidity, plant age, and growth rate. No watering is necessary at night. The entire irrigation cycle must be completed in no more than 20 minutes total, or roots will drown. The fill time is important and should occur relatively quickly, preferably in ten minutes or less. Drain time should be relatively quick so that the draining solution sucks new, oxygen-rich air into the container or cube. This is an essential principle of irrigation in any flood-and-drain garden.
A large amount of nutrient solution is required to fill garden beds. For example a 4 × 8-foot (1.2 × 2.4 m) table requires 40 gallons (151.4 L) of solution to reach a depth of 2 inches (5.1 cm). Consequently a large reservoir is necessary. Garden beds are flooded in sequence or will have individual reservoirs when more than one such table is set up in a growing area.
The entire table floods and is exposed to air, causing a huge volume of water from the solution to evaporate into the air. This creates more humid atmospheric conditions. Extra ventilation will be necessary to whisk away moist air. The balance of the nutrient solution is also affected and must be compensated.
Since all plants are in the same bed and are irrigated together, pests and diseases can also run through an entire garden quickly. Keeping garden rooms clean is essential to avoid the spread of pests and diseases.
This rockwool hydroponic garden by Trichome Technologies is completely automated.

Each clone in this top-feed garden is fed via a spaghetti tube attached to an emitter.
Roots hang in the moist air below the garden bed. Irrigation water is recirculated back to the reservoir.
Variations of Ebb-and-Flow
A few gardeners place a capillary mat between the table and containers to hold nutrient solution and promote root growth. I do not recommend this practice. Once plant roots have anchored into the capillary matting, they cannot be moved without damaging roots. Excessive algae growth and waterlogged roots that leads to root rot are inherent problems with this practice. After irrigation, the water under matting takes a very long time to dry.
Top-Feed Gardens
Top-feed hydroponics and container culture gardens are efficient and productive, and once set up, they are easy to control and maintain. The nutrient solution is metered out in specific doses at intervals over time and delivered to individual plants via spaghetti tubing or an emitter placed near the base of the stem. Aerated nutrient solution flows down into the growing medium. Roots take in some of the nutrient solution and the balance drains out the bottom. The runoff solution is directed back to the reservoir as soon as it drains from the growing medium. Rockwool and expanded clay pellets are the most common growing mediums in hydroponics, and container culture gardens commonly use such mediums as soilless mix, coco coir, and soil. Versatile top-feed gardens can be used with individual containers slabs in individual beds or lined up on tables.
Top-feed 5-gallon (18.9 L) containers of growing medium work well to grow large plants that may require support. Small 1- to 3-gallon (3.8–11.4 L) containers work well for smaller plants.
Top-Feed Containers
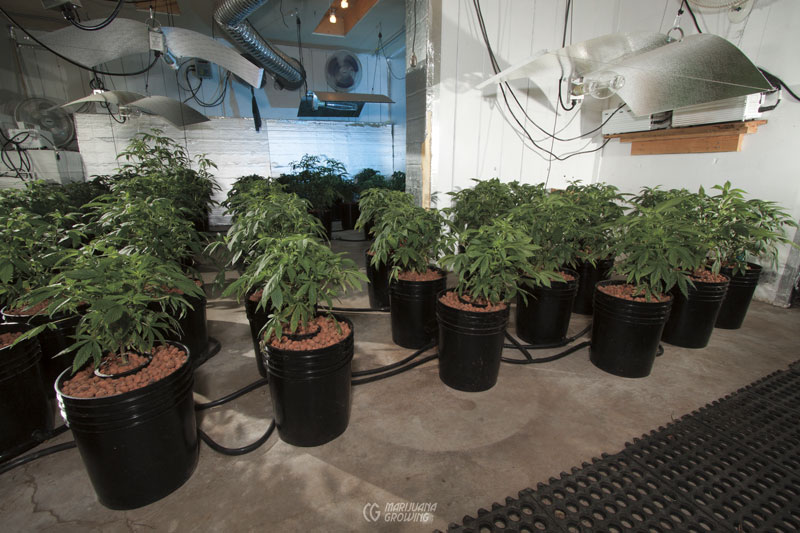
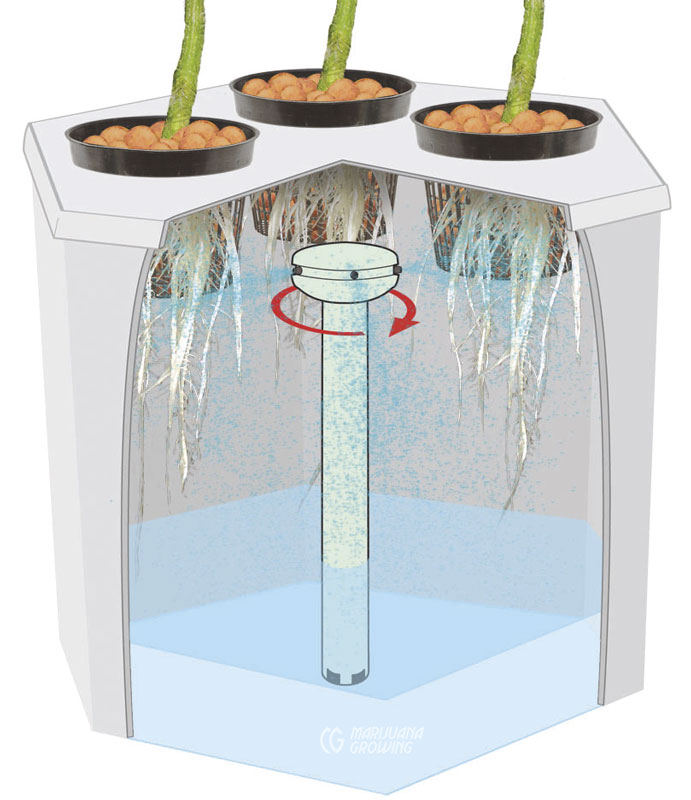
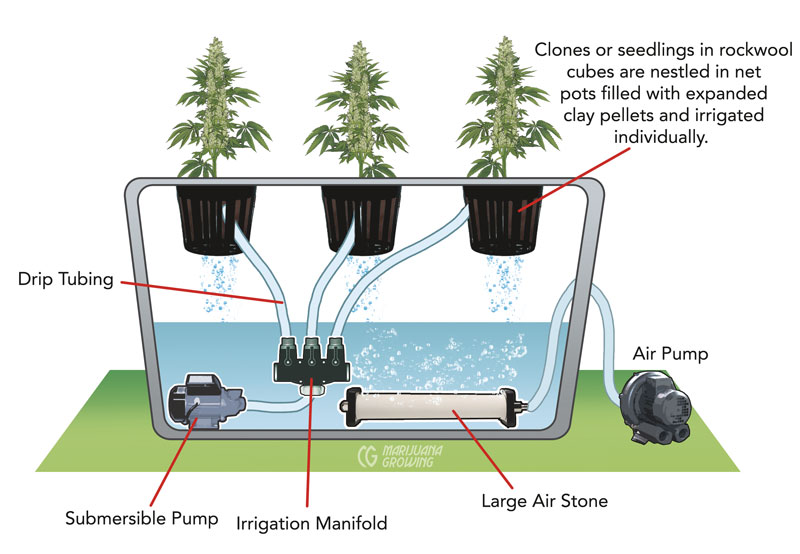
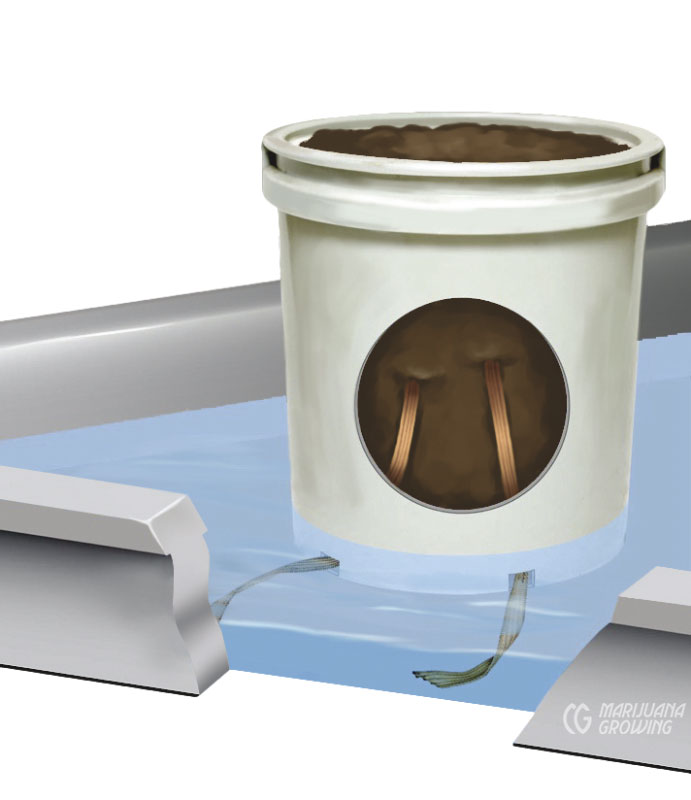
Individual self-contained recirculating top-feed container gardens consist of a net pot or pots nested in the lid of a container/reservoir containing a pump. Popular setups include a single net pot suspended in the lid of a 5-gallon container/reservoir or multiple net pots suspended in the lid of a larger container. A submersible pump in the bottom of the container lifts nutrient solution to irrigate individual plants via spaghetti tubing and emitters around the stems. Expanded clay pellets are the preferred growing medium for continuous irrigation, and rockwool for intermittent application. Nutrient solution drips down through the growing medium and runs to waste or falls back into the reservoir before recirculating. The solution is aerated every time drops fall and splash down into the self-contained reservoir below. The pump must cycle nutrient solution 24 hours a day to ensure that water is aerated. This garden does not need a timer.
Roots grow down into the nutrient solution and, over time, form a mass on the bottom. Irrigation from the top circulates aerated nutrient solution and flushes out old, oxygen-poor solution. Some containers have a 1-inch (2.5 cm) pipe to draw air directly down into the root zone. Nutrient-solution aeration in the bottom of the container can become a constant problem. Place a grate or platform in the bottom of the container so roots do not sit in water and drown. If the nutrient solution is more than an inch (2.5 cm) deep, an air stone attached to an external air pump must be added to the bottom of the reservoir to ensure that roots receive enough oxygen. At this point the garden changes names. (See “Deep Water Culture” in this chapter.)
Individual top-feed 5-gallon (18.9 L) containers are easy to move and perfect for growing 1 or 2 large plants, including mothers. Culling out and replacing a slow-growing or diseased plant is also quick and easy. Controlling each container’s nutrient solution pH, EC, and temperature are the tradeoffs for versatility.
Top-feed gardens cycle for 5 minutes or longer and should be irrigated at least 3 times daily. Often gardeners cycle the nutrient solution 24 hours a day, especially when growing in fast-draining expanded clay or similar mediums. In fast-draining mediums, overhead irrigation is continual. Microirrigation in coco coir is generally 4 to 5 times daily.
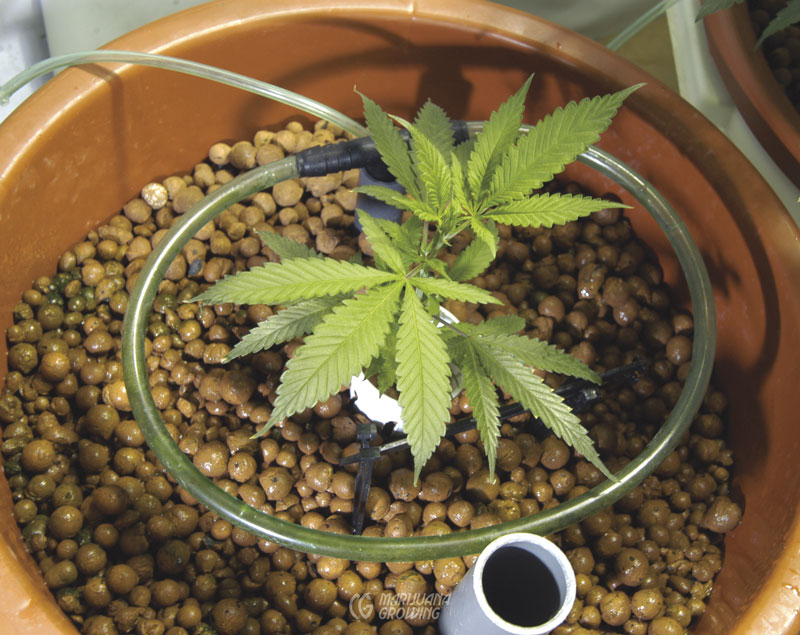
This top-feed container is irrigated by a spaghetti tube that circles the plant. Nutrient solution is delivered around the circle so it penetrates growing medium evenly.
Multiple-container, recirculating, top-feed gardens employ several containers that are connected to a main reservoir. A flexible drain hose is attached near the bottom of the container/reservoir. The hose is connected to a drainage manifold that shuttles runoff nutrient solution between reservoirs. A central pump distributes solution from a central reservoir to individual containers via an irrigation manifold and spaghetti tubing. Once delivered, the nutrient solution flows and percolates through the growing medium. Roots take in the aerated nutrient solution before it drains onto the tray and back to the central reservoir.
Each reservoir below the growing container can hold an inch (2.5 cm) or more of water. It is important to regularly cycle irrigation in these gardens, so the solution in the bottom of the container does not stagnate and drown roots— remember the 20 minute rule! Top-feed containers can also be lined up on a drainage table. Square containers make most efficient use of space.
More extensive plumbing allows nutrient pH, EC, and temperature to be controlled via the central reservoir. The reservoir must be located below growing containers to avoid high levels of solution stagnating in the bottom of containers. A reservoir located at the same level or plane as growing containers causes the levels of all reservoirs— central and all container/reservoirs— to seek the same solution level.
Individual containers in top-feed gardens can be easily arranged to fit into the allotted garden space. Plants can also be transplanted or removed from pots and cared for individually.
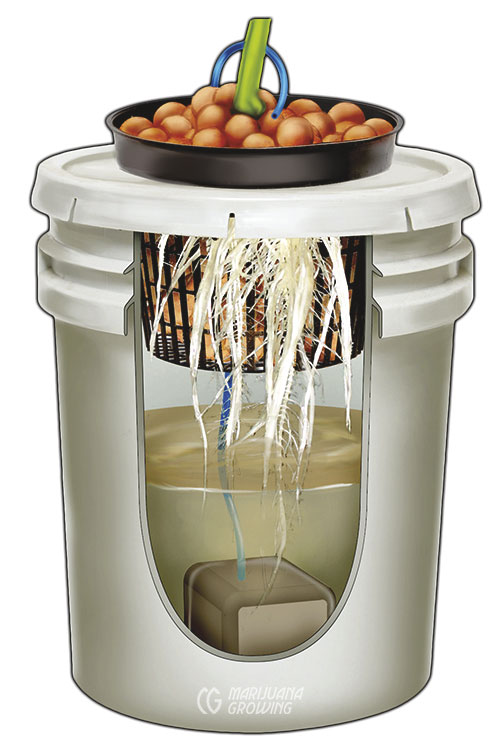
This top-feed container has a reservoir and a pump.
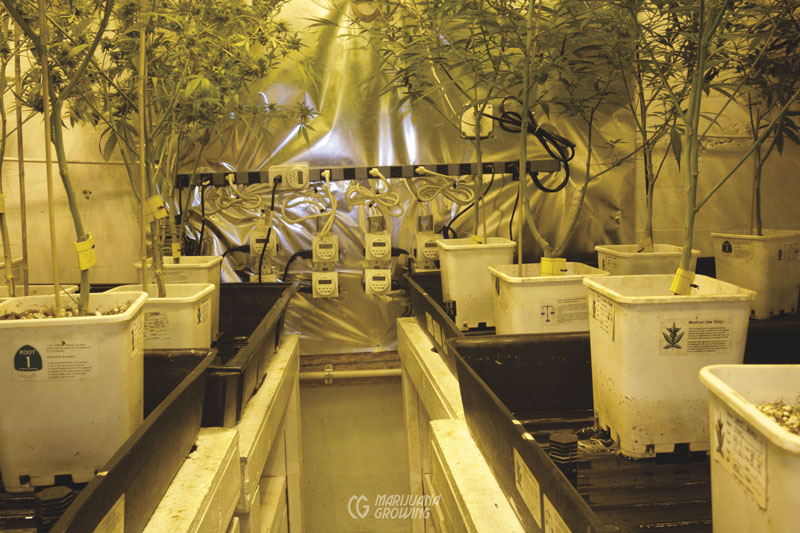
Multiple containers are connected to the same drainage tubing. The containers are irrigated from the top and all drain back into the same reservoir.
Top-Feed Slabs
Top-feed rockwool and coco coir slabs (bats) that are covered with plastic serve as growing containers. Clones and seedlings are grown in individual containers, most often rockwool blocks, and set on top of slabs (transplanted). See “Transplanting Rockwool Cubes onto Slabs,” at right.
An irrigation tube is attached to a short manifold with spaghetti tubes fed by a pump submerged in a reservoir in a recirculating garden. Spaghetti tubes with or without emitters are attached to thin stakes that are anchored in the growing medium. They deliver a measured dose of nutrient solution. The nutrient solution is aerated as it is applied, before being absorbed by the growing medium and draining back to the reservoir.
In recirculating gardens, slabs should be set on tables that have drainage channels to carry runoff nutrient solution back to the reservoir. Elevated tables are not necessary in run-to-waste gardens. Tables with a flat surface do not allow adequate drainage, and solution tends to puddle and stagnate, quickly leading to problems with root rot, pests, and diseases. Excess nutrient solution drains from pots onto the table with drainage channels and is carried back to the reservoir. Make sure the table is set up on an incline so it drains evenly. Pockets of standing water on the table contain less oxygen and promote rot.

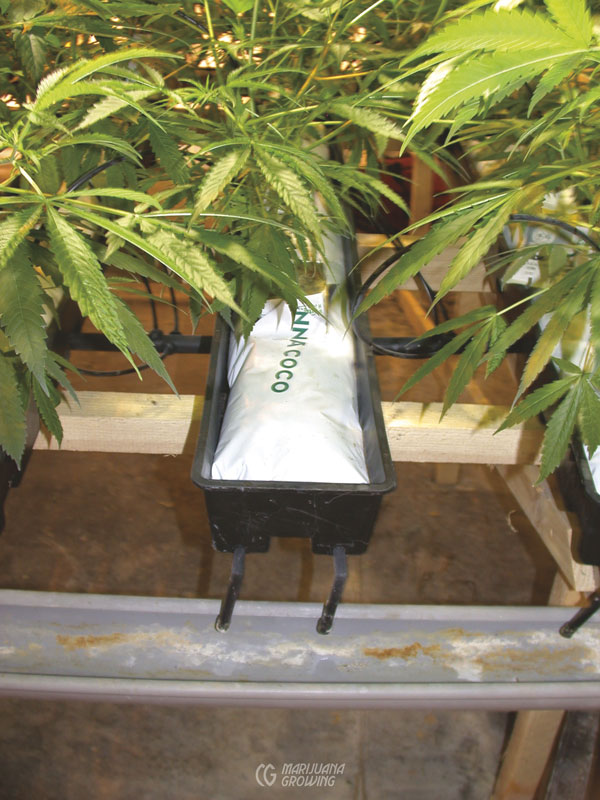
At transplanting, the bottoms are cut out of containers full of coco. Roots grow down into the coco slabs. Individual plants are watered with spaghetti tubing from above.

Many plants can fit in a small area when growing in coco slabs.
Individual trays with drainage channels can also hold slabs. The trays are connected by a manifold of tubes or troughs that drain runoff to waste or back to the catchment tank. Versatile individual trays are easy to configure for different-sized gardens, but algae growth is common when directing runoff back to the reservoir via an open-faced trough.
Transplanting Rockwool Cubes onto Slabs
Root clones and grow seedlings in 1- to 2-inch (2.5–5.1 cm) rockwool cubes. When roots are established and just starting to grow through the sides, transplant into larger 3- to 4-inch (7.6–10.2 cm) rockwool blocks. Avoid root damage and minimize shock by not letting roots grow more than a quarter inch (0.6 cm) beyond the sides of cubes before transplanting into blocks.
Transplant blocks onto slabs when the first roots start to show out the bottom of blocks. A 40-inch (101.6 cm) slab can easily support three individual plants. Transplant each of three individual blocks onto a slab by cutting an “X” that corresponds to the corners of the block on top of the slab. Peel the plastic covering back and set block on top of conditioned slab. Hold block in place with toothpicks or thin stakes until established.
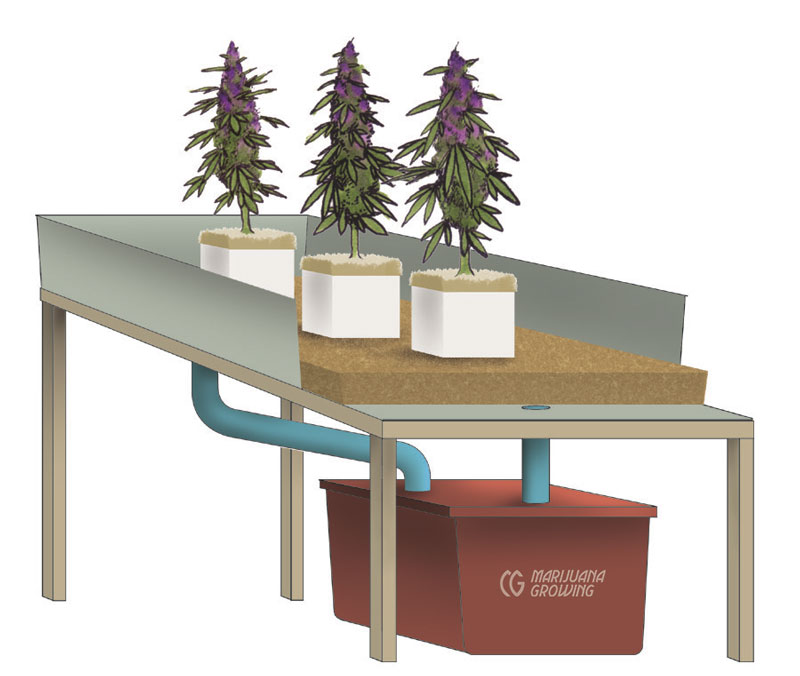
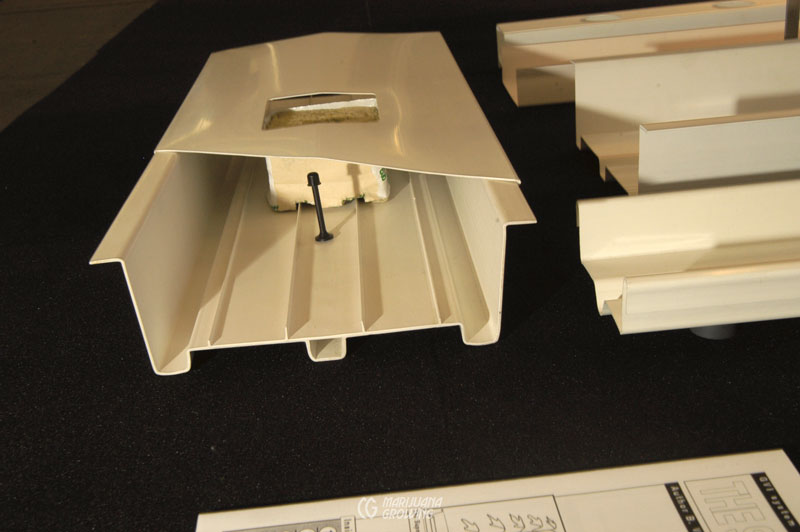
This cutaway drawing shows that nutrient delivery is simple and easy with a top-feed slab garden. Aerated nutrient solution is metered via emitters onto a growing cube. Aerated solution percolates down through the medium. Channels in the bottom of the tray speed drainage back to the reservoir.
DFT gardens are ideal for growing along a well-illuminated wall.
Vertical Top-Feed Gardens
Growing small plants in a vertical garden saves space and increases yield per square foot. Fences, sunny garden walls, and bare but well-illuminated walls around garden rooms are usable garden space. Side light in garden rooms is often underutilized or wasted. Backyard fences and walls—sunny, partially shady, and even shady—are also excellent locations for vertical gardens.
DFT gardens and top-feed irrigation can be mounted on a fence or garden wall. Containers can be placed in a trough along the walls of indoor garden rooms to take advantage of lost side light. An automated top-feed spaghetti-tubing manifold can deliver nutrient-solution. Or a sunny backyard fence or wall can be fitted with 4-inch (10.2 cm) tubing to make a DFT garden. Extra heat is absorbed and emitted from fences and walls. Take care to shade nutrient tubes to keep solution cool and prevent roots from baking. Fences and garden walls heat up to beyond 100°F (37.8°C) in direct sunlight. (The fence in my backyard reaches temperatures of about 130ºF (54.4ºC) during the summer.) In such hot conditions, it would be almost impossible to succeed with this type of garden. Protect gardens and plants by spacing tubes and containers away from excessive heat, and shade all garden beds and tubes. Cool nutrient solution by setting reservoir on cool ground in a shady location. Artificially cooling nutrient solution is expensive, impractical, and environmentally unsound.
A vertical garden that consists of shelves stocked with a layer of cannabis plants in 1- to 3-gallon (3.8–11.4 L) containers is another growing option. Plants are stacked on shelves and trained to grow out and up toward lights located in the center of the room. Shelving can be placed all the way around the lamps. Containers are irrigated with spaghetti-tubing connected to individual emitters. A trough or plumbing tubes below containers carry nutrient solution back to the reservoir.
The light can be either fixed in the center of the room with shelves surrounding it, or mobile and able to move out of the way for maintenance. The latter arrangement is a lot of work to set up and maintain. Few gardeners have the time and energy to make it work properly. Several commercial, vertical, space-saving gardens are still on the market; others have been short lived. Search “vertical marijuana garden” online for more information.
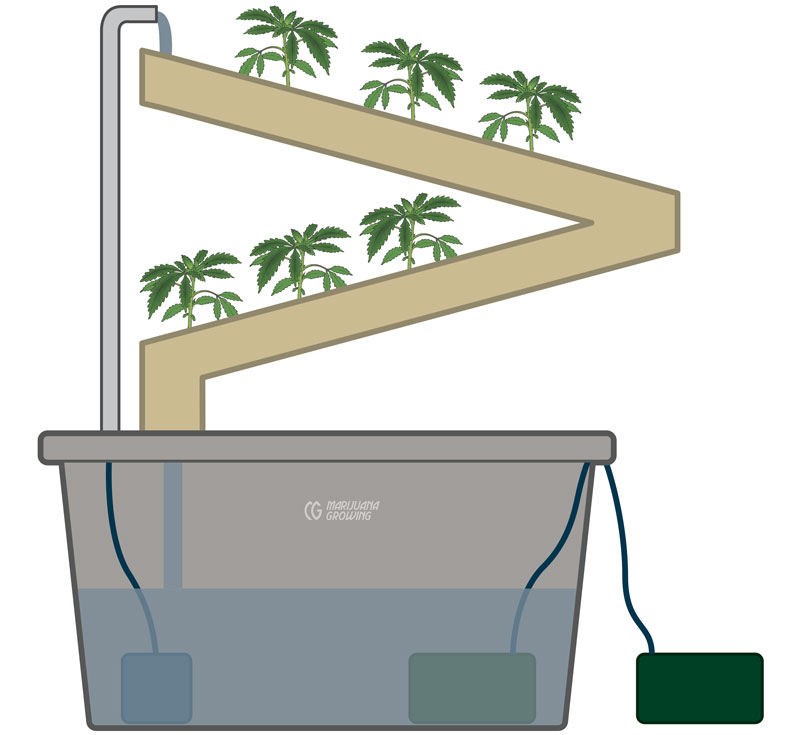
An A-frame structure having growing containers on walls of both sides and a reservoir below will save space. Orient the sides of the frame so that they receive the most light possible.
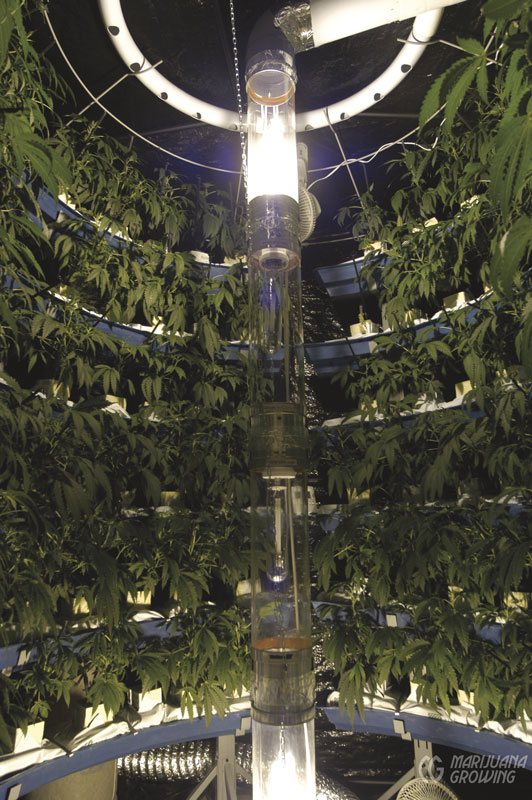
Vertical gardens take advantage of all available HID light.
Run-to-Waste (RTW) Gardens
Run-to-waste hydroponics and container gardens are among the least expensive, simplest to construct, and easiest to maintain. Many commercial flower and vegetable growers use RTW gardens. Once the nutrient solution is applied, it is absorbed by the growing medium and roots; the excess drains to waste. Used nutrient solution is not recirculated and recycled. Gardeners fertilize perennial plants, lawns, and flower or vegetable gardens with the runoff nutrient solution.

A basic, manual, run-to-waste garden is simple and efficient.
A run-to-waste garden uses about the same amount of fertilizer as a recirculating garden uses. The nutrient solution is more dilute in a RTW garden. In most recirculating gardens, the nutrient solution is dumped out and changed every 5 to 7 days or the plants’ waste products will overwhelm the chemistry of the solution. The solution is concentrated and imbalanced when thrown out. A run-to-waste garden expels a small amount of nutrient solution with every irrigation cycle. Regardless of origin, the “used” nutrient can be recycled to fertilize the outdoor garden. Please do not send the used solution down household drains! Dump it in different places outdoors in order to avoid a buildup of fertilizer salts.
A nutrient solution is applied in a run-to-waste garden, and there is reduced chance of problems with pH fluctuations, nutrient buildups, and imbalances. A consistent formula with the proper pH is applied regularly. The formula is dilute so the extra water in the solution will wash away excess salts. Fertilizer residues do not have a chance to build to toxic levels.
Ideal growing mediums for RTW gardens retain moisture and air well. Substrates that retain moisture and air for a long time require less-frequent watering. Often watering once a day or every few days is all that is necessary. In such gardens, simple manual irrigation is possible. A runoff of at least 20 percent is necessary to ensure a healthy root zone.
There are several inherent benefits to a RTW garden that lend themselves to hot climates and avoiding the spread of diseases. Roots are easier to keep cool on hot days because the nutrient solution is applied only once and not given a chance to recirculate and heat up. The nutrient solution can also be kept in a cool location. Keeping the root zone cool during very hot days can make an incredible difference in plant growth.
Plants can be easily isolated with a run-to-waste garden. Since the nutrient solution is applied only once and not recaptured, it can be applied to individual plants and not be recirculated and applied to all plants. In a recirculating garden, if one plant has a disease, all plants will be affected by the same disease.
Manual Run-to-Waste Gardens
Manual RTW gardens with containers full of substrate will hold moisture longer and requires less-frequent irrigation. Favorite mediums for low-tech manual RTW gardens include a mix of perlite/ vermiculite, horticultural-grade coco coir, and soilless mix such as Pro-Mix. Avoid low-quality coir as it tends to harbor sodium and requires heavy presoaking, washing, and pH correction.
Five-gallon (18.9 L) containers are excellent for a low-maintenance garden. To make containers into growing containers, drill a hole as close to the bottom of the container as possible so that very little water sits on the bottom. Insert a thru-hull fitting and attach a drainage hose to the fitting or simply let the irrigation solution run out the fitting or hole into another container. Run the hose down into another container to catch the runoff that will be used in the outdoor garden. Put a screen in front of the drainage hole to keep it free of blockage.
This gardener waters plants by hand so that 20 percent runs out the bottom of each container. Individual containers drain into a larger container that is lifted out and dumped in the outdoor garden.
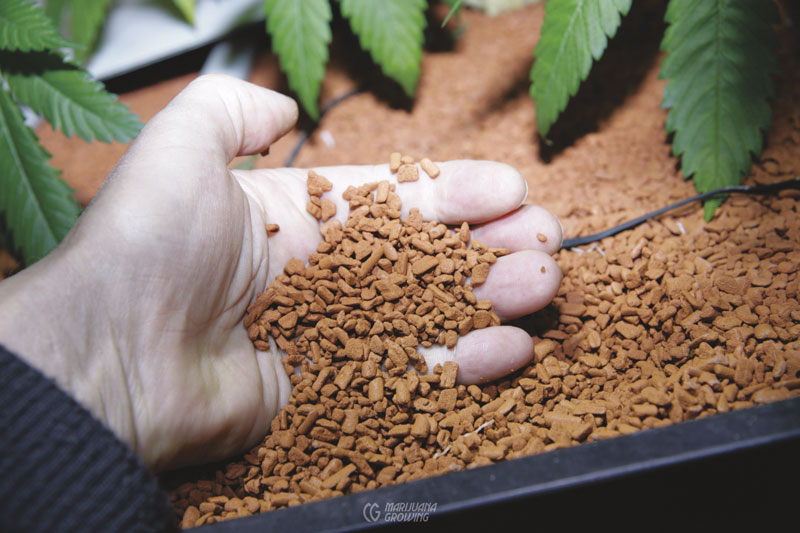
These expanded clay pellets are of different sizes and are irregular in shape. This fine grade of expanded clay pellets holds more nutrient solution for longer periods of time. It also holds plenty of air.
Automated Run-to-Waste Gardens
Automated RTW gardens use a pump and timer to apply nutrient solutions more frequently at regular intervals. The gardens can be set up using the “Top-Feed Gardens” or “Ebb-and-Flow Gardens” above as a guideline. Mediums that work well with more frequent irrigations include expanded clay, coco coir, and rockwool. Algae grow on any uncovered medium with a moist surface, attracting fungus gnats, stem rot, and other problems. Rockwool, coco coir, and peat tend to stay too wet in the upper parts and too wet toward the bottom when using large volumes in tall containers. But when in a low profile, slabs and cubes are much easier to keep moisture and air retention near ideal levels. Regardless of how often plants are watered, there must be at least 20 percent runoff every time.
This simple run-to-waste system holds runoff water in the soil below.
This amazing run-to-waste garden is filled with small expanded clay pellets to a depth of 3 inches (7.6 cm).
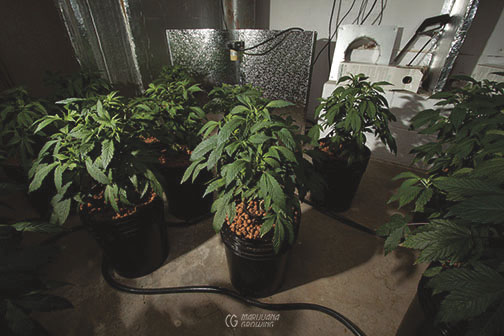
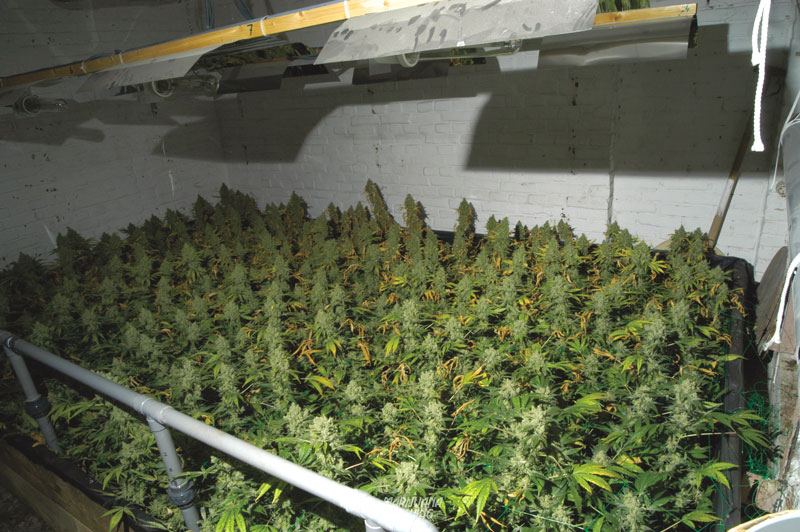
These plants receive plenty of light and are irrigated with nutrient solution several times a day. As you can see, they are strong and healthy.
Wick Gardens
Low-tech wick gardens have no moving parts to break or malfunction. Low initial cost and little maintenance are other positive points. These gardens consist of a container full of an absorbent growing medium such as coco coir, rockwool, or soilless mix containing more absorbent and air-holding mediums such as peat. A wick made from cotton rope, yarn, or other absorbent material transfers nutrient solution from a reservoir to the growing medium via capillary action.
Simple low-tech wick gardens may not be well suited to the demands of fast-growing cannabis plants. If the growing medium stays too wet and soggy, it can fail to supply enough oxygen for rapid nutrient uptake.
The wick in this passive garden continually draws nutrient solution up to roots.
Flood Wick Gardens
High-tech flood wick gardens rely on nutrient solution delivered manually or via a pump. These advanced wick gardens are actually half of a flood-and-drain garden. The difference is that they do not drain; nutrient solution is flooded into a growing table or area with sides to contain the liquid. The liquid is slowly absorbed by plants in containers for one to several days afterward.
Setting up a flood garden is relatively easy and inexpensive. The growing bed can be set up on a table or directly on the floor. The bed must be flat and level so that nutrient formula is available to be wicked up by all plants at the same rate. Unleveled growing beds cause plants on the low end of the table to receive more solution than those on the high end.
These flood wick gardens work best with 1- to 3-gallon (3.8–11.4 L) containers somewhat wider than they are deep. Larger containers tend to hold too much solution, which promotes soggy substrate, low oxygen levels, and root disease. Containers with holes around the bottom rim work better than pots with holes in the bottom only. Containers can be set on capillary mats.
This flood garden is so crowded with plants that watering any other way is impossible.
An absorbent substrate such as rockwool or coco coir that holds plenty of air and solution is preferable for these gardens. Substrates can also be mixed together to achieve the desired ratio of air to nutrient solution. There are many variables in substrates, and giving ratios is difficult.
Irrigation cycles depend upon plant size, growth habit, humidity, and temperature of the growing area and substrate, as well as the depth of the irrigation solution. When plants are small and growing slowly they consume less water and nutrients and need less-frequent irrigation. In general, irrigate with enough solution to cover the bottom of the table to a depth of 0.5-inch (1.3 cm) so that all the solution is wicked up in a few hours. Increase the frequency and depth of nutrient-solution irrigation as plants’ needs grow. Small plants should use the nutrient solution in 5 days or less. Medium to large plants commonly need irrigation every 2 to 5 days.
Mix nutrient solutions with a low EC and use very clean (low EC or reverse osmosis) water. Since the nutrient solution does not drain away from roots, mineral salts have a big opportunity to build up to toxic proportions. Prevent possible fertilizer salt buildup in the root zone by applying low EC solutions so that plants use nutrients before they build to toxic levels.
I have seen such gardens work quite well even though the substrate appears to stay too wet. Here is why: the higher the salinity, the moister the medium needs to be. Allowing the medium to dry out even a little bit causes ions to come out of solution and onto the medium. When water is reapplied, all the ions go back into solution, even the ones that normally are there, so nothing is on the particle and the EC for a short time spikes causing damage. With proper care, this type of garden can be successful.
If porosity is correct, the medium only appears to stay wet. The reality is that water stays in the small pores and weeps to the larger ones with air. The air pores never fill up; air does not really need suction to get into the root zone with correct pores. The results are a better-watered plant than most, with a steady supply of nutrients, and the roots do not drown. However, salts can accumulate in the medium’s topmost layer. The roots cannot fill the total column of medium because of this layer. The level of O2 is not as high as it would be with suction. The ratio of available ions is skewed to reflect the leftovers.
The feeding schedule should include low EC values to avoid salt accumulation, and a fertilizer would really need to be calibrated to do better than average. This is to allow for irrigation water, plant types, life stage, and seasons.
Under high-salinity conditions it becomes critical to (1) never allow a dry-down, and (2) allow for evaporation between irrigations, which forces us to water more and more often (or further decrease the feed EC) until the roots drown or we can put nothing else in the supply water. Periodic leaching of the medium is essential.
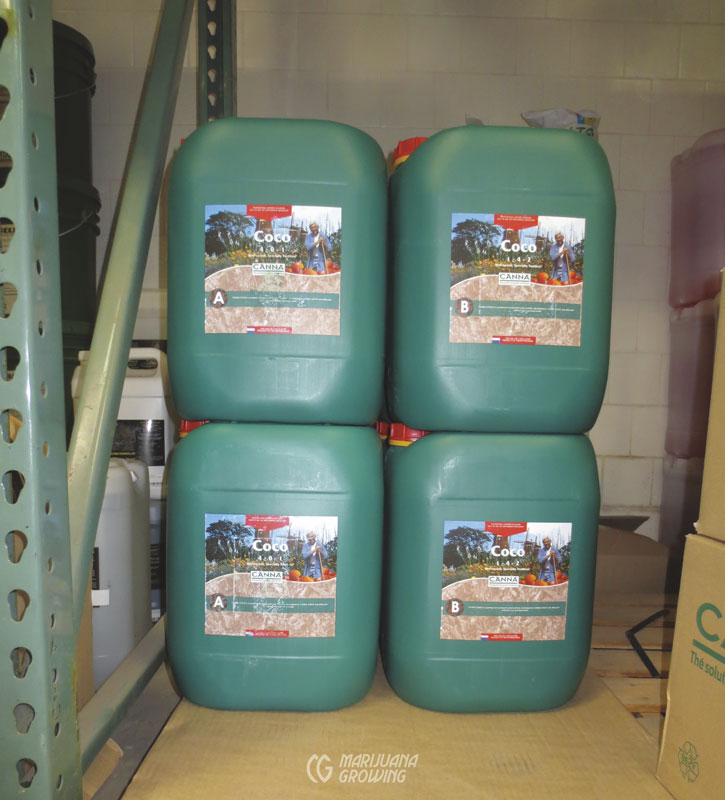
Canna A and Canna B are designed specifically for the coco that Canna sells. Designing nutrient for proprietary products has given this company a big edge for research and development.
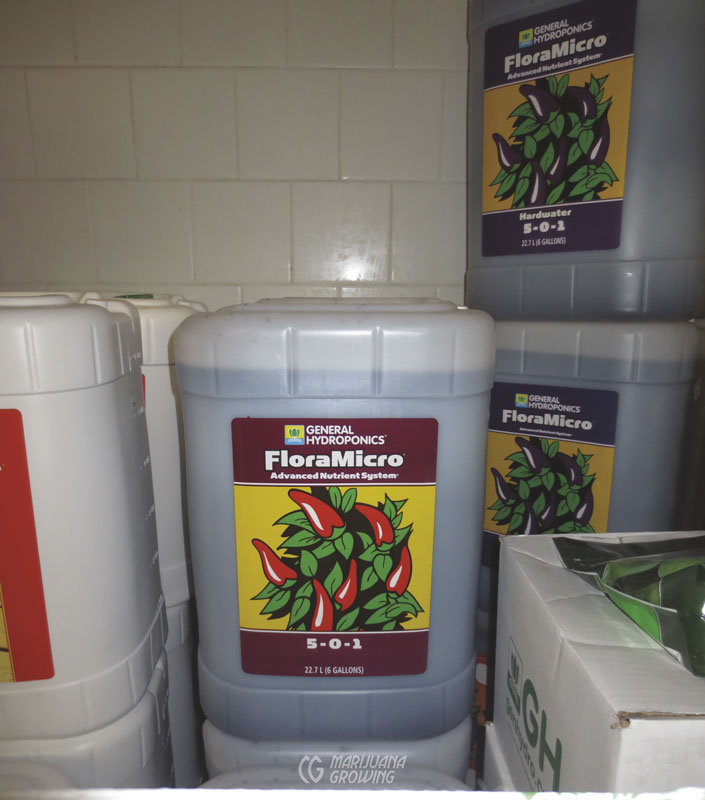
General Hydroponics produces several different formulas that are very popular among medical cannabis gardeners.
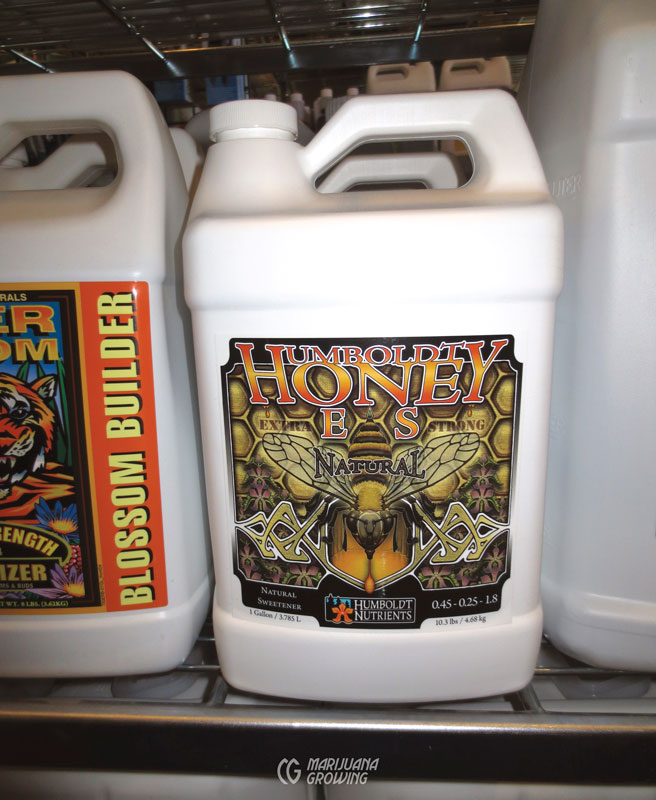
Humboldt Honey from Humboldt Nutrients is a good example of an organic-based fertilizer company that gives medical cannabis gardeners in California the mixes they want.
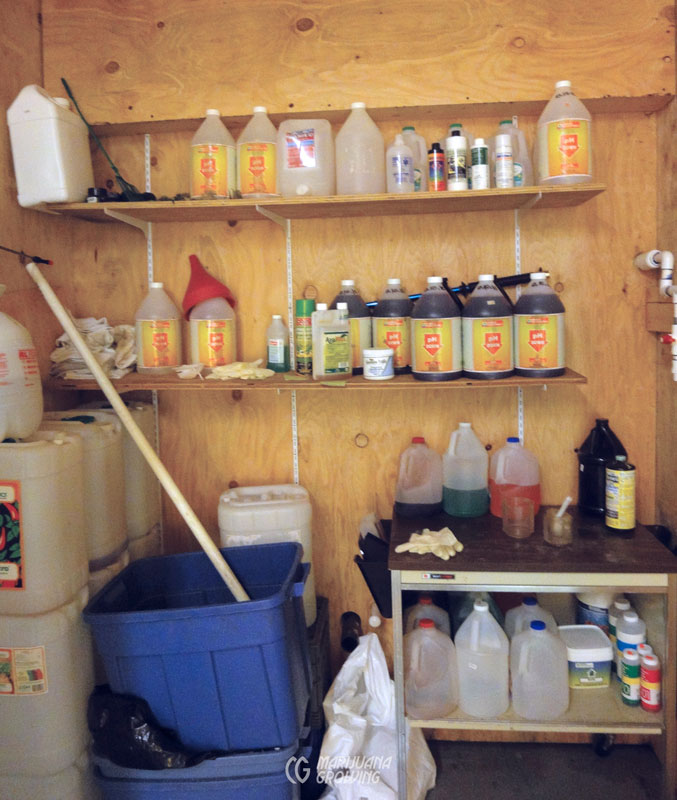
A clean garden area is essential. Trichome Technologies’ gardeners keep all their containers organized and labeled.
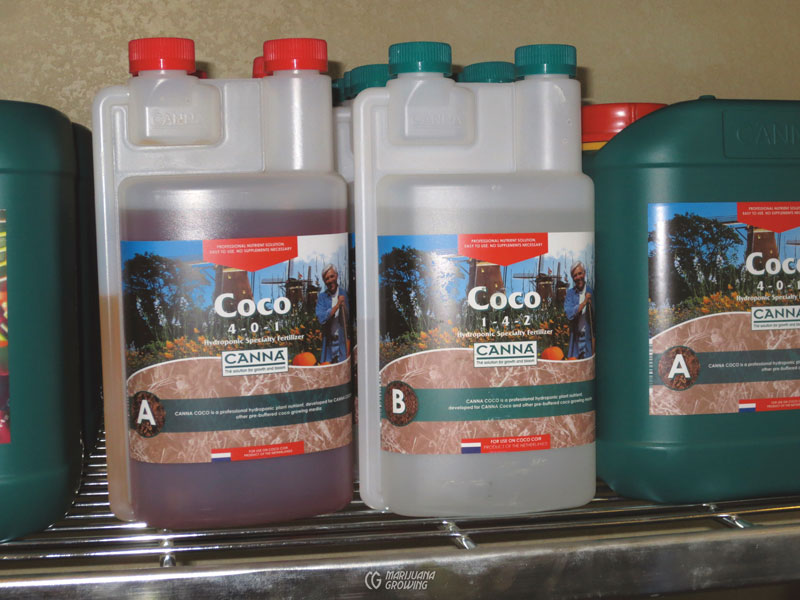
Canna produces one of the many fertilizer formulas that are packaged in two parts.
Aquaponics
Aquaponics combines traditional aquaculture (raising aquatic animals) with hydroponics in a symbiotic sustainable environment. The toxic by-products in solution generated by aquatic animals are directed into a hydroponic garden. These toxins, many of which are nutrients, are filtered out and used by plants to grow. Once cleansed of toxins, the water is recirculated back to the fish, shellfish, mollusks, and so on.
Aquaponic gardens are not yet common among cannabis gardeners. The closest thing to an aquaponic garden I have seen was in the mid-1990s in Vancouver, Canada, where an eccentric grower was filtering wastes from his freshwater predatory fish tank into his container culture nutrient tank. Technically, this was only half of an aquaponic garden.
Aquaponic gardens are more complex than standalone hydroponic or container culture gardens and are beyond the scope of this book.
Hydroponic Nutrients
Nutrients are necessary for cannabis to grow. These nutrients must be broken down chemically within the plant, regardless of origin, organic or mineral.
The nutrients could be derived from natural organic bases, or they could be simple chemical elements and compounds, man-made or naturally occurring. When properly applied, each type of fertilizer, organic or chemical, theoretically produces the same results.
Soluble complete nutrients properly applied under the right conditions are immediately available for uptake. Fertilizer designed for use in soil is unsuitable for hydroponics or container gardens because it is not “complete” and does not contain all nutrients a plant needs to grow. Low-quality fertilizers contain impure components that often leave residue and sediments. These impurities build up in reservoirs, containers, and irrigation tubes and nozzles, causing extra maintenance and other problems.
Caution! These impurities will build up in the plant faster than in the soil.
Premium complete fertilizers designed for cannabis container culture and hydroponics are soluble and mixed in the proper ratios to form a balanced formula that includes all the necessary nutrients. Commercial premixed solutions are diluted or dissolved in water before use. These fertilizers come in 1, 2, 3, 4, or more parts. There is a “base” formula that separates calcium from other nutrients, all of which are soluble and dissolve in solution, but calcium will combine with many other elements when at the right level. When united in a concentrate, the two (calcium and any other nutrient) combine, precipitating and falling to the bottom of the reservoir, unavailable to plants.* It is easy to change the ratio of the mineral elements by mixing other components of the formula to tailor the mix to the native water limitations or the plant growth stage—seedling, vegetative, and flowering. Special nutrient formulations are available for people with “hard water” that contains large amounts of calcium. For more specific information, check the fertilizer application chart provided by manufacturers.
*Note: Be wary of fertilizers that separate out many nutrients into many parts. This is often done to simply increase the product line and make more income!
Purchase 1- and 2-part nutrients in powder or liquid form
Purchase 1, 2, 3+ formulations in liquid form
Soluble complete “hydroponic” fertilizers (nutrient formulas or recipes) are diverse combinations of chemical salts. Mix a predetermined amount of fertilizer concentrate with water to make a nutrient solution. The most frequently used macronutrient chemicals include potassium nitrate, calcium nitrate, potassium phosphate, and magnesium sulfate. Plant nutrients (inorganic and ionic form) are the dissolved cations (positively charged ions) Ca2+, Mg2+, and K+. The major nutrient anions (negatively charged ions) in nutrient solutions are NO3¯ (nitrate), SO42¯ (sulfate), and H2O4P¯ (dihydrogen phosphate). Micronutrients used in hydroponic formulas are Fe (iron), Mn (manganese), Cu (copper), Zn (zinc), B (boron), Cl (chlorine), and Ni (nickel). Chelating agents are regularly added so that Fe stays soluble. Plants use water and some nutrients faster than others; this changes the composition of the nutrient solution and alters the pH. Plants also give off ions such as hydrogen, which will drive the pH up and down, depending upon circumstances, as well making elements such as phosphates more soluble.
Nutrient-solution Composition
The table below is a guideline of acceptable nutrient limits for cannabis expressed in parts per million. To avert nutrient deficiencies and excesses, do not deviate too far from these ranges.
| EXPRESSED IN PPM | CHEMICAL | LIMITS | LIMITS | LIMITS | LIMITS |
| Element | Symbol | Low | Medium | High | Average |
| nitrogen | N | 150 | 650 | 1000 | 250 |
| potassium | P | 100 | 300 | 400 | 300 |
| phosphorus | K | 50 | 100 | 100 | 80 |
| calcium | Ca | 100 | 350 | 500 | 200 |
| magnesium | Mg | 50 | 100 | 100 | 75 |
| sulfur | S | 200 | 700 | 1000 | 400 |
| iron | Fe | 2 | 7 | 10 | 5 |
| manganese | Mn | 0.5 | 3 | 5 | 2 |
| copper | Cu | 0.1 | 0.35 | 0.5 | 0.05 |
| zinc | Zn | 0.5 | 1 | 1 | 0.5 |
| molybdenum | Mo molybdate | 0.01 | 0.035 | 0.05 | 0.02 |
| boron | B | 0.5 | 3 | 5 | 1 |
Main reasons nutrient deficiencies occur:
- Low nutrient strength—not enough nutrients for plant growth
- Imbalanced formula that lacks one or more elements
- Missing fertilizer element or wrong element in mix
- Balanced solution, but reactions with growing media prevent nutrient uptake
- Balanced solution, but conditions inside plant prevent nutrient uptake
Homemade Nutrients
Gardeners who mix their own nutrients from dry components save hundreds, often thousands, of dollars every year. Most small-scale cannabis gardeners opt to purchase expensive premade formulas from hydroponic stores. Preformulated nutrients are usually the best option for small-scale gardeners. The commercial formulas usually contains all necessary nutrients, and they are available to plants for uptake.
Look forward to at least an eightfold savings when mixing nutrients from scratch. For example, a gallon (3.8 L) of store-bought dilute nutrient (EC 2.0) costs about $0.25 USD a gallon (3.8 L). The same gallon (3.8 L) of nutrient mixed at home costs $0.03 USD a gallon (3.8 L) for two-part soluble powders.
Mix pH Up or pH Down in water for a 10 percent solution, and then use this dilute solution to adjust the nutrient solution in the reservoir. This will avoid the pH “bounce,” which causes too much change followed by more change. Such dynamic change or “bouncing” is not good for the ions in solution, as it will cause issues such as precipitation and ion lockup.
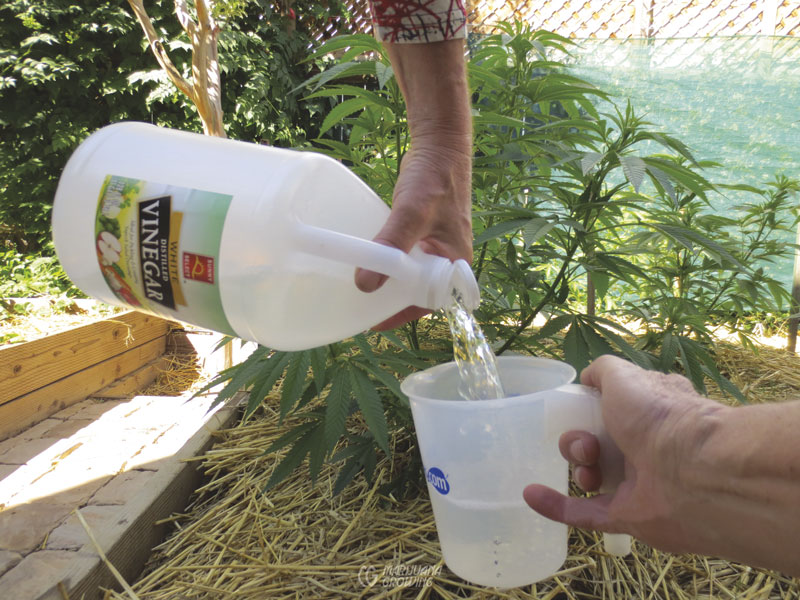
Vinegar can also be used to lower pH, but it is not as stable as phosphoric acid.
Mixing and making hydroponic nutrients is relatively easy. Many variations of the nutrient formulas developed at University of California, Berkeley, by Dr. D. I. Arnon and Dr. D. R. Hoagland have been modifi ed and are widely used today. Here is a base formula you can use and modify to fi t your needs.
Working with a concentrated nutrient solution is most convenient. Make a 100X concentrate by mixing 10 times the amount for each “A” and “B” nutrient formulas in 2 separate containers.
| Solution | Vegetative Formula | Weight in Grams | |
| A | CaNO3 | 3 | calcium nitrate |
| A | KNO3 | 1.044 | potassium nitrate |
| A | TE | 0.2 | trace elements |
| B | K2SO4 | 0.23 | potassium phosphate |
| B | KH2PO4 | 0.696 | monopotassium phosphate |
| B | MgSO4 | 2.24 | magnesium sulfate |

The numbers from 4 to 9 signify pH value of the nutrient solution. Nutrient availability is shown for various nutrients in different pH ranges.
Nutrient-solution pH
When grown hydroponically or when using soilless media, nutrients are available to plants within a narrow band of the pH scale; it is a slightly lower pH than for soil-grown plants. The pH is a measure of positive hydrogen ions. Plants feed via an exchange of ions. The pH changes as ions are removed from solution. Ions are taken up by roots as plants grow, which in turn causes pH to rise. Typically the ideal hydroponics and soilless media pH range is 5.5 to 6.0. Nutrient uptake diminishes quickly beyond this limited range of pH. The pH of the nutrient solution controls the availability of chemical ions that cannabis needs in order to assimilate nutrients.
The nutrient-solution pH in hydroponics is a little lower than for soil and the nutrients’ availability is somewhat different too.
Check the input water before mixing hydroponic nutrients into solution. Stabilize the pH of the water before adding fertilizer. If water is “soft” with a low EC (ppm), the pH will climb, sometimes for several days after mixing in nutrients. Adding a stabilizing agent such as Cal Mag (Ca and Mg) will minimize fluctuation. “Hard” water usually contains high levels of calcium and magnesium ions, which in turn can limit availability of other nutrients.
Add fertilizer before altering pH of nutrient solution. Fertilizer salts tend to be acidic and cause the pH of the nutrient solution to fall. Follow the directions on the container for raising and lowering pH. Mix pH adjusters into the reservoir slowly and completely.
Roots take in more water than chemical salts and use the nutrients at different rates, which causes their ratios in solution to change, which in turn causes the pH to climb. When the pH is above 7.0 or below 5.5, some nutrients are not absorbed as fast as possible. Check the pH every day or two and correct with an acid or base to make sure it is within the desired range of 5.5 to 6.0.
Check the pH of the nutrient solution, growing medium, and runoff every few days, or daily if necessary. Growing medium measurements reveal the pH in the root zone. Runoff pH measurements disclose possible toxic conditions of substrate. For example, if the EC is higher in runoff water than in the nutrient solution or media, you know there is a toxic fertilizer salt buildup in the media. Correct the toxic conditions by leaching media thoroughly with diluted nutrient solution, and replace with new solution. See chapter 21, Nutrients, for more information on specific nutrients.
The pH of organic hydroponic gardens is the same as for any hydroponic garden. The ion availability works the same; however ideal pH range may vary because of the need for the product to morph or mineralize for availability.
Correct pH if readings vary ± half of a point. Chemical concentration to move the pH up or down varies. Consult the label on the product for dosage instructions. Use rubber gloves when handling products that alter pH. Small-scale gardeners find that purchasing pH Up and pH Down is more expensive but easier than making it yourself from concentrated acids or bases. Commercial mixes are usually buffered and safe to use.
pH Up
potassium hydroxide
(Do not use dangerous and caustic sodium hydroxide to raise pH!)
pH Down
nitric acid
phosphoric acid
citric acid
vinegar

pH Up and pH Down
Nutrient-solution EC
The concentration of the nutrient solution has an enormous effect on plant development and growth. Measuring the overall concentration or strength of a “balanced” solution is essential. Focus on nutrient balance and concentration in the solution to head off deficiencies before they cause big problems.
Fertilizers (dissolved ionic salts) conduct electrical current when in solution. The ions in an ionic compound are held together by ionic bonds. These ions “cation” (+ positive) and “anion” (– negative) have positive and negative charges that attract one another and bond. Nutrient (salts) concentrations are measured by their ability to conduct electricity through a solution. A dissolved salts meter measures the overall concentration or strength of a nutrient solution. For example, pure distilled water has no resistance and conducts virtually no electrical current. When nutrients (dissolved ionic salts) are added to pure distilled water it conducts electricity. A greater concentration of nutrients in solution conducts more electricity.
Several scales are currently used to measure how much electricity is conducted by nutrients including: electrical conductivity (EC), conductivity factor (CF), parts per million (ppm), total dissolved solids (TDS), and dissolved solids (DS). Most US gardeners use ppm to measure overall fertilizer concentration. European, Australian, and New Zealand gardeners use EC, however they still use CF in parts of Australia and New Zealand.
The difference between EC, CF, ppm, TDS, and DS is more complex than originally meets the eye. See chapter 15, Meters, for a more detailed explanation.
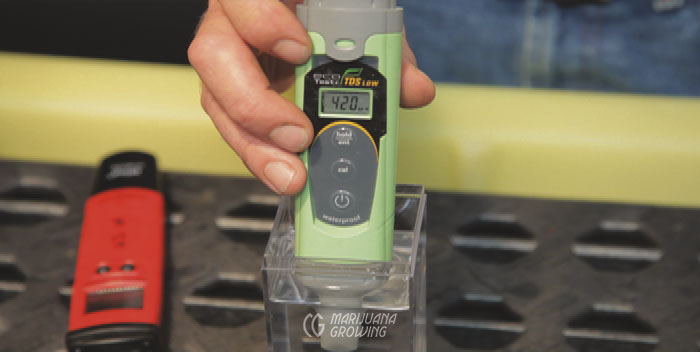
Measure pH and EC (ppm) at the same time on each testing day.
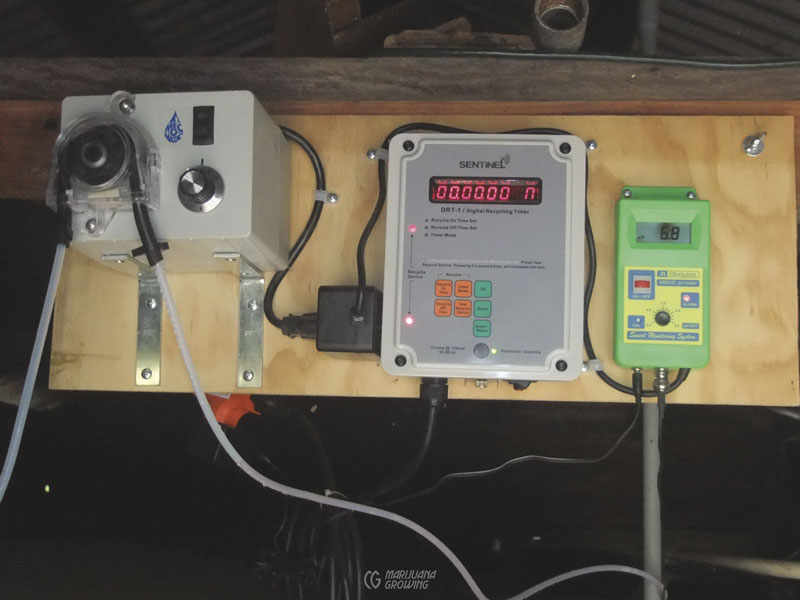
A constant readout pH meter makes keeping track of the nutrient solution much easier.
Each variety of cannabis has an ideal EC range for optimum growth. Some varieties are incredibly heavy feeders while others are easy to overfertilize. Check with seed and clone vendors for details. A high EC leads to “water stress,” causing plant cells to lose water. The water moves via osmotic pressure into the more concentrated solution surrounding roots. Wilting foliage is the first sign of an EC that is too high. When a mild EC overdose occurs, plants compensate and foliage growth becomes tough or hard, with brittleness to it. Foliage is often darker green, and plants are shorter and have smaller leaves.
Many commercial cannabis gardeners give their flowering crops progressively higher EC concentration. Flower buds plump up and put on weight but this practice tends to make flower buds develop a very harsh taste when smoked or vaporized due to the excess salts left in plant tissues. The residual ash is also very dark and abundant.
EC is also affected by water uptake. On hot days when more water is taken up from the solution, nutrients concentrate and EC climbs. A low EC also causes more water uptake and foliage soon becomes weak and soft, often lighter green too. However, lowering EC during hot spells is essential to avoid problems. Measure EC daily and adjust accordingly in relation to growing conditions.
To check the EC of the nutrient solution, collect samples from the reservoir, growing medium, and runoff. Save time and effort: collect EC and pH samples simultaneously. Collect samples with a syringe or turkey baster used for cooking by inserting it at least two inches (5.1 cm) deep into the rockwool or growing medium. Collect separate samples of runoff and solution from the reservoir. Place each sample in a clean jar—washed and triple rinsed with double-distilled water. Use a calibrated EC meter to measure each of the samples, and record measurement on a piece of paper.
Measure the EC and pH of:
- nutrient reservoir
- substrate
- runoff
Under normal conditions, the EC in the growing medium and the runoff should be a little higher than that of the nutrient solution in the reservoir. If the EC of the solution drawn from the growing medium is substantially higher than the one from the reservoir, there is a fertilizer salt buildup in the substrate. Correct the imbalance by leaching substrate thoroughly with diluted nutrient solution, and replace with new solution. Regularly check the EC of your water, slab, and runoff.
EC Guidelines:
| Growth Stage | EC Range |
| seedling | 0.8–1.3 |
| clone | 0.5–1.3 |
| vegetative | 1.3–1.7 |
| flowering | 1.2–2 |
Note: These guidelines are recommendations only. Some varieties of cannabis require higher or lower EC values than listed above.
Let a minimum of 20 percent of the nutrient solution drain from growing medium after each irrigation cycle to help maintain EC stability. The runoff carries away any excess fertilizer salt buildup in the growing medium. If the EC level of a solution is too high, increase the amount of runoff so that 30 percent of the solution drains out the bottom of containers. To raise the EC, add more fertilizer to the solution, or change the nutrient solution.
Many factors can alter the EC balance of a solution, such as irrigation, evaporation, and nutrient uptake by roots. For example, if the substrate is underwatered or allowed to dry completely, the EC reading will rise. In fact, the EC may increase to two or three times as high as the input solution when too little water is applied to rockwool. This increase in slab EC causes some nutrients to build up faster than others. When the EC doubles, the amount of sodium can increase as much as four to six times under the right conditions! There should not be any sodium present in your garden unless it is in the water supply, and it should not be in excess of 50 ppm.
Nutrient-solution concentration levels are also affected by roots’ nutrient absorption and by water evaporation. The solution weakens as plants use nutrients, but water also evaporates from the solution, which increases the nutrient concentration. Counteract the concentration of fertilizer salts by regularly adding plain water to the nutrient solution to replace what has been used by plants.
Dissolved Oxygen
Dissolved oxygen (DO) in solution is essential for nutrient uptake by the root system. Nutrient solutions hold more dissolved oxygen at lower temperatures, and the solutions ability to carry oxygen diminishes as temperatures rise. For example, well-aerated nutrient solution holds 8 to 10 ppm of oxygen between 60°F and 80°F (15.6°C–26.7°C). At 60°F (15.6°C) 10 milligrams per liter (MPL) or 10 ppm is held in solution. But at 80°F (26.7°C) only 8 MPL (8 ppm) of oxygen is available—20 percent less. Deadly Pythium loves temperatures above 60°F (15.6°C). Pythium is always present but only deadly when it gets out of hand.
Large flowering cannabis plants growing under optimal conditions require 10 ppm of dissolved oxygen. Maintaining high DO levels in solution requires close vigilance of temperature and constant replenishment of oxygen.
Keep nutrient-solution temperature between 60°F and 70°F (15.6°C–21.1°C) to help ensure adequate dissolved oxygen. Never let nutrient-solution temperature climb above 85°F (29.4°C), because its oxygen-holding ability plummets. Once roots weaken, they are easily damaged and susceptible to rot, wilts, and fungus gnat attacks at above 85°F (29.4°C).
The respiration rate of roots doubles between 68°F and 86°F (20°C–30°C). But the ability of the solution to hold dissolved oxygen will drop within this temperature range by more than 25 percent. This causes DO in solution to become depleted at a much higher rate and oxygen starvation then occurs. Organic microbial life also requires oxygen to sustain life and grow. Conversely an increase in nutrient-solution temperature lowers the availability of oxygen. Roots suffocate in low-oxygen environments, causing growth to slow and eventually stop.
When air is cooler than water, moisture rapidly evaporates into the air; the greater the temperature differential, the higher the relative humidity. Maintaining the nutrient-solution temperature around 60°F (15.6°C) will help control transpiration and humidity.
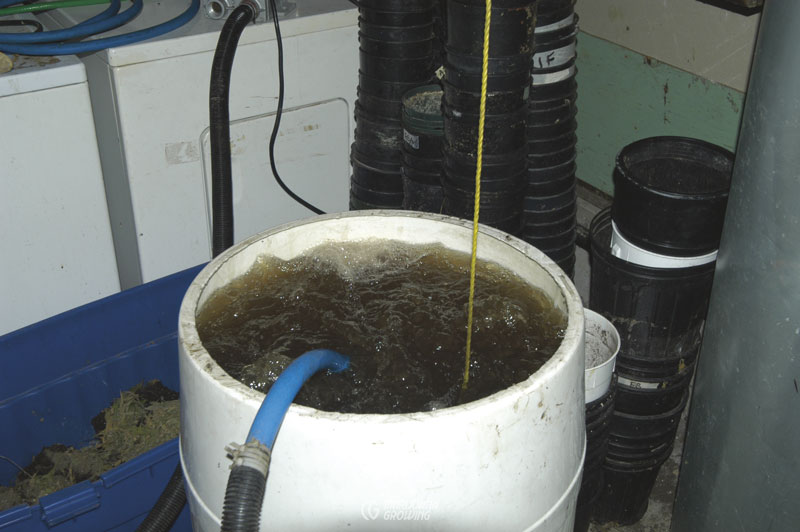
Aerating this organic nutrient solution helps keep microbes and other life flourishing.
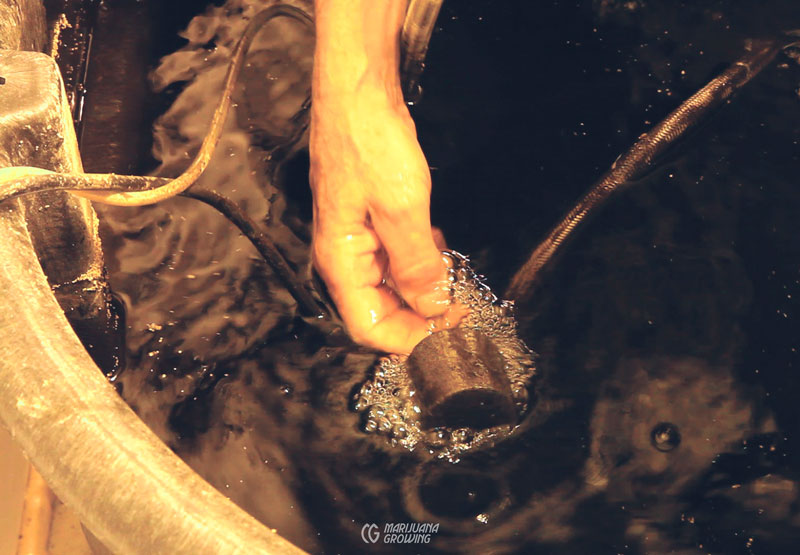
An air pump submerged in the reservoir not only aerates the solution, it will help level out the temperature differential between ambient air and the reservoir.
Solution-based gardens such as NFT, wick, and aeroponic, are extremely sensitive to DO depletion. The air-holding ability of the substrate in media-based gardens offers another source of oxygen, but these gardens are not immune to rapid DO depletion.
Oxygen depletion and starvation symptoms are often general and difficult to diagnose. The first sign is often wilting when midday temperatures climb. Roots’ ability to draw in water and nutrients diminishes, slowing the rate of photosynthesis and growth. As malnourishment continues, nutrient deficiencies surface, roots die back and plants become stunted. When severe, anaerobic conditions occur and plants start producing the hormone ethylene in reaction to stress.
Oxygen starvation causes leaf epinasty, a downward curving of leaf edges. The leaves yellow prematurely when severe. Avoid Pythium and other problems associated with lack of oxygen in the root zone by aerating the solution and keeping it in the proper temperature range.
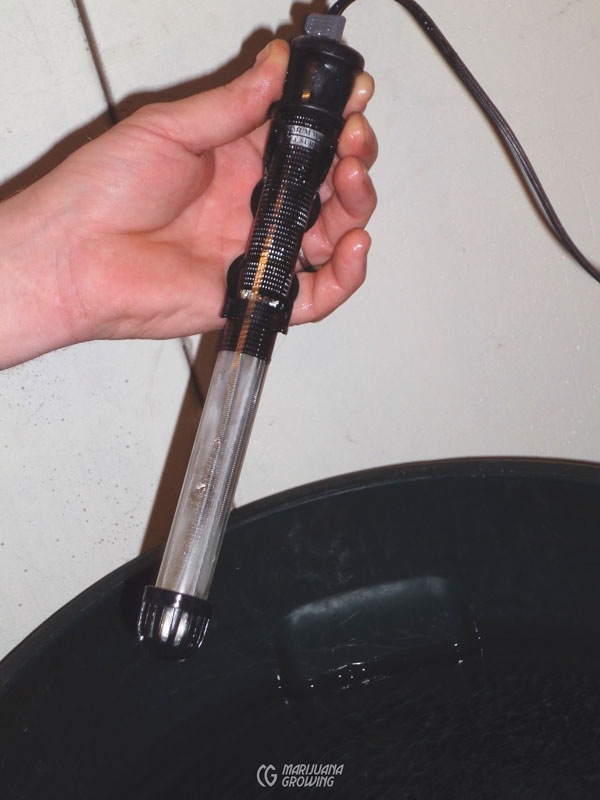
An inexpensive aquarium heater will warm a reservoir by a few degrees in 24 hours. Always purchase a heater that is big enough for the reservoir. Do not let the reservoir run dry when the heater is on, or the heater will burn out!
Increase Dissolved Oxygen
Let runoff solution cascade or fall back into the reservoir to introduce more oxygen into solution. The higher the waterfalls to the reservoir, the more oxygen is introduced. Fountains, air pumps, and diffusers (including air stones) break air into smaller bubbles to oxygenate irrigation water more. Use an air pump to add extra oxygen to the nutrient solution. Attach an air stone diffuser to the outlet to break up and multiply bubbles.
Save energy and money by heating cold nutrient solution instead of the air in a room. Use a submersible aquarium heater or grounded propagation heating cables. The heaters might take a day or longer to raise the temperature of a large volume of solution. Do not leave heaters in an empty reservoir. They will soon overheat and burn out. Aquarium heaters seldom have ground wires, a seemingly obvious oversight. But I have yet to learn of an electrocution by aquarium heater. Avoid submersible heaters that give off harmful residues.
| PERCENTAGE OF OXYGEN IN WATER | FRESH WATER MG/L | ||
| Temperature Fahrenheit | Temperature Celsius | Sea Level | 2,000 ft Elevation |
| 50°F | 10°C | 11.3 | 10.5 |
| 59°F | 15°C | 10.1 | 9.4 |
| 68°F | 20°C | 9.1 | 8.4 |
| 72°F | 22°C | 8.7 | 8.1 |
| 75°F | 24°C | 8.4 | 7.8 |
| 79°F | 26°C | 8.1 | 7.5 |
| 83°F | 28°C | 7.8 | 7.3 |
| 86°F | 30°C | 7.5 | 7 |
Note: Milligrams per liter (mg/L) is approximately equivalent (~) to parts per million (ppm). (10 mg/L ~ 10 ppm)
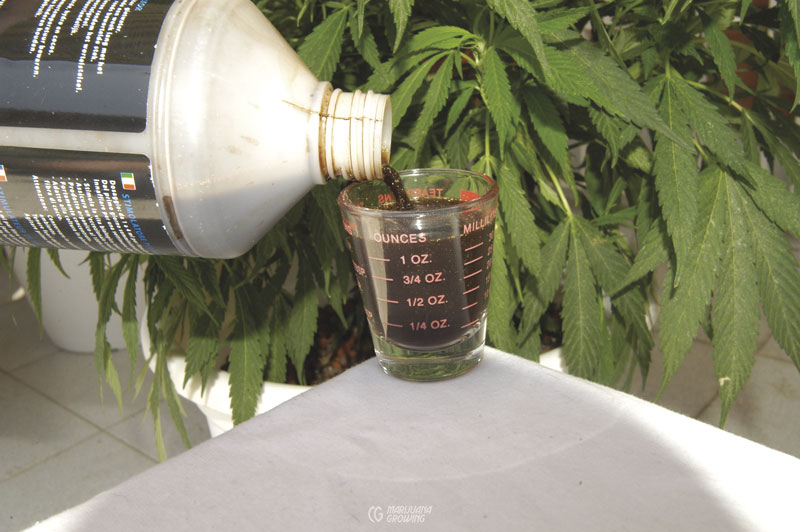
Use an accurate, easy-to-read container to measure out nutrient dosage.
Solution Mixing and Maintenance
If possible, get a water analysis before water is mixed with hydroponic nutrients. A water analysis will indicate the dissolved ionic salts already in solution. Hard water contains elevated levels of calcium and magnesium. Both elements should be added sparingly to nutrient solutions. Soft water has very few impurities (ionic salts) that cause pH to fluctuate, requiring chemical buffers, usually calcium and calcium compounds, to be added to solution. If no water analysis is available from your local water district, a simple EC reading will measure the overall concentration of dissolved solids (ionic salts) in native water. If growing hydroponically and EC is 0.3 or higher, treat water with reverse osmosis before adding nutrients. See chapter 20, Water, for more information.
Plants use so much water in relation to nutrients that nutrient solutions need to be replenished regularly. Casually topping off the reservoir with pH-balanced water daily will keep the solution relatively balanced for a week, maybe two. Use an electronic EC pen to monitor the level of dissolved solids in the solution. Occasionally you will need to add more fertilizer concentrate to maintain the EC level in the reservoir during topping off. Keep the reservoir full at all times. The smaller the reservoir, the more rapid the depletion and the more critical it is to keep it full. Employing an automatic filling function for smaller reservoirs will help ensure a balanced nutrient solution.
A few gardeners top off the nutrient solution with 500- to 600-ppm-strength nutrient solution every 2 to 3 days. If topping off with nutrient solution, keep the EC within safe limits. Avoid problems by draining the reservoir and adding fresh solution regularly.
Most gardeners leach the entire system with weak nutrient solution for an hour or more between changes of the reservoir. Leaching with a mild fertilizer solution avoids an absence of nutrients for any amount of time. But, the EC will still drop to the levels the medium is leached with which removes all the excess, resets the ratio, and ensures that the plant has nutrients at all times.
Check EC of reservoir, growing medium, and runoff nutrient solution at the same time every day. Check solution temperature to ensure that adequate dissolved oxygen is available to plants.
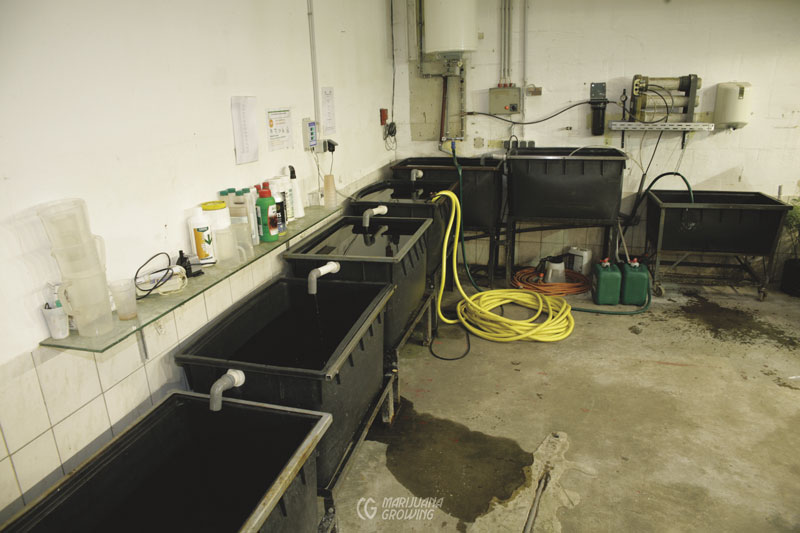
Small reservoirs are easier to manage than large tanks. This ingenious series of reservoirs along a wall uses gravity to keep them all full. Individual reservoirs can be bypassed, drained, and cleaned.
Reservoirs
Reservoirs should be opaque, as large as possible, and have a lid to lessen evaporation, prevent algae growth, and keep debris out of the system. Paint the exterior of reservoirs black or an opaque color to exclude light and stop algae growth. Spray paints are packed with plant-unfriendly chemicals; make sure to keep paint on the outside of the reservoir.
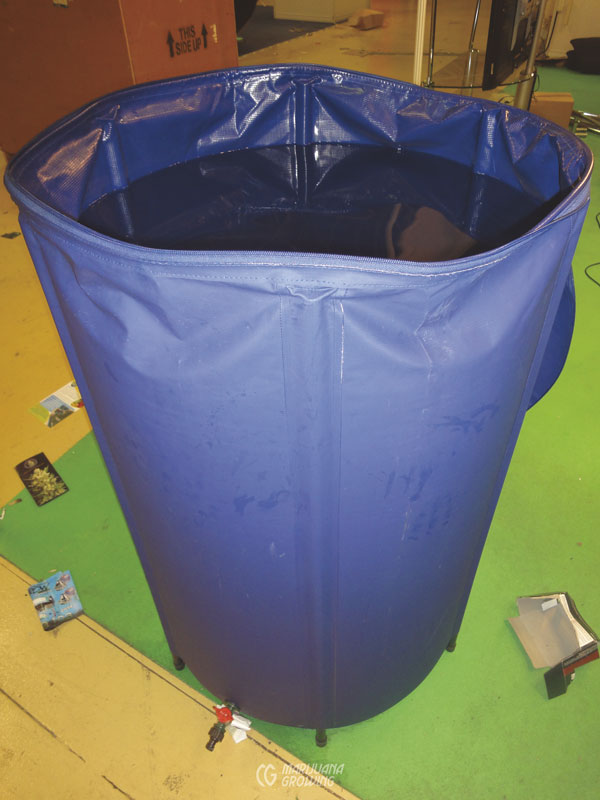
This is a pop-up reservoir. It is easy to store and holds a large volume of solution.
A fast-growing flowering plant in an ideal indoor garden can process a gallon (3.8 L) or more of nutrient solution daily. Ten maturing plants need at least 10 gallons (38 L) of water or more daily. Cannabis consumes a greater percentage of water than the percentage of nutrients from the solution. Simple arithmetic tells us that a 100-gallon (380 L) reservoir depletes at least 10 percent, 10 gallons (38 L) daily, which concentrates nutrients. Measuring EC daily will give a closer estimate of the solution’s overall concentration.
A large reservoir and volume of nutrient solution will minimize nutrient imbalances and help ensure that plenty of oxygen is available to roots. A large volume of nutrient solution tends to have a more stable temperature, which in turn helps keep the dissolved oxygen in the solution more constant. As plants use water, the concentration of elements in the solution increases; there is less water in the solution and nearly the same amount of nutrients. Add water daily or when the solution level drops more than 5 percent. The reservoir should contain at least 50 percent more nutrient solution than it takes to fill flood-and-drain beds to compensate for daily use and evaporation. The greater the volume of nutrient solution, the more forgiving the system and the easier it is to control.
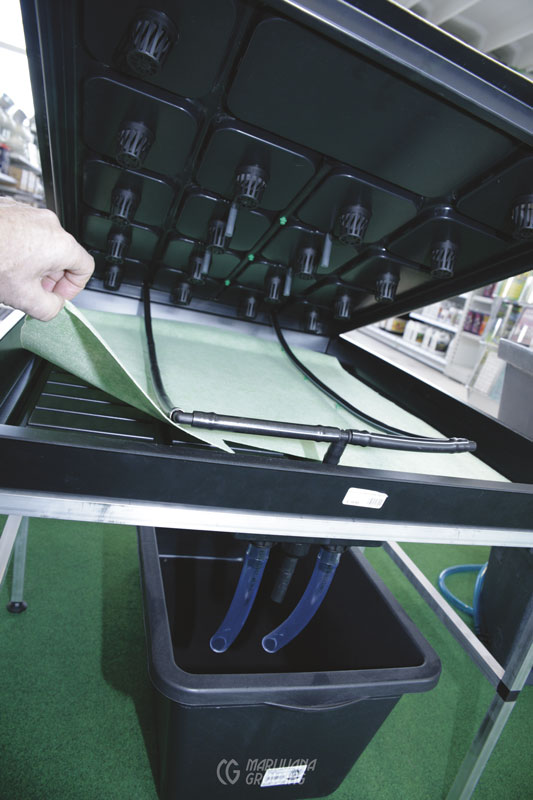
A capillary mat is set under the net pots in this garden. The capillary mat will hold moisture longer so roots will not dry out. Drain holes in the bottom of the table allow excess solution to drain freely.
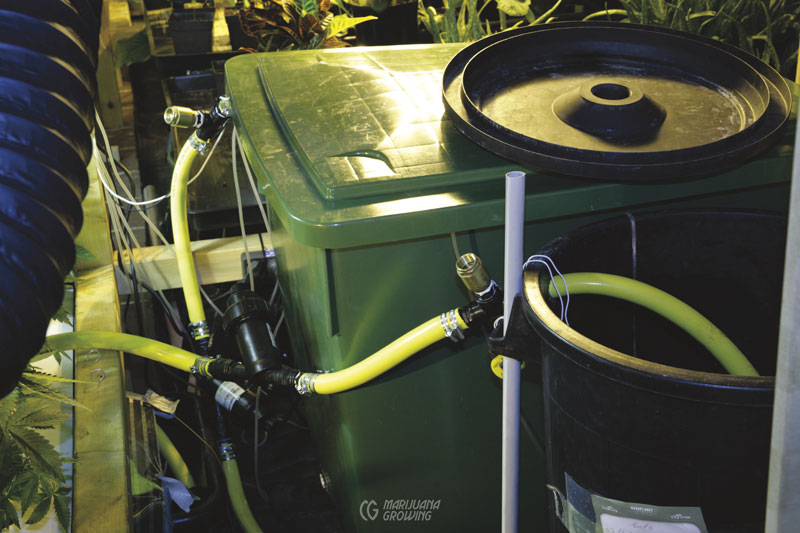
Both feeding hoses in this automated irrigation system have easy-to-clean filters.
Install a float valve to automatically replenish reservoirs with water. A float valve or Mariotte’s bottle will turn water on to fill the reservoir when the level drops. Check the level of the reservoir daily and replenish if necessary. Forgetting to replenish the water supply and nutrient solution as necessary will cause slow growth and could result in crop failure.
A 2-part nutrient solution is mixed before application. Each reservoir holds 1 part of the solution. However, many professional growers avoid such systems, citing that both parts of the nutrient solution should be present together for a while to stabilize pH and overall chemistry of the mix. Typically, mixing an hour before use provides enough time for stabilization.
If the reservoir does not have graduated measurements to denote liquid volume, use an indelible marker to make a “full” line and the number of gallons or liters contained at that point on the inside of the reservoir tank. Use this volume measure when mixing nutrients.
Set reservoirs below growing beds so recycled nutrient solution can use gravity-flow or be siphoned into a receptacle or the outdoor garden. Drains and pumps should be as big as possible.
Most hydroponic reservoirs are built of plastic, but other materials have been used, including concrete, glass, metal, vegetable solids, and wood. Nonreactive plastic is still the preferred choice because other materials could react with the solution.
Clean reservoirs completely after harvesting each crop. Add 1 cup of household vinegar per 5 gallons (23.7 cl per 18.9 L) and let the solution sit overnight to dissolve built-up salts and scum. Drain solution, and scrub reservoir with soap and water. Rinse with plain water to remove residues before refilling. Apple cider vinegar is the least expensive but there are also commercial products available.
| MINIMUM RESERVOIR SIZE | ||||
| Garden | Size in feet | Size in meters | Gallons | Liters |
| flood-and-drain | 4 × 8 | 1.2 × 2.4 | 100 | 400 |
| top-feed | 4 × 8 | 1.2 × 2.4 | 100 | 400 |
| wick | 4 × 8 | 1.2 × 2.4 | 50 | 200 |
| DWC | 4 × 8 | 1.2 × 2.4 | 200 | 800 |
| NFT | 4 × 8 | 1.2 × 2.4 | 100 | 400 |
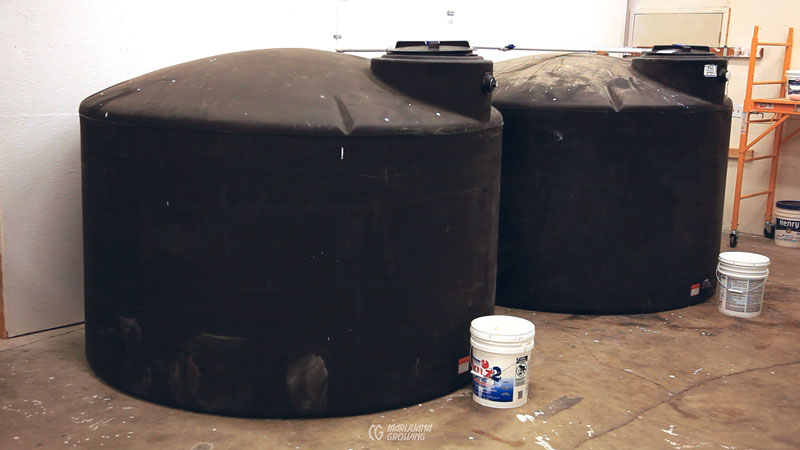
Big preformed reservoirs make large amounts of nutrient solution available. They also make it easy to mix and control the chemistry of the solution. These reservoirs require more space to transport and subsequently house in the garden.
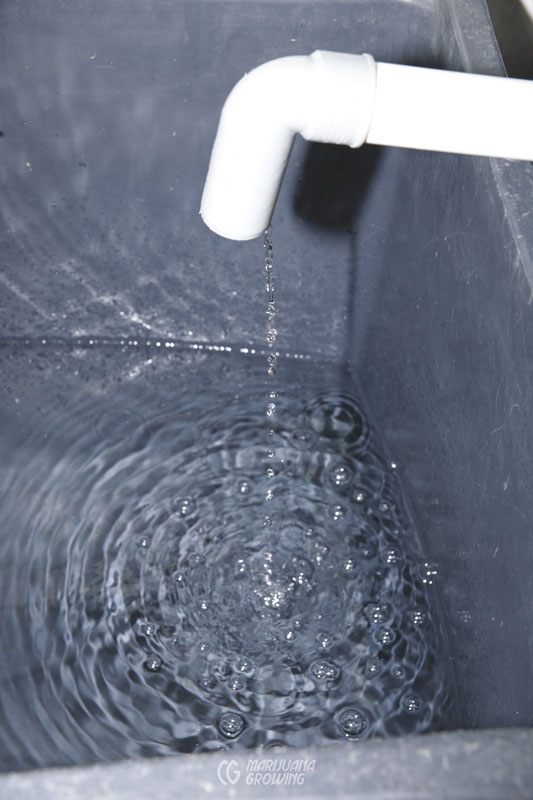
Nutrient solution is aerated when falling through the air while returning to the reservoir.
Aeration
Extra aeration is always good for nutrient solutions, especially when gravity gives it to us for free. Nutrient solution is aerated by falling through the air when it returns to the reservoir. Hydroponic and container culture gardens can use the fall of a return solution or fountain, to take advantage of this simple and free aeration principle.
Reservoir aeration is essential in solution culture. Simple gravity and recirculating pipes are not enough to ensure adequate oxygenation of nutrient solution. Make use of an air pump to diffuse air and subsequently guarantee adequate levels of oxygen.
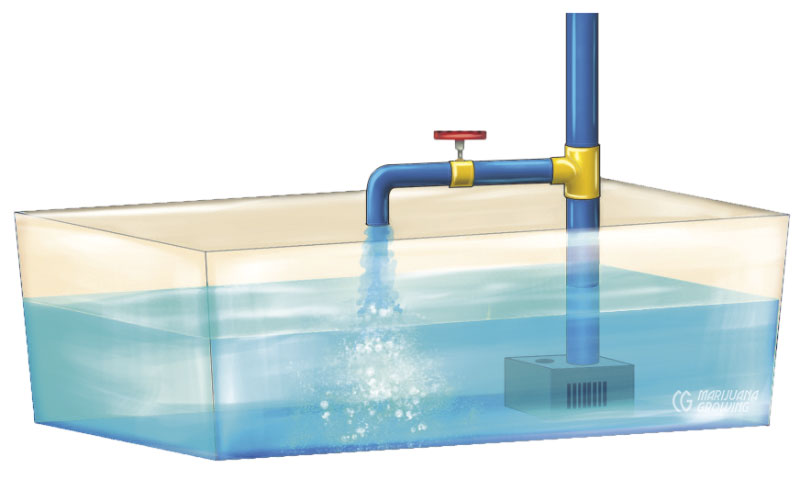
Attach a recirculating pipe with an on/off valve to the pump outlet pipe. This is a convenient, inexpensive, and easy-to-control method of aerating the nutrient solution. Add a water breaker head, similar to a showerhead, with many small holes to increase aeration.
Nutrient-Solution Pumps
Pumps are either submersible or nonsubmersible. Submersible pumps pump solution from inside a reservoir. Nonsubmersible pumps are either platform or external, located outside the reservoir. The base of a platform pump stands in the water; the motor and pump stand above the solution and remain dry. Platform pumps are usually inexpensive, and many are not designed specifically to pump nutrient solution.
Always purchase high-quality sealed pumps, especially if they are to be submerged in a nutrient reservoir. Submersible pumps must run cool so they do not heat the nutrient solution. They also must be reliable and hermetically sealed so that no internal lubricants leak and contaminate the solution.
The pump needs to be large enough to supply all the demand necessary. The nutrient solution must be lifted a few feet from the reservoir to the growing bed or table. The pump must create enough flow to fill flood-and-drain tables within a few minutes. Microirrigation systems also need adequate flow and pressure through the delivery manifold, spaghetti-tubing drippers, and nozzles. A more powerful pump is also required to lift the nutrient solution, which is heavier and thicker than water.
Caution! Overdriving and burning out a pump is easy when there is no head (backpressure caused by height or restrictions against flow) or when solution viscosity is too high. Most pumps used in hydroponic gardens are fountain or water garden pumps designed to move pure water against a small head. The more fertilizer added, especially heavy organic nutrients, the higher the viscosity and the harder the pump works. Overcome this obstacle by using a larger pump than “normally” necessary.
Pumps that run on 12-volt direct current (DC) batteries need 12-volt timers and wiring. Deep cell batteries used in golf carts and for power outboard boat motors or marine motors are designed to hold electricity for a long time. Use a solar charger to charge batteries in remote gardens.
Remember the following when installing a new irrigation system. All plumbing pipes and tubes should be opaque or dark in color to stop light from entering and thus prevent algae growth. A handle and stand on larger pumps make them easy to move and mount into a fixed position. A removable foam filter on the intake of submersible pumps removes particles that could clog the impeller and feeder tubes.
| BASIC GUIDELINES FOR PUMP SIZE | |||
| GPH | LPH | Plants Watered | USD |
| 30 | 115 | 1 | $15 |
| 70 | 265 | 2 | $15 |
| 90 | 340 | 2 | $20 |
| 190 | 720 | 4 | $45 |
| 240 | 910 | 6 | $50 |
| 350 | 1325 | 8 | $60 |
| 500 | 1890 | 10 | $100 |
| 700 | 2650 | 12 | $115 |
| 950 | 3600 | 16 | $140 |
| 1250 | 4800 | 20 | $130 |
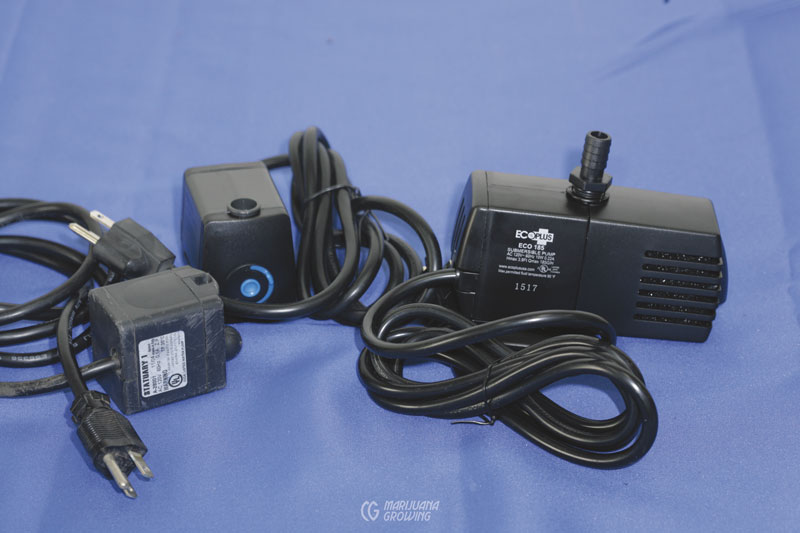
Inexpensive hydroponic pumps can be found at garden centers and aquarium stores.
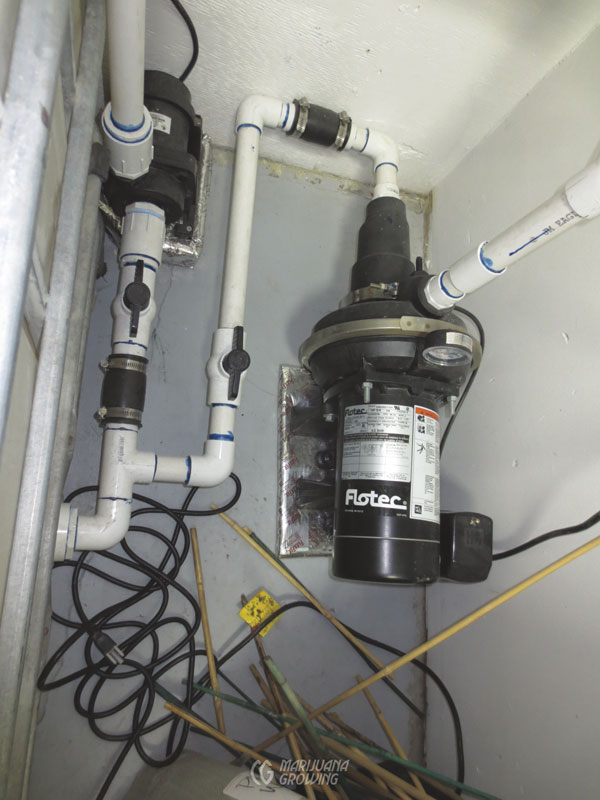
This one-horsepower high-pressure pump supplies the pressure to move nutrient solution through a warehouse garden.
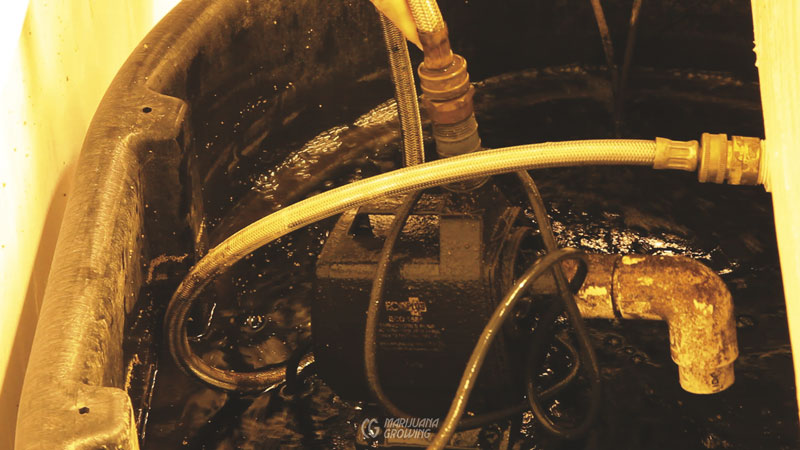
Pumps and plumbing often collect residues when pumping organic fertilizers. Make sure to use a pump that is strong enough to handle the extra weight and volume from the organic fertilizer.
Air Pumps
Use an air pump when simple gravity aeration does not supply enough oxygen to solution. Air pumps inject air into the nutrient solution, increasing the dissolved oxygen (DO) level. The outlet to the air pump is often attached to an air stone to diffuse or break the air into tiny bubbles. Or air is separated into many small tubes via a manifold before being injected into the solution.
Caution! Air in such gardens should be drawn from outside CO2-enriched areas to avoid CO2 combining with Ca to form carbonates and drive the pH up. This is a problem in all air diffusion systems because CO2 dissolves more readily in water and will drive out O2 as it competes for available dissolution space in the water, which is limited by pressure and temperature.
| AIR PUMPS | |
| Air/GPH | Reservoir/Gallons |
| 320 | 20 |
| 340 | 20 |
| 600 | 40 |
| 800 | 50 |
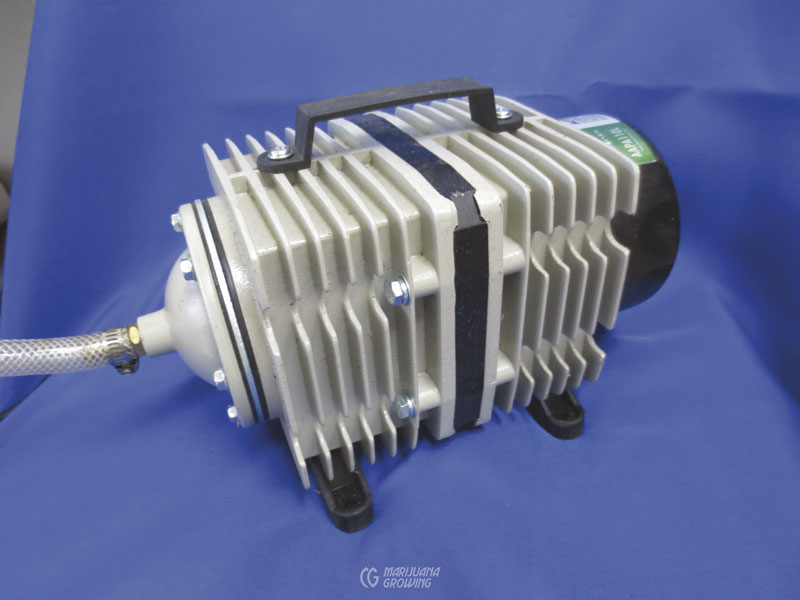
An air pump is easy to set up, but it will make a bit of noise.
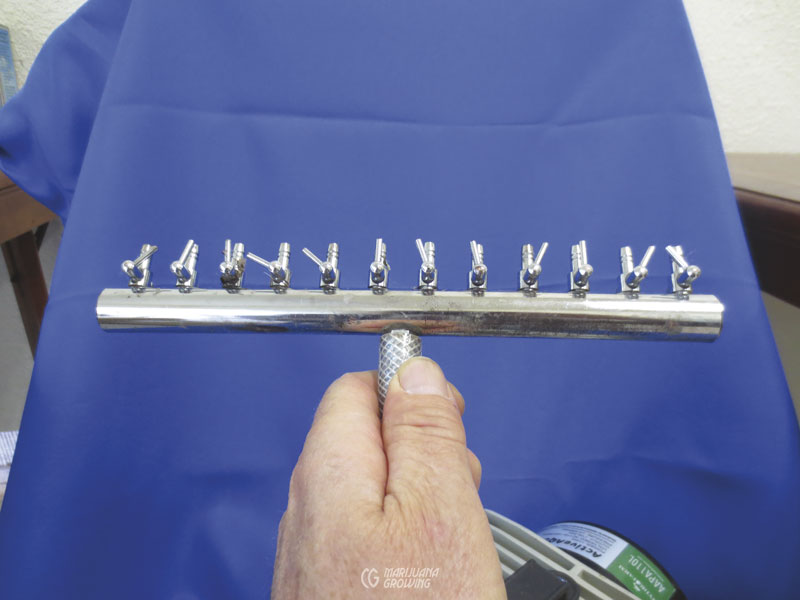
Attach a manifold to the air pump so that air can be dispersed via many different tubes.
Growing Mediums
Hydroponic and container culture substrates provide support for root systems, and they hold oxygen, water, and nutrients. The ratio of oxygen to nutrient solution is a key factor in determining nutrient uptake by roots. Three main factors contribute to cannabis roots’ ability to grow and absorb nutrients in a substrate: pH, texture, and nutrient content.
results, monitor pH daily or perpetually and control with pH Up and pH Down. See “Nutrient-solution pH” in this chapter for related information. Substrates such as rockwool must be treated (soaked) in a determined pH solution in order to fall within proper pH parameters. See “Popular Substrates” for more specific information.
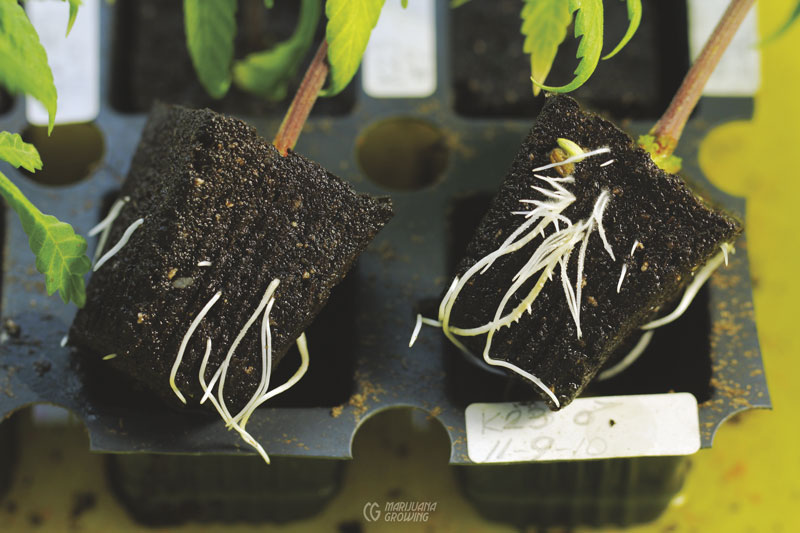
These plants are ready to be transplanted into larger containers. (MF)
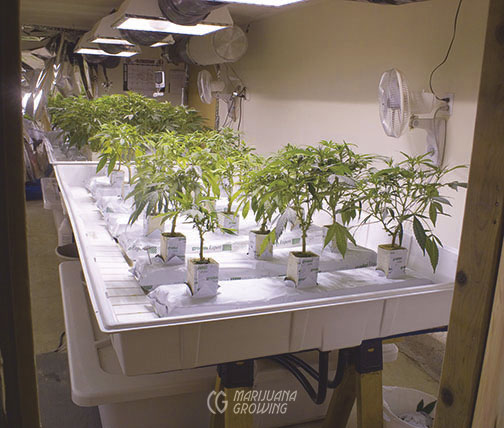
This substrate (rockwool cubes and slabs) has excellent texture, holding both air and nutrient solution.
Texture
The texture of any substrate is governed by the size and physical structure of the particles that constitute it. Proper texture promotes strong root penetration, oxygen retention, nutrient uptake, and drainage. Growing mediums that consist of large particles permit good aeration and drainage. Increased irrigation frequency is necessary to compensate for low water retention. Water- and air-holding ability and root penetration are a function of texture. The smaller the particles, the closer they pack together and the slower they drain. Larger particles drain faster and retain more air in between.
Irregularly shaped substrates such as perlite and some expanded clays have more surface area and hold more water than round substrates. Avoid crushed gravel with sharp edges that cut into roots if the plant falls or is jostled around. Round pea gravel; smooth, washed gravel; and lava rocks are excellent mediums to grow cannabis in an active recovery garden. Thoroughly wash clay and rock growing mediums to get out all the dust that will turn to sediment in the system. Fibrous materials like vermiculite, peat moss, rockwool, and coconut coir retain large amounts of moisture within their cells. Such substrates also work well in passive gardens that operate via capillary action.
Mineral growing mediums such as coco coir and peat moss (and rockwool*) are not inert; often they are mistakenly classified as inert growing mediums. They react in solution and supply minerals as they break down, which in turn affects the CEC and moves the pH.
*Rockwool is not inert until it is treated.
Non-inert growing mediums (mineral and organic) are not hydroponic substrates, and may cause unforeseen problems when minerals and organic substances react chemically with water and supplemental nutrients. Two examples: gravel from a limestone quarry is full of calcium carbonate, and old concrete is full of lime. When mixed with water, calcium carbonate will raise the pH, and it is very difficult to make it go down. Growing mediums made of reconstituted concrete bleed out so much lime that they soon kill the garden. Substrates composed of organic material that is still decomposing will interact with nutrient solutions, altering nutrient availability and pH. These substrates also compact, which eliminates many of the air-filled pores. Even substrates designed to hold air and absorb moisture lose effectiveness when overwatered.
Avoid substrates found within a few miles (km) of an ocean, sea, or large body of salt water. Most likely, such mediums are laden with toxic salts. Rather than washing and leaching salts from the medium, it is easier and more economical to find another source of substrate.
Oxygen is contained in the pores of growing media. Fresh air is drawn into the root zone as nutrient solution drains from the growing medium; that is if the medium is not overwatered or saturated. Oxygen must be replenished habitually to keep up with root tissue needs. The oxygen content in a substrate is essential to a healthy root zone and nutrient uptake. But “oxygen use” is probably the most difficult concept for many container culture and hydroponic gardeners to master.
One of the best ways to maintain high oxygen levels in the root zone is by using proper irrigation techniques. Make sure air-filled pores in substrates are allowed to drain completely between irrigation cycles. Overwatering is one of the main reasons for lack of oxygen to roots.
The duration that nutrient solution is held in a substrate is dependent upon the cation exchange capacity (CEC). Substrates with a high CEC hold nutrient solutions in their ionic form longer than substrates with a low CEC. Nutrient solution is more difficult to leach from substrates with a high CEC rating. Hydroponic mediums with a low CEC offer more exacting control because nutrients can be leached quickly and replaced with new nutrient solution with a different formula. See chapter 18, Soil, for more information on CEC.
Buyer beware! There are many overpriced hydroponic growing mediums with “special” qualities. I have seen more than one “new” grow medium hit and miss the marketplace. My best advice is to properly use a tried-and-true medium.
The best way to buy substrate is to go to the manufacturer. It is impossible to ascertain what the values of a soil or soilless mix are by simple written description.
For example, peat vermiculite will depend on the grade and type of peat as well as the vermiculite used by size and age. You need to physically examine the product, like Pro Mix BX or a 3:1 peat perlite mix. The manufacturer will include airspace as well, based on the medium. Usually they list values based on size of the particle. Pro-Mix BX is the typical mix (www.pthorticulture.com).
Popular Substrates
Expanded clay pellets and rockwool are the most common substrates in hydroponics. Soilless mixes and coconut coir are the most popular growing mediums used to grow cannabis in container culture. Peat (Jiffy pellets), Oasis, and small rockwool cubes are the most popular growing mediums used to start clones and seedlings.
Brick shards (not inert) have similar properties to gravel. They have the added disadvantages of possibly altering the pH and requiring extra cleaning before reuse.
Caution! They can cause heavy metal contamination due to poor sources of clay.
Coconut fiber (not inert) also called coco peat, palm peat, coir, coco(s), and kokos is coconut pith, the fiber part just under the heavy husk of a coconut. It is the by-product after the fibrous shell (bolster) has been removed from the coconut. Pith is soaked in water for up to 9 months to remove salts, natural resins, and gums in a process called retting. The retted, straw-brown fiber is beaten to extract the husk. Low-quality, poorly processed coconut fiber may contain undesirable elements (primarily salts) that have not been extracted. Quality coconut coir is guaranteed to have sodium content of less than 50 ppm. Some of the best coconut coir is from the interior of the Philippines, where the environment is not heavy with coastal salts.
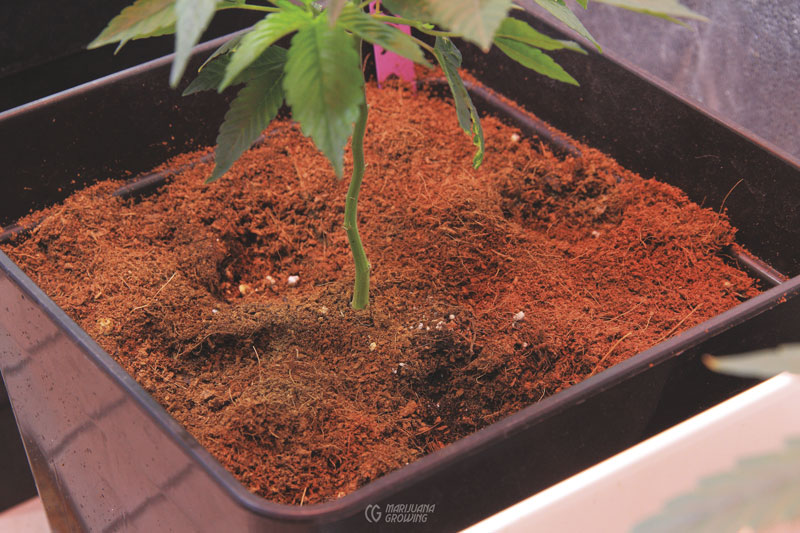
Coco substrate is absorbent and holds air.
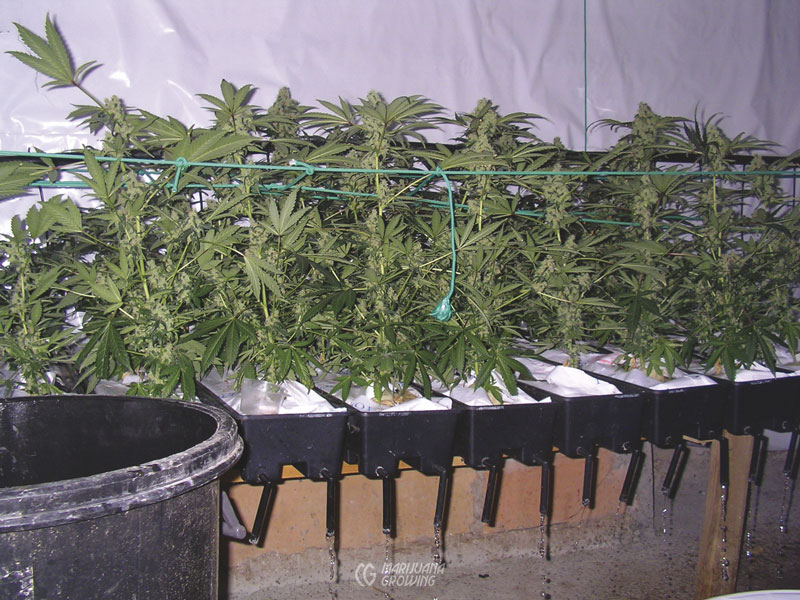
Coco is available in slabs.
Darker coco is typically mature at harvest and contains tough, durable lignins and cellulose. It degrades slowly and provides good aeration and solution-holding ability. Coco that is lighter in color generally signifies immature fibers with poor structure that break down quicker and provide less aeration.
To test coco for salts, see Canna’s “Coco Infopaper,” available for download at http://other.canna.com/media. The “Coco InfoPaper” is outstanding and tells you everything you need to know and do to measure coco root environment for EC and pH.
Quality coir has an appearance and texture similar to peat moss, but coco fiber is tougher and coarser than peat moss and difficult to overwater. The nearly perfect air-to-water ratio of coir compacts very little during the course of a single crop.
Horticultural grade coco is available loose in bags, pressed into bricks, or compressed into slabs and covered in plastic. The fibers can be found in long strands, coarse chopped, and fine chopped, all of which can also be mixed together to provide different air- and solution-holding abilities.
Use coir in containers by itself or mix 50/50 with perlite, expanded clay pellets, or other mediums to add air and drainage to the mix. Coarse, fast-draining coco is often used in lieu of peat moss. Containers full of coco should be low profile because coir holds so much solution that gravity will concentrate liquids in the lower portion of the medium. This creates an uneven ratio of solution to air within the container. Low-profile plastic-covered slabs are very popular and easy to use. See “Top- Feed Gardens” for more information.
Washed and pressed blocks or bricks are easy to store and transport and are very popular among outdoor gardeners. Bricks weigh about 1.3 to 2.2 pounds (0.6–1 kg) and typically the pH is between 5.5 and 7.0. To wet, flake dry bricks of coconut coir apart by hand or soak the bricks in a bucket of water for 15 minutes. One brick will expand to about 9 times its original size.
Treating Coco
Often coconut coir must be “conditioned” or “treated” before use. Conditioning usually requires soaking coir in a pH altering solution for a length of time to bring the pH to a neutral 7.0. Check with coir manufacturers or suppliers for more information about specific products.
Unlike most coco, coco sold by Canna and some other companies is colonized with Trichoderma fungi that protect roots and stimulate their growth. It also teams with naturally occurring growth hormones and other biostimulants.
Store-bought compost is available at most garden centers.
The low cation exchange capacity (CEC) of the coir fiber also helps to reduce incidence of salt burn. The minerals stored in spongelike particles are released over time when roots are able to readily absorb them. However, it does store some anions such as phosphates and sulfates. Coco also offers some buffering against positively charged ions such as sodium.
Coir has a good anion exchange capacity (AEC) and holds onto negatively charged particles. AEC is related to CEC, the measurement of the positive charges in soils that affects the amount of negative charges a soil is able to absorb. Few anions are restrictive in cannabis cultivation, but they are important. For example it will hold phosphate well but not more common nutrients such as calcium, magnesium, etc. This bit of chemistry makes fertilizers containing much phosphorus an issue when overapplied, especially early on during the growth cycle. The AEC usually drops when pH decreases, and rises when pH increases.
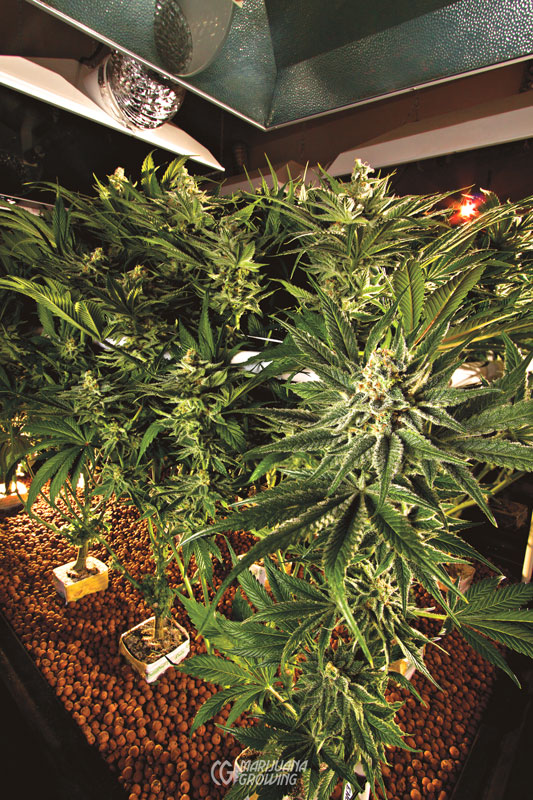
Expanded clay pellets are an excellent medium to mix with Peat-Lite and other soilless mixes in container culture. I like the way it drains so well yet still retains nutrient solution while holding lots of oxygen.
Coco fiber can be reused, but it may compact a little. It should also be sterilized or treated to remove any signs of pests and diseases it might be harboring. When reusing any growing media, impurities such as sodium tend to accumulate over time. Check with manufacturers and suppliers for specific guidelines for reusing coco fiber products.
Visit the Canna site (www.canna.com) for detailed information about growing cannabis in coco. See “Coconut Fiber” under “Soil Amendments” in chapter 18, Soil, for more information.
Expanded clay pellets (inert) are sold under different names, including expanded clay aggregate, Hydroton, GroRocks, Hydrokorrels, Geolite, and LECHA. Expanded clay pellets are inert and typically pH neutral. They are environmentally friendly, made from naturally occurring clay. Fired and sometimes tumbled in a rotary kiln at 2,190°F (1,198.9°C), clay expands like porous popcorn with a protective shell. Many little catacomb-like pockets form inside each pellet; these pockets hold air and nutrient solution. Shapes are irregular or uniform, and size ranges from 0.8 to 2 inches (20.3–50.8 mm) depending upon the manufacturing process.
This lightweight substrate does not compact over a long lifetime, and it can be reused. Once used, separate the clay pellets from roots and other substrate. Pour expanded clay pellets into a container and soak them in a sterilizing solution of 0.3 ounces (10 ml) hydrogen peroxide per 1.1 gallon (4 L) of water, or 5 percent chlorine bleach or white vinegar. Soak for 20 to 30 minutes. Remove expanded clay and place on a screen of hardware cloth. Wash clay pellets thoroughly with clean water and separate them from remaining dead roots and dust. Let pellets dry and then reuse them. Always reuse!
Caution! Avoid using expanded clay made for the construction of tall buildings, which is not inert and is often full of undesirable substances. This expanded clay also tends to bleed a lot of heavy clay dust that collects in the garden and could contain pollutants.
Gravel (not inert) is heavy but inexpensive and easy to keep clean. It holds plenty of air and drains well. Gravel has low water retention and low buffering ability. But it is difficult to overwater and is suited to continuous irrigation. It holds moisture, nutrients, and oxygen on its outer surfaces. Use pea gravel or washed river gravel with round edges that do not cut roots when jostled about. Avoid using crushed rock with sharp edges. Gravel should be 0.125 to 0.375 inches (3.2–9.5 mm) in diameter, with more than half of the medium about 0.25 inches (6 mm) across. Presoak and adjust pH before use.
To reuse, follow guidelines outlined under “Expanded Clay.”
Oasis is rigid, open-celled, water-absorbing, phenolic foam. It is designed for optimum callus formation and rapid root growth of clones and seedlings. Oasis rooting cubes have a neutral pH and hold more than 40 times their weight in water. Plus, the water is drawn into the foam by wicking action. Transplant versatile Oasis cubes into any hydroponic medium.
Once used, Oasis cubes lose structure and cannot be cleaned, disinfected, and reused.
Peat moss (not inert) is partially decomposed vegetation. Its decay has been slowed by the cold, wet conditions and low pH of the northern latitudes where it is found in vast bogs. It consists of long strands of highly adsorbent, spongelike material that holds water while simultaneously having good aeration. Water adsorbs onto a peat particle and is not spongelike. Peats are harvested and used to amend soil or soilless mix; they can be used as a growing medium.
There are three common kinds of peat moss: sphagnum, hypnum, and reed/ sedge. Sphagnum peat, the most commonly used peat moss, is light-brown and is about 75 percent fiber with a pH of 3.0 to 4.0. This bulky peat gives soil body and retains water well, absorbing 15 to 30 times its own weight. It contains essentially no nutrients of its own, and its pH ranges from 3.0 to 5.0.
After sphagnum moss decomposes for several months, pH could continue to drop and become very acidic. Counter this propensity for acidity and stabilize the pH by adding fine dolomite lime to the mix. Peat adsorbs water by its clinging to the outer portions of the very small stem and leaves and does not absorb it into the tissues of the plant parts.
Hypnum peat is more decomposed and darker in color, with about 50 percent fiber and a pH of about 6.0. This peat moss is less common and contains some nutrients. Hypnum peat is a good soil amendment even though it cannot hold as much water as sphagnum moss can.
Reed/sedge peat is about 35 percent fiber with a pH of 6.0 or more. This peat holds less water and air and is more difficult to find commercially.
Peat moss is typically bone dry and difficult to wet the first time. Wet peat is heavy and awkward to transport. When adding peat moss as a soil amendment, cut your workload by dry-mixing all of the components before wetting. Lightly sprinkle with water to quell dust, and use a wetting agent.
Another trick to mixing peat moss is to kick the sack a few times to break up the bale before opening.
Purchase peat in dry, compressed blocks, or bails. Peat moss must be soaked in water for approximately an hour to become completely wet before use. Two drops of natural liquid dish soap per gallon (3.8 L) will ensure thorough wetting.
Peat mixed half and half with perlite is one of the all-time favorite growing mediums. It is also an excellent soil amendment. Sphagnum peat moss is a major ingredient in many potting soils and soilless mixes.
Avoid reusing peat, because it compacts. Also, it decomposes over time and sheds small particles that can plug pumps, irrigation lines, and emitters. For more information, see “Soil Amendments” in chapter 18, Soil.
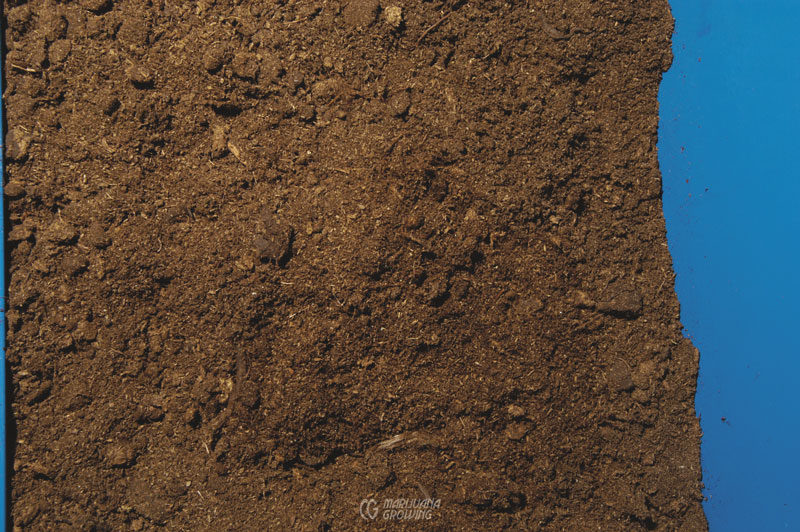
Fine-grade peat moss
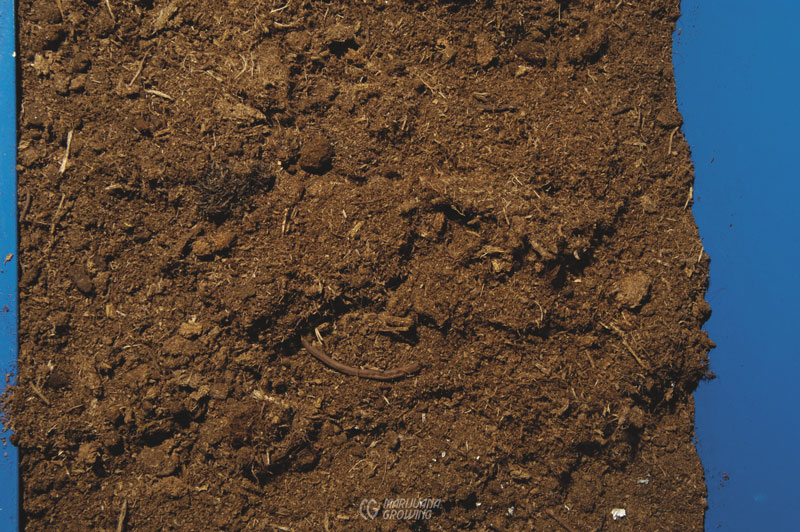
Medium-grade peat moss
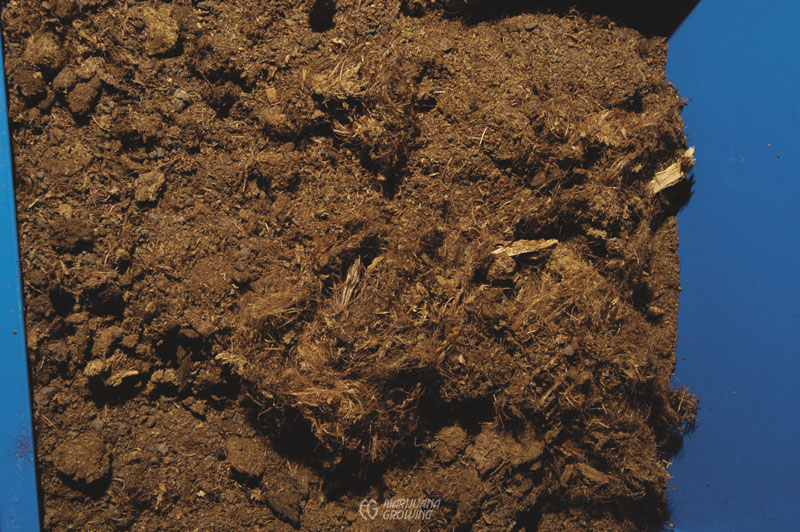
Coarse-grade peat moss
Perlite (inert) is sand or volcanic glass that has been superheated and expanded by heat. It holds water and nutrients on its many irregular surfaces, and it drains fast, but it’s very light and tends to float when flooded with water. Perlite has no buffering capacity and is best used to aerate soil or soilless mix.
Perlite can be reused once sterilized, but it tends to disintegrate and become smaller.
Caution! Perlite may contain high levels of fluoride (F), which is toxic to plant foliage. See “Soil Amendments” in chapter 18.
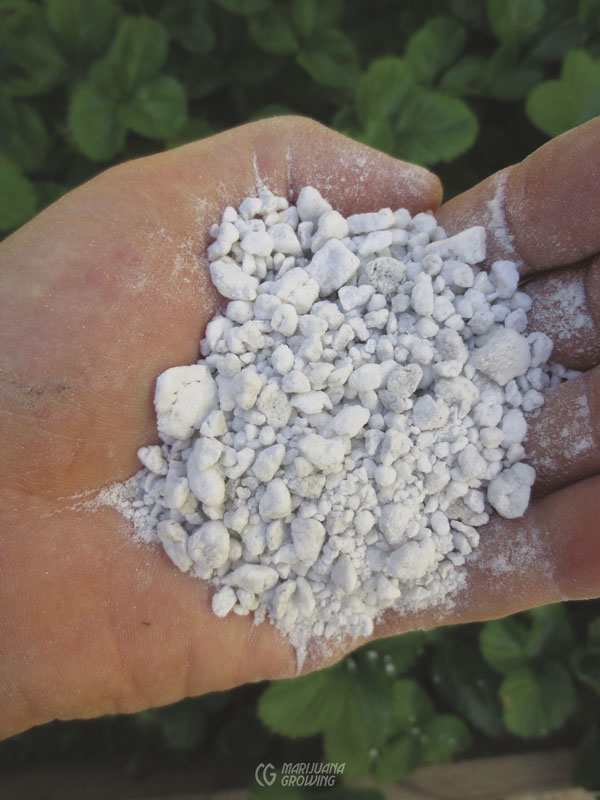
Perlite is available in three main grades: fine, medium, and coarse. Most gardeners prefer the coarse grade as a soil amendment for container planting and outdoor planting. The fine grade is best to use when making a seedling mix. To keep it from floating and stratifying, lightweight perlite should make up less than one third of any mix.
Polyurethane grow slabs (inert) have approximately 75 to 80 percent airspace and 15 percent water-holding capacity. As this substrate is so new, very little information is available about it. Cannabis is an accumulator plant that may absorb petroleum-based styrene and pass it to the consumer. Few gardeners use it to cultivate medicinal cannabis.
Polystyrene packaging peanuts are inexpensive, readily available, and have excellent drainage. They are very lightweight and float when mixed with other elements. The same health precautions are applicable to peanuts as to polyurethane slabs.
Do not use biodegradable packing peanuts. They will decompose into sludge.
Rice hulls (not inert) are underutilized by cannabis gardeners even though they are as effective as perlite. A by-product of rice production is commonly used in compost mixes, rice hulls can be very inexpensive through a good source. This free-draining medium has low to moderate water-holding capacity, a slow rate of decomposition, and a low level of nutrients.
Check the origin and storage condition for rice hulls. They are often stored outdoors and, when uncovered, rice hulls are subject to the forces of nature and pollution. They also have a tendency toward salt buildup. Make sure to sterilize rice hulls before use. They decompose after one or two crops, so avoid reusing rice hulls.
Rockwool, also called stonewool or mineral wool (inert once treated), is an exceptional growing medium and popular among indoor cannabis gardeners. It is a sterile, fibrous, porous, nondegradable growing medium that provides firm root support. Rockwool has the ability to hold adequate levels of both water and air for roots. Roots are able to draw in most of the water stored in the rockwool, but it has no buffering capacity and a naturally high pH. To become inert, rockwool must be treated— soaked in a low pH solution prior to use. Popular brand names in horticulture include Grodan, HydroGro, and Vacrok.
Rockwool is made from molten rock, basalt or ‘slag’ that is spun into bundles of single filament fibers and bonded into a medium capable of capillary action. It has proven its efficiency and effectiveness as a commercial hydroponic substrate. Fibers run vertically on blocks and horizontally on slabs. Fiber orientation affects air- and solution retention.
Check with specific manufacturers and suppliers for reuse guidelines.
Caution! Use rockwool designed for horticulture only! Do not use rockwool that is designed for insulation, soundproofing, or filtration, since these typically have all kinds of bad stuff in them, including metals that can bleed into the nutrient solution and accumulate in cannabis plant tissue.
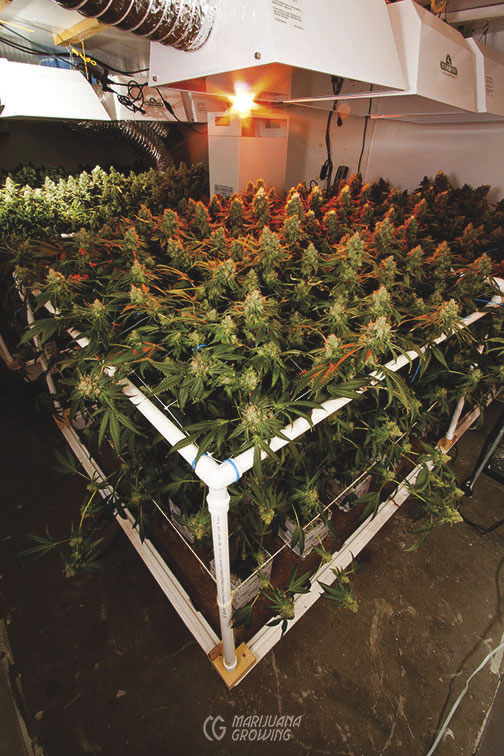
Rockwool cubes
Pumice (not inert) is a naturally occurring, porous, lightweight volcanic rock that holds moisture and air in catacomb-like surfaces. Light and easy to work with, some lava rock is so light that it floats. Be careful that sharp edges on the rocks do not damage roots. Lava rock acts similarly to expanded clay. See “Pumice” in chapter 18, Soil.
To reuse follow guidelines outlined in the “Expanded Clay” section.
Sand (not inert) is heavy, inexpensive and readily available. It has no buffering ability. Some sand has a high pH. The best sand to use is a grade known as #2 mortar in the USA. If it or a similar type is not available, use sharp river sand. These sands have irregular and sharper edges that avoid compacting, thereby creating better airspace. Do not use ocean, sea, or salty beach sand. Sand drains quickly, retains some moisture, and is very slow to decompose. Sterilize it between uses. Sand is best used as a soil amendment in volumes of less than 10 percent. Be sparing when adding sand in order to break up clay soil. Coarse sand has the tendency to wash upward and accumulate on the soil surface.
Sawdust (not inert) is a popular and inexpensive growing medium among many commercial vegetable growers. But it holds too much water for cannabis growth and is usually too acidic, and new or fresh sawdust robs the medium of its nitrogen reserves.
Soilless mixes (not inert) are very popular, inexpensive, lightweight, and clean growing mediums. Commercial greenhouse growers have been using them for decades. Soilless mixes are available in different grades including small, medium, and coarse.
Premixed commercial soilless mixes retain moisture and air while allowing strong root penetration and even growth. The fertilizer concentration, moisture level, and pH are very easy to control with precision in soilless mix. Soilless mixes have good texture, hold water, and drain well. Unless fortified with nutrients, soilless mixes contain no nutrients and are pH balanced near 6.0 to 7.0. Fortified elements supply nutrients for up to a month, but follow directions on the package.
Coarse soilless mixes drain well and are an easy choice to push plants into growing faster with heavy fertilization. The fast-draining mixes can be leached efficiently so soluble nutrients have little chance of building up to toxic levels. Look for ready-mixed bags of fortified soilless mixes such as Jiffy Mix, Ortho Mix, Sunshine Mix, Terra- Lite, Pro-Mix, and Terra Professional Plus (Canna). To improve drainage, mix 10 to 30 percent coarse perlite before planting.
Add dolomite lime (1 cup per cubic foot [24 cl per 28 L]) to all heavily irrigated soil and soilless mixes when growing cannabis, unless a given mix already contains it. Regular heavy irrigation tends to leach out both calcium and magnesium in most any soil or soilless mix. Add a little calcium carbonate for immediate pH control.
Pro-Mix contains Canadian sphagnum peat moss, perlite, macro- and micronutrients, and dolomite and calcitic limestone. At least one product is fortified with beneficial endomycorrhizal fungus to strengthen roots and increase plants’ ability to completely utilize available nutrients. One version of Pro-Mix contains MX fungus. Inoculants are often short-lived; some have a shelf life of only 30 days.
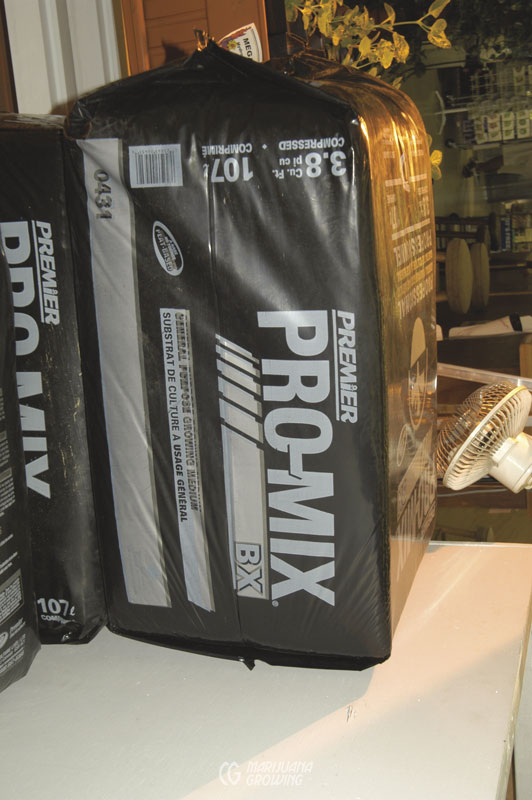
Pro-Mix is a favorite of professional nurseries and medical cannabis gardeners alike.
Sunshine Mix consists of Canadian sphagnum peat, perlite, dolomitic limestone, gypsum, and a wetting agent to provide plants a growing environment with abundant oxygen and quick drainage. This mix comes in different formulas and textures to suit needs of seedlings and clones, vegetative and flowering.
Soilless components can be purchased separately and mixed to the desired consistency. Ingredients always blend together best when mixed dry and wetted afterward using a commercial wetting agent or organic liquid dish soap to make water more adhesive. Mix small amounts right in the bag. Larger batches should be mixed in a wheelbarrow, concrete slab, or in a cement mixer. Blending your own soil or soilless mix is a dusty, messy job. To cut down on dust, lightly mist the pile with water several times when mixing. Always wear a respirator to avoid inhaling dust.
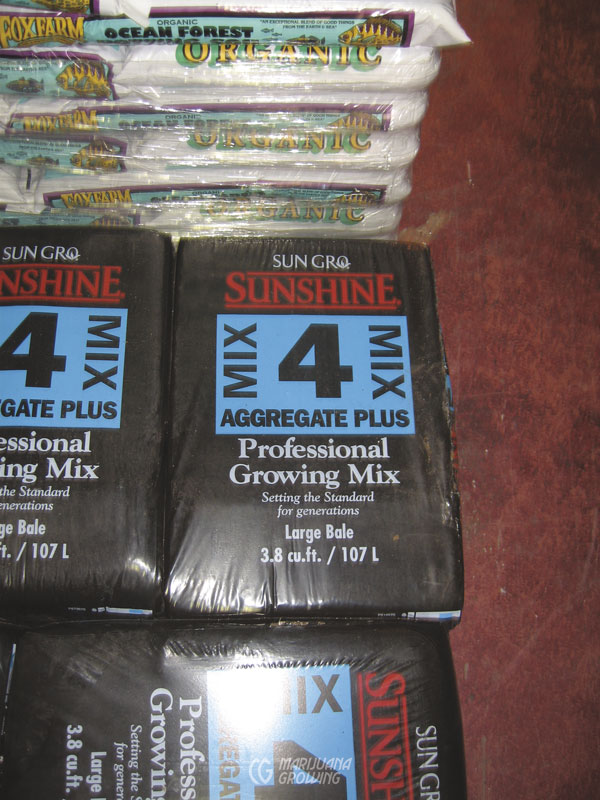
Sunshine Mix is very popular among medical cannabis gardeners from British Colombia, Canada, and western USA.
The texture of soilless mixes—for rapid-growing cannabis—should be coarse, light, and spongy. Such texture allows drainage with sufficient moisture and air retention, as well as providing good root penetration qualities. Fine soilless mix holds more moisture and works best in smaller containers. Soilless mixes that contain more perlite and sand drain faster, making them easier to fertilize heavily without excessive fertilizer-salt buildup. Vermiculite and peat hold water longer and are best used in small pots that require more water retention.
The pH is generally 6.5 to 7.0 in soilless mixes, which are peat-based as a rule but could include coco and other organic products. As the organic components decompose, especially when pH is adjusted to correct more neutral values, the chemistry of the soilless mix changes. Added lime makes changing the pH of soilless mix very difficult and tends to bring the pH back to adjusted levels in spite of water pH. The acidic quality of basic elements with a large pH capacity like sulfur or lime can alter the pH permanently.
Check the pH of soilless mix regularly—a minimum of once a week. Check the pH of the runoff water to ensure that the pH in the medium is not too acidic.
Avoid reusing soilless mixes. They tend to compact, and they have issues with salts, pests, and diseases. If you do reuse, add 20 to 30 percent used medium to 70 to 80 percent new medium.
Vermiculite (inert) holds a lot of water and is best suited for rooting cuttings when it is mixed with sand or perlite. With excellent buffering qualities, vermiculite holds lots of water and contains traces of magnesium (Mg), phosphorus (P), aluminum (Al), and silicon (Si).
Used in hydroponic wick gardens, vermiculite holds and wicks much moisture. Vermiculite comes in three grades: fine, medium, and coarse. Use fine vermiculite as an ingredient in seedling and cloning mixes. If fine is not available, crush coarse or medium vermiculite between your hands, rubbing palms back and forth. Coarse is the best overall choice as a soil amendment. Use finer vermiculite in seedling and clone mixes.
Do not reuse vermiculite; it breaks down substantially after a single crop.
Caution! Do not use construction-grade vermiculite, which is treated with phytotoxic chemicals.
Caution! Vermiculite has also been a source of asbestos. Most manufacturers test for asbestos at mines. Nonetheless, I am always leery of cheap imports.
See “Soil Amendments” in chapter 18, Soil, for more information.
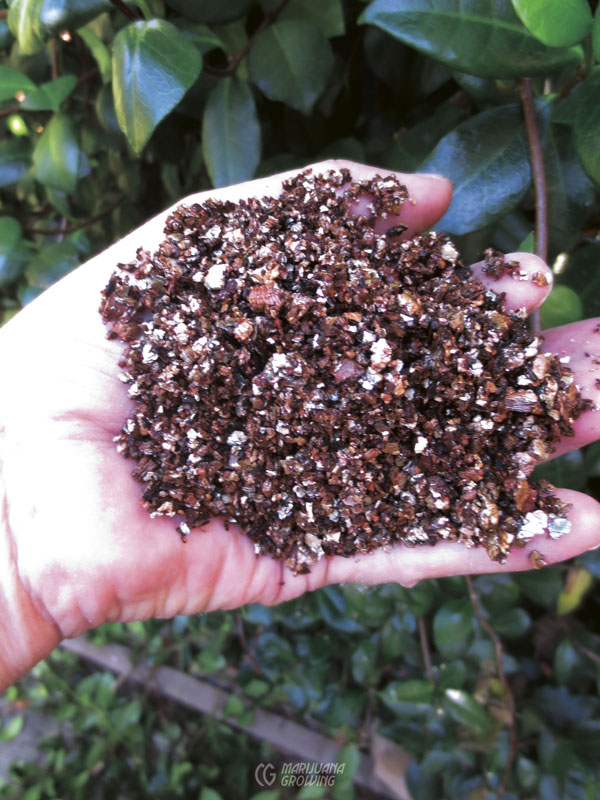
Vermiculite is mica superheated until it expands into small, lightweight pebbles. Its natural wicking ability draws in nutrient solution in passive hydroponic gardens. Vermiculite holds so much water that it is typically mixed with perlite to improve drainage.
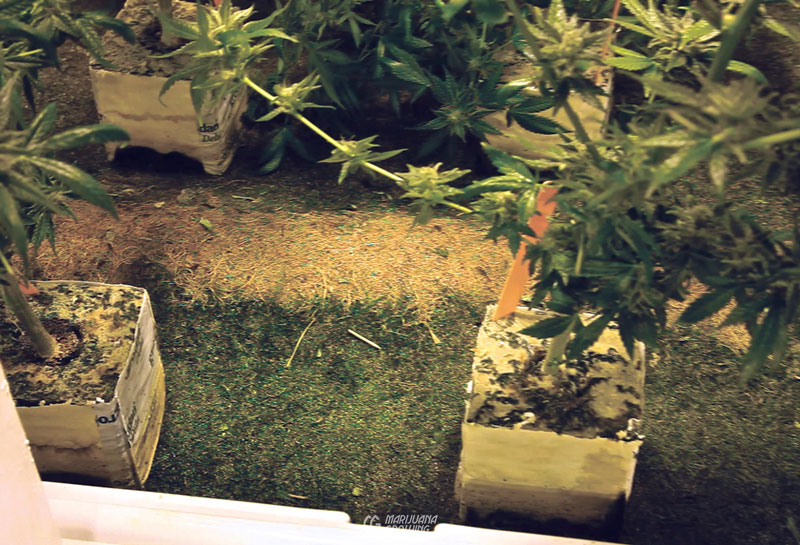
Green algae grow anywhere there is a moisture and light. Algae completely cover this mat!
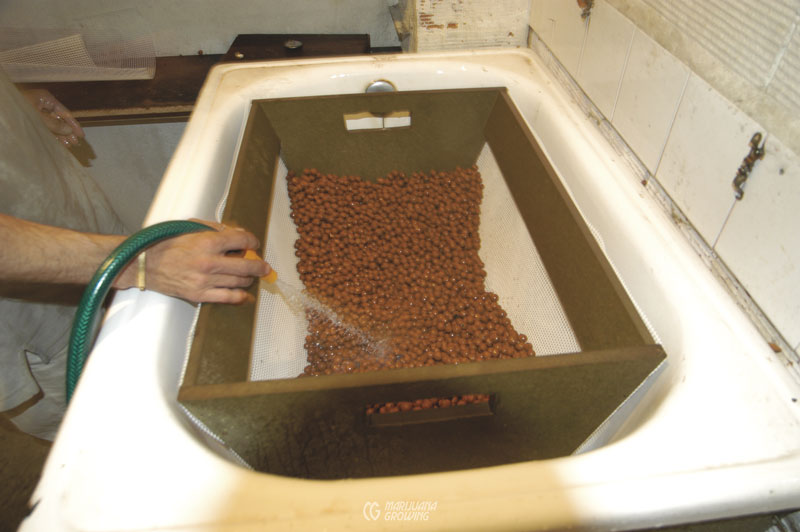
Expanded clay pellets are an easy substrate to wash and reuse. This gardener set a plastic grate inside a container. This allows him to rinse the clay pellets efficiently.
Sterilizing Substrates
Properly sterilizing a growing medium after use ensures that destructive microorganisms, including bacteria, fungi and pests and their eggs, will be eliminated. For most gardeners, sterilizing is easier and less costly, both economically and environmentally, than replacing the growing medium.
The most popular ways to sterilize substrates include bathing them in an antiseptic liquid such as laundry bleach, (hydrochloric) acid, or, my favorite, hydrogen peroxide (H2O2). Steam sterilization is also an option, but it is too much work for small gardens. Heating in an oven or with natural sunlight also cooks all the bad stuff out of a growing medium. Ultraviolet (UVC) light has limited applications and is seldom used to sterilize growing mediums.
Sterilizing works best on rigid (aggregate) growing mediums such as gravel and expanded clay, which do not lose their shape. Sterilizing and reusing substrates such as rockwool, coconut coir, peat, perlite, or vermiculite may cause them to compact and lose structure. Replace “spent” growing mediums to avoid problems caused by compaction.
Take the growing medium out of the hydroponic garden. Remove all dangling and easy-to-eliminate roots by hand before sterilizing. A 3- to 4-month-old cannabis plant can have a gallon (3.8 L) or more of root mass. Manually remove the mats of roots that are entwined near the bottom of the bed, and shake loose any attached growing medium. Pour growing mediums such as expanded clay and gravel through a screen placed over a large bucket. Most of the roots will stay on the screen. Latent, dead and decaying roots cause pest and disease problems and clog irrigation systems and drains. Substrates can also be washed in a large container such as a bucket, barrel, or bathtub. Washing works best with rigid substrates such as expanded clay. Roots float to the top and are readily skimmed off with a screen or by hand.
Once excess roots are manually removed, submerge the substrate in a sterilant such as a 10 percent laundry bleach (calcium or sodium hypochlorite), or mix a 5 percent solution of hydrochloric acid, the kind used in hot tubs and swimming pools. Place the substrate in a barrel or bathtub and soak for at least an hour. Pour, drain, or pump off the sterilant, and leach the medium with plenty of fresh water. Make sure to wash the harsh chemicals away so no future crops are damaged. It may be necessary to fill the bathtub with fresh water and drain it several times to rinse any residual sterilants from the substrate.
Hydrogen peroxide (H2O2) is an excellent sterilant for aggregate media. H2O2 solution breaks down naturally when exposed to air. It does not need to be rinsed out unless you are planting immediately.
Mix the solution at a 9:1 ratio, 16 ounces (47.3 cl) of 3 percent concentration H2O2 to 5 gallons (19 L) of water. Or dilute more powerful 35 percent hydrogen peroxide. Mix 4 ounces (12 cl) per 10 gallons (38 L). Wear gloves and protective clothing so 35 percent H2O2 does not touch skin.
Place the substrate in the bathtub, bucket, or barrel. Set a screen over the drain, and use the showerhead or a hose to wash the medium. The media must sit in the H2O2 solution for at least one hour to be sterilized.
Mix a bucket of dilute bleach solution to scrub walls, tables, pots, and floors. Use a 5 percent bleach solution to scrub down the garden room including the inside of growing beds, reservoirs, and system plumbing. Fill the reservoir with the dilute bleach mix, and cycle it through the irrigation system to sterilize. Pump the solution off. Avoid sending bleach solution down household drains, and definitely do not pump it into a septic tank; the nutrients will disrupt the chemistry. Fill the reservoir again and flush for at least an hour with plenty of fresh water to wash away any trace of bleach.
Once sterilized, lay out growing medium on the floor, and train an oscillating fan on it to dry.
Sterilizing substrates in the oven works for small amounts that are able to fit in the oven. First, roots must be removed and the medium rinsed with plenty of water. Next the medium is set on a baking sheet and placed in an oven at 250°F (121°C). Allow the substrates to bake for 2 hours. Check the temperature inside the substrate to ensure that it has reached 250°F (121°C).
The sun can also be used as a source of heat. Set growing media in the sun in a sealed plastic bag for several days. Place the media-filled bag in full sun, up off the ground. The temperature inside the bag and the growing medium will climb to 140°F (60°C) or more, enough to kill most all harmful pests and diseases.
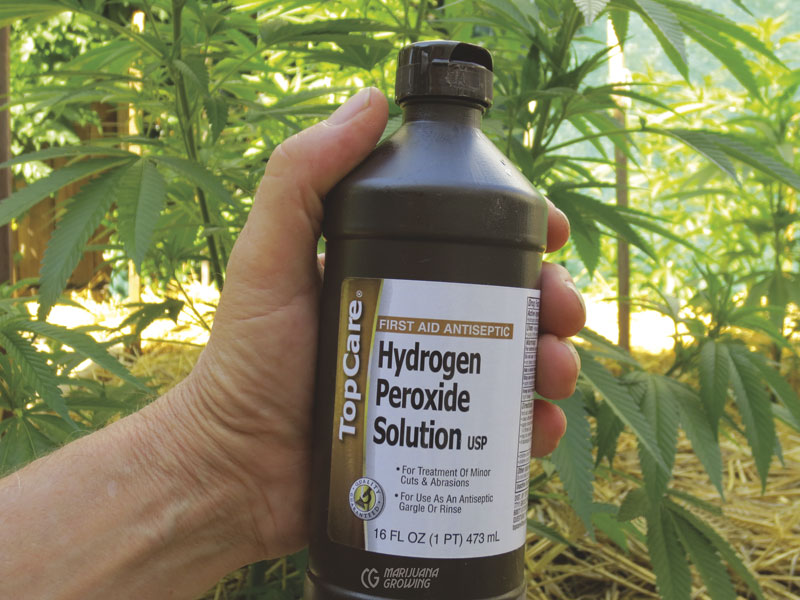
Hydrogen peroxide (H2O2) is one of the safest sterilants to use. But do not use H2O2 on or around live roots.
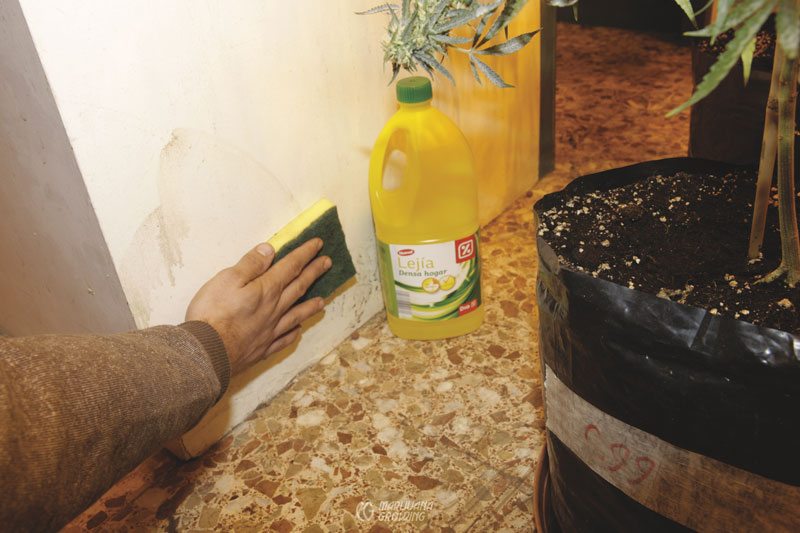
Wash garden room walls, floor, and other surfaces with a mild bleach solution to kill any bacteria, fungus, or insect eggs.
Irrigation
Irrigation volume and frequency depend on the crop, plant size, climate conditions, type of garden, kind of medium, and the root environment. Each one is as important as the next, and one functioning below optimum levels will drag others to the same level of malfunction. The type of medium is determined by needs of the crop and gardener. Roots need the correct ratio of air, water, and nutrients. Large, round, smooth particles of substrate drain rapidly and need to be irrigated more often, 4 to 12 times daily for 5- to 15-minute cycles. Fibrous mediums with irregular surfaces, such as vermiculite, drain slowly and require less frequent watering, often once per day or less.
Cannabis root systems require 100 percent humidity to keep tiny root tips from dying back. The minute tips are responsible for absorbing most of the minerals and water. Further up, root surfaces are more rigid and absorb much less nutrient solution. If root tips die, they must regenerate before being able to push forward into the medium.
During and soon after irrigation, the nutrient content of the bed and reservoir are the same concentration. As time passes between irrigations, the EC and the pH gradually change. If enough time passes between irrigations, the nutrient concentration might change so much that the plant is not able to draw it in.
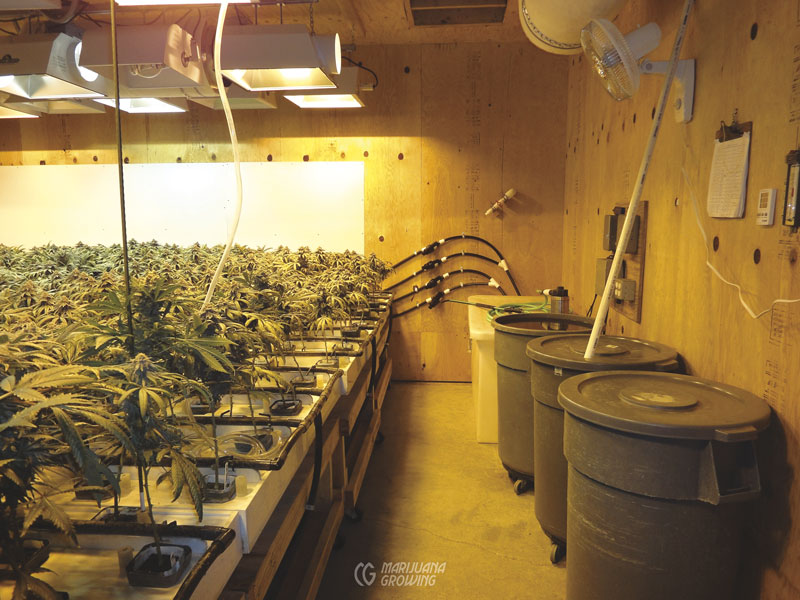
Beds in this garden are irrigated from the 300-gallon nutrient tank at the end of the room, on the right.
When minerals are depleted, root tips grow to find and take in more nutrients. When minerals and water are abundant, root systems do not grow and spread out. They do not develop a balanced relationship with green foliage aboveground. When this balance is disrupted and plants do not receive adequate nourishment, they become weak. Small containers must be irrigated more often than large containers, and the oxygen-to-solution balance is more difficult to maintain. Big root systems in large containers make it easier to maintain the oxygen-to-nutrient solution balance. Overall sativa and sativa-dominant varieties have a more extensive root system and use more water than indica and indica-dominant varieties.
Growing mediums that drain well can be watered for longer periods because excess water drains away quickly. Poor-draining mediums must be watered for shorter periods. As long as the drainage is good, it is difficult to overwater fast-growing cannabis. When the proper environment is maintained, virtually the only way to overwater is by saturating the medium for 20 minutes or longer, which drives out air and oxygen and drowns roots.
Rule of Thumb: 1 square meter (39.4 in per side) of indoor or greenhouse growing bed covered with foliage will use 4 to 7 quarts (3.8–6.6 L) of water a day. New plants in the same square meter that don’t cover table completely with foliage will use about 3 quarts (2.8 L) of water a day. This rule of thumb holds true whether there are 4 or 40 plants in the square meter quadrant.
Rule of Thumb: Irrigate soilless mixes when they are dry one-half inch below the surface. Stick your finger into the soilless medium to the first knuckle. If it is dry, plants need water.
Small plants with a small root system in small containers or rockwool cubes must be watered often. Water frequently—as soon as the surface dries out.
Flowering cannabis uses high levels of water to carry on rapid floral formation. Withholding water stunts flower formation. Plants that are exposed to wind dry out quickly.
Start irrigation cycles first thing in the morning; plants have used much of the solution during the dark of night. Even slow-draining media dry a little at night. Growing mediums that remain moist enough during the day may need irrigation only in the morning. Avoid watering growing mediums within a few hours of lights-out or nighttime. Excess solution in the growing medium at night displaces oxygen. A soggy medium that lacks air is cooler, and both conditions slow growth, weaken plants, and invite attacks by pests and diseases.
Irrigate mineral soils, soilless mixes, coco, etc., when about 50 percent of the total volume of water in the container is gone. To figure when the moisture level is at 50 percent, weigh the container when it is bone dry. Water it until saturated, let it sit for 10 minutes, and then weigh it again. The difference in weight is how much water the growing medium and container will hold. When half of this weight is reached, moisture levels are at 50 percent. For example, a 3-gallon (11.4 L) container full of growing medium weighs 10 ounces (29.6 cl) when bone dry and 60 ounces (177.4) when saturated with water. We know the container can hold 50 ounces (147.9 cl) of water. When the plant has used 25 ounces (73.9 cl) of water the growing medium is at 50 percent moisture level.
Once you have an idea of when and how much the plants need to be watered, it is a simple matter of picking up the containers to “weigh” them. When they are about 50 percent full, they need water. After experimenting with this “heft the pot” method for a while, you will have a feel for it and will soon be able to tip each pot to access its moisture level.
You can estimate the water needs of entire gardens can by weighing several containers and figuring the average weight. But the crop must all be the same age, size, light, and ventilation exposure, and so on.
Irrigate containers and let at least 20 percent of the solution flow out the bottom as runoff. The runoff solution will carry away any nutrients that build up in the growing medium.
Vertical Gardens: Indoors, grow bags, pots, tubes, or slabs can be positioned vertically around an HID to form a vertical garden. Short plants are usually placed at a 30-degree angle in the medium and fed individually with microirrigation. The runoff drains through the growing medium and back to the reservoir to be reused, or it drains to waste. Plants at the top of slabs receive less irrigation solution than those below. Solution dosage to individual containers should be controlled by individual emitters. When using DFT, solution depth is controlled by their degree of incline.
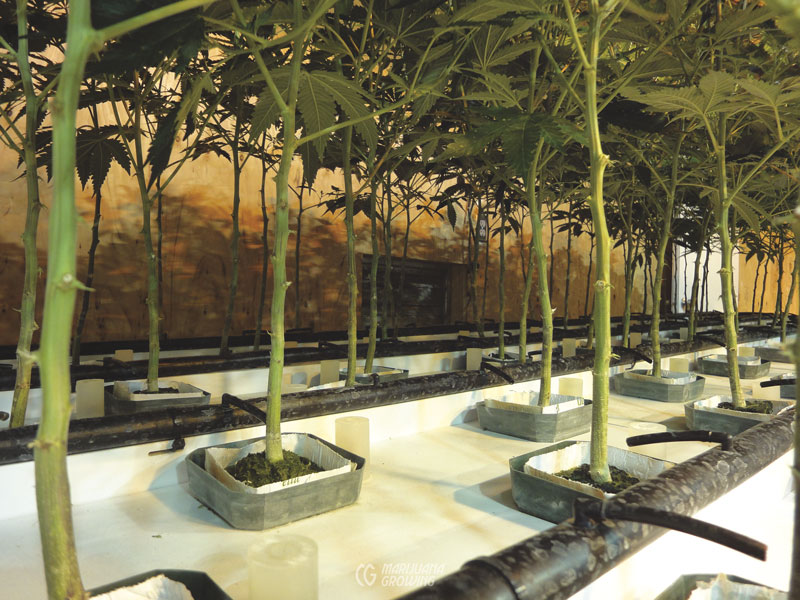
Short spaghetti tubes that come off a larger manifold supply nutrient solution to individual plants.
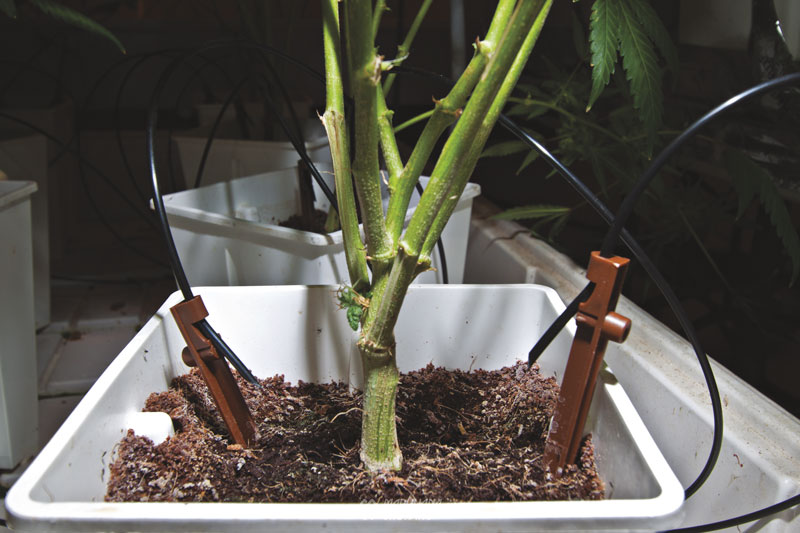
This plant is irrigated with two separate spaghetti tubes so that the entire growing medium will be evenly moist.
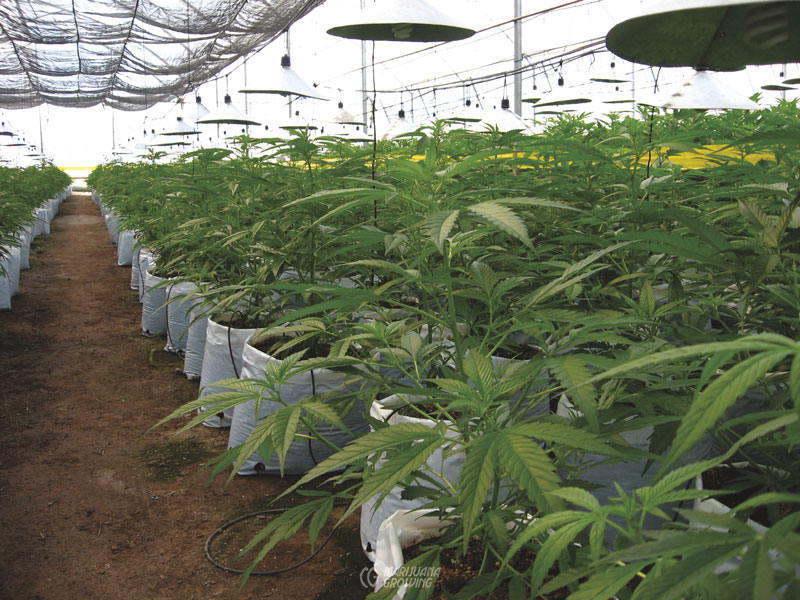
Keep containers in straight rows and arrange rows in a matrix when growing and watering. It is much easier to keep track of watered and fertilized pots when they are lined up in rows.
Water Supply
A readily accessible water source is essential. If a water tap or outlet is not located in or near the garden room, it is a good idea to plumb one into the area. Water weighs 8 pounds (3.6 kg) per gallon (3.8 L). It is much easier to transport water via a hose than it is to schlep it by hand.
If you are growing hydroponically and your water contains more than 300 ppm of dissolved solids (salts), it should be demineralized with reverse osmosis (RO) before using. If growing in mediums like coco, peat, or mineral soil, the tolerances for salts in the water are higher, and watering is more frequent.
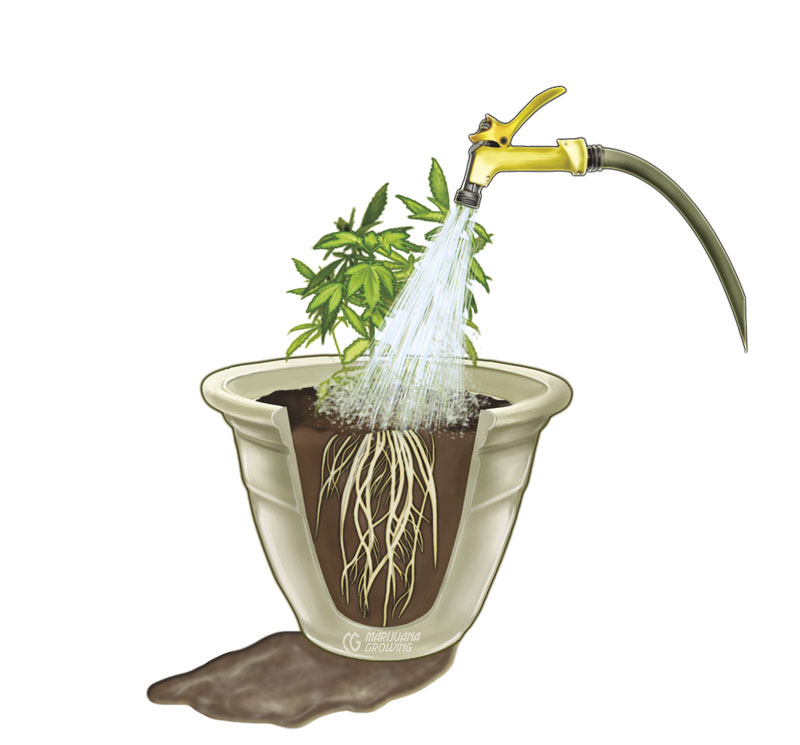
Leach growing medium as per “Leaching Growing Mediums” in chapter 21, Nutrients. Leaching must be completed in 20 minutes or less so that water does not displace oxygen in the substrate and drown roots. Leaching the growing medium monthly helps avoid nutrient excesses and deficiencies.

Spaghetti tubes direct nutrient solution to the base of each plant, ensuring complete wetting of the rockwool growing medium.
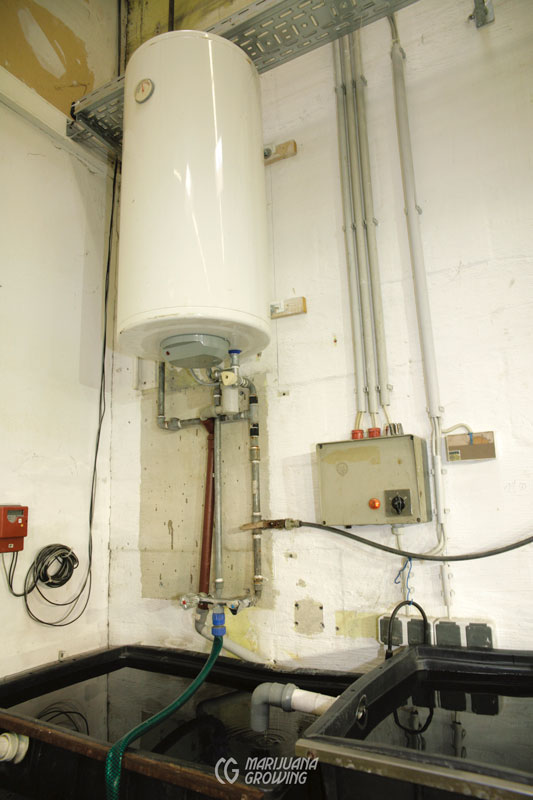
Hot water comes in very handy in all garden rooms. This large room is equipped with an electric water heater.
Even Solution Penetration
Use a moisture meter to test growing mediums for even nutrient-solution penetration. Insert the probe into the medium at several different points and levels to check for consistent readings. Dry pockets in growing medium will lead to dead roots. Direct top-feed emitters so that solution will percolate evenly down through mediums, ensuring even penetration to the entire root zone.
Cultivate the surface of soilless mixes to allow the water to penetrate evenly and guard against dry pockets. It also keeps water from running down the crack between the inside of the pot and the medium and then out the drain holes. Using soft-sided containers that conform to the shape of the contracting growing medium will also solve this problem. Gently break up and cultivate the top half-inch (1.3 cm) of the mix with your fingers or a salad fork, being careful not to disturb the tiny surface roots. Another option would be to apply a layer of mulch, which is my preference.
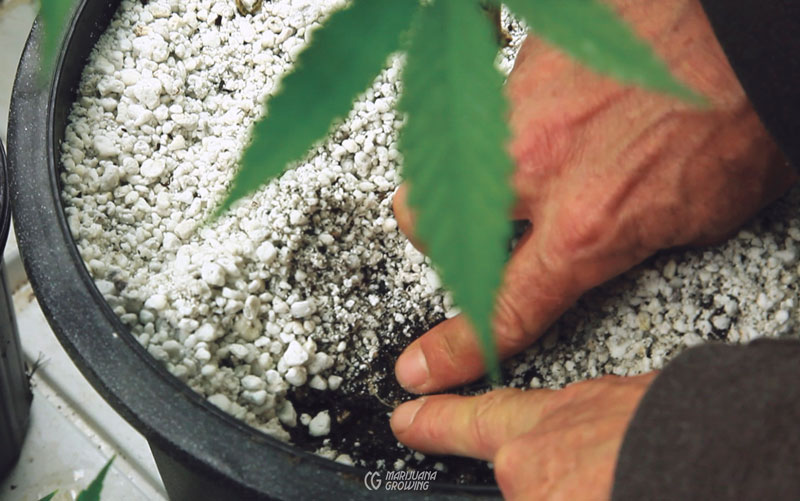
Spread a layer of perlite, expanded clay pellets, or plastic mulch across the substrate surface of hydroponic and container gardens to discourage algae growth. The mulch also protects surface roots from temperature extremes and the force of pelting water.
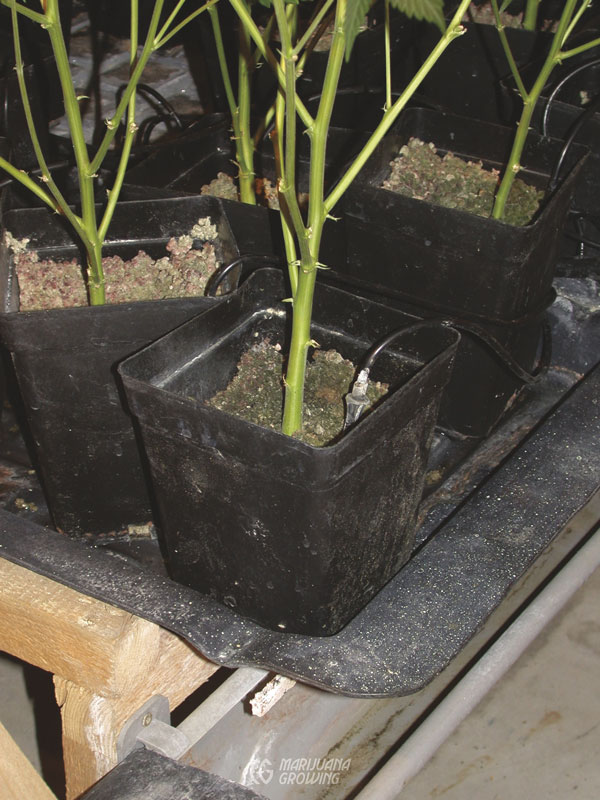
Using a spike, anchor spaghetti tubing in the growing medium. Drops, a spray, or a stream of nutrient solution will be emitted and will percolate down through the growing medium.
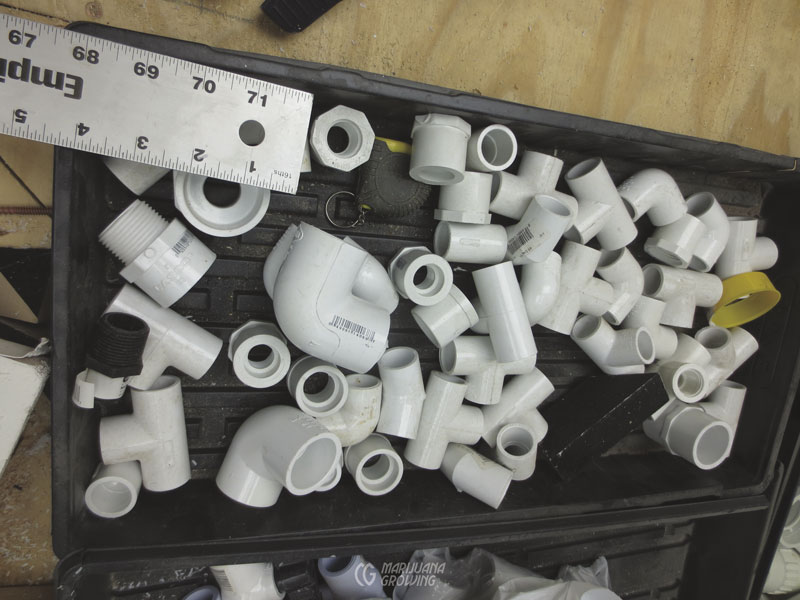
PVC pipe is simple to work with and relatively inexpensive. PVC pipe can be easily plumbed into the garden room from an outside source of water.
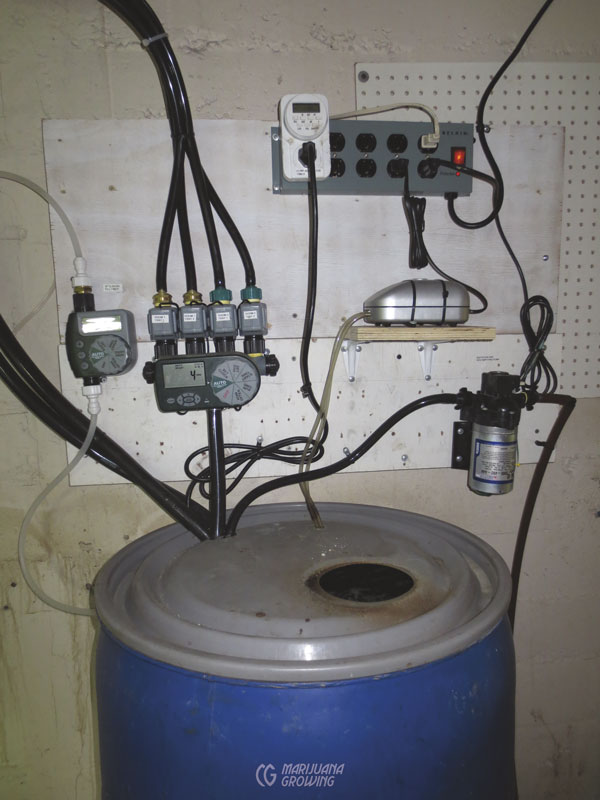
Solenoid valves and a small timer control nutrient supply to 4 different garden beds, as shown here.
Microirrigation
Microirrigation delivers water or nutrient solution one drop at a time (drip irrigation), as a spray, or in a stream to individual plants. Such systems often deliver low volume and require low-pressure plastic pipe with friction fittings. When under high-pressure, irrigation fittings must be able to withstand the added stress. Microirrigation systems can be used with RTW or recirculating systems.
Automatic microirrigation systems require a pump, reservoir, and delivery system. Top-feed systems require a main feeder tube or manifold and individual spaghetti tubes and emitters. Nutrient solution is pumped through a pipe and out the emitter one drop at a time or at a fixed rate. The emitters that are attached to the main hose are spaghetti tubes, nozzles, or drippers that meter out a specific volume of solution. Microirrigation kits are available at garden stores and building centers. You can also construct your own microirrigation system from component parts.
Note: See “Ebb-and-flow Gardens” in this chapter for irrigation guidelines.
Microirrigation systems offer several advantages. Once set up, they lower watering maintenance. Fertilizer may also be injected or nutrient solution pumped into the irrigation system (aka fertigation). Pay attention to the pressure of the water in the main supply tube, and make sure all the emitters have the same amount of pressure so they all deliver the same volume of solution. When setting up a microirrigation system, make sure the growing medium drains freely to prevent soggy substrate or salt buildup. If you are growing many different varieties of plants, , they may have different water and fertilizer needs. If you are growing plants that are all the same variety, age, and size, an automatic microirrigation system works very well.
Microirrigation systems cost a few more dollars to set up, but with the consistency they add to a garden, their expense is often paid off by a bountiful yield. Vigilantly monitor all vital signs: moisture, pH, ventilation, humidity, and so on. Everything still needs to be checked and adjusted daily. Automation, when applied properly and monitored, adds consistency, uniformity, and usually a higher yield.
A microirrigation system attached to a timer disperses nutrient solution at regular intervals. If using such a system, check emitters and substrate daily to ensure that plants are watered and that all the substrate receives solution evenly. Microirrigation systems are very convenient—often indispensable when you have to be away from the garden for a few days. Avoid leaving automatic irrigation systems unattended for more than 3 to 4 consecutive days, or you could return to a surprise!
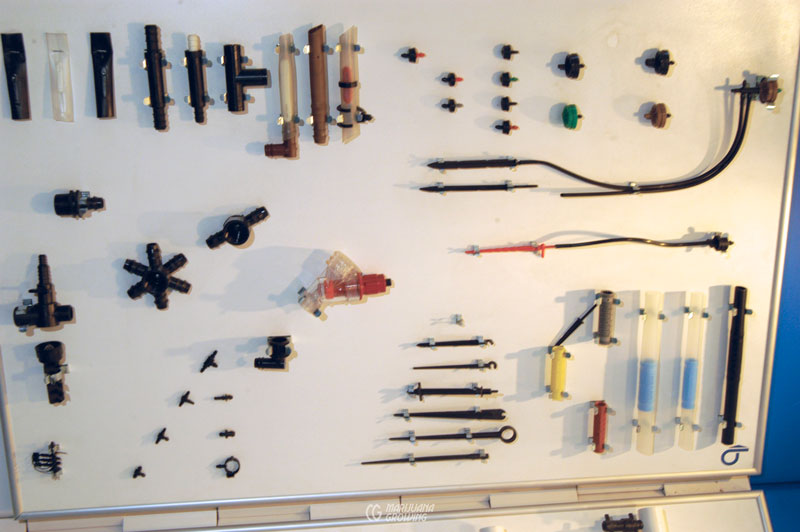
This selection of irrigation nozzles and supplies is outstanding. Always choose nozzles and emitters that are difficult to plug and easy to clean. And always use a filter!
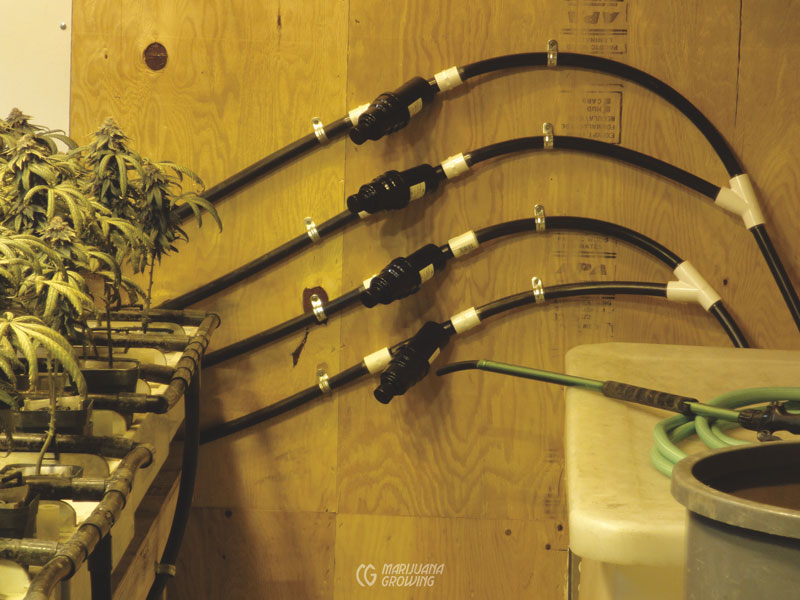
Each irrigation supply line has its own filter. The filters are easy to monitor and access. A clean filter will help you avoid wasting time troubleshooting irrigation emitters and subsequently unplugging them.
Container Culture and Hydroponic Nutrient Disorders
Hydroponic and container culture nutrient disorders show the same signs in plants grown in soilless or soil gardens. But the causes are often specific to hydroponics or container culture. A regular maintenance schedule and adhering to “Guidelines for Success,” (on the next page), will help avoid nutrient deficiencies and associated cultural problems.
If nutrient deficiencies or excesses affect more than a few plants, check irrigation fittings to ensure that all plants are receiving a full dose of solution. Check substrate around affected plants to ensure that nutrient solution is penetrating the entire medium and all roots are moist. Check the root zone to ensure that roots have not plugged drainage conduits and are not standing in stagnant solution.
Nutrient disorders most often affect plants of a given variety of cannabis at the same time when they are receiving the same nutrient solution. Different varieties often react differently to the same nutrient solution. Check with seed purveyors for the fertilization recommendations of specific varieties.
Overfertilizing during vegetative growth is a common error. Typically, signs of overfertilization and toxic nutrient lockup appear between the sixth and eighth weeks of growth. It can cause excessive lush leafy growth and can result in overdoses and deficiencies of different nutrients. Flower formation is then often slow and weak.
Hydroponics and container culture provide the means to supply the maximum amount of nutrients a plant needs but can also starve plants to death or rapidly overfertilize them. Many automated gardens are designed for high performance. If something malfunctions—the electricity goes off, the pump breaks, a drain gets clogged with roots, or there is a rapid fluctuation in the pH—major problems could result. A mistake could kill plants or stunt them so seriously that they cannot recover before harvest.
Run-to-waste (RTW) gardens tend to have fewer problems—toxic substrate, pH and EC imbalances, temperature issues, and so on—than recirculating systems do. RTW gardens also use about the same volume of nutrient as recirculating systems use.
Plants absorb different nutrients at different rates, and some nutrients become unavailable before others, creating an imbalanced solution. The best form of preventive maintenance is to change the solution often. Avoid nutrient problems in recirculating systems by changing the solution in small and medium-sized reservoirs every week, and remember to top off reservoirs with fresh water to compensate for water used by plants. Large reservoirs can be changed less often when monitoring nutrient content very carefully.
Nutrient imbalances also cause pH to fluctuate, usually to drop. Avert problems by using pure nutrients and leaching the substrate with fresh water between nutrient-solution changes.
Change the nutrient solution if there is a good flow of nutrient solution through the root zone but plants still appear sickly. Make sure the pH of the water is within the acceptable 5.5 to 6.5 range before adding new nutrients.
Hydroponic gardens have no soil or soilless mix to buffer the uptake of nutrients. This causes nutrient disorders to rapidly manifest as problems like discolored foliage, slow growth, or spotting. Novice gardeners must learn to recognize nutrient problems in their early stages in order to avoid serious problems that cost valuable time for plants to recover. Treatment for a nutrient deficiency or excess must be quick and certain. Once treated, plants take several days to respond to the remedy. For a fast fix of some nutrients, foliar feed plants. See “Foliar Feeding” in chapter 21, Nutrients, for more information on nutrient disorders.
Diagnosis of nutrient deficiency or excess becomes difficult when two or more elements are deficient or in excess at the same time. Symptoms might not point directly at the cause. The easiest way to solve most unknown nutrient deficiency syndromes is to change the nutrient solution.
Plants do not always need an accurate diagnosis when the nutrient solution is changed. Overfertilization, once diagnosed, is easy to remedy. Drain the nutrient solution. Flush the system at least 3 times with fresh, dilute (5–10 percent) nutrient solution to remove small amounts of lingering sediment and salt buildup in the reservoir. Replace with properly mixed solution.
The proper balance of nutrients in a solution does not guarantee that all nutrients are available to roots for assimilation. Inside plant tissue, deficiencies occur even when plants have the proper balance of nutrients. Calcium is the most common nutrient found deficient. It results from transport problems within the plant. Leaf tip burn and dry burnt leaf margins are the most common symptoms of calcium deficiency. This sort of calcium deficiency in plant tissue is difficult to diagnose when calcium is abundant in the nutrient solution. Frequently misdiagnosed, calcium deficiency within plant tissue is often confused with damage resulting from chemical salt burn, temperature, or wind.
Tip burn starts on younger inner leaves. At first leaf tissue looks water-soaked, but then it turns brown and ultimately black. Cells break in affected areas causing cell fluid to leak out. The ruptured area is an excellent place for diseases like rot to start growing.
Coco coir contains large amounts of potassium. Calcium and magnesium uptake are affected by high levels of potassium. A nutrient solution that is formulated specifically for coco coir will ensure that cannabis receives the exact balanced blend of nutrients it needs.
The symptoms of calcium deficiencies show as contorted leaves early in older foliage. Tip burn on new growth is caused by the buildup of potassium. Calcium becomes less available and potassium accumulates at tips causing interior salt burn. This is not the normal salt burn that is caused when EC levels are too high in the medium. However, the issue can replicate if potassium is in excess and calcium is being applied correctly. In other words, potassium toxicity is the actual problem in coco.
Do not confuse other problems such as windburn, lack of light, temperature stress, or fungi and pest damage with nutrient deficiencies. But these cultural issues could very well be the cause of nutrient deficiencies. Such problems usually appear on individual plants that are most affected. For example, foliage next to a heat vent might show signs of heat scorch, while the rest of the garden looks healthy. Or a plant on the edge of the garden might be small and leggy because it receives less light or a lower temperature.
Guidelines for Success
- Mix nutrients with low-EC or RO
water. - Keep solution temperature about 60°F
(15.6°C). - Use sterile growing medium.
- Calibrate electronic DO, EC, and pH
meters before use. - Regularly measure and rectify DO,
EC, and pH in reservoir, media, and
runoff. - Use high-quality hydroponic nutrients
designed to grow cannabis. - Keep growing area clean.
- Use a black or opaque reservoir with
a lid. - Aerate nutrient solutions continually
(24/7) in solution culture gardens. - Aerate nutrient solutions in hydroponic
and container culture gardens
during daytime hours. - Change nutrient solution and clean
the reservoir weekly in recirculating
systems. - Regularly check the irrigation system
for blockages and leaks.
Main Reasons Nutrient Solutions
Create Problems
- Imbalanced pH
- Inaccurate pH or EC meter
- Nutrient solution is too concentrated
or imbalanced - Input water has too many dissolved
solids - Nutrients combine and precipitate,
becoming locked out - Temperature is too high and lacks
dissolved oxygen - Temperature is too cold and slows
root system functions, including
water and nutrient uptake
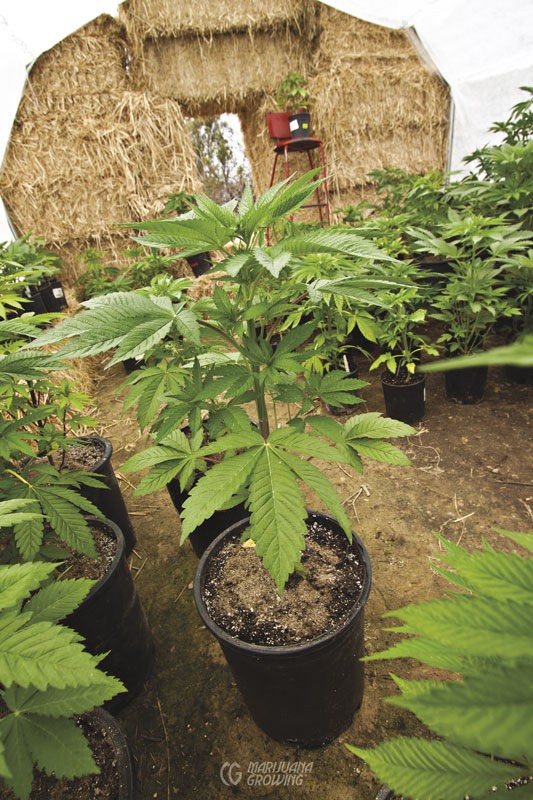
Keeping plants strong and healthy is the first defense against nutrient and culture disorders.
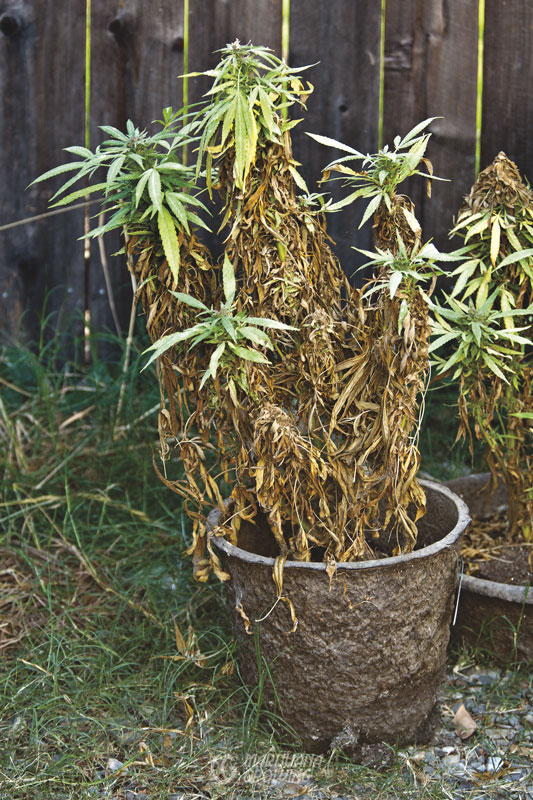
This sad plant is far from strong and healthy!
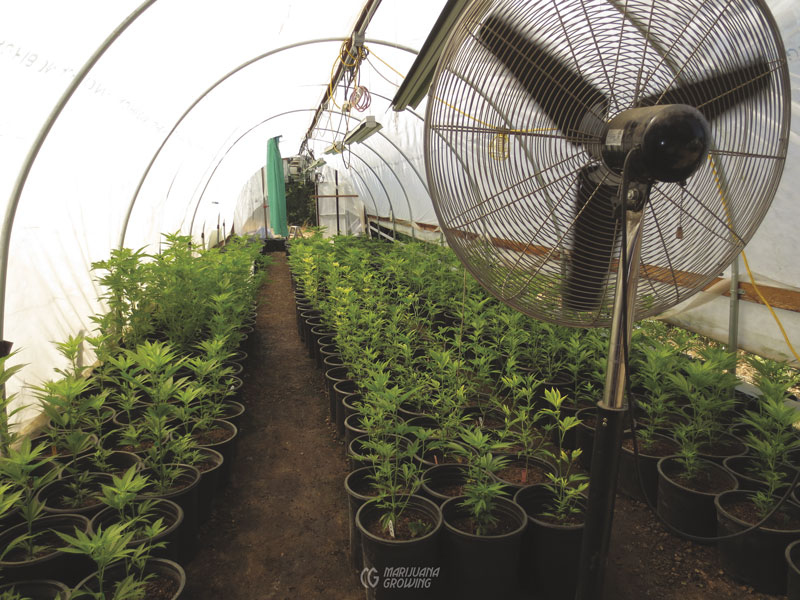
This greenhouse full of clones is growing in a perfect environment.