Garden rooms require a secure space, consistent environment, and a regular maintenance schedule. They also increase your carbon footprint. Climate, consistency, and security are the best reasons to garden indoors. Medical cannabis can also be started in a garden room and moved into a greenhouse or outdoors. Plants get an early start with minimal environmental impact when moved outdoors.
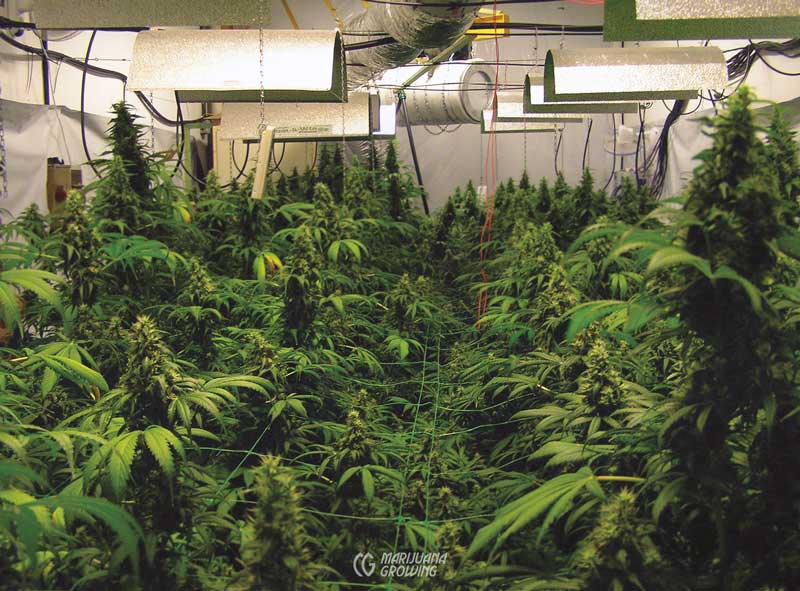
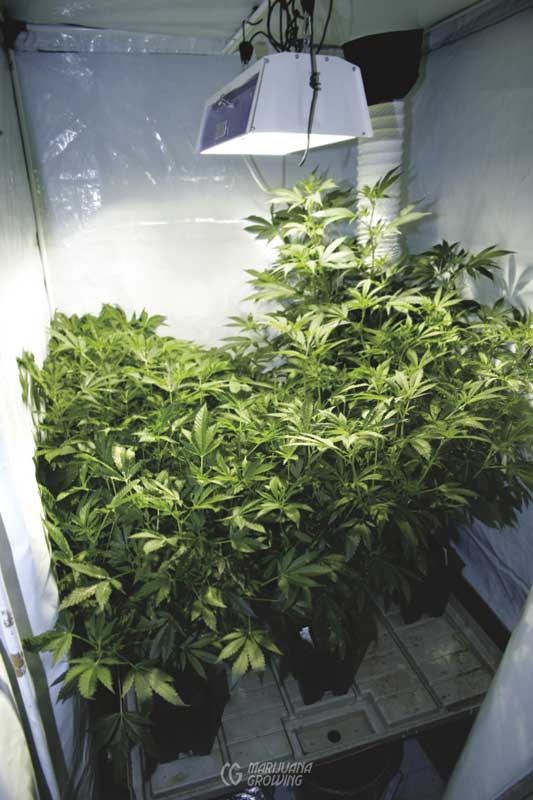
Growing an indoor garden like this from start to finish requires an investment of time, money, planning, and hard work.
To set up a garden room, you must first assess needs and desires. How much medical cannabis do you want to grow? How much time, space, and money are you able to invest to achieve this goal? Do you want to build the garden room, or do you prefer to purchase a prefabricated “grow closet?” Building a garden room takes time, skill, and a budget. The room will also need adequate electrical power, an air ventilation outlet, and a source of clean water.
Your personality traits and habits are also important to consider. Do you have a regular schedule? Do you have enough time to dedicate to this project? Do you start projects and tend to not finish them? Are you away from home several days at a time? All of these factors figure into your ability to maintain an indoor medical cannabis garden.
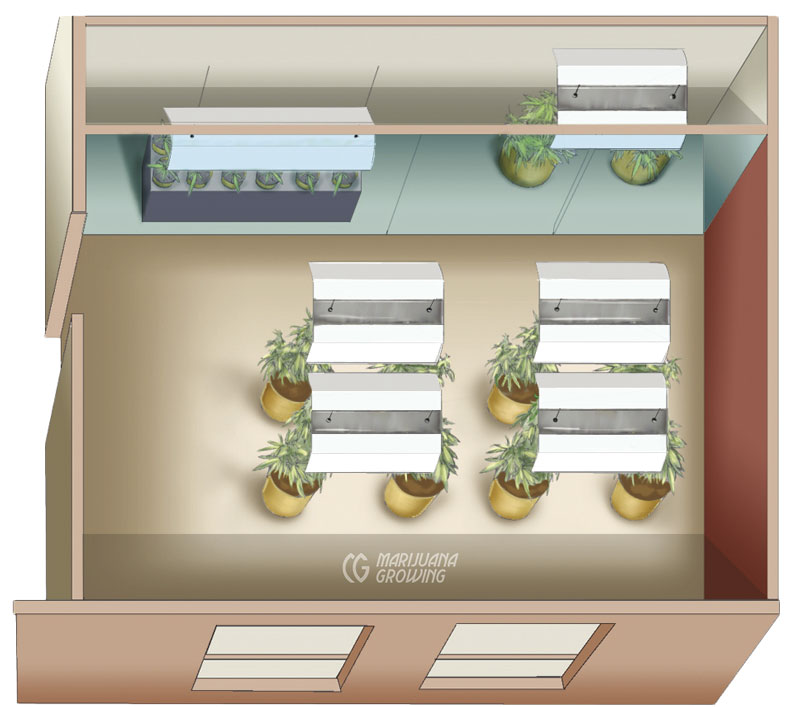
You will have to make your own clones if a source of clones is not readily available. You will have to divide the room in two to form a clone/mother room and a fl owering room. The harvest can be periodic or perpetual.
Once divided, the rooms need filters and vent fans, circulation fans, hygrometers/ thermometers, and sources of water and electricity.
The size of the garden space dictates the type, wattage, and number of lamps. The most efficient lights with the highest lumens per watt conversion include CFLs (compact fluorescent lamps) and HIDs (highintensity discharge lamps). CFLs are available in various lengths and wattages. See chapter 17, Light, Lamps & Electricity, for more information on each type of lamp.
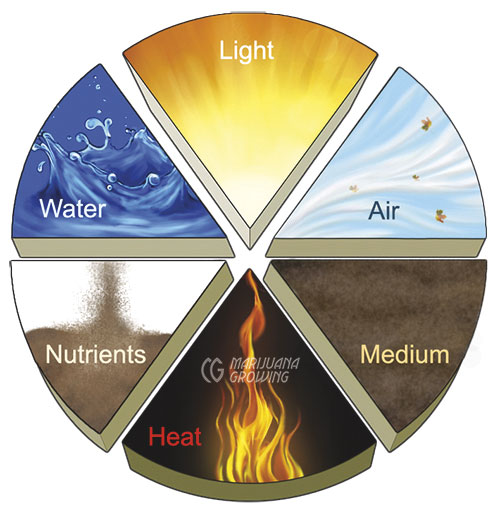
The goal of the garden room is to supply everything that medical cannabis needs to grow well.
Air 20%
temperature
humidity
CO2 and O2 content
Light 20%
spectrum (color)
intensity
photoperiod (hours of light per day)
Water 20%
temperature
pH (a measure of acidity or alkalinity)
EC (electrical conductivity)
O2 content
Nutrients 20%
composition
purity
Growing Medium 20%
air content
moisture content
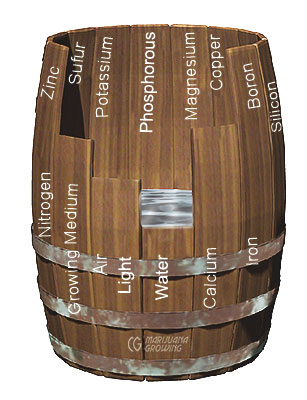
This barrel full of water illustrates that canna- bis will grow only as fast as its most limiting factor. Light, air, and imbalanced soil are most often the factors that limit growth indoors.
Carbon Footprint
According to a study by Evan Mills, PhD*, indoor cannabis gardeners use 1 percent of all electricity in the USA, shelling out $5 billion dollars to electric utility companies every year. This is the equivalent use of 2 million average households. Approximately 22 billion kilowatt hours are consumed. California, one of 16 states to allow cultivation of medical cannabis, is estimated to consume 3 percent of all electricity in the state. Gasoline and diesel electric generators use about 140 gallons (530 L) of fuel to produce 1 plant.
*Read the summary and full report, Energy up in Smoke: the Carbon Foot- print of Indoor Cannabis Production, at http://evan-mills.com/
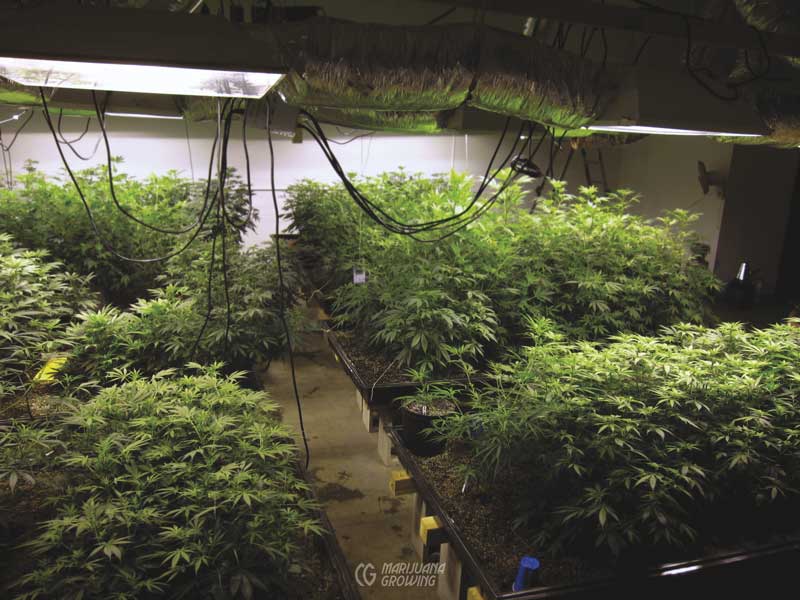
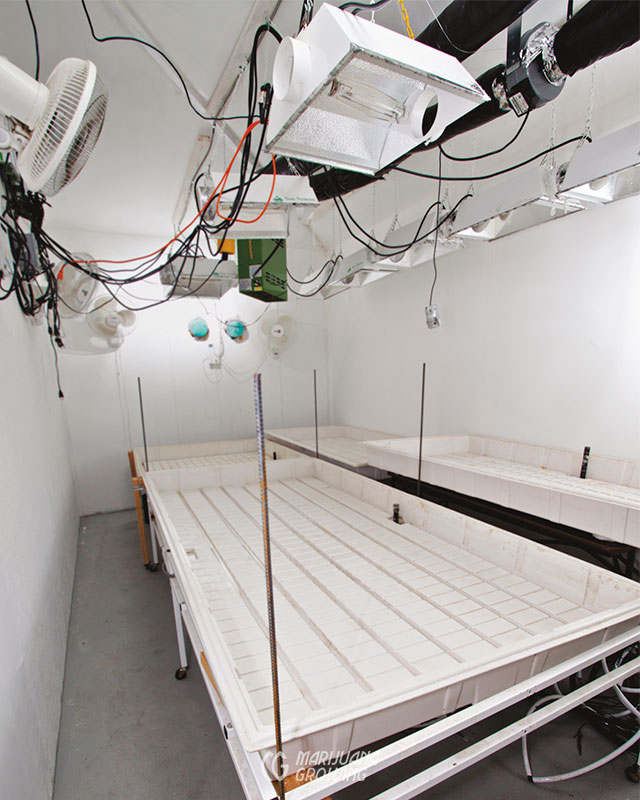
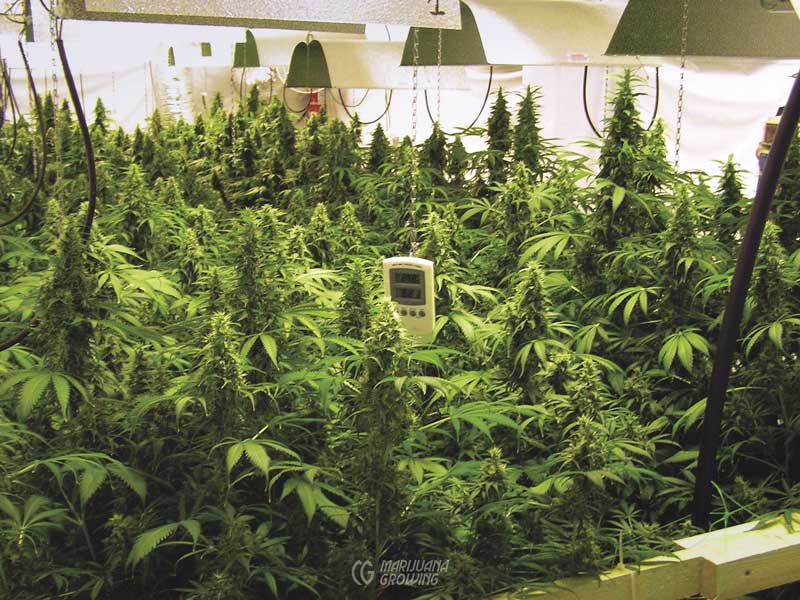
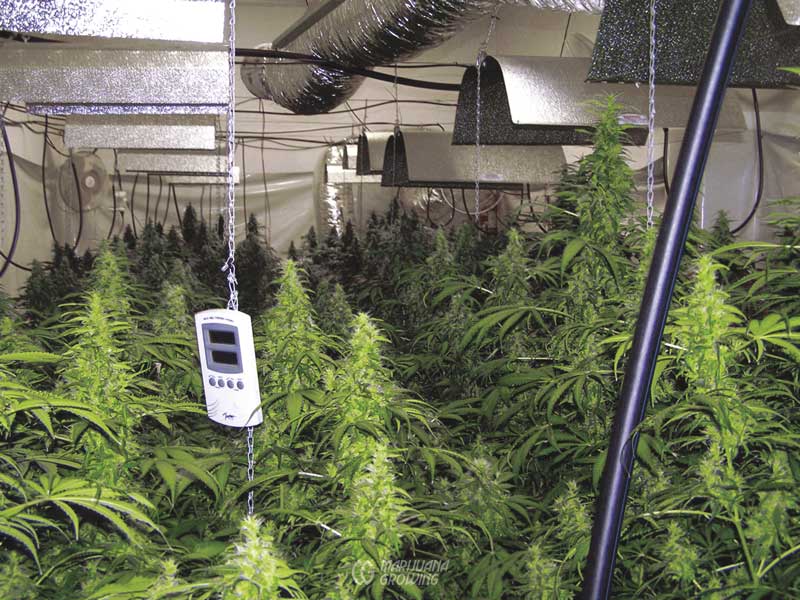
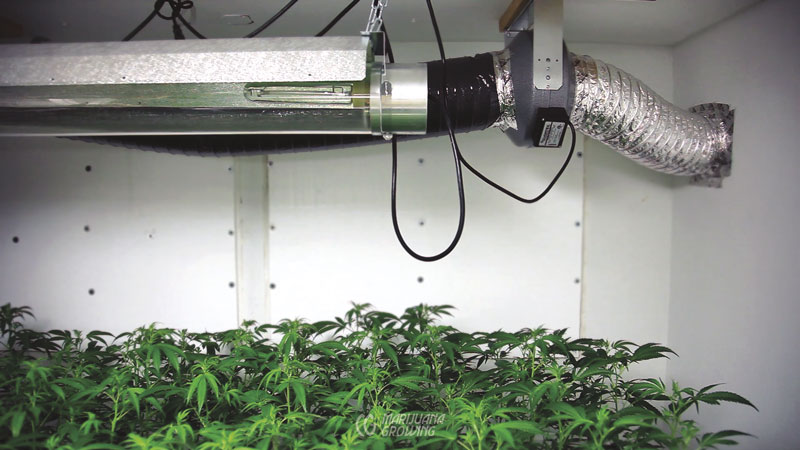
Even efficient indoor rooms like this one create a carbon footprint. Fortunately, these plants will be moved outdoors in the coming weeks.
Gardeners cultivate medical cannabis indoors to produce highquality crops and keep their highvalue produce from thieves. Keeping cannabis illegal increases the carbon footprint of gardeners. Criminalizing cannabis contributes to long driving distances, odor and noise suppression, and offgrid fossil fuel power production.
Reduce your carbon footprint by reducing your use of electricity, gas, and diesel fuel. Promote renewable energy generation. Use indoor growroom heating, cooling, and lighting systems more effi ciently. Install photovoltaic (PV) solar panels..
More efficient growing practices reduce carbon footprints, as does using lower-wattage lamps and fewer electrical and fossil fuel–using devices. Employing all the natural principles possible will help lower carbon footprints. Human caloric energy is much less expensive than fossil fuel energy, and we can make more human energy quickly, but fossil fuel energy takes a very long time to recreate. Growing medical cannabis outdoors eliminates most costs other than for a few tools, transport, water, soil amendments, and fertilizer.
Mix your own fertilizers from simple, readily available elements. When you purchase local ingredients and mix your own organic fertilizers, you are supporting local industry and farmers. You are also lowering your overall carbon footprint by decreasing transport, packaging, and sales costs.
Use online tools to qualify your carbon footprint. Enter information on electricity, gas and diesel fuel usage, vehicle fuel consumption, and renewable energy generation to measure your total carbon footprint. Take a couple of minutes to fill out the Nature Conservancy’s carbon footprint calculator to get an idea of the environmental waste you produce.
Closed (Sealed) Rooms
Closed or sealed garden rooms have most all of the qualities found in a phytotron, a scientific growth chamber, and they create a very big carbon footprint. Just like a phytotron, precise control of each factor—light, temperature, humidity, CO2, and so forth—can be individually controlled in a closed room. The room is sealed completely so all air that enters and exits is controlled. Targeted specifically at the high-tech gardener, sealed rooms are for gardeners with advanced skills.
The room must be sealed completely so that no air enters or exits. Caulk all corners and put weatherstripping around doors. Some gardeners install a vent fan to create a very small amount of negative pressure. An air conditioner is essential to supply fresh filtered air.
A sophisticated air filter can be installed to scrub ethylene, nitrous oxides, and other contaminants such as fungi from the air in the room and precisely control fresh air exchange.
This enclosed room has its ballasts outside so the entire room can be sealed off. In fact, a fire started in this room several months before this photograph was taken. Since the room was tightly sealed, limited oxygen was available and the fire went out. After the fire, the gardener moved the source of the fire—ballasts— out of the room. Do not count on fires putting themselves out in sealed rooms, however. This gardener got lucky!
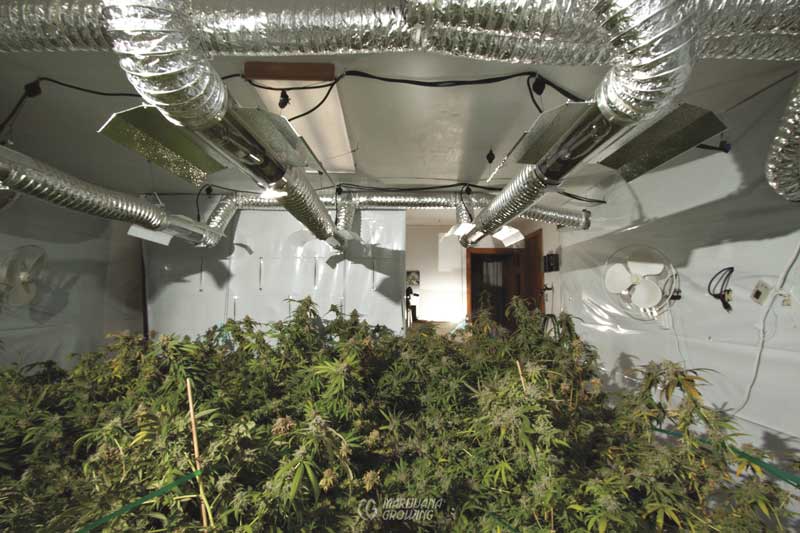
This sealed room is set up and ready for the gardener to bring in clones and start growing. The entire room is spotless and free of pathogens.
| RECOMMENDED BTU REQUIREMENTS FOR A/C IN SEALED ROOMS | ||||||
| Cumulative Watts | A/C Btus Moderate Temp. | A/C Btus Low Temp. | ||||
| 1 | 1.000 | 600 | 4.000 | 2.400 | 3.300 | 2.000 |
| 2 | 2.000 | 1.200 | 8.000 | 4.800 | 6.600 | 4.000 |
| 3 | 3.000 | 1.800 | 12.000 | 7.200 | 9.900 | 6.000 |
| 4 | 4.000 | 2.400 | 16.000 | 9.600 | 13.200 | 8.000 |
| 5 | 5.000 | 3.000 | 20.000 | 12.000 | 16.500 | 10.000 |
| 10 | 10.000 | 6.000 | 40.000 | 24.000 | 33.000 | 20.000 |
A 20-pound CO2 tank lasts two weeks in a sealed room with ten 1000-watt lamps. The room must be equipped with a big air conditioner to adequately dehumidify and cool the air. The grower must figure out how many watts the air conditioner uses, and how much it will cool the room.
| Fuel Type | Btus per Unit of Fuel |
| shelled corn | 6,300 Btus per pound |
| propane | 91,500 Btus per gallon |
| natural gas | 100,000 Btus per therm |
| kerosene | 127,000 Btus per gallon |
| electricity | 3,413 Btus per kilowatt hour |
GrowBots are able to perform robotic control, including remote iPhone video monitoring. A fully equipped 12-light grow room costs $80,000 USD and has a big carbon footprint. The initial out-of-pocket cost is more than $6,500 per installed 1000-watt lamp. It will take two perfect and heavy harvests to cover the initial cost— not including genetics, growing supplies, and electricity. Turnkey convenience is expensive in both money and carbon footprint. A small single-light homemade semi-sealed garden room costs about $1,000 USD to set up and performs nearly the same level of control.

Plan the garden room on paper first.
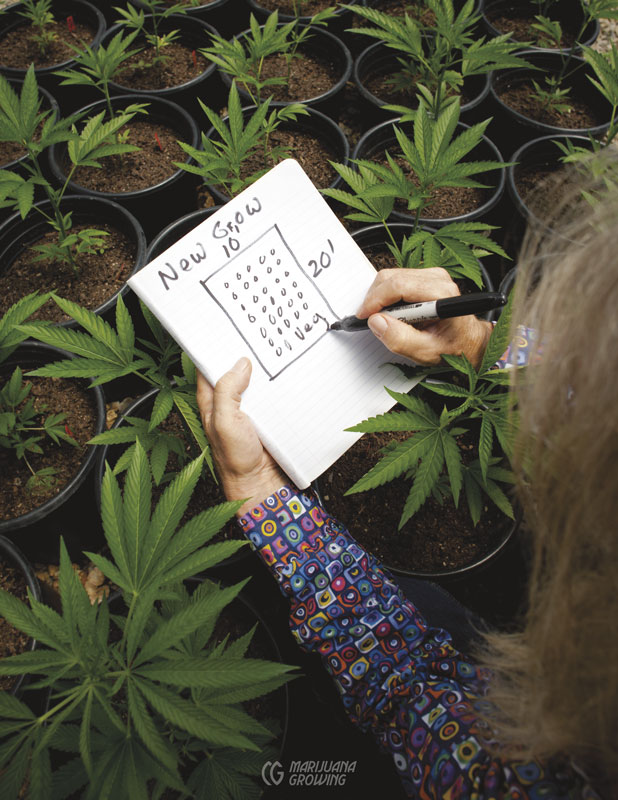
Make a rough sketch of the garden room showing lights, plants, fans, etc.
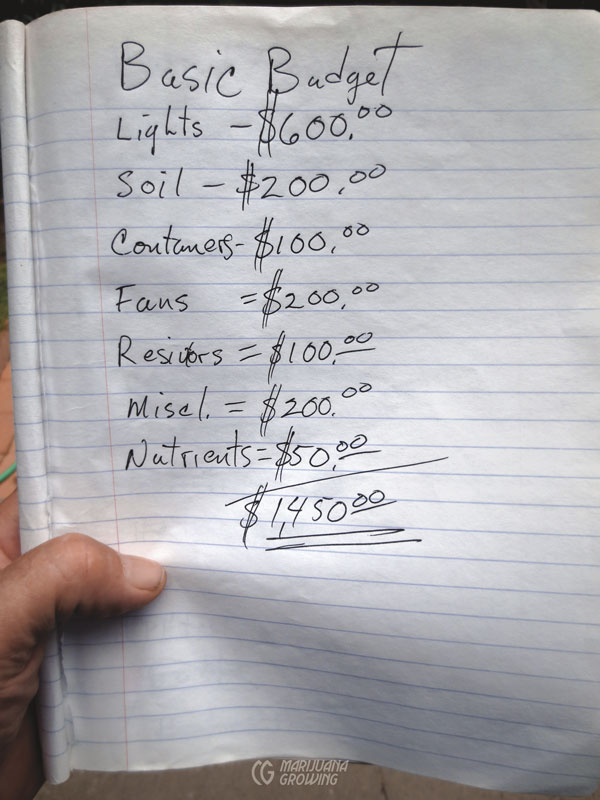
First make a rough budget to get an idea of future expenses. Next make a detailed budget that fits your needs.
Setting Up the Garden Room: Step-by-Step
Set up the garden room and make sure each step is completed before introducing plants. Construction requires space, a financial budget, and planning. A garden room under construction is a terrible environment for plants. Once the garden room is set up and totally operational, you will be ready to move in plants and start growing.
Step One: Define Needs and Desires
Needs and desires are at the basis of a garden room. The first decision is whether or not to purchase a prefabricated garden room. Start shopping by typing “garden closet,” “garden tent,” or “garden box” into an Internet search engine. Garden closets with flexible plastic walls are the most economical. Fixed-wall (rigid) models are more expensive. If this is your first indoor garden, consider starting with a simple soil garden rather than more expensive and often complex hydroponics.
Take an inventory of the prerequisites to cultivating a medical cannabis garden.
Needs and desires:
1. Legal medical gardener card
2. Time to dedicate to a small, medium, or large garden
3. Financial budget
4. Desired harvest
5. Available space indoors, in a greenhouse, or outdoors
How much cannabis is necessary to fulfill your patient’s medical needs? Will you need 1 ounce or 6 pounds (28 gm or 2.7 kg) every month to satisfy patient needs? A properly managed room with a perpetual crop using one 600-watt flowering lamp and two 65-watt compact fluorescent lamps in a garden space of 4 × 4 × 8 feet (1.2 × 1.2 × 2.4 m) will produce from 0.25 to 0.5 pounds (113– 227 gm) every month when using clones purchased at a medical dispensary. Buy clones at medical cannabis dispensaries for about $15 USD each. When properly managed, growing 16 clones to harvest 4 to 6 times every year under a 600-watt HID will yield 4 to 6 pounds (1.6–2.7 kg) of dried flower tops and about the same in leaf annually.
Setting up a small indoor garden usually takes a full weekend. Plan to dedicate about 2 hours per week to maintaining a small garden. Budget 1 hour per HID lamp per week when maintaining larger gardens. Maintenance time will fluctuate from planting to harvest. Maintenance consists of fertilizing and watering by hand or automatically, staking plants, measuring growth, cleaning up, and making sure all systems are functioning well and all plants are healthy.
| Flowering Time: 60 to 70 days | ||
| Watts | Yield gm | Yield oz |
| 200 | 100-200 | 3.5–7.0 |
| 400 | 200-400 | 7.0–14 |
| 600 | 300-600 | 10.5–21 |
| 800 | 400-800 | 14–28 |
| 1.000 | 500-1.000 | 16–32 |
Step Two: Budget
Budget about $1,000 USD to construct a do-it-yourself indoor medical cannabis garden room. Budget $1,500+ if you purchase a prefabricated “garden closet.” This is an approximate budget for a 600-watt HP sodium lamp and two 65-watt CFLs and the necessary construction and growing supplies. If you are on a super tight budget, you can purchase secondhand equipment by applying ingenuity and finding deals. Of course costs will vary depending upon prices in your area and the components you need to purchase.
Step Three: Tools
There are some tools an indoor gardener must have and a few extra tools that make indoor horticulture much more precise and cost effective. The extra tools help make the garden so efficient that they pay for themselves in a few weeks. Procure all tools before bringing plants into the room.
If the tools are on hand when needed, chances are they will be put to use.
| EXPENSES FOR CONSTRUCTING A GARDEN CLOSET* | |||
| Equipment, Supplies, and Tools | Average | Economical | Used |
| grow lights | $300 | $200 | $50 |
| ventilation fan | $100 | $50 | $50 |
| circulation fan | $40 | $30 | $20 |
| charcoal filter | $200 | $200 | $50 |
| thermometer/ hygrometer | $30 | $30 | $30 |
| white walls | $30 | $20 | $0 |
| containers | $30 | $0 | $0 |
| soil or soilless mix | $30 | $20 | $20 |
| tools | $100 | $50 | $0 |
| fertilizer | $30 | $20 | $30 |
| construction supplies | $110 | $50 | $10 |
| Total (in USD) | $1,000 | $680 | $260 |
*Both financial and environmental costs increase as the level of sophistication increases. For example, if electricity costs $0.15 per kWh (1000 watts for 1 hour), then 30 days × 12 hours = 360 hours × $0.15 = $54 per month for electricity.
Electricity for 2 months of flowering would cost $108.
A hygrometer is a good example. If plants show signs of slow, sickly growth due to high humidity, most gardeners will not identify the exact cause right away. They will wait and guess, wait and guess, and maybe figure it out before a fungus attacks and the plant dies. When a hygrometer is installed before plants are brought into the garden room, the horticulturist will know from the start when the humidity is too high and is causing sickly growth.
Tools
Here are a few tools you will need to set up your garden room. I like to use both hand tools for small jobs and power tools when appropriate.
Tools Normally Needed
• saws – Japanese
• Two manual saws: one (flat) for cutting boards and one for cutting holes. (You can also use a power saw.)
• electric drill with a set of drill bits for wood, metal, and ceramic
• claw hammer
• manual screwdriver or battery-powered screwdriver
• hygrometer
• light meter
• moisture meter
• pH tester
• pliers
• pruners or scissors
• putty knife
• tape measure
• thermometer
• 400-watt lamp
• 15-watt timer
• 150-watt fan
Supplies Normally Needed
• pencil and notebook
• spray bottle
• biodegradable liquid dish soap
• indelible marking pens to mark distances and identify plants
• measuring cup and spoons
• butterfly screws
• butterfly bolts
• ceramic and wood screws
• screws and nuts for Mecalux
• Sheetrock screws
• cable ties
• wire ties
• duct tape
• Velcro to seal doors and section off rooms
• Visqueen plastic for walls
• Teflon tape to seal treads and prevent moisture leaks
• caulk
• plywood for ceiling
• several hooks to hang lamps, cords, timers, etc.
• 560 total watts of electricity
• yardstick (metrico) to measure plant growth!
Step Four: Site Selection
The location of the garden room is often an unused space in a home or outbuilding. The garden room will need irrigation water, air circulation and air exchange, grow lights, soil, and medical cannabis plants. Walls and ceilings may need to be insulated to facilitate regulating temperature. The flowering room space should be a minimum of 5 feet (1.5 m) high to allow space for containers, lights, and maximum plant growth.
Clone gardens using fluorescent lamps can have a low, even profile so that light is best used. Four basic locations for a garden room include: basement, attic, ground floor, and outbuilding.
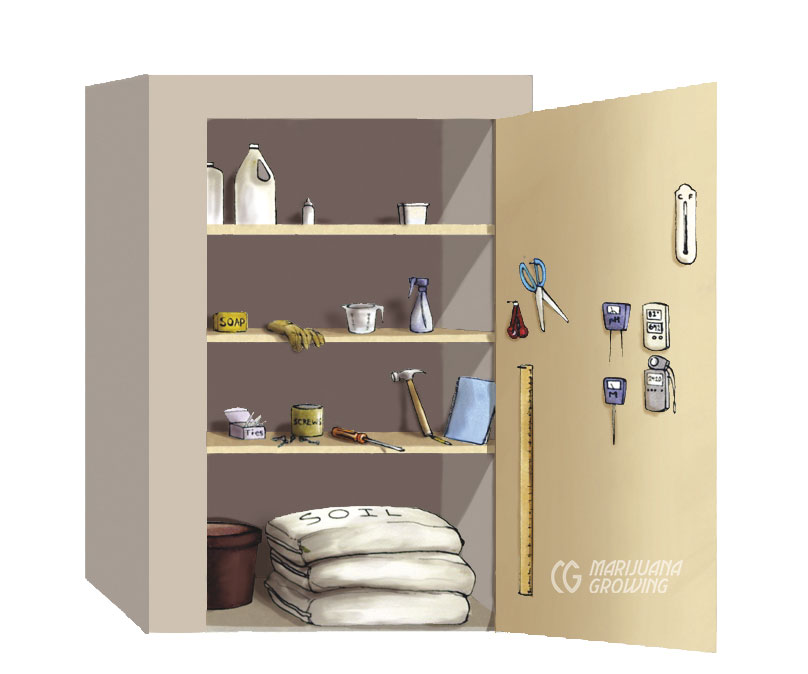
Keep tools and supplies organized in a closet.
Step Five: Design the Room
UOnce you know how much room you need in order to grow, where you want to grow, and if you will need 1 garden room or 2, you are ready to design your garden or purchase a ready-made grow closet. I like to draw the room to scale on paper before constructing it so that I can figure out what will be needed to construct the room. In any event, constructing a garden room always takes more trips to the hardware and hydroponic stores than planned!
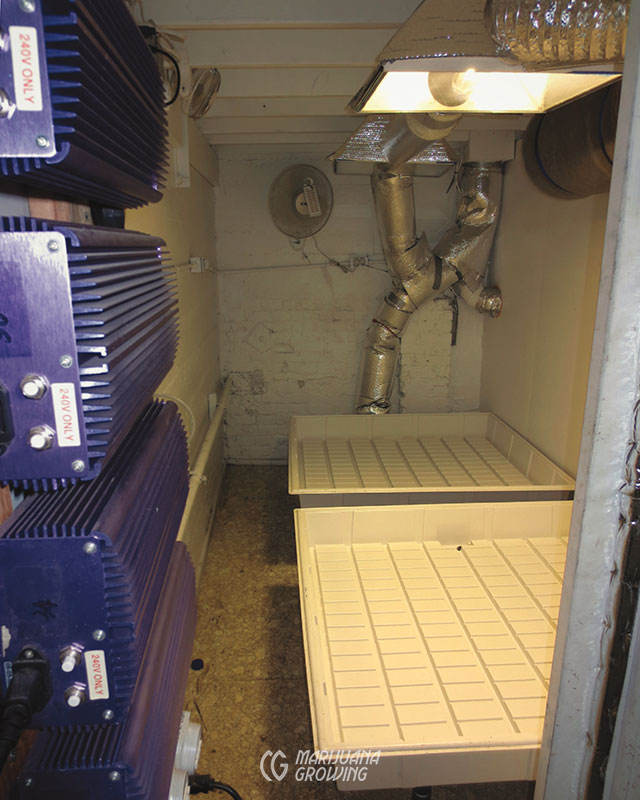
This prefabricated garden closet with a single growing space measures 4 × 4 feet (120 × 120 cm). The ballast for the 600-watt HPS lamp is located outside the room. The space below the growing bed serves as a storage area.
Garden Room Options
Single room for vegetative and flowering
a. Purchase clones at a dispensary, grow them for 2 to 4 weeks before flowering
b. Take clones and grow for 2 to 4 weeks after roots strike before flowering
c. Grow seedlings of autoflowering feminized plants
d. Grow seedlings, cull/separate males, flower females
e. Grow seedlings, open pollinate males and females. See chapter 25, Breeding.
A basement is a great location for a garden room because the temperature and humidity stay relatively constant. Concrete walls backed with soil serve as insulation. Open earth or subterranean cellars with a dank moist atmosphere should be avoided. Basements are also more isolated and have less traffic.
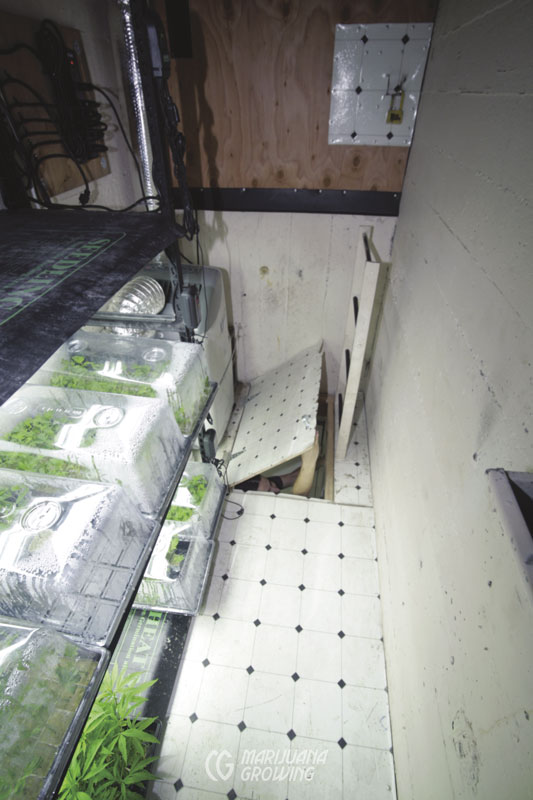
This medical cannabis gardener uses a trapdoor to access an unused part of the indoor facility. The clone room stays closed and clean.
Two rooms, one vegetative and one flowering
1. Grow clones and mother plants
a. Grow consecutive crops of clones, harvest every 2 months
b. Grow perpetual crops of clones, harvest 1 to 3 times weekly
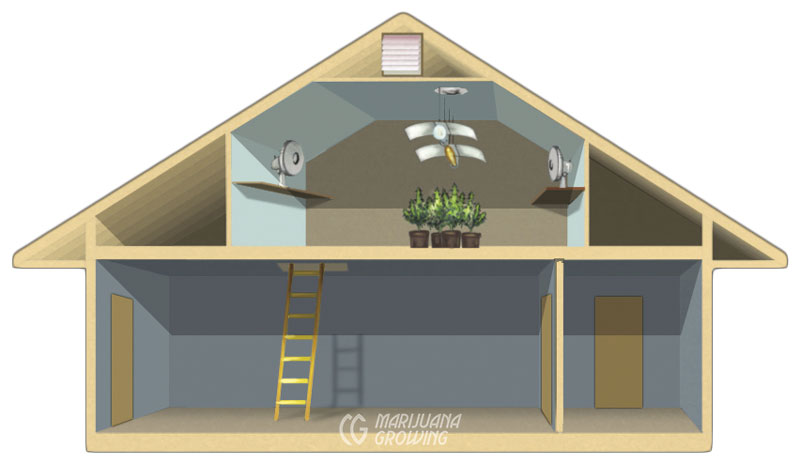
Attic garden spaces are isolated and more difficult to access. Limited access can make garden room setup and maintenance more time consuming. Heat buildup can be a problem too. If the roof is not insulated, the garden may suffer from cold in the winter and high temperatures in the summer. Unexposed roofs with attics located under trees or shade are easiest for controlling temperature and humidity. Cautious gardeners go so far as to construct a false wall and doorway or a trapdoor to enter the garden room.
Most gardeners start out with a crop grown in a single room. After they harvest the crop, they introduce a new batch of seedlings or clones. The photoperiod is switched back to an 18/6-hour day/night photoperiod and the cycle continues.
2. Grow consecutive or perpetual crops of F1 hybrid feminized seedlings
3. Grow consecutive or perpetual crops of F1 hybrid regular seedlings, cull male plants
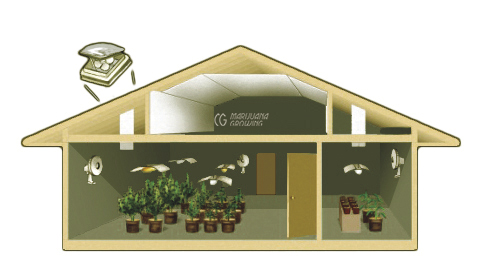
Set up 2 rooms: Productive indoor gardens consist of 2 rooms, a vegetative/ mother/cloning room, about a quarter the size of a second room used for flowering. The light is on in the vegetative room 18 to 24 hours a day, and the flowering room has a light schedule of 12 hours on and 12 hours off. Smaller vegetative plants take up less space than older flowering plants and can be huddled together. For example, a 250-or 400-watt metal halide could easily illuminate vegetative plants and clones that would fill a flowering room lit by 2 or 3 600-watt HP sodium lamps. If the metal halide in the vegetative room is turned off, fluorescent and compact fluorescent lamps are more economical and will work well to root clones.
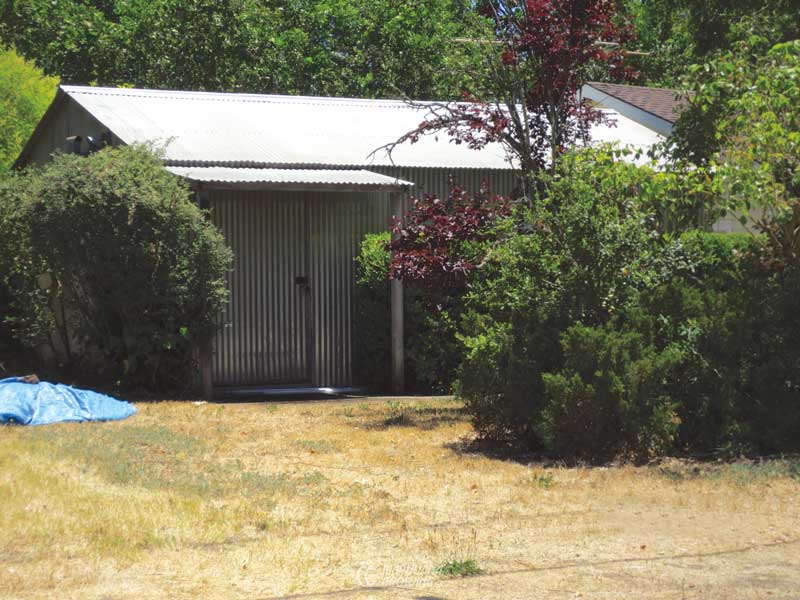
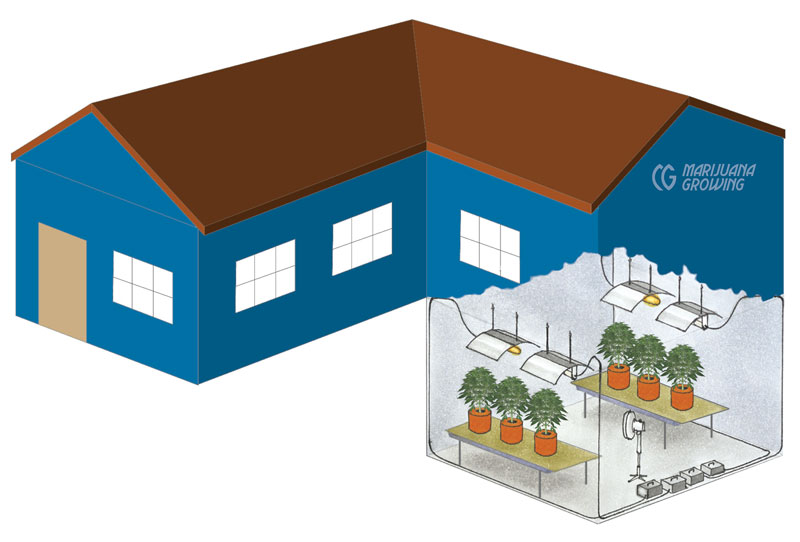
Outbuildings are less secure and should have an alarm system. Outbuildings, barns, and garages not attached to homes often lack security unless equipped with a security fence, motion-detecting floodlights, an alarm system, and possibly a guard dog. Less-secure structures are easier for thieves to break into; a garden is much easier to secure when the entry is within another building.
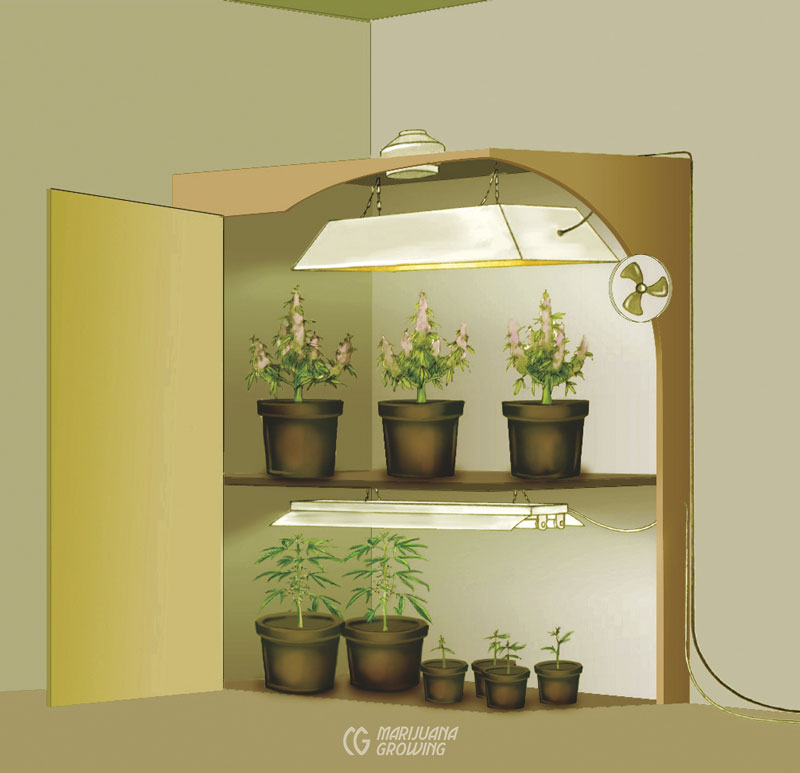
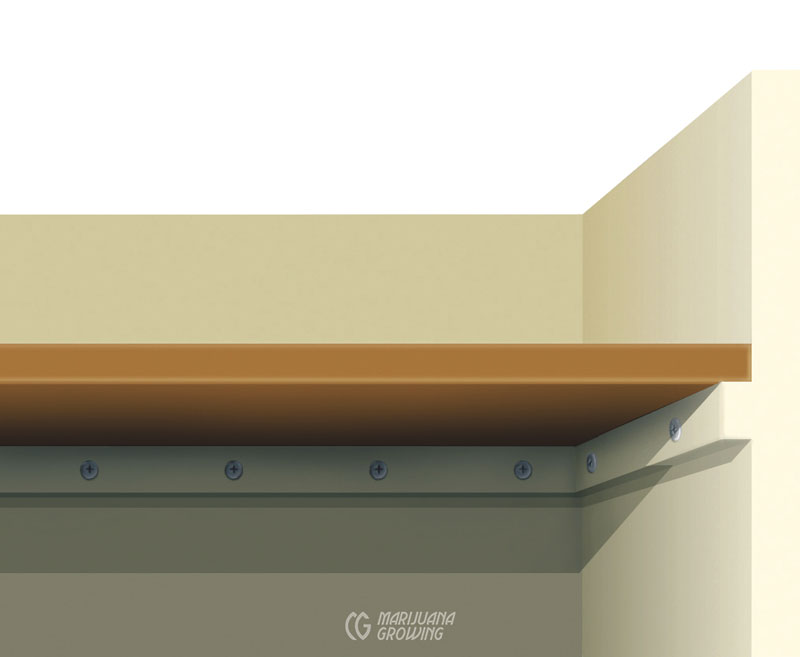
This grow closet is divided by a shelf just below the center point. The vegetative room for seedlings, clones, and mothers (shown in the photograph of the garden below) is illuminated by two 55-watt compact fluorescent bulbs. The flowering room above is illuminated by a 600-watt high pressure sodium lamp.
Main-floor garden rooms located in closets, cabinets, bedrooms, and spare rooms are very common. These rooms are easy to access and maintain. The atmosphere is usually easy to regulate because it is controlled along with the temperature and humidity of the home. Sometimes finding a readily accessible window or air vent is difficult.
Clones and mothers can be grown in the same room.
Consecutive harvests every 60 to 70 days: F1 hybrid seedlings or clones and mothers are grown in the vegetative room in the lower portion of the closet. Seedlings or clones advance into strong vegetative growth and are moved upstairs to the flowering room every 60 to 70 days, after ripe buds from the previous crop are harvested. This room requires a bit more knowledge and care but is very productive. Gardeners should harvest about 7 to 14 ounces (198–396 gm) every 60 to 70 days from this garden.
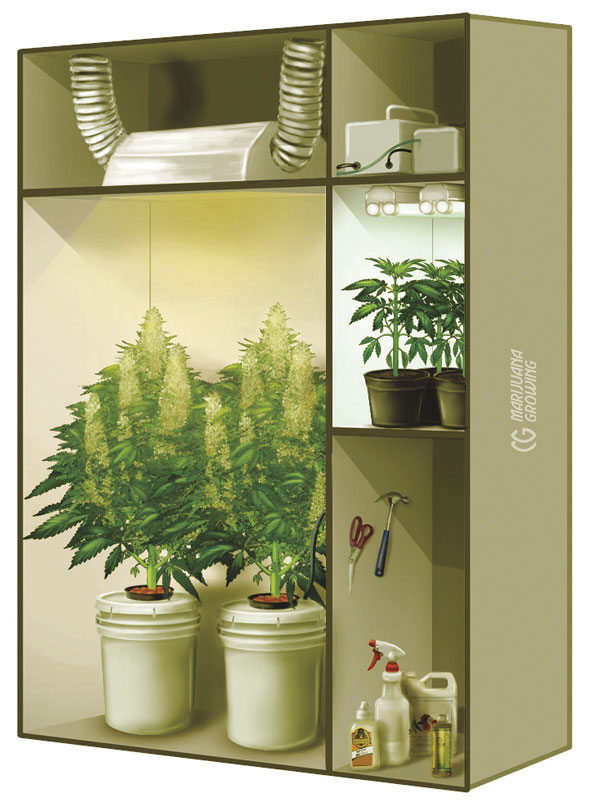
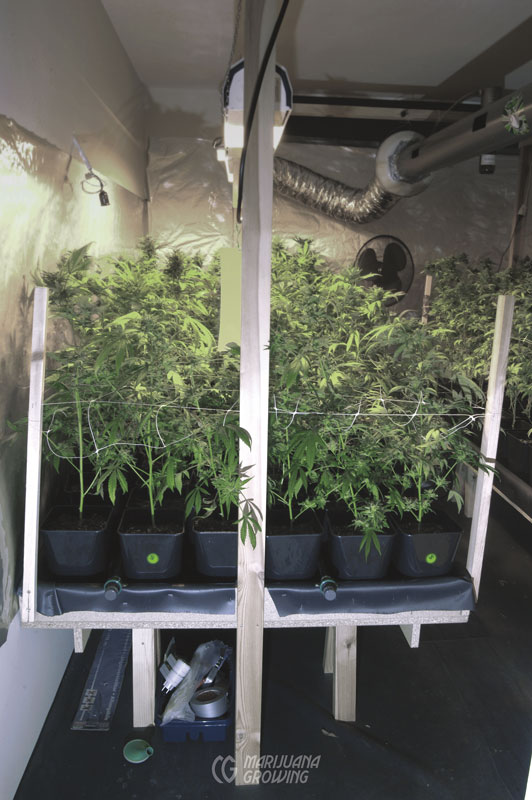
This compact setup has 2 garden rooms: one vegetative room for growing seedlings, clones, and mothers, and a separate room for flowering. A 600-watt HPS lamp is in the flowering room and two 65-watt CFLs illuminate the vegetative room. The side-by-side orientation of the rooms allows the vegetative room to be taller and narrower and the closet a little wider. The higher profile of the flowering room allows space for a hydroponic reservoir below. It also provides space above and below for appliances and storage
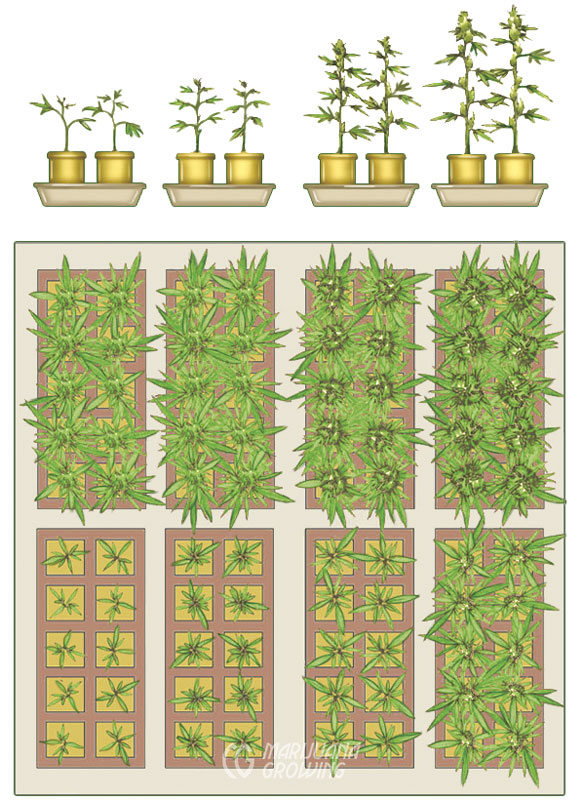
In this simple sea of green layout, there are ten plants in each tray (80 total plants) illuminated by a single 1000-watt HID. Each week one tray of ten plants is harvested, and ten new plants are started.
Perpetual Crops: Harvesting a single flowering plant every 1 to 4 days is the most efficient way to employ artificial lighting, but it is more labor intensive. Mothers, clones, and F1 hybrid seedlings are grown in the vegetative room. Seedlings and clones are grown into strong vegetative plants that are moved to the flowering room whenever a flowering plant is harvested. This room requires a little more organization but is about 20 percent more productive than harvesting an entire crop and replanting. Several clones are taken every day or every week. Every one to three days a plant or two is harvested. A new cutting takes the place of every plant harvested.
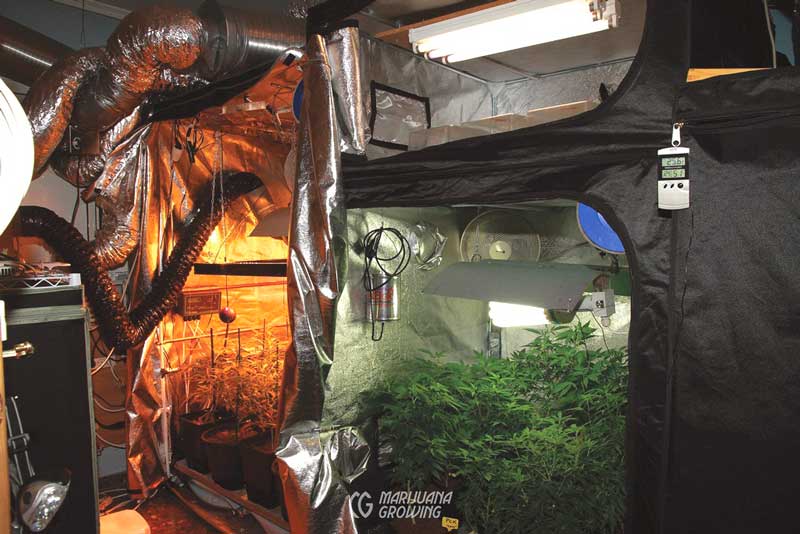
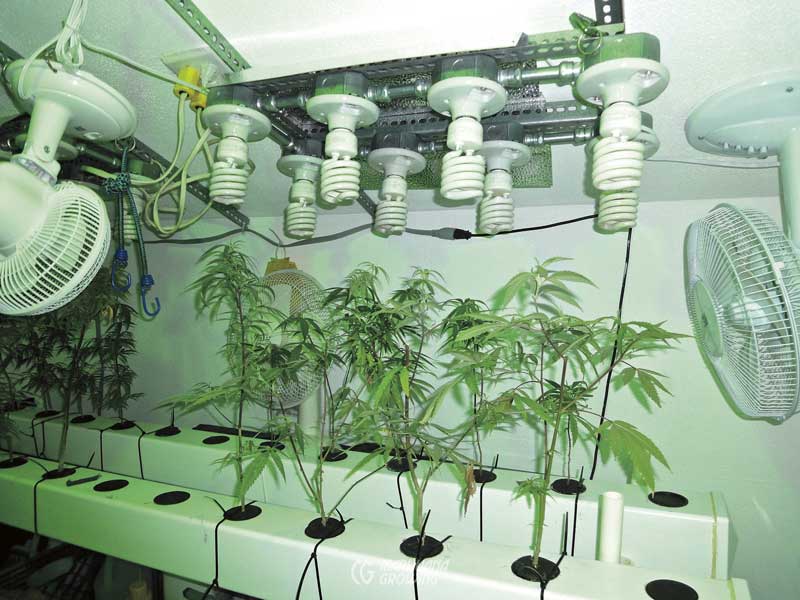
Three gardens in this photo show a continuous growth cycle. Clones are growing under fluorescent lights above a vegetative garden under CFL light below. To the left HP sodium and LED lamps illuminate the flowering garden.
Step Six: Electrical Needs
A typical home has a breaker box, but older homes may have fuse boxes. Each fuse or breaker switch controls an electrical circuit in the home. In North America using 120-volt service, fuse or breaker switches are rated for 15, 20, 25, 30, or 40 amperes (amps). Breakers list the amp rating on the switch lever.
The average small 1-or 2-room garden closet will need a single 15-to 20-amp electrical circuit at 120 volts and a 10-to 15-amp circuit at 240 volts. An electrical circuit is overloaded when it is at 80 percent capacity. For example, a 120-volt 15-amp circuit is overloaded when it draws 12 amps, and a 20-amp circuit is overloaded at 16 amps.
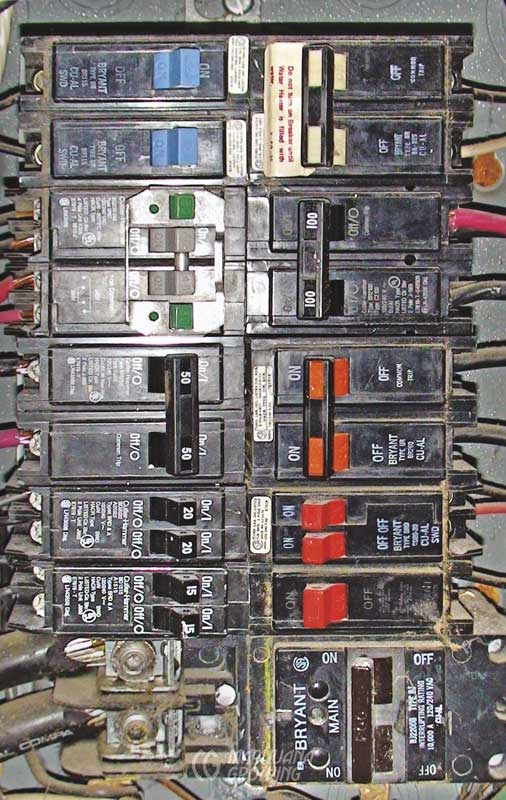
This large circuit box from a North American garden is full of breaker switches that meter 120 volts of electricity at 60 cycles to the garden room.
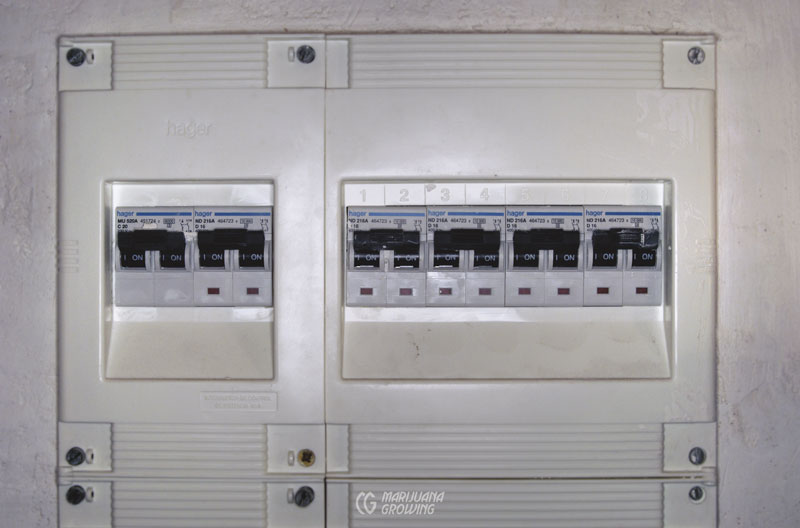
European breaker boxes control 240 volts of electricity at 50 cycles. The amp rating is printed on the end of the switch lever.
To find out which electrical outlets are controlled by a fuse or breaker switch, remove the fuse or turn the breaker switch off. Test each and every outlet in the home to see which ones do not work. All the outlets that do not work are on the same circuit. All outlets that work are on other circuits.
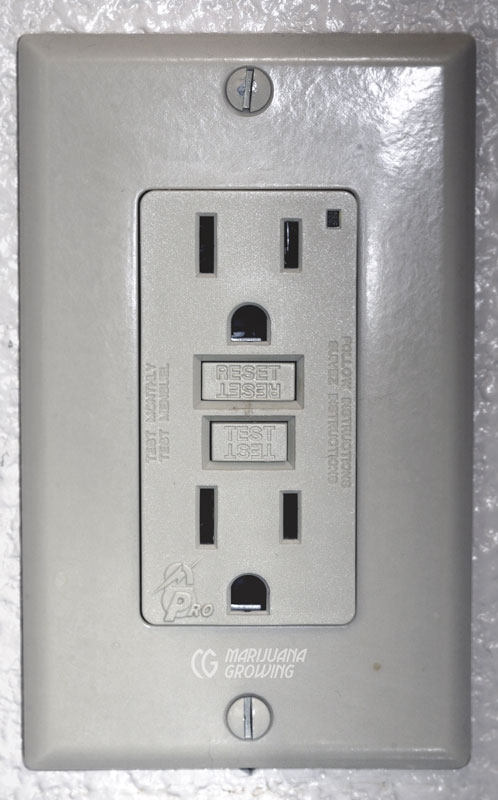
Ideally a ground fault interrupter (GFI) electrical outlet with a separate breaker switch inside will be in the garden room; if not, they are inexpensive and easy to install. A GFI outlet is essential for safety! Keep water away from outlets.
When you have selected a desirable circuit, unplug everything—lights, TVs, stereos, toasters, and so forth—on that circuit. Look at the circuit’s amp rating on the breaker switch. If it is rated for 20 amps, you can plug one 600-watt HID into it. A leeway of about 5 amps is there to cover any power surges and incongruence. If the circuit is rated for 20 or more amps, it may be used for a 1000-watt HID and a few other low-amp appliances. To find out how many amps are drawn by each appliance, add up the number of total watts they use, and divide by 120. If you are using 240-volt service, add the total number of watts and divide by 240.
Typical electricity consumption for small room
600-watt lamp
160-watt fluorescents
15-watt timer
50-watt fan
50-watt fan
875 total watts
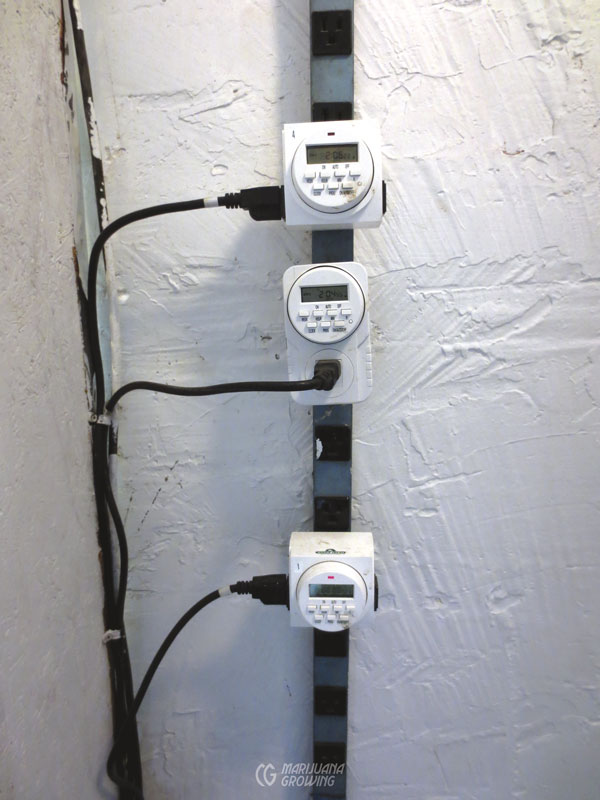
Grounded timers connected to an electrical power strip control several nutrient-solution pumps at the same time.
| Volts × Amps = Watts | ||
| Volts | Amps | Watts |
| 120 | 7,3 | 876 |
| 120 | 4,7 | 564 |
| 120 | 6,5 | 780 |
| 240 | 3,65 | 876 |
| 240 | 2,35 | 564 |
| 240 | 3,25 | 780 |
| Appliance Watts | Amps @120 V | Amps @240 V |
| 100-watt lamp | 0,83 | 0,42 |
| 250-watt lamp | 2,08 | 1,04 |
| 400-watt lamp | 3,33 | 1,67 |
| 600-watt lamp | 5,00 | 2,50 |
| 1000-watt lamp | 8,33 | 4,17 |
| 100-watt circulatory fan | 0,83 | 0,42 |
| 150-watt vent fan | 1,25 | 0,60 |
| 50-watt pump | 0,42 | 0,21 |
IMPORTANT! Employ a certified electrician to complete any work that requires wiring or opening the fuse box!
An electrician friend recently checked the new wiring in a small medical cannabis warehouse garden. It was three-phase electric service with three hot wires. The original “uncertified electrician” had wired the garden room in a way that easily could have created fires in two places. ALWAYS employ a certified electrician when installing electrical devices!
If an extension cord must be used, make sure the wire for the extension cord is at least 16/3 (16-gauge wire with 3 strands, one of which is grounded) for 120-volt systems or it will lose voltage enroute. When using 240-volt systems, wire thickness can be smaller. Do not let the run of the electrical cord extend more than 10 feet (3 m)—the shorter the better.
Step Seven: Enclose the Garden Room
Enclose the room with white Visqueen plastic, plywood, or moisture-resistant green Sheetrock known as “sound board” in the United States. Secure plastic to walls with staples, and screw down 1 × 2-inch (2.5–5 cm) strips with Sheetrock screws or duct tape. Join seams together with duct tape. Insulating the room will help contain sound and help control temperature and humidity. Cover the outside walls with Sheetrock once it is insulated. Sheetrock will further deaden the sound and make the room blend in with the rest of the rooms in the home.
Enclose the room, if it isn’t already enclosed. Remove everything that does not pertain to the garden, including furniture, drapes, rugs, and curtains that may harbor fungi and other undesirables. An enclosed room allows easy, precise control of everything and everyone that enters or exits, as well as what goes on inside.
Insulate windows and walls to keep room cool in summer and warm in winter. If covering a window, make it look aesthetically pleasing and conform to the architecture of the home. Basement windows often are insulated and painted to look like the foundation. Avoid light leaking through a crack in an uncovered window, which could annoy neighbors.
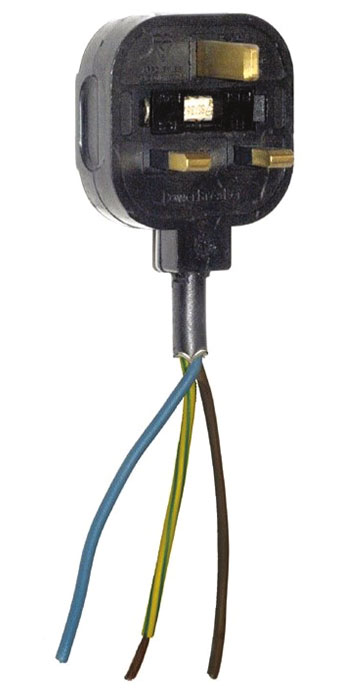
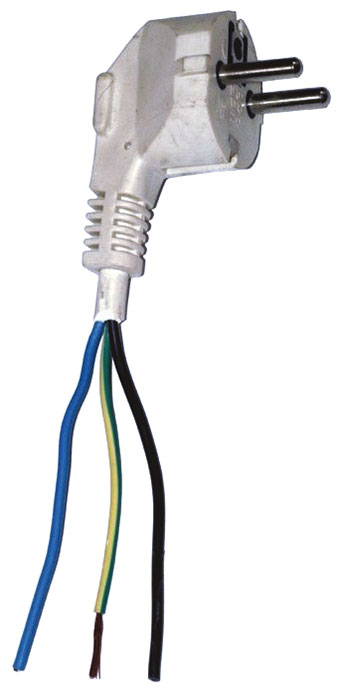
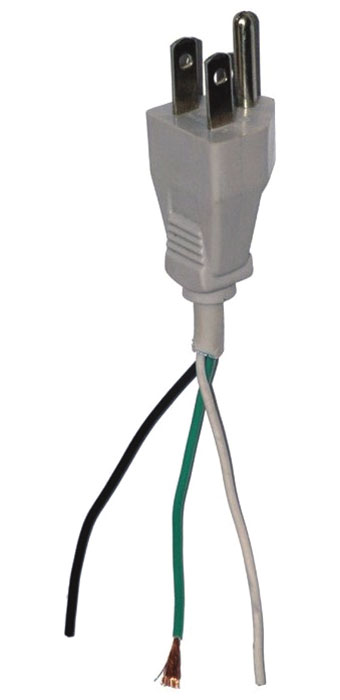
Always use 3-prong grounded plugs. If your home is not equipped with working 3-prong grounded outlets, buy a 3-prong grounded plug and outlet adapter. Ground wires are either green or brown, or brown with a green stripe. Attach the ground wire to a grounded ferrous metal object like a grounded metal pipe or heavy copper wire driven into the earth to form a ground, and screw the ground into the outlet face. NOTE: All electrical outlets and plugs require a ground wire for safety.

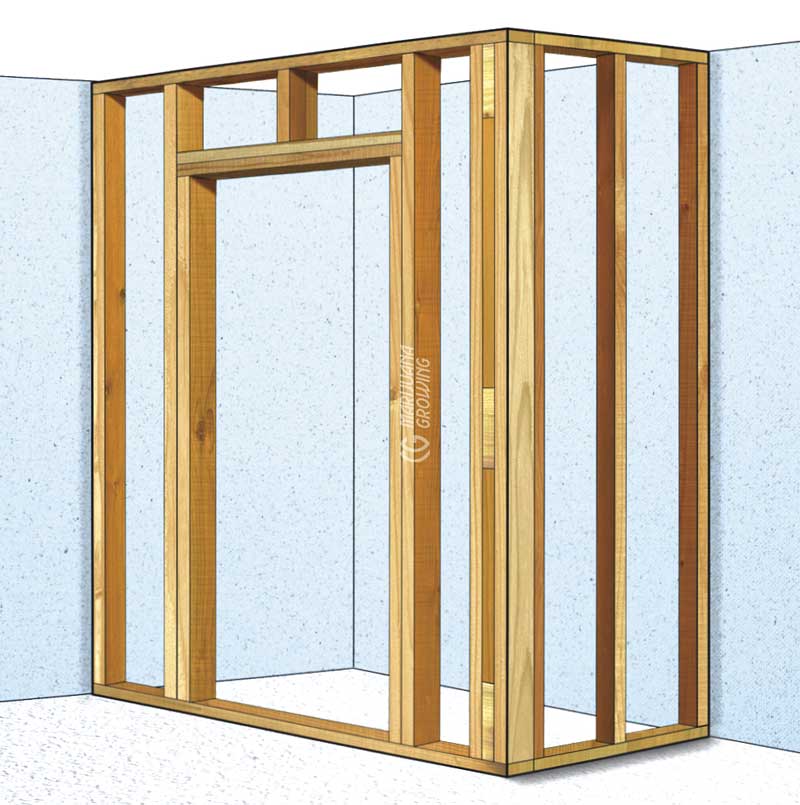
Frame in the new garden room with wood or metal studs. Cover framed garden closet with sheet rock or plastic.
Step Eight: Divide into Two Rooms
Divide the room to make a vegetative room for seedlings, clones, and mothers on the bottom third and a flowering room on top. Install a plywood shelf to form a partition between the top and bottom of the garden closet. Or purchase a small garden closet and set it inside the larger flowering room.
Frame 1 × 2-inch (2.5 × 5 cm) boards (or Mecalux) 3 to 3.5 feet (91–107 cm) from the floor around the walls of the room. Secure 1 × 2-inch (2.5 × 5 cm) boards with screws. Cut a 3 × 4-foot (91 × 122 cm) piece of 0.75-inch (1.9 cm) plywood with a 6 × 6-inch (15 × 15 cm) piece cut from the right rear corner for the duct vent. Set the plywood on the ledge of the 1 × 2-inch (2.5 × 5 cm) boards with the vent hole toward the back wall.
Install rigid 6-inch (15 cm) ducting through the hole to connect the vegetative and flowering rooms. Use small screws to install a small inline fan in the pipe to direct air up from the vegetative room to the flowering room.
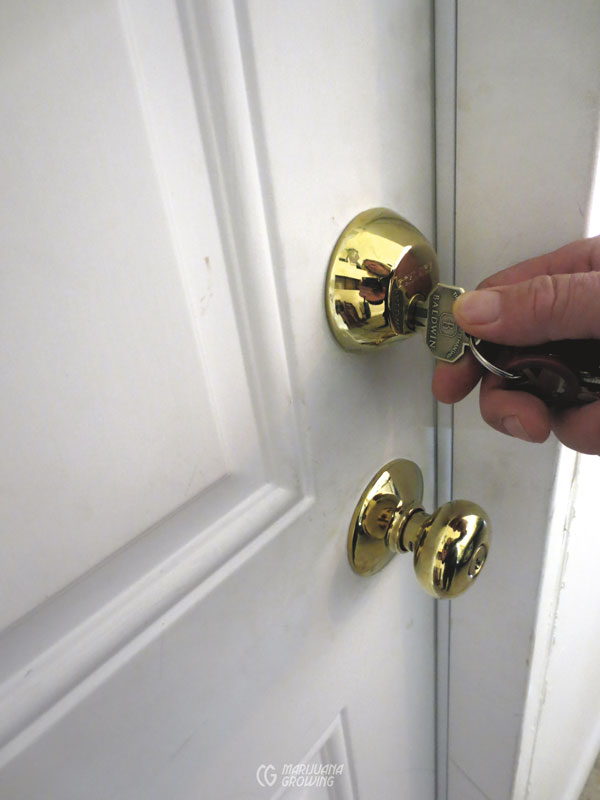
Install a door with a lock and key. Make sure to seal the perimeter of the door with plastic or carpet to prevent leaks and help control temperature, humidity, light, and sound inside the garden room. Make certain no pest-attracting light is visible from outside.
A freestanding garden is a good alternative to making holes in walls.
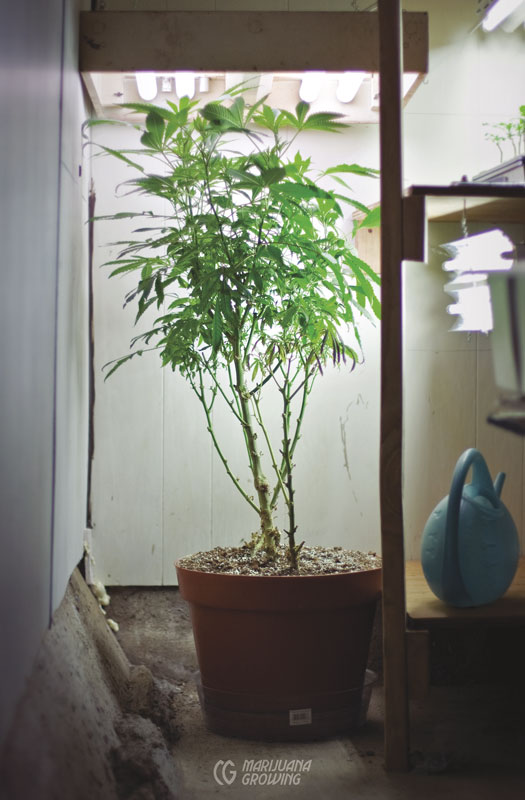
Clones root under fluorescent lamps on the right and the mother plant grows on the left.
Step Nine: Increase Light Reflectivity
Cover walls, ceiling, floor—everything— with a highly reflective material like flat white paint or Mylar. Good reflective light will increase the effective coverage of an HID lamp by more than 10 percent—all for a few dollars’ worth of paint on the walls! Reflective white Visqueen plastic is another inexpensive way to “white out” a garden room, with the added benefit of protecting walls and floors from moisture.
When painting walls and ceiling white, use high-quality semigloss latex paint.
Do not use inexpensive paint; it takes longer to apply. Ask the store clerk to add a fungicide if the paint does not already contain one. For fast application, use a roller to apply paint on large flat surfaces and brush-paint corners.
Ideally, the floor should be concrete or a smooth surface that can be swept and washed down. A floor drain is also very handy. If the floor is not concrete or tile, cover with heavy plastic or impermeable painter’s drop cloth to form a large tray to protect the floor from dirt and water. Fold the plastic so that at least 6 inches (15 cm) run up the wall. Attach the plastic floor covering to the walls with duct tape or staples.
Step Ten: Install a Vent Fan
Constant air circulation and a supply of fresh air are essential but often inadequate for healthy plants. A vent fan is necessary in virtually all garden rooms, and there should be at least one fresh-air vent in every garden room. Vents can be an open door, window, or duct vented to the outside. An exhaust fan vented outdoors that pulls new air through an open door usually creates an adequate exchange of air within the room. Larger rooms will need an intake fan too. If the room contains a heat or air conditioning vent, it may be opened to supply extra heat or air circulation.
One of the biggest obstacles to constructing a garden room is where and how to run the exit ducting for the ventilation fan with a minimum of work and structural change to the room. Often the vent can run out a window, chimney, or other preexisting exit. The last-choice option is to cut a hole in the ceiling or wall.
See “Setting Up the Ventilation System” in chapter 16, Air, for complete information on setting up a vent fan.
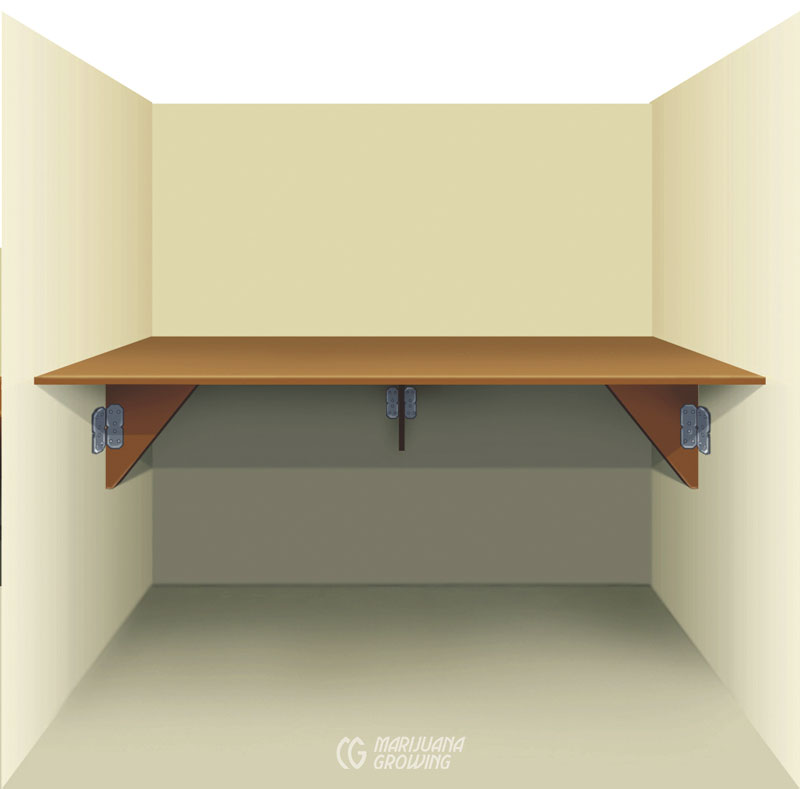
Secure shelf to upright vertical supports.
Secure partition to supporting wood around the perimeter.

A dog carrier was modified to form a small seedling clone and mother plant room for these ‘OG Kush’ × ‘Master Kush’ feminized plants.
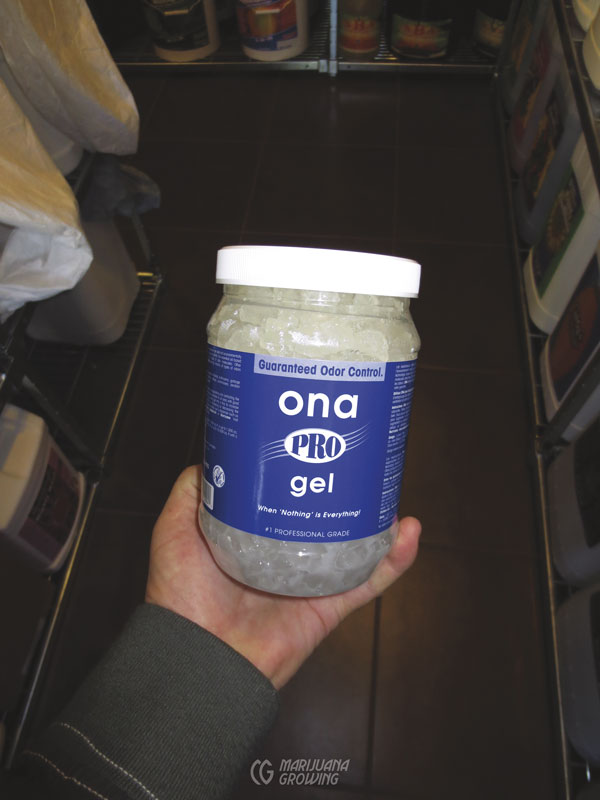
Masking agents work well for small garden rooms.
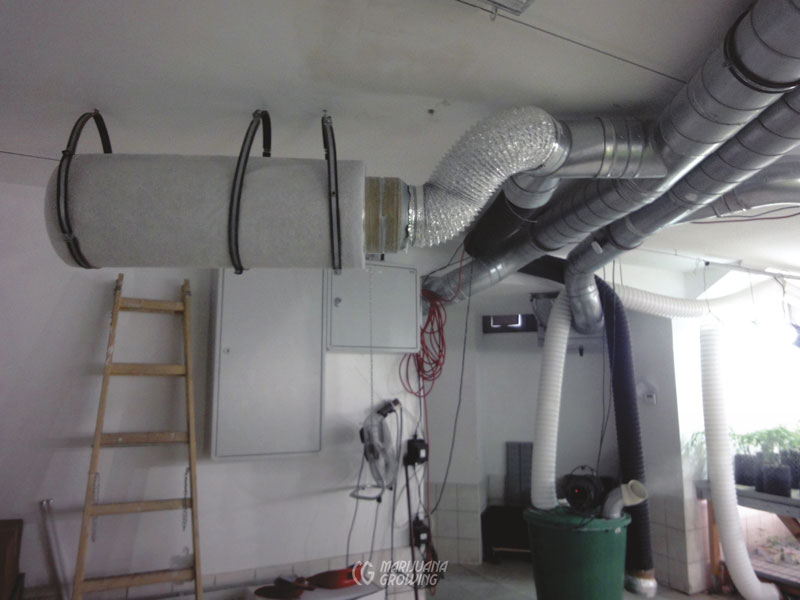
Heavy air filters can also be set on end or set on a table. The important thing is that they are able to whisk out the air and filter it through the carbon.
Ventilation fans can be affixed to the ceiling so that they are out of the way. A fan on the ceiling can provide ventilation to the top parts of the garden room.
Step Eleven: Install an Air Filter
Most garden rooms require some sort of fragrance control to keep air fresh. A charcoal filter is often the best option.
Masking fragrance is often less expensive than purchasing a carbon filter, especially in small grow rooms. Mask lingering fragrances with a strong air freshener or a host of odor masking products. See “Fragrance” in chapter 16, Air, and search “air freshener reviews” on the Internet for more information.
Activated charcoal filters are the most popular and effective method to filter outgoing air. Unless made from new lightweight carbon-impregnated material, carbon filters can be quite heavy and will require stout mounting. Make sure to choose the right one for your garden area so you don’t have to mount a filter that is too heavy. For example, a carbon filter rated at 200 cfm (cubic feet per minute) is more than adequate for the average closet garden room.
See www.carbonactive.ch for information on outstanding new lightweight carbon filters. The site also has a good calculator for filter and fan size in relation to room size.
Check www.canfilters.com and phatfilter.com for more on standard activated charcoal filters. Note: They are quite heavy.
For more information on air filtering and fragrance control see chapter 16, Air.
Step Twelve: Install Circulation Fans
Air circulation is necessary in all garden rooms, especially during flowering. Usually air circulation must be increased with circulation fans. Small clip-on oscillating fans come in very handy to circulate air in small garden rooms. They are easy to move in order to direct air where it is needed. Mount inexpensive oscillating fans to the ceiling or buy wall-mounted fans. See the fan size table in chapter 16, Air, to help choose the proper circulation fan(s) for your room. In general, rooms require at least one 12-inch (30.5 cm) circulation fan for every 400 watts of light. Install fans so that all leaves on plants can be seen to be slightly moving in the airflow.
When installing oscillating fans, make sure they are not set in a fixed position and blowing too hard on tender plants, which could cause windburn and dry out the plants, especially tender seedlings and small clones. Regardless of plants’ size, excessive wind will slow growth.
White walls help reflect up to 10 percent of the light in a room. This reflective light ensures that plants on the edges of the garden receive all possible light.

A good ventilation fan is essential!
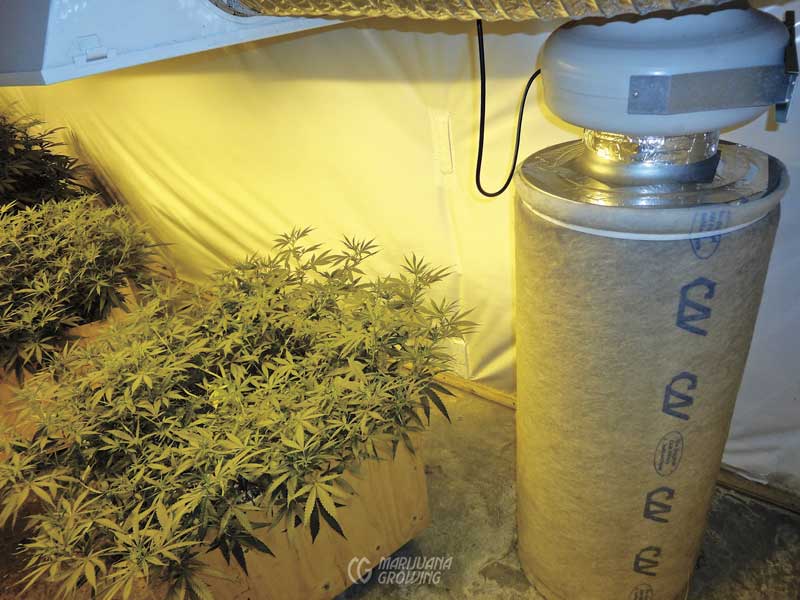
A carbon filter is essential equipment in most garden rooms in order to strip fragrances from the air before it is expelled outdoors.
Step Thirteen: Install a Hygrometer/Thermometer
You can control the climate in most garden rooms with a vent fan attached to a timer or a rheostat. See sections on “Temperature” and “Humidity” in chapter 16, Air, for more information. Personally inspecting the meter and plants daily will help you gain experience and learn exactly how much ventilation the room needs in order to keep the temperature about 75°F (24°C) day and 65°F to 70°F (18°C–21°C) at night and the humidity below 50 percent (day/ night) in the flowering room, and the vegetative room at 75°F (24°C) day and 65°F to 70°F (18°C–21°C) at night and 50 to 60 percent humidity day and night.
LEnvironmental controllers control temperature and humidity and other garden room functions. Prices range from $80 to $1,500 USD. Quality atmospheric controllers cost a little more and are well worth the money. Check these sites for more information on atmospheric controllers: www.greenair.com, www.hydrofarm.com, www.sunlightsupply.com
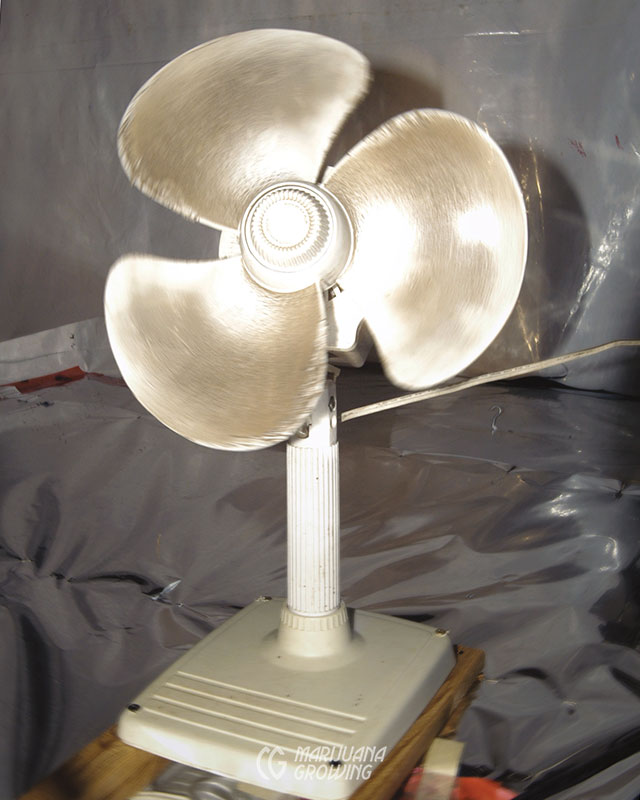
Inexpensive fans are often used in garden rooms. Removing the fan shroud lowers air friction and extends the fan’s life. Be careful to not hurt yourself on a fan with no shroud.
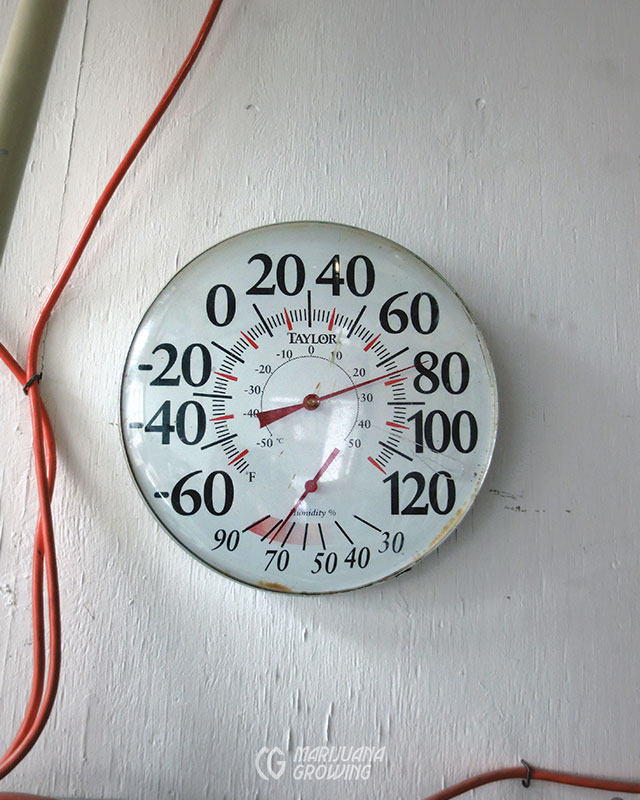
At least one thermometer is essential in every garden. Mounting 3 thermometers is a good idea, 1 near the ceiling, 1 at plant level, and 1 near the floor. This allows you to distinguish all temperature zones.
Step Fourteen: Install Lights
To install a lamp in the flowering room, insert 2 hooks strong enough to support 30 pounds (13.6 kg) for each light fixture. Position the hooks in a beam or 2 × 4-inch (5 × 10 cm) board and mount to the ceiling. Mount the HID reflective hood/bulb fixture, attaching it to the hook(s) with chain or cord. If using cord, attach the other end to a cleat mounted on the wall so that it is easy to move the fixture up and down.
Hang fixtures from an adjustable chain or cord. Attach the cord’s loose end to a cleat mounted on the wall. If a ballast is attached to the fixture, its hooks should be strong enough to support 30 pounds (13.6 kg) for each lamp.
Install at least 1 maximum/minimum thermometer/hygrometer in each garden room to measure temperature and humidity. Digital models are relatively accurate and easy to use. Calibrate them against 1 or 2 other thermometer/hygrometers so they remain accurate. Place the thermometer/ hygrometer equidistant between ceiling and floor, and fasten it to a wall or hang it from a string. Check the meter daily. Preferably install 3 units, 1 near the ceiling, 1 halfway up the wall, and 1 near the floor. Compare readings daily. Increase air circulation if air is stratified with different temperature readings.
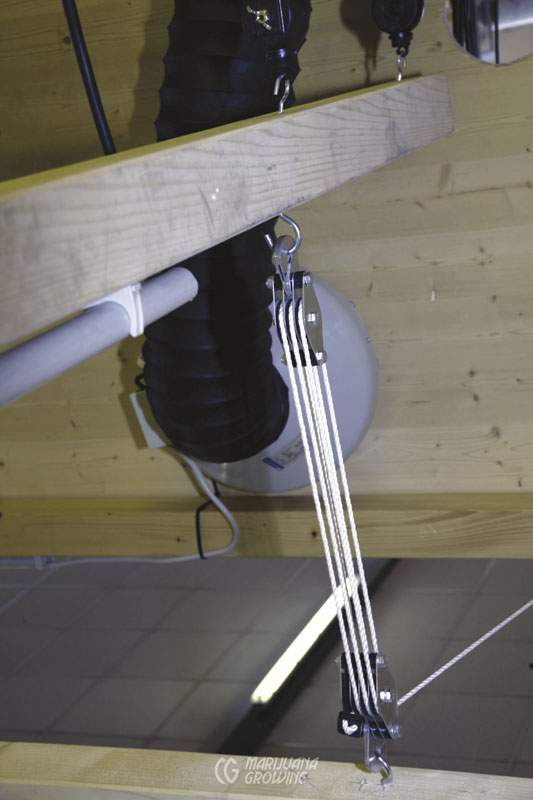
The lamps and ventilation system are suspended from recoiling hangers that are anchored to the ceiling with hooks screwed into wooden beams behind the Sheetrock. The entire system can be raised and lowered to change the distance from plants.
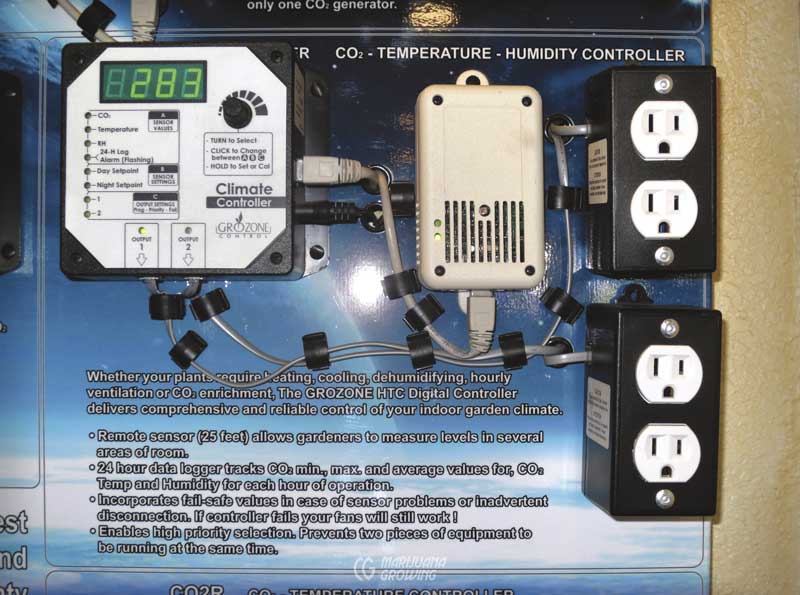
This CO2, temperature, and humidity controller makes it easy to plug in appliances and start growing.
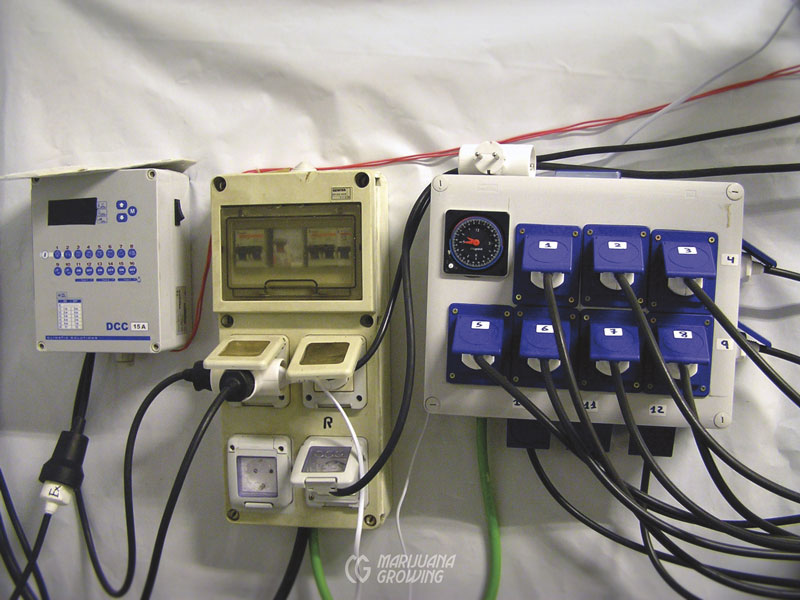
Atmospheric controllers are normally located next to timers and all the control systems for the garden room.
Orient the reflective hood fixture so that light shines most efficiently. Less light shines from the ends of the fixture and more from the sides, thus throwing a rectangular footprint of light below. For example, if the room is 3 × 4 feet (91.4 × 121.9 cm), orient the HID fixture so that the ends of the bulb run on the 3-foot (91.4 cm) axis and the sides along the 4-foot (121.9 cm) axis.
Setting Up the HID System: Step-by-Step
Step One: Both the lamp and ballast radiate quite a bit of heat. Take care when positioning them, so they are not so close to plants or flammable walls and ceiling that they become hazardous. If the room has limited space with a low ceiling, place a protective, nonflammable material such as sheet metal between the lamp and ceiling to protect from heat.
When hanging the lamp on the overhead chain or pulley system, make sure electrical cords are unencumbered and not too close to any heat source.
Buy and use a good electronic or analog timer to keep the photoperiod consistent. It is most effective to place the remote ballast near the ceiling to keep the room cool. Place it outside the garden room if the room is too hot.
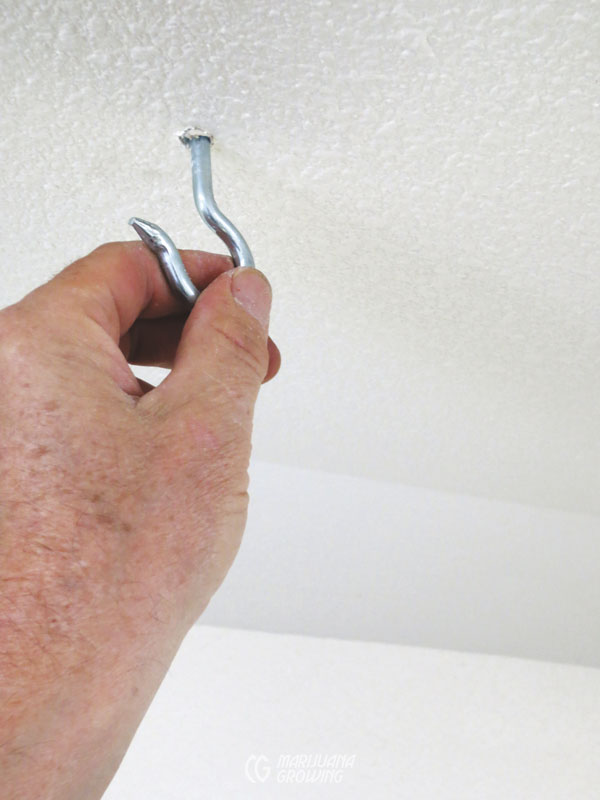
Screw a large eyebolt into the wooden beam behind the Sheetrock. Larger threads may require drilling a smaller diameter hole first.
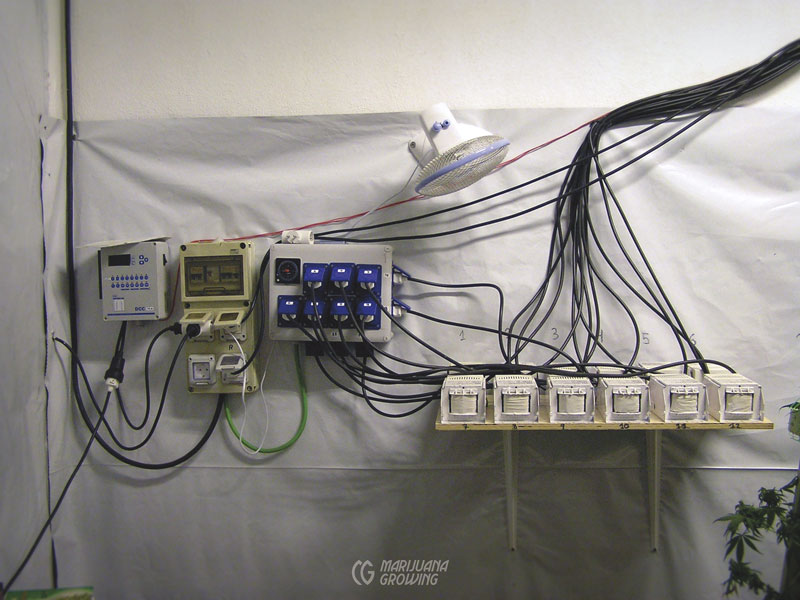
This garden room has all the electrical controls in one place, including the light timer. The lamps are on a dedicated circuit that is able to handle the load (amperage) drawn by the six lamps.
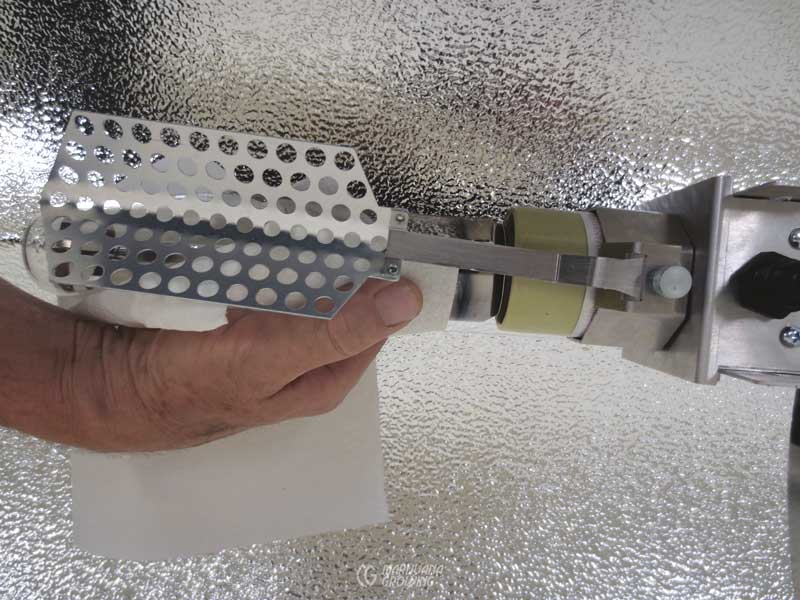
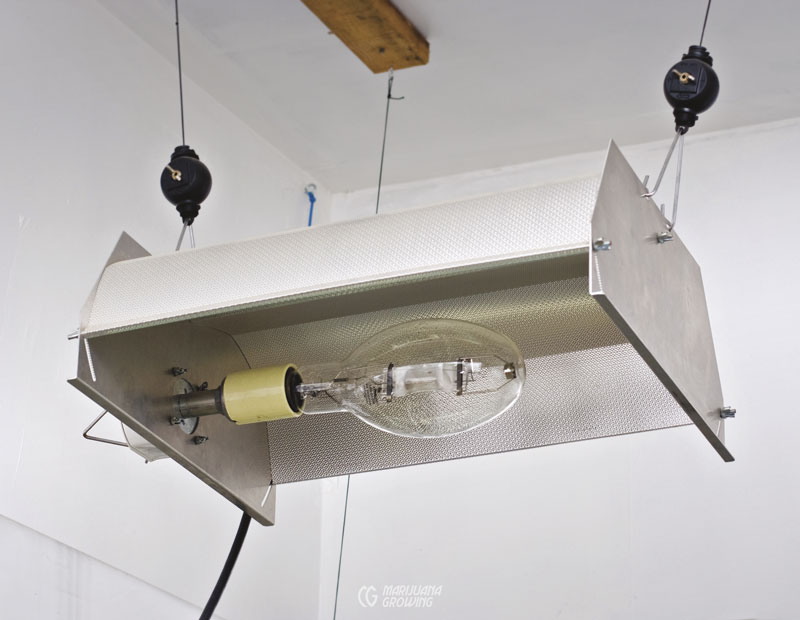
Using a paper towel, clean smudges off the bulb after screwing the bulb in place. Fingerprints attract dust that dims light. A light deflector is placed under this bulb so that the bulb and reflector can be placed closer to the canopy of the garden.
Step Two: Insert the HID lamp plug into an electrical circuit dedicated to the garden room. A 1000-watt HID lamp will use about 9.5 amperes (amps) of electricity on a regular 120-volt house current.
Step Three: Once the proper circuit is selected, the socket and hood are mounted overhead, and the ballast is in place (but not plugged in), screw the HID bulb finger-tight into the socket. Make sure the bulb is secured in the socket, but not too tightly, and make certain there is a good, solid connection. When the bulb is secure, wipe off all smudges in order to increase brightness. Some gardeners prefer to handle HID bulbs with latex gloves to avoid leaving greasy fingerprints.
Step Four: Insert the 3-prong plug into a timer that is in the OFF position. Plug the timer into the grounded outlet, set the timer at the desired photoperiod, and turn the timer on. The ballast will hum, and the lamp will flicker as it slowly warms up, reaching full brilliance in about 5 minutes.
Attach the lamp to a chain or a pulley system so that it is easy to raise and lower.
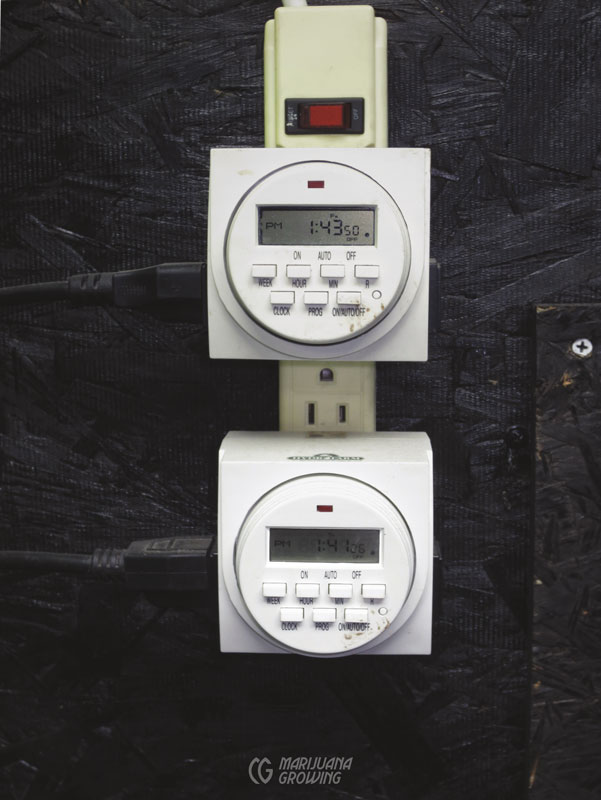
A timer is essential in every garden room. Simple inexpensive digital timers will take care of most tasks.
Plug the HID system into the timer and turn it on!
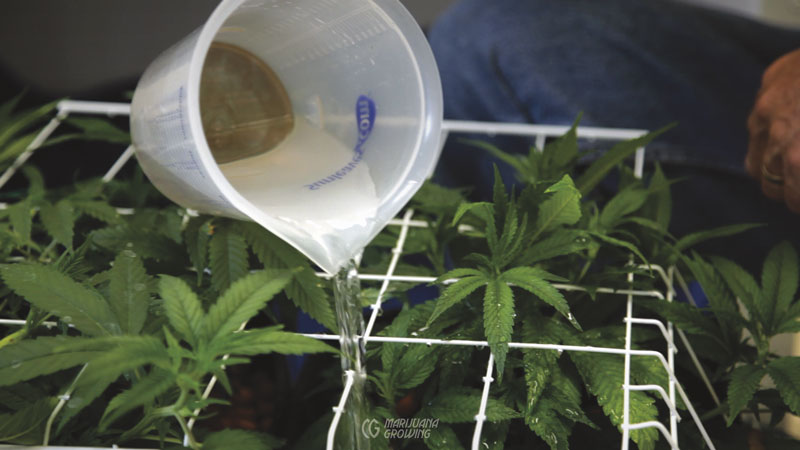
Small gardens are easy to water by hand using a container; for a large garden, hand-watering with a container is time consuming, tedious, and exhausting.
The lighting system is all set up and turned on. This interesting reflective hood and ventilation system support two 600-watt HP sodium bulbs.
Step Fifteen: Water Source and Reservoir
A readily accessible source of water will reduce labor. The larger your garden becomes, the more water it will need. A 10 × 10-foot (3 × 3 m) garden could use more than 50 gallons (189.3 L) per week. Carrying water is hard, regular work. One gallon (3.8 L) of water weighs about 8 pounds (3.6 kg); 50 × 8 = 400 pounds (181.4 kg) of water a week! It is much easier to run in a hose with an on/ off valve or install a hose bib in the room than to schlep water back and forth. A 3-foot (91.4 cm) watering wand attached to the hose on/off valve makes watering easier and saves cannabis branches from being broken when watering in dense foliage. Hook up the hose to a hot and cold water source so the temperature is easy to regulate.
Step Sixteen: Install a Hydroponic or Soil Garden
Move in soil-filled containers and hydroponic systems. Set up the irrigation system and make sure it is functioning properly.
Step Seventeen: Systems Check — Ready to Grow!
The room is all set up. Now is the time to test everything to make sure it operates properly before bringing in the plants. Turn on the lights, fans, and everything else. Turn it all on at the same time to make sure it will not blow fuse or trip a breaker. Make sure the humidity and temperature are at safe levels. Set a large pan of water on the main growing beds to simulate plant transpiration. Close the doors of the garden room and let everything run for an hour or two. Open the doors and check the temperature and humidity in the room. Next turn off the fans and let the light run for 60 minutes with the doors closed. Check the temperature and humidity levels to see if the room is hotter and more humid with no ventilation, just in case the vent fan malfunctions.
Test hydroponic garden systems before adding plants. Cycle all the systems to ensure that water flows from all emitters and runs back to the nutrient tank unobstructed. Check for leaks, and clear out any blockages. Cycle the timer’s on/ off functions several times while you are watching the system to ensure that everything works properly.
Move seedlings and rooted clones into the room. Huddle vegetative plants closely together under the lamp. Make sure the HID lamp is not so close to small plants that it burns their leaves. Position 400-watt lamps 18 inches (45.7 cm) above seedlings and clones. Place a 600-watt lamp 24 inches (61 cm) away, and a 1000-watt lamp 30 inches (76.2 cm) away. Hang a precut string from the hood to measure the distance from lamp to plants. (Measure daily!) Move in plants and turn on the lights. The indoor medical cannabis garden is ready to grow!
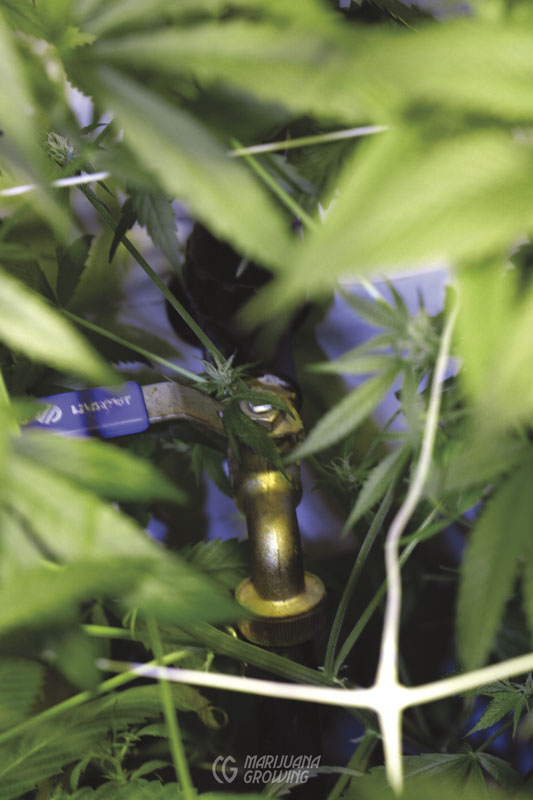
A water source in the garden room makes watering easy. But sometimes the source of water is overgrown!