A bountiful harvest of consistent, disease- and pest-free medicinal cannabis is the reward for your financial investment and hours of work and worry about the garden. Strong, healthy, well-grown clones and seedlings yield the heaviest harvests. A well-organized harvest will cut the workload, and a basic knowledge of what is happening in the cannabis plant will help you preserve its medicinal qualities during and after harvest. Cannabinoid levels increase as plants approach peak ripeness. Proper harvest timing is essential to achieve the desired medicinal cannabinoid levels. The peak harvest window indoors is normally open for about 5 to 7 days, and not all flower buds are ripe at the same time. A few gardeners harvest their crops early—after 45 to 50 days of flowering, and before it reaches peak maturity. The vast majority of gardeners harvest their gardens when at peak maturity. Cannabinoid profiles, especially THC content, are highest at peak harvest.
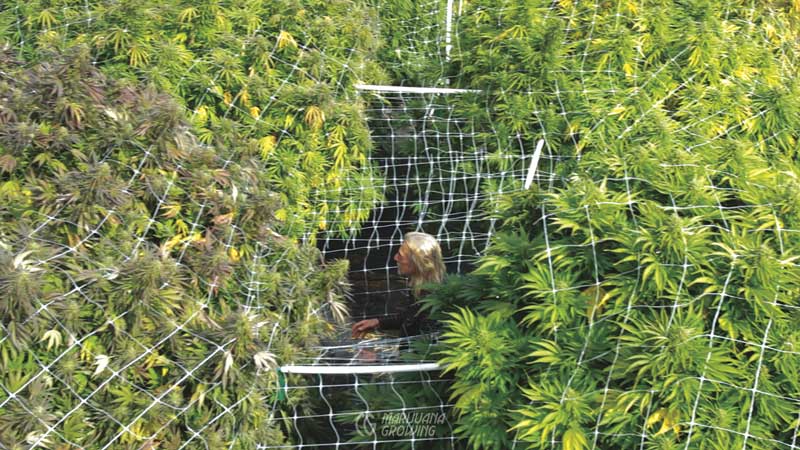
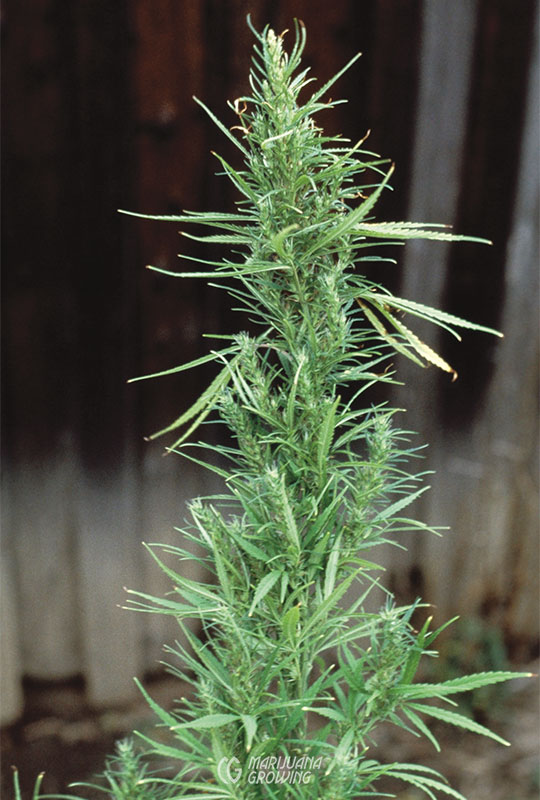
I have been fascinated with outdoor gardening for the last 15 years, since I was able to grow cannabis legally with the help of Mother Nature. Growing big plants outdoors during a long season allows them to express their genetic potential to the fullest.
The bulk of cannabinoids, including THC, are found in resin glands that cover flowers and leaves; lesser amounts are present on stem surfaces and in interior cells of the plant. Stems and roots may smell like they contain cannabinoids, but they actually contain much lower levels of desirable cannabinoids. Male plants contain much lower quantities and levels of cannabinoids than do females, and are normally harvested before they pollinate females. Unpollinated female plants (sinsemilla) have the greatest amount of resin glands and cannabinoids, and are harvested when resin glands show peak ripeness. Leaves and flower buds are harvested, separated, manicured, dried, and cured.
Growth stops at harvest, and thereafter the THC (cannabinoid) content cannot increase. Some plant processes continue until they run out of stores. Overall cannabinoid levels are fixed, but the type changes with harvest from inactive cannabinoids to active ones or back again.
Drying removes about 75 percent of the water weight found in foliage. Drying concentrates cannabinoids in relation to overall weight. The actual cannabinoid content of resin glands will remain the same or decrease after harvest. Proper handling is the key to retaining cannabinoid potency. Prolonged periods of light, temperatures above 80°F (26.7°C), friction from fondling hands, and damp, humid conditions should be avoided because they all degrade resin glands and cannabinoids.
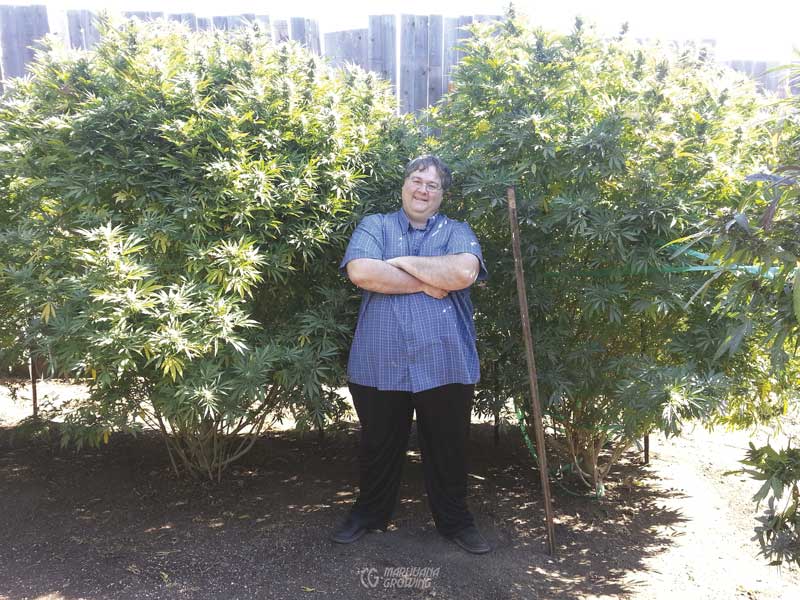
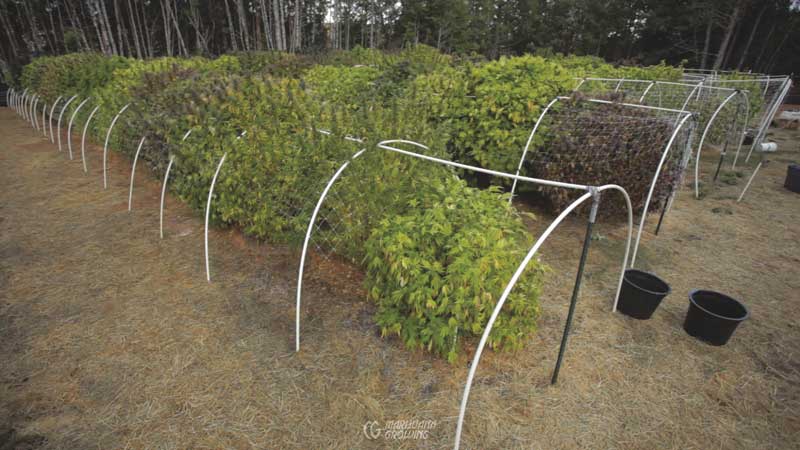
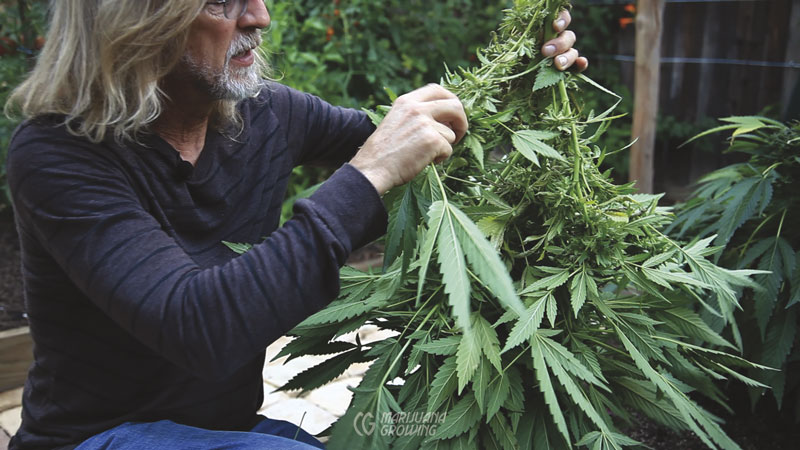
Paul Stanford, organizer of Hempstalk (www.hempstalk.org), is pictured in his medicinal cannabis garden in Portland, Oregon. He is standing in front of two female ‘AK47’ plants in full flower.
To make the harvest experience as stress-free as possible, there are a few things you should know.
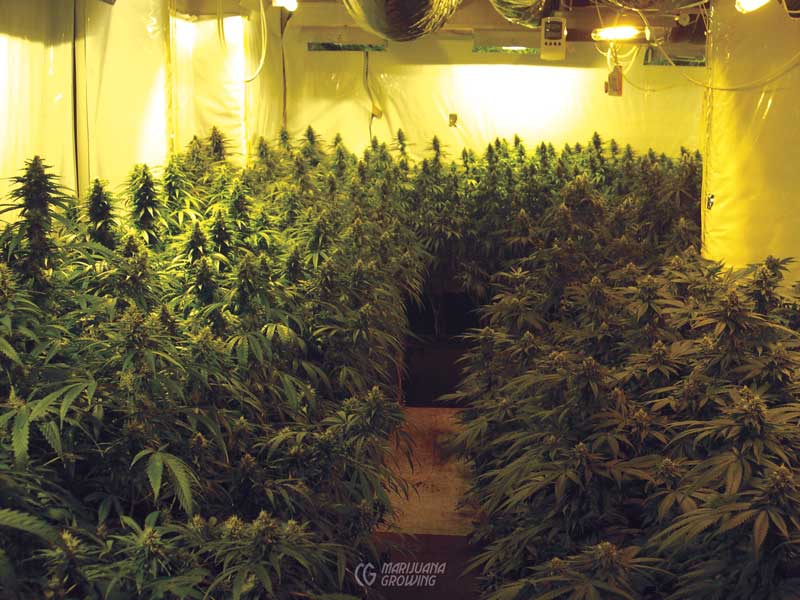
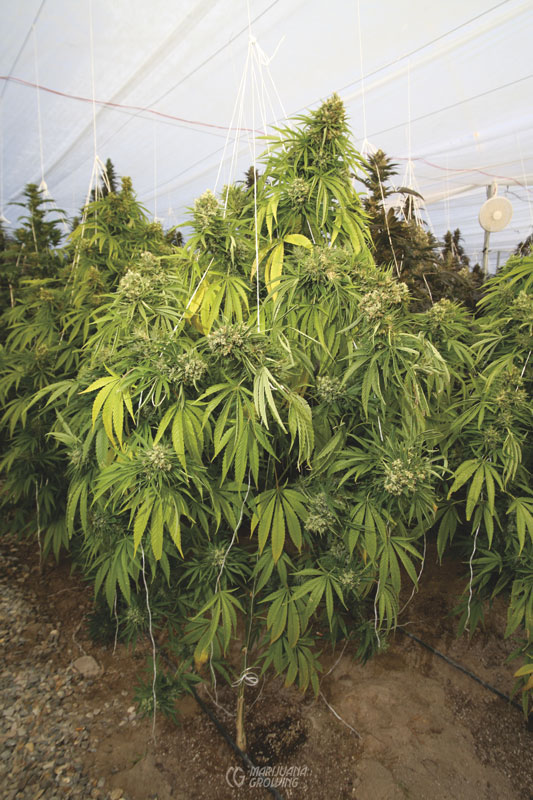
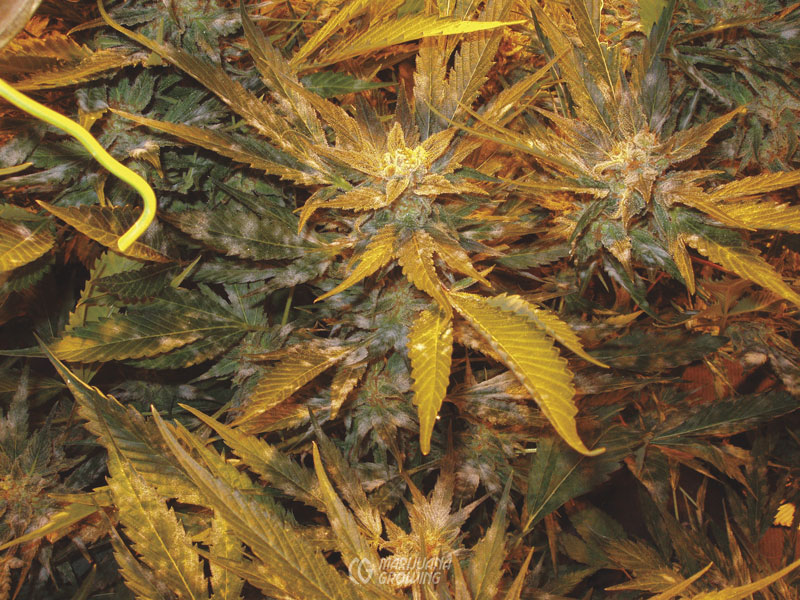
Medical gardeners are harvesting gardens like this one, full of cannabinoid-rich flower buds grown to test the varieties of DNA Genetics.
Washing branches of harvested flower buds in a mild solution of H2O2 (hydrogen peroxide) is becoming popular. We wash vegetables before consuming them, and cannabis is no different. A gentle bath of H2O2 removes surface bacteria, mold, dirt, dead pests and their feces, and other bad stuff. Such a bath also creates free radicles*.
*An H2O2 free radicle drench changes anything composed of carbon, just like using ozone in a garden room or curing room. Washing treated buds with plenty of fresh water is essential. No studies have been done to determine potential for damage to carbon chains of cannabis after an H2O2 bath.
Avoid excessive damage to resin glands by manicuring fresh flower buds immediately after harvest. Manicure when foliage is supple, by hand or by using a trimming machine to remove outer, less cannabinoid-potent foliage from flower buds. Once manicured, flower buds are dried slowly to equalize moisture content, preserve cannabinoids, and shed chlorophyll. After drying, flower buds must cure to achieve full aroma and flavor. Too often beautiful buds are dried too hot and fast, and are not cured properly. Mishandling cannabis may rupture and degrade resin and terpenes. Such flower buds lose their bouquet. As resin glands degrade, cannabinoid content decreases. Poorly and quickly dried cannabis still contains various amounts of chlorophyll, starch, nitrates, etc.
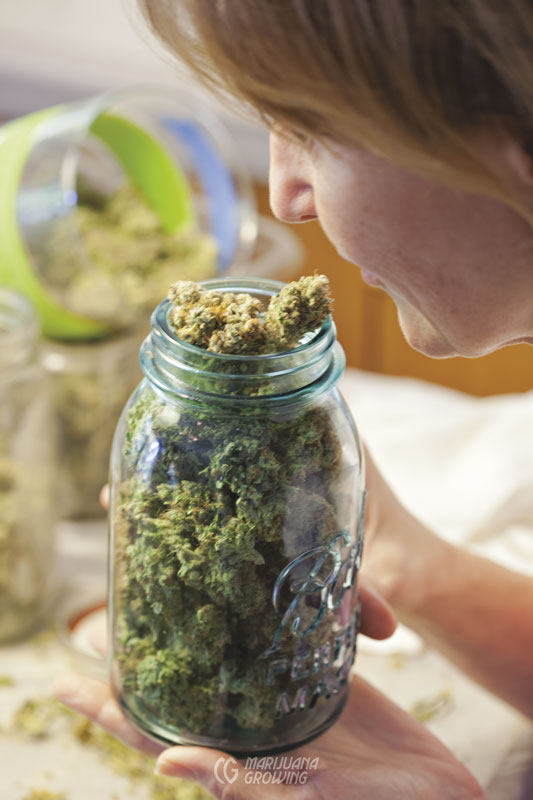
Once cured, proper storage will ensure that medicinal cannabis retains all its essential qualities.
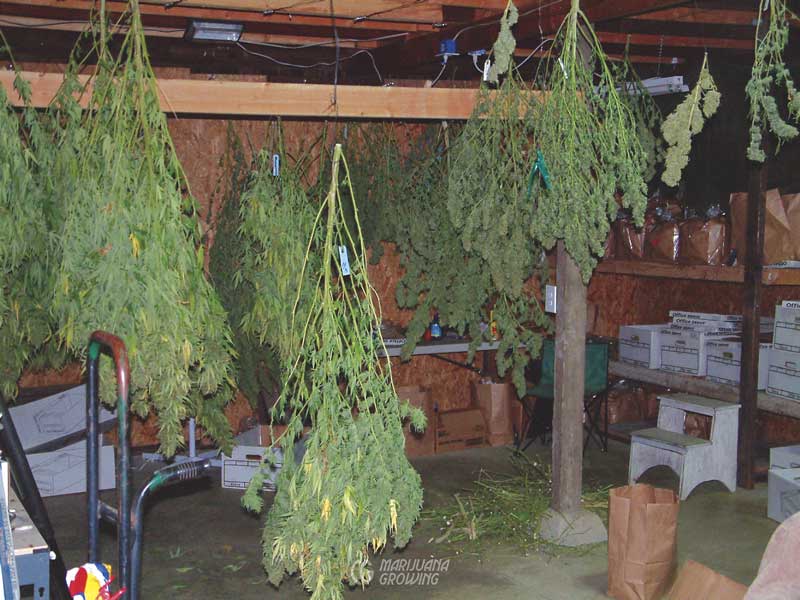
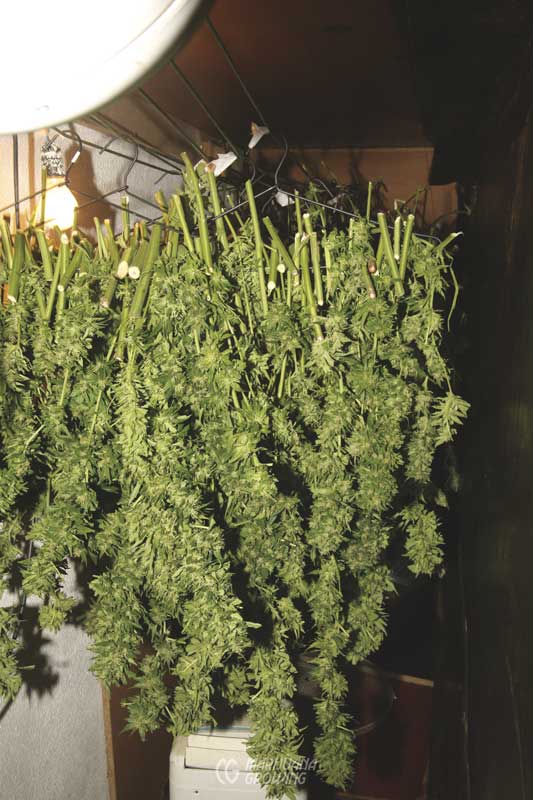
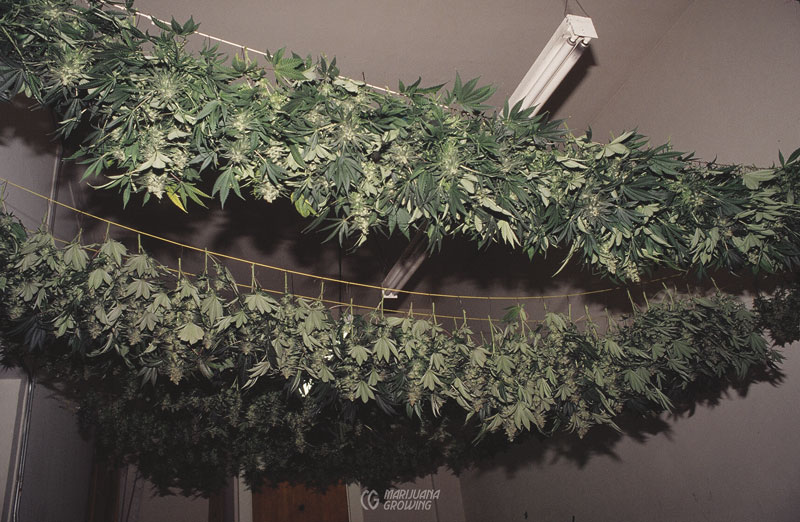
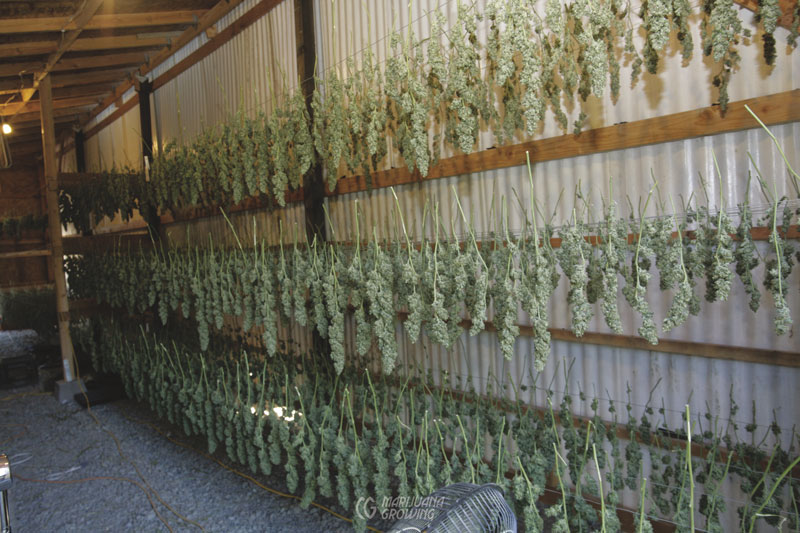
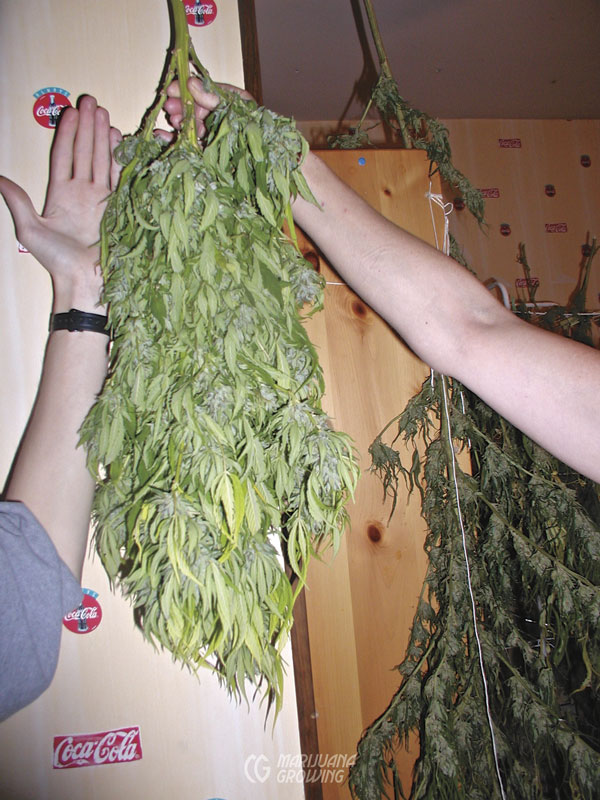
Hanging plants upside down to dry is simple, convenient, and effective. Contrary to rumor, hanging plants upside down does not drain existing cannabinoids into flower buds. Cannabinoids do not migrate to other parts of the plant after harvest.
Before Harvest
Do not water for 1 or 2 days before harvest. The soil should be fairly dry, but not dry enough that plants wilt. This will speed drying time by a day or more and will not affect the quality of cannabinoids and terpenes.
The fragrance of flowering medicinal cannabis is often pungent before, during, and after harvest. If air in and around drying and manicuring rooms is stagnant, odors will linger and accumulate. To help control fragrance, keep drying and manicuring rooms well vented. If possible, allow plenty of fresh, circulating air to pass through the drying room to remove fragrances quickly. Keep temperatures below 70°F (21.1°C) to minimize aroma.
Loss of Fragrance
“Terpenes, or terpenoids, are the compounds in cannabis that give the plant its unique fragrance. THC and the other cannabinoids have no odor, so marijuana’s compelling fragrance depends on which terpenes predominate. It’s the combination of terpenoids and THC that endows each strain with a specific psychoactive flavor.” —Martin A. Lee, “Talking Terpenes,” High Times
The aroma, taste, and ultimately the effects of smoked cannabis depend upon the mix of terpenes and cannabinoids. Often cannabinoids and terpenes volatize and are destroyed during flowering, harvest, and storage as a result of high temperatures and maltreatment. The absence of these compounds diminishes bouquet and taste. It can also change the overall effect of the cannabis.
Cannabis plants lose their fragrance for a combination of reasons, all of which involve destruction of terpenes or the creation of a poor environment for terpene development. During flowering, plants that are subjected to heavy weather—including wind, rain, and hot sunlight or artificial light—are often less fragrant. Outdoor plants also accumulate surface dust, bacteria, and other bad stuff. When allowed to remain on the plant, these pollutants can smell and may possibly speed cannabinoid and terpene degradation. Funny thing is that poorly ventilated indoor environments are often more polluted than the great outdoors. Such pollutants can also play a role in diminishing fragrance.
Terpenes and cannabinoids evaporate into the air in a wide range of temperatures: 246ºF to 815ºF (118.9ºC–435ºC). As temperatures climb, more and more terpenes evaporate into the air. Terpenes can be destroyed by high temperatures, humid weather, wind, rain, and fondling or rough handling. Also, terpenoids may not have a chance to develop properly on plants that grow under stressful conditions caused by climate, poor care, or attacks by pests and diseases.
Cannabis can lose its fragrance when it dries too hot and fast. Fast drying does not allow enough time for chlorophyll and other pollutants to dissipate, and they may remain in the foliage. Lingering smells and tastes of these undesirable elements can impart detectable odors and tastes when consumed.
When poorly dried, and allowed to stay too wet, as if in a compost pile, cannabis starts anaerobic decomposition. This process causes cannabis to smell like wet hay and, in extreme cases, to have an ammonia-like odor.
Plants can harbor powdery mildew or another disease within their tissue. Powdery mildew is impossible to detect without laboratory analysis. Such diseases weaken plants and could also play a part in the deterioration of fragrance.
Bacteria, dead microscopic pests and their feces, dust, and many other pollutants remain on the surface of cannabis foliage at harvest. These elements could also affect fragrance. Washing harvested cannabis with a dilute bath of H2O2 will remove and disinfect plants. Clean plants smell “fresh”; the fragrance of cannabis is all that remains.
Genetically, some plants appear to be predisposed to less aroma and to losing fragrance over time. In combination with climatic conditions, genetics could play a role in minimizing cannabis fragrance.
Negative ion generators act within a small area and have little impact on the fragrance of growing cannabis. Ozone generators introduce ozone (O3) into an enclosed area. The O3 converts to O2 within a few minutes. Carbon filters remove fragrances before air is expelled outdoors*.
*A free radicle of O floating next to O2 becomes stable when they combine to form O2, oxygen. However this O molecule could attach to any carbon it finds and strip it away. Much of the O3 is converted to O2 in the air, but laws of equilibrium and diffusion also apply.
Ozone generators should be located outside of occupied cannabis drying and manicuring rooms. See chapter 16, Air, for more information.
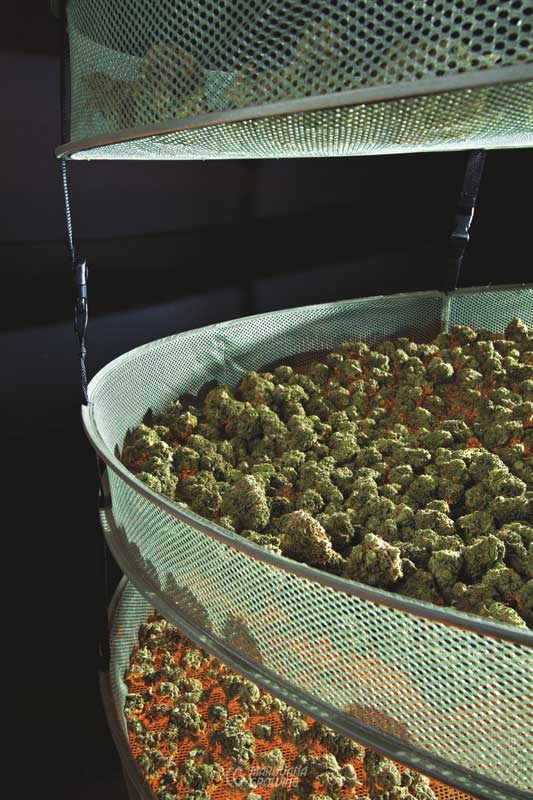
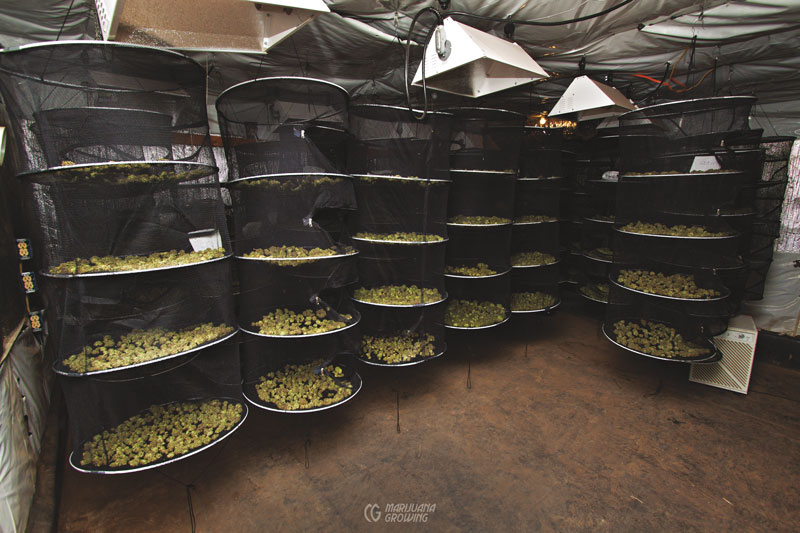
Plenty of air circulation and ventilation is necessary for manicured flower buds to dry. The buds in these net trays are turned once or twice a day by hand for even drying.
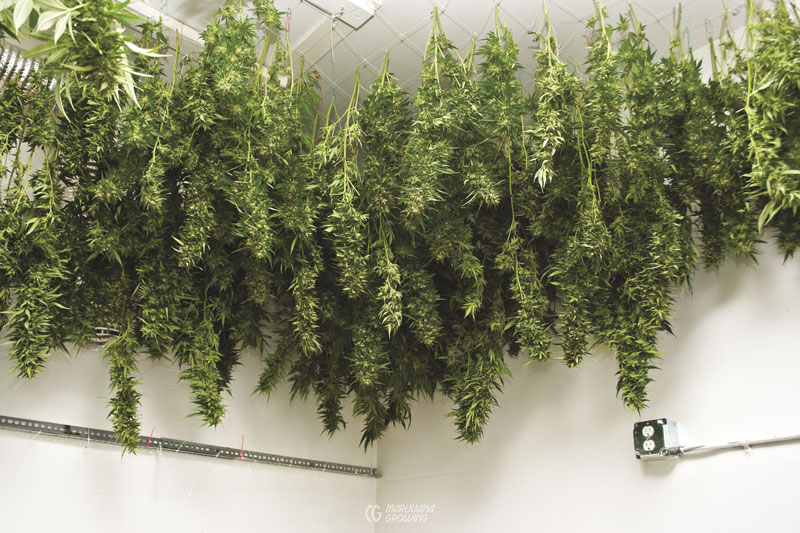
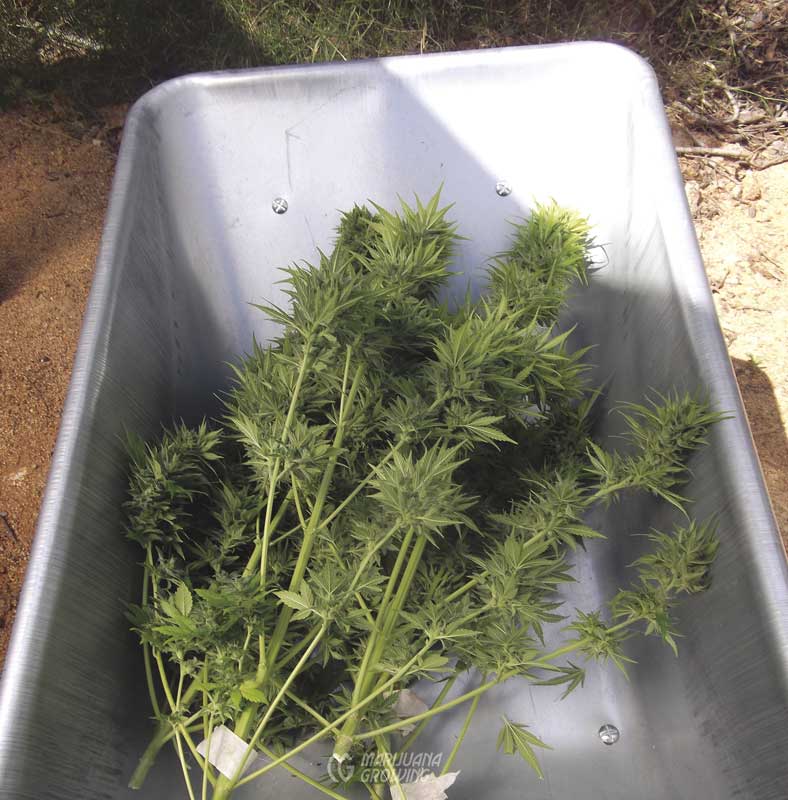
Hanging complete branches is a great way to dry flower buds of medical cannabis. These branches have just been harvested. The large leaves have been removed and the buds lightly trimmed.
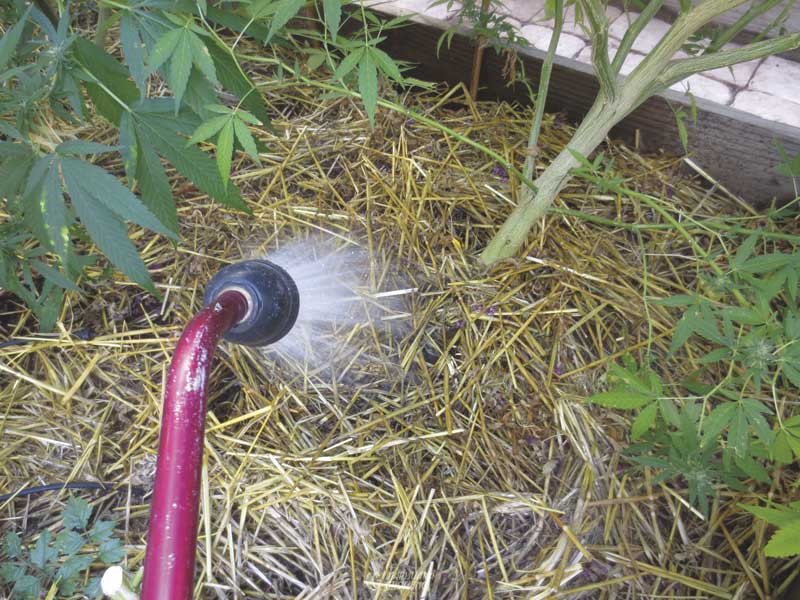
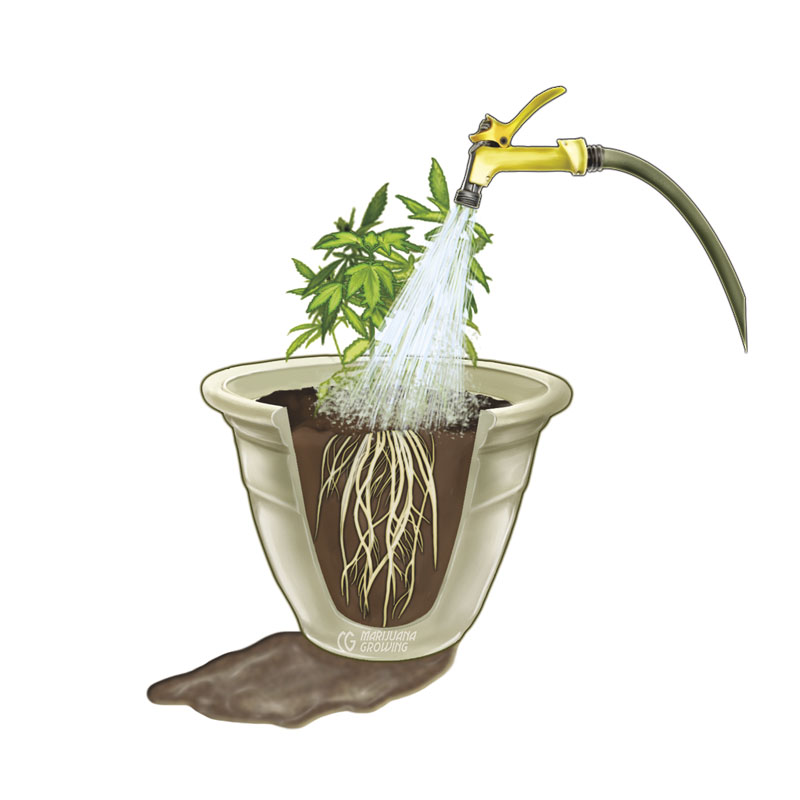
Watering is important during the flowering stage. Check soil moisture daily to avoid overwatering. Always irrigate in the morning so that the majority of water is used during the day. Soggy roots at night will slow growth substantially.

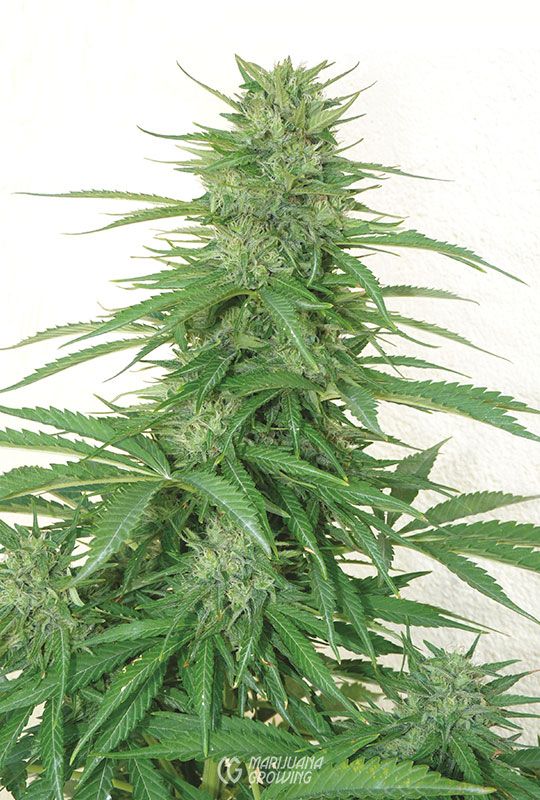
This big, healthy crop of ‘Blue Dream’ is ready for harvest.
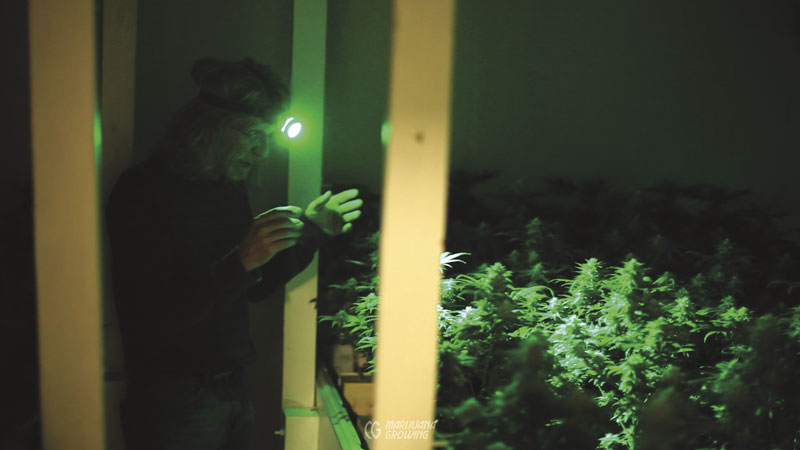
A green light or a UVB lamp makes pest trails and diseases very easy to see.
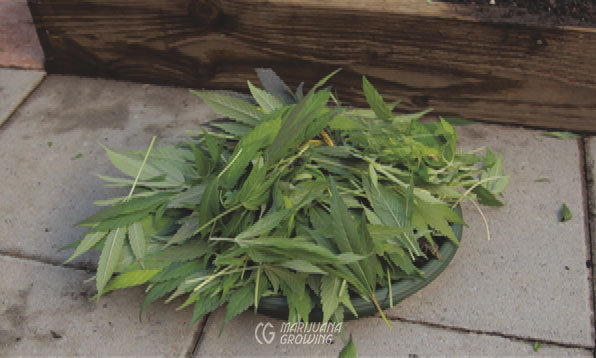
Save large leaves for making concentrates or for use in cooking.
The fragrance of cannabis can also be controlled by sealing the drying and manicuring rooms. Set up a fan and carbon filter in the room to remove fragrances before venting the air out of the room. See “Fragrance” in chapter 16, Air, for more information.
Avoid the taste of chemical and organic fertilizers in harvested buds by leaching with plain water or a clearing solution to remove any residuals and chemicals that have built up in soil or plant foliage. Five to six days before harvesting, leach the growing medium with clean tap water or reverse osmosis water. Use a clearing solution such as Final Flush to remove any built-up nutrients in soil.
Leaching soil will wash out any fertilizer salts that have accumulated in the soil. This allows the plant to use the balance of the nutrients in its system before harvest.
Some indoor gardeners fertilize with a liquid salt-based fertilizer until 2 or 3 days before harvest, and use a clearing solution to remove fertilizer residues. They say the practice helps plants retain weight in flower buds. But it does not make buds grow any faster, and fertilizer residues are still present in plant tissue. The tradeoff is that fertilizer adds weight at the expense of medicinal quality.
Apply the leaching solution according to directions on packaging. Always let at least 10 percent, preferably more, drain out the bottom of containers. If using a recirculating hydroponic system, change the water after the first 4 to 6 days of application. Continue to top off the reservoir with “clean” fresh water.
How to Tell When Fertilizer Could Affect Taste
- Leaf tips and margins are burned.
- Leaves are brittle at harvest.
- Flower buds smell like chemicals.
- Flower buds crackle when burning.
- Buds taste like fertilizer.
Do not water cannabis for 1 or 2 days before harvest. The soil should be fairly dry but not dry enough that plants wilt. This will speed drying time by a day or more and will not affect the quality of cannabinoids.
Inspect plants at night with a green light or a UVB light. Powdery mildew and insect feces and trails are visible; they actually jump out at you as if you were reading an eye chart in the optometrist’s chair. Carefully remove all signs of powdery mildew before it enters plant tissue. Spray fungus with an organic fungistat before removing affected plant parts to ensure that the disease does not contaminate the rest of the crop. This method works only when there is very little mildew.
Some gardeners keep plants in 24 to 48 hours of darkness before harvesting. They say this practice causes buds to become more resinous.
Leaves
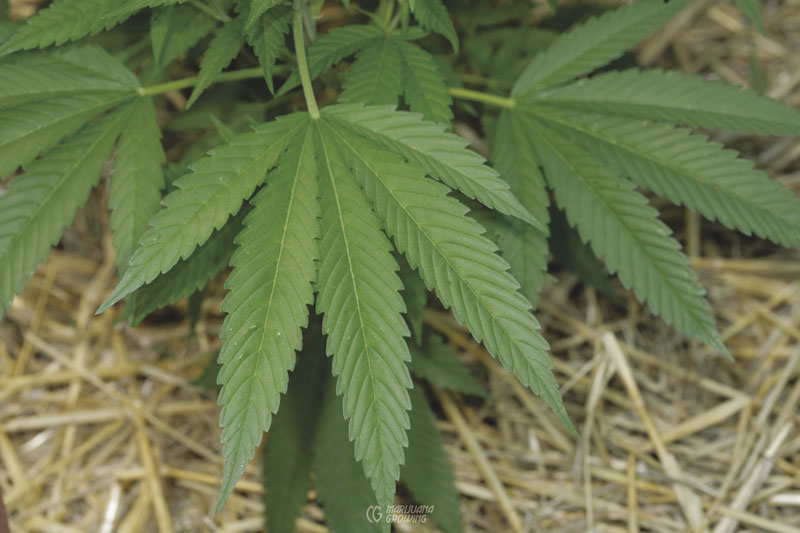
Once the large leaves are fully formed, cannabinoid potency has generally peaked out. Potency increases from the bottom of the plant upward. Large, old bottom leaves are not as cannabinoid-potent as younger smaller leaves toward the top of the plant. The most cannabinoid-potent part during much of the growth stage is found at the tips of branches in the small leaves and well-formed shoots.
Cut the entire leaf, including the leaf stem (petiole) and toss it into a bag. If left on the plant, the petiole shrivels and may attract fungus. Paper bags breathe well and can be closed by folding over the top. Plastic bags do not breathe and often “sweat” inside, so the top of the bag must be left open.
Once cut, turn plants or branches upside down, and start removing large leaves by hand. Make sure to inspect all leaves for resin!
Leaves on this ‘Maui’ plant are developing resin as it matures. Leaves closer to flower buds and near the tops of plants tend to have more resin than those closer to the bottom of the plant. Always check leaf undersides for visible signs of resin. Start another paper bag to segregate leaves that show visible resin. These leaves are great for making hashish. (MF)
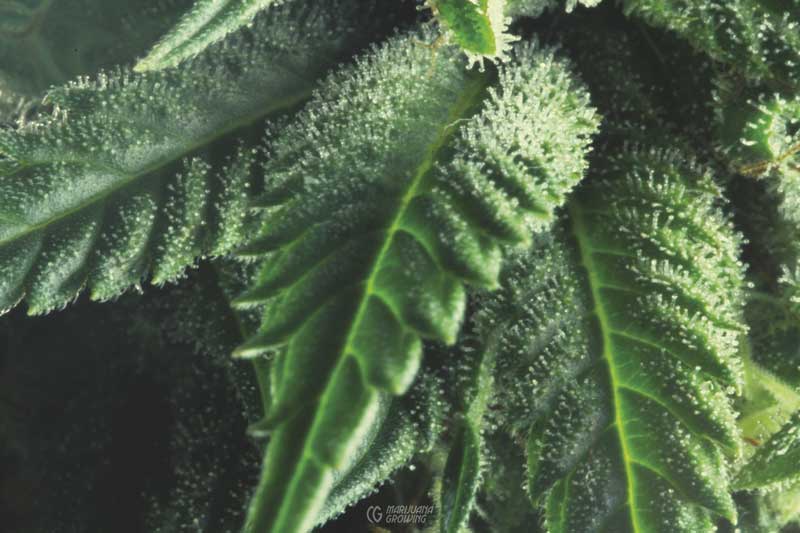
The resin on these ‘Jack the Ripper’ leaves is as thick as found anywhere on a flower top. It is easy to separate the resin glands from foliage into a concentrated form. Save leaf trimmings laden with visible resin to make concentrated hashish. (MF)
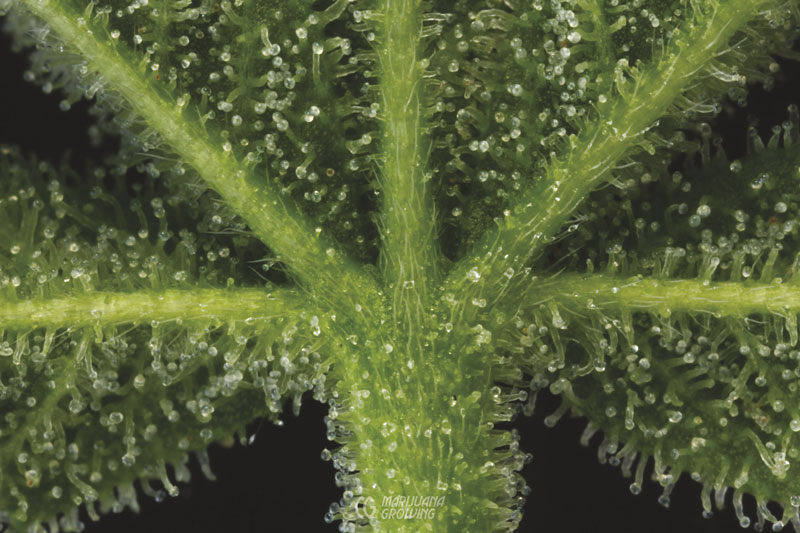
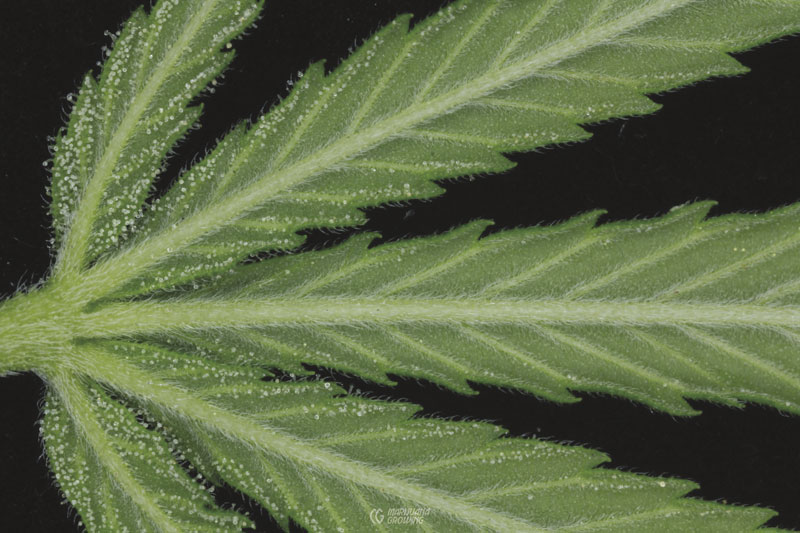
This ‘Garlic’ leaf is magnified 4X. Often small leaves around flower buds harbor as much resin as the flower buds themselves. These small leaves continue to develop resin until buds are ripe. These small leaves can be left with flower buds or separated to be used for a different purpose. (MF)
The leaf stem (petiole) has few resin glands that contain cannabinoids. This image shows many cystolith glands.
Harvest leaves if they show signs of disease or rapid yellowing that fertilizer has failed to cure. Once they start to yellow and die, their potency decreases rapidly. This is true especially with large, older “fan” leaves that turn yellow when nitrogen-rich fertilizer is withheld during flowering.
Keep the paper bag in a closet or area with 40 to 60 percent humidity and 60°F to 70°F (15.6°C–21.1°C) temperature. Reach into the bag once or twice a day and stir leaves by hand. Leaves should be dry to the touch in 5 to 7 days. Once dry, place small resinous leaves in the freezer so resin glands will readily separate from foliage. Large leaves carry fewer cannabinoids and are most useful to make tinctures, food dishes, and drinks. See chapter 26, Medicinal Concentrates & Tinctures, and chapter 27, Cooking with Medicinal Cannabis, for more information.
Male Harvest
Harvest male cannabis plants as soon as they are identified, unless they are to be used for breeding. Males produce less and lower-quality cannabinoids, as well as taking up valuable space in the garden. Male flowers can produce pollen indoors or in light-deprivation greenhouses as early as 2 weeks after inducing flowering with the 12-hour day/night schedule. Outdoors, male pre-flowers contain pollen too. Watch out for early openers. Three to 6 weeks after initiating flowering, pollen sacks open. Plants continue producing flowers for several weeks after the first pods have begun to shed pollen. Once male flowers are clearly visible but not yet open, cannabinoid production is at peak levels. Remember, though, that cannabinoid content is low in male flowers even at peak production. After males have released their pollen, the degradation process speeds up and flowers fall.
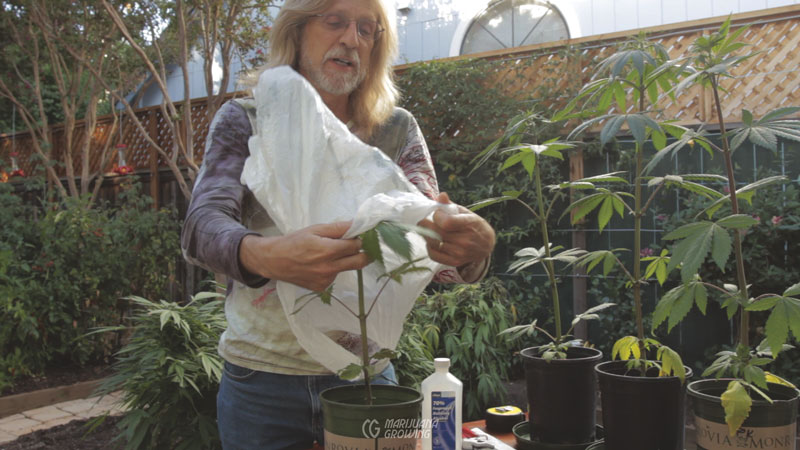
Before removing male plants from the garden, cover them with a plastic bag to help contain pollen.
Branches full of male flowers can be stored in a glass of water for several days. Their pollen sacks will continue to open. The pollen is easy to collect once it is contained in the bag.
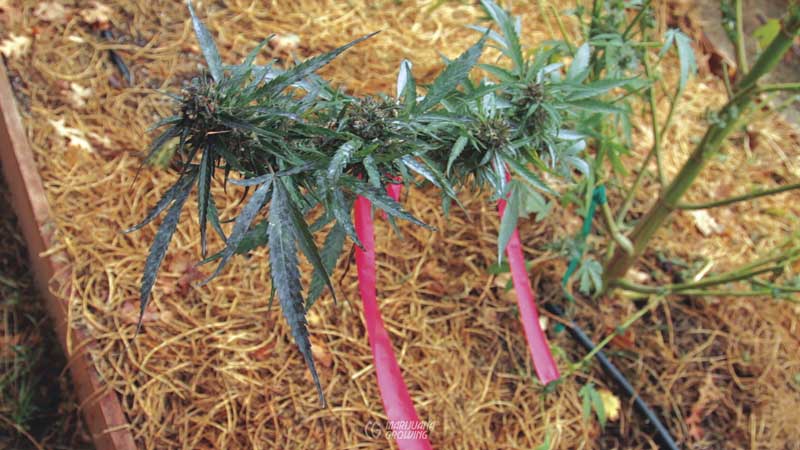
This is the last branch on a harvested outdoor female plant. A couple of plastic ties mark this branch full of flower buds that was fertilized by male pollen and left to mature after harvest.
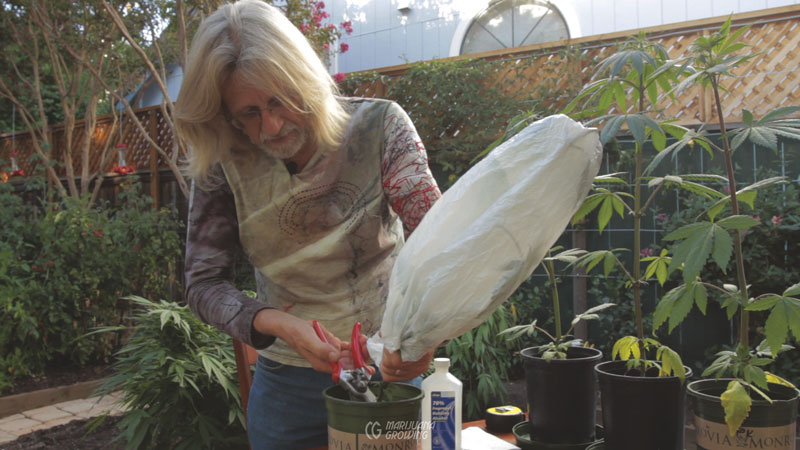
Harvest males carefully, especially if they are close to females. Spraying males with water will render pollen useless and help avoid accidental pollination. Cut the plant off at the base, taking care to shake it as little as possible. To help prevent accidental pollination by an unnoticed open male flower, carefully cover the male plant with a plastic bag, and tie it off at the bottom before harvesting. Or, if you can see an open male flower, spray it with water to make pollen unviable.
Keep males used for breeding as far from flowering females as possible. Make sure to install fine screens for air coming into the flowering room and wet them down regularly to discourage rogue pollen. Isolate males until needed. After a month, the male often starts reverting to vegetative growth even though it retains viable sacks of pollen. Males can also be cloned and held in the vegetative stage until needed. Induce flowering about 3 weeks before viable pollen is needed. Within 3 to 5 weeks, the male will be full of viable pollen sacks.
Swollen seed bracts on a ripe ‘Jack Herer’ female.
Prolong harvest on 1 or 2 males by removing flowers with tweezers or fingernails as they appear. New flowers soon emerge after plucking old ones. Continue to remove pollen sacks until females are 2 weeks from full bloom. Picking off individual male flowers is a tedious, time-consuming process, and it is easy to miss a few.
Harvesting most of the branches and leaving only 1 or 2 pollen-bearing limbs is practical. A single male flower contains enough pollen to fertilize many female ovules; a single branch full of male flowers is more than adequate to produce enough pollen for most home seed crops and breeding needs.
See “Making Seeds at Home” in chapter 25, Breeding, for complete information on harvesting.
Sinsemilla Harvest
According to cannabis expert Mel Frank, “the “peak potency window” lasts at least a week while the potency stays within a few percent of its highest. It is not critical whether to harvest today or tomorrow, but it is critical whether to harvest this week or next.”
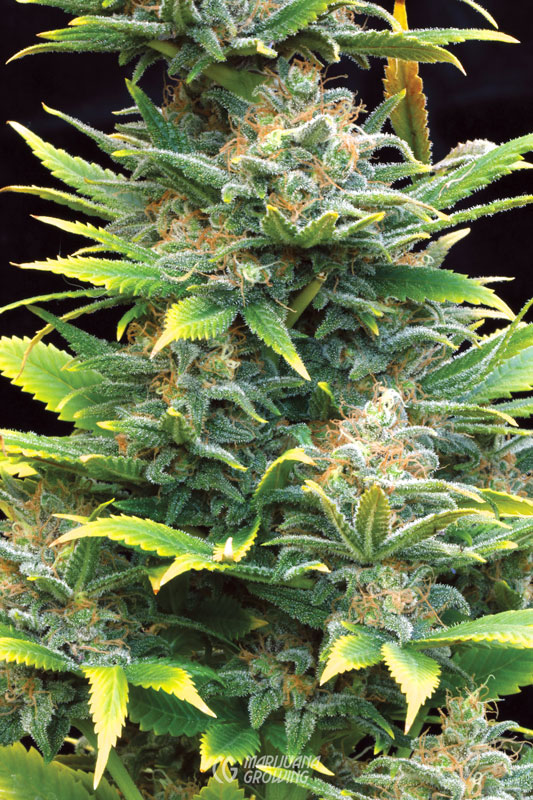
Harvest sinsemilla when the flowering cycle is coming to an end and further growth will be slow and minimal. Besides slowed growth, bracts, stigmas, and resin glands function as 3 easy-to-use indicators to help you determine when to harvest. When using commercial seeds from reputable breeders, medical gardeners also have the breeders’ recommendation for weeks-to-maturation, particularly indoors.
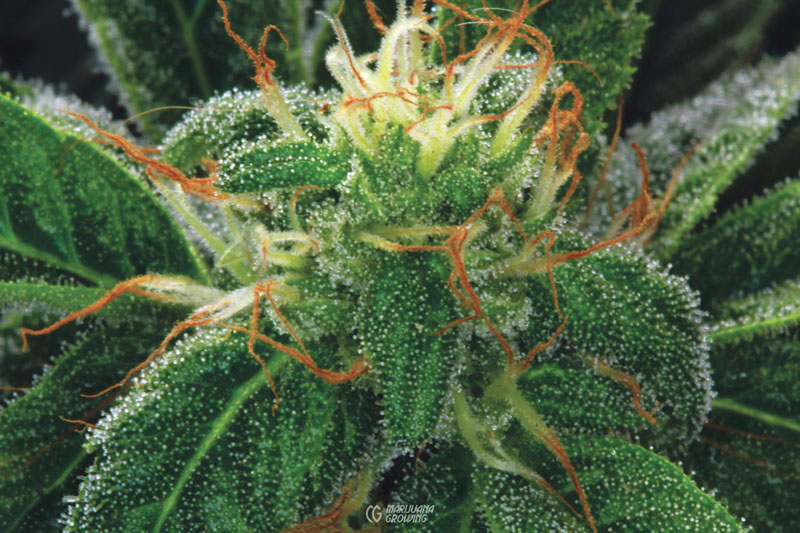
Bracts: Especially look at the bracts, all of which should be mature and swollen except for bracts at the very tops of the buds. The topmost bracts should have begun to swell but not yet be fully swollen.
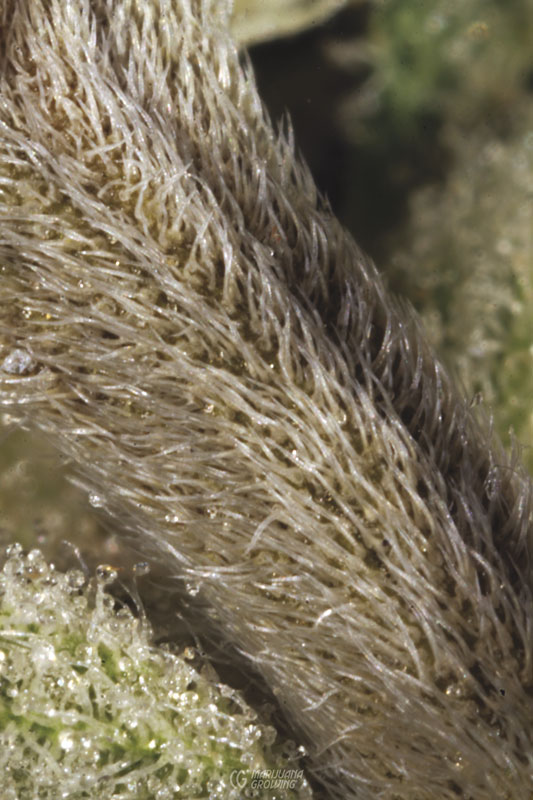
Stigmas: Most of the stigmas (a good 90 percent)—the pollen-catching “fuzzy white “hairs”—will have withered and turned rust/brown. The few remaining, still-white stigmas will have started to curl and will no longer look fresh, straight, and receptive to pollen. All cannabis plant parts except roots, seeds, and stigmas are covered with resin glands. Stigmas are devoid of resin and claims that these are potent are simply wrong. The only resin stigmas might have would come from contact with resin from broken or secreting resin glands on the bracts.
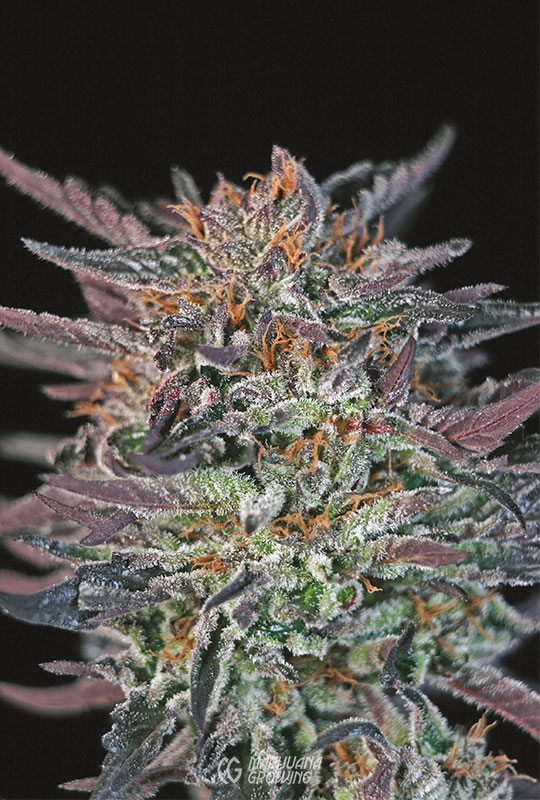
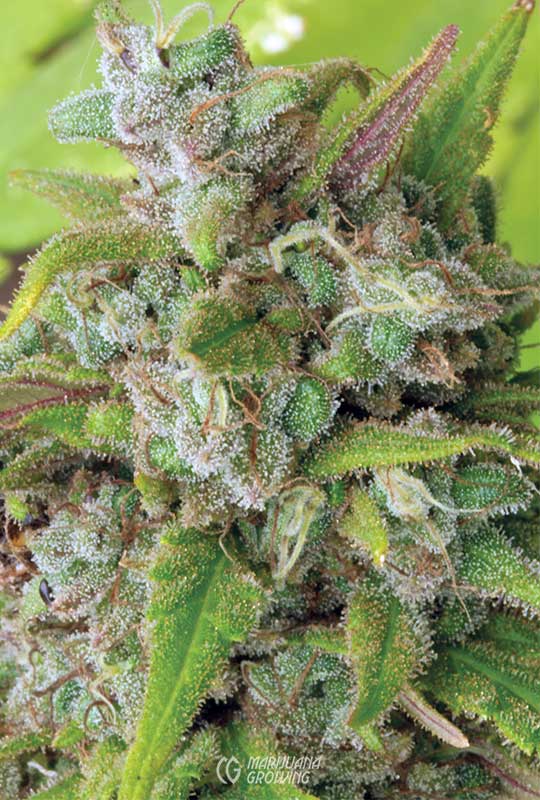
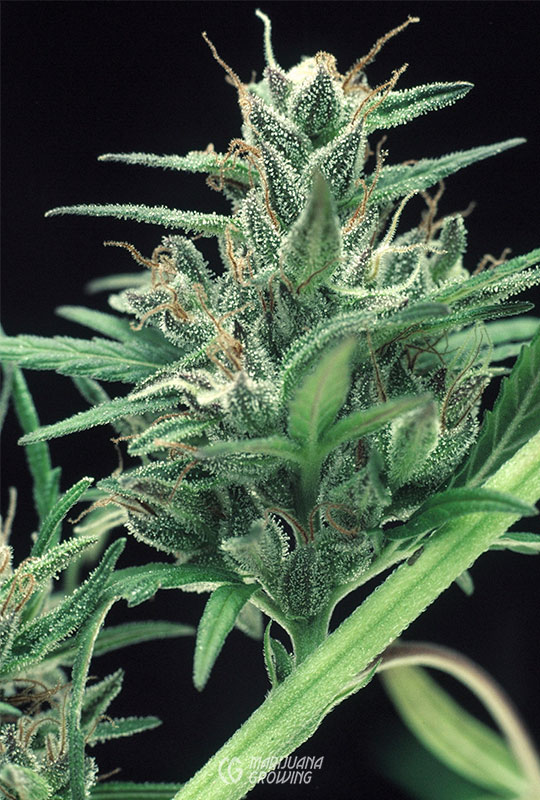
The images opposite follow different varieties of cannabis through the last few weeks of flowering. Notice how the bracts and stigmas change to indicate peak harvest time.

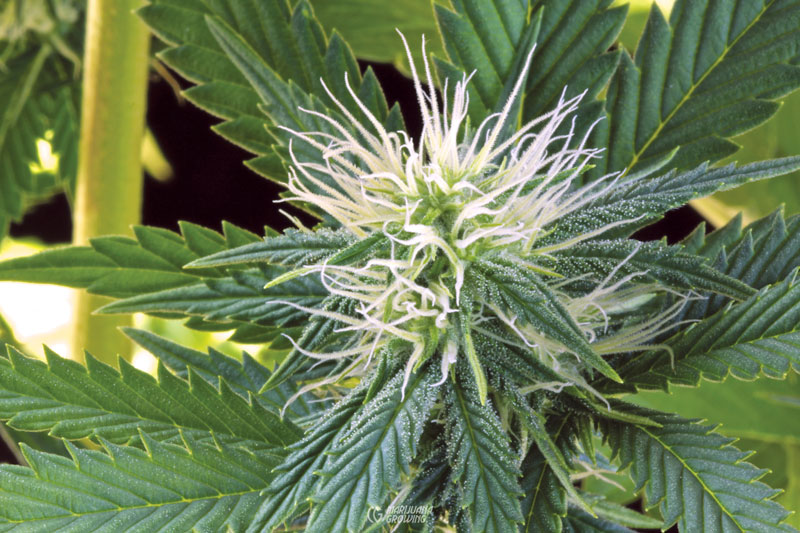
This indica variety, ‘Garlic’, is just starting to develop white stigmas to attract male pollen. (MF)
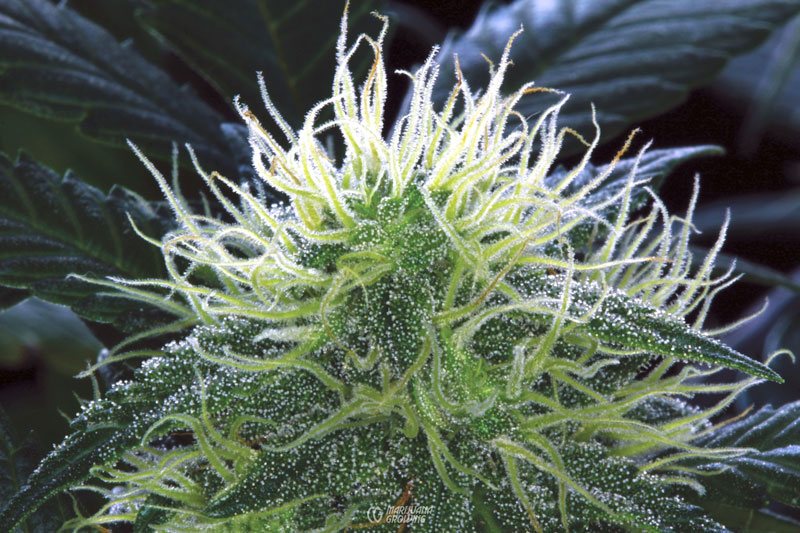
This ‘Maui’ bud continues to flower and develop stigmas while waiting for male pollen to land. When there is no male pollen available, growth continues. (MF)
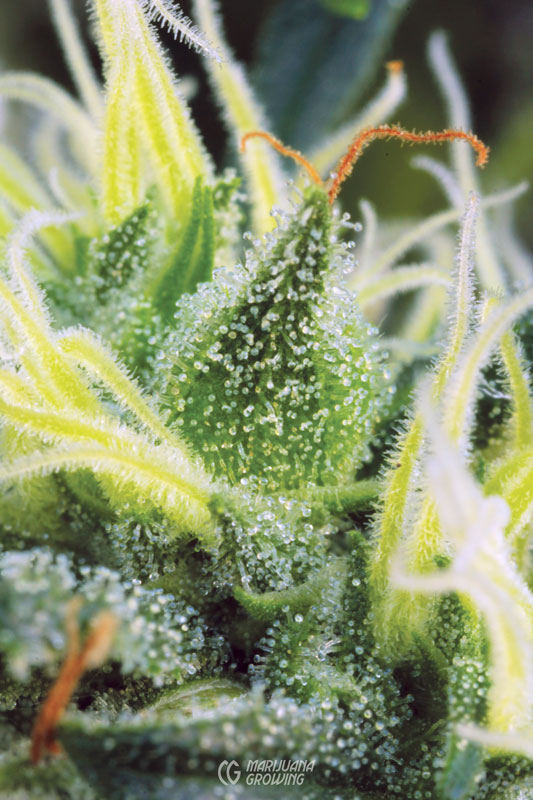
White female stigmas from this ‘Skywalker’ grown indoors continue to grow from seed bracts. Notice that resin is starting to become visible with the naked eye. (MF)
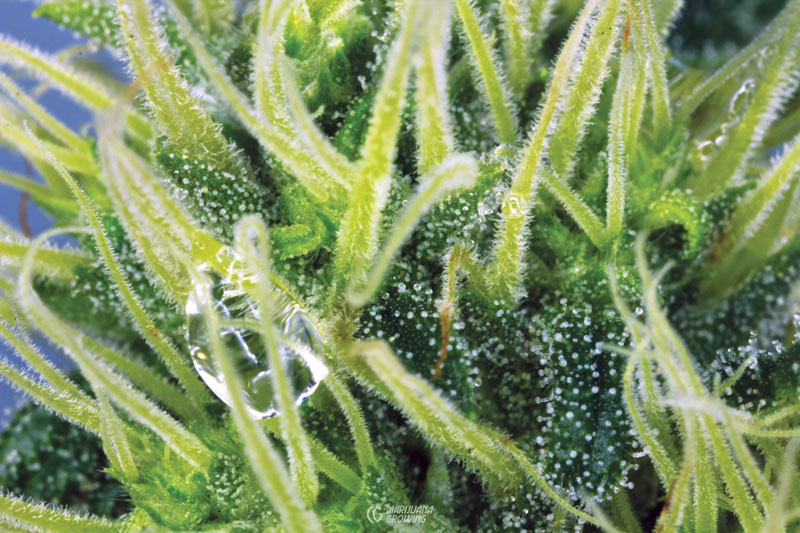
Overhead watering and sprays should be avoided during the last 2 weeks before flowering. A drop of dew water is suspended between the stigmas of this ‘MK Ultra’ × ‘Sensi Star’, but any more water would stay in between seed bracts and attract rot. (MF)
During flowering, changing the fertilizer to a high-phosphorus, high-potassium, low‑nitrogen mix causes larger leaves to yellow as harvest progresses. (MF)
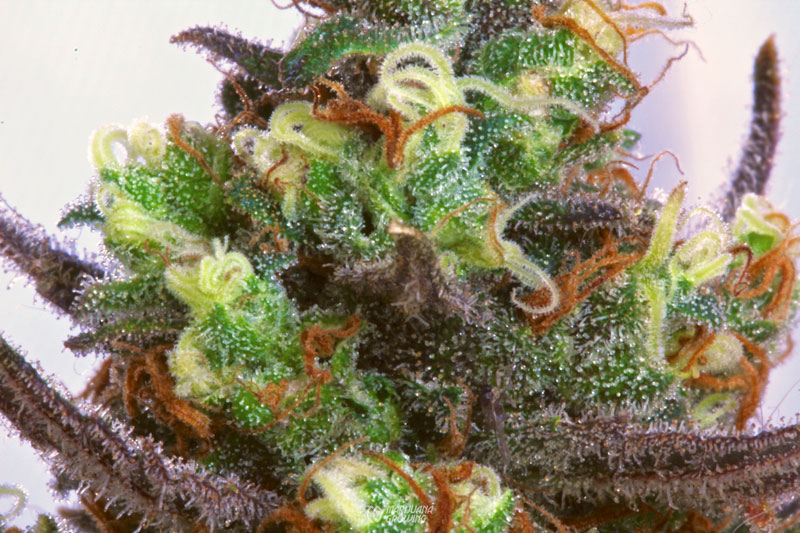
Stigmas tend to die back at the same rate as capitate-stalked resin glands start to weather and experience oxidation, turning amber in the process. The images show the change in the stigmas as they wither. The following images follow a progressive sequence of the maturation of the pedicellate capitate resin glands until harvest.
Here is a close-up of a ‘Maui’ bud on which pairs of white female stigmas are just starting to senesce. You can see that a few pairs of stigmas are completely dark. In this case, the stigmas have been fertilized by male pollen. (MF)
Stigmas on this ‘Haze’ × ‘Northern Lights 5’ × ‘Sensi Star’ cross are dying back a little at a time and will continue to convert from white to reddish-brown as flowers mature.
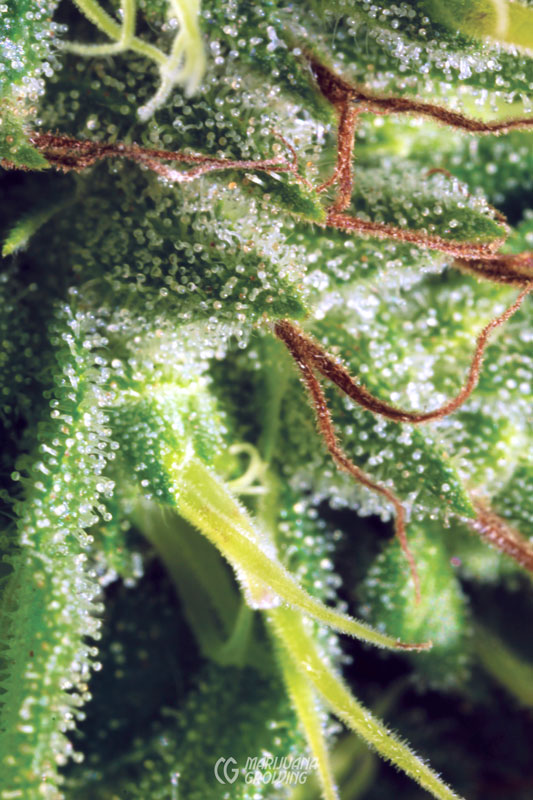
More and more stigmas on this ‘OG Kush’ × ‘Master Kush’ are dying back as harvest day nears. Look at the way the resin is continuing to pile up on the buds, small leaves, seed bracts, and foliage. (MF)
Half the stigmas on this ‘Purple Heart’ bud have died back and about half are healthy. This bud has so much resin that looking at resin glands could be the best indication of harvest time. (MF)
Stigmas on this ‘Diesel’ bud continue to die back and resin continues to populate buds. More resin is forming on small leaves now. (MF)
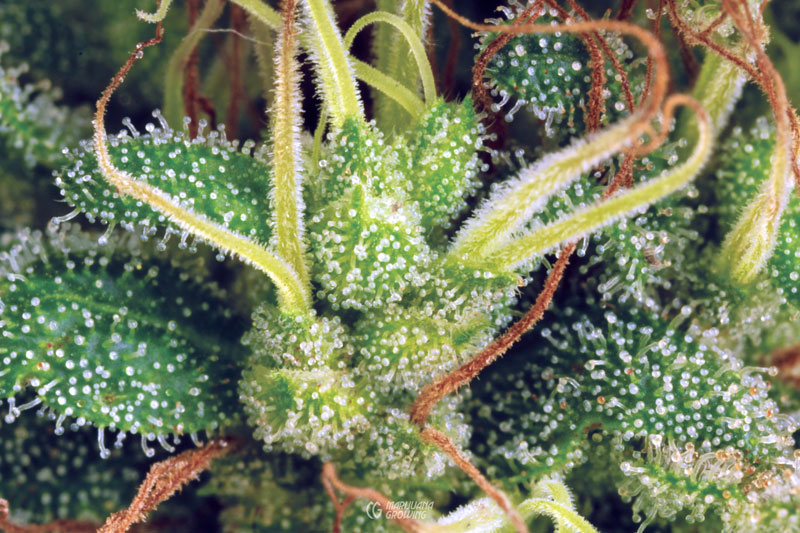
Seed bracts on this ‘Jack the Ripper’ bud continue to swell even though they contain no seeds. The seed bracts are packed with resin glands that still glisten in the light, although the stigmas have completely died back. (MF)
All the stigmas on this ‘Haze’ × ‘Northern Lights 5’ × ‘Sensi Star’ bud have turned a rich reddish brown and the resin glands are ready to harvest. This plant was grown indoors. Indoor plants tend to show resin turning amber at the same time both on seed bracts and small leaves around them. (MF)

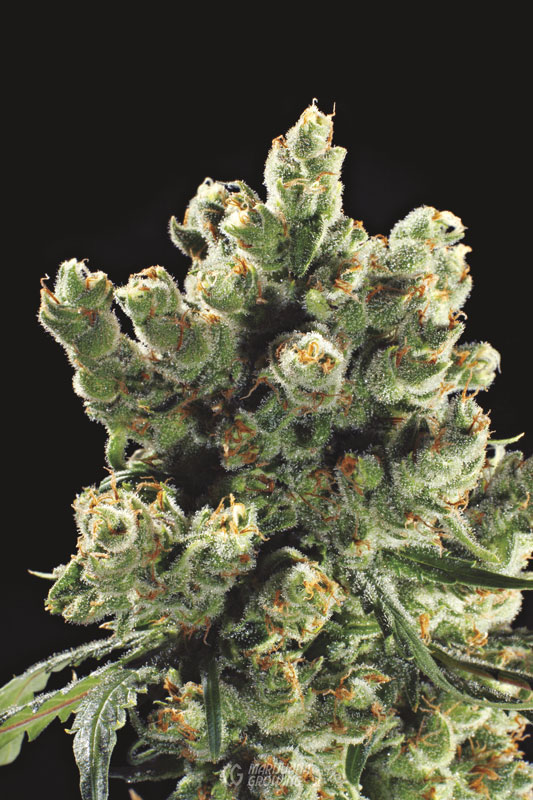
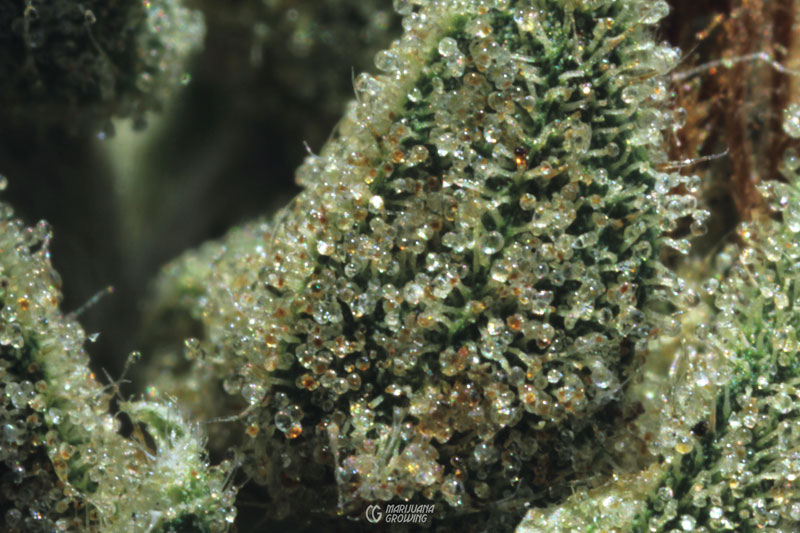
This plant bud is perfect and ready to harvest. All the resin glands are glistening in the light, and just a few resin glands have started to deteriorate.
Capitate-Stalked Resin Glands
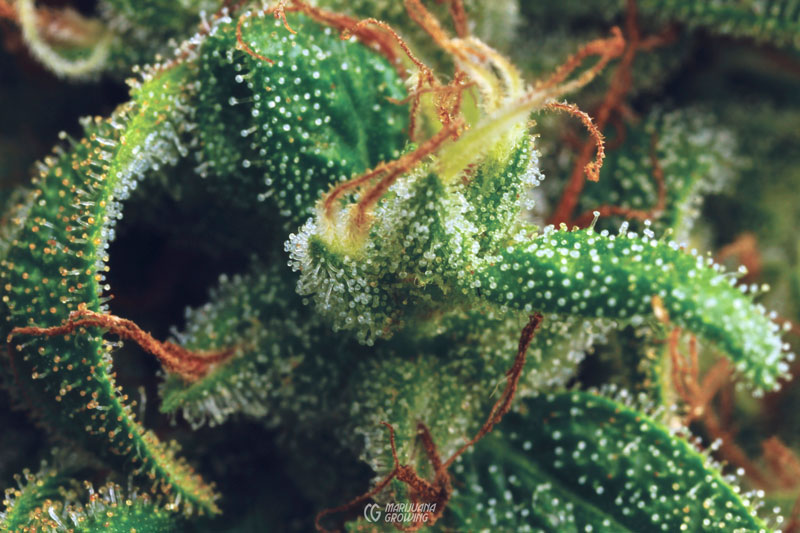
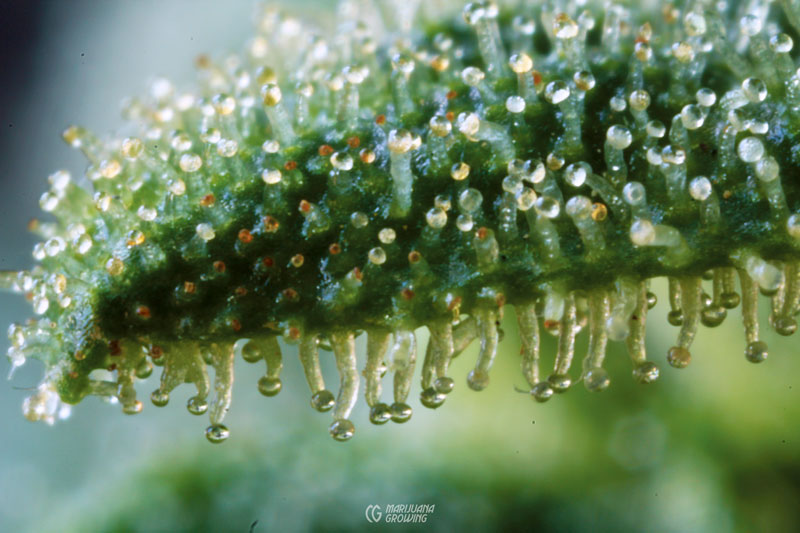
The best time to harvest is when capitate-stalked resin glands have developed a spherical head and have not yet begun to senesce. The glands start to degrade, turn amber, and fall apart; cannabinoid content diminishes and continues to digress. Check flower buds from each plant and harvest them individually as they become ready. Often the uppermost buds will be ready and harvested, while lower buds are left for another week or two to finish. Treat plants individually.
Resin glands that are bruised from being squeezed or jostled about deteriorate quickly changing color. The process is gradual, and individual resin glands change at different rates. Of course there are exceptions such as the variety ‘Blueberry’, which bears darker, even purplish resin glands.
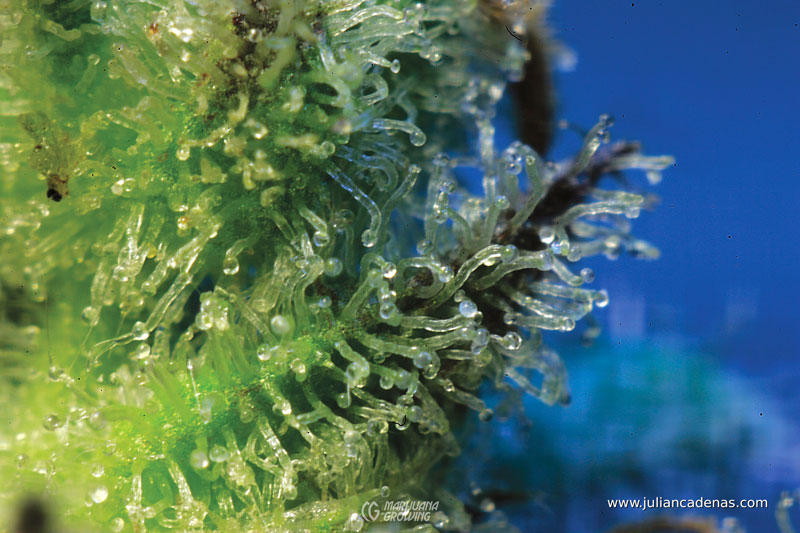
On indoor plants a majority of the glands should be clear or translucent; fewer should be cloudy or milky, and very few, if any, should have color. Resin glands with an amber color signify oxygen has entered the gland and the degradation process is under way. Look for well-formed capitate-stalked resin glands that are fully intact and translucent.
EThis outdoor ‘Haze’ × ‘Northern Lights 5’ × ‘Sensi Star’ bud ripens a little different than indoor cannabis flowers. The small leaves around the seed bracts tend to show oxidation first, which is demonstrated by the change in color from clear to amber. This is a sign of deterioration and loss of cannabinoid content. (MF)

The stigma on top is dying back while the stigmas below are still healthy. This plant has a few more days until harvest.
Resin glands on outdoor plants are entirely different. More often, a good number of the visible glands will be cloudy or milky rather than clear or translucent, although after harvesting, a look inside the buds reveals predominantly clear or translucent glands. Larger bud-leaves often have yellow or amber resin glands, but glands with color should be a small minority on bracts. Having some yellow or amber glands is typical on full-sun outdoor-grown plants, where lots of sun, significant swings in temperatures, bad weather, wet or dry soil, and physical damage affect resin glands.
This section focuses on capitate-stalked resin glands. The images show the resin glands just before peak maturity through senescence.
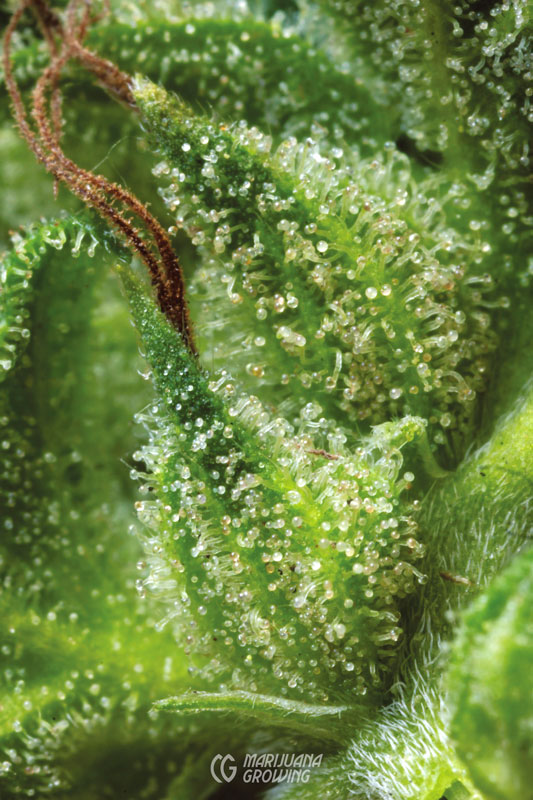
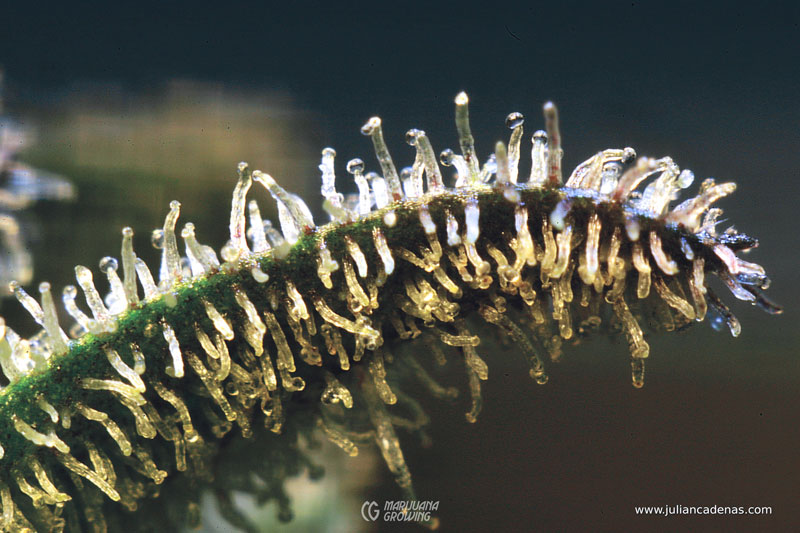
The tip of this resin-coated leaf of ‘Garlic’ shows a clear view of capitate-stalked resin glands. The majority of the cannabinoids, specifically THC, will be located at the base of the stalk, where the bulbous top connects. You can see that some of these resin glands have started to turn amber. (MF)
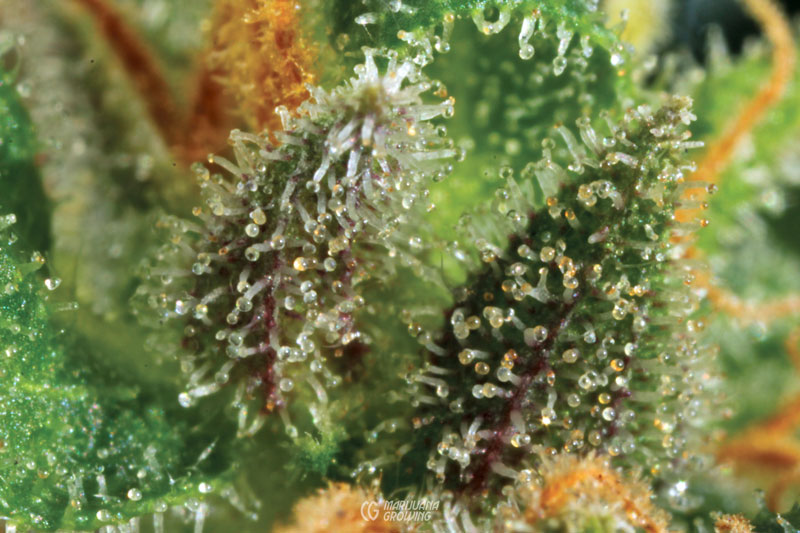
This close-up view shows beautiful resin glands at peak harvest. They are fully formed, strong, and healthy.
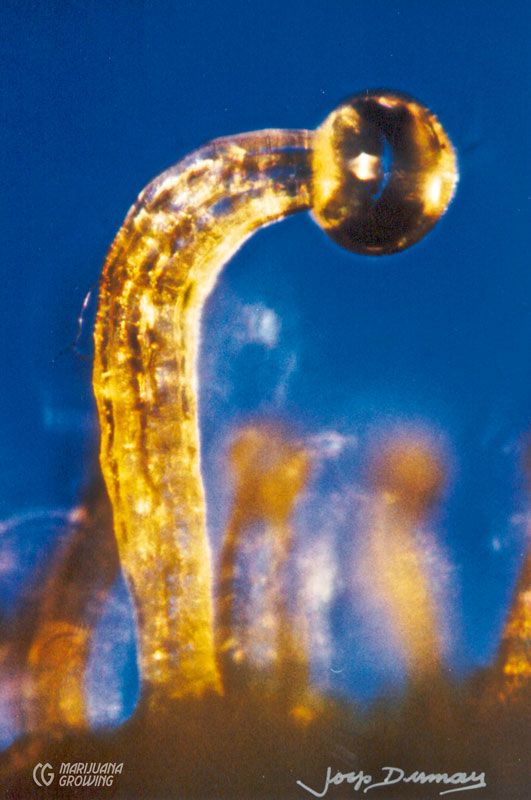
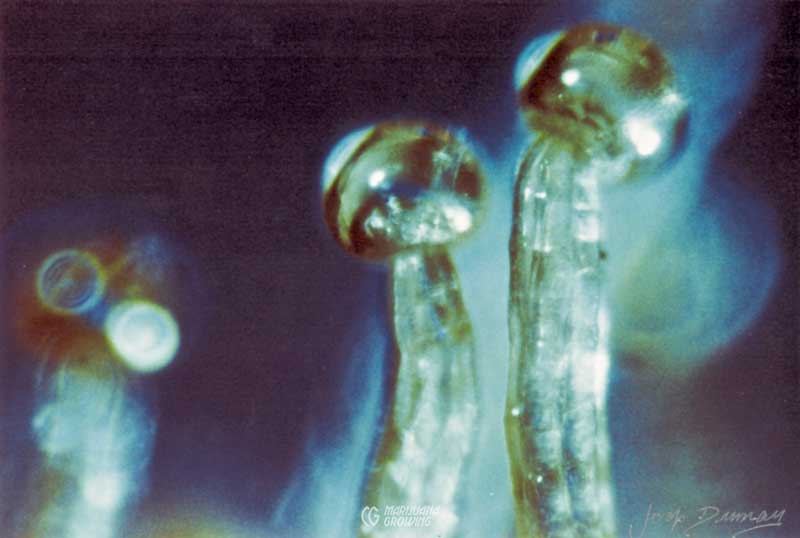
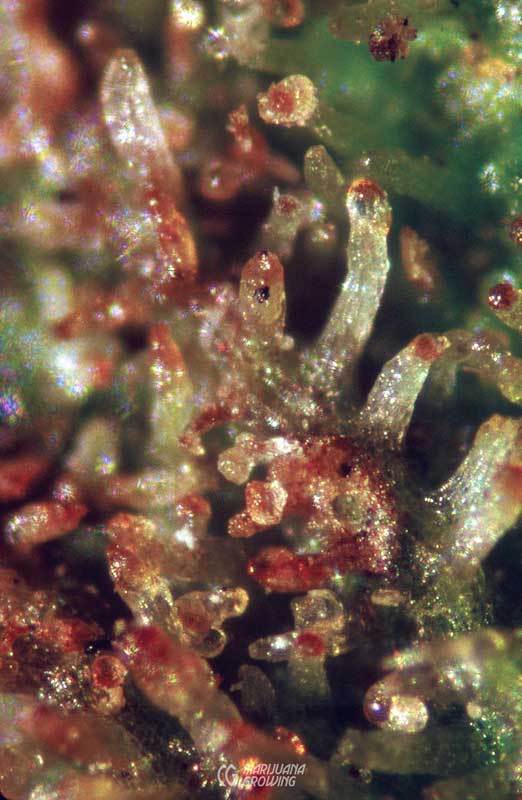
An amber color signifies oxidation and senescence of capitate-stalked resin glands. Once the inside of the bulbous top is exposed to oxygen, cannabinoids dissipate at a rapid rate.
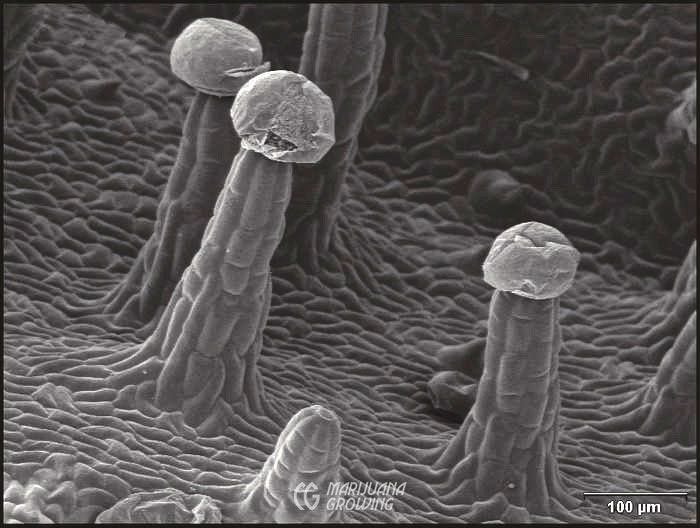
This scanning electron microscope image shows how the bulbous tops of the capitate-stalked resin glands suffer lesions from friction, wind, or rain, or start to naturally senesce—all of which will decrease cannabinoid content and potency. Such resin glands appear with an amber-colored bulb on top of a clear stalk under natural light.
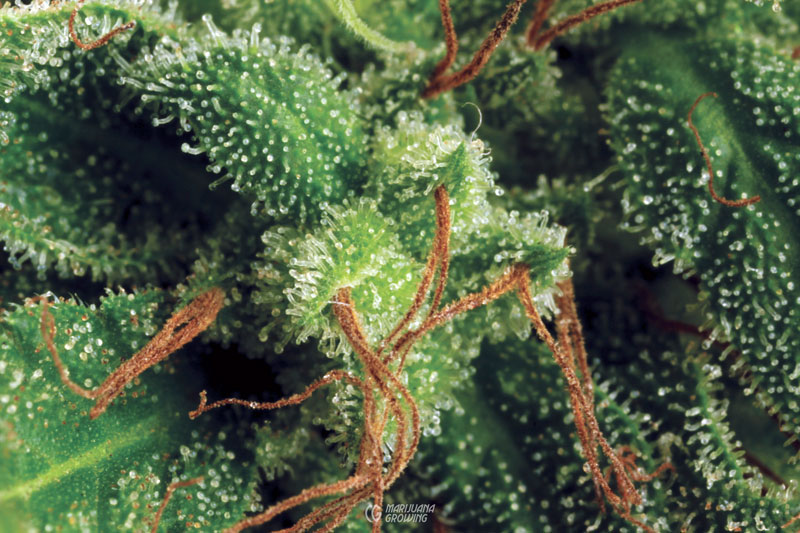
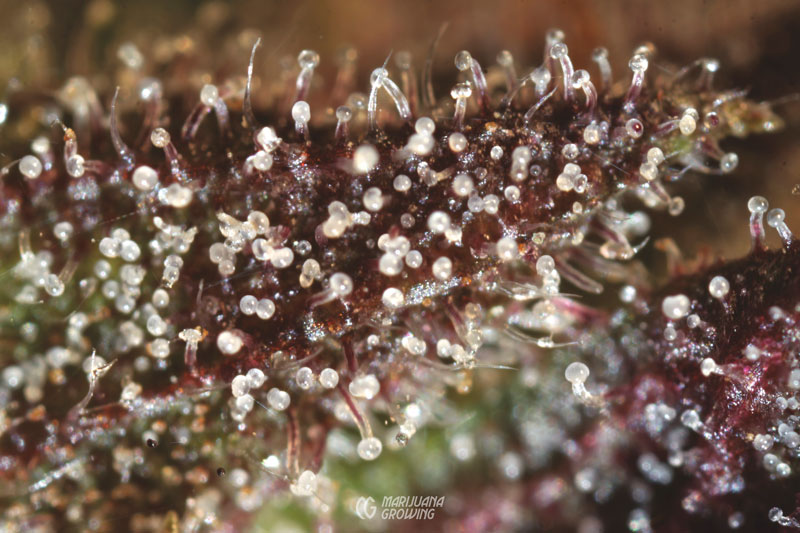
This ‘Skunk #1’ seed bract has some capitate-stalked resin glands that are perfectly clear and others that have started to turn amber. Time to harvest! (MF)
Ready to harvest! Look at the resin glands on this ‘Skunk #1’ bud to see that they are continuing to turn amber in color. (MF)
Here is the first in a three-photo sequence of the variety ‘Garlic’, showing resin glands on a small leaf. The first photo shows the resin glands completely clear to translucent. They cover the leaf! (MF)
The second photo shows that some of the resin glands are starting to turn amber. Notice that the heads are the first part of the gland to turn amber. (MF)
The third photo shows resin glands continuing to mature and turn amber as maturity slowly turns to senescence. (MF)
This close-up of a ‘Mexican’ from 1976 shows that the resin glands are well on their way to impotency. The bulbous heads have all ruptured and cannabinoids have volatized into the air. Few potent cannabinoids are left in the residue. (MF)
You can see that the resin gland heads are decomposing on the top of this leaf, and many resin gland heads on the bottom of the leaf have already disappeared. This plant is past peak harvest.
‘Cocoa Kush’ from DJ Short shows short, stocky resin glands.
Resin glands on this ‘Critical Mass’ flower bud have long stalks and small resin heads.
Qualities of Indica, Sativa, and Ruderalis
The difference between resin glands is striking—indica and indica-dominant resin glands tend to have a short, pyramid-like stalk with a big strong bulb on top. Sativa and sativa-dominant varieties tend to have a long, thin stalk with a large or small bulb on top. The bulbs on top of stalks are also different sizes. Large and small bulbous resin glands fall through different mesh sieves, making different grades of kief. Thin stalks tend to fall through sieves and create a “fiber” in the kief.
Flower buds harvested when the majority of resin glands have started to senesce generally deliver a more corporal or physical effect. Pure indica, afghani, and indica-dominant varieties harvested at this late point will possess a heavy body or tranquilizing effect. Waiting to harvest pure sativa and sativa-dominant varieties until this late stage does not take advantage of the high cannabinoid content. Such varieties are best harvested when resin glands are clear and ripe but not yet senescing.
Indica and Indica-Dominant Varieties
Pure indica varieties and indica-dominant crosses grown in greenhouses and indoors are harvested 6 to 9 weeks after inducing flowering with a 12/12- hour day/night photoperiod. Outdoors, indica-dominant plants often initiate flowering when they receive about 13 hours of daylight and 11 hours of darkness. Flowering increases as nights grow longer.
Some medical gardeners choose to harvest 6-week-old flower buds with showy resin glands that have lower cannabinoid content. Shorter flowering times make harvesting one more crop every year possible.
Sativa and Sativa-Dominant Varieties
Pure tropical sativa varieties, especially Thai and Asian varieties that were grown from native seed, take longer to bloom after turning the light to 12 hours. Seeds brought directly from the tropics can take 4 months to finish blooming under 12 hours of light. These types tend to form buds at an even rate throughout flowering, with no marked decline in growth rate.
Few indoor gardeners have the time or patience to grow pure sativa varieties because of their long flowering period, leggy stature, and low yield. Buds at the top of the plant often reach peak potency long before lower buds. See chapter 8, Flowering, for more information on altering the photoperiod to increase production and shorten flowering time.
Sativa-dominant crosses with indica varieties may not be ready for 10 weeks or more..
Magnifiers and Microscopes
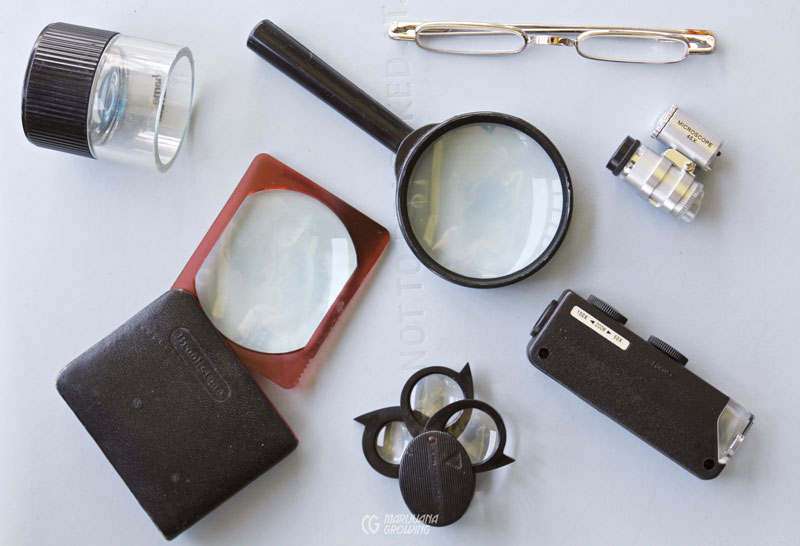
Use a magnifying lens or mini microscope to examine capitate-stalked resin glands. Use a 10X magnifying glass, jeweler’s loupe, or a 20X to 50X handheld microscope. My preference is a 45X handheld microscope with a battery-powered LED lamp. Look at resin glands without harvesting buds, or take a small, thin, resinous portion of a ripe bud and place it under the microscope at a low 30X to 50X magnification setting. If the microscope does not have a lamp, a flashlight will be necessary for an unshadowed view.
Sometimes it is easiest to remove a small piece of a bud so that you can get a complete view of it on the inside.
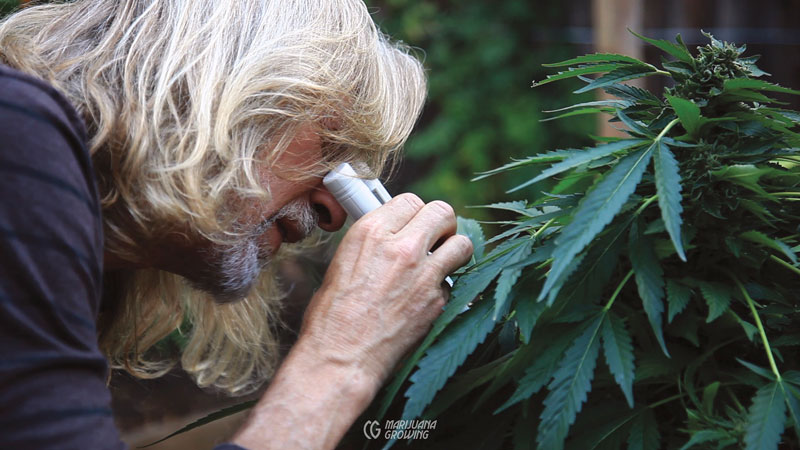
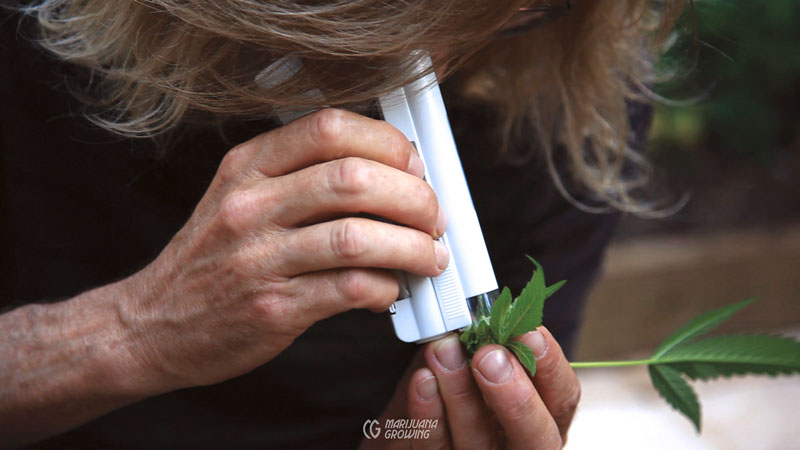
Look at resin glands right on the plant to make sure their growth is progressing properly. It is fun to watch them develop over time.
‘Granddaddy Purple’ is a cross between ‘Purple Urkle’ and ‘Big Bud’; both parents are indica-dominant.
Indica– and sativa-dominant varieties tend to flower differently. Indica-dominant ‘Purple Hen’ flowers tend to come ripe at the same time if they receive the same amount of light. (MF)
Sativa-dominant varieties like this ‘Afghani #1’ × ‘Chiba Colombian 60’ × ‘African 3’ from 1980 tend to ripen later and also grow differently. (MF)
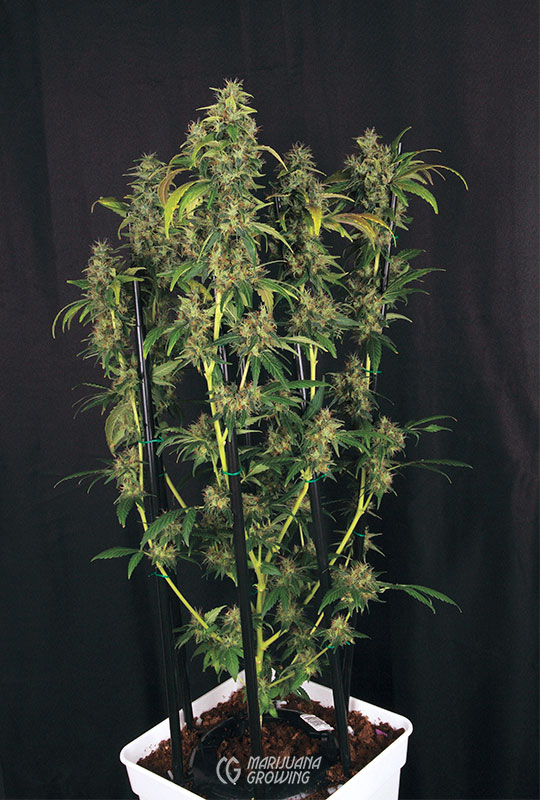
This ‘Amnesia Haze’ from Hy-Pro Seeds shows classic ‘Haze’ growth habit. Small buds grow at branch unions and tips of branches are loaded with flowers.
Mexican varieties are some of the most pronounced of this type of flower bud growth. (MF)
Ruderalis cross ‘Chaze’ takes longer to mature and produces more than most autoflowering varieties.
Ruderalis and Ruderalis-Dominant Varieties
Ruderalis crosses (autoflowering and autoflowering-feminized) varieties are daylight-neutral and ready to harvest about 70 to 80 days after germinating seed. These crosses are harvested the same as other varieties, when cannabinoid production has peaked out.
Cannabis ruderalis is crossed with indica and sativa varieties to yield short, autoflowering plants with big buds!
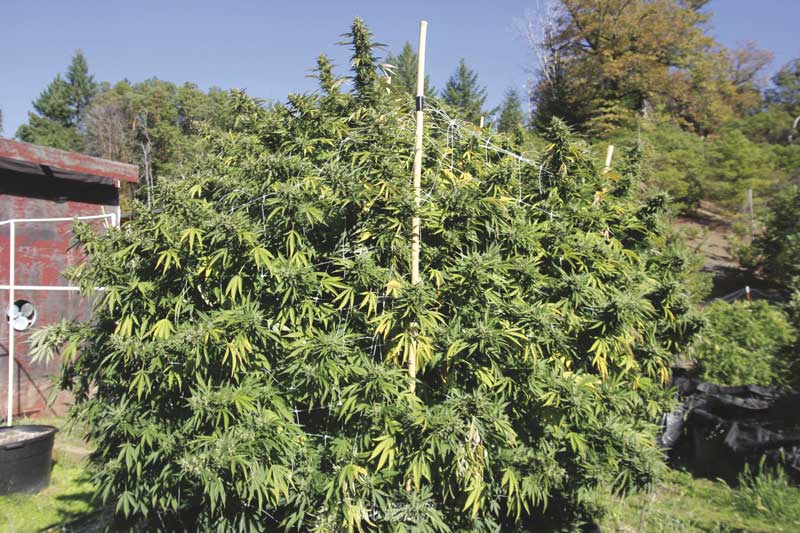
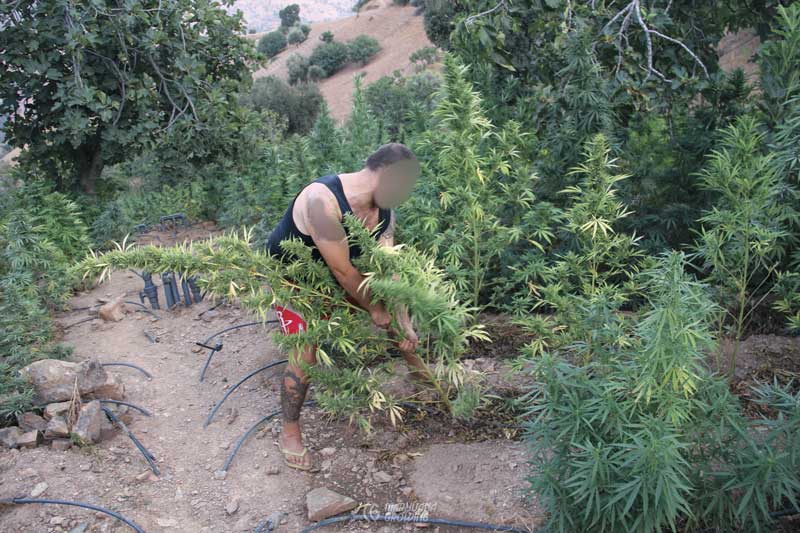
Big outdoor plants are often harvested in stages. First the outer 2-foot (61 cm) layer of flower bud–filled branches is removed. Two weeks later a second harvest is taken after smaller buds have had a chance to fatten up in the sunlight.
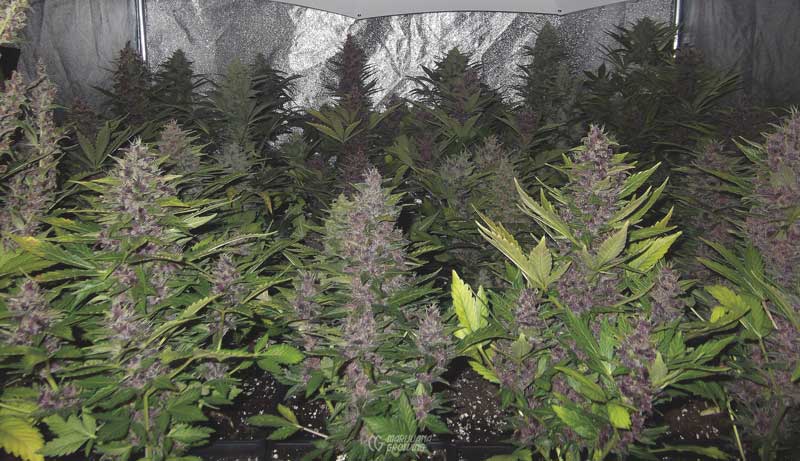
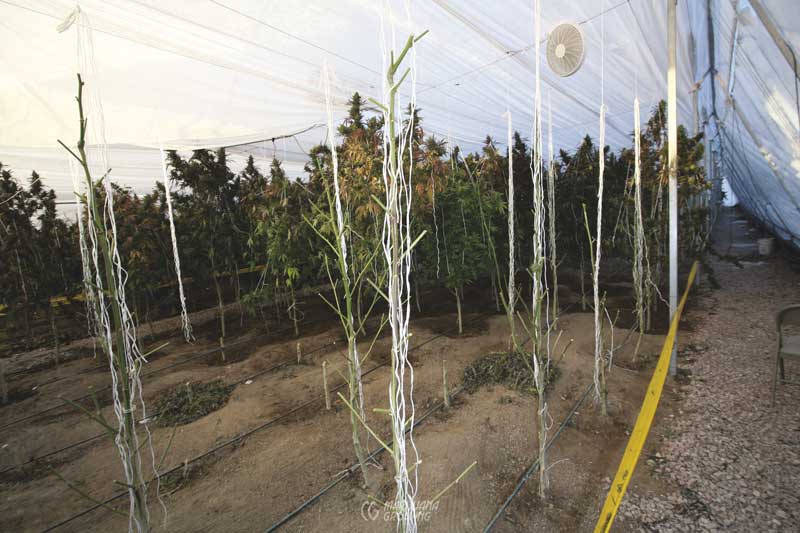
Small plants toward the front of Humboldtlocals’s garden have been harvested once and will be harvested again and again. Medical cannabis gardeners growing outdoors in Northern California harvest plants twice or even 3 and 4 times. The purple plant in the second row has been harvested once and will be harvested in another week or two.
Harvest Timing
Indoors and in “light deprivation” greenhouses, sinsemilla flowers are mature from 6 to 12 weeks after the photoperiod has been changed to 12 hours to induce flowering. Seed companies list “flowering time” in their catalogs, and much information is available on the Internet about maturation dates. Outdoors, the first early harvest is ready in late spring. Fall crops are harvested from late September through November, depending on varieties grown and climate. The best time to harvest sinsemilla is when cannabinoid production has peaked but the degradation process has not yet started. Established indoor varieties are bred so the entire plant reaches peak potency at the same time. Lower flower tops that received less light are not as heavily frosted with resin as upper branches and could be slower to mature. Varieties that ripen all at once tend to go through 4 to 5 weeks of rapid bud formation before growth levels off. The harvest is taken 1 to 3 weeks after growth slows.
Outdoor harvests depend upon weather. Fall rains and cold weather arrive late in some years, and the harvest can be taken at its peak. Plants are often harvested early in bad weather years. Harvest when there is no longer enough intense sunlight for buds to grow. At a point of diminished sunlight, resin development virtually stops. There are several reasons to harvest plants early, such as lack of light, cold rainy weather, and freezing nights.
Cold weather also influences the development of resin. Most often prolonged 40ºF to 50ºF (4.4ºC–10ºC) nights and cool days with ample sunlight will slow foliage growth and promote resin development.
Harvest large outdoor plants up to 4 times. Harvesting 2 to 4 times over the course of 2 to 6 weeks can increase harvest weight by as much as 40 percent. The top 1 to 2 feet (30.5–61 cm) is removed at the first harvest. Secondary smaller buds receive more sunlight and become heavier. The second layer of medicinal buds is then harvested. If it is a big, 10-foot-tall plant, up to 2 more harvests are possible in a good growing year. We found this technique to work best with the variety ‘Mr. Nice’.
An inexpensive liquid chromatography test can also be performed. These tests are relatively inexpensive, about $10 USD, and are fairly accurate. See chapter 2, Measuring Cannabinoids, for more information on liquid chromatography tests.
Laboratory analysis, though More expensive, is also available in many states and countries that sanction medical cannabis. Many countries have decriminalized small amounts of cannabis, and it can be measured legally by third-party labs.
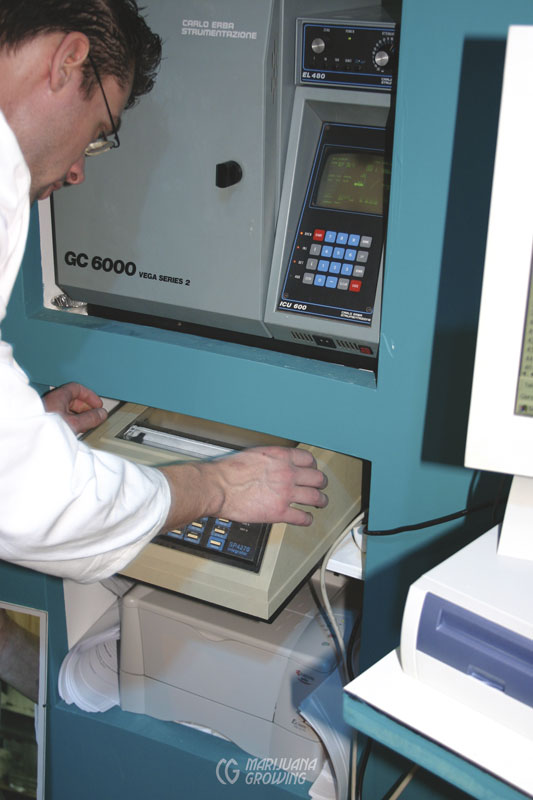
A scientist from Canna measures the exact THC content of harvested buds with a gas chromatograph. Canna provides this free service at Spannabis in Barcelona, Spain. Spannabis (www.spannabis.com) is the biggest cannabis fair in the world.
Stop fertilizing container plants before harvest.
Bud-heavy branches will be covered with a dilute H2O2 solution to sanitize against residuals of pests and diseases.
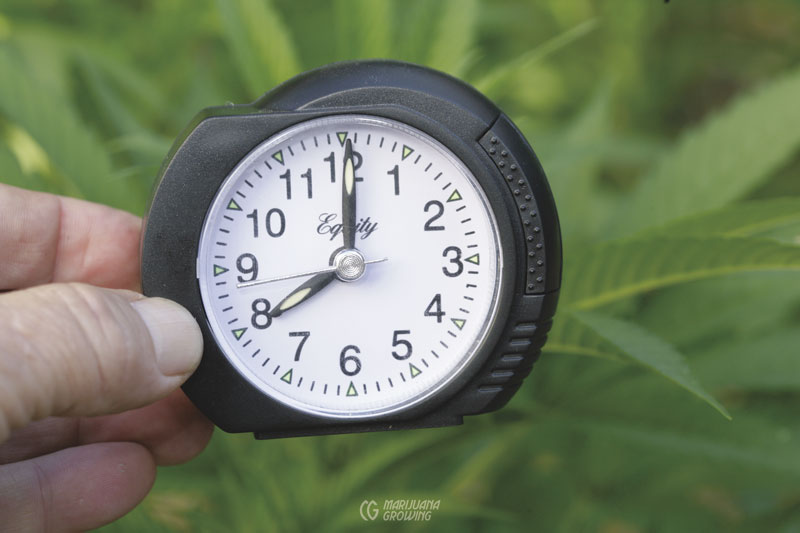
Harvest early in the day.
Harvest: Step-by-Step
Step One: Stop supplemental fertilization 5 to 7 days prior to harvest. Latent nutrient accumulation in foliage imparts a fertilizer-like taste and a “nutrient residual.” Leach nutrients from the growing medium 7 to 10 days before harvest. Some gardeners continue to fertilize until 3 days before harvest if using a commercial “leaching” product that expedites the removal of built-up chemicals in the substrate.
Step Two: If sprays have been applied during the last 2 weeks (not recommended), mist plants heavily to wash off undesirable residues that may have accumulated on foliage. A 5-minute pre-bath in a dilute (5%) hydrogen peroxide (H2O2) solution will disinfect and wash away pest feces, bacteria, dust, etc. Remove branches from the H2O2 bath and gently rinse with a spray of water. The spray bath will not affect resin production. Gently jiggle buds after rinsing to shake off any standing water. To prevent fungus and bud blight, remove large leaves and wash the garden early in the day to allow excess water to dry before nightfall. If bud mold (Botrytis) is visible, carefully remove infected bud an inch below damage. Remove contaminated growth from garden and destroy. Wash hands. Insert “amputated” branches in H2O2 bath.
Step Three: You may want to give plants 24 to 48 hours of total darkness before harvest. Some gardeners do this and say the buds are a little more resinous afterward.
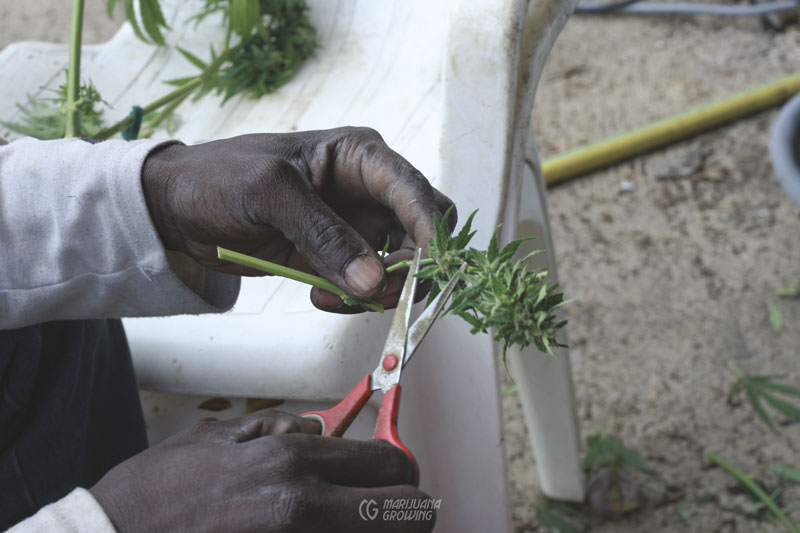
Step Four: Harvest early in the morning, before direct sunlight warms the plants. This is when cannabinoid content is at its peak. Harvest entire plant or one branch at a time by cutting near the base with pruners. Jerking the root ball creates a mess and is unnecessary. All of the cannabinoids are produced in the foliage, not in the roots of the cannabis plant.
Step Five: Once formed, resin does not move and therefore cannot “drain into the foliage.” Drying the entire plant by hanging it upside down is simply convenient. When stems are left intact, drying is much slower.
Step Six: To harvest branches or entire plants:
a. Remove large leaves 1 or 2 days before actually harvesting plants. Or remove leaves upon harvest. Harvesting large leaves early starts the drying process, gets them out of the way, and makes manicuring easier and faster.
b. Harvest entire plants by cutting them off at the base before manicuring.
c. Or cut each branch into lengths of 6 to 24 inches. Manicure the freshly harvested tops, trimming away leaves with clippers or scissors. Hang the manicured branches until dry. Once dry, cut the tops from the branches, taking special care to handle tender flower buds as gently as possible.
d. Or leave larger leaves on branches to act as a protective sheath to flower buds.
Tender resin glands are protected from bruises and rupture until final manicuring, but manicuring is much slower and more tedious when trimming dry foliage. Resin glands are also more apt to bruise and resin tends to fall from the dry foliage when handling.
Harvest with clippers or a saw. Depending upon how buds mature, you may want to harvest the entire plant at once, or harvest individual buds as they become ripe. Indica-dominant plants are usually harvested all at once.
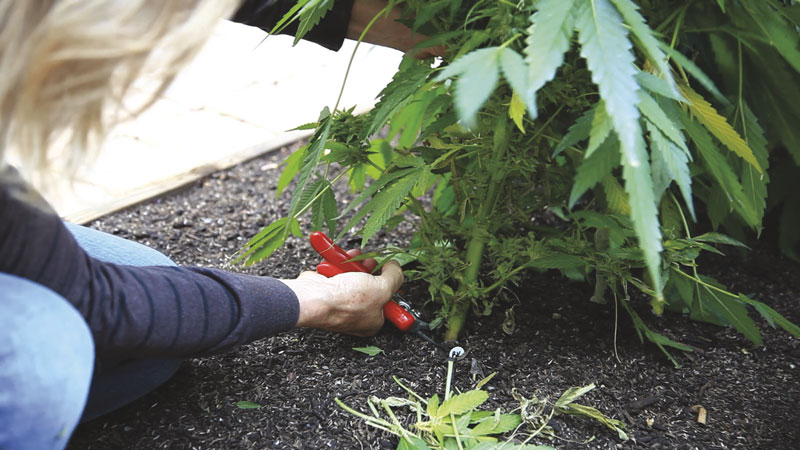
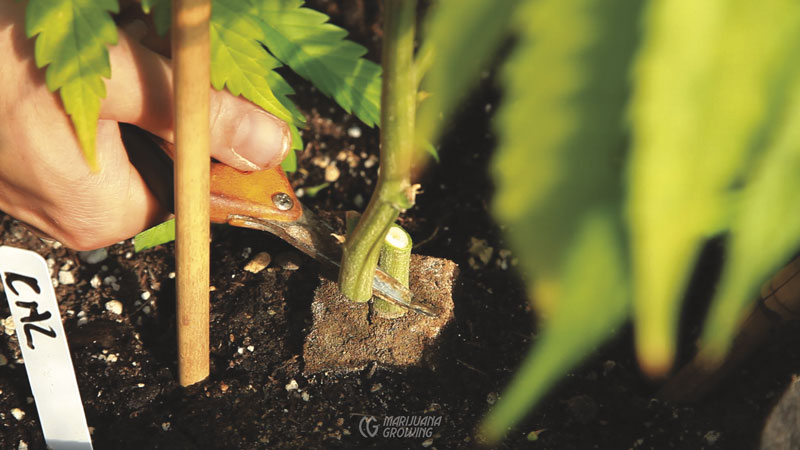
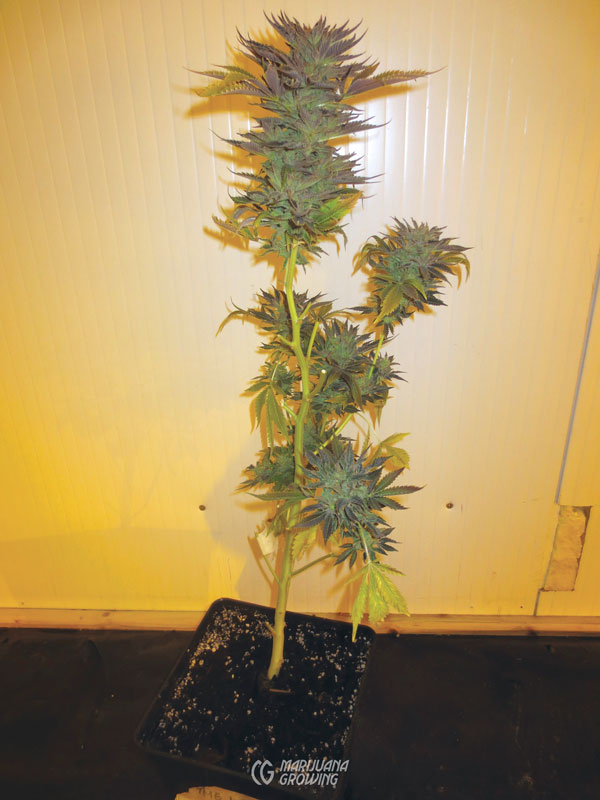
Cutting small plants at the stem is the easiest way to harvest. This plant is about 3 feet tall (about a meter) and easy to handle. I always cut it just below the soil line so that all the branches are attached to the stem.
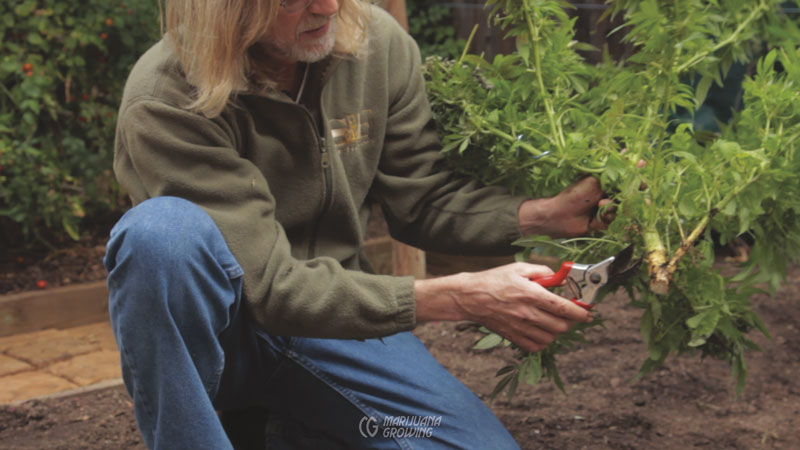
Next, trim up the bottom branches. I discard the small growth on the bottom and throw it in with the big leaves.
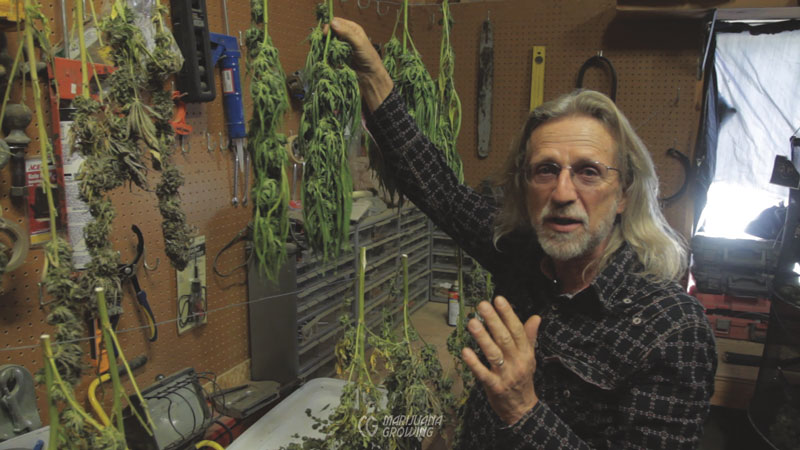
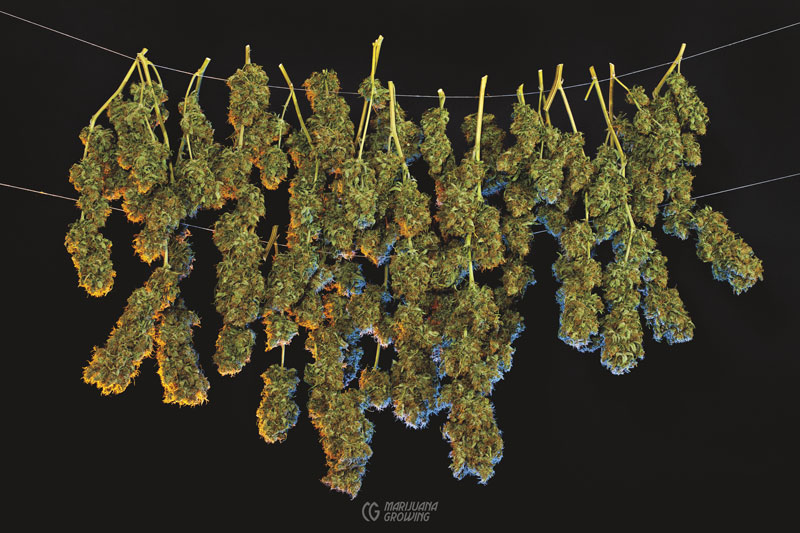
These branches full of flower buds were lightly manicured before being hung to dry on hangers in a dark, well-ventilated closet.
Plants can be harvested a branch or bud at a time. The main stem of the plant remains in the ground, and large leaves are left in the garden. The stem and leaves are cultivated into the soil to benefit the next crop.
Removing large leaves and smaller leaves around buds is much easier immediately after harvest when foliage is still supple.
Cut smaller plants at the base to harvest.
Drying bud-filled branches before manicuring causes many resin glands to be damaged.
Manicuring
Manicuring is easiest when foliage is soft and supple immediately after harvest. Keeping the trimming room at 45 to 50 percent humidity will ensure that buds stay supple longer. Trimming off leaves now will also speed drying. Waiting until foliage is dry to manicure will make manicuring buds a more tedious and time-consuming job than it already is. And removing leaves now keeps dry buds from being handled again. However, some gardeners prefer to take the extra time and energy, citing a slower and more uniform drying process.
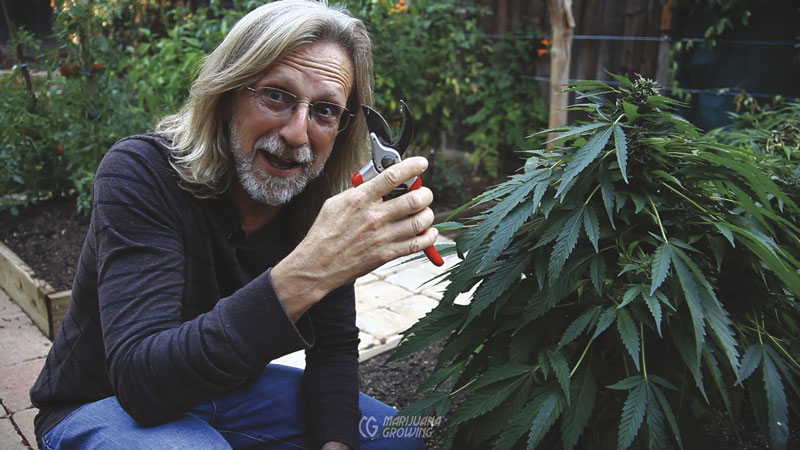
Manicuring is easiest and most efficient with a good pair of trimming scissors that has small blades to facilitate reaching in and snipping off leaf stems and leaves around flower buds. An ergonomic pair of scissors with comfortable handles is indispensable when manicuring cannabis for hours. Small scissors are preferred because they require much less motion and energy to operate.
Manicure over a fine silkscreen (see chapter 26, Medicinal Concentrates & Tinctures) or a table with a smooth, slick surface. Scrape up the cannabinoid-rich resin from under the screen or on the flat surface. The resin can be consumed immediately or pressed into blocks of hashish for easy and practical storage.
Wear inexpensive rubber gloves to collect “finger resin.” After trimming for a few hours, remove accumulated finger resin on gloves by putting the rubber gloves in a freezer for an hour. Cooling will make it easier to remove the accumulated resin from the gloves.
Budget enough time to harvest and manicure your crop. Properly manicuring one pound (454 gm) takes 1 person 6 to 8 hours by hand with scissors.
Trimming machines speed the manicuring process. There are many different models to choose from. Small manually powered trimmers cost less than $300 USD and work well for small harvests. Large machines that can trim 3 to 4 pounds (1.4–1.8 kg) of flower buds per hour cost $12,000 USD or more. A single machine can do the work of 6 to 10 pairs of hands with scissors. Of course, 1 or 2 people must feed the trimmer untrimmed buds, and the buds must be carted away to another room.
You can informative videos on YouTube about each of the following trimmers: Big Red Trimmer, Bonsai Buddy, Magic Trimmer, Rolling Thunder Trimmer, Samurai Power Trimmer, Trimbox, Trim Reaper, Trimpro Automatic, Tumble Trimmer, and my favorite, the Twister. However, the videos lack the close-up detail necessary to see what condition the buds are in after trimming.
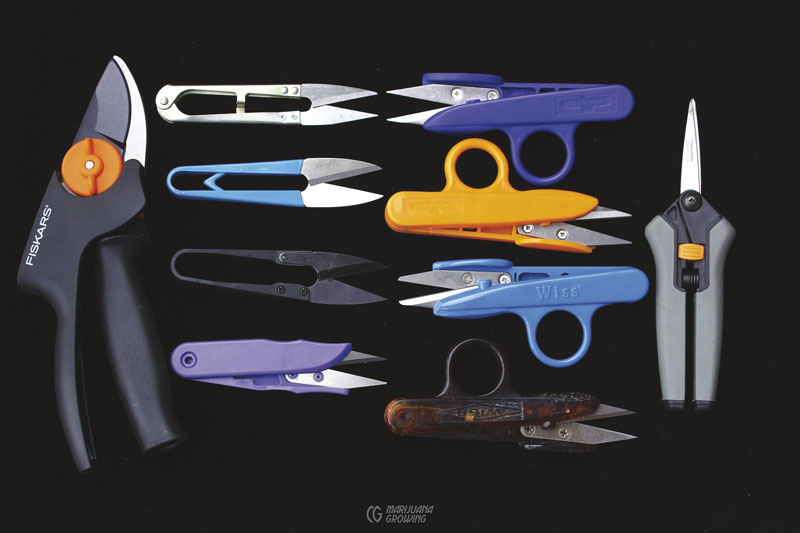
Manicuring scissors come in a couple of basic shapes. Many trimmers prefer small, compact scissors that require little hand movement. (MF)
Remove large leaves and large stems upon harvest. Fresh supple leaves are easier to work with than when dry. Remove large “fan” leaves and leaf stems (petiole) to avoid possible rot. Plants with outer leaves intact take longer to dry and require much more time to manicure.
Inexpensive rubber gloves keep the resin on gloves rather than sticking to hands. The resin can be removed from gloves later to make “finger hash.”
Some gardeners wet a concrete floor, or employ inexpensive swamp coolers or humidifiers. Gardeners in cold, rainy climates must ventilate adequately and possibly employ heaters. Using a dehumidifier in a large drying room is often impractical.
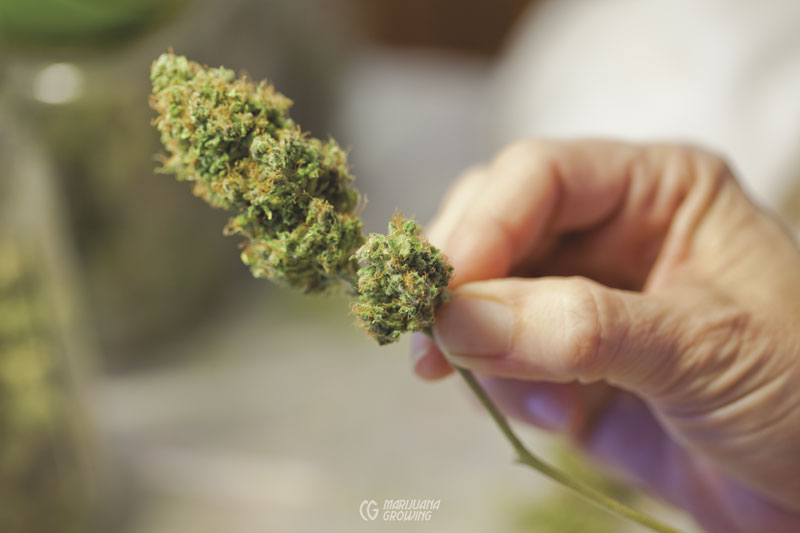
Snip off smaller, low-potency leaves around buds that show little resin, so a beautiful cannabinoid-potent flower bud remains.

Small scissors make it easier to reach in between dense buds when manicuring.
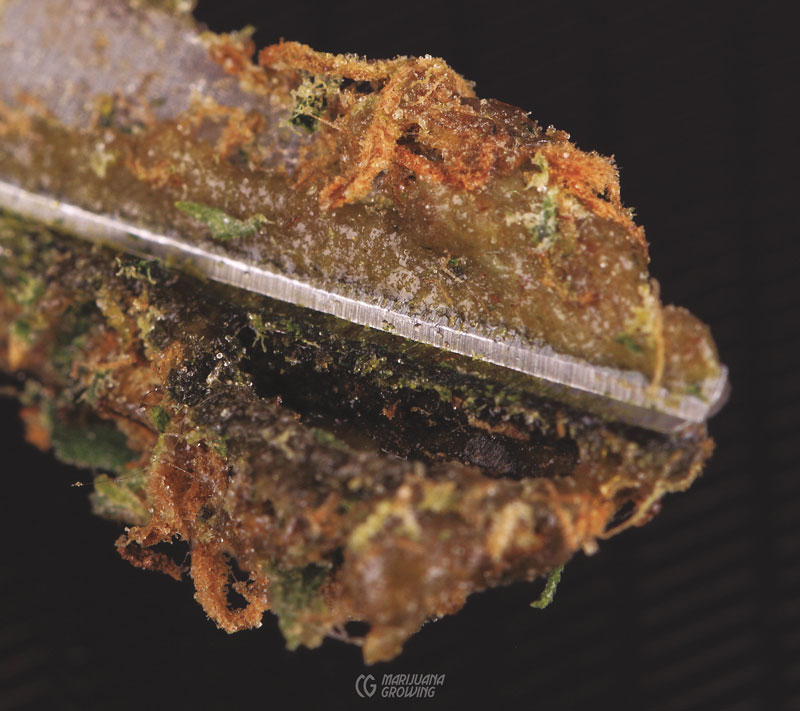
Resin can build up heavily on scissors!
Once frozen, resin is easier to remove from scissors.

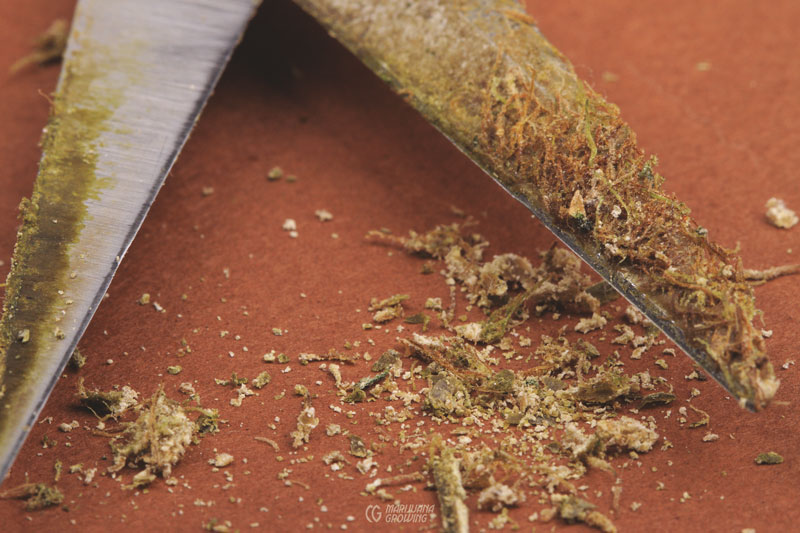
Scrape accumulated resin from scissors when it impairs blade movement. Use a small knife or razor blade to remove built-up resin from blades. Ball up small bits of scraped resin by rubbing it together between fingers. The ball of “finger hash” will grow as manicuring progresses.
Relative humidity of about 50 percent keeps leaves supple when manicuring.
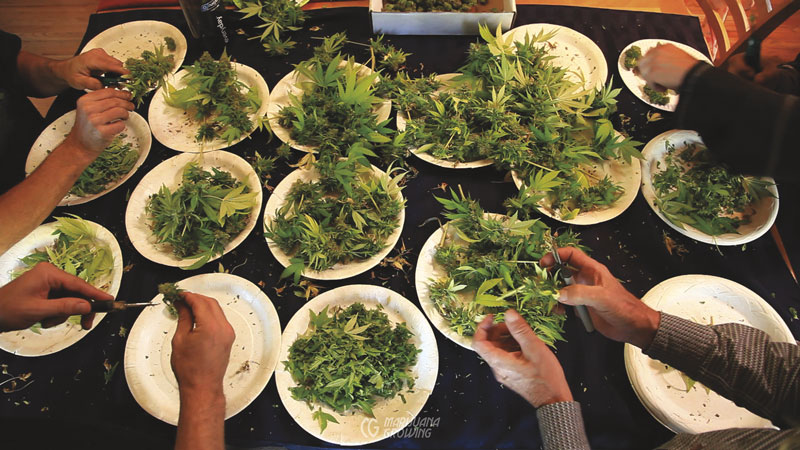
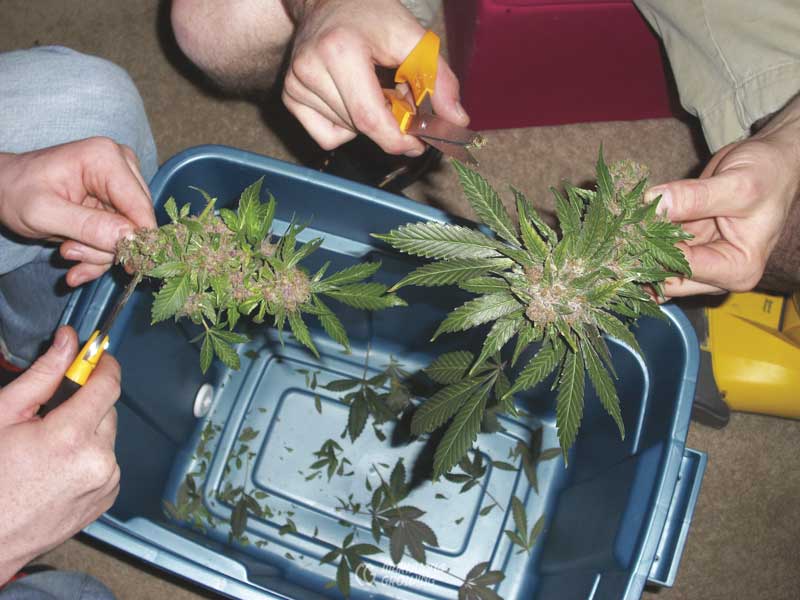
After passing through the trimming machine, buds are touched up and further manicured by hand. Hand-manicuring removes rough edges. These trimmers are manicuring over smooth paper plates. Scrape up fallen resin glands on the table or under the screen.
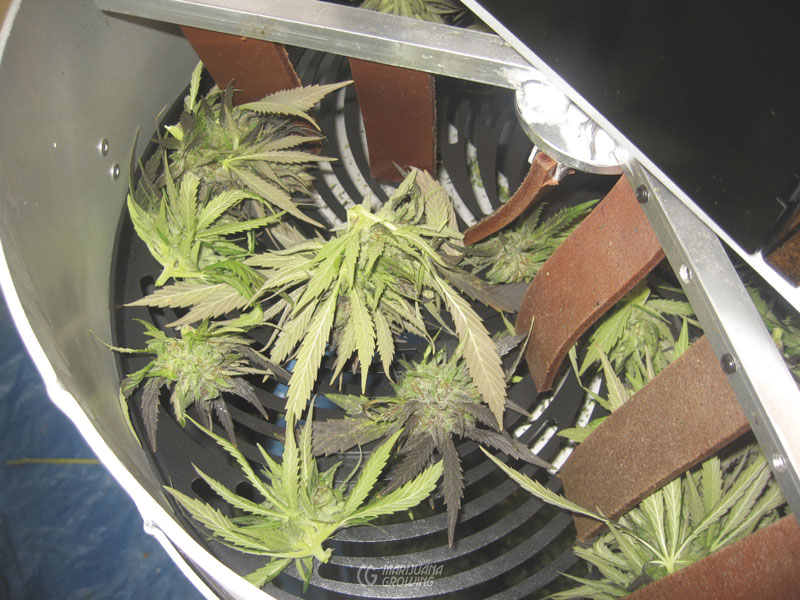
This SpinPro trimmer has a blade spinning below a steel grate. Buds are dumped on top of the grate and moved around with pliable plastic fingers.
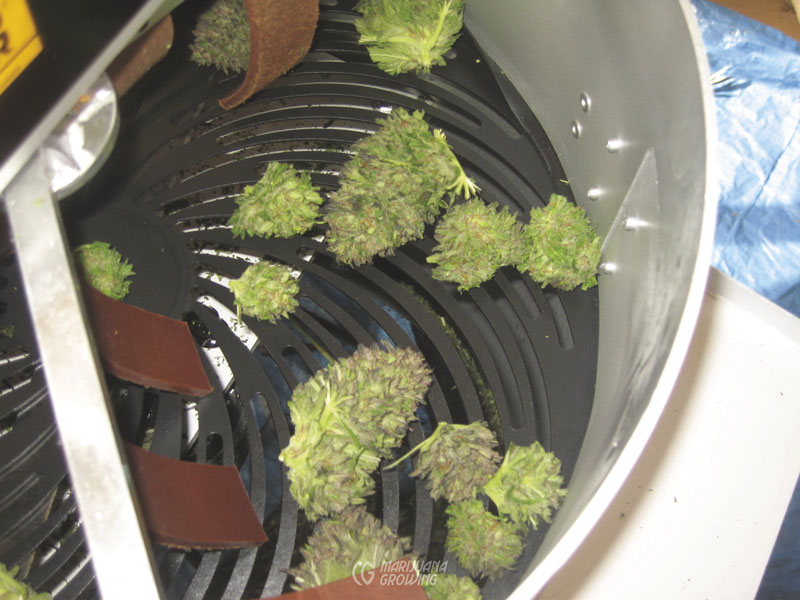
Buds are trimmed after a few spins around the grate of the SpinPro. Once trimmed, buds are removed and a new batch is dumped in.
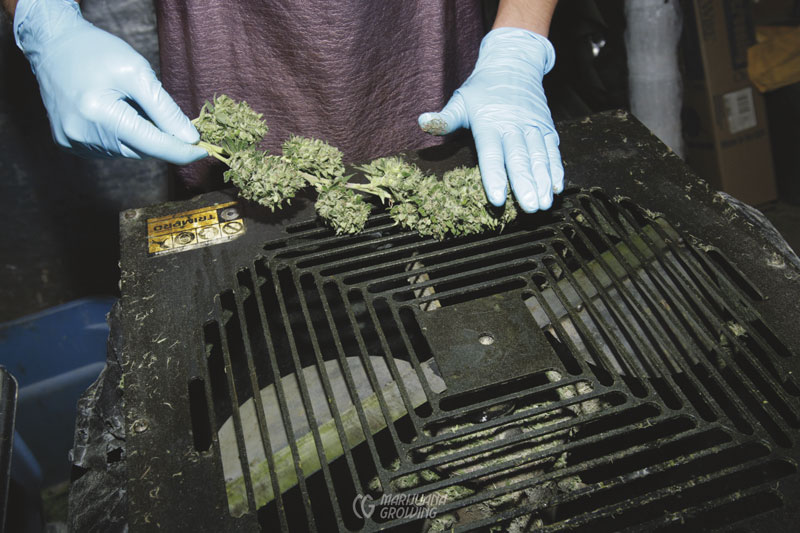
This TrimPro trimmer consists of a rotating blade below a protective steel grate. Buds are manually moved across the grate. The blade trims off any foliage that hangs below the grate.
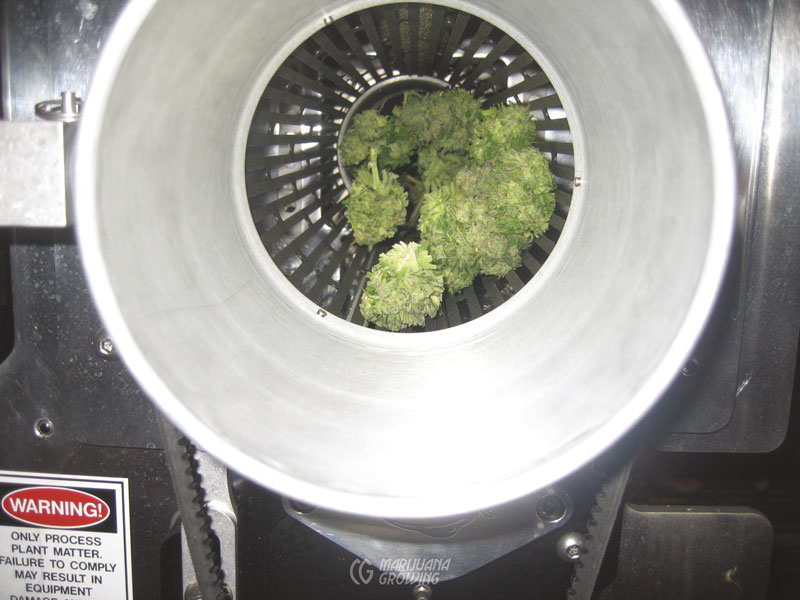
The Twister is a top-end trimmer. Buds are fed into a hopper and passed through a cylinder with a cutting deck below. Above you can see trimmed buds coming out the cylinder.
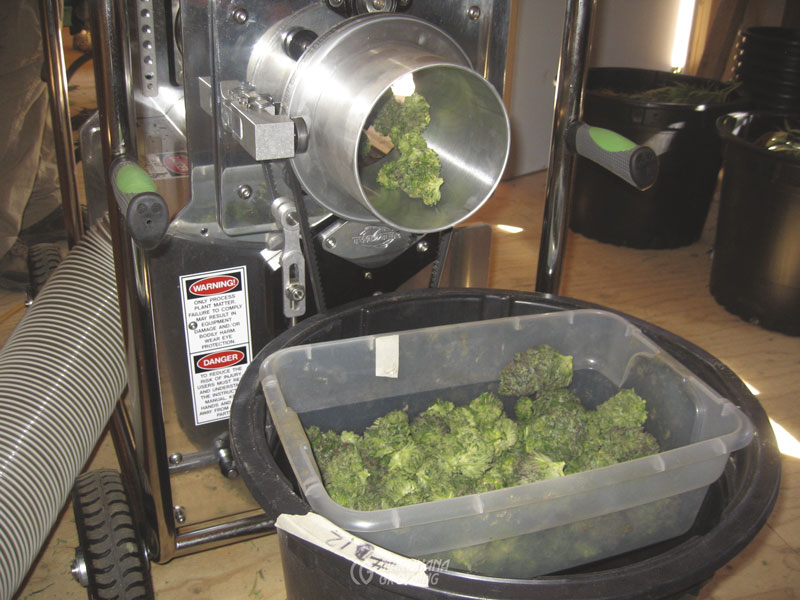
Once trimmed by the Twister, flower buds fall into a container to be further manicured by hand.
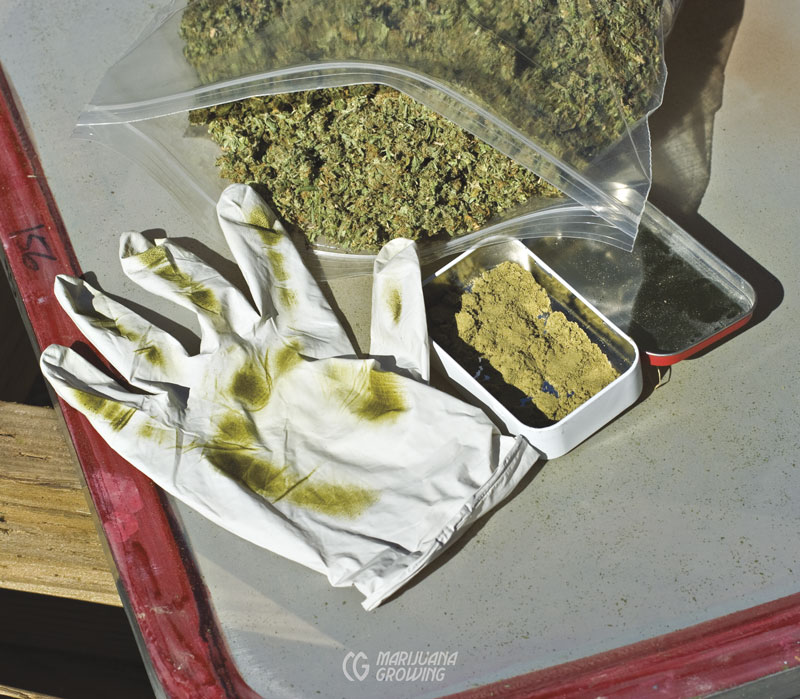
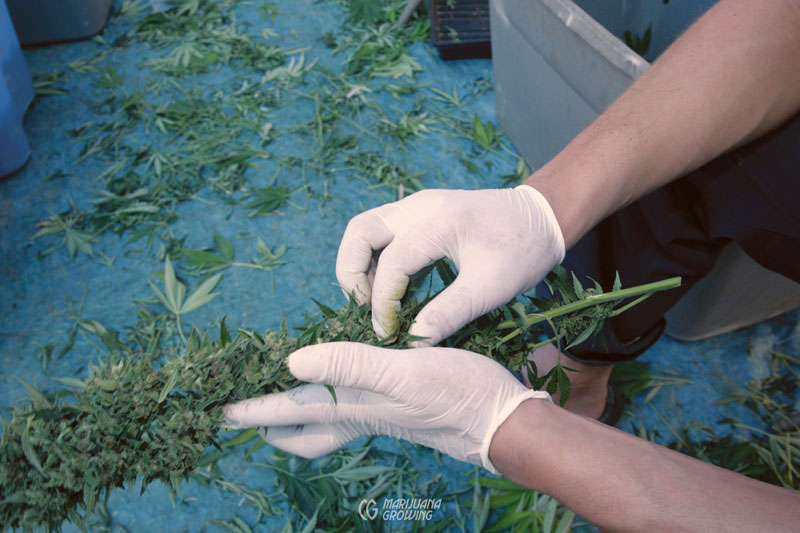
Wear tight fitting latex gloves when manicuring. Remove gloves after trimming to collect the accumulated resin.
Drying
When an entire plant or branch is harvested and hung to dry, the transport of fluids within the plant continues, but at a much slower rate. Stomata close soon after harvest, and drying is slowed since little water vapor escapes. The natural plant processes slowly come to an end as the plant dries. The outer cells are the first to dry, but fluid still moves from internal cells to supply moisture to outer cells, which are dry. When the drying and curing processes occur properly, plants dry evenly throughout. Removing leaves and large stems upon harvest speeds drying; however, moisture content within the “dried” flower buds, leaves, and stems can become uneven. If flower buds are dried too quickly, chlorophyll and other pigments, starch, and nitrates or other fertilizer salts are trapped within plant tissue, making it burn unevenly and taste unpleasantly “green.”
The smell of ammonia in drying cannabis indicates a lack of air circulation, anaerobic bacteria, and an excess of nitrogen in foliage. Avoid the formation of ammonia by keeping cannabis buds and foliage well aerated during drying.
Drying facilitates storage for later use. Drying converts 75 percent or more of a freshly harvested plant into water vapor and other gases, and converts carbohydrates to simple sugars. Drying also converts chlorophyll and other pigments so that no “green” residuals remain.
Manicuring bud–laden branches and hanging them individually allows them to dry longer. All the moisture from the stem must dry too.
During drying, starch is converted into reducing sugars*. As starch degrades, reducing sugar concentration increases and peaks out during the first few days of drying. After that, respiration is slowed, which oxidizes reducing sugar into carbon dioxide and water. The stored starch is broken down to simple sugars, which are used for food. This imparts a sweet earthy aroma and taste. *See a complete definition of “reducing sugars” here.
Chlorophyll degradation is apparent as the green colors pale and fade into yellows, browns, reds, and purples. Although independent of one another, starch and chlorophyll degradation occur at about the same rate. The minty green taste of cannabis also dissipates with the degradation of chlorophyll.
When dried slowly, over 5 to 14 days, moisture evaporates evenly into the air, yielding uniformly dry flower buds with minimal cannabinoid decomposition. Slowly dried flowers retain terpenes and cannabinoids, providing medical users with full medicinal benefits. Slow, even drying—where moisture content is the same throughout stems, foliage and buds—allows enough time for pigments to degrade. After 5 to 14 days of slow drying, all the chlorophyll is gone from “dry” buds. Hanging entire plants to dry, although more laborious, allows this process to take place more slowly over time.
Circulation and ventilation fans will help control heat and humidity and keep them at proper levels. You can also use a dehumidifier to control humidity. Air conditioners are ideal to dial in temperature and humidity in warm climates, but they are environmentally expensive to operate. Large drying areas may require a heater to raise temperature and lower humidity. Do not train fans directly on drying plants; it causes them to dry unevenly.
With temperatures above 75°F (23.9°C) buds may dry too fast, and humidity can more easily fall below the ideal 50 percent level. Temperatures above 85°F (29.4°C) cause buds to dry too fast, after which they burn inconsistently and are unpleasant to consume. High temperatures also ignite fragrance. Relative humidity below 30 to 40 percent causes buds to dry too fast and retain chlorophyll, giving them a “green” taste. Quick-dried buds are easy to mistakenly dry unevenly and for too long, making them crispy on the outside and moist on the inside. Low humidity also causes buds to lose fl avor and odor. If humidity is between 30 and 40 percent, allow for minimum air movement to slowly dry buds. Always use an accurate maximum/ minimum thermometer and hygrometer to ensure that temperature and humidity are kept in the ideal range.
To find the approximate moisture content of dry buds, weigh a specific bud upon harvest, when it is wet. Weigh it again during the drying and curing process to learn how much moisture it has lost. For example, a bud that weighs 0.5 ounces (15 gm) upon harvest, will weigh 0.14 ounces (4 gm) when it has lost 75 percent of its moisture.
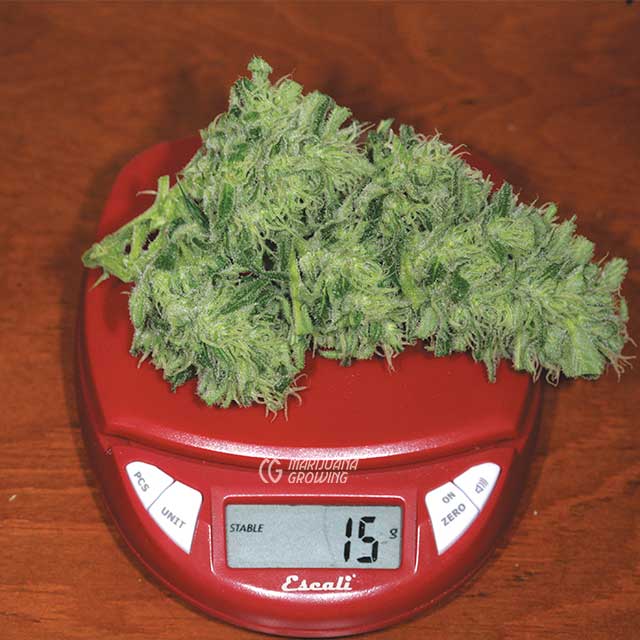
Weigh a bud at harvest. This freshly harvested bud weighs 0.5 ounces (15 gm).
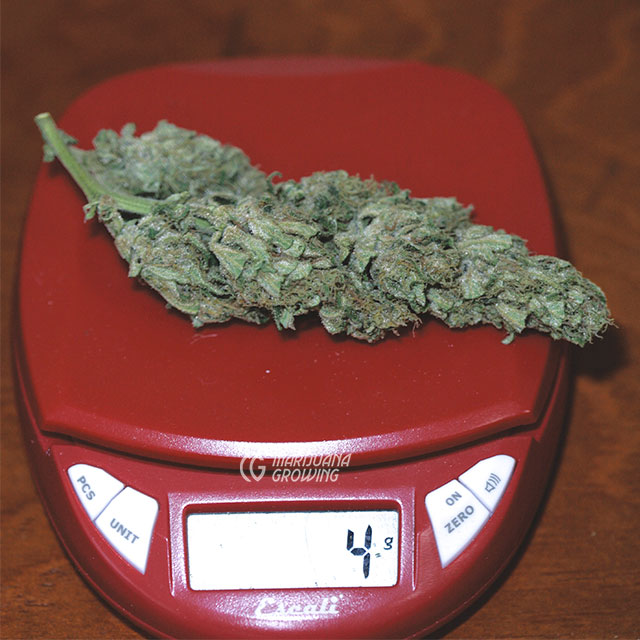
When dry, the same bud pictured above weighs 0.14 ounces (4 gm)—75 percent less.
Suspending plants is a laborsaving way to facilitate slow, even drying. Large, moist stems can be removed and small branches hung from the ceiling to cut drying time by a few days. Use clothes- pins to attach branches to drying lines, or poke a paper clip through the base of branches and hang the clip from a line. Another option is to trim branches to form a hook and hang from the “hook.”
Use the grow area as a drying room when not growing a garden. Do not dry plants in the same room in which plants are growing. Different climates are required for growing medicinal cannabis and for drying it. Fungus, spider mites, and other insects can also migrate from dead plants to live ones. Inspect drying buds daily for any signs of disease, spider mites, or insects. Smear Tanglefoot around the end of drying lines to form a barrier that keeps mites from migrating to live plants. Mites congregate at the barrier and are easy to smash between fingers.
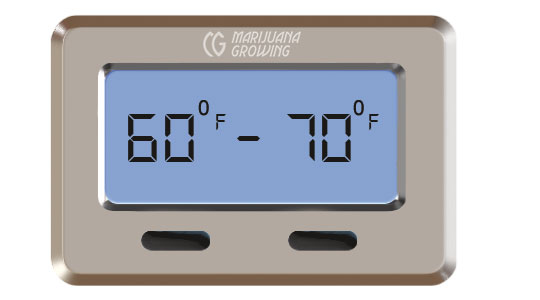
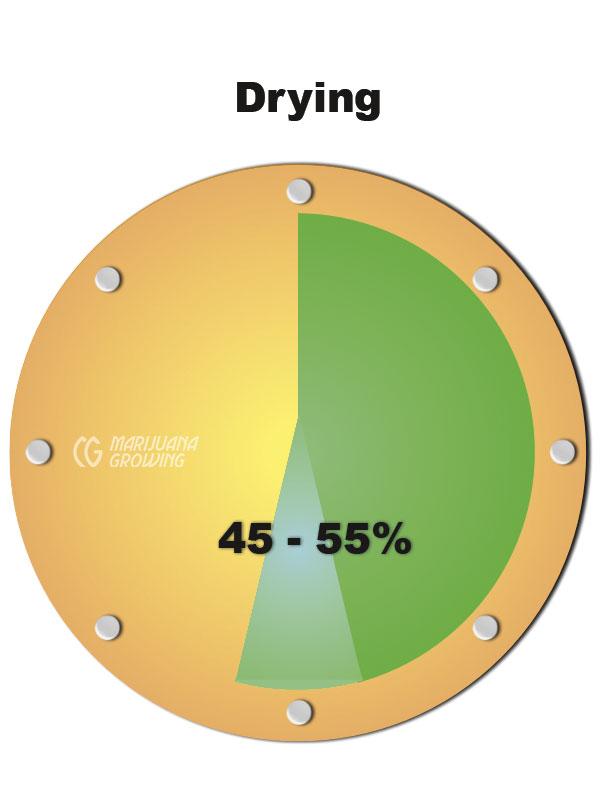
The ideal air temperature range for slow drying is between 60°F and 70°F (15.6°C–21.1°C) and humidity from 45 to 55 percent. Temperatures below 60°F (15.6°C) slow drying, and humidity often climbs quickly. Humidity above 80 percent extends drying time and heightens the threat of bud mold.
Small harvests like this ‘Sensi Star’ plant are manicured before hanging to dry.
These bud-filled branches were removed and manicured individually before hanging to dry.
Drying Small Harvests
Small harvests can easily be dried in a closet, cabinet, or a cardboard box that is smaller than the growing area’s size. If drying space is a problem, using a staggered planting schedule or planting varieties that ripen both early and late carries over to a staggered harvest that frees up drying space as buds dry.
A cardboard or wooden box makes an excellent drying space to hang small harvests. Airflow in the enclosed area is diminished, so buds and leaves must be turned daily to even out the moisture content and discourage mold. Thread a large needle with dental floss, and string the floss back and forth through the open box near the top to make drying lines. If the box is tall enough, you can install several levels of drying lines.
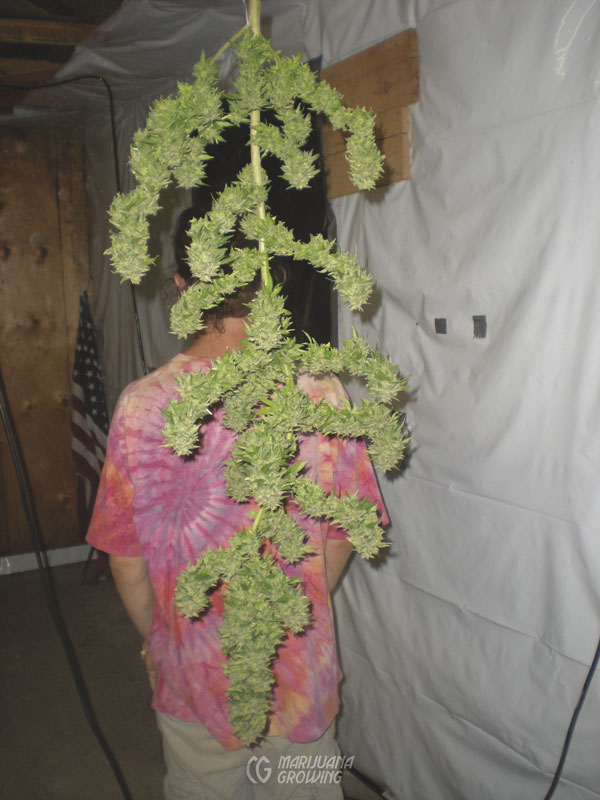
Excess foliage has been manicured from this plant. It is difficult to trim an entire plant and keep the branches intact.
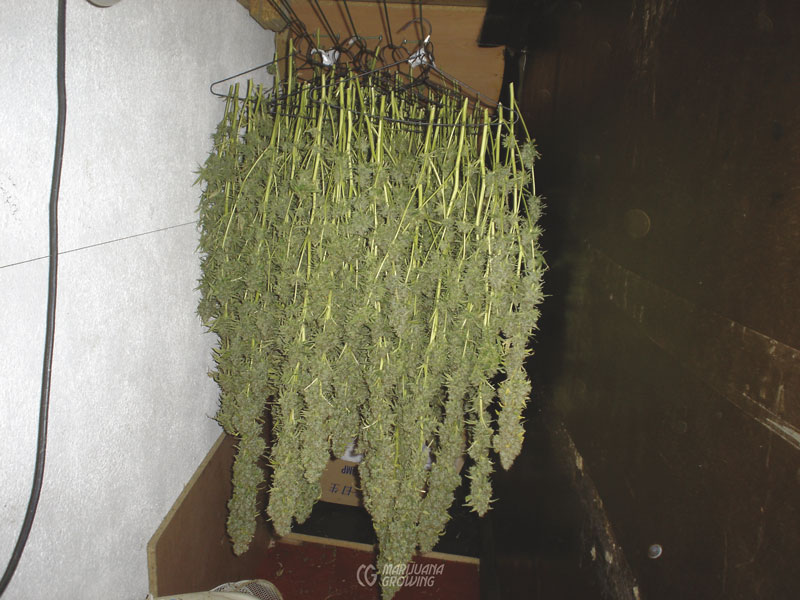
This nice crop of ‘Power Plant’ was manicured and hung to dry on clothes hangers in a well-ventilated closet.
Lock the flaps on the box and set it in a closet or spare room. Open flaps to allow air circulation as needed. Or, cut holes near the bottom and top of the box to allow air exchange and circulation. Check daily to see how buds are drying. If buds and leaves start drying too quickly, open the box top and set the box in a cooler location.
Use a portable, foldable clothesline to make a quick and mobile drying room. Unfold clothesline, hang buds from lines, and cover with a large black bedsheet or cloth to allow for the exchange of air while maintaining darkness. Train a fan on the outside of the sheet so air circulates underneath to help dry the flower buds.
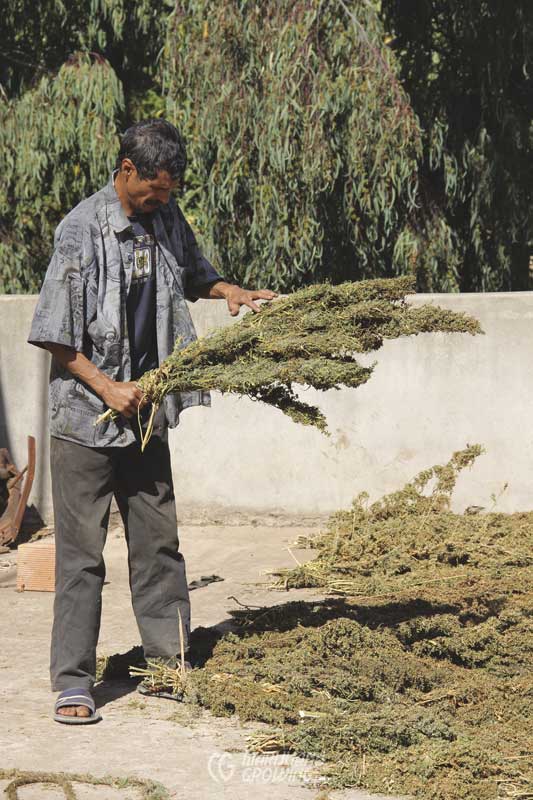
Moroccan plants are being dried in the sunlight on a warm slab. This practice degrades resin.
Compartmentalized net bags are inexpensive, collapsible, and easy to hang, expand into a drying rack, and store. These drying racks are perfect!
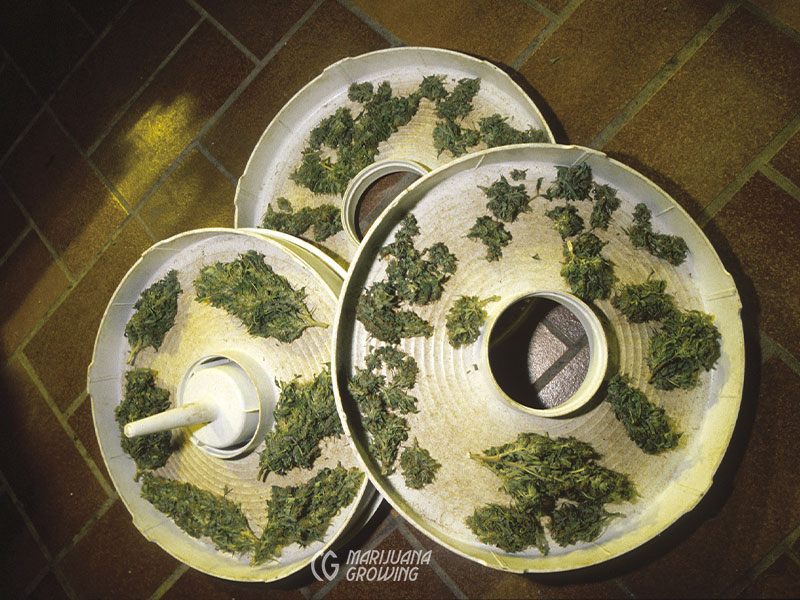
Hang manicured buds to dry for a day or so before placing on drying screens to allow the bulk of the moisture to dissipate. Once on screens, buds should be turned every day or two to ensure even drying.
Building a small drying room is as easy as tacking some plywood together at right angles and hanging lines across the enclosure. Or you can tack or tape black Visqueen plastic to the ceiling and floor to make “walls.”
Manicured buds can also be placed in boxes to dry. Move buds daily so new surfaces are exposed to air. Drying might be slower because the airflow is reduced. Line boxes with cardboard or paper to contain and collect resin glands that fall to the bottom. Or seal cracks with tape to contain resin glands for collection.
Drying Large Harvests
Stagger large harvests on big 10- to 15-foot-tall plants by harvesting the top 2 to 3 feet (60–90 cm) from the top of the plant. The buds located lower on the plant, now exposed to sunlight, will continue to grow and swell. Harvest again in a couple of weeks (weather permitting) by cutting the next 2 to 3 feet (61–91.4 cm) from the top branches. Most varieties can be harvested 2 to 3 times over a 4-to-6- week period.
Note: Gardeners in Northern California prefer to keep flower buds harvested last for use as personal medicine.
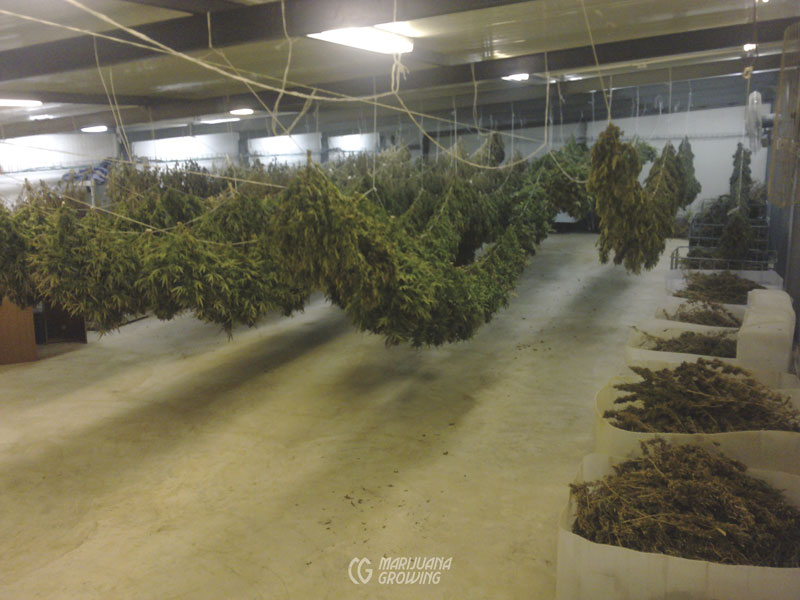
Drying a large harvest requires a large, dark, cool space with good airflow. Do not harvest more cannabis than available drying space can accommodate. Stagger the harvest so that there will be enough drying space. Friends in Switzerland were compelled to buy a 4-story industrial building to dry several acres of cannabis. Other surprised gardeners have to quickly erect tents and temporary buildings to serve as drying sheds. Large spaces such as bedrooms, barns, and sheds are also used.
Cut plants at the base or pull whole plants from the ground. Remove large leaves and hang the harvested plants on lines in the drying room. Cut branches from 12 to 40 inches (30.5–101.6 cm). Manicure each branch and hang on drying lines to complete the drying process.
Save space by building or buying drying racks for the buds. Make drying racks from window screen or plastic agricultural netting. Stretch the screen or netting over a wooden frame and secure with staples. Put 3- to 6-inch (7.62–15.2 cm) spacers between framed screens to allow for adequate airflow. Or build a drying box with removable screens.
Drying Time
Checklist for Proper Drying
• Temperature 60°F–70°F (15.6°C–21.1°C)
• Humidity 45–55 percent.
• Dry under minimal or no light.
• Handle buds as little as possible.
• Hang manicured buds until dry.
• Exact conditions may vary; use parameters below as a guideline.
Drying time depends upon temperature, humidity, and bud density. Most flower buds will be dry enough in 3 to 5 days before passing to the curing process, but they may take longer. It takes up to 2 weeks before all chlorophyll—the stuff that gives the “green” taste—has dissipated from foliage. Big, fat, dense flower buds can take 3 to 4 days longer to dry than smaller buds. Gently squeeze buds after they have been drying for a few days to check for moisture content. Bend stems to see if they are dry. If the stem breaks rather than folds, it is ready to cure.
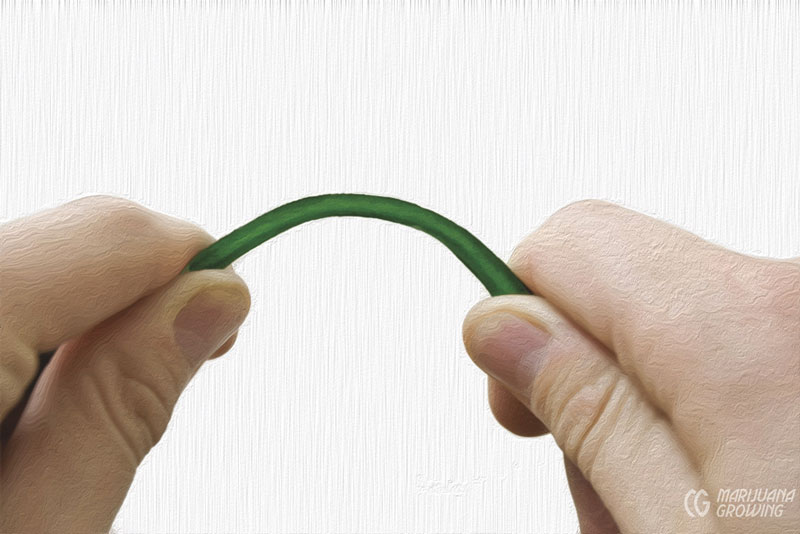
The harvest is not dry if the stem does not snap when bent.
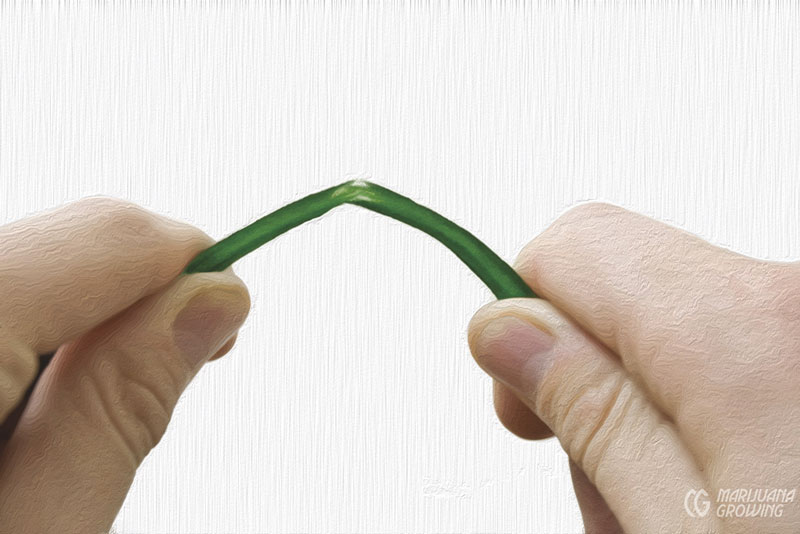
The harvest is dry or nearly dry if stems break when bent.
Check for dryness by bending a stem. The stem should snap rather than fold when bent. The bud should be dry to the touch but not brittle. The bud should burn well enough to smoke when dry.
Light—especially ultraviolet (UV) rays from natural sunlight—heat, and friction hasten biodegradation of resin glands and cannabinoids. Do not place dried cannabis in hot automobile glove compartments, and keep it away from heat vents and so forth. Friction and rough handling can bruise and rupture resin glands. Even with proper drying and curing, brutal handling of harvested cannabis will diminish cannabinoid content.
Fast Drying
Here are 6 ways to dry flower buds quickly. Remember, buds that dry quickly burn hot, are harsh to the pallet, and may taste “green” when vaporized.
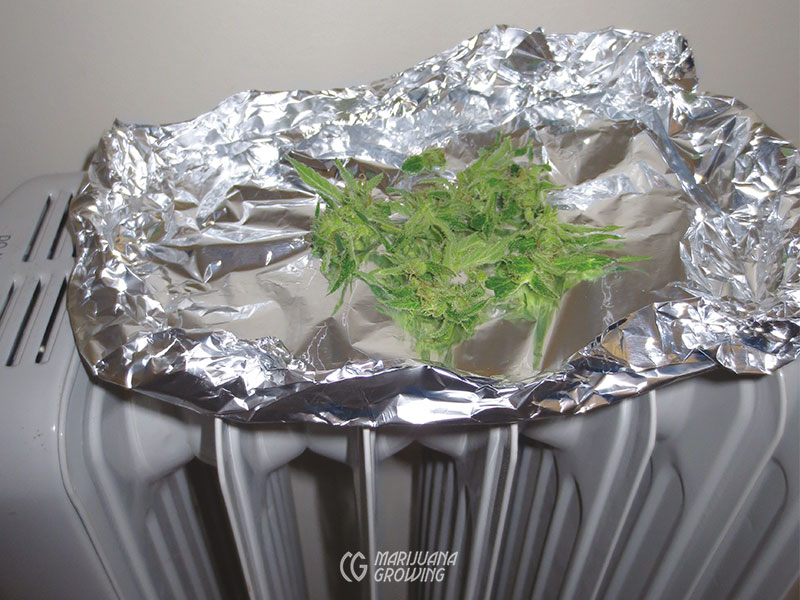
One: Manicure fresh buds and remove all branches and leaves containing no visible resin. Spread evenly on tin foil or wrap in paper or enclose in an envelope.
Place the paper or envelope on a warm refrigerator, radiator, television, etc. Depending upon heat level, buds will be dry in a few hours or the next day. Buds will be a bit crispy when dry but may contain moisture deeper within. Place them in an airtight container until they sweat. Put back in the paper and dry until dehydrated enough to burn well.
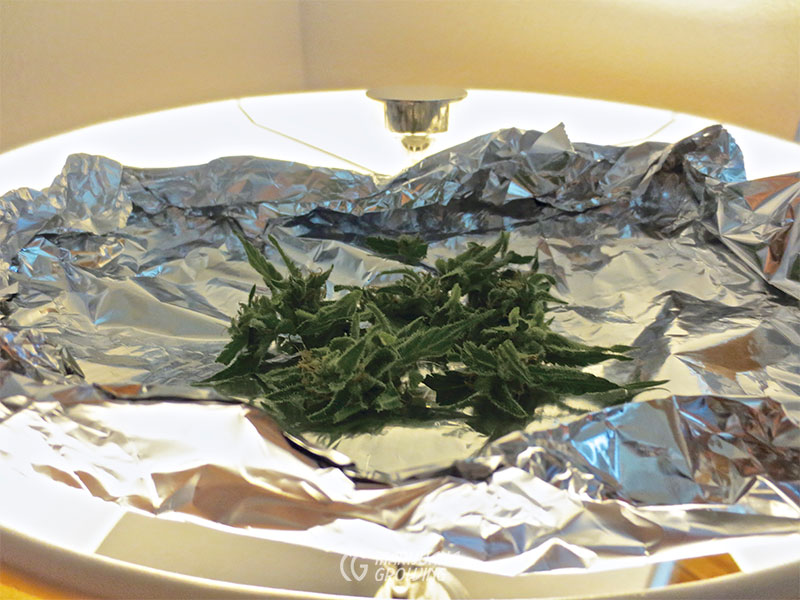
Two: Cut up fresh buds and/or foliage. Place on a 12-inch (30.5 cm) square of tinfoil. Hold or place it over a 60- to 100-watt incandescent lightbulb. Stir every 15 to 30 seconds. It will be dry enough to consume in a few minutes.
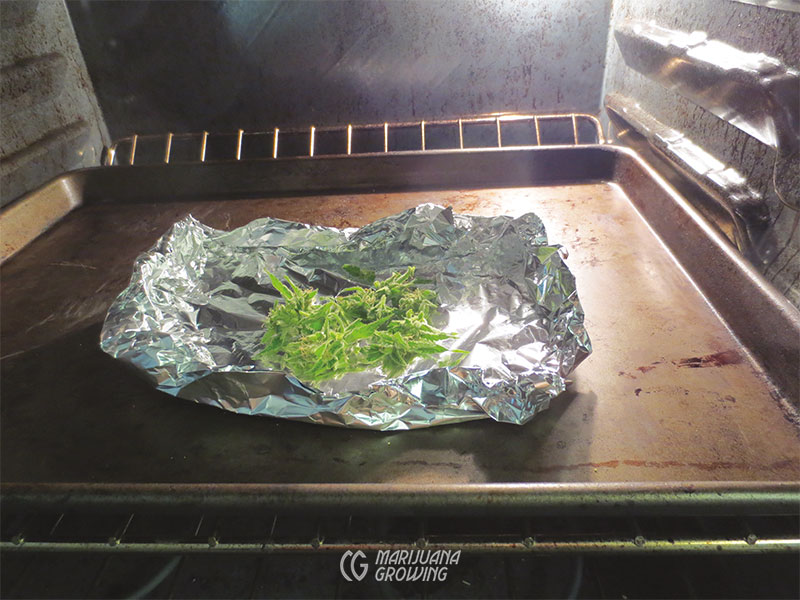
Three: Place diced buds and/or foliage on a cookie sheet in an oven at 150°F (65.6°C) for 10 to 15 minutes. Check regularly and stir if needed until dry. Do not increase temperature above 200°F (93.3°C) or the cannabinoids will vaporize into the air.
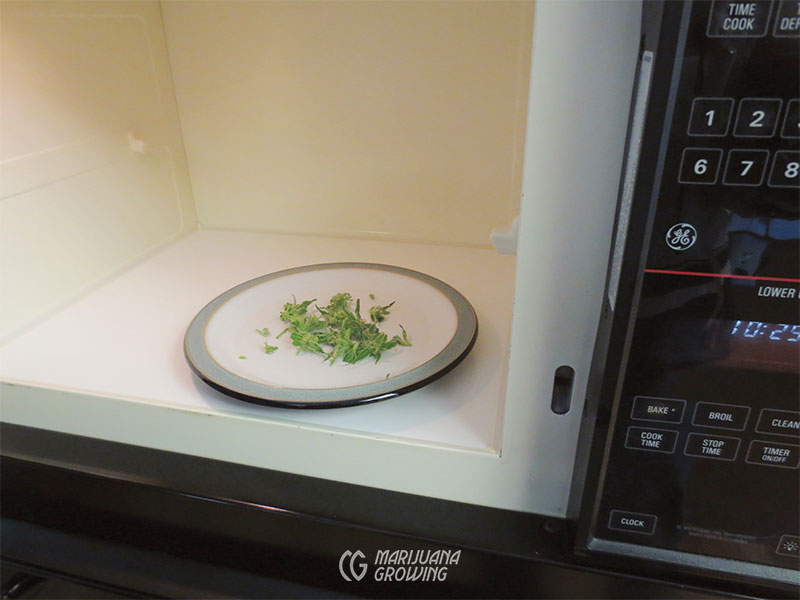
Four: Place chopped buds and/or foliage on a paper plate in a microwave oven. Turn the microwave on in short, weak (50% power) bursts of 15 to 30 seconds each. Re-cycle until dry, and stir if necessary.
Five: Dry buds in a food dehydrator for 24 to 48 hours. Food dehydrators have a series of stackable screens. Place bud and leaf on screens and stack. A fan blows temperature-controlled air gently upward to quickly dry the cannabis.
Buds and/or foliage can be cut into small pieces and place in a glass jar with an airtight lid. Place several silica gel desiccant packs (the kind that come with electronic devices and cameras) into the glass jar and seal. Moisture will migrate to the silica gel in a few hours. Remove the packets and dry using a dry heat source. Replace silica packs until cannabis is dry enough to consume. Find silica gel pack at auto parts or electronics stores.
Six: Dry buds in a food dehydrator for 24 to 48 hours. Food dehydrators include a series of stackable screens. Place bud and leaf on screens and stack. A fan blows temperature-controlled air gently upward to quickly dry the cannabis.
Water “Drying”: Step-by-Step
Water can be used to remove excessive chlorophyll, salts, and impurities in harvested cannabis. Cannabis that is imported from Paraguay, parts of Africa, and Mexico is often soaked in a water bath to wash out dirt, chlorophyll, and other bad stuff, but this method of curing is seldom used by home gardeners. Branches are soaked in water that is replaced daily for several days. The undesirable soluble plant matter leaches into the water and after four to seven days is almost gone. After water curing, manicured buds on branches are lightly shaken to remove water before being hung to dry.
Once completely and evenly dry, buds smoke smooth and burn evenly. Water-dried buds are about 30 percent smaller, but cannabinoids are intact and more concentrated than with air-dried buds. Lackluster color, fragrance, and overall appearance of water-cured cannabis result in low “bag appeal,” a term popular at medical cannabis dispensaries. However, using this method, salts are removed even if plants were fertilized until harvest.
Note: Be very gentle when handling buds in water. Resin is not water soluble, but when branches are knocked around indiscriminately, resin glands can fall into the water. Be gentle with tender buds.
Step One: Cut branches from plants and remove large leaves including stems (petioles). Small leaves are usually left intact around buds.
Step Two: Carefully place bud-filled branches in a container of distilled or RO (reverse osmosis) water. Keep the temperature between 60ºF and 70ºF (15.6ºC–21.1ºC). It may be necessary to gently push the branches down by hand or with a weight to keep them completely submerged.
Step Three: Pour off the chlorophyll/ salt–contaminated water and replace daily. Chlorophyll, salts, and contaminants are drawn out of the plant via osmosis (see chapter 20, Water). The water must be changed daily and replaced with fresh; old water is full of the bad stuff.
Step Four: After 4 to 7 days, remove branches from water, carefully shake off excess water, and hang to dry. Use a circulation fan to ensure that all latent water evaporates and dries from buds. Manicure small leaves while they are still soft and supple.
Step Five: Hang bud-filled manicured branches to dry (see “Drying Small Harvests” earlier in this chapter).
Dry Ice “Drying”: Step-by-Step
Dry ice drying retains cannabinoids and freshness and causes very little degradation of resin glands from heat, light, and air. When vaporized or smoked, dry ice–cured cannabis has a mint-like taste because the chlorophyll does not break down. This curing method is expensive and time-consuming.
Dry ice is frozen carbon dioxide. When it warms, CO2 converts from a frozen solid to a gas, without turning into a liquid. When moist cannabis is enclosed with dry ice, low relative humidity occurs and water molecules migrate from the cannabis to the dry ice. This causes the relative humidity of the CO2 to increase and the moisture content of the cannabis to decrease. This process occurs below 32°F (0°C), and it preserves cannabis. Dry ice is expensive and this method is best used for drying small amounts of flower buds.
Step One: Place one ounce (28.3 gm) each of dry ice and flower buds about three-fourths dry into a 4-quart (3.8 L) container. Put dry ice on the bottom and flower buds on top.
Step Two: Make a few small 0.25-inch (6.4 mm) holes in the lid of the container for excess gas to exit. Seal the lid on the container.
Step Three: Defrost freezer. Turn freezer to coldest setting. Place the entire container in the freezer. Check every 12 to 24 hours.
Step Four: When the dry ice is gone, the buds should be completely dry. If not dry, add dry ice until cannabis is dry. Conserve dry ice by partially drying buds for a few days before enclosing with dry ice.
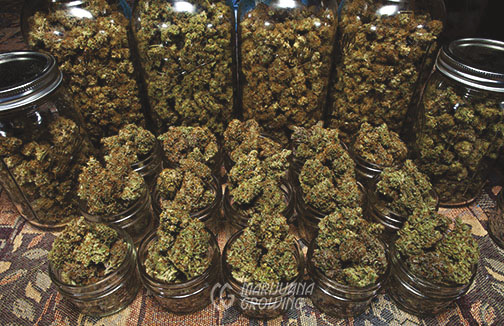
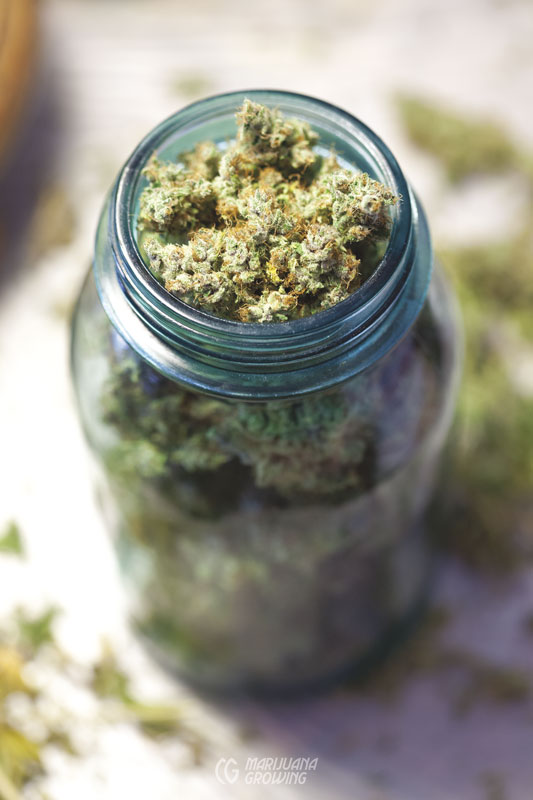
Canning jars are excellent containers to store these dry ‘Black Shaman’ flower buds. The rigid glass protects buds from damage. Always store jars in a cool, dark location to avoid heat and sunlight.
Curing
Curing after drying helps remove any remaining chlorophyll, other pigments, latent fertilizer salts, and so on that have accumulated in flower buds, leaves, and stems. If dried too quickly, flower buds retain more chlorophyll and have a “green” taste. When vaporized or smoked these imports are harsh on the pallet and often burn too hot. Removing chlorophyll, salts, etc., can be achieved with air, water and air, and with dry ice (CO2).
Curing is not essential; in fact, many medical patients prefer the often minty flavor of uncured cannabis.
Even after plants, branches, or buds have dried on screens or been suspended in a drying room for five to seven days and appear to be dry, they still contain moisture inside. This moisture affects taste, fragrance, and cannabinoid content (potency). Curing will remove this excess moisture and all it contains. Curing makes buds uniformly dry and pleasant to consume, and preserves natural cannabinoids and terpenes.
Light, air, and water are all that aerobic bacteria need to start consuming chlorophyll, salts, and so forth. When the bacteria consume all the available food and oxygen dissipates, bacteria die. This action frees up carbohydrates, chlorophyll, and other contaminants. Properly dried and cured cannabis flower buds burn evenly and have a smooth, rich taste. The vibrant green color fades when chlorophyll dissipates and reddish hues become more prominent.
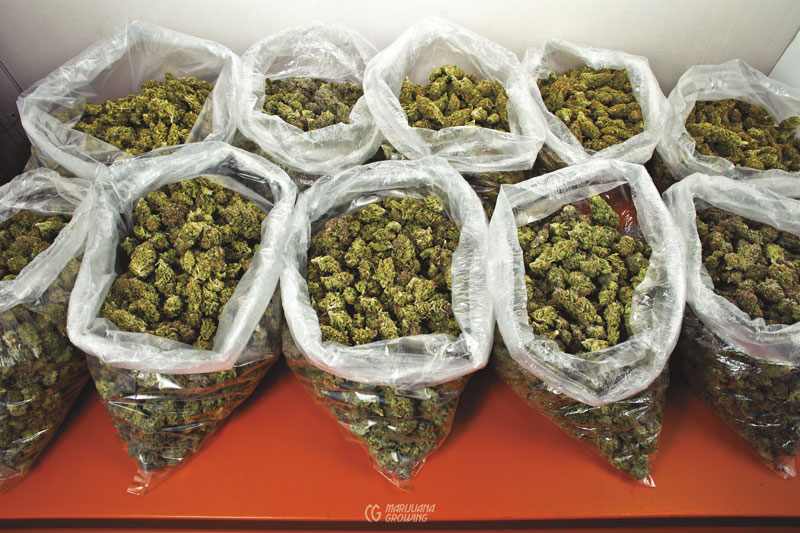
Dry cannabis flower buds are packed into turkey bags to cure.
The first week of curing affects potency in that it evenly removes moisture within the foliage so that few impurities — pigments, salts and contaminants that affect taste and fragrance — remain in the dry foliage and flowers. Curing also allows cannabis to dry so that mold does not grow when it is stored. Well-cured flower buds are soft and pliable but dry inside. Flower buds should feel like they are dry and only the dry pliable foliage is holding resin onto stems. When smoked it should have an even glow and enter the body smoothly. When vaporized, there should be no apparent “green” taste.
Air Curing: Step-by-Step
Step One: Remove flower buds from branches and place in an airtight container. Some plastic bags may impart a plastic or metallic odor. Clear and opaque turkey bags used for long-term storage are airtight. I prefer Black Magic Odor Barrier Bags because they are black, durable, and airtight. There are also bags that reflect heat and are airtight (when properly sealed) and infrared-proof, which protects them from heat.
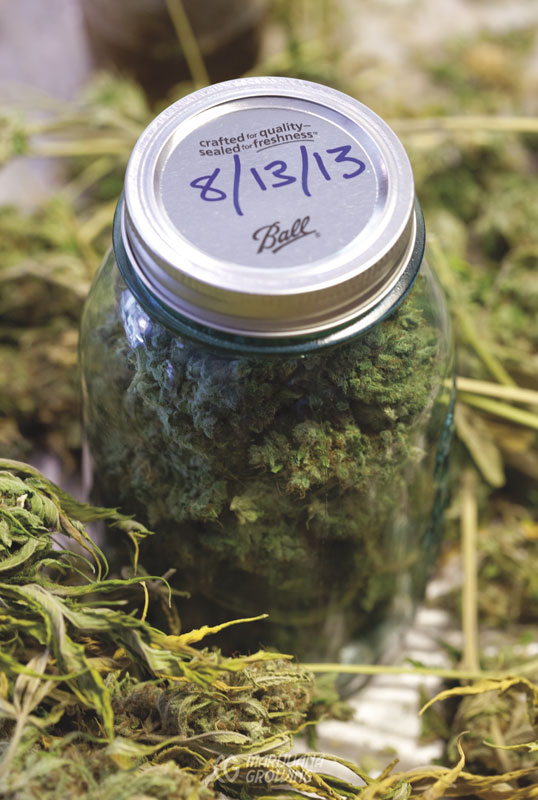
Step Two: Write today’s date on each curing container.
Step Three: Gently pack as many buds into container as possible without forcing or damaging them. Place containers in a cool, dry, dark place.
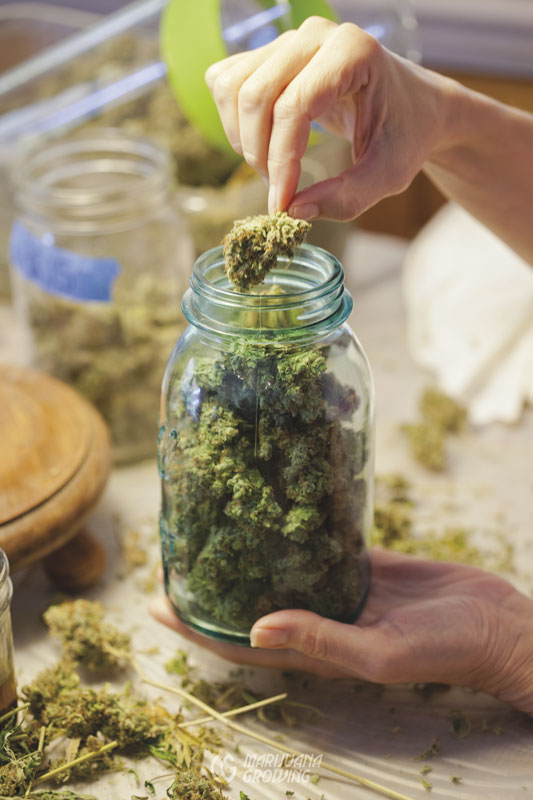
Step Four: Once enclosed in an airtight container, moisture inside buds migrates to dry portions of stems and foliage. Check in 2 to 4 hours to see if buds feel different. Gently squeeze a couple of buds to see if they feel moister now. Be careful! Resin glands bruise easily.
Step Five: Open the drying container 2 to 3 times daily for the first 7 days to release moisture. Take a whiff the instant you open the container. The fragrance should be sweet and somewhat moist. Close the container quickly. If necessary, remove buds from jar for a short time to inspect for mold and disease.
Step Six: After the first week, open containers once or twice a week for a quick whiff. Do not open too many times or the slow curing process will not work.
Step Seven: Some gardeners cure flower buds slowly for 6 months or longer. However, after 2 to 3 weeks they should be fully cured and remain fresh, firm, and pliable. Flower buds can be sealed in containers and stored.
Once cured, keep medicinal cannabis flower buds in an airtight container. Open the container periodically to let out moisture that may have condensed. Or you can keep the container sealed and store in a cool, dry, dark place. Buds should store well for 2 years or longer. However, most are consumed earlier!
Packaging and Storage
Packaging dry cannabis in an airtight or similar environment will help preserve aroma, taste, and potency. Excessive exposure to oxygen causes the cannabinoid profile and the medicinal effect to change. Dry cannabis oxidizes when exposed to the oxygen in air. Oxidation breaks down THC molecules, converting them to cannabinol (CBN).
Plastic bags are commonly used to package and store cannabis. Such containers preserve cannabis best when the bags are handled very little. Handling bruises and degrades resin glands. A rigid container (I prefer dark glass) will help protect resin glands from extra movement and abrasion.
Guarda el cannabis medicinal seco y curado en un lugar seco, oscuro y fresco para preservar el aroma, el Store dry, cured medicinal cannabis in a cool, dark, dry place to preserve aroma, taste, and cannabinoid content. Cannabis quality is best preserved under these conditions. Patients store the bulk of their medicinal cannabis in a cool, dark, dry location and keep only a few days supply close at hand. The cannabis does not have time to degrade and remains potent.
Silicon packets, newspaper, or paper towels placed in the drying container will absorb excess moisture. Make sure to remove the silicon packets, paper, and so forth regularly to dry them out before returning them to the container.
Packaging cannabis for long-term storage (6 to 48 months) requires a little more effort to ensure the qualities of cannabis are retained. Cannabis can be stored for more than 2 years, but this is seldom the case. If cannabis must be stored for more than 2 years, be sure to make the preparations listed below.
Refrigeration and freezing are also means of preserving cured and dry cannabis. Although refrigeration slows decomposition, household and commercial refrigerators and freezers have high humidity levels. High humidity can cause condensation inside the sealed containers. Many refrigerators have a “low humidity” drawer, but the humidity is still quite high. Expensive “low humidity” refrigerators are available for health care and other industries. These are the refrigerators many seed purveyors use. The storage container must be well sealed to slow condensation inside. Place silicon packets in the container to absorb condensed moisture. Check stored cannabis periodically for deterioration.
Other ways to store cannabis include concentration into hashish, oil, or alcohol.
Vacuum Sealing
Vacuum seal cannabis for long-term storage. Vacuum packaging removes oxygen from the airtight storage container, which slows biodegrading of cannabis flowers to a crawl. The absence of oxygen in airtight bag makes an impossible environment for pests and diseases. Inexpensive vacuum packagers use a jar with a twist off lid. A small air suction pump is attached to a tube with a one-way valve in the top. The air is sucked out of the jar to form a vacuum seal. There are simple manual vacuums for small amounts of cannabis.
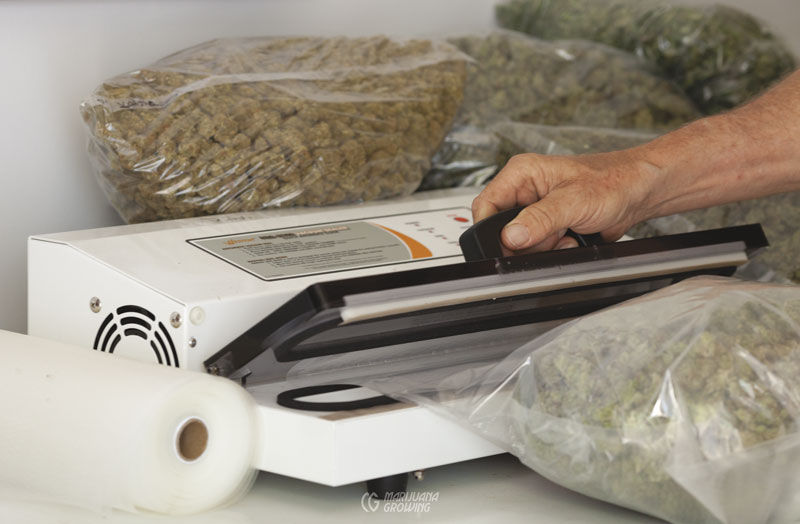
A vacuum sealer will help keep harvested cannabis from biodegrading quickly.
Food Saver and Seal-A-Meal vacuum sealer machines are very popular in North America. These vacuum sealers remove air from the plastic bag full of cured cannabis, which reduces oxidation to nil. Once the air is removed from the bag, the machine forms a hermetic seal that keeps the cannabinoid profile and flavor intact. More sophisticated vacuum packaging machines use special impermeable plastic bags. The more expensive models are able to inject CO2 and nitrogen,* gas into the bag. Models of these sealers range in price from $50 to $2,000 USD. Inexpensive vacuum sealers are also available in the canning section of many grocery and variety stores in late summer and early autumn. Containers sealed with inexpensive vacuum sealers can lose the vacuum after a few days. Properly vacuum-packed, medicinal cannabis flower buds will stay as fresh as the day they were sealed in the airtight container. Visit the site of my good friends at Trim Scene Solutions in Northern California. They are experts on the subject.
*Carbon dioxide (CO2) gas in a concentration of 35 percent, or nitrogen (N2) gas concentrated at 98 percent will displace oxygen inside the sealed bag. In the absence of oxygen, degradation of cannabis essentially stops. Pests and diseases cannot survive without oxygen. The inert gases (CO2 and N2) do not alter the cannabinoid profile.
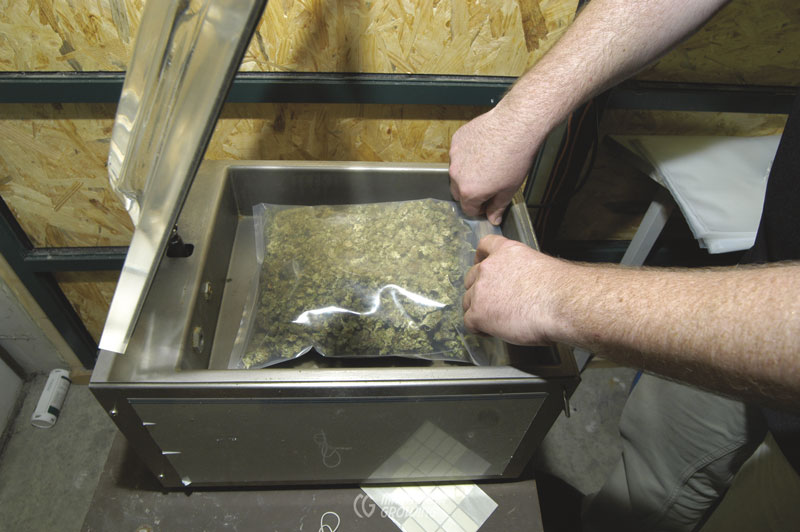
An industrial vacuum sealer removes the air inside a strong plastic bag and melts closed the open end of the bag to hermetically seal in freshness.
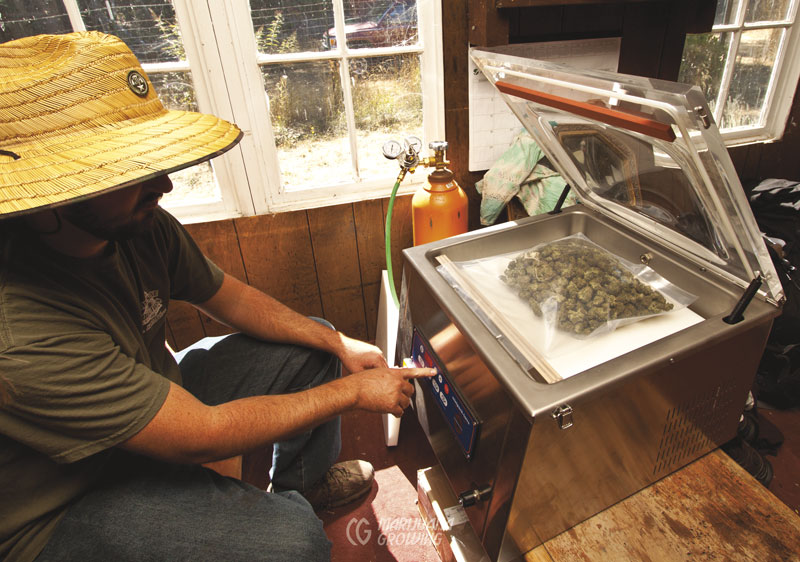
A sophisticated vacuum sealer is able to inject inert nitrogen gas into sealed bags.
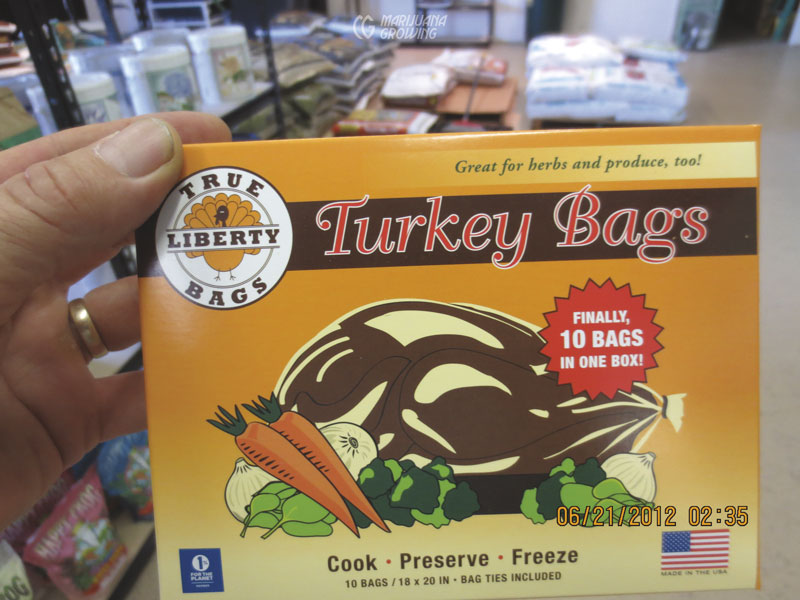
Turkey bags are the favorite storage container for many medical cannabis gardeners. True Liberty Bags makes opaque black bags to exclude light.
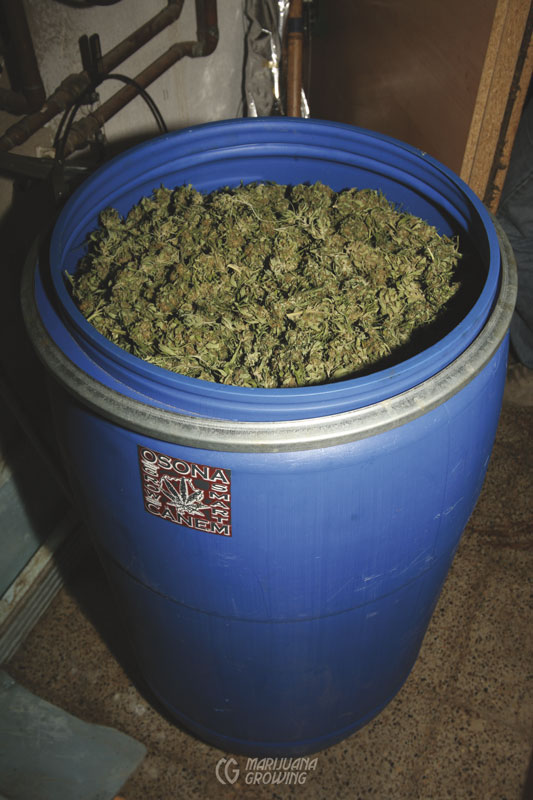
Cannabis flower buds must be perfectly dry to store in 30-gallon (113.6 L) containers. Excess moisture in such a large amount tends to attract mold and rot.
What to Do with a Moldy Crop
Moldy flower buds, whether infected with bud rot (Botrytis cinerea) or powdery mildew (or oidium, a catchall term for a fungal disease caused by a powdery mildew), and depending upon severity, will have a lower overall harvest weight. If mold has entered the plant’s system, it will remain there after harvest. Medical patients or anybody with respiratory ailments should not vaporize or smoke moldy cannabis. For more information, see chapter 24, Diseases & Pests.
Medical patients or anybody with respiratory ailments should not vaporize or smoke moldy cannabis.
Stop molds and mildews before they start and spread through the entire crop. Inspect plants at night with a UVC flashlight to spot newly forming fungus. Spray with a hydrogen peroxide (H2O2) solution to kill fungus. If the infection is bad, spray the entire plant with hydrogen peroxide solution before harvesting. Harvest plants carefully so that any remaining spores from the fungal disease do not contaminate other plants in the garden. Pour one cup (8 oz [236.6 ml]) of 3 percent H2O2 into 5 gallons (19 L) of water.
Bathe harvested branches full of buds for 1 to 5 minutes in the diluted H2O2, then shake dry and hang in a well-aerated room until excess surface water is gone. Manicure buds while plants are fresh and supple. See “Powdery Mildew” in chapter 24, Diseases & Pests, for complete information on control.
Too often gardeners harvest their moldy crops and trim off mold-affected foliage. This practice spreads mold spores and does not control the disease. Drying the crop will result in lingering mold living in and on harvested flower buds, branches, and leaves. Making water-or dry-sieve hashish will not kill the disease either. Once the diseases have entered the system of the harvested foliage, they will stay even if washed off the surface of the plant.
Two ways to clean include soaking in hydrogen peroxide and passing under a UVC lamp.
Soak freshly harvested cannabis in a container filled with diluted H2O2 (see recipe earlier in this section). Mildews and surface molds will float to the top and can be skimmed off. Rinse bud-filled branches with a spray of fresh water, shake lightly to remove water, and then manicure and dry.
Pass harvested foliage under ultraviolet (UVC) light to kill surface molds and bacteria. About a second or two is all the UVC light a plant can withstand. Check with manufacturers for application times.
A moldy crop is a big problem. Always keep a close eye on the garden, and inspect for early signs of mold so that it does not spread.