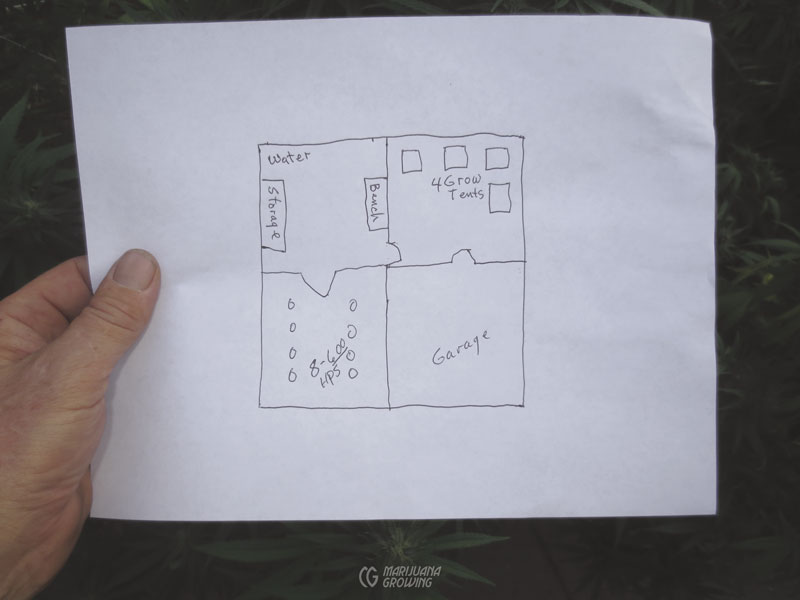
A rough drawing of the garden rooms and garage was an essential tool when the gardeners were in the initial planning stages. A detailed drawing with precise measurements was made before starting construction.
Two growers, Mitch and Tim, personify many new growers that have learned the basics of crossing and feminizing cannabis. They are crossing autoflowering feminized plants with “regular” photoperiod-reactive males and females. The regular male and female plants are grown from seed for selection and then multiplied into cuttings.
The beautiful indoor garden is in a basement with a concrete floor. The single secure point of access is through a secret door in the garage. The entry door, secured with a deadbolt lock, is hidden inside a locked storage cabinet.
A doorway to the left leads to a 10 × 10- foot (3 × 3 m) work and storage room. An immediate left turn leads through a doorway to the main flowering room. The storage room is full of soil, containers, two 55-gallon (208.2 L) reservoirs for water and nutrient solution, a potting bench, garden supplies, and a few garden tools.
Construction
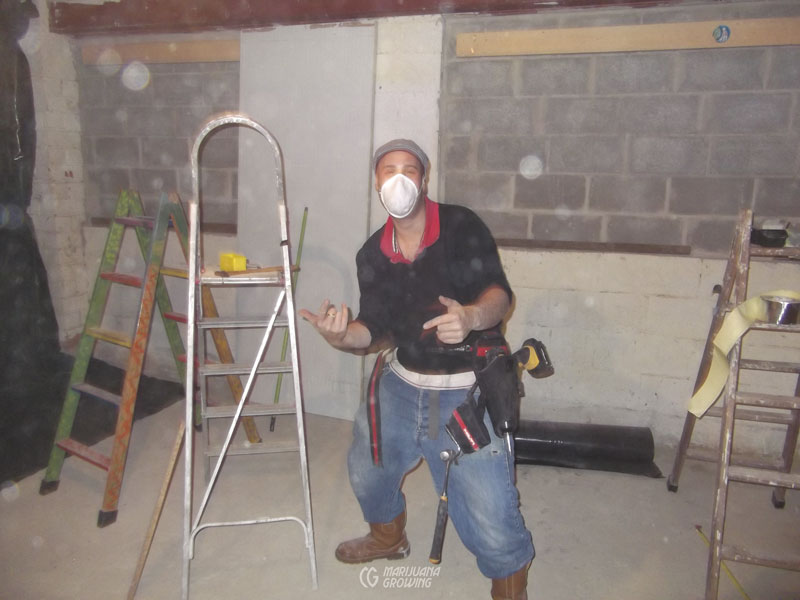
Ready and working! Tim kept all his tools at hand on a tool belt and in special pockets. A dust mask protected him from ever-present construction dust when working with Sheetrock and plaster.
In the original space, water seeped through the basement walls. To remedy this perpetual problem, the gardeners built a new inside wall of cinder blocks. They sandwiched a layer of heavy-duty water barrier material to keep the seepage behind the cinder block wall.
The floor was lined with a double-layer plastic water barrier. The barrier developed small holes after the first year and had to be replaced with a more durable product.
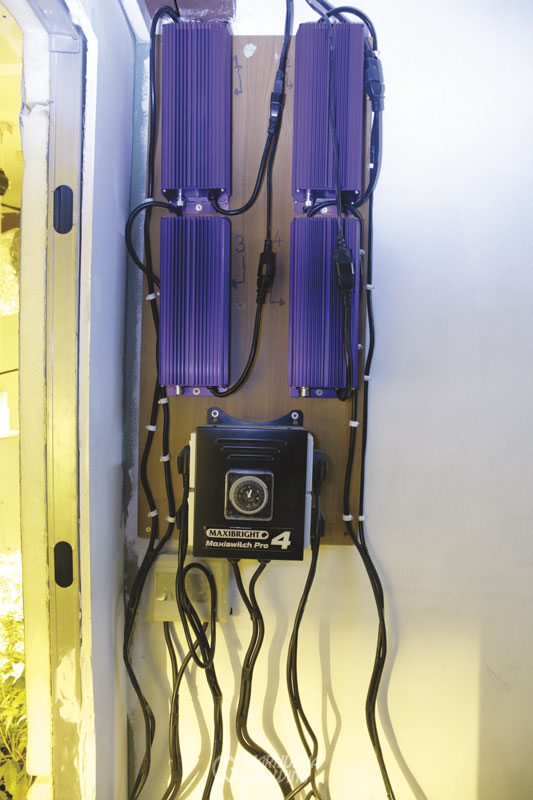
Four adjustable (400- to 600-watt) ballasts and a timer were mounted on a separate board for each side of the garden room. They were mounted at eye level for easy monitoring and to avoid splashes of irrigation water.
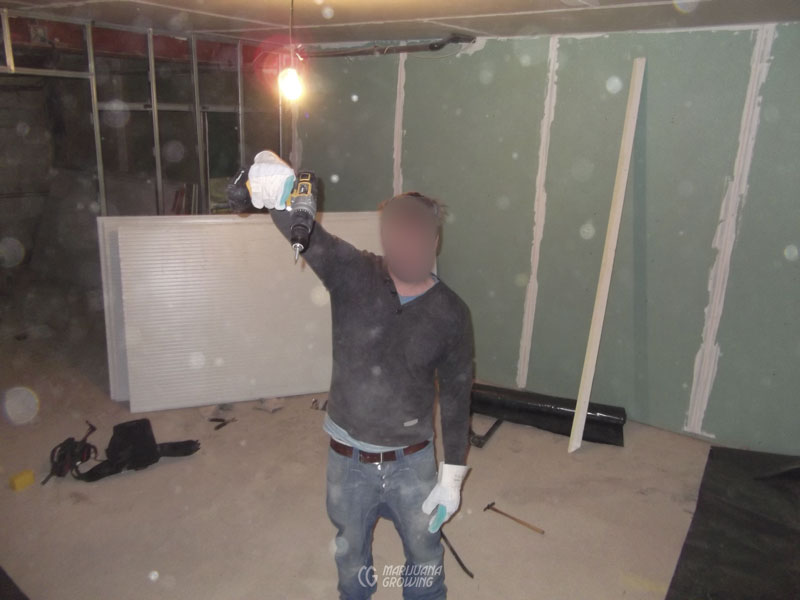
Drywall (aka Sheetrock) is color-coded green to signify it is water-resistant.
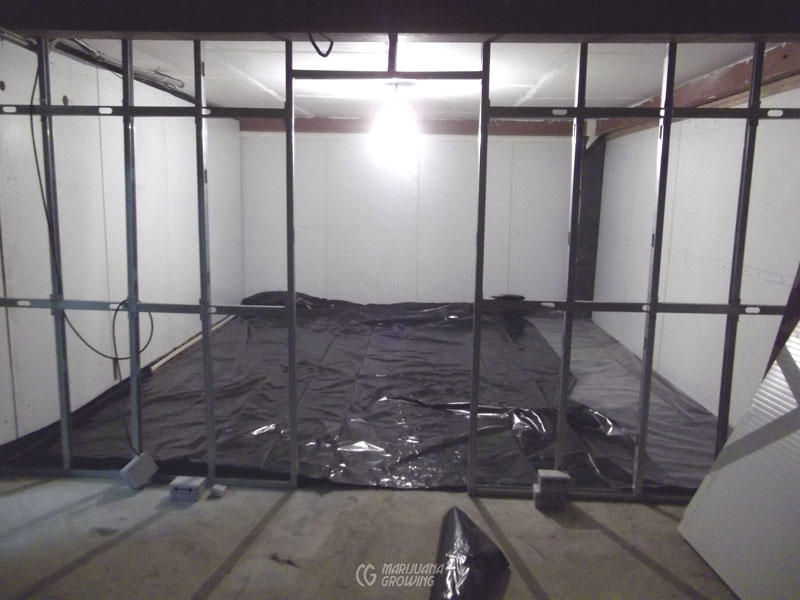
Aluminum-stud construction is easy to manage; aluminum studs weigh much less than wood studs. Wiring can be threaded through premade holes in the aluminum studs. The big room was wired with two separate electrical circuits, each side of the room having a dedicated circuit.
The walls were covered with reflective panels filled with Styrofoam and covered with thin aluminum sheets. The panels dovetailed together and were mounted to a wood backing. Lights were hung from the aluminum beams that framed the ceiling, which was covered with Sheetrock.
Soil, Water, and Nutrients
Soil, water, and nutrients had to be sorted out before gardening could start.
Soil
Used soil was kept outdoors in 3-foot-tall (91.4 cm) plastic bins. The gardeners added an enzyme product whose manufacturer claims leaches out any built-up salts. They also include a dose of Gnat Off to kill gnats and gnat eggs before bringing the used soil back indoors. Used soil was left outdoors, exposed to the elements for a minimum of 30 days, before being reintroduced to the indoor garden room.
Water
The water for the gardens came from a well, and the composition of the well water changed throughout the year. In the late summer, more dissolved solids were in the water supply. Readings for input water EC were 610 ppm and pH 8.2. Plants would grow well for the first 3 to 5 weeks, and then nutrient problems would manifest.
The gardeners installed a reverse osmosis filter to remove salts from water and lower the pH. However, water pressure in the garden room was at 1.4 bars. The RO device required 2.4 bars of pressure to force water through the filter. They replaced the pump, after which the pressure was 2.7 bars and the RO filter worked perfectly.
Nutrients
Once a week, 2 heaping teaspoons of molasses were added to every 8 gallons (30.3 L) of irrigation water. Fertilization with molasses started 2 weeks after transplanting into 3-gallon (11.4 L) containers. Weekly fertilization with molasses continued until the end of flowering. Epsom salts were applied once during late vegetative growth and once after 3 to 4 weeks of flowering. Varieties that needed a higher dose of nutrients received a topdressing of chicken manure. This tactic made it much easier to care for many plants with different fertilizer needs.
| SOIL MIX | |||
| Amount | Measure | Metric | Notes |
| 7 | cubic feet | 200 liters | used soil |
| 2,6 | gallons | 10 liters | Biobizz Premix |
| 1,3 | gallons | 5 liters | perlite |
| 1,3 | gallons | 5 liters | vermiculite* |
| 1 | pound | 450 grams | dolomite lime |
| 2,2 | pounds | 1 kilogram | worm castings |
| 1 | pound | 450 grams | bat guano |
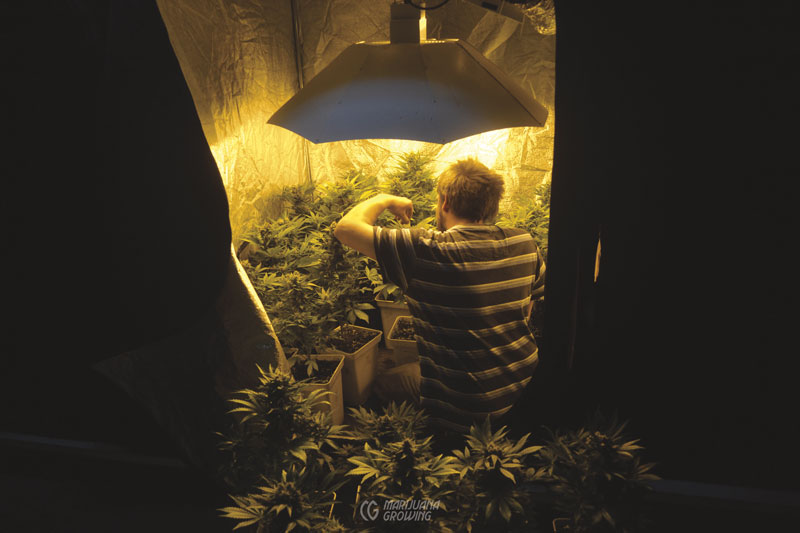
The gardeners used vertical parabolic reflectors in their garden.
Grow-Tent Rooms
The main door to the gardens opened into a room that measured 10 × 15 feet (5 × 4.6 m) and contained 4 grow tents, each 4 × 4 × 6 feet (1.2 × 1.2 × 185 m) and equipped with a 600-watt HPS lamp.
There are many different grow-tent manufacturers, and most grow tents are easy to set up and start using. Setup takes about 30 minutes, and the tents come with written setup instructions; some even have video instructions that can be found on YouTube.
The grow tents were filled with flowering crops or clones, seedlings, and mother plants. A workbench along the wall was stocked with indoor garden supplies, and tools were hung on hooks above. A big open space in the middle of the room served as a staging area to move plants, soil, and supplies in and out of the garden area.
Each 4 × 4-foot (1.2 × 1.2 m) tent yielded from 12.6 to 26 ounces per 600 watts (0.6–1.2 grams per watt). Clones were taken as needed 4 to 5 weeks beforehand, and seeds were planted 3 to 5 weeks before moving them into the flowering room.
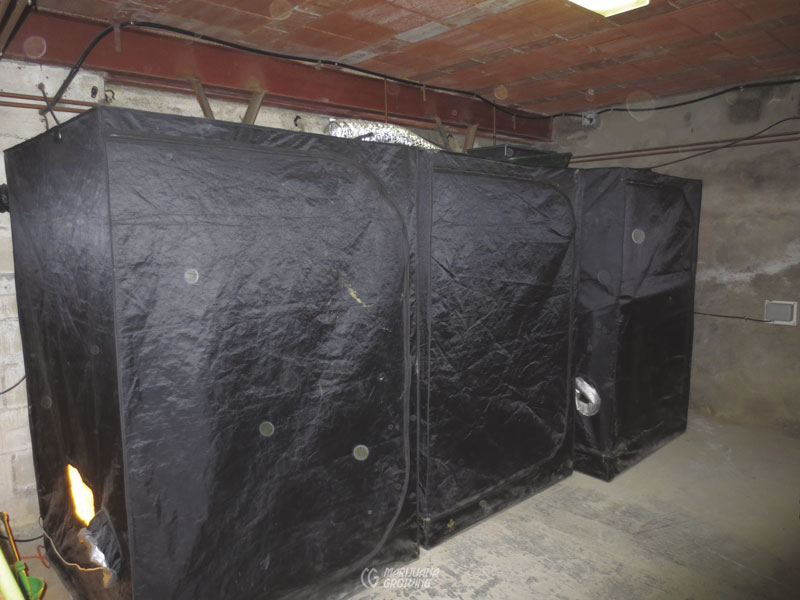
Grow tents stay a few degrees warmer when set up off the floor on pallets. Setting up individual garden rooms allowed complete control of the environment. Each tent could grow a different seeded variety of cannabis. Or cuttings or seedlings could be grown in the tent and later moved into the big flowering room. The tent could also be used as a drying room.
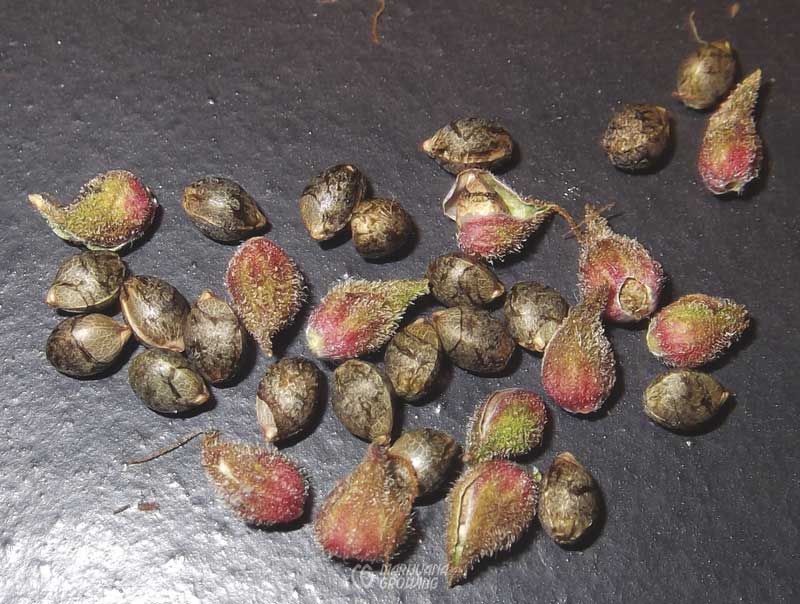
Seeds from breeding crosses were collected and planted once the grow tents were completed.
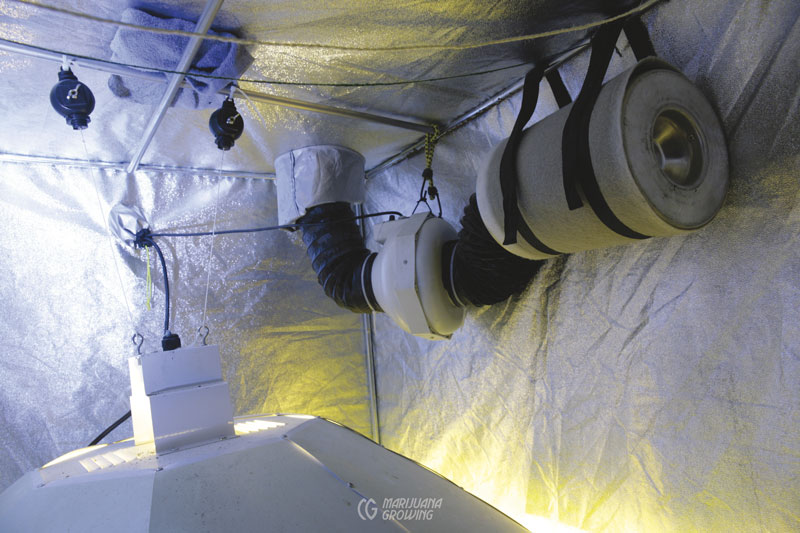
A carbon air filter with an inline 4-inch (10.2 cm) temperature-controlled, 138 cfm (270 m3/hr) fan was connected to a short run of ducting that efficiently eliminated cannabis fragrances from the grow tent. The fan also kept the air in the tent changed and the temperature perfect. The high-quality inline fan ran very quietly, day and night.
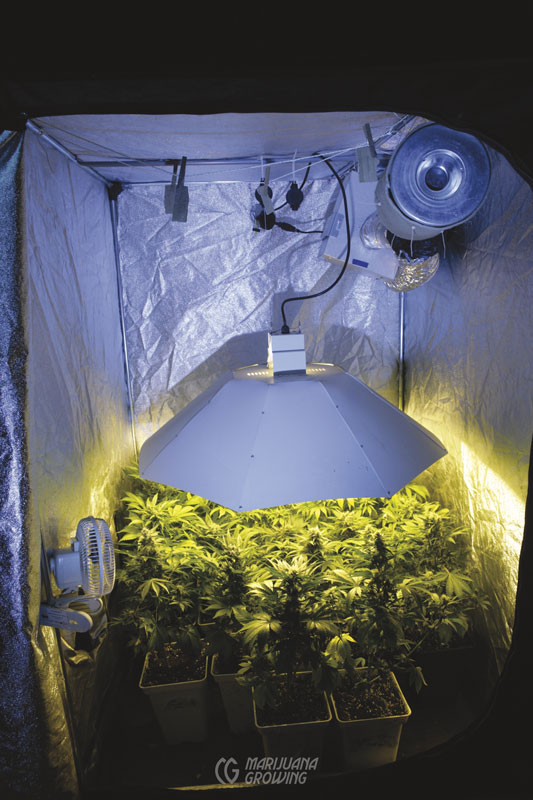
A parabolic dome reflector and 600-watt HPS lamp provided an even canopy of light to the seedlings in this grow tent. The gardeners kept temperatures lower, which allowed the lamp to be placed closer to plants.
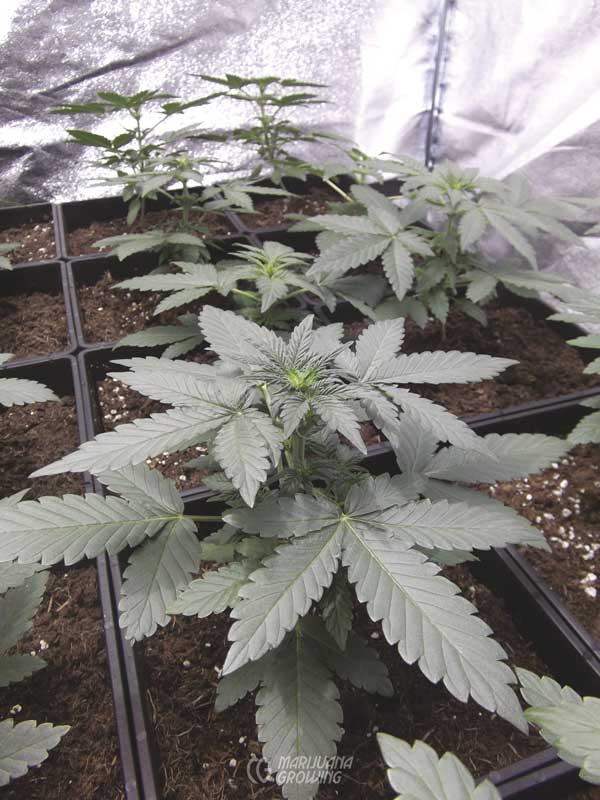
This 18-day-old autoflowering feminized seedling showed healthy foliage growth. Strong vegetative growth transforms into robust flowering, which is perfect for a sea of green garden.
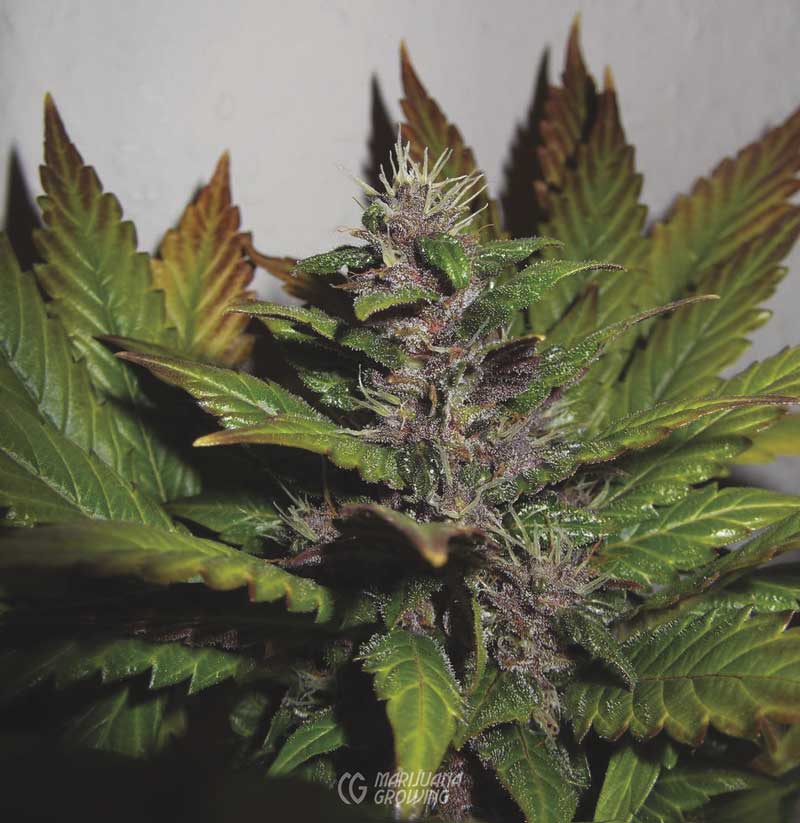
Genetic differences in flowers became more pronounced closer to harvest. This ‘Blueberry’-based automatic turns purple for harvest.

At just 21 days after breaking ground, these little autoflowering feminized seedlings were already starting to flower! The rapid growth phase starts at flowering and continues for another 2 weeks. During this growth phase, growth can quadruple.
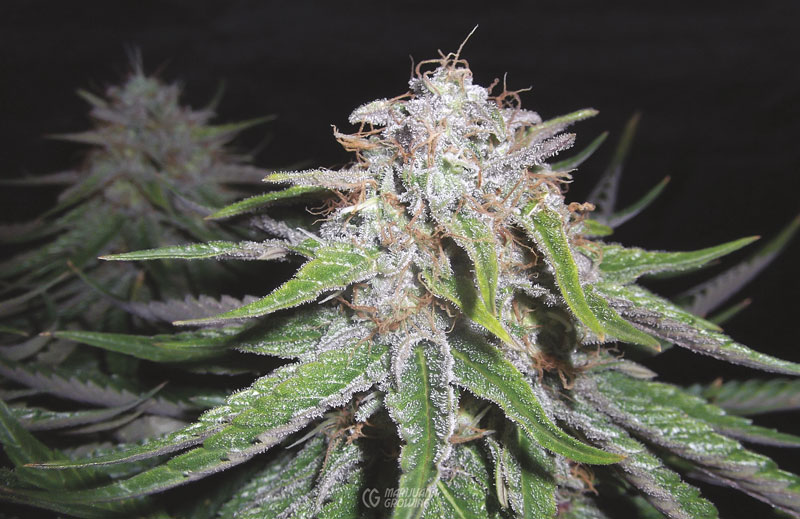
This regular, resinous ‘Panama’ × ‘Deep Chunk’ bud was on the verge of harvest. The gardeners grew both autoflowering plants and regular females from clones in this garden. This particular plant was part of an autoflowering breeding project.
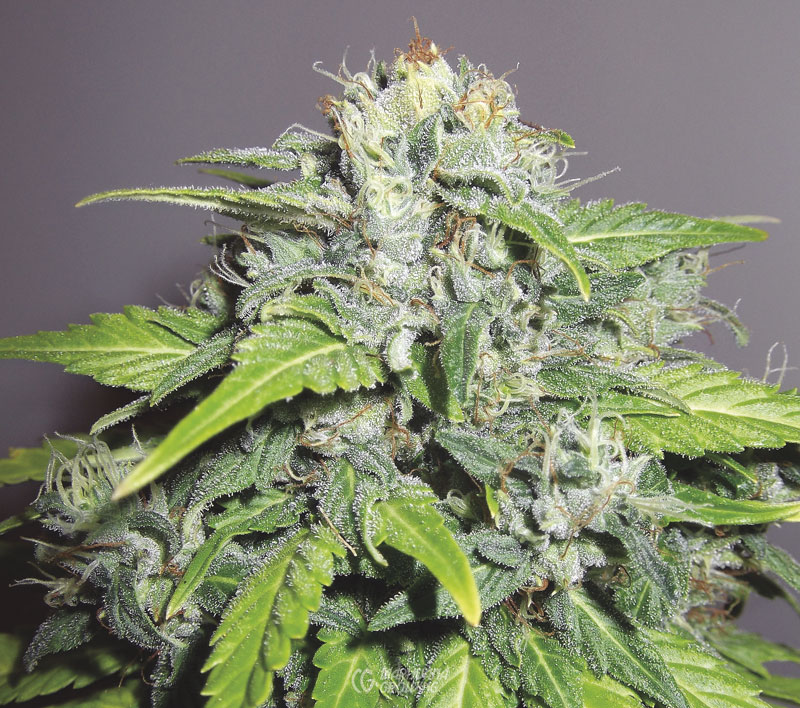
Another close-up view of the same harvest shows us the quantity of cannabinoid-rich, capitate-stalked resin glands covering the floral clusters of this autoflowering breeding parent plant.
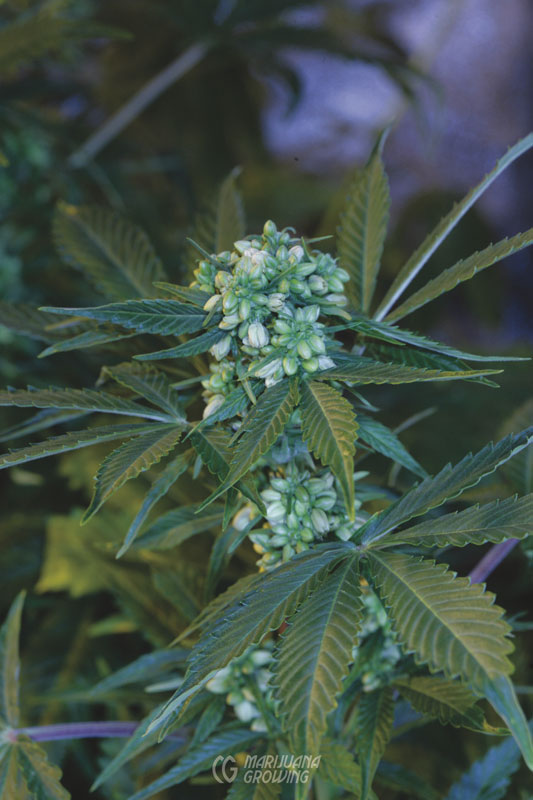
Pollen was captured from this male plant to use for breeding.
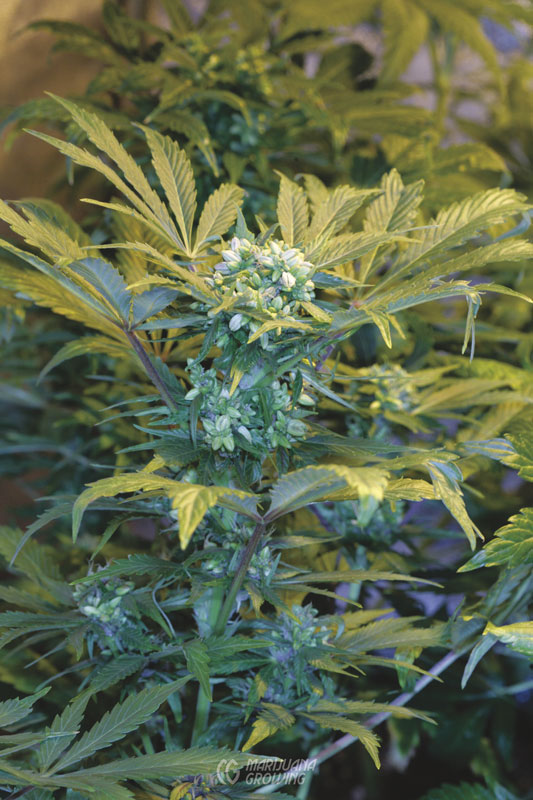
Male plants were segregated into a single grow tent.
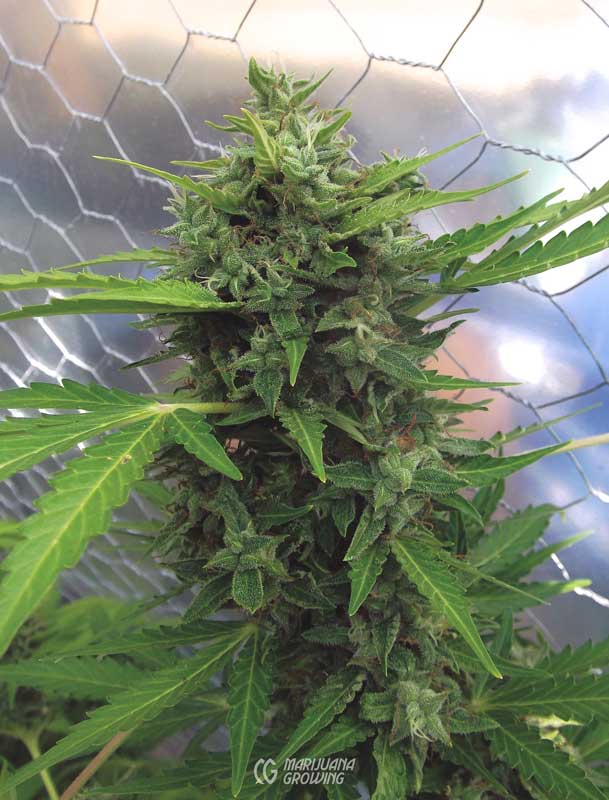
This breeding female was recently pollinated and will produce seeds in a few weeks.
Big Rooms
The 13.8 × 19-foot (4.2 × 5.8 m) flowering room had eight 600-watt HPS lamps—4 on each side. Each lamp had a vertical parabolic reflective hood and remote ballast. The lamps were mounted overhead with 2 adjustable nylon cords that kept hoods hanging evenly. The 1 × 2-inch (2.5 × 5 cm) boards were attached to the Sheetrock and aluminum beam ceiling with screws driven into concrete anchors. Lamps were hung from hooks screwed into the board in the ceiling.
The layout of the room was simple and easy to access with a wheelbarrow, which was essential for moving soil and supplies in and out of the garden rooms. A big open aisle in the center of the room was used as a staging area and to grow small plants.
Plants in 3-gallon (11.4 L) pots were lined up in neat rows. A few larger containers and plants were mixed with some of the 3-gallon (11.4 L) containers. The aisle in the middle allowed easy access to plants.
The autoflowering feminized plants received 18 hours of light and 6 hours of darkness during their entire lifetime, seedling through flowering. Light leaks between rooms were not a concern!
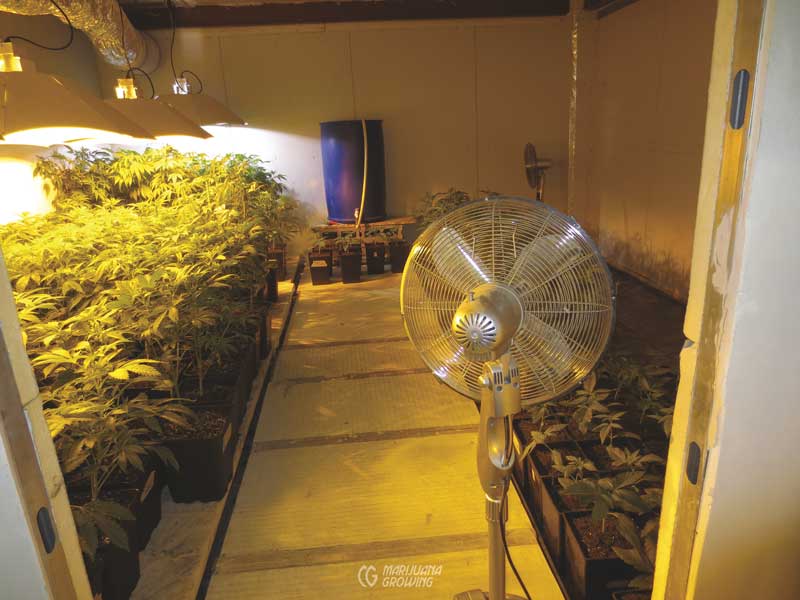
The floor fan was later replaced by wall-mounted oscillating fans. Four new fans were mounted on the walls and directed above plants. Air circulation improved dramatically, and there were no electrical cords on the floor.
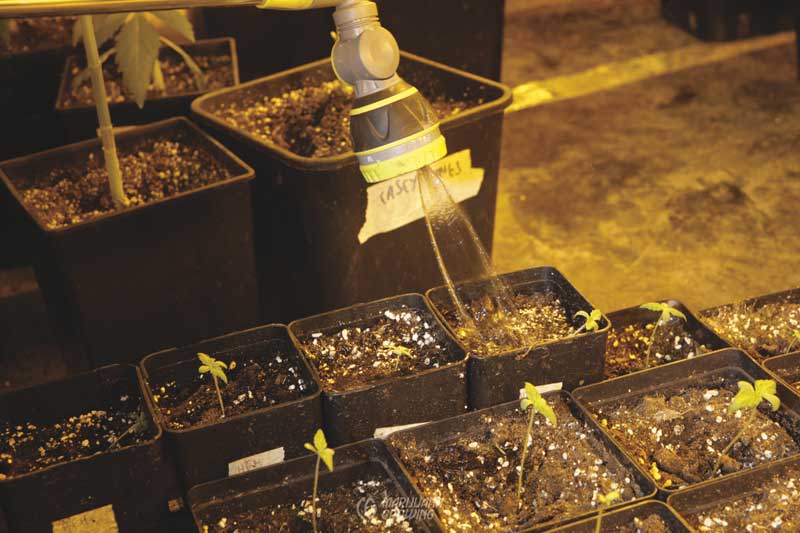
Water flow was regulated with a button on the hand-controlled watering wand attached to the hose bib.
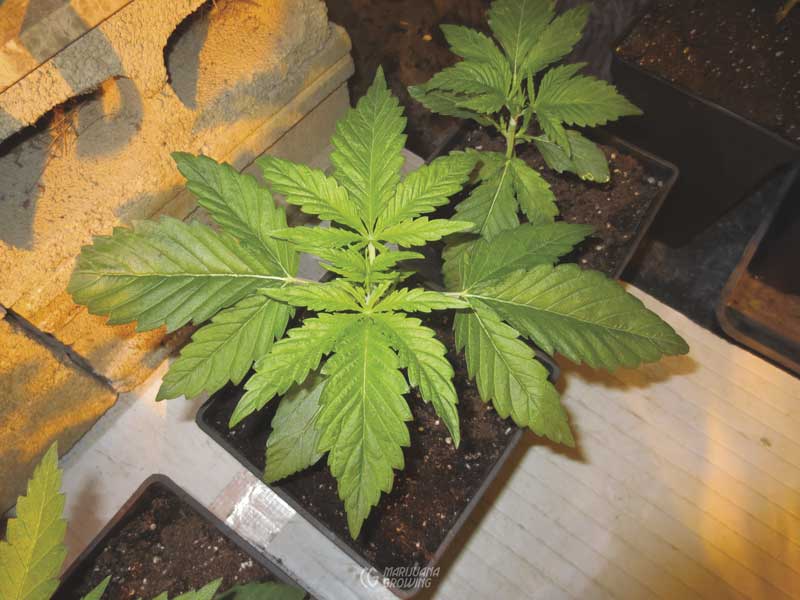
This robust F1 ‘Sour Boggle’ × ‘LPI’ (autoflower) 21-day-old seedling was developing well. Note the minor lack of nitrogen at growing tips, signified by a light-green color. More nitrogen is used at growing points, causing leaf color to become lighter.
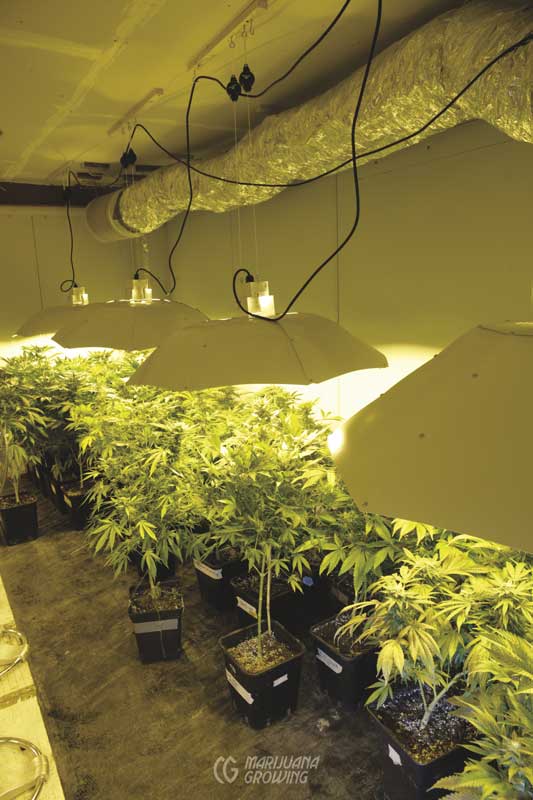
These 3-gallon (11.4 L) containers were clearly labeled on 2 sides. The plants grew for about 2 weeks too long in the containers, in addition to suffering from an invasion of thrips. Lower growth slowed down and showed signs of nutrient deficiencies and spider mite damage, and was then removed.
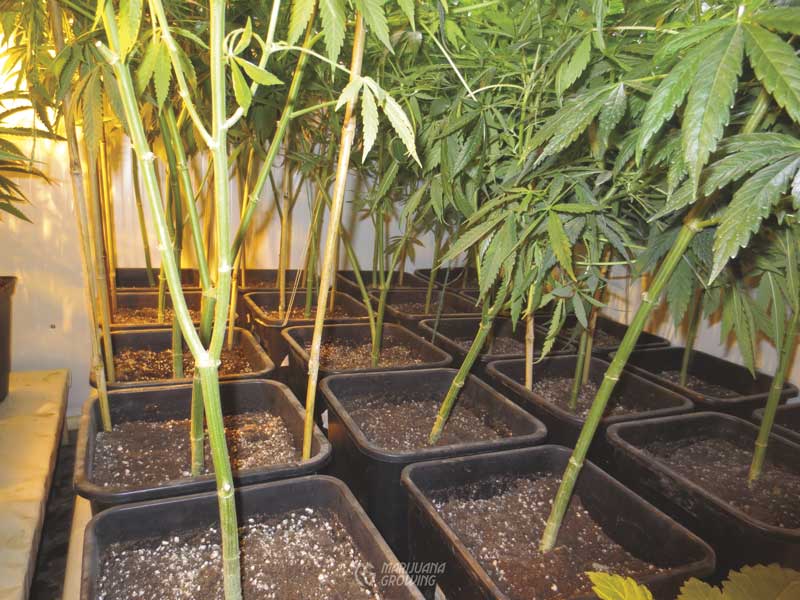
Square 3-gallon (11.4 L) containers fit closely together to get the most out of floor space. These plants stayed in vegetative growth too long. Spindly lower growth was removed to improve air circulation and facilitate maintenance.
Temperature, Humidity, and Ventilation
During the summer months, garden-room temperatures climbed a few degrees above outdoor ambient temperatures of 77ºF to 86ºF (25ºC–30ºC). Just a few degrees above the ideal 75ºF (23.9ºC) caused nutrient problems to manifest much more quickly than during cooler months of the year.
The gardeners purchased a small, portable air conditioner for use during hot summer days and nights. Cooling the room by a few degrees and lowering the humidity made a big difference in growth. When temperatures were around 80ºF (27ºC) in the indoor garden, growth was slow and weak, leaves curled under, and water and nutrient uptake were depressed.
Lowering the temperature and humidity bolstered overall plant health. Nutrient and water uptake were improved, and leaves became much stronger and were oriented toward the light. A minor change was visible within a few hours, and the garden looked much healthier a week later.
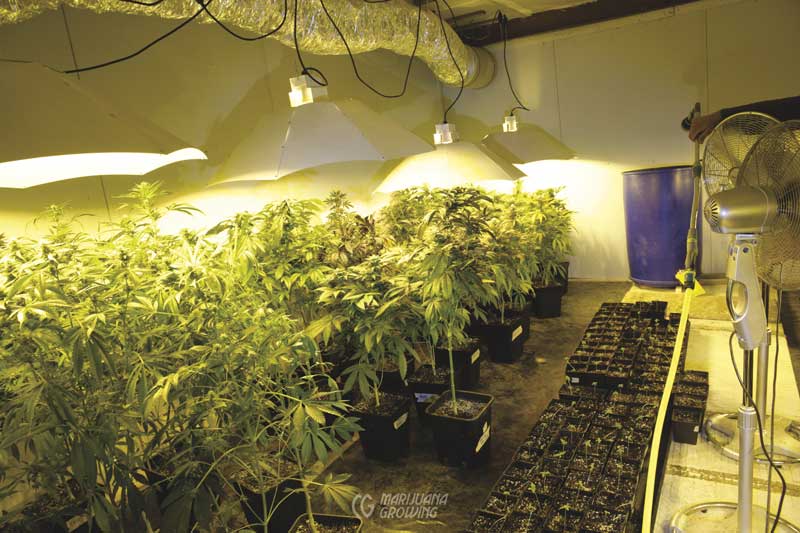
The carbon air filter at the end of the room was attached to 10-inch (25.4 cm) acoustic ducting 13-foot (4 m). Identical carbon filters were located on either side of the room.
Air was drawn through a carbon filter at each end of the room and pulled out by a 10-inch (25.4 cm) temperature-controlled inline fan that moved 1130 cfm (1980 m3/hr). The ducting continued through the wall to a short run outdoors where the flowing air was passively moved up and out by natural convection.
Small plants were easy to move into the large flowering room to take advantage of the excess light. They were placed on the floor and received just the right amount of light for the seedling growth stage.
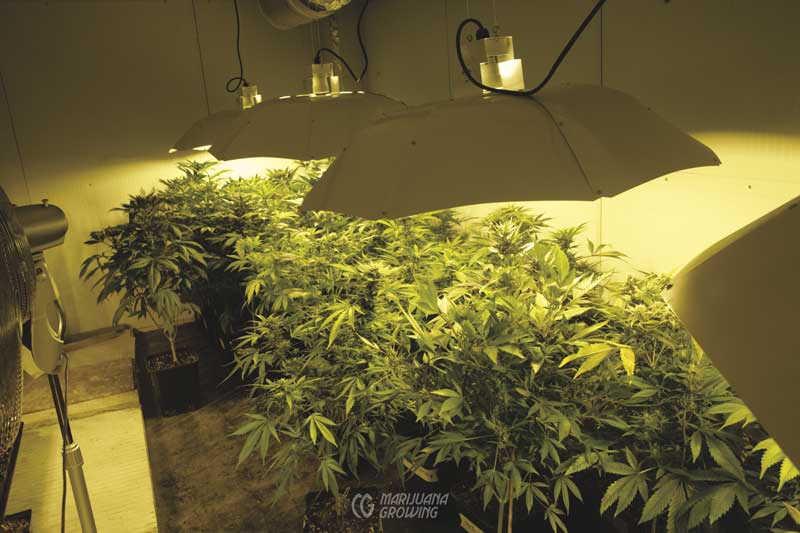
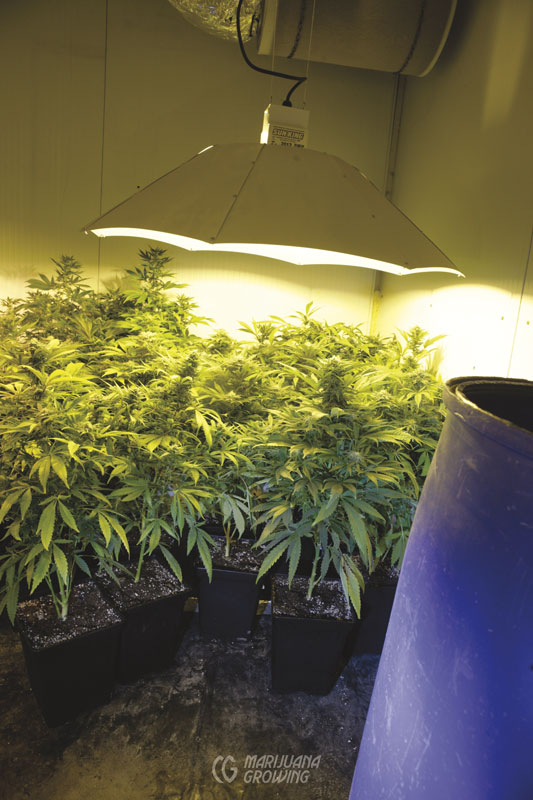
At 5 weeks into flowering, this mixed batch of clones and seedling varieties had different nutritional needs. For example, indica-dominant varieties required more water and frequent fertilizing, while sativa-dominant varieties required more water and less-frequent fertilizing. Sativa-dominant varieties must be bent, and the lamp must be moved closer to indica-dominant varieties.
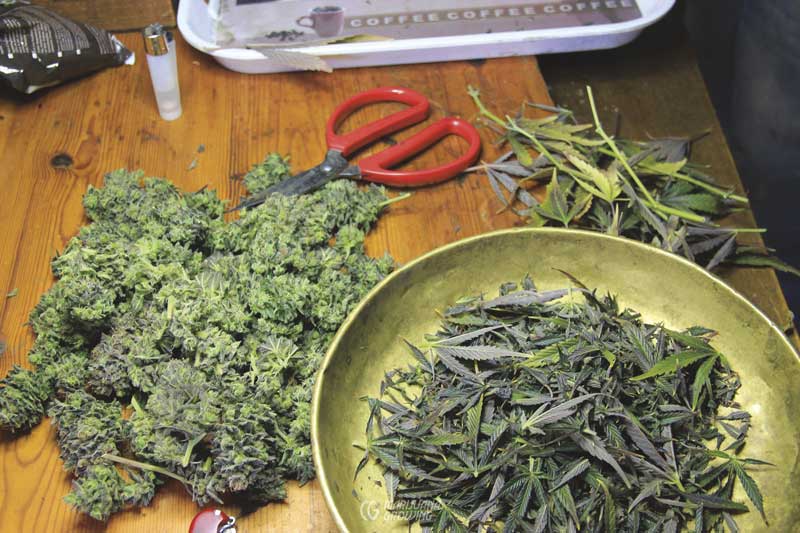
Manicuring and trimming away excess foliage is a time-consuming job!

