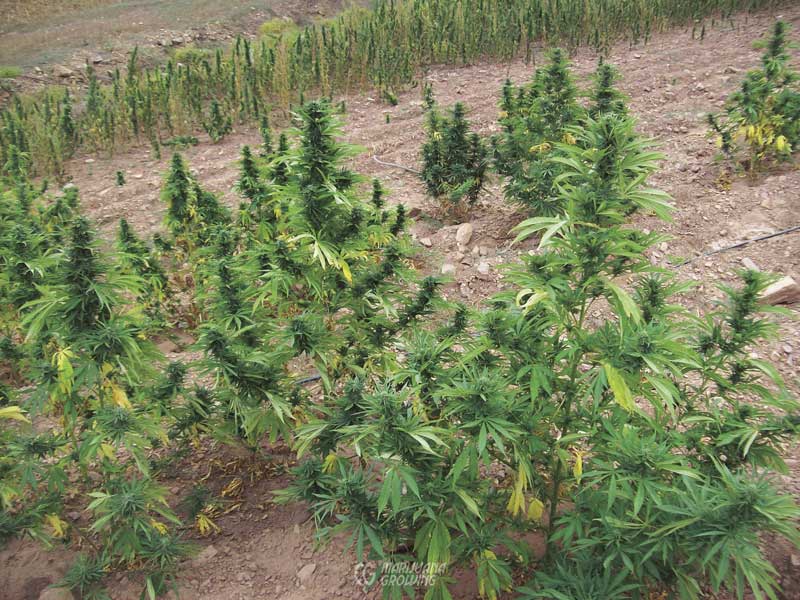
Growingmedical cannabis outdoors is the first option for most gardeners in states and countries where growing medical cannabis is legal or tolerated. Cannabis evolved naturally and grows best outdoors naturally. Growing medical cannabis outdoors is ecologically sound and works in concert with Mother Nature. Sunlight and air are virtually free; water and nutrients are also much less expensive in outdoor gardens. Bulk organic nutrients—composts, manures, rock powders, and so forth—are inexpensive and most often environmentally friendly. Outdoor gardening is more popular than indoor gardening in countries with progressive medical cannabis laws. More cannabis is grown outdoors than indoors, for these simple reasons: Cannabis is a strong plant that can be grown successfully almost anywhere. Virtually any sunny growing area can be coaxed into yielding a healthy crop.
Harvesting two crops, one in spring and another in the fall, is possible in temperate climates. Long nights and short spring days trigger cannabis to flower. Savvy gardeners harvest the spring crop and then plant the fall crop the next day! Harvest the fall crop when nights become long and days short. Adventurous gardeners can plant the new autoflowering feminized seeds; such stable hybrids yield 3 to 4 ounces (85–118.3 gm) 70 days after planting seeds. Autoflowering feminized plants can be harvested in the middle of summer when sunlight is most intense and resin production is at its peak.
Research local garden trends, read local garden columns, and talk to local gardeners about the best time to plant and grow medical cannabis, tomatoes, peppers, or similar vegetables, and then plan accordingly. Also inquire about common pests and diseases and when they are most prevalent. Collect publications on local growing conditions. These are often available at hydroponic stores, nurseries, and garden centers, or through your local department or ministry of agriculture.
Big cannabis plants like these Colombian plants have been growing for many years. This giant plant was photographed by Mel Frank in 1977. (MF)
Organic soil preparation, plenty of sunlight, water, and a long growing season are all most plants need to thrive.
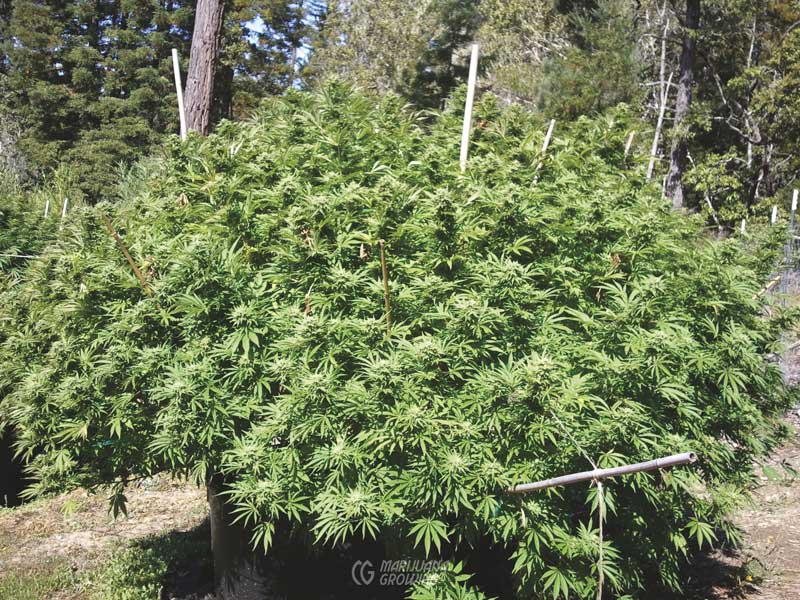
Security is still a concern when cultivating medical cannabis outdoors. Theft can be a problem, and so can uninformed law enforcement. Make sure to have all your paperwork in order should law enforcement knock on your door. Posting your medical recommendation at the garden is a common practice.
Much of the information that pertains specifically to outdoor cultivation is in this chapter; however, many of the subjects within this chapter are covered in great detail in other chapters of this book. References to these chapters are made in the appropriate places.
Climate
Cannabis will grow in nearly all climates. Specific varieties of cannabis grow better in some zones than others. Most varieties of cannabis need a minimum of 120 frost-free days to produce a decent harvest; gardens in such climates should be protected with plastic in the springtime. Transplanting or setting out autoflowering feminized seedlings in short-season climates is an excellent option. Gardens in short-season climates with 90 frost- free days require a greenhouse to protect plants from cold at night. Southern and warm-climate gardens suffer from excessive heat and sometimes humidity both day and night.
Outdoor gardens are dominated by climate, soil, and water supply whether in a backyard, on a balcony, in a greenhouse, or at a remote location. Microclimates are mini climates that exist within larger climates. Many maps such as the United States Department of Agriculture (USDA) Hardiness Zone map detail limited climatic boundaries. The USDA Hardiness Zone map divides North America into 10 zones plus an eleventh zone to represent areas that have average annual minimum temperatures above 40°F (4.4°C) and are frost- free. Look into detailed microclimate maps for your growing zone. One of the most detailed climate maps for western North America can be found in Sunset Publishing’s Western Garden Book. The map details 26 distinct climate zones in 13 states in the western United States, as well as British Colombia and Alberta, Canada. This is the best climatic map available for the area. See information on climate zones in the western United States at www.sunset.com. Search “Sunset climate maps picture” on the Inter- net to learn more about climate zones.
Europe and industrialized countries have much climatic information available via the Internet. Check out charts showing rainfall, temperature, and humidity for virtually all large cities in the world and most geographic regions. Visit www.weather.com for specific information on your local weather. Temperature, rainfall, and sunlight vary widely across the globe, providing unique growing environments and countless micro- climates. Look for specific information for your climate at local nurseries and in regional gardening books and magazines or through the department or ministry of agriculture (called County Extension Agents in the USA) in your area.
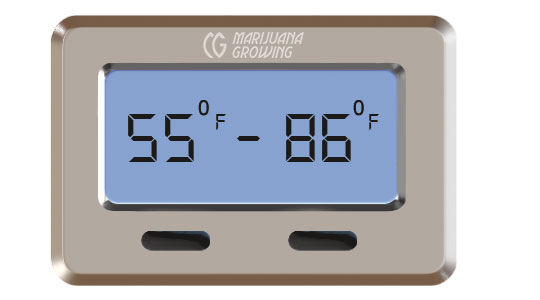
Cannabis grows best between 55ºF and 86ºF (13ºC–30ºC).
Below is a brief description of 4 distinct climate zones where cannabis grows. Reference the basic climate for your garden location in terms of the climate, light, and soil charts in this book.
Fill out the brief “Garden Climate Data” so that you will understand the overall qualities of your climate.
This ‘Annapurna’ super-autoflowering plant grows well in most outdoor climates.
Rainy climates create a constant battle with mold and diseases. This garden in the Basque Country of Spain receives rain throughout the growing season.
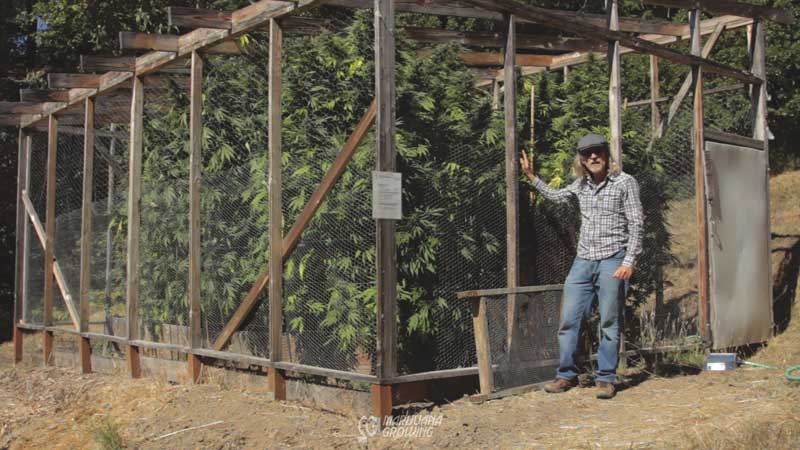
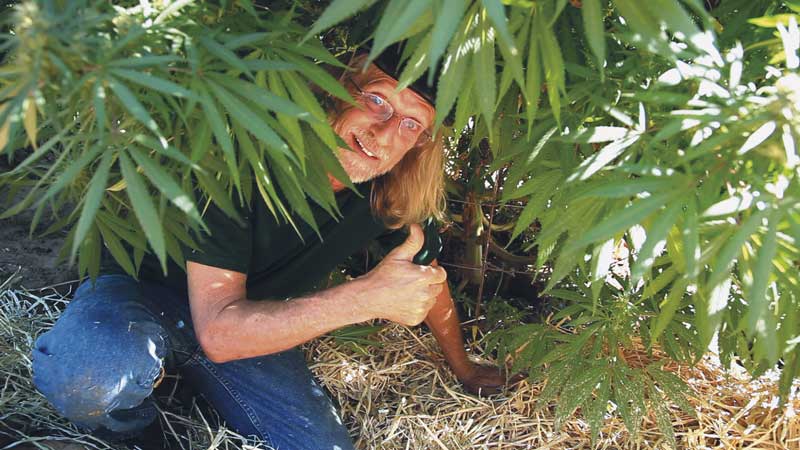
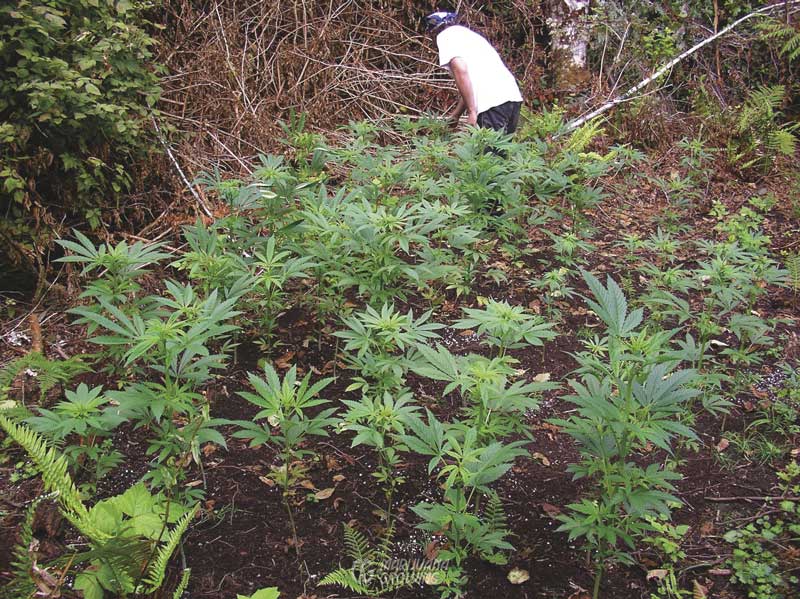
Many medical cannabis gardeners post their medical data at the garden site.
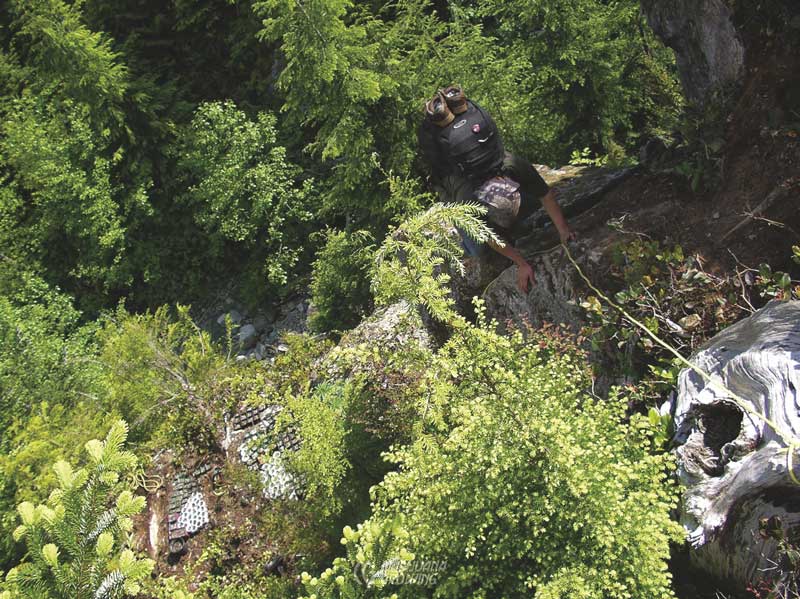
Some medical cannabis gardeners are forced to grow in mountainous terrain to avoid detection. This gardener from British Colombia, Canada, has to put on a special pair of rock climbing boots to descend the last 80 feet (24.4 m) to the garden.
The Mediterranean Coast has an arid subtropical climate that is perfect for growing long-season sativas such as this giant ‘Haze’ plant.
Water is the most precious commodity in a dry climate. Pounding sunlight heats soil and plants, which then must use more water. Plant in sunken beds and use mulch to conserve water.
Alpine Short-Season Climates
Alpine climates are particularly challenging for growing a strong, healthy medical crop. Medical gardeners in Colorado, most of Canada, and northern or alpine regions such as Switzerland are growing at elevations ranging from 4,600 feet (1,402.1 m) to 1,000 feet (304.8 m) in elevation. Most often soil is difficult to manage in alpine climates, but a little bit of light and heat works wonders!
Rainy Climates
Rainy climates can be cool and wet during winter and spring and hot and humid during other months. Annual rainfall most often exceeds 40 inches (100 liters per m3) and can top 100 inches (250 L/m3)! Winter often blows in early in these areas, bringing a chilling rain and low light levels. The more northern zones experience shorter days and wet, freezing weather earlier than the southern zones. Medical cannabis grows well in temperate maritime climates. Growing further inland often requires more protection. The temperature seldom drops below freezing in many coastal rainy climates, which contributes to larger insect populations. Some cold coastal rainforests are packed with lush but invasive foliage and fungal growth brought on by the cold, damp weather.
Arid Climates
Arid climates have little rainfall and low humidity. Wind and poor soil often accompany dry climates. Landscape flora consists of plants with small leaves that conserve water. Water is at a premium. Sunlight is intense and heat pervasive. Often cannabis needs to be planted under shade cloth to lower foliage temperatures that cause heat stress. Placing mulch around the base of plants is essential to prevent water loss. Planting in sunken beds also keeps plants cooler and attracts moisture.
Tropical and Subtropical Long-Season Climates
Tropical and subtropical climates are generally warm to hot and humid. Rainy and dry seasons vary by location. Most “selva” or jungle and tropical climates experience 10 to 30 minutes of daily rainstorms. Protecting flowering females from rain with a greenhouse or shade house will help avoid bud mold and other problems. Nighttime temperatures and humidity are often high in these climates. In fact, extended nighttime temperatures above 85°F (29.4°C) will cause most plants to stop growing.
| GARDEN CLIMATE DATA | YOUR TOWN NAME |
| number of days above 50ºF (10ºC) | |
| monthly rainfall | |
| monthly nighttime temperature lows | |
| monthly daytime temperature highs | |
| monthly mph/kmph wind | |
| monthly average humidity | |
| percent of sunlight monthly | |
| percent of cloudy days monthly |
See chapter 18, Soil, for more information on soils in different geographic regions.
Microclimates
Each of the 4 climates (alpine short- season; arid; rainy; tropical and sub- tropical long-season) contains more localized climates or microclimates. Within these microclimates are even more micro-microclimates, all of which affect cannabis growth. For example, south-facing hillsides receive more solar heat than flat-topped or north-facing slopes. Hills and valleys also affect wind pat terns as warm air rises and cold air drops.
Each and every garden has even more microclimates! For example, some places are shady and others get much more sunlight. Some growing beds are located next to a wall or fence that holds heat. Each one of these variations will influence the microclimate.
We can measure the factors that constitute microclimates and apply this knowledge in order to grow the best medical cannabis possible. Cannabis growth is governed by climatic conditions:
Collect all the information you need to garden outdoors in your climate. Precise answers to climate questions will solve most cultivation dilemmas before they arise. Take the time to learn the best times to plant and harvest in your climate and a lot more. Use the charts in this book and find additional information on the Internet to answer questions related to your climate. A couple of hours spent on research before planting a medical cannabis garden will save you time, money, and gardening-misery.
One of the best measures of outdoor gardening variables can be found in Sun- set magazine’s climate zone maps, which take these factors into account. Agricultural hardiness zone maps devised by the US Department of Agriculture and other government agencies divide zones based strictly on winter low temperatures. Sunset’s climate zone maps consider what every medical cannabis gardener should consider: temperature, yes, but also latitude; elevation; ocean influence; continental air influence; and mountains, hills, and valleys—all of which together form many micro- climates. To grow the best garden possible in each of these climate zones, search the Internet for specific weather information about your local climate.
Sunlight and Siting the Garden
Before siting the garden, remember that all tools, irrigation equipment, soil, fertilizer, and so on must be carried to the garden. Bulk soil and amendments are easiest to move on flat ground. Make plans with this in mind when constructing backyard or terrace gardens and large gardens of any type.
Cannabis plants need 5 to 6 hours of direct sunlight, preferably during mid- day, at minimum levels of 4,500 foot- candles (48,437.6 lux), to flower well and produce a good crop. Lower levels of light prolong harvest and lower both quality and yield. Cannabis requires the most intense sunlight during flowering. Receiving more hours of direct sunlight during flowering promotes thick, dense flower buds. Ideally cannabis should be planted in an open, level fi eld with no shade. But most often gardens are shaded by trees, houses, buildings, and so forth, and it is not possible for them to receive full sunlight all day long.
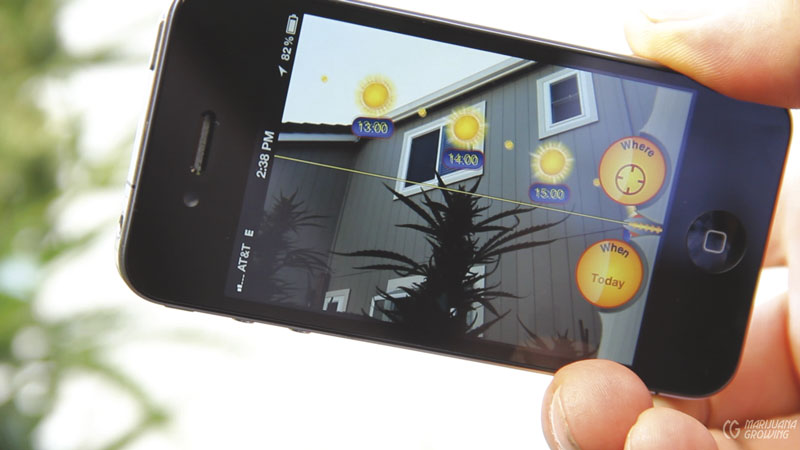
Several different “sun position” apps can be downloaded for iPhones and Android phones that will help you site your garden so that it gets the maximum amount of sunlight.

Sunlight intensity diminishes as the angle de- clines in the sky. Sunlight is about 15 percent less bright from September to October when the sun is lower in the sky. The drawing shows the sun at a 75-degree angle in summer and near its lowest angle, in winter, of 28 degrees.
| HOURS OF LIGHT PER DAY AT DIFFERENT LATITUDES | |||||||||||||
| City | Latitude | Jan 21 | Feb 21 | Mar 21 | Apr 21 | May 21 | Jun 21 | Jul 21 | Aug 21 | Sep 21 | Oct 21 | Nov 21 | Dic 21 |
| Honolulu, HI | 21° N | 11:03 | 11:34 | 12:08 | 12:45 | 13:14 | 13:26 | 13:14 | 12:45 | 12:09 | 11:33 | 11:03 | 10:50 |
| San Diego, CA | 32° N | 10:21 | 11:14 | 12:09 | 13:11 | 13:58 | 14:19 | 13:59 | 13:11 | 12:11 | 11:12 | 10:21 | 10:00 |
| Sacramento, CA | 38° N | 9:56 | 11:01 | 12:11 | 13:26 | 14:26 | 14:52 | 14:28 | 13:27 | 12:12 | 10:59 | 9:55 | 9:28 |
| Philadelphia, PA | 40° N | 9:45 | 10:56 | 12:11 | 13:33 | 14:38 | 15:06 | 14:40 | 13:34 | 12:13 | 10:53 | 9:44 | 9:15 |
| Portland, OR | 45° N | 9:19 | 10:43 | 12:12 | 13:49 | 15:07 | 15:41 | 15:09 | 13:50 | 12:14 | 10:40 | 9:17 | 8:42 |
| Seattle, WA | 47° N | 9:05 | 10:37 | 12:13 | 13:58 | 15:22 | 15:59 | 14:24 | 13:58 | 12:15 | 10:34 | 9:04 | 8:25 |
| Calgary, CAN | 51° N | 8:40 | 10:25 | 12:13 | 14:12 | 15:49 | 16:33 | 15:52 | 14:13 | 12:16 | 10:22 | 8:39 | 7:54 |
| Anchorage, AK | 61° N | 6:51 | 9:38 | 12:19 | 15:17 | 19:22 | 19:01 | 18:01 | 15:17 | 12:22 | 9:32 | 6:48 | 5:27 |
On the summer solstice (the longest day of the year), the angle of the sun at 40.3º north latitude* is 73.2º. On the winter solstice, the shortest day of the year, the angle of the sun at the same latitude is 26.2º. As the angle of the sun climbs in the sky, sunlight intensifies and lower shadows are cast from objects over gardens. In the fall when the angle of the sun drops in the sky, intensity diminishes and objects throw a longer shadow. Measuring the path of the sun through the sky can be guesstimated by standing at planting sites and looking toward the sun. Hold your arm up and track the arc of the sun. Figure the sun will climb and drop in the sky, and guess about how much shadow it will throw. Or you could buy one of several applications such as the Sun Seeker for an iPhone or an Android phone that allows you to type in any date and see the path of the sun. I love this application!
*The angle of the sun changes in relation to latitude. In the USA, Eureka, California; Salt Lake City, Utah; and the border between Kansas and Nebraska, are all about 40.3º north latitude.
Direct sunlight can heat foliage and cause plants to transpire excessive amounts of water in order to stay cool. Shade cloth stretched over plants will lower temperatures by blocking a percentage of the sunlight that hits foliage. A natural breezeway is also formed between the shade cloth and plants, which helps to cool them even more. If shade cloth is not an option, give plants heavier doses of magnesium and calcium. See also “drought” in the Index.
Scout garden sites in winter and try to visualize how trees will cast shadows during summer months, and how plants will get 5 to 6 hours of midday sun. Use one of the many iPhone or Android phone apps that tell you exactly where the sun will be on specific dates. Remember that the sun takes a higher path in the late spring and summer. Six hours of direct midday sun per day is essential for acceptable growth. More is better. South-facing gardens, hillsides, and terraces receive full sun all day long.
See chapter 11, Greenhouses, for more information on hours of light per day for various climates.
Outdoors, hours of daylight are short in spring and increase in length during summer. Daylight hours diminish in fall and winter. The shortest day of the year falls on or near December 21, and the longest day of the year falls on or near June 21.
This table shows the number of daylight hours at different latitudes in the USA. Note that at 40° north latitude, the maximum amount of sunlight is only 15.2 hours on June 21. If plants are grown in a greenhouse, supplemental light could be applied to increase production.
Check the soil drainage by digging a small hole and filling it with water.
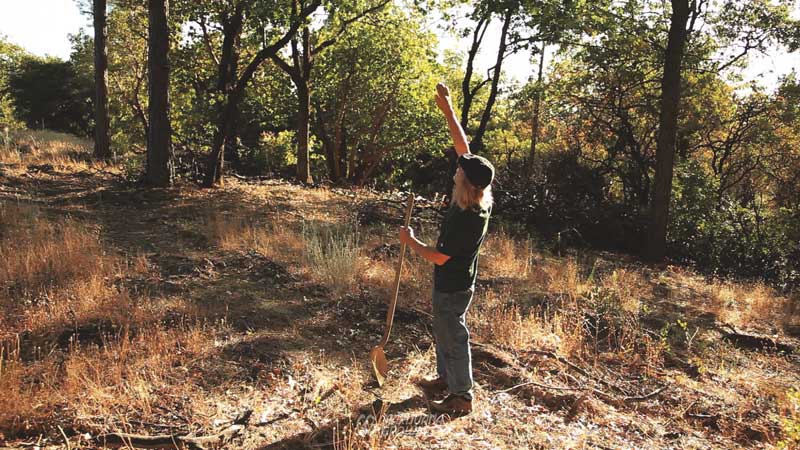
Site the garden in the spring by standing where the plants will grow. Hold up your hand and cover the sun. Trace an imaginary line through the sky where the path of the sun will be.
Shade cloth stretched over plants will help keep them cooler during the day and a little warmer at night.
Special Planting Considerations
Little research has been done on cannabis and plants that produce allelotoxic chemicals.* Some plants are immune to these toxins, and others are not. These chemicals may not affect cannabis, or all varieties of cannabis. Nonetheless, avoid planting under trees or near bushes that produce allelotoxic chemicals, including: black cherry, cottonwoods, hackberry, junipers, sassafras, sugar maples, and walnut trees. Black walnut trees are the worst..
*Allelotoxic chemicals are released by one plant that has an effect on another plant. The release of allelotoxic chemicals is a survival mechanism that allows certain plants to compete with or kill other plants. The chemicals often inhibit seed germination, root development, or nutrient uptake.
Water and Irrigation
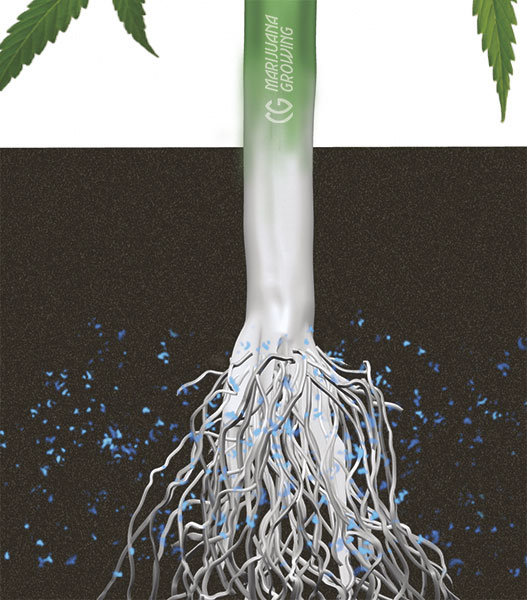
Medical cannabis plants grown outdoors use a lot of water, especially when they grow large. Big vegetative and flowering plants may need 5 to 10 gallons (38–75 L) of water or more daily during the heat of the growing season. Adequate water can make the difference between success and failure. Water use and conservation is essential now. Backyard gardens are easy to water with a garden hose, or automated irrigation systems can be set up. Watering remote gardens is more of a challenge. Water may have to be pumped from a well, stream, irrigation ditch, or river and then stored in a reservoir. Check local regulations on using wáter with regard to public and private water rights.
Water quality also affects fertilizers and nutrient availability. Pay special attention to water pH and mineral content (measured in ppm or EC) of irrigation water regardless of the source—reservoir, tap, or well. Active live organic soil teaming with microbes is blessed with chemistry that rectifies high- or low-pH water, seemingly like magic. Nonorganic gardeners can use one of several commercial hydroponic fertilizer formulations to solve “hard water” problems.
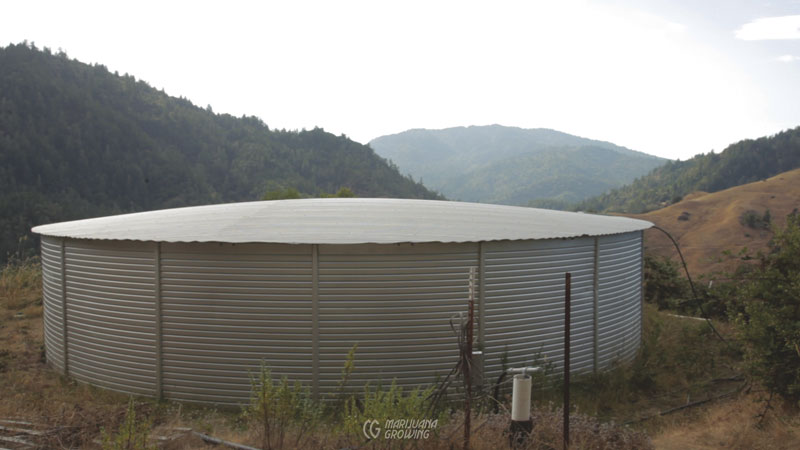
This 20,000-gallon (75,708 L) reservoir is located on top of a small hill. Water gravity flows from the reservoir to the garden.
Store daily irrigation water in a large reservoir.
Storing water is an option for gardeners who want a constant supply of water but have only a sporadic water source.
Irrigate the garden during morning hours so that plants have time to use all the water necessary during the heat of the day. Do not water late in the day; unused water that sits in the ground or in containers displaces much-needed oxygen for roots. If plants are slightly overwatered, especially late in the day, this oxygen depletion slows growth and could lead to root rot.
Check the garden daily, if possible, and water when soil is dry 1 inch (2.5 cm) below the surface. Irrigate containers until 10 to 20 percent of the water comes out the drainage holes. Irrigate plants in the ground until they are completely wet, but let them dry somewhat between waterings to accommodate more air (oxygen) in the soil. See “Sources of Water” in chapter 20, Water, for more information.
Automatic watering systems deliver a regular supply of water to plants. Consistent and fail-proof operation are two indispensable qualities for automatic irrigation systems. Type “drip irrigation” into your favorite search engine; hundreds of company sites will pop up on your screen and tell you all about drip irrigation and automated watering. See chapter 20, Water, for more specific information on irrigation.
Avoid nutrient buildup problems by leaching container gardens monthly with three quarts (2.8 L) of water for each dry quart (liter) of soil.
Many different types of receptacles and reservoirs can store irrigation water. Use the biggest storage unit that you can manage; plants will always need water. One good option for storing a lot of water is to dig a big hole and line it with a plastic pond liner. For all kinds of water storage devices, see www.realgoods.com.
Polymers in the soil hold water longer than soil does.
The garden needs a readily available water source. If water is not at hand, it must be hauled to the garden. Big plants can use 5 to 10 gallons (18.9–37.9 L) of water a day. Hauling water takes time and is a lot of work. One gallon (3.8 L) of water weighs 8 pounds; 100 gallons (380 L) weighs 800 pounds (360 kg)! Even carrying water by hand for short distances to water small plants is a lot of work.

Irrigate with a hose attached to a breaker head nozzle that aerates the water. Water plants in containers daily when necessary. Small containers dry out quickly. Large containers need watering every few days. Irrigate small containers every day or two; they might require water twice daily during hot weather. A 200-gallon (757 L) container with a full-grown plant in full sun will use 5 to 10 gallons (18.9–37.9 L) of water daily.
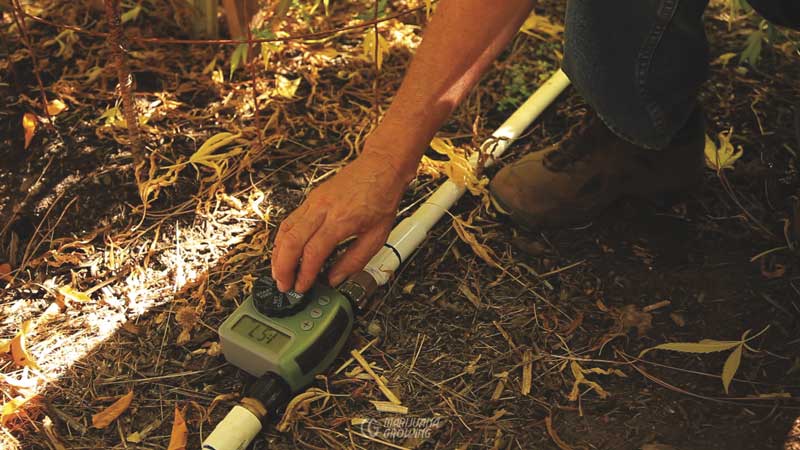
Many inexpensive battery-operated irrigation timers are available. This timer took just a few minutes to set up, and the batteries last a long time.
Pumps
Regardless of the type of water pump, it will need a filter that is easy to clean. A pre-filter before the fine filter will also cut maintenance, especially if pumping from an open water source. Remember to clean the filter periodically. Put “clean the pump filters” on your regular weekly checklist.
Pumps can be operated by hand, electric current, batteries, gasoline, gravity, and pressure from moving water. Moving water uphill requires a powerful pump. A gasoline-powered pump is necessary when lifting water more than 100 feet (30.48 m). Battery-powered pumps can lift water 10 to 15 feet (3–4.6 m) before they become inefficient. Ram pumps and the High Lifter can lift water many feet over time. Manual pumps require a lot of physical energy to operate and are impractical for moving a large volume of water uphill.
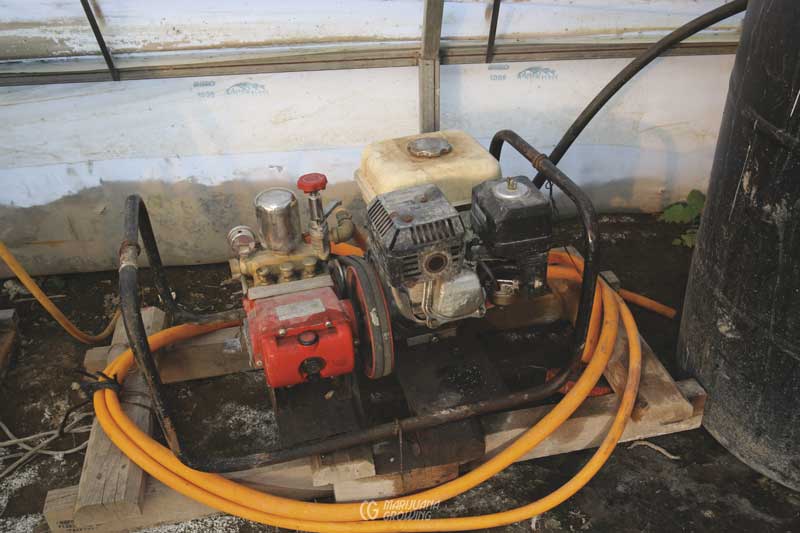
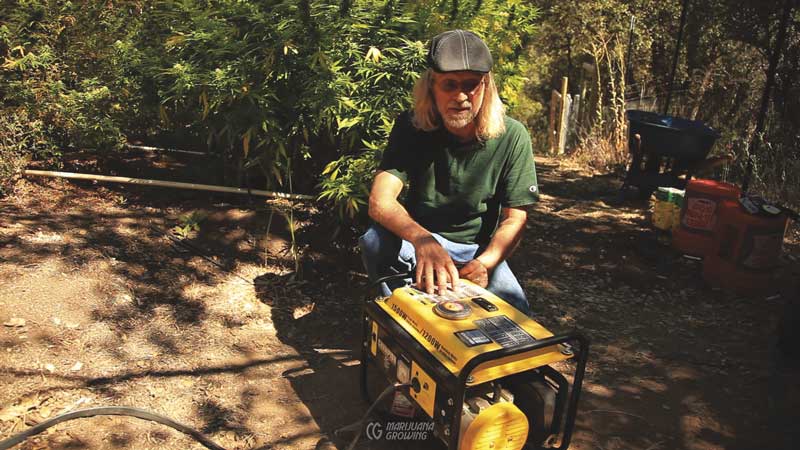
This gasoline pump is built on a small frame so that it is easy to move around.
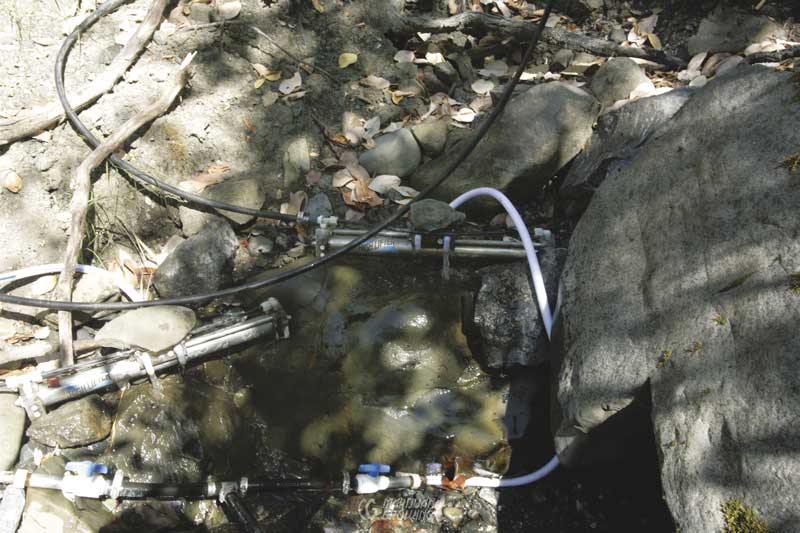
The High Lifter pump in this creek has provided three growing seasons of uninterrupted service. The pump runs quietly and is very efficient.
Water flow / pressure pumps
With a small flow of water under pressure, water pressure pumps use the power of water running downhill to lift part of the water uphill. These pumps are very efficient and can run 24 hours a day to lift water up to a storage reservoir, where it is stored until used for irrigation. Here is a great website with more information on pumps: http://journeytoforever.org/at_waterpump.html.
Pumps can move water long distances and uphill. Pump size, horsepower, pipe size and length, vertical lift, and elevation above sea level all play a part in water-moving dynamics, but the specifics are beyond the scope of this book.
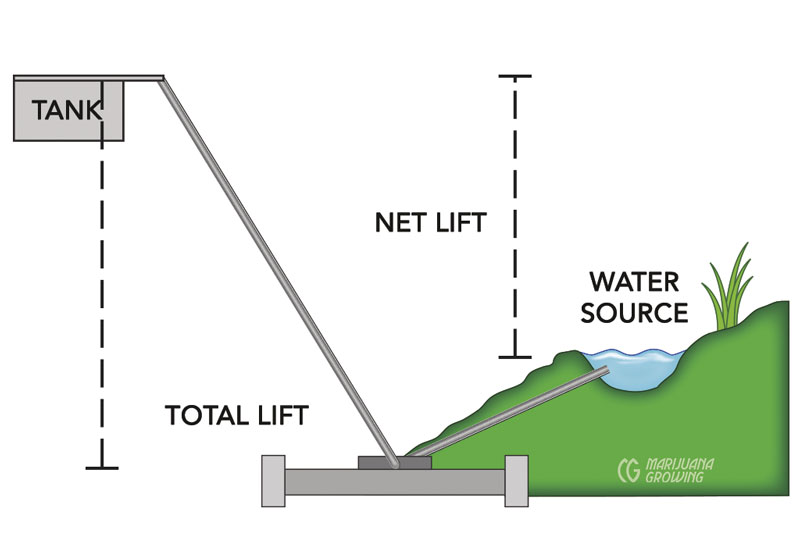
Always drain the pump before an expected freeze. Water frozen within it can rupture the pump. Before shopping for a pump, copy the following 9-item list. This necessary information will tell you everything you need to know to purchase the proper pump.
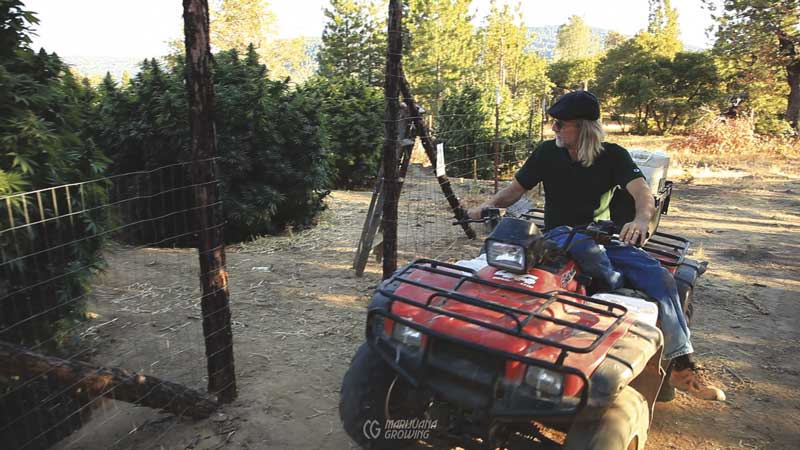
The neighbors all agreed to operate their gasoline pumps in the morning, two days a week to avoid local noise pollution. Many residents in this part of Northern California pump water from a well and store it in a large reservoir.
Before purchasing a pump, find out:
1. Vertical pipe length
2. Horizontal pipe length
3. Pipe diameter
4. Pump GPM—gallons per minute (LPM, liters per minute)
5. Elevation above sea level
6. Determine the height of the tank above water source: (net lift) = ___ft (m)
7. Next determine the drop from the water source to the pump: (fall) =___ft (m). To estimate lift or fall, consult topographical maps or use a tape measure, a handheld sight level, an altimeter, or a tube and a water-pressure gauge. Remember that 1 psi = 2.3 ft.
8. Use a gallon container and a watch to measure or estimate the flow of water at the source =___ gallons per minute (LPM).
9. Determine the amount of water required at the tank _____ gallons per day.
A hydraulic ram pump lifts water from a source of flowing water located above the pump. The natural force of gravity and flowing water is all the power needed. Ram pumps are rugged and dependable but noisy. For more information see www.rampumps.co.uk
The Bamford Hi-Ram Pump is a simple, self-powered water pump using a plastic ball, which makes the pump run much quieter than conventional ram pumps. This pump is economical and has many interesting features. www.bamford.com.au/rampump
The High Lifter Water Pump is water-powered and will work with a low flow of water. The unique design uses hydraulic pressure and is self-starting and self-regulating. If inlet water stops, so does the pump; the pump starts by itself as soon as water flow begins. They are very quiet and lightweight. Investing in this pump is expensive, but it will last for many years. Check it out at http://high-lifter.com/. I love this pump!
Make sure all of these specifications conform to your needs for water pressure and volume of water. Most often water is pumped to a reservoir located above the garden. Periodically it is dispersed as irrigation water via gravity-flow drip irrigation.
Gasoline-powered pumps are reliable and can lift much water uphill quickly, but they are noisy and polluting. You can purchase a pump already attached to the motor, or connect one yourself and mount it on a board or metal platform. For example, a 4-horsepower pump that weighs 56 pounds (25.4 kg) and pumps 6,300 gallons (23,848 L) per hour costs about $450 USD.
Noise is a major factor in starting up a small, gasoline-powered engine in the middle of a quiet rural area. An oversized muffler and small baffle will deaden most of the exhaust sound, but will lower the efficiency and will strain the motor. You can also build a shroud around the pump or bury it in a large hole to baffle noise. I was recently in a Northern California area where neighbors agreed to run their pumps the same day of the week to minimize noise pollution.
Battery-powered pumps are an option if noise is a factor. A 1,400 gallons-per-hour (5,300 LPH) electric pump at a 9-foot (2.7 m) head pressure costs about $400 USD. Battery-powered pumps quickly lose lifting ability after 15 feet (4.6 m).
Solar energy is an outstanding way to move water. On a sunny day a 75-watt solar panel supplies enough power to a pump to move 75 gallons (284 L) of water 35 feet (10.7 m) uphill and more than 400 feet (121.9 m) away to a reservoir. Here are 2 great sites to learn more about solar power, www.realgoods.com, www.otherpower.com.
Set up the pump so that the intake will be able to draw in water easily. An adequate filter on the intake of the pump is essential. A hydraulic ram pump lifts water from a source of flowing water located above the pump. The natural force of gravity and flowing water is all the power needed. Ram pumps are rugged and dependable but noisy.
The Bamford Hi-Ram Pump is a simple, self-powered water pump using a plastic ball, which makes the pump run much quieter than conventional ram pumps. This pump is economical and has many interesting features www.bamford.com.au/rampump. Pump intakes can be placed in proprietary ponds and ditches, but consult laws about local water rights before using public sources of this precious resource.
Siphoning water downhill is free when the natural force of gravity is applied. With a little effort and knowledge, however, gravity-flow water will also run uphill. The principle is simple: water flowing downhill develops energy. This energy can be used to move it uphill. Water flowing down a hose that is 10 feet (3 m) long can be bent at the bottom and flow uphill for at least 5 feet (1.5 m). The flow rate decreases as the elevation increases. Experiment with your flow rate and pressure to find out how high water will flow. This is the secret behind making water run uphill. For example, as long as the outlet of the pipe remains below the water surface, water will move higher than the stored water, in a pipe that runs over a hill but then continues until the outlet is below the actual elevation of the water tank or siphon pipe. Make sure to install an on/ off valve to stop siphoning. The valve can be manual, or set on a timer or gallon (liter) meter.
Large-diameter hose (0.75 and 1 inch [1.9 and 2.5 cm]) is more expensive but allows for better flow rate and more volume. However, if time, flow rate, and debris blockage are less important, use less-expensive 0.5-inch (1.3 cm) diameter hose. Lightweight hose, which is normally available in green and black, will not disturb foliage.
Temperature and Humidity
Temperatures below 50°F (10°C) and above 86ºF (30°C) virtually stop cannabis growth. Temperatures below 40°F (4.4°C) can cause green tissue damage in many varieties, especially when succulent or weak. Low temperatures cause stress in plants. On the other hand, plants in high alpine climates tend to produce more resin and 10 to 20 percent more cannabinoids than those in lower- elevation gardens.
Continental influences cause temperatures to drop more rapidly at night and remain high during the day. Maritime influences buffer and moderate day and nighttime temperatures. Microclimates caused by geography, artificial structures, and so on, influence temperatures too.
Nighttime temperatures are as important to plant growth as daytime temperatures. Nighttime temperatures below 55ºF (12.8°C) can slow growth. Nighttime temperatures that drop more than a few degrees cause humidity to increase proportionately. Conversely, nighttime temperatures above 86°F (30°C) stop growth. Southern and tropical gardeners are often faced with this dilemma and must find ways to cool plants at night.
Some indica- and ruderalis-dominant varieties are able to withstand freezing temperatures but often suffer nutrient imbalances as a result. See chapter 23, Container Culture & Hydroponics, for more information on temperature.
The best way to control temperature outdoors is to plant in the proper place. Normally hot temperatures are common during midday in full sun. If you are planting in a hot climate, make sure plants receive filtered sunlight during the heat of the day. Or plant in natural breezeways so a breeze will cool cannabis during the heat of the day. Cold temperatures can be avoided by planting at the proper times—well after last frost.
Temperature is difficult to control on sunny terraces and balconies. The reflection and heat-holding ability of tile, concrete, and stone make these spaces a challenge to cool. Shade cloth shades balcony plants from scorching midday sun. And dousing soil surfaces with water also keeps direct sunlight from heating containers enough to cook roots. See chapter 19, Containers, for more information on keeping containers cool.
Cannabis grows best between 55ºF (13ºC) and 86ºF (30ºC).
Growing in Tropical and Subtropical Humid Climates
Temperature can be an issue in tropical climates because there is a dormancy period in summer when nighttime temperatures rise beyond 86ºF (30ºC). Plants start growing again when nighttime temperatures fall into the seventies (20ºC–29ºC). For example, an Alabama gardener who plants by July 15 will still produce a leafy plant if it is watered well.
Hot wind is better when it is humid but not so good when it is arid amid high temperatures. Reduce heat stress with shade in the afternoon to block the strongest sunlight. Climates change— and there are many microclimates—so each gardener has to fine-tune his or her garden individually. Select proper plants for your climate, provide filtered light from 2:00 p.m. on, balance the humidity and watering, avoid high-EC feedings (especially nitrogen), and wish for cooler weather in September.
Cool plants by misting them with superfine atomized water. Avoid spraying plants with droplets of water during the heat of the day. Sunlight can burn foliage, leaving small spots on leaves. These spots will also stress plants.
Combat hot temperatures by irrigating with plenty of water. Mulch is essential and will cool roots and soil and cut down on water loss. Also make sure plants have optimum levels of calcium. Do not overfertilize plants in hot weather. High EC (ppm) levels of fertilizer salts and heat do not work well together. See chapter 18, Soil, for more information.
Humidity is almost impossible to control outdoors. Locate the garden in a breezy location or microclimate to lessen the effects of humidity. You can plant in cooler, more humid locations in a garden. Natural breezeways are under any tree or structure, between two fences, or in a gulch or canyon. Shady spots in the garden tend to be cooler and a little more humid. See chapter 16, Air, for more specific information about humidity.
Wind
Wind is one of the strongest forces medical cannabis plants must withstand outdoors. Sustained desiccating wind sucks moisture from plants. Wind causes plants to draw moisture from the roots and shed it through the leaves as a defense mechanism to regulate internal temperature and chemistry. Severe problems can arise if the water supply is limited for any reason.
Both cold and warm winds cause moisture loss, and plants dry out quickly in windy conditions. Moisture must be replaced by irrigating every day or two. Plants that are allowed to dry out completely suffer stress and are soon stunted. Stress also weakens plants and leaves them open to attack by disease and insects.
Wind patterns will affect your garden and influence where plants should be located. Pay attention to conditions and research average wind direction and force in your area. Windbreaks can help protect plants from wind, heat, and water loss. See chapter 16, Air, and check your local weather station via the Internet for wind patterns and local conditions over time.

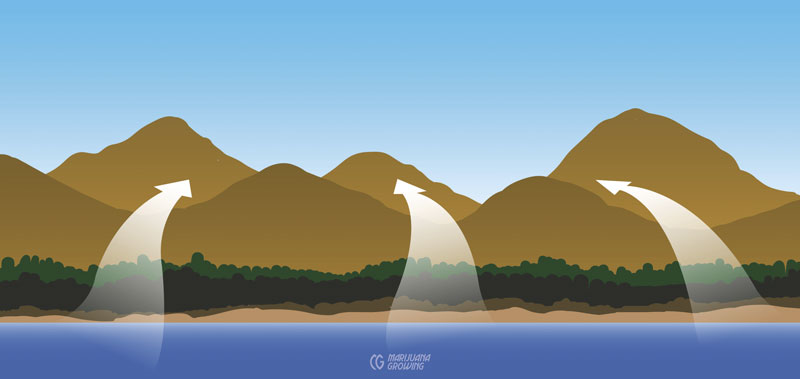
Cool air tends to sit in natural and man-made valleys, which are often a few degrees cooler than surrounding areas. Coastal breezes generally carry air from land out to sea at night. Valleys and exposed hillsides experience more wind. Coastal winds tend to flow inland during the day, creating cool zones.
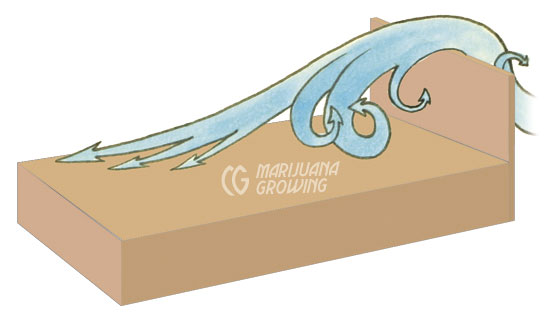
1. A solid wall causes air to drop and whirl about the same distance equal to the height of the wall.
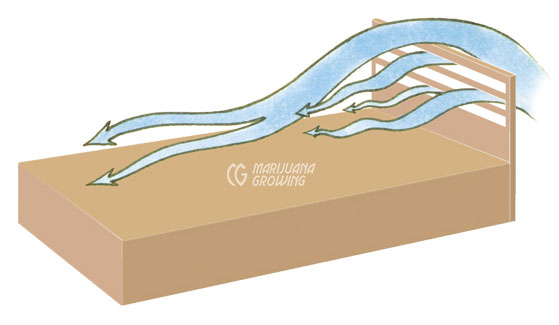
2. A louvered wall diffuses air and protects plants placed 6 to 12 feet (1.8–3.7 m) from the wall.
3. A solid wall that is angled into the wind protects plants close to the wall.
4. A solid wall that is angled away from wind protects plants up to 8 feet (2.4 m) from the wall.
On our terrace, 1.5 miles (2.4 km) from the Mediterranean Sea, the wind often blows throughout much of the day and more in the morning and evening. Plants grown in 5-gallon (18.9 L) containers on a terrace that receives full sun and constant moderate winds use about 2 gallons (7.6 L) of water daily. Indoors, the same plant would use 75 percent less water!
Wind carries pollutants, including male cannabis pollen, dust, and sand. Coastal winds carry salty seawater mixed with fine desert sand. All winds carry fine particles of earth. In Spain “kalmia” is grit mixed with saline air from the Mediterranean. These winds can destroy crops. If your climate is plagued by such abrasive winds, protect plants with windbreaks. Wash foliage with plenty of water to remove the particles after windstorms. Moderate sustained winds will dry out container- and field-grown crops within a few hours. Container crops suffer the most.
Wind also promotes degradation of trichomes on flowering plants. Light breezes cause little damage, but heavy winds cause branches and leaves to rub together and damage fragile trichomes.
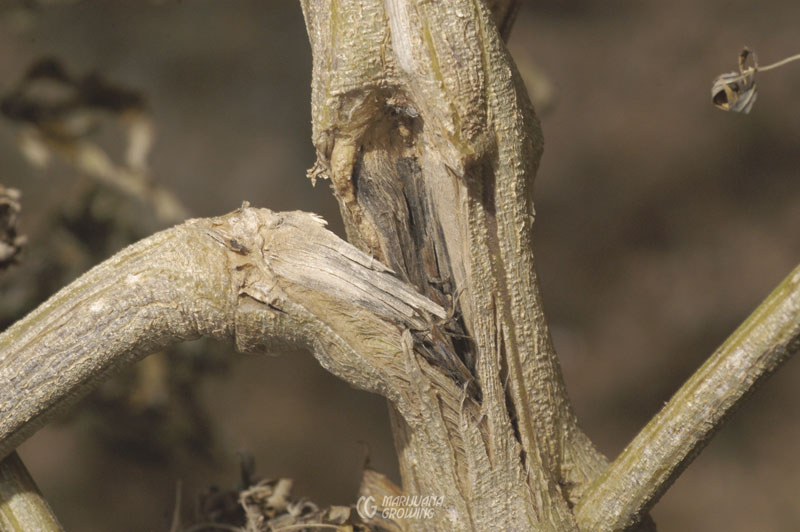
Wind coupled with rain can cause broken branches.
Black shade cloth protects plants from wind and lets some air through. Or protect by planting among other annuals and perennials to block heavy wind. When planting, look for areas that are protected from the wind.

A heavy rainstorm laid this garden on its side. The ‘Green Crack’ plant in the back has the stoutest stems. I shook off the plants and installed a wire fence around the garden as a trellis.
Rain
Some gardeners in some climates are able to count on regular spring and summer rains for irrigation. But most growers cannot count on Mother Nature to water their gardens. Cannabis gardens in most climates must be irrigated for best results.
Given the value of medicinal cannabis and the limited cultivation possibilities, most gardens are irrigated. Rain is considered by most gardeners as something to avoid.
Rainwater is heavy and it weighs down blooming cannabis. Rainwater collects between leaves and flowers in buds and on the overall foliage. Many varieties with weak stems and excessive foliage are unable to support the extra weight and will fall over, often one on top of another. Also, excess moisture creates a perfect environment for the growth of mold.
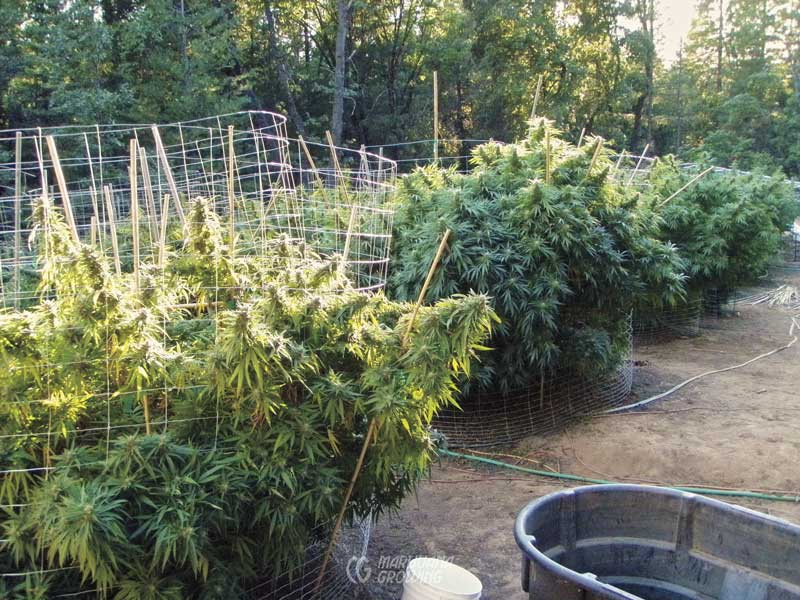
Avoid damage from rainstorms by staking buds adequately before rain arrives. Use 6-inch plastic or nylon netting to trellis branches in 1- to 2-foot (30.5– 61 cm) layers as the plant grows. This will give support to plants in the wind and when heavy rain falls. Bud-laden branches will fall into the netting and not tend to lie over on the side.
A plastic covering over plants is more work to install but can be the best option for many backyard and terrace gardeners. Watch local weather reports and cover plants with a plastic roof before heavy rains fall.
Los jardineros de climas lluviosos pueden oscurecer los invernaderos a mediados de verano para provocar que las plantas florezcan cuando la luz solar es intensa, y antes de que lleguen las lluvias otoñales (véase “Invernaderos con privación de luz” en el capítulo 11). Inducir pronto la floración también es una buena táctica para evitar el oidio, que es común en los jardines una vez que termina el verano. Además, la luz del sol es más brillante cuando maduran las flores.
Gardeners in rainy climates can black out greenhouses in mid-summer to induce plants to flower while sunlight is intense and before autumn rains start to fall (see “Light-Deprivation Greenhouse” in chapter 11). Inducing early flowering is also a good tactic to avoid powdery mildew, which is common in gardens after summer ends. Sunlight is also brighter when flowers are ripening.
Protect plants—organically—from desiccating heat and wind. Mix extra calcium, in the form of gypsum, into the soil mix so that plants have the optimum amount available. Fertilizing with the proper levels of calcium will help leaves become more rigid and assist them in retaining moisture. Organic growing techniques help soil retain moisture and toughen up leaves. For more information, see “drought” in the index.
Soil
Soil is divided into 3 basic categories: clay, sand, and silt. Most soils, including those found in grasslands, mountainous areas, bogs, and backyards are combinations of the 3 basic soils. Land alongside most rivers and ancient lakebeds is fertile, while nearby hillside soil is much less fertile. Fertile topsoil is often scraped away around houses during construction. Ask local gardeners and farmers for details on local soils.
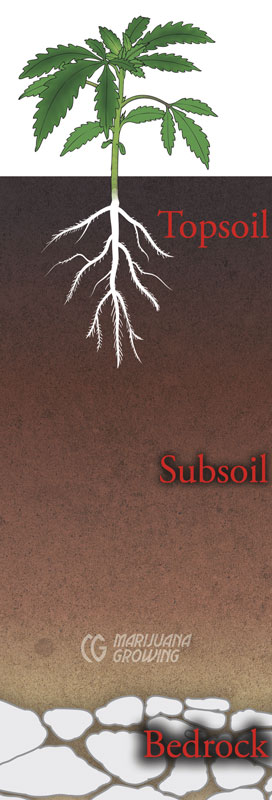
Topsoil is rich and fertile. Soil structure and fertility change with depth.
Wooden stakes support plants and provide a frame for irrigation tubing in Eddy Lepp´s garden in Northern California.
Always make sure to dig a big planting hole to give roots space to spread out.
Clay soil holds water well and provides slow, even drainage. Clay soils are slow to warm in the spring but hold warmth well into autumn when sunlight is fading. The density of clay does not allow for proper air circulation, however, and root growth is inhibited. Extremely hard and dry clay soil is often referred to as hardpan or adobe. Lime (calcium carbonate) can also form a thick layer in some desert soils and is referred to as hardpan too.
At least a month before planting, prepare clay soil by adding lots of compost and manure. Clay soils can hold water too well, which can smother roots. Adding organic matter will lighten the heavy soil, thus creating air pockets, improving drainage, and promoting root growth. The month’s delay gives the manure and compost a chance to assimilate into the soil.
Sandy soil is less common and is often found near large bodies of water, in deserts, and in many inland areas. It is comprised of small, medium, and large particles and is easy to till even when wet. Plants can achieve excellent root penetration. Sandy soil feels and looks gritty.
Sandy soil is easy to work and warms quickly in the spring, but it does not hold fertilizer well, especially when overwatered, which causes the nutrients to wash out. Compost, peat moss, and coco peat help bind the large particles providing food and air circulation, but in hot climates the organic matter decomposes rapidly and is soon consumed by bacteria and other soil organisms. For best results, keep sandy soil cool and retain moisture with mulch and additional compost. Winter season cover crops will hold moisture and prevent runoff while retaining life in the soil.
Silty soil has all the advantages of clay and sand; it holds moisture and water like clay but is quick to warm and has good drainage and a work-friendly structure like sand. It is the perfect growing medium. Most soils are a combination of sand and clay. Silty loam falls in between and feels almost greasy when rubbed in your hand, though it is less slippery than clay. The ultimate soil for growing plants is loam found in ancient river bottoms and lakebeds where sedimentary soil builds up. It is dark, fertile, and crumbly in the hand.
Forest soils vary greatly in pH and fertility. Needles and deadfall from the trees usually make the soil acidic. Most forests remaining in North America and Europe are on hillsides, since flat land is used for farming, recreation, and urban sprawl. Long-needle pines can grow in poor soils such as those found in mountainous and tropical regions. They have deep roots to look for all the elements in the soil. When a layer of humus evolves, however, short-needle conifers dominate. The roots on these trees spread out on the surface to search for nourishment and bury roots to anchor it in place.
Jungles are usually low-growing, moist, hot, and dense. Jungle soil is shallow and alive. The hot weather makes all foliage that falls to the ground decompose quickly. Often nutrients are available to plants, but the soil does not have a chance to build density. Layers of tropical soils can be very thin. However, throughout much of Mexico, Central America, and other parts of the world volcanic eruptions have brought much rock and minerals to the surface. Mountain valleys and lowlands are full of alluvial plains packed with nutrient-rich soil.
Grasslands often have wonderful soil that recycles nutrients. Sunshine is likely to be good, but detection could be a problem in wide-open spaces. Plant in areas that are protected from wind.
Mountain soils are often very rich in minerals but lack humus. Alpine valleys hold the best alluvial-plain soil that is the product of volcanic rock erosion. Hillsides are generally less fertile, and soil must be amended to grow a good crop. Most alpine soils lack humus, and strong winds will dry out the plants. For best results, look for patches where pasture grass grows. You can help your plants deal with mountain stress by backfilling planting holes with a mix of peat moss, soil, polymer crystals, and slow-acting layers of organic fertilizer.
Bog soils are moist and spongy. Bogs are filled with vegetation and often have very rich soil. They may present a perfect place to grow individual plants. However, bogs are located in northern climates and most often present a short growing season.
Cut a square yard (0.8 m2) of moist sod from the ground, turn it over, and plant. Marsh ground supplies sufficient water on its own. Add a bit of time-release fertilizer during transplanting and another handful of “flowering” formula during a checkup in early August.
Prepare Soil
To harvest a strong healthy crop, all soils except for silt should be amended before planting. Amendments improve soil, nutrient uptake, root penetration, and soil water retention. Here we will look at how to amend and get the most from outdoor soils. Compare the descriptions of the soils above with your garden soil to learn its basic type. Then follow amendment recommendations.

Driving a spade into soil, especially clay soil, causes a microscopic clay soil barrier (aka glazing, as in pottery) in which soil particles lay vertically and are very difficult for roots from transplanted seedlings and clones to penetrate.
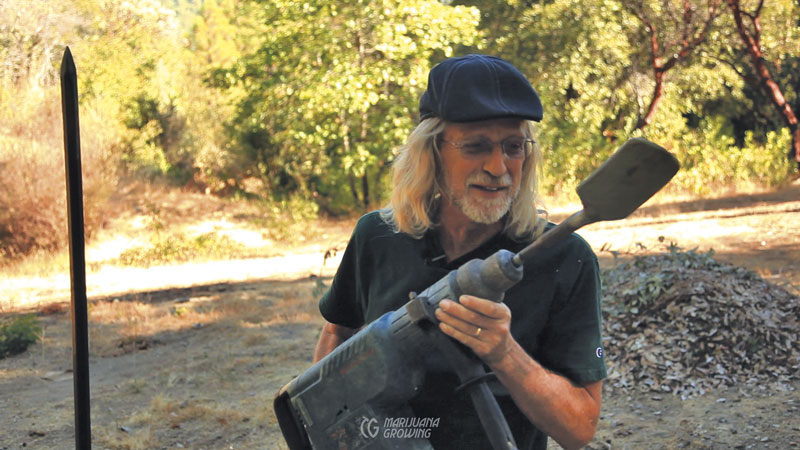
Rent an electric jackhammer and power it with a generator at your garden in the country. A jackhammer with a wide blade makes digging heavy clay and rocky soil much faster.
Preparing soil in an arid climate requires large holes and a lot of work! This gardener in Morocco planted in sunken beds to conserve water.
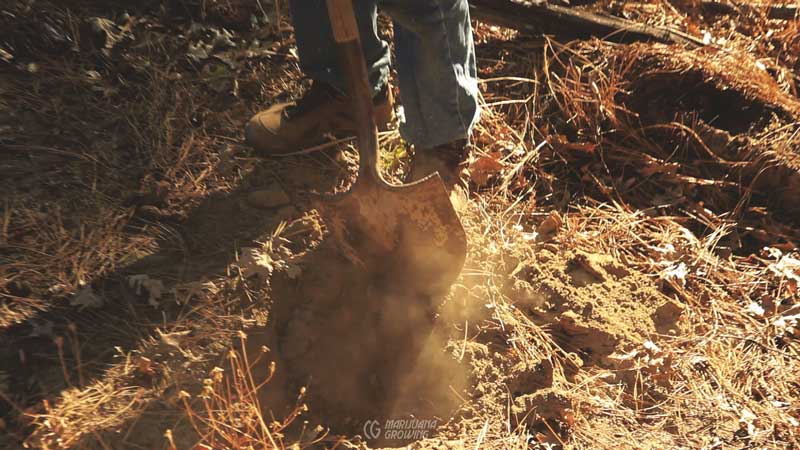
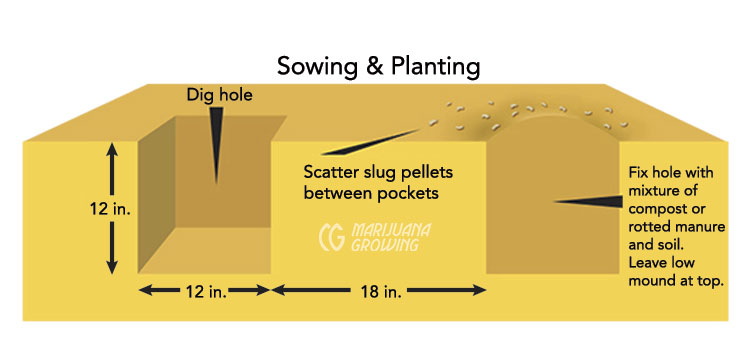
Once you have discerned the type of soil, amend it with appropriate amounts of compost, manure, coco coir, bone meal, minerals, etc. Dig as large a hole as possible for each plant. Dig holes at least 18 inches (45.7 cm) wide by 18 inches (45.7 cm) deep for each plant. Dig holes 3 to 6 feet (0.9–1.8 m) wide and 2 feet (0.6 m) deep if planting big outdoor plants. Spending a little extra time digging a big hole will pay off in fewer problems and a heavier harvest.
Adding water-absorbing polymers in the planting mix is a good defense against dry soil. The crystals expand up to 15 times when watered, making moisture available to the roots for longer periods of time. Slow-release crystals will allow an extended period between watering. This is very helpful if your patch is in a remote location that you cannot visit often.
When adding amendments, backfill in layers. For example: Fill a 2 × 3-foot (0.6 × 0.9 m) deep hole with an 8-inch (20.3 cm) layer of steamed bone meal and soil; cover this with a thin layer of topsoil blended with a rich compost-manure-straw mixture, rock phosphate, and seaweed meal. Build a mound of compost and soil about a foot above ground level. The mound will settle to about half height during the growing season. See “Organic Fertilizers” in chapter 21, Nutrients, for more information. See also chapter 13, Case Studies #3 and #4.
On hillsides, planting holes must be terraced and be large enough to catch runoff water. Dig extra gulleys to channel runoff to growing plants, and make a sunken “dish” around the plants to hold runoff water.
If excessive drainage is a problem, which seldom occurs if soil is properly amended, place a substance with different surface tension, such as clay soil or rocks, a foot or two below the bottom of the planting hole. The difference in surface tension will slow downward drainage. You can add many amendments including compost, peat moss, coco peat, good soil, organic nutrients, polymers, and dolomite lime—to help soil hold water—then top with a concave “bowl” of soil that will catch rain and irrigation water.
Soil Tests
Total dissolved solids (TDS) levels for soil and water are very important. Taking a soil test is the only accurate way to know the contents and profile of your soil. The soil scientist will also give recommendations to improve soil.
Well water and tap water should also be analyzed for high levels of sodium and other dissolved solids that may affect the soil. See chapter 18, Soil, for more information on soil tests.
Note: All of these soils and amendments are discussed in detail in chapter 18, Soil.
Planting on a hillside requires a small terrace. Containers are set into the hillside to form terraces in this Lake County, California, medical cannabis garden.
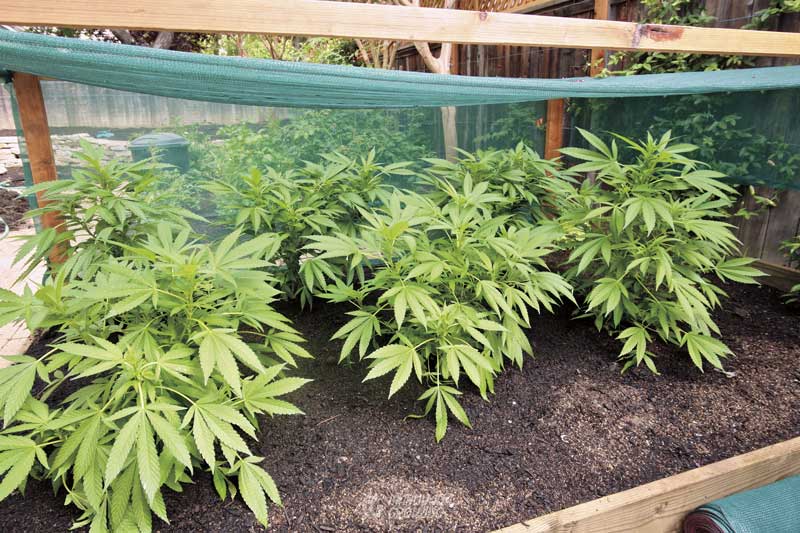
Raised Beds
Raised beds are wonderful for growing in the backyard or in greenhouses. Raised beds warm earlier in the spring and hold warmth longer in the fall. But they may heat up too much in the summer when soil enjoys direct sunlight. Cultivation and weed control are easier in a raised bed, and soil quality is easy to maintain. Build a raised bed on top of poor soils. Planting in a 6- to 8-inch (15.2–20.3 cm) raised bed eliminates the necessity of trying to dig in wet sticky clay while providing the early warmth and good drainage clay lacks. Plants can be put into the ground 2 weeks to a month early and may even produce an early spring crop. I like raised beds framed with lumber because the wooden sides serve as a base for cold frame greenhouse construction. See chapter 11, Greenhouses. Find information on building and ready-made raised beds by typing “raised beds” into your favorite web browser.
Raised beds are similar to giant 200- to 500-gallon (757–1892.7 L) containers, except they are often bigger and bottomless, directly in touch with Mother Earth. Make raised beds outdoors, in a greenhouse, or in an indoor garden with earthen floors. New soil can be added on top of the old. If drainage is poor, dig soil deeper and backfill with well-draining soil. Dig deep ditches to drain excess water away if necessary.
A raised bed with a large soil mass can be built up organically after several crops. To hasten organic activity within the soil, add organic seaweed, manure, and so forth, and let Mother Nature go to work. Do not overdo it! When mixing soil or adding amendments, use the best possible organic components and follow organic soil food web principles. There should be good drainage, and the soil should be as deep as possible, 12 to 24 inches (30.5–61 cm). See “Organic Soil” in chapter 18, Soil, for more information.
A friend of mine plants on top of the compost pile. He plants 6, 12-inch-tall (30.5 cm) clones in 3 to 4 inches (7.6– 10.2 cm) of good soil that is on top of a 2- to 3-foot high (61–91.4 cm) compost heap. By the time the roots penetrate into the compost, it has cooled enough and is releasing nutrients.
See also chapter 19, Containers; chapter 12, Outdoors; and chapter 13, Case Studies.
ERaised beds were set up by pounding stakes into the ground and lining the “walls” with permeable fabric.
Sunken Beds
Sunken beds conserve moisture in hot climates. Make a sunken bed by digging down 6 to 12 inches (15.2–30.5 cm) and across 2 to 4 feet (0.6–1.2 m) or more to form a big, shallow bowl. (Do not dig deeper; subsoil in hot climates is very poor.) Dig the planting hole in the center of the sunken bed. Make sure to augment the soil with plenty of appropriate amendments. Place a heavy layer of straw, dry foliage, or rocks as mulch in the basin around each plant to conserve water. To accommodate more water and disperse it better, amplify the sunken bed a little as the plant grows.
Use low-sodium manure contains few salts. Cows are fed sodium nitrate, among other things, to make them gain and retain weight. The extra salt is passed into their manure and it will lock up nutrients, burning plants and stunting their growth. Test loads of bulk manure with a sodium (Na) meter or make sure manure is well-composted (3 to 6 months) in an open area to leach out bad salts.
Sunken beds help hold in moisture. The beds need to be dug 6 to 12 inches (15.2–30.5 cm) deep and amended well. Sunken beds allow water to collect during rainstorms.
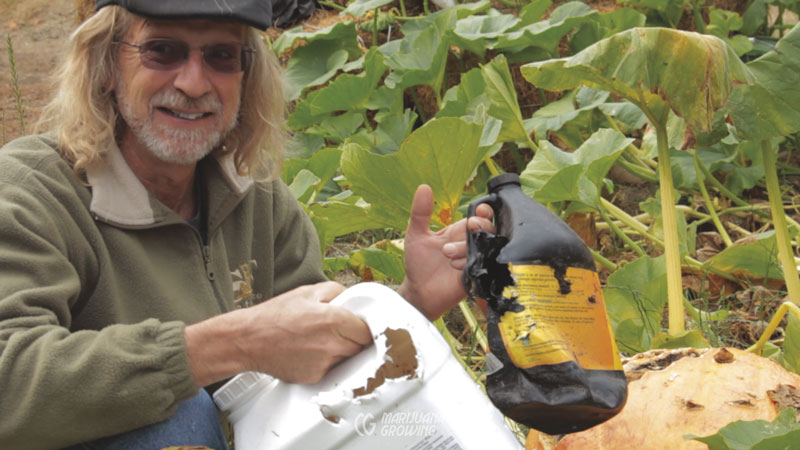
Bears and other animals can be problematic in remote gardens! Organic fertilizers left at the garden site can attract scavengers.
Large planter boxes make a great place for plants and puppies!
Fertilizers
There are two basic approaches to outdoor fertilization: (1) adding salt-based (synthetic) fertilizers to soil, and (2) building the soil with organic nutrients and supplemental organic fertilizers. Often gardeners build organic soil, yet use salt-based fertilizers that impair or kill soil life. Smart medical cannabis gardeners grow organically.
Once soil has been prepared, it is usually amended with organic fertilizers such as manures and composts that also serve to condition the soil, improving water retention and drainage. Most often a complete range of macro- and micro-organic nutrients are also added to the soil mix. These nutrients will become available as plants mature. Supplemental fertilization may be necessary if soil nutrients become depleted. Supplemental fertilizing is easy with organic (or salt-based) fertilizers applied in a liquid or dry form as per directions. Be careful to avoid overfertilizing—your soil may already contain ample nutrients.
Growing in a container, especially a small container with less than 10 cubic feet (283.2 L) of soil, is much different than growing in living organic soil found in Mother Earth. The difference is buried in the soil biology. When cannabis is grown in a small container for 2 to 4 months, there is no time for soil biology to kick in and build the soil. When growing in containers, regular supplemental fertilizing is necessary.
Organic products such as mycorrhizal fungus and Trichoderma will get organic gardens off to a good start. See chapter 22, Additives, for more information.
When choosing organic fertilizers, remember that many of them are “alive”—some more so than others! Dry organic fertilizers can be full of dormant soil biology that springs to life and multiplies when water and air are added. See chapters 18, Soil, and 21, Nutrients, for more information on fertilizers and fertilizer mixes.
Properly mixed in a large container, organic soil can have all the nutrients necessary in an available form from transplant through harvest. The large growing container and rich organic mix are the first secrets to success. Build organic soils using natural elements such as manures, composts, peat moss and coco coir, rock powders, kelp and seaweed. Whenever possible, use the most readily available and least expensive ingredients.
Be sparing with fertilizer during the first month after transplanting. Depending upon the fertilizer, application could be as often as every watering or as seldom as every week or two. Often gardeners fertilize with a mild, soluble flowering solution for germination and seedling growth. Change to a high-nitrogen formula during the vegetative stage and back to a “super-bloom” when long nights induce flowering.
If fertilizing every few irrigations or every irrigation, you may need to dilute the food to half-strength or less until you figure out the proper dosage. Use the instructions on the fertilizer label as a guide.
If you must transport fertilizers, make sure they are in dry or powder form, lightweight, and not bulky. Avoid leaving fertilizers at remote gardens, especially those with ingredients such as molasses, blood meal, or bone meal, which attract animals—including bears. I recently visited a garden where containers had been ripped open and the fertilizer consumed by a bear.
Backyard Gardens
Backyard medical cannabis gardeners are available to give their garden the tender loving care it deserves. Paying close attention to plants’ cultural needs pays off in big, healthy plants and abundant harvests at the end of each growing season.
Site the garden in the sunniest part of the yard, usually where the vegetable garden is located. Growing medical cannabis in flower and vegetable gardens allows a gardener to glean experience from past gardens.
Prepare soil in the fall. Remove rocks, debris, and weeds, and dig planting holes or garden beds. The best gardens grow in tilled soil with plenty of organic amendments. Many gardeners prefer raised beds. No-till organic gardeners leave the soil “as is” and add a heavy layer of mulch. Either way, a layer of mulch is helpful. A 4- to 6-inch (10.2– 15.2 cm) layer of mulch will keep soil elements intact, as well as attract moisture. Bare soil loses some of its valuable topsoil and nutrients to erosion during winter months.
In the spring, mulched amended soil should be well-mixed and ready for planting. If soil is poor and was not amended the previous fall, dig large holes 3 feet (0.9 m) in diameter by 2 feet (0.6 m) deep, and backfill with good soil/compost, potting soil, or planting mix. Otherwise, break up the top 6 to 8 inches (15.2–20.3 cm) of soil in a 6-foot (1.8 m) radius to provide room for root penetration.
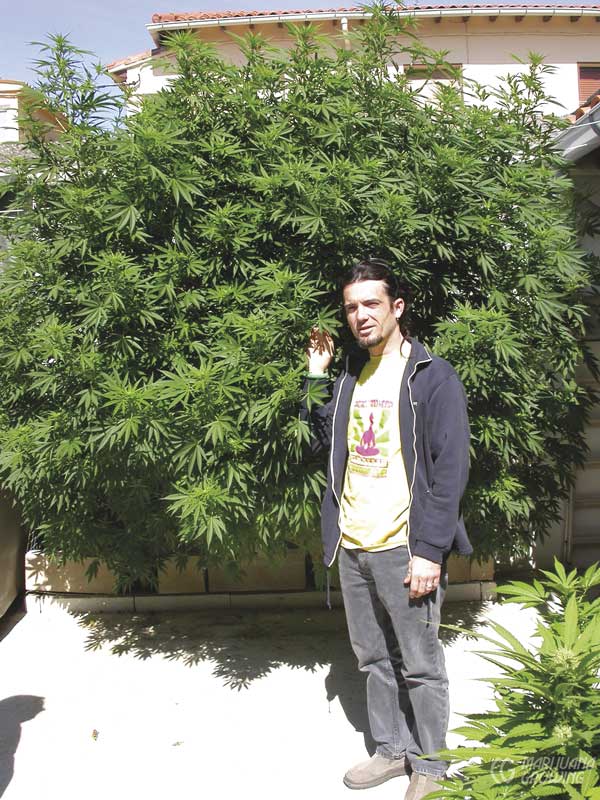
Backyard gardens are easy to grow. Wismy, editor of Yerba magazine in Spain, stands in front of a healthy cannabis plant in one of the many backyard gardens found in Spain.
This vegetable garden was transformed into a medical cannabis garden. To facilitate maintenance, the gardener left plenty of space between plants.
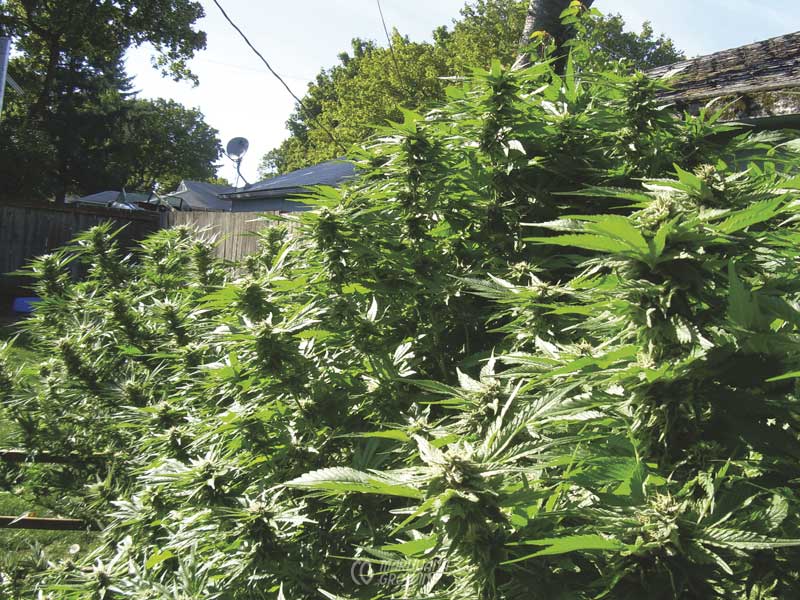
Medical cannabis plants can also supply shade. Four plants shade one wall of a home, which keeps it cooler indoors. These plants are 8 feet (2.4 m) tall!
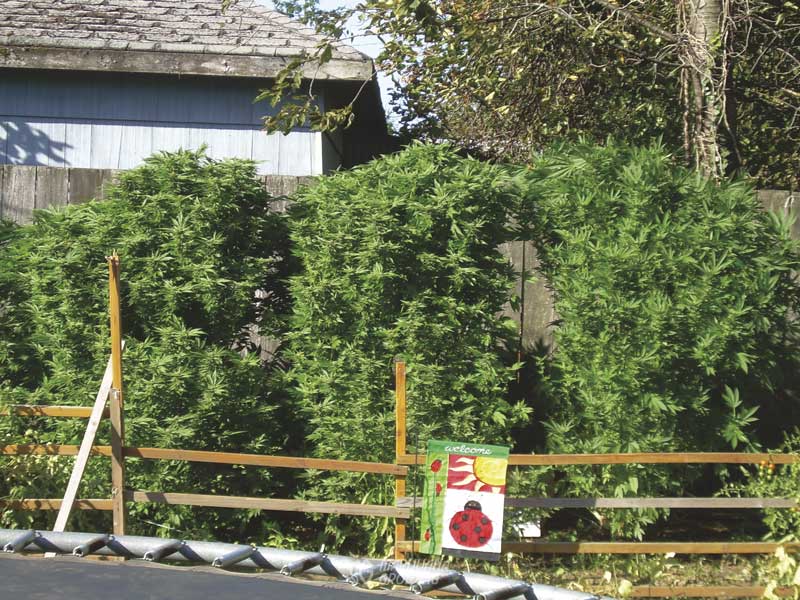
A backyard garden full of cannabis can be ornamental.
Transplant cannabis seedlings or clones into the garden after threat of frost, and if temperatures dip below 50ºF (10ºC) at night, protect with a cloche, hot cap, or Wall O Water. Follow planting guidelines for setting out tomatoes.
Water and fertilize as needed. Make sure to keep up with watering during hot weather. Irrigate in the morning so that water has a chance to be used all day long. Mixing fertilizer with water is a simple and effective way to fertilize. If fertilizing with dry powders, mix them into the top few inches (cm) of soil so that they are effective.
Be on the lookout for pests and diseases, and take appropriate control measures. Flower and vegetable gardens can contract seasonal diseases and pests including powdery mildew, spider mites, and thrips that can spread to cannabis gardens. Control diseases and pests on flowers and vegetables early on so they do not spread to the cannabis garden. Follow guidelines below for planting, maintenance, and harvest.
A little plastic stretched over a simple structure keeps plants much warmer at night. It also keeps plants from suffering damaging effects of wind and pounding rain.
Some medical cannabis gardeners are fortunate to have big backyards!
Mulch is essential and serves to keep soil cool and protected from temperature extremes and compaction by heavy rains.
Container Gardens
Growing in containers is the easiest option for gardeners with limited space or very bad soil. Containers can be moved into sunny and warm locations. Grow cannabis outdoors in containers that can hold from 1 to 500 gallons (3.8–1892.7 L). Small containers are easy to pick up, scoot around, or move with a caster platform. Handles on 5- to 20-gallon (18.9–75.7 L) containers make them easier to pick up and move. Large 200-gallon (757 L) containers can be placed on a pallet and moved with a forklift–equipped tractor. Always move plants before watering!
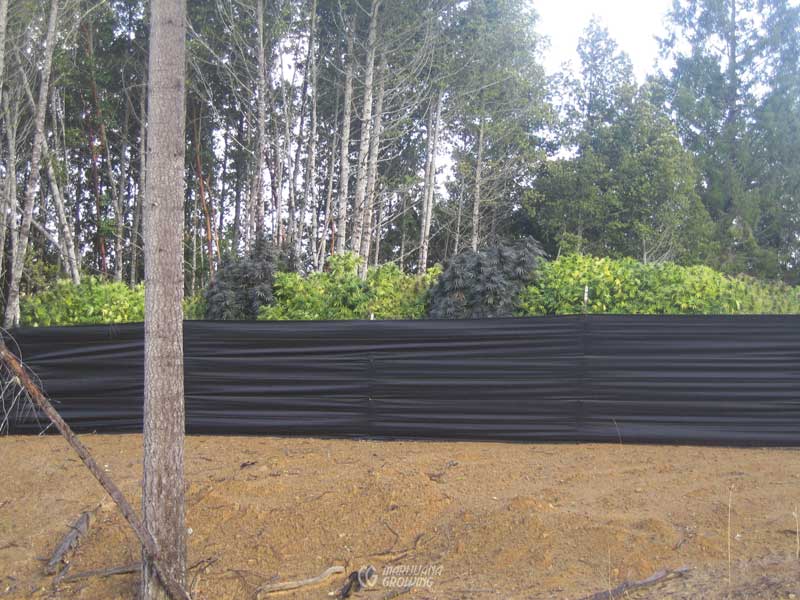
Backyard gardening techniques depend upon the location and microclimate in the garden. City building rooftops, terraces, and balconies tend to be windy, as do hilltops and hillsides. The higher the garden, the more wind. Wind quickly dries plants and soil. Patio gardens are often protected from strong winds. If not, erect a wind block made from 50 percent shade cloth, lattice or another semipermeable material. Wind can also carry rogue male pollen or industrial hemp pollen creating problems for terrace gardeners. Plan ahead and know your neighbors. For more information, see “Rogue Pollen” in chapter 25, Breeding.
Small containers fit easily on a patio, balcony terrace, or rooftop. Plants need a sunny location, good genetics, good soil, water, and nutrients. Direct sunlight beaming down on containers can cook roots, however; shade containers from direct sunlight. Putting pots inside other containers can help protect roots from the sun. See chapter 19, Containers, for more information.
Daily watering and maintenance are essential during hot and windy weather. An automatic watering system is often a good idea in such gardens to ensure they receive adequate water, especially if you will be away from the garden for days at a time.
For more information, see chapter 19, Containers, and chapter 13, Case Study #4. Follow guidelines below for planting, maintenance, and harvest.
Setting the growing container inside a larger container will help protect soil from heating in the direct sunlight.
This terrace garden is flowering in the springtime.
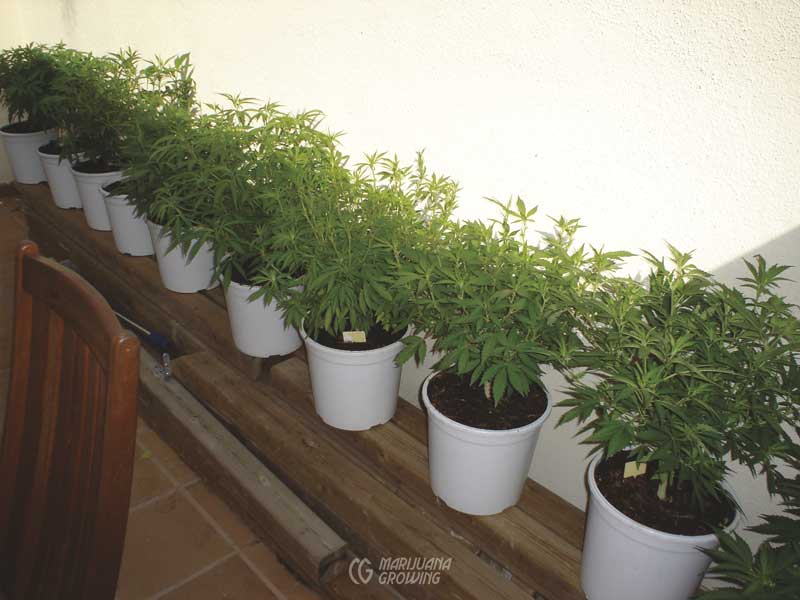
This healthy garden of 5-gallon (18.9 L) containers is being moved outdoors to flower.
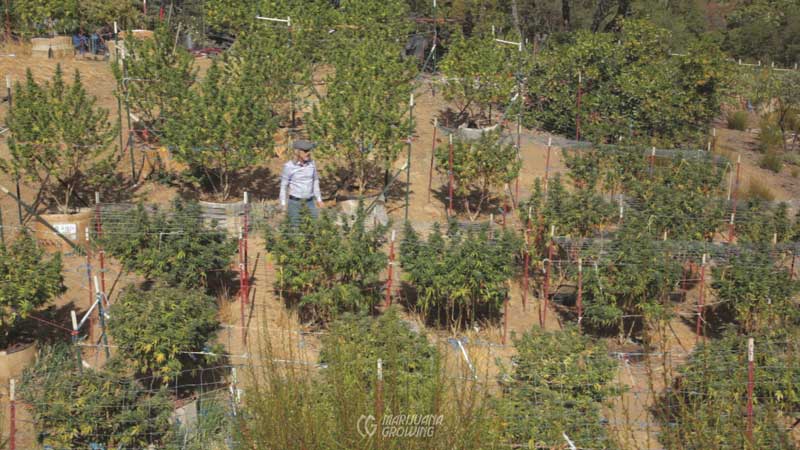
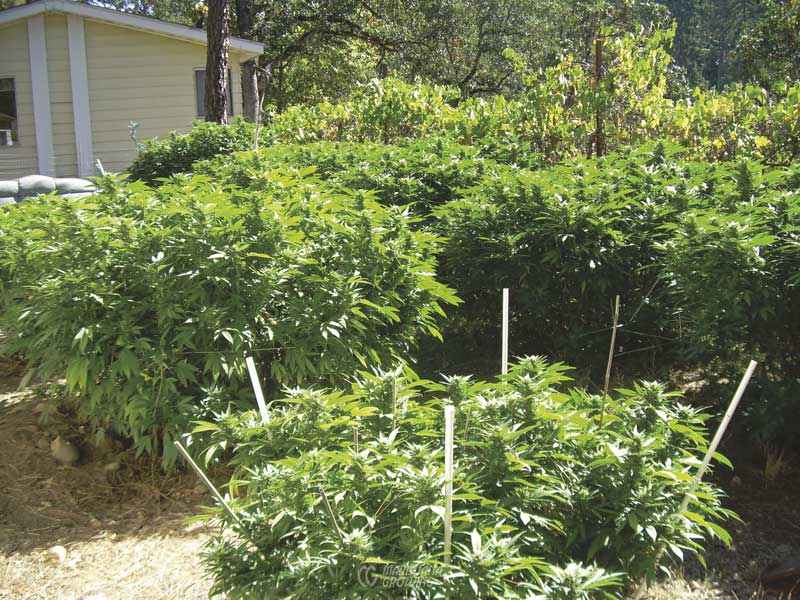
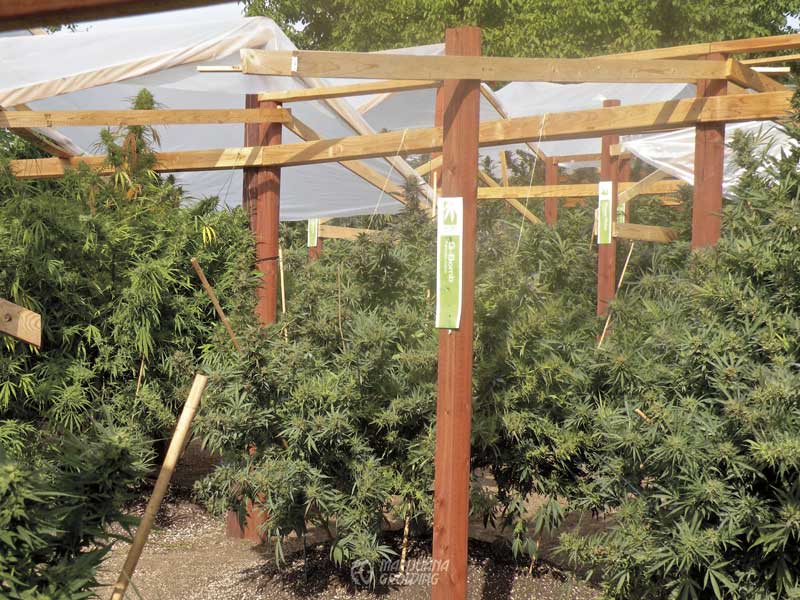
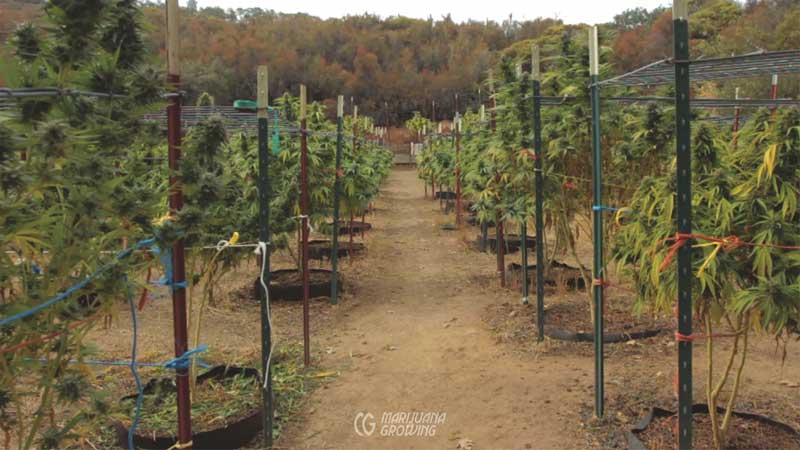
Large Gardens
Large gardens require a full-time investment of time and assets. For example, a 99-plant garden full of big 10-pound (4.5 kg) plants can yield about 990 pounds (449.1 kg) of dried cannabis and almost the same amount of stems, leaves, and trim, all of which must be processed. Planting, growing, harvesting, curing, and packaging a big garden is a big job. Planning is essential to the success of large outdoor gardens. Smart gardeners lay out a week-by-week plan.
First, a perfect variety for your climate (preferably an F1 hybrid), must be grown from seeds or clones. It must be planted in January or February indoors and moved outdoors in April or May. Lights must be installed in the temporary greenhouse over the plants to keep them from blooming. Hundreds of gallons (L) of soil must be mixed and potted. In midsummer, individual plants will need up to 10 gallons (37.8 L) of water daily. This garden will need up to 1,000 gallons (3,785.4 L) of water every day! At harvest, 1 person can manicure 1 pound per day. The fastest machine can trim 3 to 4 pounds in an hour. A team of 12 people (that must be paid) with 1 trimming machine can process about 30 pounds (13.6 kg) a day; 1,000 pounds / 30 pounds (453/13.6 = 33) = 33 10-hour workdays. I have never seen an operation this efficient. Normally 1,000 pounds (453.6 kg) takes 12 workers with a trimming machine 3 months to manicure, dry, and preserve. A detailed plan with a timeline is in order!
Large gardens are a full-time job and must be cared for at all times. Roaming around in between the plants is always fun and informative. Inspecting all the plants daily is very rewarding; they teach you something every day. Remember that any problem such as trellising, diseases, and pests occurs in a big way to many plants. It is very important to avoid problems before they occur. Keen observation skills will be necessary. See chapter 13, Case Studies, for more information about large gardens.
Follow guidelines in this chapter for planting, maintenance, and harvest.
Big plants grow big buds!
Large outdoor plants require more garden and soil preparation, water, and maintenance.
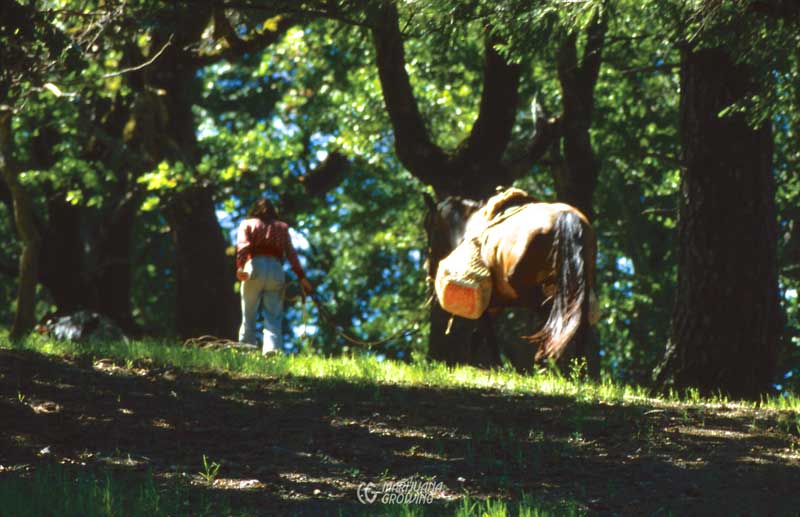
This clandestine cannabis gardener hauled her supplies in on a horse in the late 1970s. (MF)
Remote Gardens
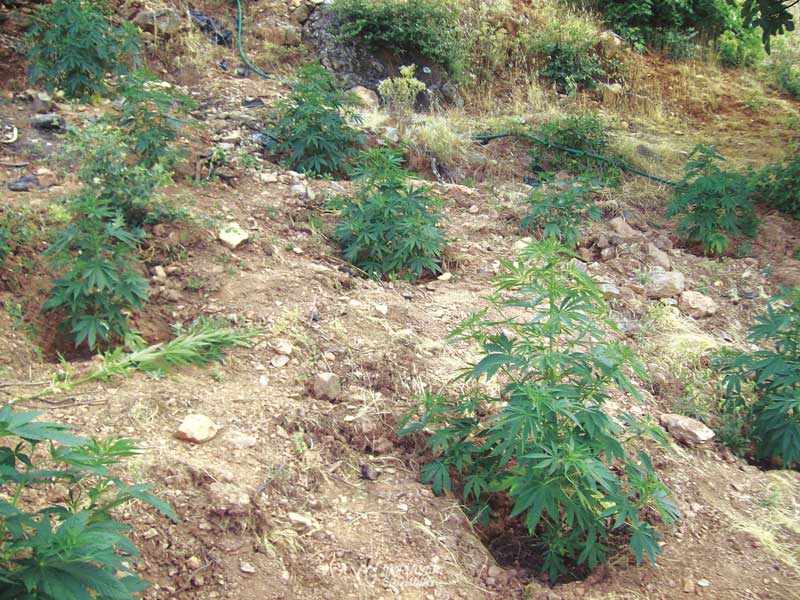
Remote gardens are sometimes referred to as “guerrilla gardens,” a term coined in the early 1970s. Remote gardens require strategy, time, and frequently, physical prowess. Unfortunately, international, national, state, and local laws can deem growing medical cannabis illegal. Clandestine guerrilla growing in remote locations is the only option for medical cannabis gardeners in such hostile areas. Location and security are the main concerns for a medical cannabis guerrilla grower. Choose a location that has limited public access. Check regulations for hunting, recreation, and insurgent movements. Consider who might be using the area, such as hunters, mushroomers, illegal marijuana growers, hikers, dirt-bikers, and Boy Scouts. Select a remote site unlikely to be used casually.
Loading clones and seedlings in a backpack in boxes is a safe convenient way to transport them to the garden site.
Some gardeners go so far as to bury 8 × 8 × 40-foot (2.4 × 2.4 × 12.2 cm) shipping containers underground to serve as a garden area. These gardens are quite interesting. The containers are set in a trench or hole on 2- to 4-foot (0.6–1.2 m) blocks. The area underneath the container serves as ventilation ducting. Earth is filled in around and over the container; it also serves to insulate the subterranean garden.
Other clandestine gardeners have buried large, 12- to 14-foot (3.7–4.3 m) culverts (big pipes) in the ground. These were divided into top and bottom garden rooms.
Growing cannabis on federal or public land is not advised. Unfortunately, park rangers in the USA now carry lethal firearms and have the authority to arrest “suspected” gardeners. A few trigger-happy survivalists and a minority of South American organized crime factions have also moved into national forests, installing illegal immigrants with guns to grow and defend large stands of guerrilla grass. However, many times Latin immigrants band together in small groups and plant in the wild. These small groups of people have nothing to do with organized crime across borders. They want only a better life for their families. The War on Drugs has turned gardening into a crime, and much of the world, particularly the Americas, into an unsafe place to live.
These seedlings were moved out and transplanted six weeks before the photo was taken. Clearing thick undergrowth in the British Colombia, Canada, forest was a big job.
This Basque cannabis gardener turned an unused road into a remote garden patch.
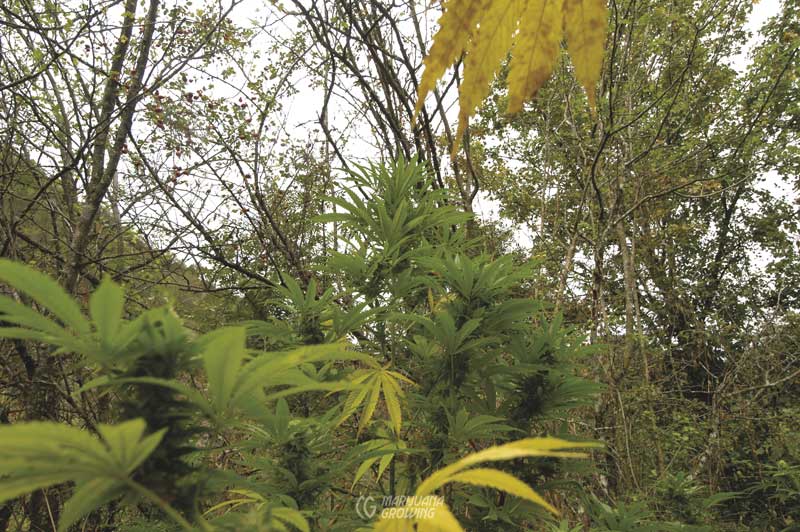
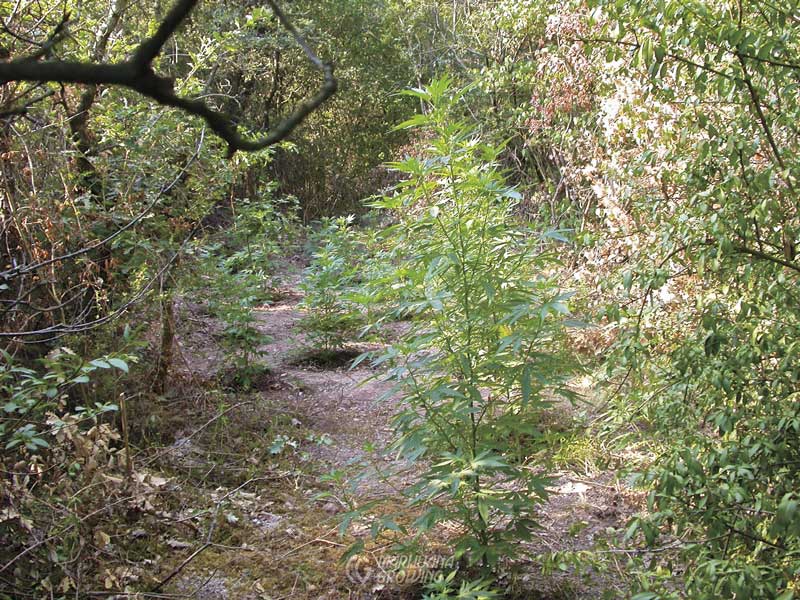
Remote gardens are often located in or near big green stands of vegetation. Cannabis is a vigorous plant and can have a large root system. A flowering female will stand out if surrounding vegetation dies back before cannabis is harvested. Stands of thorny blackberry bushes, ferns, and meadow grass are good options for planting locations.
Prepare the medical cannabis garden up to 6 months before planting. Remove green vegetation in the fall for a spring garden. Clear a few patches to allow sufficient sunshine, cut back roots of competing plants, and dig planting holes 2 to 3 feet square (61–91.4 cm3). Dig holes wider than deep so that surface roots can take hold. If possible, allow amended soil to sit for a month or longer before planting. Remote locations are hard to visit on a regular basis, so proper planning and preparation is important. If home and remote gardens are similar, you can plant an indicator crop like tomatoes as a backyard guide to your hidden plants’ condition.
Ample water is an important factor for site selection. If you cannot count on rainfall, locate your garden near a water source that does not dry up in the summer; doing so will make watering easier. Water may have to be piped in from another source, including pumped uphill and stored in a reservoir. Exclusive access by boat may reduce the risk of discovery, but make sure your plants cannot be seen from the water. Many people use waterways and explore land bordering rivers.
Follow guidelines in this chapter for planting, maintenance, and harvest.
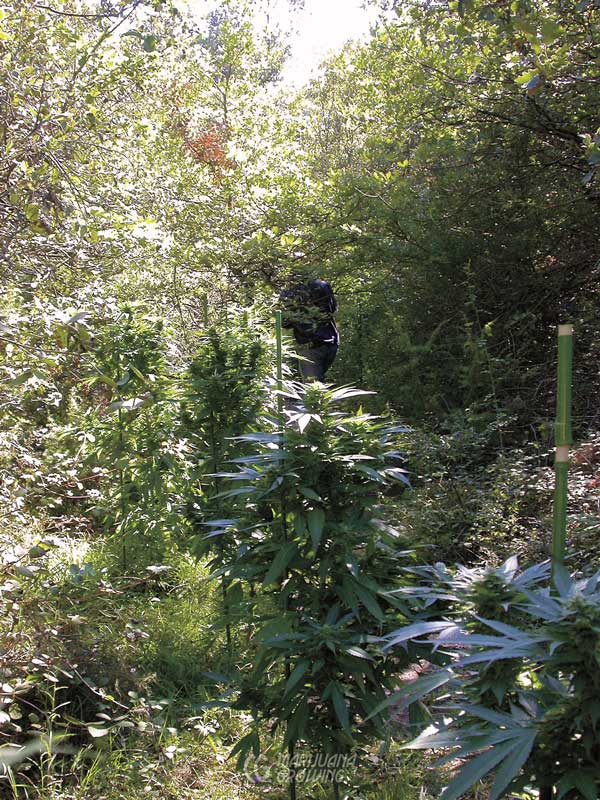
Camouflage grow bags and pots are available.
Poor soil and lack of water are two of the biggest problems remote gardens face. These plants weighed in at between 6 and 12 ounces, respectively (170.1 and 340.2 gm).
Outdoor medical cannabis gardeners can purchase clones grown indoors at dispensaries such as this one in Oaksterdam. Gardeners take the clones home and grow them indoors for a month or two before transplanting outdoors.
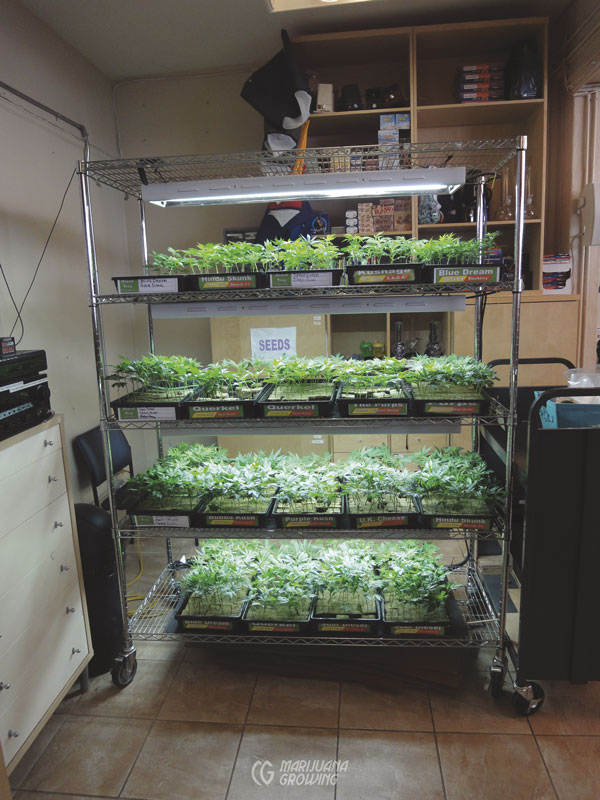
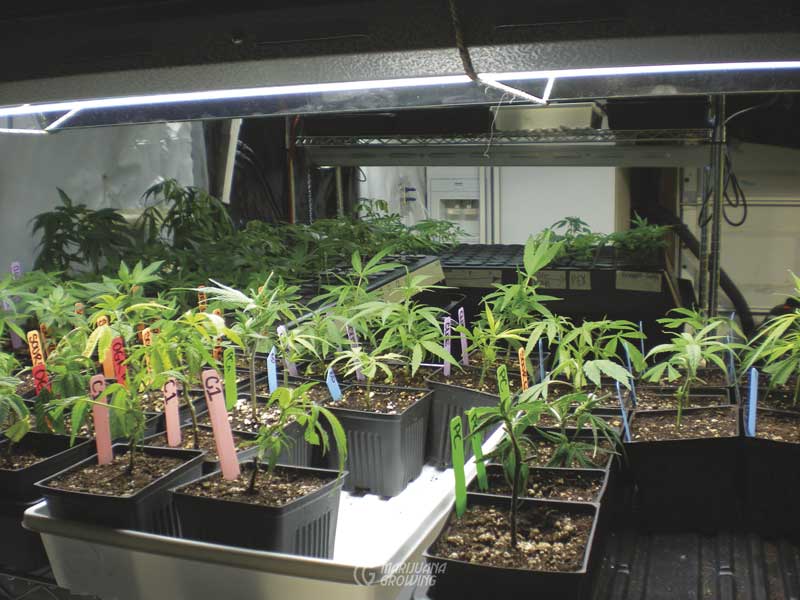
Starting Clones & Seedlings Indoors
Get a jump on the season by starting cannabis clones and seedlings under lights indoors. Move small, containerized plants into heated greenhouses to harden-off. Transplant them to a backyard or remote garden once they have become hardened-off and are more resistant to environmental stress.
Grow seedlings in tall containers (3 inches square by 6 inches tall) (7.6 × 7.6 × 15 cm), which will produce a strong, deep root system and a plant that has a better chance of surviving in tough conditions. Water seedlings and clones heavily before transplanting. A little effort preparing the planting holes will result in healthier plants and a heavier harvest.
Start seedlings and cuttings indoors and move them into a heated greenhouse in March or April or as soon as you can in your climate. A 400-watt HP sodium lamp on a timer can augment the less-intense natural light of early spring. Seedlings and clones will need at least 16 hours of artificial and natural light per day until plants are transplanted outdoors.
Transplant into a temporary greenhouse as soon as nighttime outdoor temperatures are 50ºF (10ºC), or earlier if the structure is heated.
Getting plants outdoors and established early in the spring allows plants to take advantage of the entire growing season. Given favorable conditions, a plant that is 3 feet (0.9 m) tall the first of May will produce about twice as much as a plant that is 3 feet (0.9 m) tall by the first of June.
Some medical gardeners keep a stream of plants moving from the indoor garden to the outdoor garden. The first crop of clones is planted in 3-gallon (11.4 L) pots in a greenhouse. Once they are hardened-off they are moved to their final location outdoors. The second crop is moved into the greenhouse when the first crop is moved out. This process can be repeated 3 to 4 times during the season.
Transplant 1-foot-tall (30.5 cm) seedlings and clones by removing the first few sets of leaves and burying the root ball deeper, with only 8 inches (20.3cm) of foliage left above ground. Roots will grow along the belowground stem in a few weeks. Outdoors, when planted in Mother Earth, deep roots will create more self-sufficient plants. This is of particular importance in remote areas that are hard to get to, and in the mountains where rainfall may be sporadic.
Note: Outdoors in the ground only! This technique does not work the same in containers. Strong roots do not always grow off the stem and the main root ball often stays at the bottom of the pot.
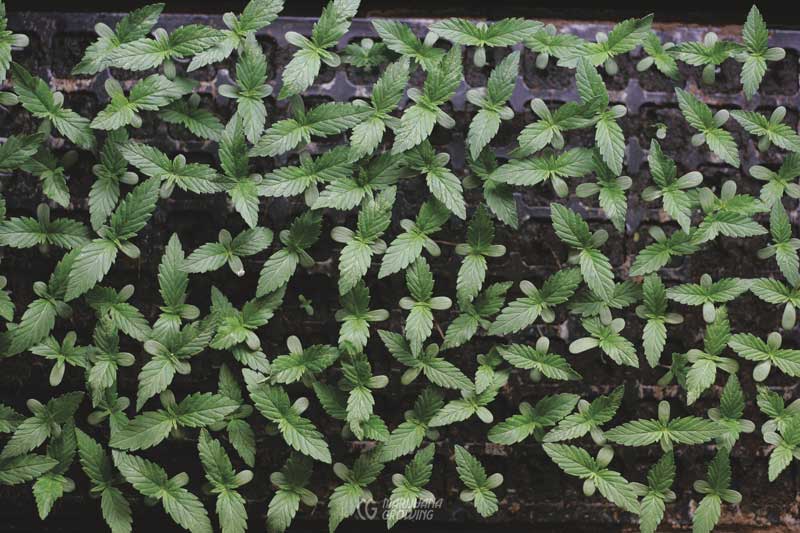
Clones growing in 4-inch (10.2 cm) containers will soon start the vegetative growth stage. When the clones are a foot (30.5 cm) tall, they will be ready to move outdoors.
These seedlings will be transplanted into deep containers and moved outdoors in 2 months, after their sex has been determined.
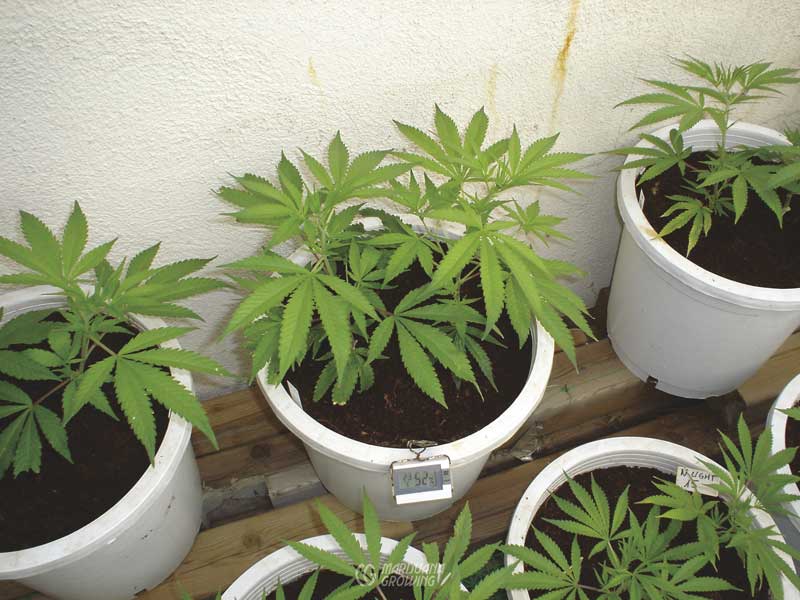
Move transplanted clones outdoors for a few hours every day to harden-off and acclimate them to the harsher outdoor climate. After about a week, they should be acclimated.
Hardening-Off Plants
Seedlings and clones grown indoors are very tender. Indoors, seedlings and clones lose much of their protective waxy coating when they are pampered with the indoor climate. Hardening-off is the process of toughening-up clones and seedlings so they can be transplanted outdoors. During hardening-off the protective wax coating has a chance to grow back on foliage. Gradually hardening-off clones assures that they will suffer a minimum of stress and will continue to grow rapidly outdoors.
To harden-off seedlings and clones, set them outdoors for progressively more hours over the course of a week. Set transplants out in the shade on the first day. Gradually move them into the sun so they receive progressively more hours of sunlight every day. If temperatures are below 50ºF (10ºC), bring transplants in at night. Or you could set them out under a plastic greenhouse.
Transplants suffer a huge climate and temperature shock when moved outdoors. Wait to move clones and seedlings outdoors until they are fully rooted and growing well. It takes time to toughen up to the climate outdoors. Transplant seedlings and clones outdoors when nighttime temperatures are above 40ºF (4.4ºC). Planting under plastic will help protect tender plants from cold temperatures and winds.
A temporary cold frame greenhouse will give plants a much stronger start when temperatures are below 50ºF (10ºC). The superstructure of a greenhouse provides a place to hang lights if there are not enough hours of daily sunlight for early spring plantings.
Planting Time
Planting time outdoors depends upon the weather. There has been little scientific research into planting temperatures for cannabis outdoors. In general, do not transplant seedlings or clones until nighttime temperatures are above 50ºF (10ºC). If the garden bed is raised or heat is added to a greenhouse at night, temperatures can be lower. Hardened-off plants should be protected from cold weather, rain and wind with a small plastic greenhouse until weather warms. The plastic skin or greenhouse is removed during hot days and replaced when temperatures drop at night. Some years the crop can have full exposure in May. Other years we have to cover the greenhouse until the middle of June.
| THREE GARDEN PLANS | ||
| Planting Dates | Plant | Harvest |
| spring crop | March 15 | May 15–30 |
| fall crop | May 1 | October 15–30 |
| summer greenhouse crop | May 1 | August 15–30* |
*Note: Darken greenhouse every evening to black out plants so they receive 12 hours of uninterrupted darkness.
Note: Dates are the opposite by 180 days in the Southern Hemisphere.
Maintenance
Backyard gardens can be watered along with vegetables, lawns, and trees. Plants need plenty of water when days get hot. Keep an eye out for cultural problems, pests, and diseases. In the USA you can telephone the local master gardeners at the County Extension Agency to ask about current pests and diseases.
Large containerized plants like this one require water every couple of days. Always check foliage for pests and diseases while watering.
Container gardens require regular watering—usually daily. Set up a sunblock around containers to keep soil cool. Containers left to cook in the sun suffer fried roots and stopped growth.
Large gardens need regular, daily maintenance. Routinely check plants for diseases and pests. Water the garden every day or every other day when temperatures climb. Add extra mulch around plants to conserve and attract moisture.
Remote gardens require a complete low-maintenance setup. Loosen the soil, amend it, and throw in a few handfuls of polymers to retain moisture. A thick layer of mulch, early in the year, will attract water, keep the soil cool, and prevent evaporation. Water and fertilize as needed.
Regular irrigation is the primary maintenance medical cannabis plants require outdoors. Basic information about irrigation is given under the heading “Water.”
Plants should also be inspected regularly for pests and diseases. Caterpillars, spider mites, thrips, and more can move into a garden unnoticed. Careful scrutiny is necessary to find and destroy pests quickly and efficiently. Pay close attention to plants every time you are in the garden. Check foliage for signs of mold, insects, caterpillars, and fertilizer excesses or deficiencies. See chapter 24, Diseases & Pests, for more information on identification and treatment of disease and pest attacks.
Trellis plants as needed. Always plan ahead. It is easier to build a trellis when plants are small. See “Trellises and Ties” in chapter 6, Vegetative Growth.
Pest prevention is crucial for all medicinal crops, especially low-maintenance gardens. It is easier to keep pests from attacking plants in the first place than to do damage control later. Build a fence to protect seedlings and small vegetative plants from deer. A low, electrified fence is in order for wild pigs and various other rodents. See chapter 24, Diseases & Pests, for more information.
Water and fertilize as needed. See chapters in this book that pertain to specific outdoor needs.
A nylon horizontal trellis is easy to stretch over the garden.
This manicured cannabis will be dried on screens.
A Swiss gardener harvested a couple of plants. Transporting whole plants requires extra space, but he took them home to manicure.
Harvest
Backyard and container-garden harvests are easy because all facilities are at hand. Harvest as for indoor gardens. See chapter 9, Harvest, Drying & Curing, for more information.
Large outdoor harvests require planning and hard work. Harvesting a 5- to 10-pound (2.3–4.5 kg) plant takes time, space, and physical energy. Read about harvesting large gardens in chapter 9, Harvest, Drying & Curing.
A trick that helps prolong harvest and increase harvest weight is to harvest the top 2 feet (60.9 cm) of large plants. Let secondary buds continue to mature in the newfound sunlight. Some varieties, such as ‘Mr. Nice’, can be harvested up to 4 times when grown as big plants!
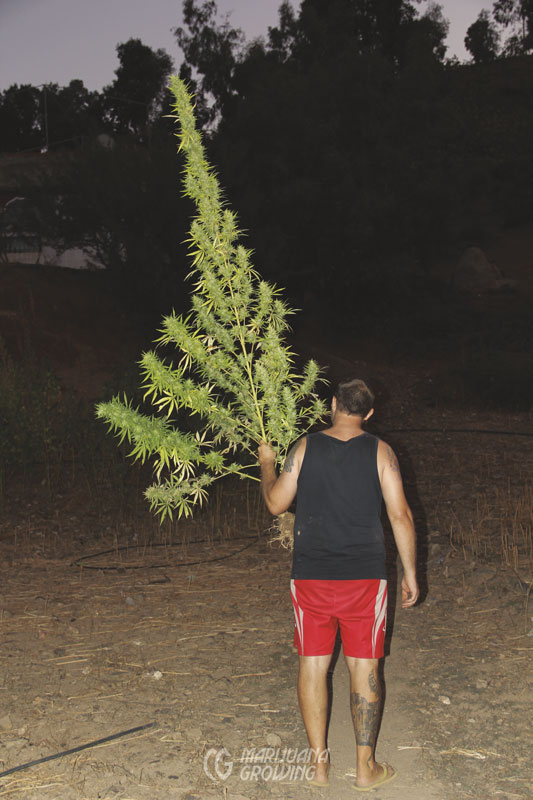
This Moroccan grower has been working all day. This is one of the many plants he harvested on a very productive day.
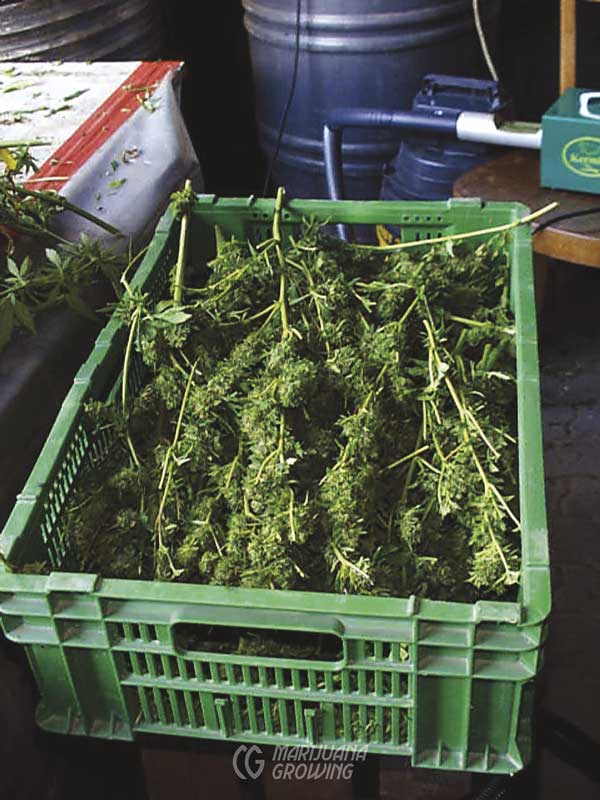
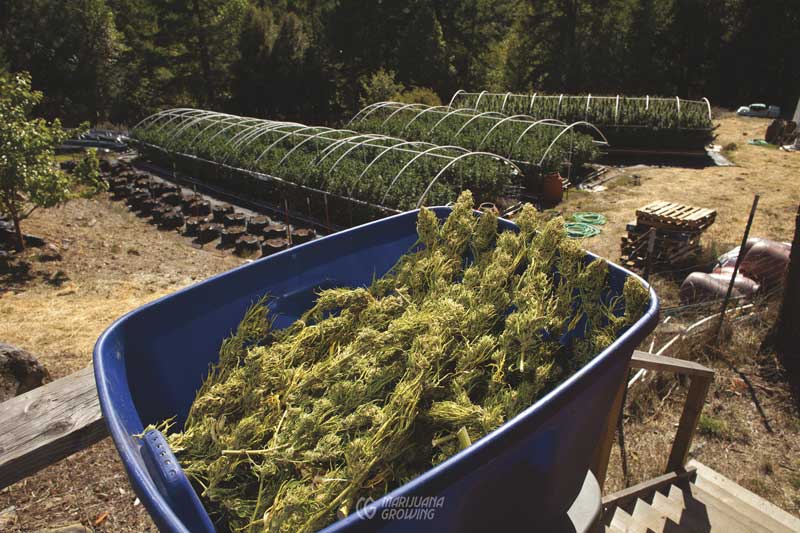
Branches full of flower buds are cut from plants and transported to the manicuring room in this lightweight plastic container.
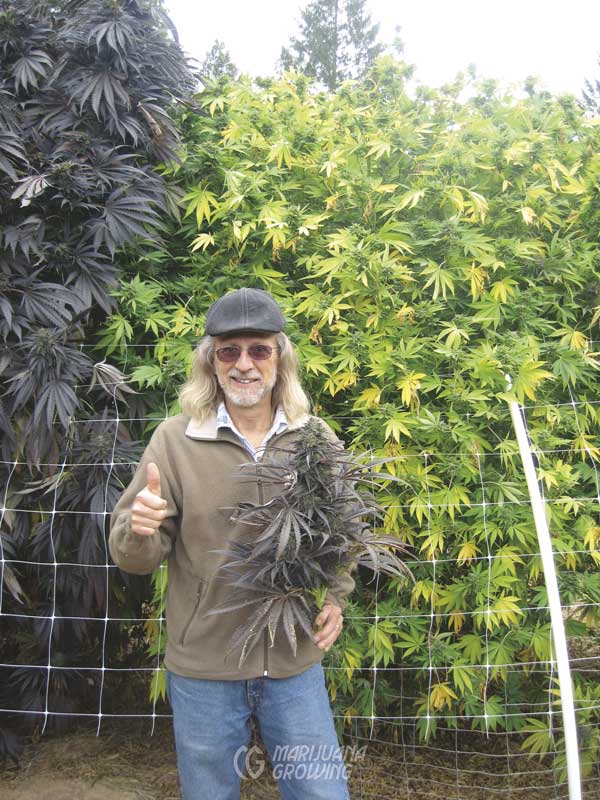
This is one of the top buds from the ‘Purple Star’ plant behind me. The local variety is well acclimated to the area and produces exceptionally well there. The entire plant yielded 12 pounds (5.4 kg) of dried flower buds!
Harvesting remote gardens is challenging. Harvest before cold, damp autumn weather sets in. This weather causes fungus—Botrytis (bud mold) and powdery mildew. Many indica-dominant plants can take a short, mild freeze (30°F–32°F [-1°C–0°C]). But if the temperature stays below freezing for more than a few hours, it could kill plants. Pay close attention to weather forecasts and apply the information to the microclimate where your plants are growing. Be ready to harvest quickly if weather dictates.
Accidents and thieves can force a harvest, too. Limit potential discovery by hunters, hikers, and others by harvesting at night. Find out when hikers are prone to visit the area, and plan accordingly. Some gardeners even use police scanners that pick up local police activities.
Should you encounter other hikers or unwanted people while visiting or harvesting the crop, have a believable story to explain your presence in the area. Offer nothing, explain little, and keep conversations simple. Always remember Bart Simpson’s words, “I didn’t do it. Nobody saw me. You can’t prove a thing!”
Take a sharp pocketknife or pruners to cut plants, and a backpack to haul away the harvest. If large amounts must be harvested, it is easier to “field strip” plants before transporting. If harvesting more than one variety, put each of them in separate bags, or wrap them in newspaper before they go into the backpack.
See chapters 8 and 9 for more information on flowering and harvesting.
Catch and save all leaves and small trim around buds. Separate into low, medium, and high grades. See chapter 9, Harvest, Drying & Curing, for more information on drying leaves and leaf trim around buds. Convert leaves and trim into concentrates (chapter 26, Medicinal Concentrates & Tinctures) or cook with it (chapter 27, Cooking with Medicinal Cannabis).
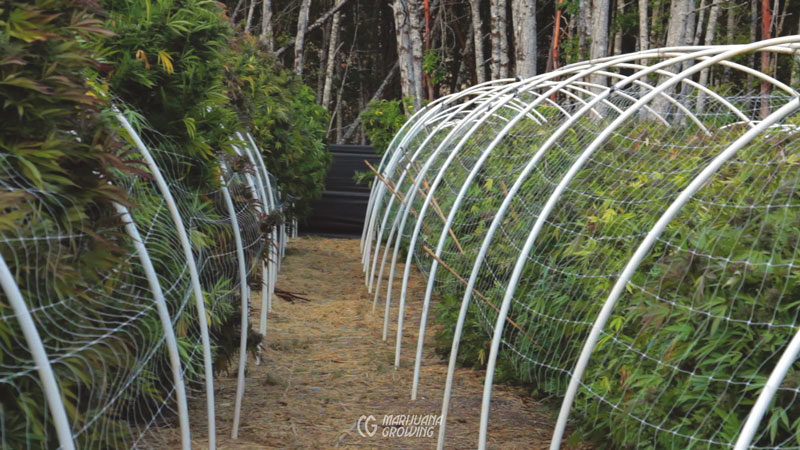
The garden on the right has been harvested once and will be harvested one more time. The garden on the left will be harvested for the first time.
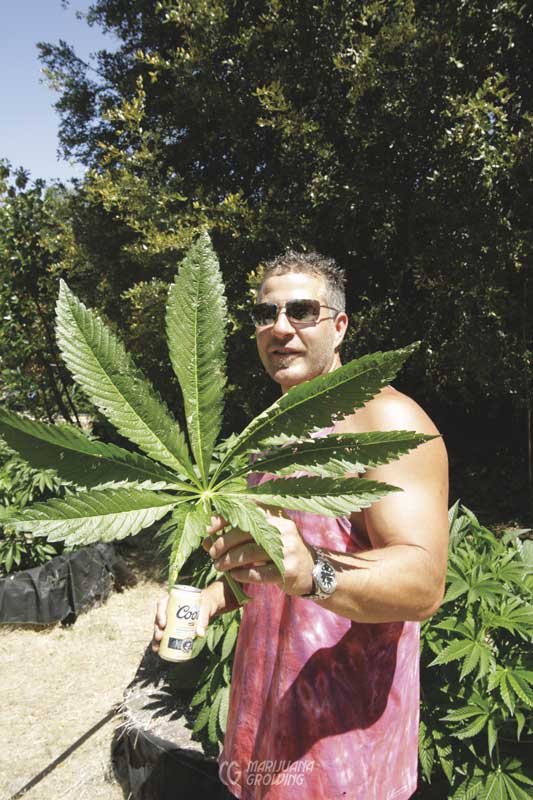
Some leaves should be framed!
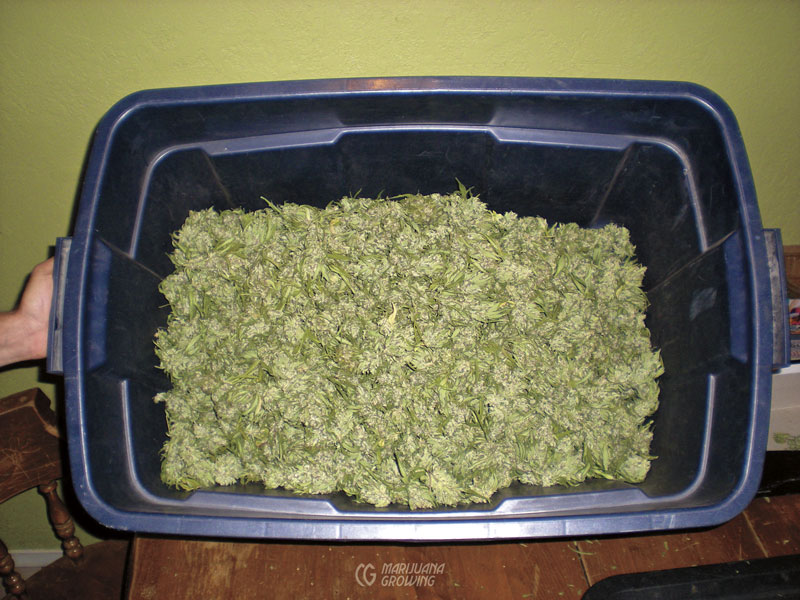
Harvested flower buds are tossed into this large bin after manicuring. They will be moved to drying racks.