Introduction
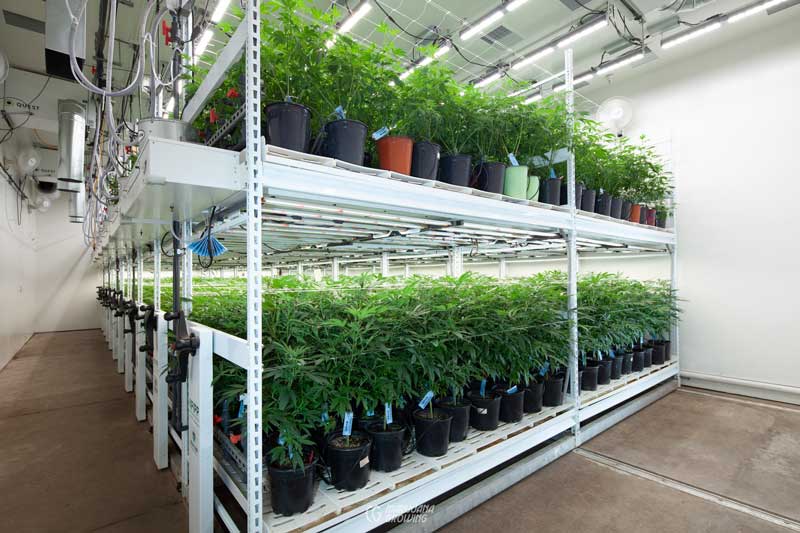
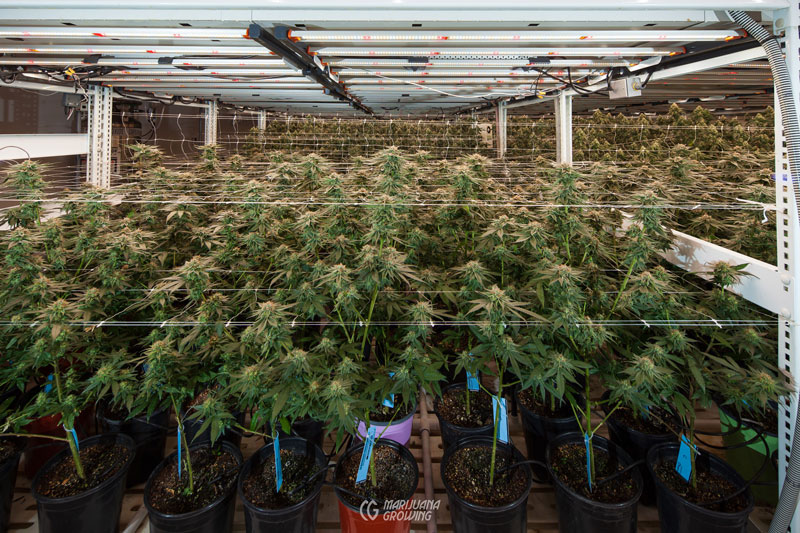
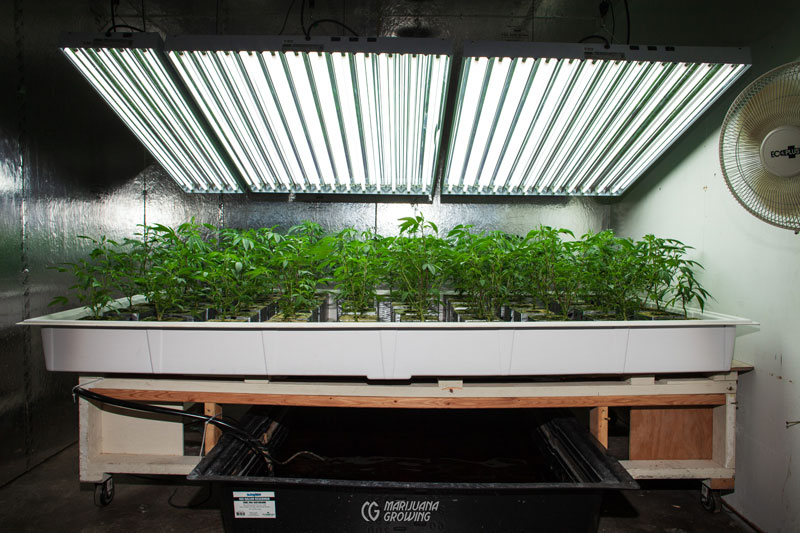
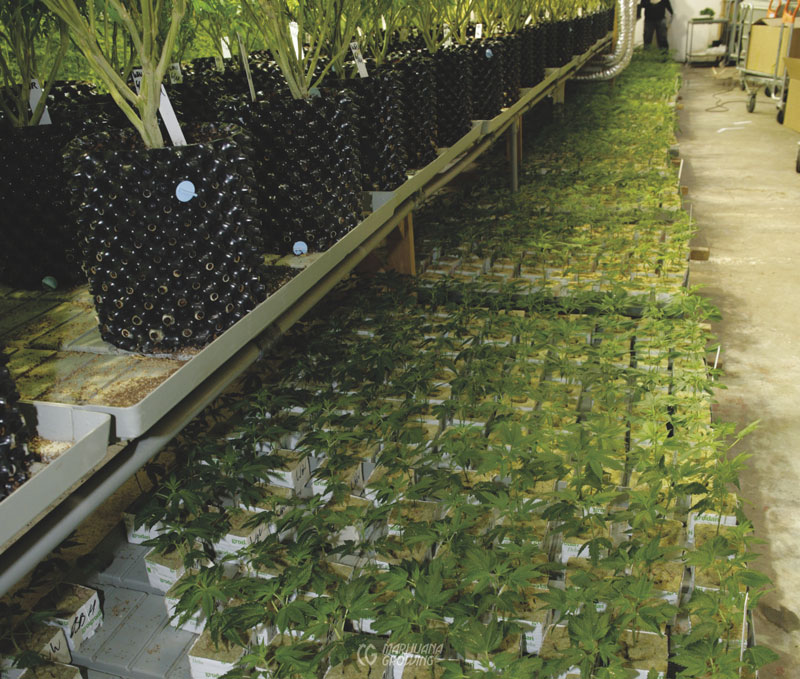
LED light fixtures illuminate this two-level indoor cannabis garden in California. Crops are harvested one day and replaced with new clones the next morning.
Plan your indoor garden on paper before investing any time or money. A few hours of planning and research on the internet will ensure a good start and increase your chances of success. What are your goals? Do you want to grow a single crop from seed to harvest? Do you want to grow a perpetual crop and harvest a few plants every week or two? Or do you want to harvest a crop every 2-3 months? Maybe you have designs on starting a big commercial garden. Are you an outdoor or greenhouse gardener who wants to get an early start on the growing season by starting plants indoors? Your decision will dictate the type of garden area you set up and the materials and supplies you will need.
Set a budget that fits your needs. A small area to start seeds that grow into plants a foot (30 cm) tall to transplant outdoors is inexpensive and requires a minor financial and time investment. Setting up a large space to produce several pounds (kg) per month requires a serious budget, planning and dedication. Remember that all gardens will require extra time to fine-tune the first few months. I have found that every time I set a budget for a project it always costs me more time and money than anticipated.
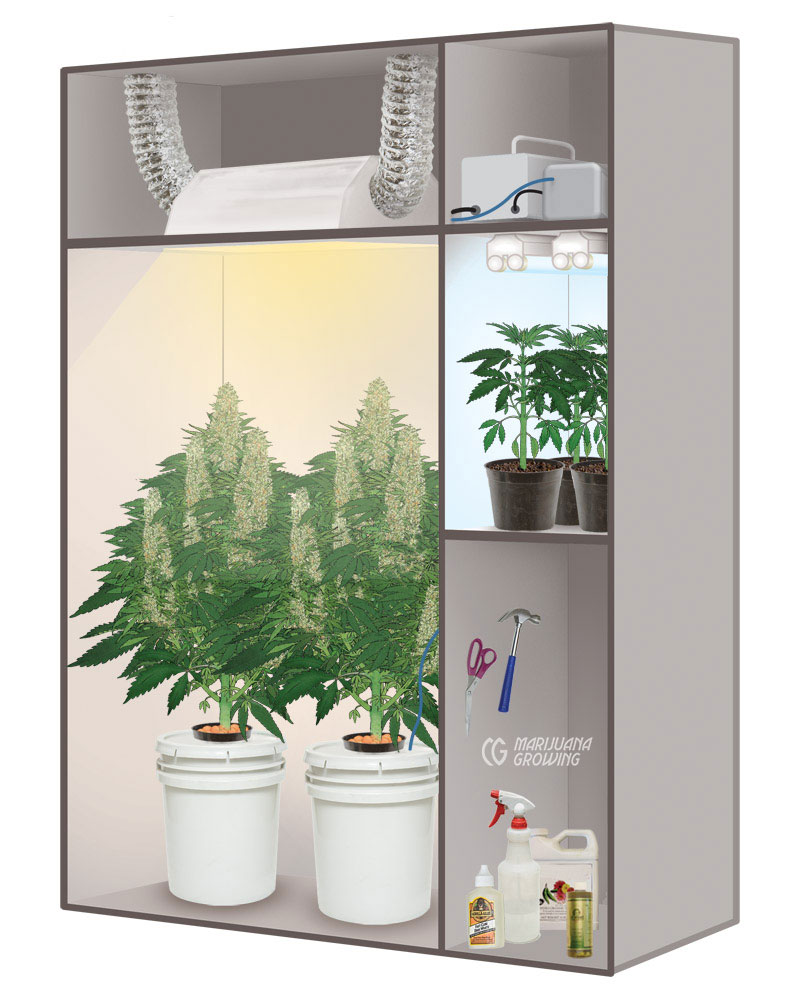
Site selection can limit the options for the type of indoor garden you can set up. Growing a few seedlings into plants that are 1-2 feet (30-60 cm) tall requires little space, electricity and ventilation. Large gardens require more space, electricity, water and ventilation. If you plan to grow a perpetual crop you will need at least two different rooms, one for seedling, clone and vegetative growth and a second room for flowering growth. Post-harvest drying and processing may require a completely separate room for larger crops.
Plan Your Garden
Single Crop
Growing in a single room is a good way to harvest a crop every 4-6 months. You can take the time to set up the garden properly and not be overwhelmed with growing plants when problems arise. Starting too many plants in a big room in a “get rich quick” scheme often results in a substandard harvest and in some cases, crop failure.
Purchase female clones legally at cannabis dispensaries or germinate seeds. Huddle small plants in containers under artificial light. Small plants in the vegetative growth stage need less intense light levels. Spread plants out and add more lights as their size increases. Set your timer to 18 hours of light and 6 hours of darkness for the vegetative growth stage. Induce flowering with an even 12 hours of darkness and 12 hours of light.
Set up a vegetative garden room. Apply the information in “Vegetative Room” below until plants are flowering size – 11-24 inches (30-60 cm) tall. Note: the room will need to be big enough to accommodate a flowering crop.
Induce flowering with a 12-hour day, 12-hour night photoperiod in the vegetative room. Apply the information in “Flowering Rooms” below.
Perpetual Crop
Two separate rooms are necessary to harvest a perpetual crop unless you are able to trust a clone vendor. The vegetative room should be about one quarter the size of the flowering room. This is a ratio of 1 to 4. Set up a vegetative room and a flowering room so that you can grow a perpetual crop. Take several clones from vegetative plants in the vegetative room every day or every week. Move the same number of plants to the flowering room daily or weekly. Harvest the same number of plants daily or weekly. Take clones of the same number of plants harvested. Actually, take 10-20% more clones to allow for mistakes.
Harvest a plant in the flowering room and move in a plant from the vegetative room into the flowering room.
Set up a vegetative garden room. Apply the information in the “Vegetative Room” below.
Set up a separate flowering room. Apply the information in the “Flowering Room” below.
Set up a separate post-harvest room. Apply the information in “Post-harvest Rooms” below.
| Growth Stage | Time | Plants |
| Clone | 2 weeks | 30 |
| Vegetative | 2 weeks | 10 |
| Flower | 8 weeks | 30 |
| Totals | 12 weeks |
Big Gardens
Big gardens will require several rooms to nurture plants in each stage of life. Separate rooms for seedlings, clones and mothers are necessary to give each the exact conditions they need. The seedling and clone rooms can be a part of a larger room as long as they are sectioned off so that temperature, humidity, ventilation and light levels can be controlled separately. The small plants use very little water and can be irrigated by hand. Small plants should be set up off the ground so that they can be visually monitored.
Set up a separate seedling room. Apply the information in “Seedling Room” below.
Set up a separate clone room. Apply the information in “Clone Room” below.
Set up a separate mother room. Apply the information in “Mother Room” below.
Set up a vegetative garden room. Apply the information in the “Vegetative Room” below.
Set up a separate flowering room. Apply the information in the “Flowering Room” below.
Set up a separate post-harvest room. Apply the information in the “Post-harvest Room” below.
Indoor, Greenhouse & Outdoor Crop
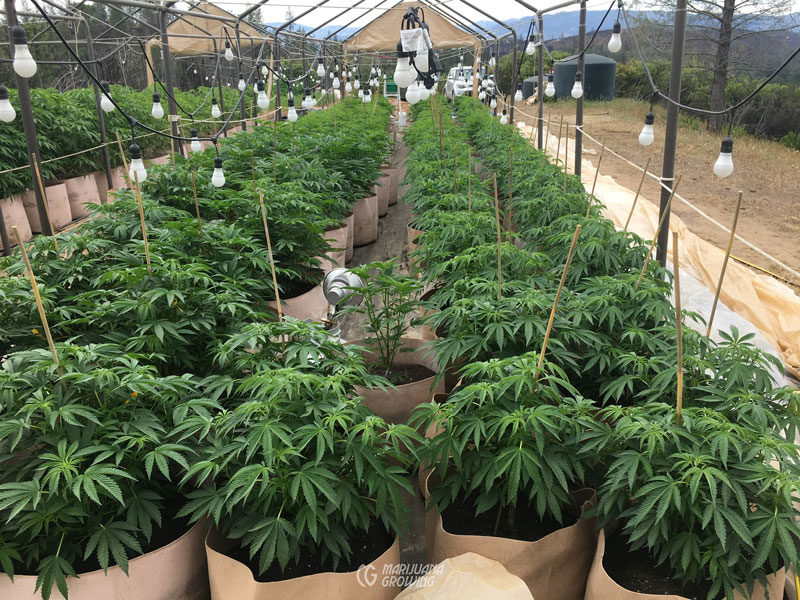
This outdoor garden in California started indoors under grow lights. Plants were transplanted into the greenhouse and the lights interrupted the nighttime dark cycle to maintain vegetative growth. The plastic you can see on the right is put back on the greenhouse at night to keep plants warm and protected.
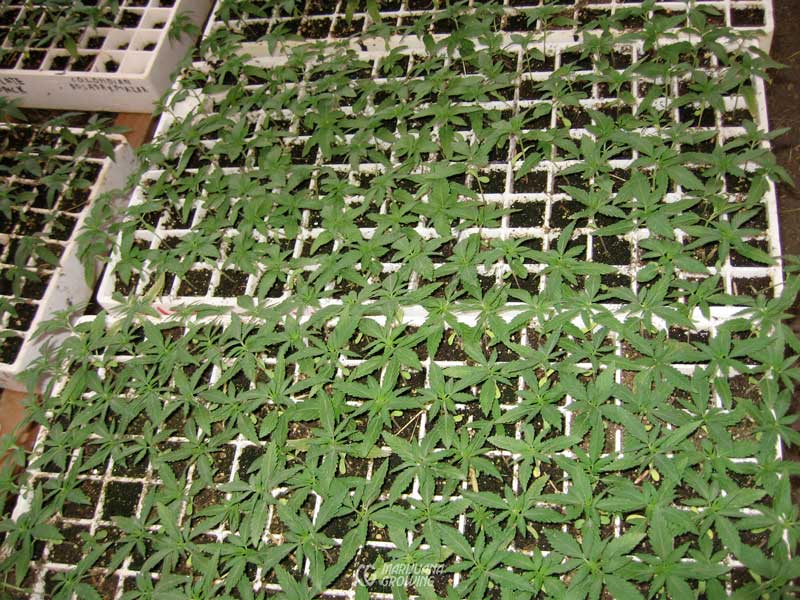
Start seedlings and clones indoors under lights and move them into a greenhouse or outdoors. Grow small plants to 6-24 inches (15-60 cm) tall before transplanting outdoors. Small plants must be hardened-off when they leave the protected indoor environment before making the final move to harsher outdoor and greenhouse environments.
Set up a separate seedling room. Apply the information in “Seedling Room” below.
Set up a separate clone room. Apply the information in “Clone Room” below.
Seed and Seedling Room
Size and siting: A seedling room is usually small and can be as simple as an enclosed box with ventilation and adequate light. Unless you are growing vast quantities of seedlings, a small area is all that is needed. Avoid growing seedlings on a countertop in the bedroom, garage and protected corner of the garden room. These locations have their own climates – temperature, humidity, ventilation, lighting, etc. Seedlings will have to conform to this climate and often get a poor start in life. Seeds and seedlings are most fragile and vulnerable during their first few weeks of life. A slow start could haunt them all the way to harvest.
Lighting: Seeds need darkness to germinate. Provide them with warmth, humidity and air only. Once seeds are planted in a growing medium and sprout through the soil, they need low levels of light. A fluorescent lamp or indirect sunlight is all they need for the first week after sprouting through the soil. Increase light levels to filtered sunlight or move the fluorescent lamp a little closer. You can add a low-wattage CFL bulb too.
Set timer to 16-hour days and 8-hour nights to promote more females and fewer males for regular seed varieties
Set timer to 18-hour days and 6-hour nights for feminized varieties and clones
Set timer to 20-hour days and 4-hour nights for auto-flowering varieties
Temperature: Seeds sprout best in a temperature range from 72-79ºF (22-26ºC). Warmer temperatures within this range usually speed sprouting. I like to keep temperatures at the ideal 75ºF (24ºC). Increasing bottom heat 2-3ºF (1-1.5ºC) speeds root growth.
Humidity: High humidity (90-100%) is necessary to moisten the outer shell to initiate germination. inside. Supply this humidity with a moist paper towel or similar material. Room humidity can be as low as 40-60%, but the moisture will evaporate quickly from the paper towel. Note: Seeds also need air, so do not soak them in water for more than 24 hours.
Air ventilation and circulation should be minimal during germination and seedling growth. Seedlings have a tiny fragile root system and are unable to withstand much wind. Air that moves a little and is not stagnant is perfect.
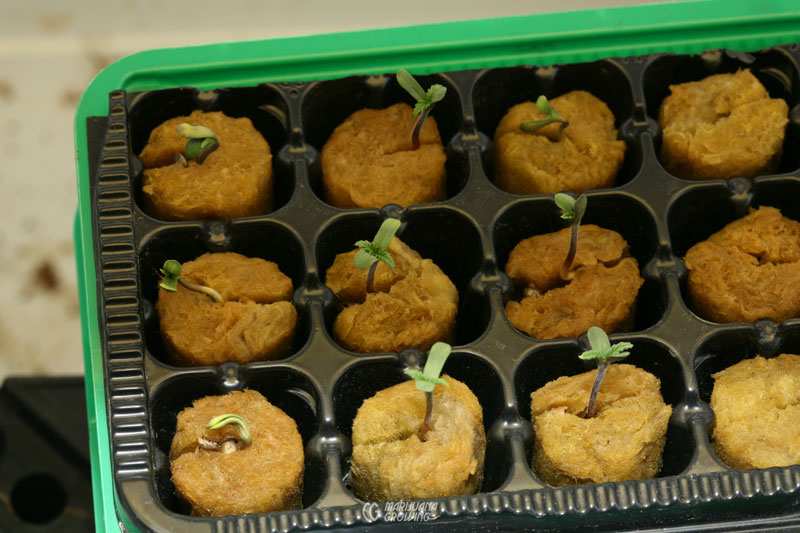
Rockwool rooting cubes hold a lot of air when saturated with water. They are easy to keep evenly moist for rapid seedling growth.
Water: Give germinating seeds and small seedlings distilled water or water with very low (<100 ppm) of dissolved solids and a pH between 6.0-7.0 for best results.
Nutrients: No nutrients are necessary for the first few weeks of growth. Some growers start fertilizing with a very mild nutrient solution after the third week of growth.
Growing medium: Transplant germinated seeds into a fine soil or soilless mix made for seedlings. These mixes hold a little more moisture to compensate for smaller growing containers, and the consistency allows roots to penetrate easily. Or transplant into preformed root cubes – Easy Plugs, Ellepots, Jiffy®, Oasis®, rockwool, etc. Use cubes that have similar water-holding-ability as the growing medium they will be transplanted into.
Containers: Small seed containers 1.5-2 inches (4-5 cm) across and 1.5-2 inches (4-5 cm) deep with a drainage hole are great if starting many seeds. Seedlings must be watered daily so the growing medium does not dry out. Grow in 4-inch (10 cm) pots if growing a few seedlings. Transplant germinated seeds into deep cell ((3 x 9 inches) 7-23 cm)) containers if you plan to transplant seedlings into Mother Earth outdoors or in a greenhouse.
Diseases and Pests: Damping-off rots seedlings at the soil line. Slugs, snails, and chewing insects are the main pests that attack seedlings. Seeds can carry diseases, and once germinated, diseases and pests can attack. Dip seedlings in a fungicide/pesticide solution when transplanting.
Commercial cannabis seeds must be shipped with a “phytosanitary certificate” that guarantees they are free of diseases and pests. Seed-producing females are often treated with fungicides so that they do not pass any pathogens along to seeds.
Kill any latent pathogens on seeds with a hot water treatment or soak in dilute hydrogen peroxide (H2O2). Hydrogen peroxide breaks down the outer coating on the seed and kills pathogens too. It is a chemical scarification of the seed to prepare for fast germination.
https://www.elevatedbotanist.com/grow-basics/seedgermination
Clone Room
Size and siting: A small clone room is necessary for small home gardens, but a big room is a must to produce many clones on a regular basis. A small setup can be as simple as an enclosed area with ventilation and adequate light. Large dedicated rooms are a must for serious clone production. You can section off a small portion of a vegetative or mother room to stick clones. The small separate area requires temperature, humidity, air circulation and ventilation and lighting control. Clones are most susceptible to drying out, disease and pests from the instant they are cut until they have developed a strong root system. As with seedlings, a slow start now can plague clones all the way to harvest.
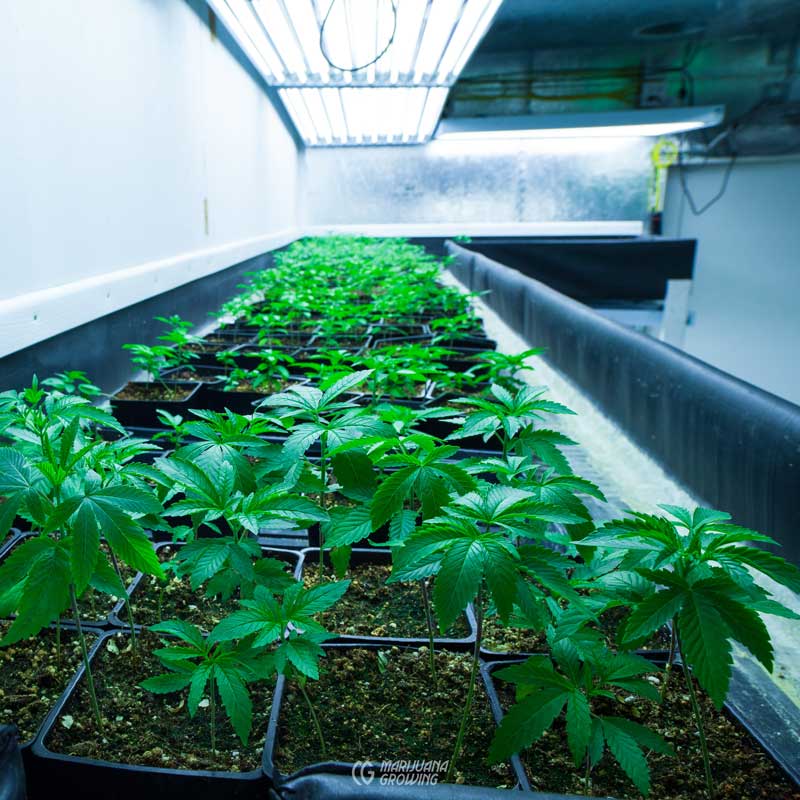
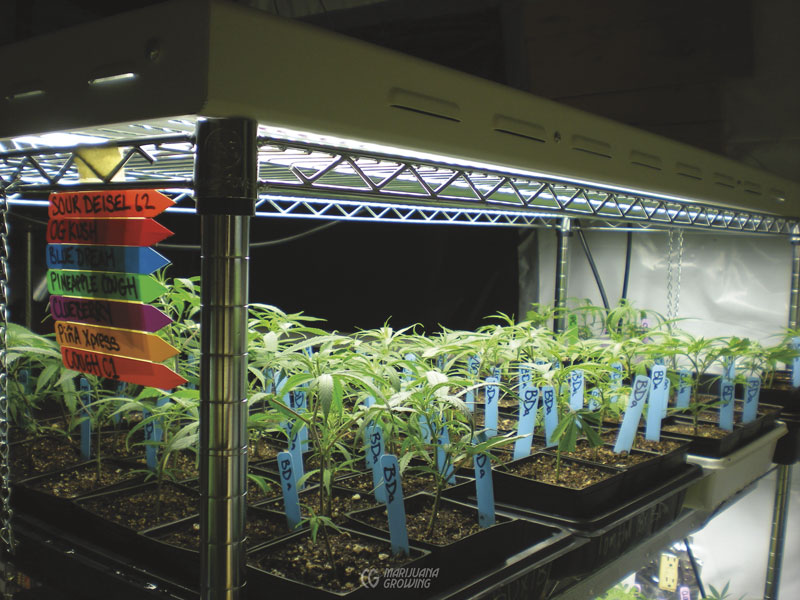
T-5 fluorescent tubes are fading away and being replaced by LED fixtures.
Lighting: Clones need low levels of light to survive while they are striking roots. Fluorescent lamps, low levels of CFL, LED lighting and ambient or highly filtered sunlight are all clones need to carry on life processes until they grow a strong root system. Once they have developed a strong root system, clones can utilize more intense light. After transplant shock has passed, clones can process light necessary for vegetative growth.
Set light timer to 18-hour days and 6-hour nights
Temperature: Clones root best in a temperature range from 68-78ºF (20-25.5ºC). Warmer air temperatures may not speed rooting. Keep temperatures at the ideal 75ºF (24ºC) for best results. As with seedlings, increasing bottom heat 2-3ºF (1-1.5ºC) speeds root growth.
Humidity: High humidity (85-95%) is necessary for the first couple of days after cutting and sticking clones. Place clones in a humidity tent or humidity-controlled room. They can handle lower humidity (70-85%) after the first 3-4 days because they are more acclimated to the environment.
Clones need a little air circulation and ventilation. Usually a humidity dome with at least two adjustable vents located on either side supplies enough natural airflow to be sufficient.
Water: Give rooting clones distilled water or water with very low (<100 ppm) of dissolved solids and a pH between 6.0-7.0 for best results.
Nutrients: Clones do not need any nutrients until after they are transplanted. Some growers start fertilizing with a very mild nutrient solution just before transplanting.
Growing medium: Stick clones into Ellepots or Easyplugs or into preformed root cubes – Jiffy®, rockwool, etc. You can also use fine soil or soilless mix that holds a little more moisture and plenty of air. The substrate must have plenty of air for clones to grow a strong root system. Use cubes that have similar waterholding- ability as the growing medium clones will be transplanted into.
Containers: Small seed containers 1.5-2 inches (4-5 cm) across and 1.5-2 inches (4-5 cm) deep with a drainage hole are great if taking many clones. Keep an eye on the medium, do not let it dry out and be careful to not overwater. Grow in 4-inch (10 cm) pots if growing a few clones. Take clones or transplant into deep cell ((3 x 9 inches) 7 x 20 cm)) containers if you plan to move them into Mother Earth outdoors or into a greenhouse.
Diseases and Pests: Diseases such as powdery mildew and damping-off are the two main pathogens that attack clones. Mother plants with powdery mildew pass it on to clones. Damping-off is typically the result of an overly moist growing medium. Dip clones in a sterilizing solution when transplanting. Any diseases and pests mother plants have are passed on to clones. Always start with clean disease- and pest-free mothers.
Mother Room
Size and siting: Mother plants need plenty of space to grow and should not be crowded. They are pushed very hard and live 6 months or longer. The extra space will help them stay healthy and avoid diseases and pests. Grow large mothers on tables and smaller plants can be grown on the floor.
Lighting: Mother plants need adequate CMH, MH or LED light for rapid growth.
Set timer to 18-hour days and 6-hour nights for regular and feminized varieties
Temperature: Vegetative plants grow best within a temperature range from 55-80ºF (13-27ºC). Keep temperatures from climbing beyond 80ºF (27ºC) to avoid internodal stretching in some varieties. Do not let day and night temperatures fluctuate more than 10ºF (5ºC) to promote faster growth. Water and nutrient usage change when overall temperatures are higher or lower for more than one day.
Humidity: A humidity range of 50-70% is OK for mother plants. Avoid higher (70%) humidity because foliage tends to turn soft and supple. Soft stems with soft foliage grow roots more slowly. Soft foliage is more susceptible to diseases and pests.
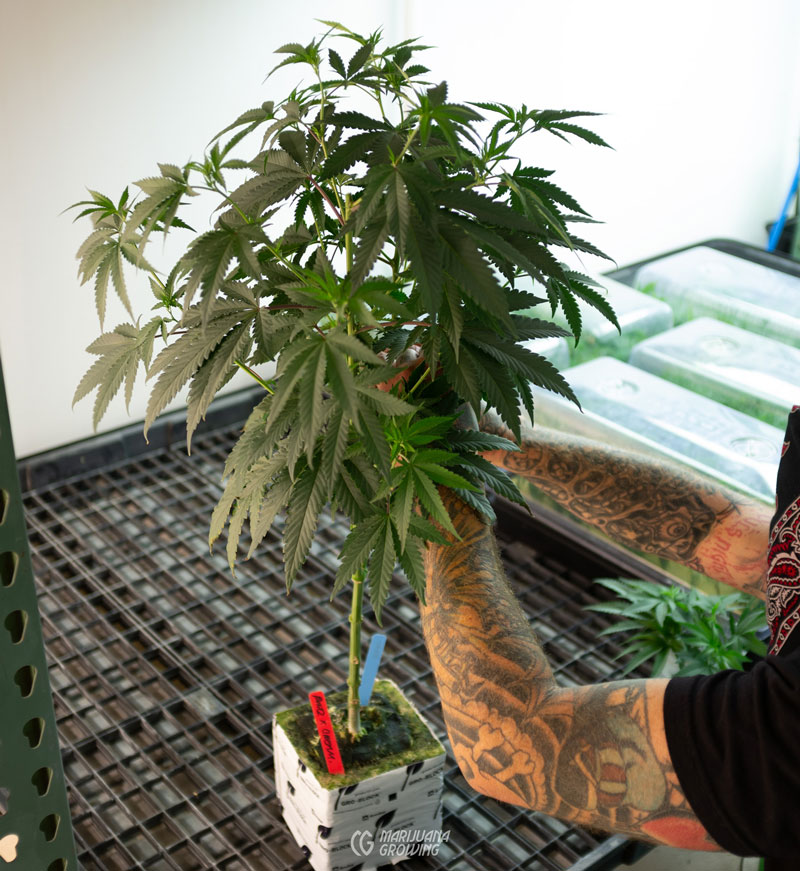
This mother plant will produce several crops of clones before she is flowered and harvested.
Air ventilation and circulation: Plenty of air circulation and ventilation is essential for mothers to grow fast and stay healthy. Diseases and pests are discouraged by good air flow. See “Vegetative Room” below for more information.
Water: Mother plants need low ppm water (<300) and pH around 6.0 for fastest growth.
Nutrients: Follow a regular nitrogen-rich nutrient application schedule. Nutrients must have all micronutrients AKA trace elements. Use the same brand or mix of nutrients throughout the crop. Change nutrient regimen only when deficiencies or excesses occur.
Growing medium: Mother plants love a substrate that drains quickly but holds plenty of moisture and air at the same time. Mothers stay in the growing medium 6 months or longer so compaction can be a problem. Add extra expanded clay pellets or perlite to the substrate to increase drainage and discourage compaction.
Containers: Grow mothers in air-pruning containers to promote a more profuse root system. More roots grow in a self-pruning container; smaller containers can grow bigger plants. Or grow mother plants in individual hydroponic containers so that they receive all the nutrients they need to keep them growing fast and strong.
Diseases and pests: Mother plants are in the ground 6 months or longer and are heavily abused by taking cuttings. Diseases, especially powdery mildew, and pests including spider mites, are common. Inspect mothers daily for disease and pest damage. Diseases and pests are passed on to clones when mothers are tainted.
Cultural problems: When a nutrient is deficient or the mother is sick, the malady is passed on to her clones. Keep mothers healthy by supplying her exact needs.
Vegetative Room
Size and siting: Vegetative plants are smaller and take up less space. The vegetative room should be about 0.25 (one quarter) the size of the flowering room. Allow enough space for plants to grow up to 3 feet (90 cm) tall if you plan to move them outdoors. Setting plants on the floor allows for more vertical growth and is less expensive than setting up on tables. Grow tables allow for easier plant maintenance and extra storage or growing space below tables. Reservoirs can also be set under tables.
Lighting: Vegetative plants need less light than flowering plants. CMH, MH and LED lamps all provide adequate light for rapid vegetative growth.
Set timer to 18-hour days and 6-hour nights for regular and feminized varieties
Set timer to 20-hour days and 4-hour nights for auto-flowering varieties
Air ventilation and circulation: Plenty of air circulation and ventilation is essential for mothers to grow fast and stay healthy. Diseases and pests are discouraged by good air flow. See “Vegetative Room” below for more information.
Water: Mother plants need low ppm water (<300) and pH around 6.0 for fastest growth.
Nutrients: Follow a regular nitrogen-rich nutrient application schedule. Nutrients must have all micronutrients AKA trace elements. Use the same brand or mix of nutrients throughout the crop. Change nutrient regimen only when deficiencies or excesses occur.
Growing medium: Mother plants love a substrate that drains quickly but holds plenty of moisture and air at the same time. Mothers stay in the growing medium 6 months or longer so compaction can be a problem. Add extra expanded clay pellets or perlite to the substrate to increase drainage and discourage compaction.
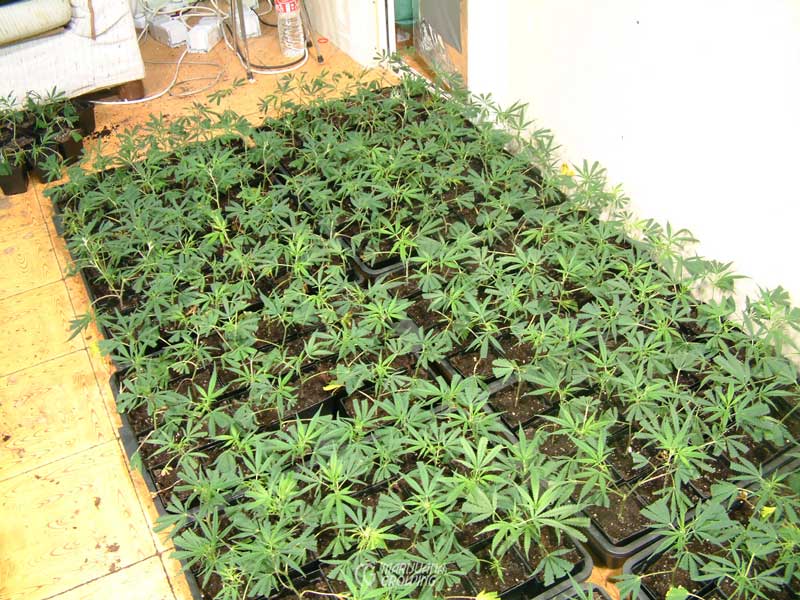
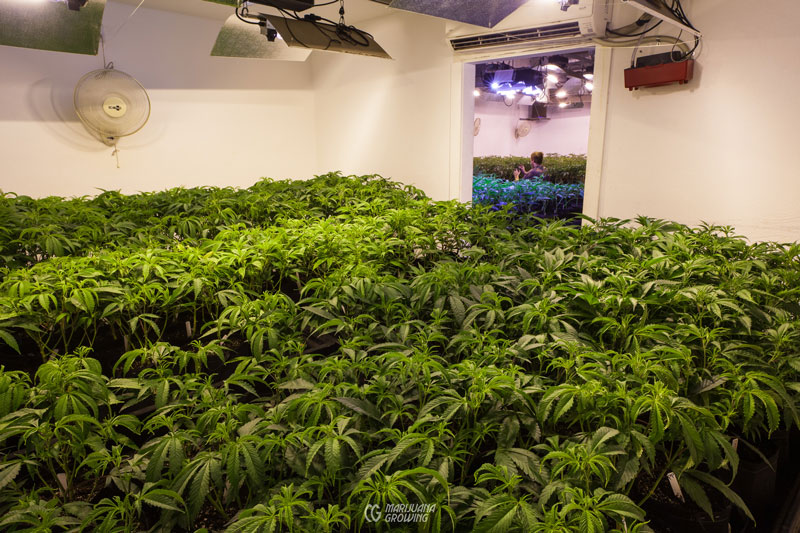
Large females in the foreground are leafing out and getting ready to move into the flowering room after providing several crops of clones. Small plants in the background will be moved outdoors in 30 days.
Containers: Grow mothers in air-pruning containers to promote a more profuse root system. More roots grow in a self-pruning container; smaller containers can grow bigger plants. Or grow mother plants in individual hydroponic containers so that they receive all the nutrients they need to keep them growing fast and strong.
Diseases and pests: Mother plants are in the ground 6 months or longer and are heavily abused by taking cuttings. Diseases, especially powdery mildew, and pests including spider mites, are common. Inspect mothers daily for disease and pest damage. Diseases and pests are passed on to clones when mothers are tainted.
Cultural problems: When a nutrient is deficient or the mother is sick, the malady is passed on to her clones. Keep mothers healthy by supplying her exact needs.
Flowering Room
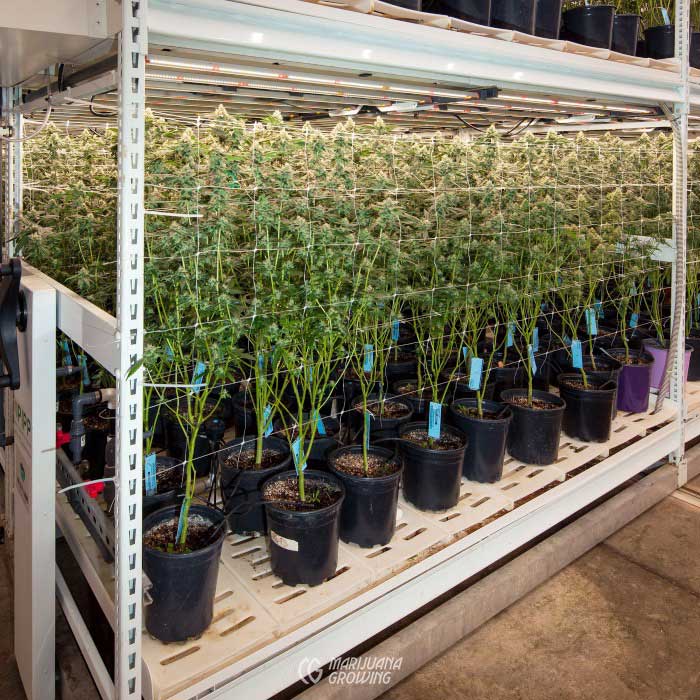
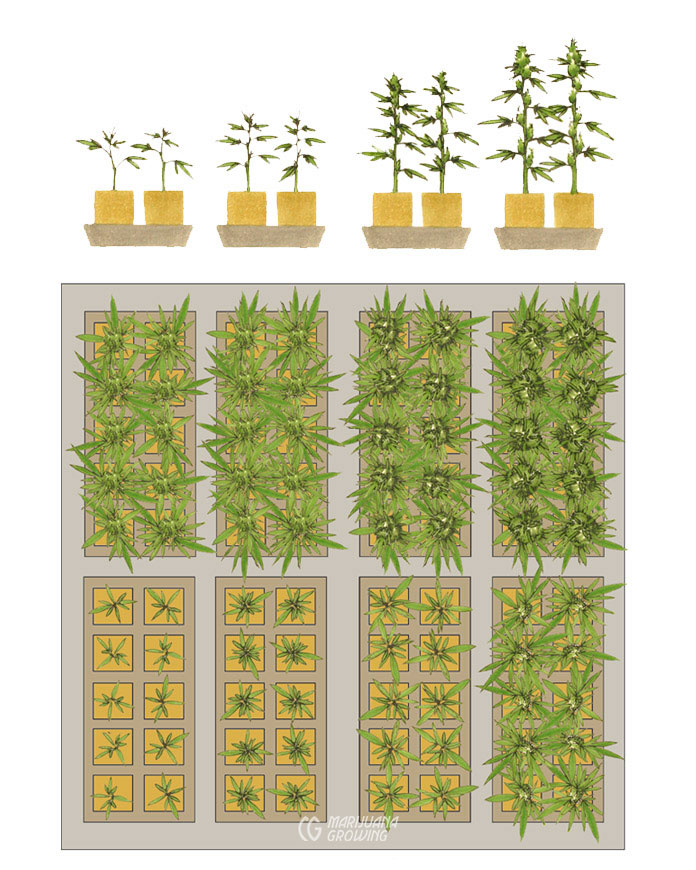
Size and siting: The flowering room should be about four times larger than vegetative room. Flowering plants will put on more foliage during the first 3-4 weeks of flowering especially when they are given more intense light. You can calculate 40 x 40 inches (100 x 100 cm) square per flowering plant that is 4 feet (120 cm) tall including the container. This flowering room gains double the space by stacking plants on two levels.
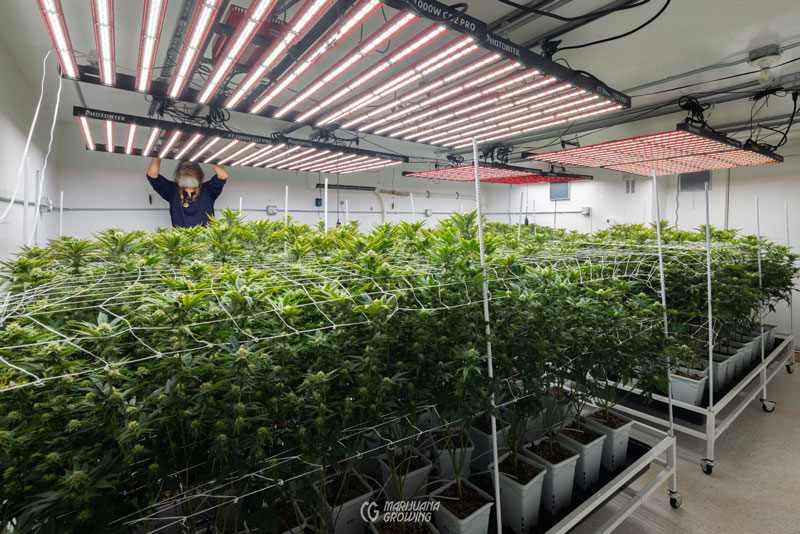
Lighting: Ideally you are using LED grow lights. New LEDs are substantially more efficient than all other grow lights including HIDs and CFLs. Add a HPS bulb if you are using a CMH or MH bulb. Add one 600w HPS for each 315 CMH. Add one 1000w HPS for each 630w CMH or 1000w MH bulb. Or change out your MH for a HPS of equal or greater wattage.
Set timer to 12-hour days and 12-hour nights to induce flowering for regular and feminized varieties.
Set timer to 18-hour days and 4-hour nights for autoflowering varieties.
Temperature: Flowering cannabis grows best with 55-80ºF (13-27ºC), with the ideal at 75ºF (24ºC). Drastic temperature fluctuations cause stress and slow growth.
Humidity: Flowering cannabis loves a humidity range from 40-60%. This range keeps most mold and diseases at bay. Remember charcoal filters clog and stop filtering out fragrances when relative humidity climbs above 80%. Humidity climbs at night when lights go out. Extra venting is often necessary.
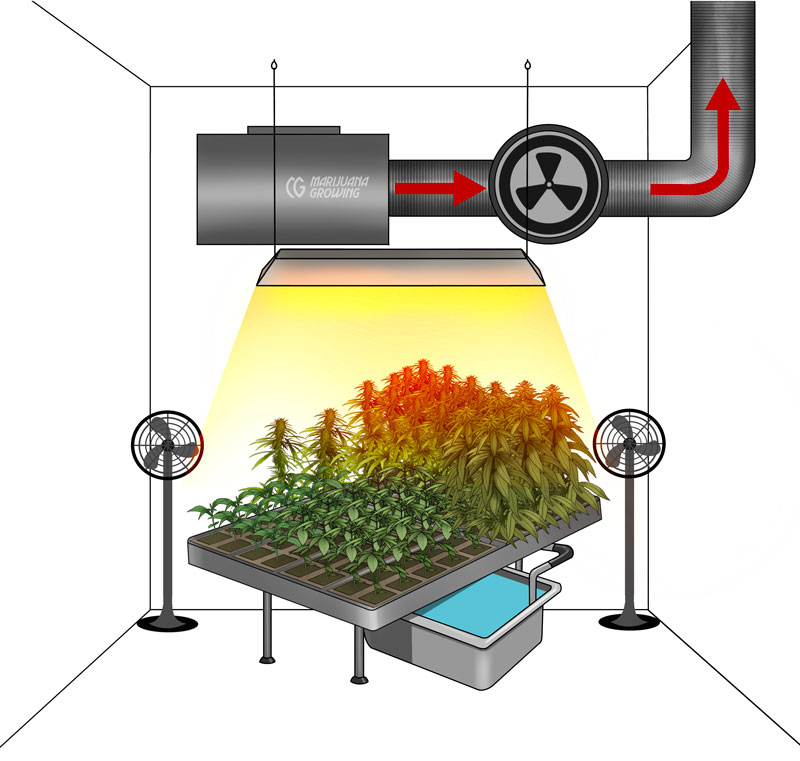
Air ventilation and circulation: Air movement keeps CO2-rich air available around foliage. Ventilation carries off fragrant CO2-depleted air and brings in new CO2-rich air to grow big flowers. Changing the air every minute in grow rooms keeps fragrance under control too.
Water: – Flowering plants use a lot of clean water. Check plants daily and irrigate as needed. Use a moisture meter to check for dry soil pockets.
Nutrients: Follow a regular phosphorus- and potassium-rich nutrient application schedule. Bottlednutrient formulas must have all micronutrients AKA trace elements. Use the same brand or mix nutrients throughout the crop. Change nutrient regimen only when deficiencies or excesses occur.
Growing medium: Use the same growing medium as for vegetative plants.
Containers: Use the same containers as for vegetative plants. Do not transplant plants when moving from vegetative room to the flowering room.
Diseases and pests: Kill or stop any and all diseases on flowering plants as soon as they are noticed. Always use the least toxic way to control plagues. Inspect flowers and other foliage daily carefully so that you catch all problems immediately.
Cultural problems can get out of hand easily during flowering. Be very careful during vegetative growth to solve all cultural problems. Cultural problems that carry on into flowering are well entrenched and may take longer to remedy.
Post-harvest Room
Size and siting: Hanging plants and branches take up the most space. Hang branches 2-3 levels high if space and access permits. Hanging net baskets make most efficient use of space. Each hanging net shelf can hold about a half pound (230 gms) of manicured flowers. Site drying room in a cool location that is easy to regulate the temperature.
Lighting: Minimal lighting is necessary in a drying room. Plants do not need light to dry. Bright light and heat degrade drying cannabis. If trimming tables are located in the drying room, use small directional lights to illuminate the manicuring area.
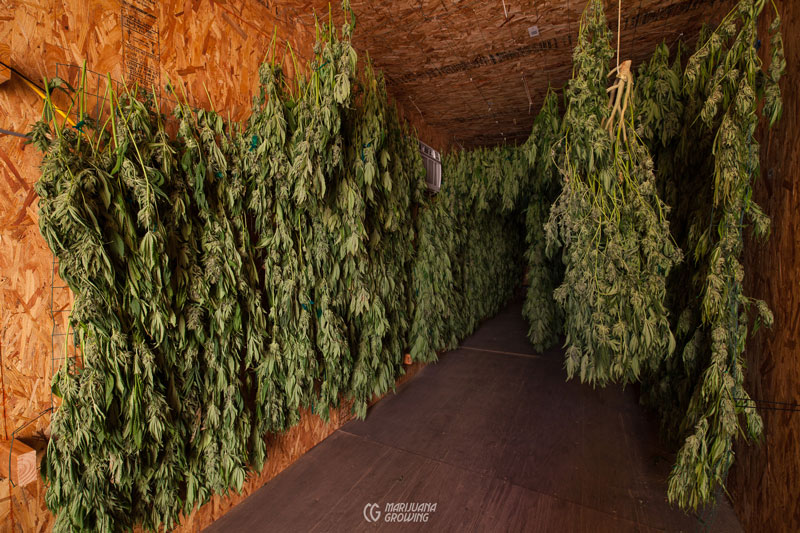
Hanging cannabis branches and complete from drying lines is a simple low-tech method that takes more space.
Temperature: Cannabis dries best in a temperature range of 55-70ºF (18-21ºC). Cannabis dries too fast at temperatures above this range. Higher temperatures also liberate more of the fragrances. Lower temperatures cause it to dry too slowly.
Humidity: The ideal humidity range to dry cannabis is 55%. This humidity range will let it dry quickly enough to remove moisture, pigments, and other substances from stems, flowers and foliage. Fungus can become a problem in humid rooms. Adequate air ventilation and circulation are essential. The room may need a dehumidifier if ventilation is inadequate.
Modern drying practices have a low humidity (40%) for the first few days, to draw moisture from thick foliage and stems. Then humidity is ramped up to 65%, during the next 2-3 weeks. And reduced once again to 40% to finish the drying process.
Air ventilation and circulation: Constant air ventilation and air circulation 24/7 are necessary.
If fragrance becomes an issue, set up a charcoal filter fan to clean the air before expelling.
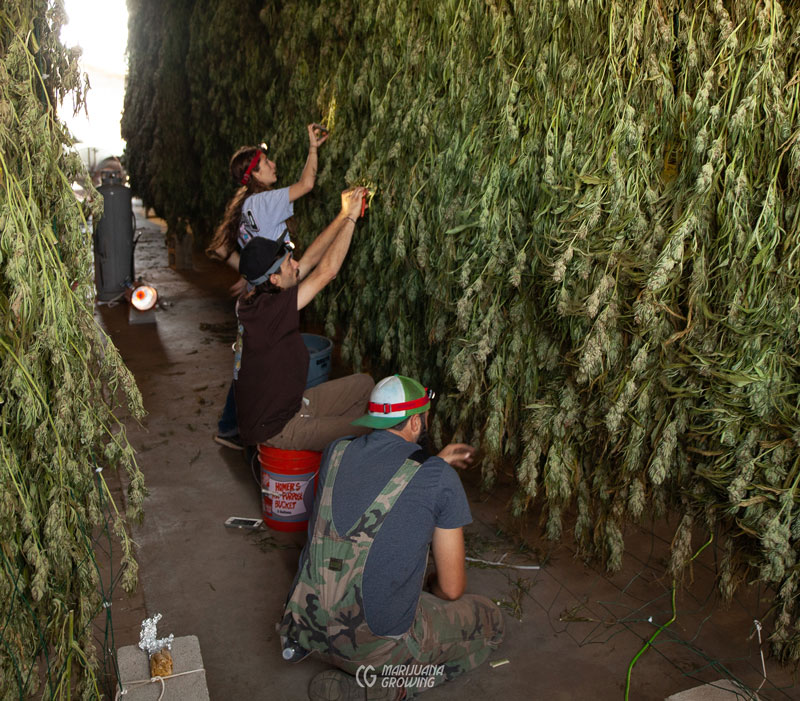
Diseases and pests: Fungus is the main disease that attacks drying cannabis. Avoid problems by following temperature and humidity recommendations above. Caterpillars and insects will drop to the floor from hanging plants. Corral them below hanging plants with sticky traps or spray the floor intermittently. Smear the ends of drying lines with sticky traps to contain spider mites and other insects. They bunch up at the end of the lines. You can smash them all at once every couple of days. Most pests are not interested in attacking drying cannabis.

Drying: Hang branches or in the worst case scenario, entire plants, from drying lines. Allow plenty of air in between hanging branches for air circulation. Hang net shelves to dry manicured buds. Hanging net shelves make the absolute best use of drying space. Two- and three-foot-wide shelves can hang closely together. Turn flowers on net shelves daily so that they dry evenly and do not have a “flat” side.
Manicuring: Set up folding manicuring tables and chairs as needed. Set tables up outside the drying room if possible.
Storage: Designate a clean, cool, dry, dark, place to set storage containers. Keep the storage area temperature below 60ºF (15.5ºC) and humidity as close to 40-50% as possible. Store harvested cannabis in labeled airtight containers. Label with name of variety and date harvested. Include any other pertinent details on the label too.
Clean up before planting the next crop. Harvest should be well-planned so that ripe plants are cut and removed from the garden area for processing. Remove all debris on the floor and on growing beds. Containers full of growing medium should be removed and separated. Scrub containers with soap and water. Compost used soil. Once the growing area is completely clean, move in new seedlings or clones.
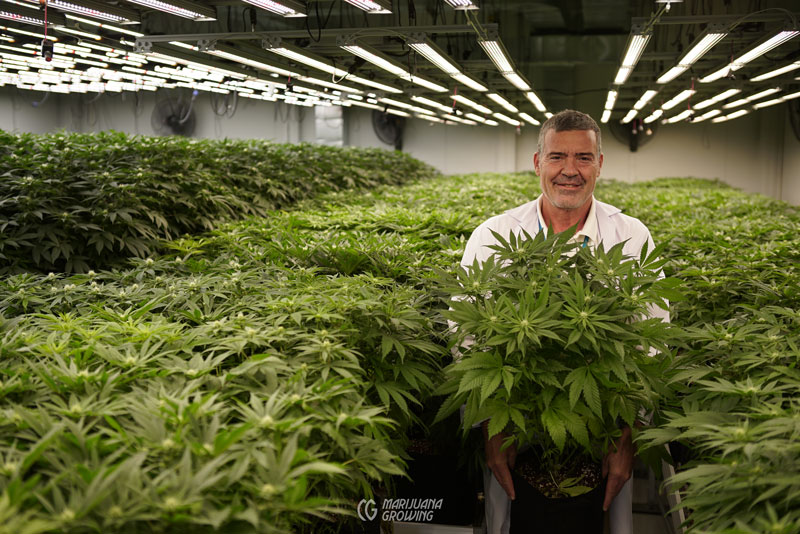
Jaime Carrion, breeder of Cannatonic, displays medicinal cannabis plants he grew with Golden Triangle Group in Thailand.