Introduction
Your goal as an indoor gardener is to supply your cannabis garden with the maximum proportions of light, air, water, nutrients and a substrate. Cannabis can grow to its fullest potential when given all of these essentials.
Each and every element, light, air, water, nutrients and growing medium must be functioning at 100% efficiency. If one element does not perform at 100%, all suffer. For example, if air is working at 80%, ALL elements suffer and cannot break the 80% barrier.
Keep these basics – light, air, water, nutrients and growing medium – in mind when setting up your grow room so that you can use all the natural advantages available. Site the grow room where it stays naturally cool with easy outlets for air ventilation. Nearby electrical outlets for lights, fans, timers, etc. are essential. A wáter source attached to a hose will save much manual labor. Setting up a low maintenance grow room will keep both you and your garden healthy and happy.
This chapter shows you how to set up your grow room so that lights, fans, water, nutrients and substrate function properly. They supply light, air, water, nutrients and a substrate to anchor cannabis plants for maximum growth.
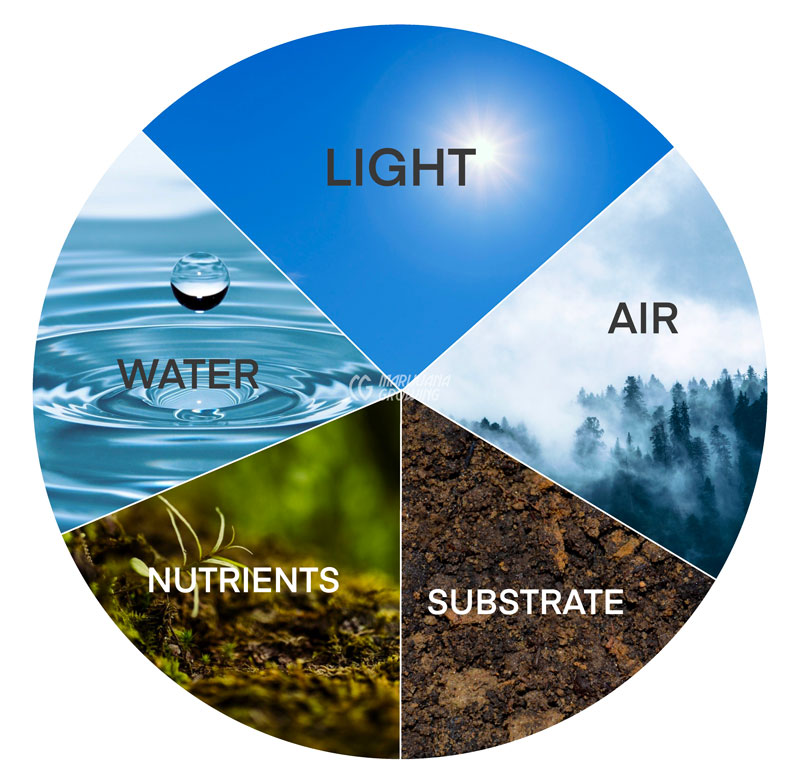
Remember these five (05) essential variables with the acronym “LAWNS” – Light, Air, Water, Nutrients, Substrate. You must control each of these essentials to harvest a heavy cannabis crop.
Light 20%
Photoperiod
Intensity
Color spectrum
Air 20%
Temperature
Humidity
CO2 content
Water 20%
pH
EC
Oxygen content
Temperature
Nutrients 20%
Composition
Purity
Substrate 20%
Structure
Moisture content
Air content
Each and every element, air, light, water, nutrients and growing medium must be functioning at 100% efficiency for photosynthesis to occur in cannabis. If one element does not perform at 100%, all suffer. For example, if air is working at 80%, ALL elements suffer and cannot break the 80% barrier.
Site Garden Rooms and Postharvest Room
Small garden rooms can be located in an easy-toaccess sunroom or windowsill if growing seedlings or clones will move outdoors. Larger garden rooms are typically sited in an out-of-the-way space with little or no traffic. A corner of the basement or a spare bedroom that is not frequented by children, pets and other people, is perfect. Enclosed rooms are easiest to control. The room will need an entrance and exit for ventilation and electric service. A water source and floor drain will add much convenience and lower setup expenses. A door that locks will keep out unwanted people and pests.
Post-harvest drying and processing rooms need electric service and ventilation capabilities.
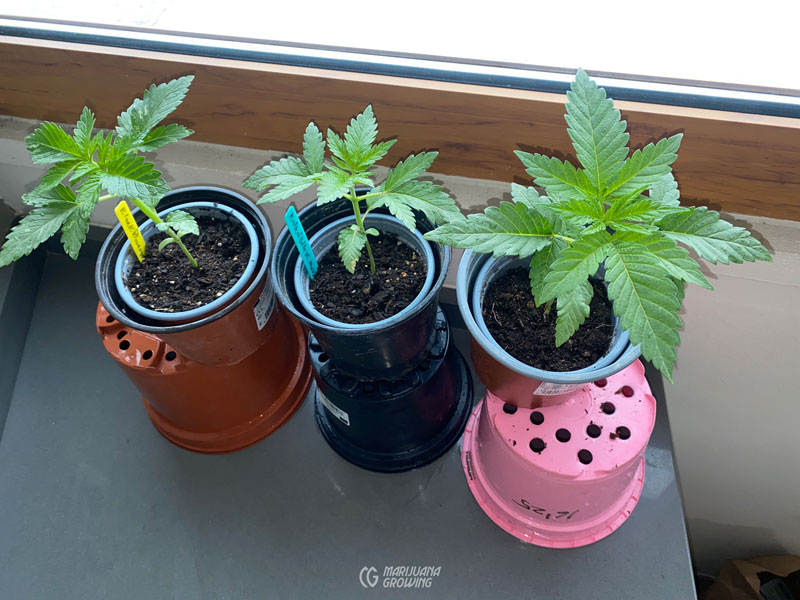
Windowsills and sunrooms are excellent spaces to start plants that will be moved outdoors. Plants must receive 5 hours of direct sunlight to grow well. A small sunny space is all you need to set small plants so that they can grow big enough to move outdoors.
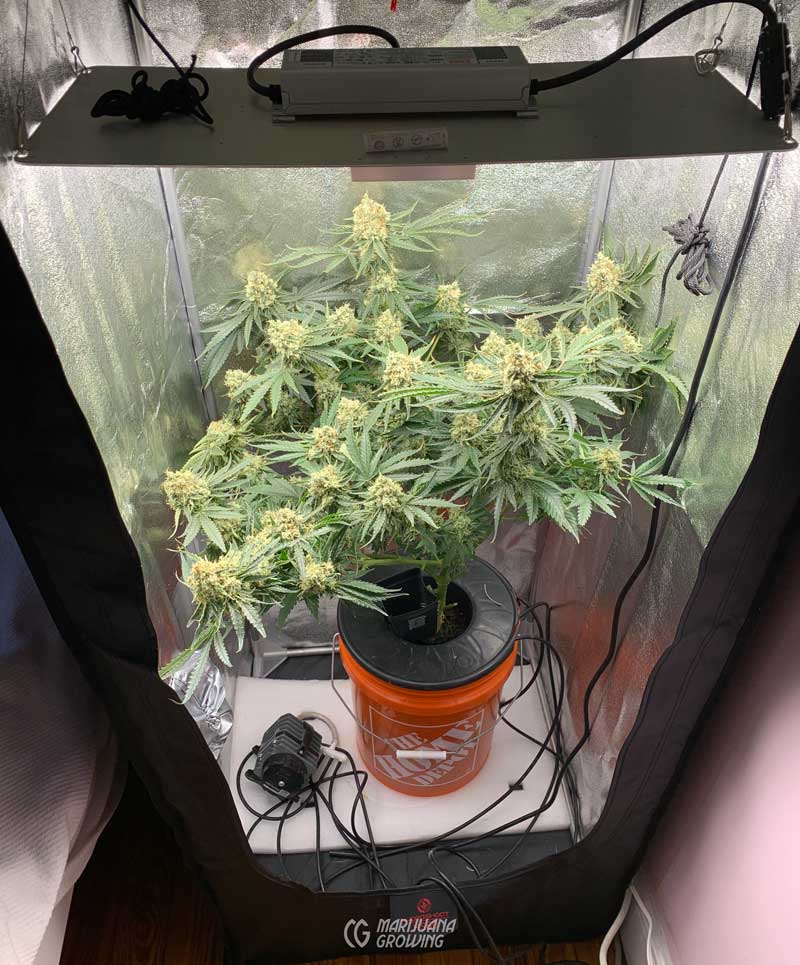
Grow tents offer a simple and easy grow space. There are a few details
Grow tents or closets are a great value for many indoor and outdoor home gardeners. Grow closets are relatively inexpensive and they can be shipped directly to your home. They are freestanding and can be set up in any room in or near the house. When you figure the cost of grow room construction in your home and the cost of a grow closet, the closet is usually more economical. You will still need electricity, openings in the room for ventilation in and out. A water source will also save you time and energy.
Basements are often a perfect location for a garden room. Temperatures are easy to keep constant in an underground, earth and concrete insulated grow room. Usually equipped with water supply and drainage. In hot climates, a subterranean room may be the only place you are able to grow. The basement must be clean and dry. Dank humidityladen basements require extra ventilation to expel moist air. Patch all cracks in walls and floor. Paint walls with a waterproof paint so that moisture does not bleed through walls. Premium paints are epoxy-based and manufactured with a fungus inhibitor. A quick internet search for “antidamp paint” will turn up many options.
Main floor grow rooms are usually plumbed for heating with hot air vents. Some homes may have central air conditioning. A window in the room provides a ready-made opening for air ventilation. Locate the main floor grow rooms next to a bathroom, laundry room or kitchen so water source is readily accessible. Always site the garden in the coolest room in home to minimize temperature fluctuations.
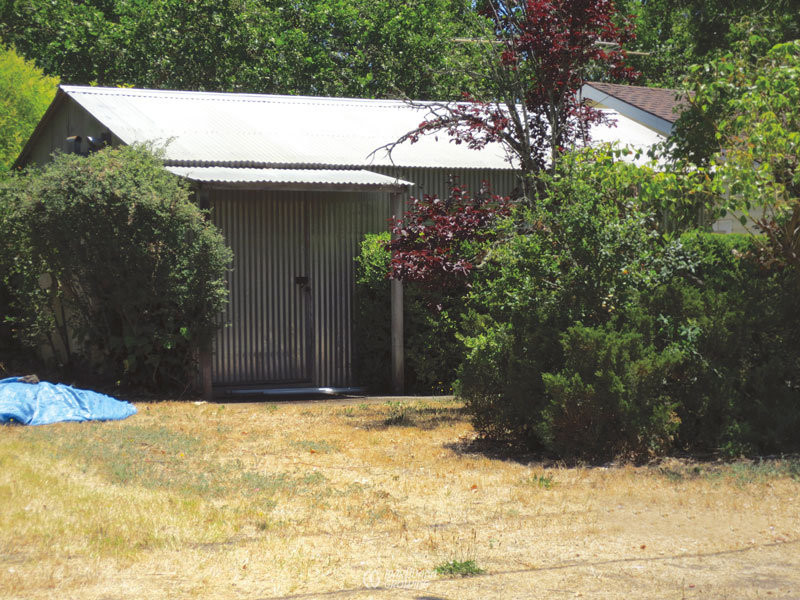
Outbuildings, including garages, workshops and barns, not attached to homes may need to be insulated to keep the temperature constant. The room will need openings for ventilation, a water source and water draining capabilities. Electrical service is essential. A water source will lower the workload. You can grow plants on a trailer and move it out into the sunshine during the day. This is an excellent way to harden-off clones and seedlings that will move outdoors.
Conex containers make great grow rooms and drying rooms. Steel containers are less expensive, but they get hot in direct sunlight and very cold when outdoor temperatures freeze. Burying the container will keep temperatures more consistent but add expense of burying. Aluminum conex containers were used to move perishables and are insulated. Temperatures are easier and less expensive to regulate in an aluminum conex. Both aluminum and steel containers have wooden floors. You can drill holes in the sides and floor to fasten shelves and partitions. Inspect containers before purchasing for holes. Conex containers are easy to sell too.
Used mobile homes are insulated and inexpensive. They already have electrical service, heating and cooling ducting, and plumbing. Moving an old mobile home requires a Highway Department permit. Contract a professional moving company about moving details.
They get the permit, park it where you want, are insured and possess the required truck and special tools for the job. Older models may not comply with local electricity standards. You can gut the inside and assemble grow rooms. Standard widths are 8, 12 and 14 feet (0.90, 3.5, 4 m) wide. Double-wide mobile homes can be up to 28 feet (8.5 m) wide. Make sure to get the necessary permits and inspections before setting up your legal garden.
Attic garden rooms are a last resort if no other space is available. Typically, attic rooms are difficult to access and have no piped in water supply or drainage. Attics are usually hot during the summer when sunlight hits the roof and cold during the winter, especially when snow accumulates outside. If you have something to hide, grow in the attic.
Enclose the Garden Area
Remove everything that does not pertain to the garden. Furniture, curtains, books, etc. will accumulate moisture and could harbor diseases and pests. An enclosed room allows easy, precise control of everything and everyone that enters or exits, as well as who and what goes on inside. You can enclose the room by framing some plywood or even fabricating white plastic walls in the designated area. Turn on a light inside the room and check for cracks – light leaking outside the room. Insulate windows so that the temperature is easier to keep constant in the room. I have done several YouTube videos that show how to enclose and construct a grow room.
Prefabricated grow closets are a convenient alternative to spending time and energy constructing a grow room. A quick internet search for “grow closet” will net millions of results. Make sure to read the reviews and all the details about grow closets before investing.
White-out Walls, Ceiling and Cover Floor
Cover walls, ceiling, floor–everything–with a highly reflective material like flat white paint or reflective Mylar. The more reflection, the more light energy available to plants. Good reflective light will allow effective coverage of grow light to increase from 10% or more, just by putting a few dollars worth of paint on the walls. Reflective white Visqueen® plastic is inexpensive and protects walls and floors.
Ideally, the floor should be concrete or a smooth surface that can be swept and washed down. A floor drain is very handy. In grow rooms with carpet or wood floors, a large, white painter’s drop cloth or thick, white Visqueen® plastic, will protect floors from moisture. Trays placed beneath each container add protection and convenience.
Specially designed paints for damp conditions contain a fungicide and are attracted by moisture. When applied to a damp, cracked wall, the paint is drawn into the moist crack to seal it off, preventing moisture from entering. An internet search for “moisture resistant paint” and “paint for moist basement” will show you available products. Wash walls with a 5% bleach solution to ensure they are clean.
Lighting and Electricity
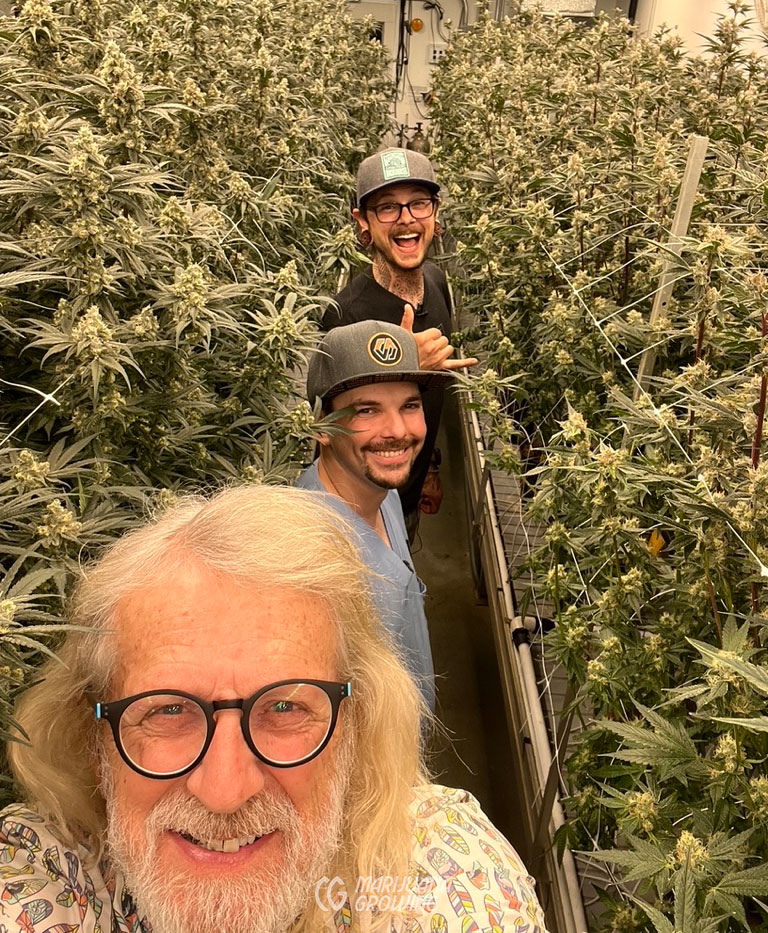
Fluence LEDs illuminate this super productive indoor cannabis garden at Shango Farms in Portland, Oregon. Casey Rivero and head grower Josh are leading the tour.
Typically, hobby growers spend $100-$500 for a single grow light fixture that covers a 3 x 3-foot (90 x 90 cm) or a 4 x 4-foot (120 x 120 cm) area. Mounting heights vary from 1-3 feet (30-90 cm) depending upon the design of the LED fixture. The fixture must supply adequate amounts of usable light for cannabis growth over the entire garden canopy. Start with the highest rated PPFD (μmols/m2/second) LED light fixture you can afford. Look for μmols/m2/second above 2.0 for best results.
Measuring usable light for cannabis growth can become complex and confusing. To simplify a few complex measurements, I have condensed this information so that it is easy to understand. You will need to know the active growing area of your grow room, the height of the grow light fixture, the efficiency of the fixture and the hours the light is on. Area – Square feet (m2) of grow room – length x width, light footprint – the physical area covered by light
Height of fixture – 1, 2, 3 feet (30, 60, 90 cm)
Watts of electricity – LEDs use 40% less electricity than HID, CFL, etc.
Grow light efficiency – measured in PAR, PPFD of 2-2.7 μmol/J for your grow
Hours of light – Photoperiod 18/6 veg, 12/12, 13.5/10.5 flower, Auto-flower 20/4 veg & flower
Many manufacturers, like www.MIGRO.com provide all the information you need – area, mounting height, usable light for plant growth and wattage of grow light fixture. The manufacturer will provide the correct mounting height for the area covered to illuminate the area with the optimum amount of light for plant growth. The information below summarizes the main points you need to know.
Area – Measure the square feet or m2 (length x width = sq ft (m2)) of the active garden area to be illuminated by grow lights. This is the area to be illuminated by the grow lights. Light that does not fall on plant foliage – walls and floor – is wasted.
Height of fixture – Hobby LED grow light fixtures are usually designed to be mounted at 1, 2 or 3 feet (30, 60, 90 cm) above the garden. When mounted at 1 ft. (30 cm) light reaching the canopy of the garden is bright, but the footprint is fairly small. As the mounting height increases, light coverage (footprint) increases and light intensity decreases.
Measuring PAR
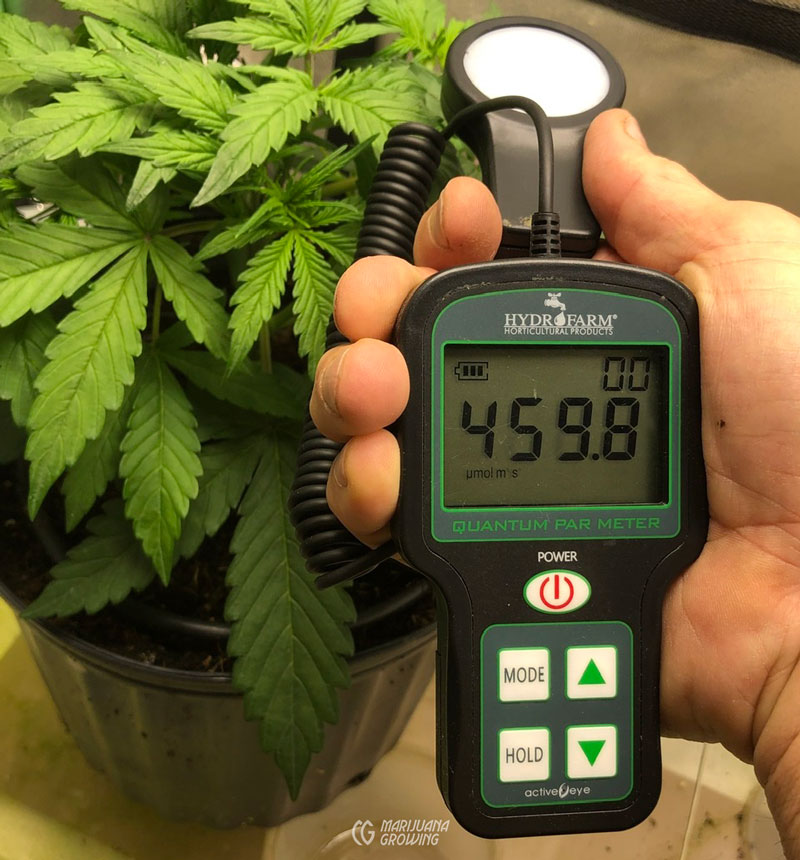
The best way to ensure cannabis plants receive enough usable light for growth is to measure it. A quantum sensor (AKA PAR meter) accurately measures Photosynthetically Active Radiation (PAR). Quantum sensors cost a minimum of $300. A quantum sensor measures individual photons in the PAR range at a single point. The measurement is recorded as Photosynthetic photon flux density (PPFD).
Smartphone apps for IOS and Android are accurate to a range of about 10% at measuring PAR/PPFD. Inexpensive lux and foot candle meters can also be used with a conversion factor. You can find the conversion factor charts at www.migrolight.com.
Photosynthetic photon flux (PPF) is the amount of PAR (number of photons between 400 and 700 nm) emitted from a lamp per second. The unit is micromoles (μmol) per second (s), abbreviated μmol•s-1 or μmol/s. This value is usually measured in a lab with an integrated sphere, which measures the total photons emitted from a lamp.
Photosynthetic photon flux density (PPFD) is the PPF incident upon a square meter (m2) with units of μmol•m-2•s-1 or μmol/m2-s. The PPF and PPFD are often used interchangeably and debate continues among plant scientists and engineers about which term is “correct.” To avoid ambiguity, concentrate on the unit; if m2 is included, then the value refers to the intensity of PAR at a surface, which is usually measured at the top of a plant canopy. If m2 is not included, then that refers to the total amount of light emitted from a lamp (the PPF) and not the intensity at a particular location (the PPFD).
Hours of light – Photoperiod cannabis plants require 12-13.5 hours of light to induce and maintain flowering. You must use more intense grow light so supply all of the necessary light for rapid growth. Auto-flower cannabis can be given 20 hours of light during flowering. You can give auto-flowering cannabis less intense light for more hours to fulfill the Daily Light Integral (DLI) so that big fat flowers form. More hours of light pro.
Watts of electricity – High quality LED grow light fixtures produce almost twice as much light as High Intensity Discharge (HID) lights for the same amount of electricity consumed. Once PPFD is determined, watts-per-square-foot (Wm2) are a useful unit of measurement.
If your grow space is not a standard size you can calculate the area and the corresponding wattage to provide the PAR intensity with the table in the section ‘grow light wattage guide’.
Recommended PAR intensity
Seedling stage
Both auto-flower and photoperiod cannabis seedlings (under three weeks old) need low-PAR intensity of about 250 μmols/m2/second. A lower PAR intensity prevents fragile plants from being damaged by bright light.
Vegetative stage
For photoperiod plants older than the seedling stage or about 3 weeks we recommend a PAR intensity of about 500μmols/m2/second and increase evenly through the vegetative stage up to 900 μmols/m2/second when switching over to flowering.
Auto-flower older than the seedling stage or about 3 weeks old we recommend PAR intensity to about 300μmols/m2/second and increase through the vegetative stage up to 550 μmols/m2/second when switching over to flowering.
Flowering stage
Photoperiod flowering cannabis illuminated 12 hours per day needs to receive 500-1000 μmols of PAR light for every m2 (PPFD) to flower properly, lower levels of PAR light slow rapid growth. Higher PAR intensity does not increase growth rates enough to justify the extra energy cost.
Auto-flowering cannabis needs a lower maximum PAR intensity of about 550μmols/m2/second. This is explained and detailed later in this chapter.
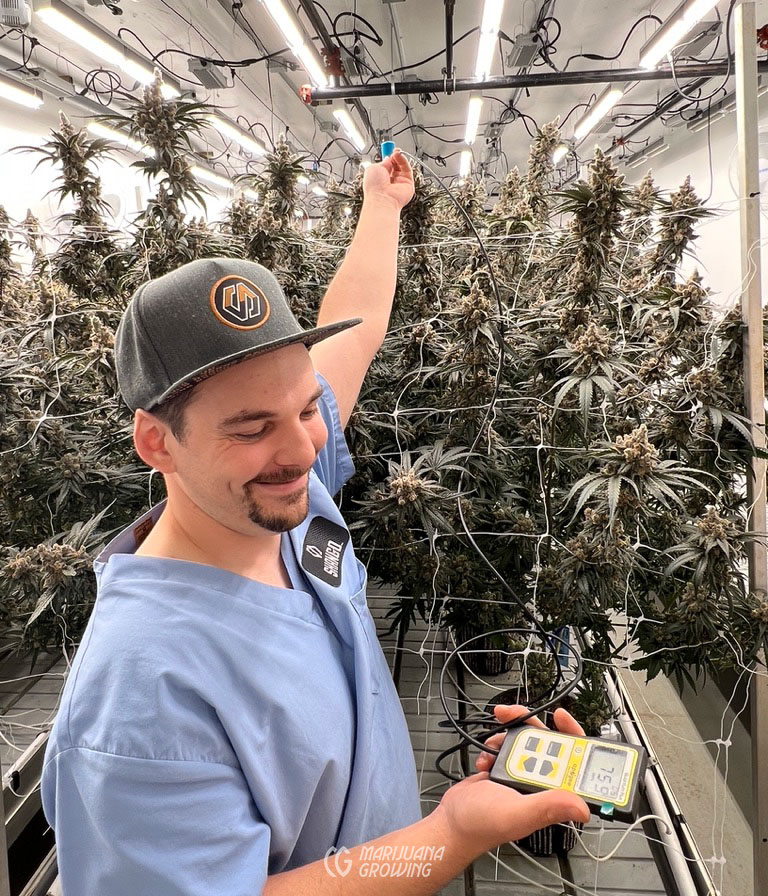
Head grower, Josh from Shango Farms in Portland Oregon demonstrates high PAR value of Fluence LED grow lights.
Daily Light Integral or DLI
Daily light integral (DLI) describes the number of photosynthetically active photons (individual particles of light in the 400-700 nm range) that are delivered to a specific area over a 24-hour period and is measured in moles of light (mol photons) per square meter (m−2) per day (d−1), or: mol·m−2·d−1.
An average PAR intensity of 900 μmols/m2/second will deliver 900 x 60 seconds x 60 minutes x 12 hours = 34.56 Mols/m2/day.
Overall, the maximum PAR most plants can absorb in a day is about 50 mols. Above 40 mols, growth rate decreases. However using elevated CO2 can enable more efficient absorption of high PAR intensity above about 45 Mols.
PAR intensity for Autos and Photoperiod plants
Photoperiod flowering cannabis that receives only 12 hours of light per day must take in the entire DLI necessary in 12 hours. This requires very high PAR levels of light. The average PAR of up to 900 μmols/m2/ second is necessary to maximise the potential yield.
Auto-flowering cannabis can flower under 20 hours of light per day. Auto-flowering plants require lower levels of light during flowering to reach their DLI. The average PAR of up to 550 μmols/m2/second is necessary to maximise the potential yield.
Grow Light Wattage Guide
Photoperiod flowering cannabis requires 900 PAR to achieve a DLI of 40 In 12 hours. Photoperiod and feminized cannabis plants require 12 hours or more of uninterrupted darkness to flower. This leaves only 12 hours of daylight or artificial light to supply the DLI.
Regular – 12-hour days
| Grow Light | Efficiency | Target PAR | DLI 12 hrs | Watts/m2 | Watts/sq ft |
| White Red LEDs | 2,4 | 900 | 40 | 330 | 30 |
| White LEDs | 2 | 900 | 40 | 400 | 35 |
| Blurple LED | 1,4 | 900 | 40 | 600 | 50 |
| HPS | 1,4 | 900 | 40 | 600 | 50 |
| Fluorescent | 0,7 | 900 | 40 | 1150 | 100 |
Auto-Flower – 20-hour days
| Grow Light | Efficiency | Target PAR | DLI 12 hrs | Watts/m2 | Watts/sq ft |
| White Red LEDs | 2,4 | 550 | 40 | 230 | 20 |
| White LEDs | 2 | 550 | 40 | 280 | 25 |
| Blurple LED | 1,4 | 550 | 40 | 400 | 35 |
| HPS | 1,4 | 550 | 40 | 400 | 35 |
| Fluorescent | 0,7 | 550 | 40 | 800 | 75 |
Measuring grow light intensity at the canopy of the garden will tell you exactly how much light is available for plant growth.
Air Ventilation and Circulation
Air ventilation and circulation: Good air flow inside the room is essential to keep air from stratifying in the room and around foliage. Adequate air circulation also discourages diseases and pests. Changing the air in the room is essential to allow a fresh supply of CO2 and to expel stale used air. Ideally, the air in a smallto- medium-size grow room should be replaced every minute or two.
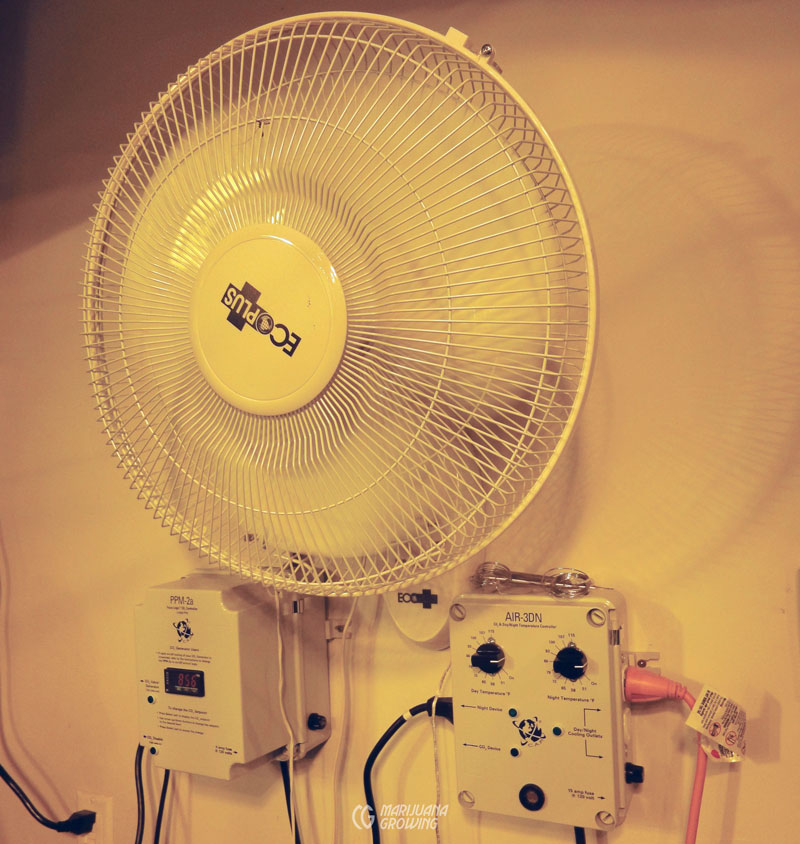
Constant air circulation and a supply of fresh air are essential but often inadequate. There should be at least one fresh-air vent in every grow room. Vents can be an open door, window, or duct vented to the outside. An exhaust fan vented outdoors usually creates an adequate flow of air. An oscillating fan works well to circulate air. When installing such a fan, make sure it is not set in a fixed position and blow too hard on tender plants. It could cause windburn and dry out plants, especially small seedlings and clones. If the room contains a heat vent, it may be opened to supply extra heat or air circulation. Read “Setting Up the Vent Fan” below for more information.
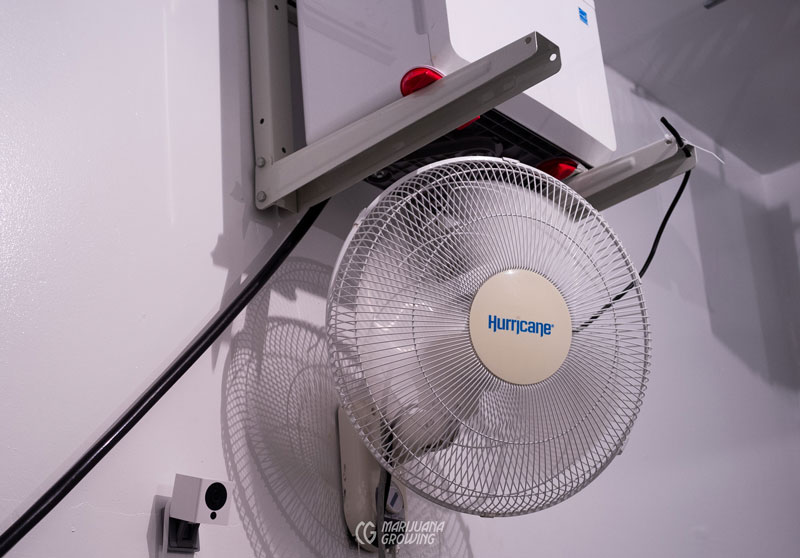
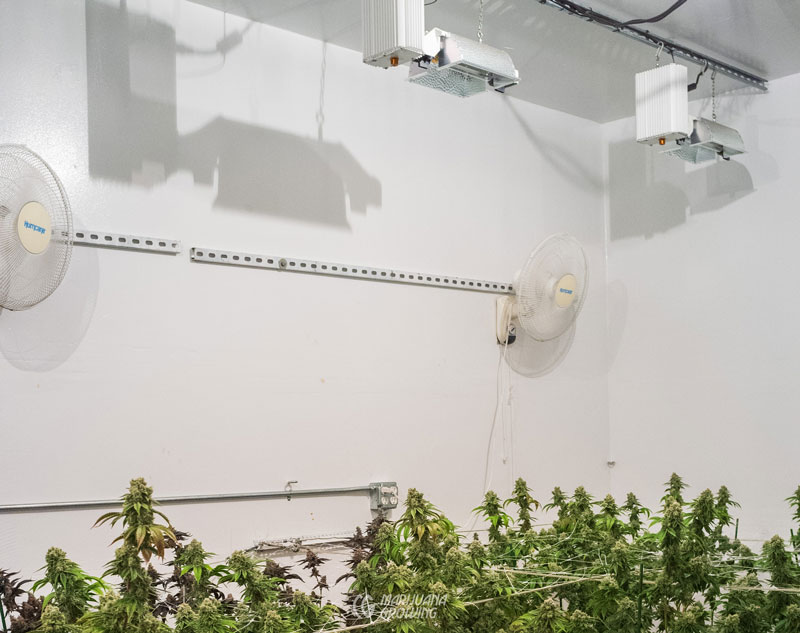
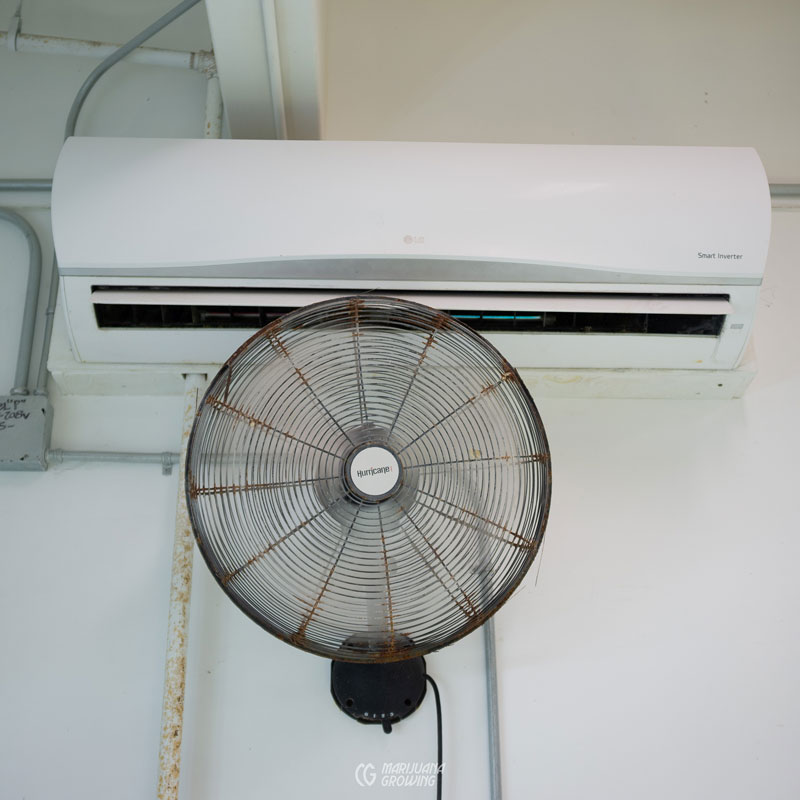
Wall-mounted oscillating fans circulate grow room air and are up out of the way during maintenance.
The temperature in the grow room tends to stay the same, top to bottom, when the air is circulated with an oscillating fan(s). In an enclosed grow room, HID lamps and ballasts radiate heat, often enough to heat the room. Fluorescent and CFL fixtures radiate less heat, and LEDs emit the least amount of heat of all grow lights. A remote ballast placed near the floor on a shelf or a stand also helps break up air stratification by radiating heat upward. Grow rooms in cool climates stay warm during the day when the outdoor temperature peaks, but often cool off too much at night when cold temperatures set in. To compensate, turn on grow lights at night to help heat the room but leave it off during the day.
Intake air is supplied in some garden rooms and small greenhouses via cracks and holes, but most enclosed rooms need a designated intake vent. Sealed grow areas require an intake vent or fan to draw in new fresh air. An intake vent allows air to passively flow into an enclosed area. An intake fan blows fresh air into the garden room or greenhouse. Airflow through ducting is impaired.
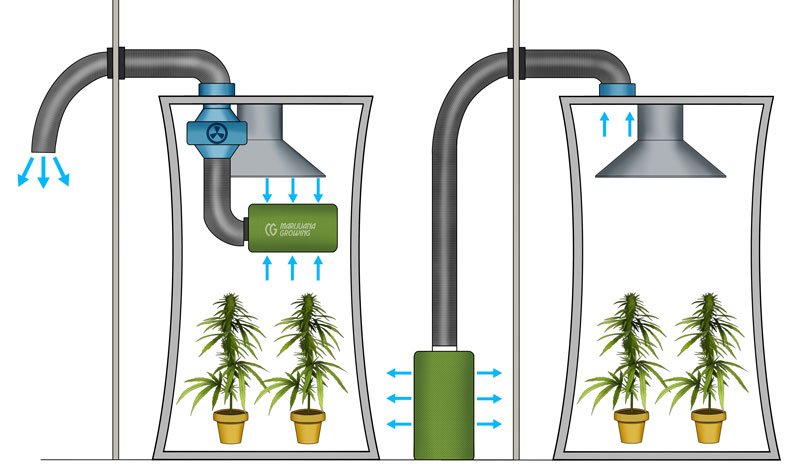
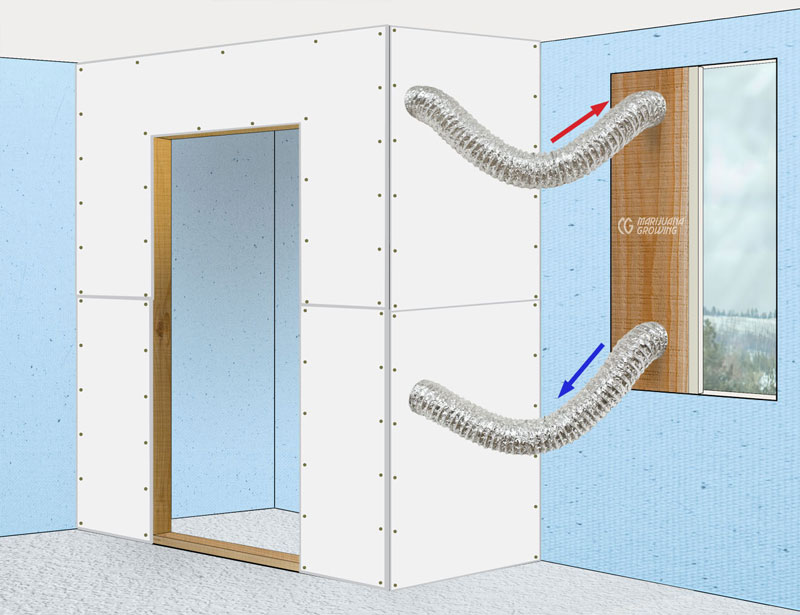
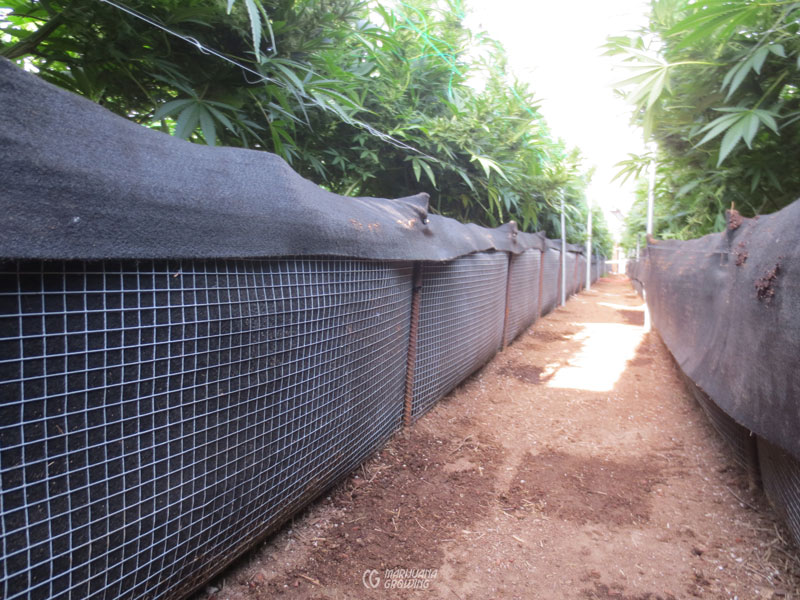
The concave walls show the negative pressure in the room. The negative pressure makes life very difficult for diseases and pests.
Negative pressure in the grow room makes life difficult for diseases and pests to live. Negative pressure helps keep the atmosphere inside the grow room stable and isolates the fragrance of growing cannabis too. A simple way to check for negative pressure in a grow room is to open the door. The door should open and close easily when intake and vent fans are turned off. When the intake and vent fans are turned on and create negative pressure in the room, the door should be difficult to open. An air entrance/exit ratio of 1:4 (a 20% differential) will create negative pressure in the grow room, for example a 100 cfm [m3/h] incoming fan and a 400 cfm [m3/h] exhaust fan will give the room negative pressure.

This carbon filter mounted directly to an efficient in-line extraction fan evacuates air efficiently out of the grow room. The filtered air keeps the fragrance of cannabis inside the grow room. The outer dust and particulate filter is easy to remove and clean.
Heating and Cooling
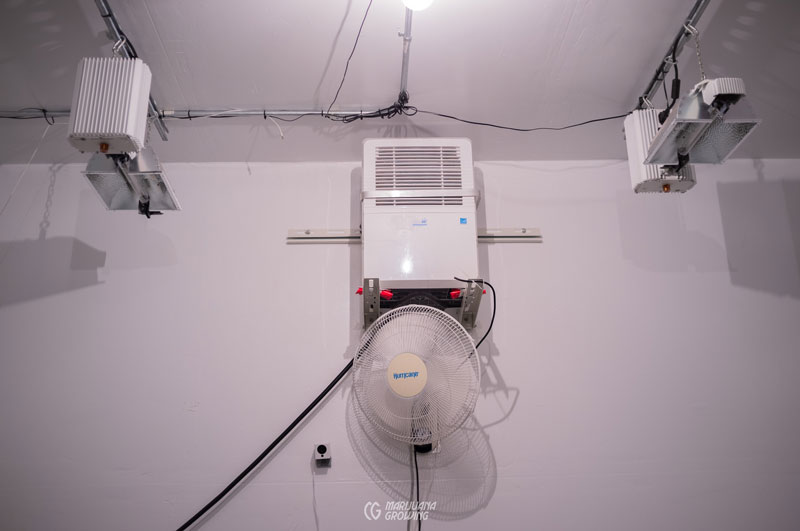
An oscillating circulation fan distributes cool air from an air conditioner.
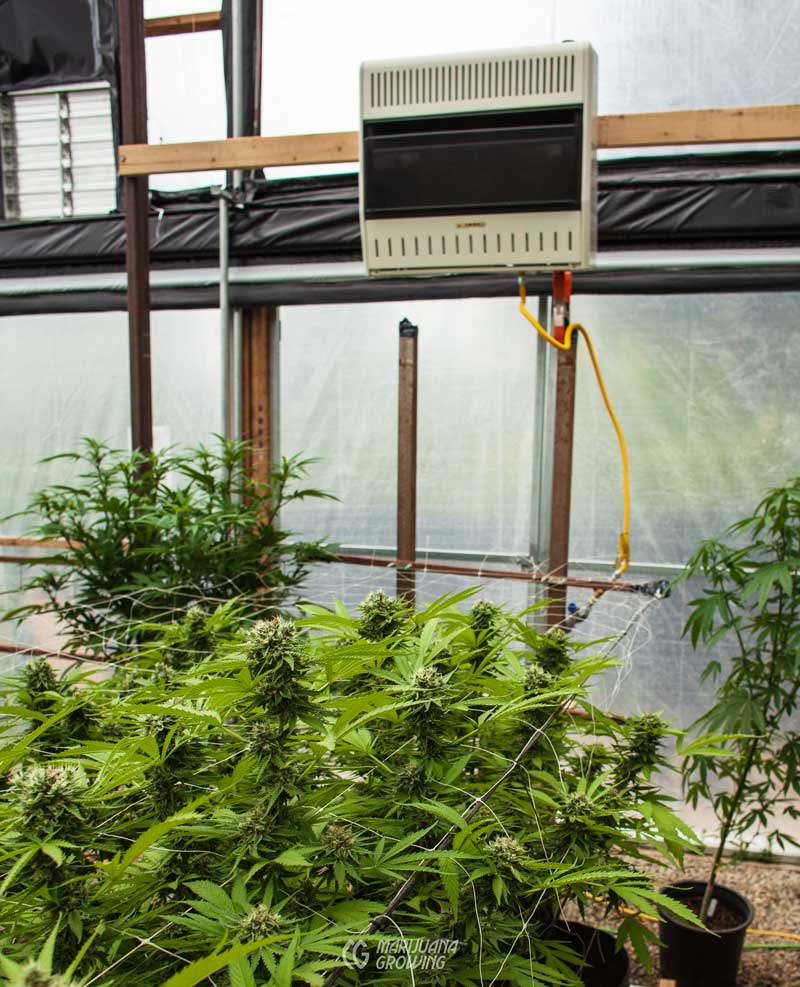
An electric heater in the greenhouse can keep the temperature warm so that plants do not suffer.
Sometimes it is too cold for lamps and ballasts to maintain satisfactory room temperatures. Grow rooms located in homes are usually equipped with a central heating and/or air conditioning vent. The vent is usually controlled by a central thermostat that regulates the temperature of the home. By adjusting the thermostat to 68ºF (20ºC) and opening the door to the grow room, it can stay a cozy 68ºF (20º C). However, using so much power is expensive. Keeping the thermostat between 60-65º F (15-18ºC), coupled with the heat from the light, may be enough to sustain 68ºF (20º C) temperatures. Other supplemental heat sources such as electric heaters are somewhat expensive and draw extra electricity, but they provide instant heat that is easy to regulate. Avoid diesel and wood heat unless it is vented properly. Propane and natural gas heaters increase temperatures and burn oxygen from the air, creating CO2 water vapor as by-products. This dual advantage makes using a CO2 generator economical and practical.
If temperatures drop more than 10ºF (5ºC) when the lights go out in a grow room, relative humidity climbs quickly. The humid air must be evacuated so that it does not condense.
HIDs lamps and ballasts radiate heat, which lowers humidity. Fluorescents and CFL fixtures radiate less heat than a HID system. LED fixtures emit the least amount of heat. Heat from the grow light fixture and a vent fan on a thermostat/humidistat are all the humidity control necessary for most garden rooms. Dry heat sources that lower humidity include hot air vented from a furnace or wood stove. Do not direct piped-in warm dry air to blow directly on foliage. Hot dry air dehydrates cannabis plants quickly.
Increase humidity by misting the air in clone rooms, garden rooms and greenhouses with water or set out buckets of water to evaporate into the air in small enclosed gardens. Usually irrigation water evaporating from the soil surface adds more than enough humidity to the enclosed area. A humidifier is convenient and relatively inexpensive. Humidifiers evaporate water into the air to increase relative humidity. Set the humidifier control to a specific humidity level. This level of humidity is achieved when enough water evaporates into the air. A humidifier is not necessary unless there is an extreme problem with the grow room drying out. More often than not, high humidity results as a byproduct of irrigation and transpiration.
A dehumidifier removes moisture in a room by condensing it from the air. Once the water is separated from the air, it is captured in a removable container, piped into a container or directed down a drain. Interestingly enough, the expelled water carries a strong enough fragrance of cannabis that can be detected by a sniffer dog. Use the collected water for irrigation, it has a neutral pH and low ppm value. You may be amazed at the amount of water in the air. For example, a dehumidifier will remove about 10 ounces (30 cl) of water in a 10 × 10 × 8-foot (21.5 m2 room when the temperature drops just 10ºF (5ºC).
Dehumidifiers are often used to discourage fungi. Relative humidity control is an integral part of insect and fungus prevention and control. Humidity above 80% discourages spider mites but promotes fungus as well as root and stem rot. Humidity levels below 60% reduce the chances of fungus and rot. Lowering relative humidity during flowering to about 50% keeps plants growing strong and healthy.
Dehumidifiers are more expensive and use more electricity than humidifiers. Air conditioners, although expensive to operate, dehumidify the air. Install an air conditioner in warm climates to cool and dehumidify the enclosed area.
Setting Up the Vent Fan
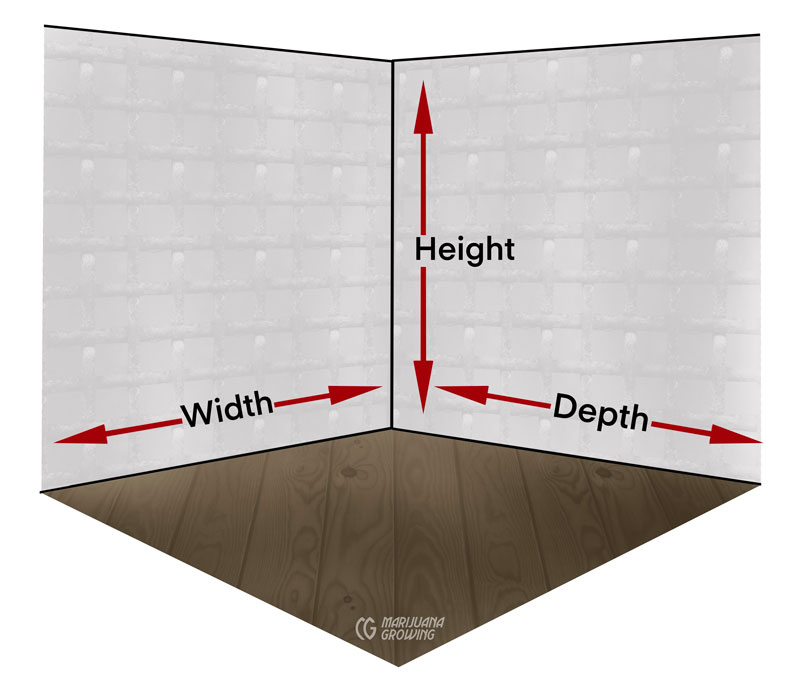
Step One: Calculate the total volume of the enclosed garden room. Length × width × height = total volume. For example, a grow room that is 10 × 10 × 8 feet (21.5 m2) has a total volume of 800 cubic feet )10 x 10 x 8 feet = 800 cubic feet, 3.04 m x 3.04 m = 9.24 cubic meters (m3).

Step Two: Use a vent fan that will remove the total volume of air in the room in 1-5 minutes. Vent fans are rated in cubic feet per minute (CFM) (M2/min) that they can move. Look for a fan with a high enough CFM (M2/min) to evacuate your grow room in 1-5 minutes. Buy a fan that can easily be mounted on the wall or “in-line” in a ducting pipe. Quality “in line” fans move large volumes of air quietly and efficiently. It’s worth spending the extra money on an in-line fan. Small rooms can use a fan that can be attached to a flexible 4-inch (12 cm) dryer hose. Many stores sell special ducting to connect high-speed squirrel blowers with the 4-inch (12 cm) ducting. Ideally you can mount a vent fan like the one above to move air directly outdoors. Extracting air with no ducting is the absolute best way to air out of the garden room efficiently.
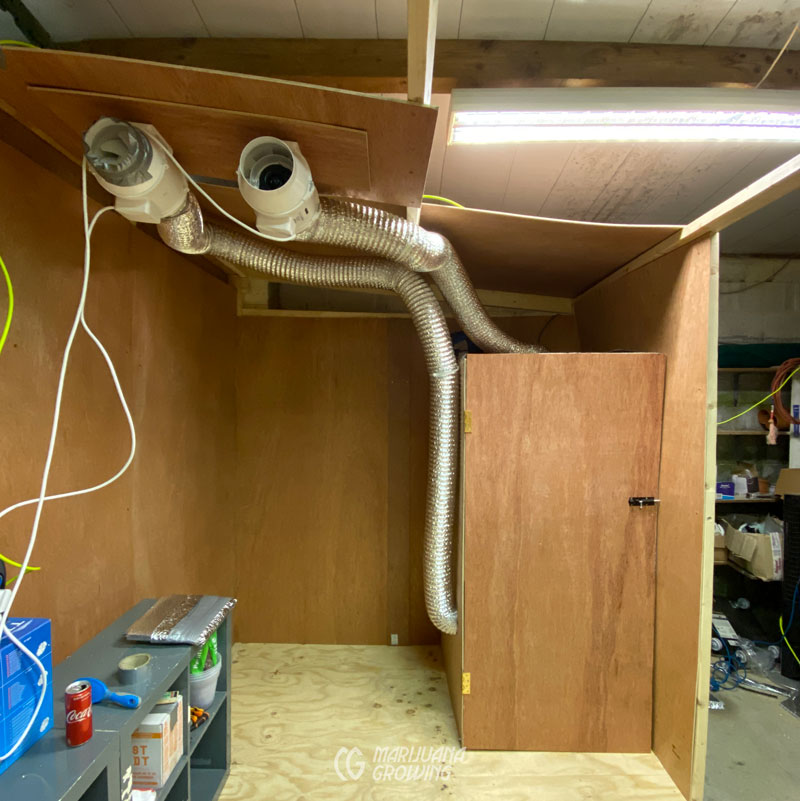
Step Three: Place the fan high on a wall or near the ceiling of the grow room so that it vents off the hottest, most humid air. If possible, cut a hole in the wall and secure the fan in place over the hole so that no ducting is needed. Most locations require special installation. See: Steps 4-8 below.
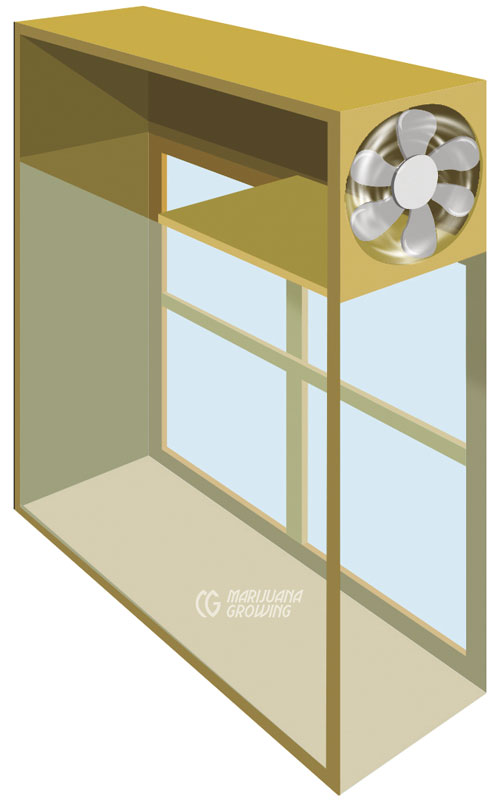
Step Four: To place a fan in a window, cut a 0.5-inch (1.5 mm) piece of plywood to fit the window frame. Cover the window with a light proof dark-colored paint or similar covering. Mount the fan near the top of the plywood so it vents air out of the grow room. Secure the plywood and fan in the windowsill with sheet rock screws. Open the window from the bottom.
Step Five: Another option to make a light-proof vent is to use 4-inch (12 cm) flexible dryer ducting. Vent the hose outdoors and attach a small squirrel cage fan to the other end of the ducting. Make sure there is an airtight connection between the fan and hose by using a large hose clamp or duct tape. Stretch the flexible ducting so it is as smooth as possible inside. Irregular interior surfaces cause air turbulence and seriously diminish airflow.
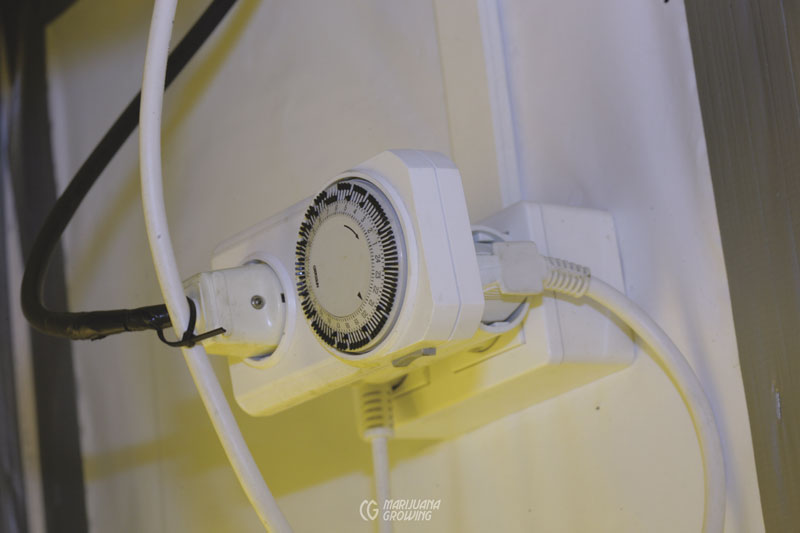
Timers for fans, pumps and lights are inexpensive and easy-to-use.
Step Six: Or attach the vent fan to a timer and run it for a specific length of time. This is the method used with CO2 enrichment. Set the fan to turn on and vent out used CO2- depleted air just before new CO2-rich air is injected.
Water
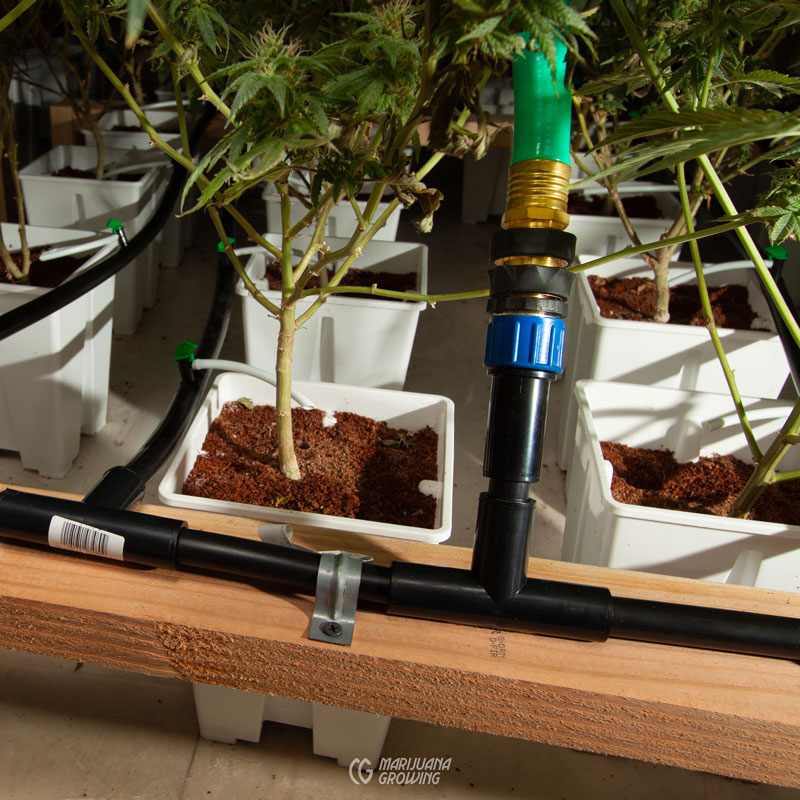
Gardens need more water as plants grow bigger. A 10 × 10- foot (3 x 3 m) garden may need more than 50 gallons (190 L) per week. Carrying water is hard, regular work. One gallon (3.8 L) of water weighs eight pounds (3.6 kg); 50 × 8 = 400 pounds (180 kg) of water a week! It is much easier to run in a hose with an on/off valve or install a hose bib in the room than to schlep water. A three-foot (90 cm) watering wand attached to the hose on/off valve makes watering easier and saves branches from being broken when watering in dense foliage. Hook up the hose to a hot and cold water source so the temperature is easy to regulate.
A drain in the floor is the most convenient way to remove excess irrigation water. If no floor drain is available, you can lay down a swimming pool liner or some impermeable cover on the floor. Run a lip up the walls about 4 inches (10 cm) to contain any water spills. The covering will contain excess irrigation water but it will not drain. Have a mop and bucket handy to clean up standing water on the floor.
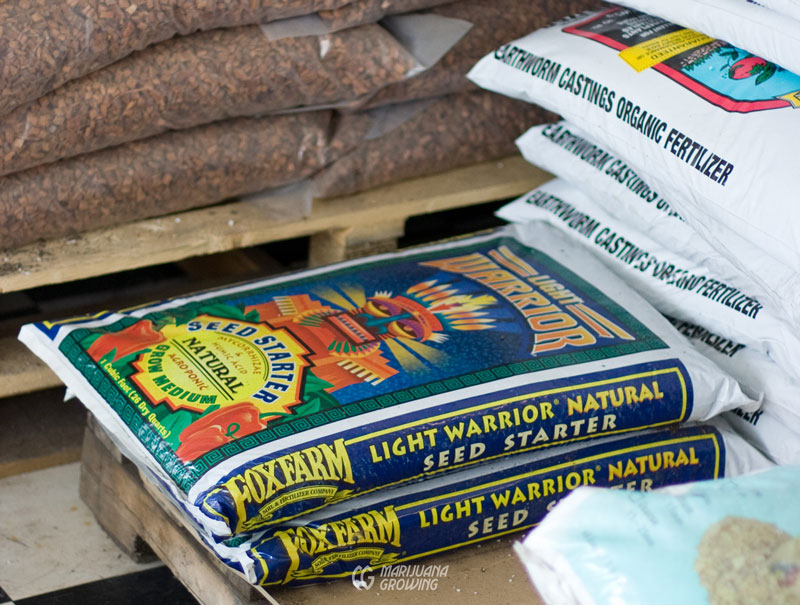
Fertilizer
Nutrient concentrations typically appear prominently on the face of the commercial fertilizer packages in a “guaranteed analysis.” The N-P-K numbers on the label give the percentages of nitrogen, phosphorus and potassium. Nitrogen is listed as total combined elemental. Most hydroponic fertilizers break nitrogen into fast-acting nitrate that is immediately available. Ammonium and urea go through a nitrification process to turn into nitrate, which a plant can use. Ammonium and urea are slower acting because the nitrification process takes a little time. Phosphoric anhydride (P2O5) is listed as the form of phosphorus, but this figure understates phosphorus content by 44%. The balance (56%) of the phosphorus molecule is oxygen. Twenty percent P2O5 is 8.8% actual phosphorus. Potassium (K) is listed in the potash form of potassium oxide (K2O) of which 83% of the stated value is actually elemental potassium.
The rest of the mineral nutrients are listed in their elemental form that represents the actual content. Most often, the mineral elements used in fertilizer formulas are listed in chemical compounds on the label. Look at the fertilizer labels to ensure that the elements, especially non-soluble trace elements, are chelated and readily available for root absorption.
Nutrients in most parts of the world are measured in parts-per-million (ppm), even though they are expressed as a percentage concentration on the label. The ppm scale is simple and finite–almost. The basics are simple: one part per million is one (1) part of 1,000,000, so divide by one million to find parts per million. To convert percentages into ppm, multiply by 10,000. For example: 2% equals 20,000 ppm. For more information on ppm and Electrical Conductivity, see chapter eighteen, Container Culture & Hydroponics.
Fertilizers are either water-soluble or partially soluble (gradual-release). Both soluble and gradual-release fertilizers can be organic or chemical.
Soluble Chemical Fertilizers
Soluble salts fertilizers are an excellent choice for container cultivation. Water soluble fertilizers applied in solution make controlling growing medium nutrient levels more precise. Soluble fertilizers dissolve in water and are easy to control. They can be easily added or leached out of the growing medium. In general, hydroponic fertilizers that use soluble food-grade nutrients cause few problems. Avoid low-quality fertilizers that do not list all necessary micronutrients on the label.
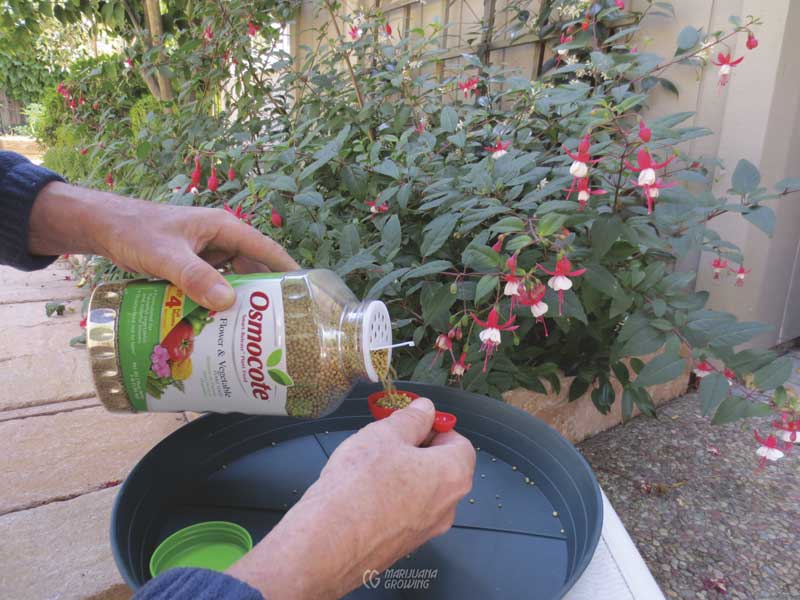
Slow-release chemical granular fertilizers such as Osmocote™ work well but are easy to over-apply in containers. They are almost impossible to leach from growing medium fast enough to save plants in containers. These time-release chemical fertilizers are used by many plant nurseries because they are easy to apply and only require one application every few months. Using this type of fertilizer on your outdoor cannabis garden is convenient. In a container exacting control is lost. Osmocote-type fertilizers are best suited for perennial and annual plants where labor costs and uniform growth are the main concerns.
Organic Fertilizers
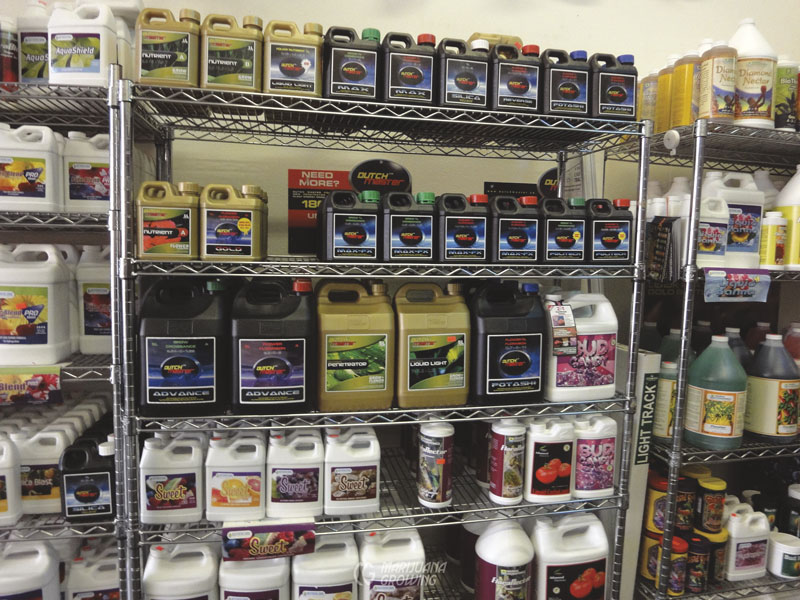
Pre-packaged organic fertilizers, although often expensive, are convenient and preferred by most home gardeners growing cannabis in containers. Concentrated soluble organic fertilizers are available from many manufacturers. See the new digital Sixth Edition of Marijuana Horticulture for more information about commercial.

Organically grown cannabis has a sweeter taste and creates a small carbon footprint. Outdoor gardens naturally lend themselves to organic principals to build the soil. Container gardens contain a limited amount of soil and the necessity for sanitation must be considered when growing organically. Outdoors, organic gardening is easy because all of the forces of nature are available to harness. Indoors and in greenhouses only few of the natural phenomena are free and easy. The nature of growing in containers does not lend itself to long-term organic soil management, but some organic techniques have been practiced with amazing success.
Organic container gardens typically use soil that contains worm castings, peat, manure, leaf mold, compost, etc. In a container, there is little space to build the soil by mixing compost and organic amendments. Even if it were possible to build the soil in a container, organic activity consumes months of valuable growing time. Diseases and pests also enter the equation. It is easier and safer to throw old, depleted soil outdoors and start new plants with fresh organic soil.
Organic nutrients work very well to increase the soil nutrient content, but nutrients are released and available at different rates. The nutrient availability may be difficult to calculate, but it is fairly difficult to overapply organic fertilizers. Organic nutrients are typically available more consistently when used in combination with one another. Growers often mix up to 20% worm castings with other organic agents to get a strong, readily available nitrogen base. They fertilize with bat guano, the organic super bloom, during flowering.
A greenhouse using raised beds allows true organic methods to function properly. The raised beds have enough soil to hold the nutrients and promote organic activity. When managed properly organic soil will provide the bulk of nutrients.
Outdoor organic gardens are easy to implement and maintain organic practices. Using compost teas, compost, manures, and big, bulky amendments is easy outdoors. Organic amendments and fertilizers can be heavy and bulky. Make sure to allow enough space to store and move them easily.
Compost and Compost Teas
Compost and compost teas are used by many organic gardeners as both an amendment to build soil and to supply nutrients to cannabis. Compost is inexpensive, abundant, and works wonders to increase water retention and drainage. Biological activity within the pile also increases nutrient uptake in plants. Indoors, compost is not as practical to use in containers unless it has been hot composted and is free of pests and diseases. Unfinished compost could have unwanted guests. I do not advise using compost in indoor gardens because it could harbor unwanted diseases and pests.
Mix nutrients in a sink or an area that can withstand water and nutrient solution spills. Keep nutrients in a cool dry place outside of the grow room to avoid degradation. Keep a written record and calendar of your irrigation and nutrient application schedule. I like to take photos of the garden and specific plants every week. Weekly images are a great way to keep track of growth and progress.
Substrates
Growing in containers is completely different than growing in Mother Earth outdoors or in a greenhouse. Container culture and hydroponics require that all nutrients are delivered to a relatively small volume of substrate. The substrate must provide the proper environment to anchor the plant and have plenty of air (oxygen) and the proper available nutrients in solution ready for uptake. Controlling the substrate environment requires basic knowledge about the qualities of the substrate and how to prepare it for cultivation and maintenance. Each substrate requires different preparation and maintenance. Get the most from substrates by choosing the proper growing and irrigation system. Some substrates are most effective when mixed together.
Substrates are the materials in which cannabis roots grow in containers. Healthy, vigorous growth and flower production all starts with the roots. The substrate you choose for container cultivation will have a profound effect on your crop. The reason for this is that the substrate may provide any or all of the following five functions:
1
Physically support the plant.
2
Water retention in an available form for uptake the plant.
3
Allow the gas exchange between the root zone and the atmosphere.
4
Provide the plants with essential nutrients.
5
Sustain the root zone swelling microbes critical for nutrient cycles, and the suppression of pests and diseases.
Total pore space
Pore space is a very important quality of a substrate. Pore space has a profound effect on both air and water retention and, therefore, a profound effect on root health. The substrates most commonly used for containerized cannabis production have a typical pore space in the range of 75% to 90%. Where your substrate falls in this range depends on your choice of substrate material and the proportions of the aggregates that are in your mix. The key point is that most of the volume of the substrate in your container is the pore spaces between the solid particles. Even more important than total pore space is the size of the pore spaces. The critical properties of water retention and air-filled pore space are determined by not only the size but the amount of different sizes of pore spaces your substrate contains.
Air-filled pore space
When a container is watered to the point of runoff, the pores of a substrate are saturated. When allowed to drain, the larger pore spaces can’t hold the water against the force of gravity, and they become air-filled. The substrate is now holding the maximum amount of water possible. This is referred to as “container capacity”. Air-filled pore spaces are what make the gas exchange between roots and atmosphere possible. Gas exchange is critical for providing the roots with needed oxygen for respiration. Too little air-filled pore space increases the chance of root rot and the root zone may become anaerobic. Anaerobic conditions cause the buildup of ethanol, ethylene and hydrogen sulfide gas. Air-filled pore space of 10%-20% is recommended for container growing. To illustrate, an 80% sphagnum peat and 20% perlite mix has an air-filled pore space of 10% to 13% in a 4 inch container. The air-filled pore space may be increased by the addition of materials such as perlite, water resistant rockwool granules, pumice, etc.
Air-filled pore space and container capacity define the condition of the substrate after drainage in a specific size container. Container height has a big effect on the water retention and air-filled pore space of a substrate. These important physical properties vary as the height of the container changes. When discussing air-filled pore space and water retention keep in mind that it is always relative to container size.
Water-holding capacity
A substrate’s most important function is retaining water and fertilizer solution available for uptake by the roots. If the water-holding capacity of the substrate is too high, then too many of the pores are retaining water and might result in insufficient air-filled pore space. This can lead to increased disease and pest pressure. Also a substrate that retains too much water requires less frequent irrigation which results in reduced fertigation. You are then faced with the choice 0f either nutrient deficiencies from inadequate fertigation or overwatering in order to give your crop enough nutrients. A substrate lacking in water-holding capacity requires frequent irrigation and the plants will be prone to water stress.
Water retained by a substrate is not completely available to the roots for uptake into the plant. There is easily available water which is held at a low tension in the substrate. There is available water, some of which can be held at a much higher tension than easily available water. The plants need to work a little harder to access this water. Some water is held tightly by the forces of cohesion and adhesion on the fine particles of the substrate and are unavailable for use by the plants.
Water-holding capacity and air-filled pore space are influenced not only by the aggregates that are mixed to create a substrate, the size and shape of the container also determines water and air retention. A tall 5-gallon bucket will hold less water and more air that a shorter, wider 5-gallon container filled with the identical substrate. This happens due to the force of gravity which causes a layer of water saturation to form at the bottom of the container. This is called a perched water table. A given substrate always has a constant height of perched water table. A shorter container with a larger diameter has a larger volume of substrate within the perched water table zone and so it holds a larger volume of water and less air than a taller, narrower container. This is important because a root substrate that works well in a tall container, may have too high of a waterholding capacity and too low of an air-filled pore space when placed in a short container. Therefore, the container in which the substrate is being placed should be considered when designing a substrate.”
Several substrates– coco coir, coco coir/perlite mix, rockwool, soilless mix and expanded clay pellets are the most commonly used by container and hydroponic growers. Each substrate is unique and has distinct strengths and weaknesses. Each has different requirements for preparation and maintenance. You must prepare and maintain each substrate according to specific parameters so that you can harvest a heavy cannabis crop.
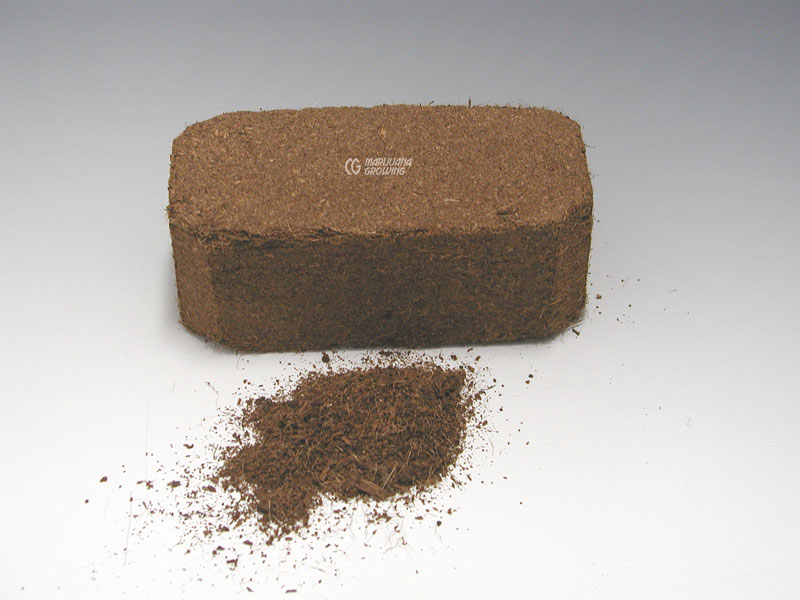
Coco Coir is very popular. Once prepared, coco coir holds air even when saturated for short times and it allows the maximum amount of nutrients in solution to be available for roots to uptake. It is more work to prepare for cultivation and requires daily monitoring of the nutrient solution. Coco coir is perfect for top-feed container systems. Hand-watering is difficult because coco coir must be watered at least once every day. Automatic fertigation systems work best. Dry coco is lightweight to ship and handle. Different grades of coco are available in compressed dehydrated bricks or in uncompressed plastic bags. Cost per cubic foot – Brick, $13, Washed, $15.
Coco/perlite mix is super popular and a very economical substrate. Adding perlite to coco coir improves drainage, increases the air-holding ability, and cuts the cost of the substrate immensely. Coco coir/perlite 50/50% mix costs $9.00 per cubic foot.

Perlite is a lightweight inexpensive additive that increases drainage and air-holding ability. It is problematic when used as a standalone substrate. Mix perlite with other substrates including coco coir, soilless mix, and potting soil to increase drainage and air-holding ability. Also enjoy the cost cutting benefits when you add perlite to other substrates.
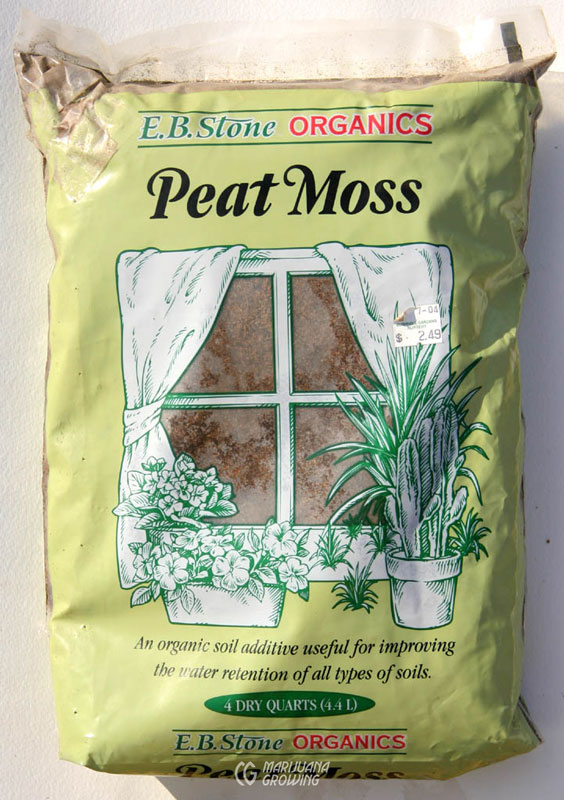
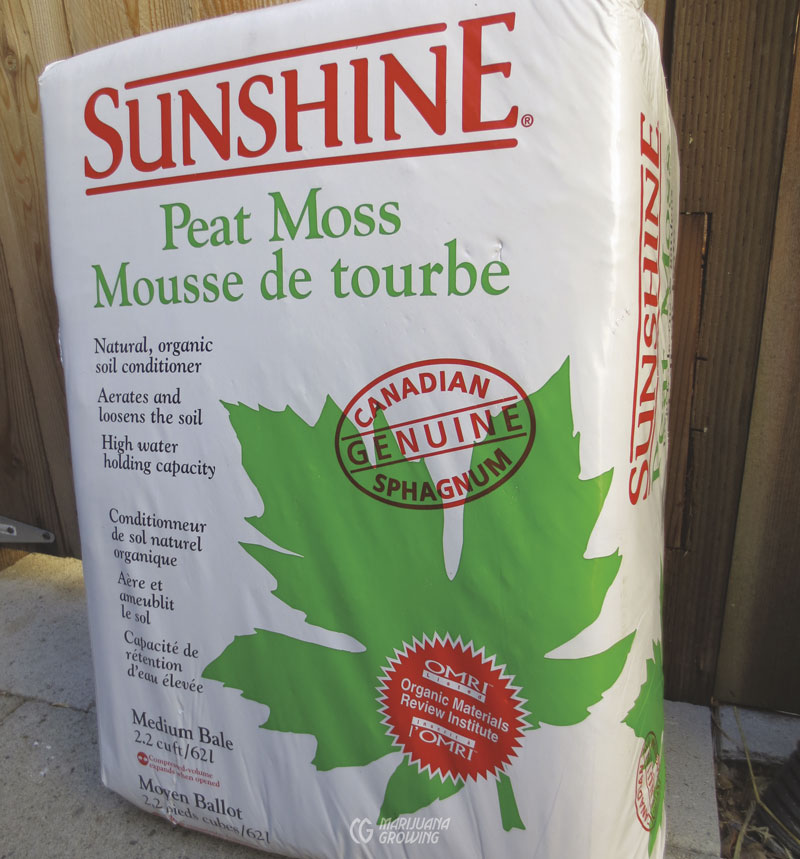
Peat moss contributes to half or more of soilless mixes and is included too. Vermiculite is included but with less information. Other substrates such as scrounged items, foam, milpito, washed gravel, rice hulls, sand, sawdust, etc. are low-cost substrates that come with their own set of complications and are covered at the end.
Sphagnum moss and sphagnum “peat” moss have been common potting soil and soilless mix ingredients for decades. Peat moss is the most commonly available sphagnum moss. Both grow in wetlands in northern climates. Peat holds plenty of water and air. It is mixed with perlite and other amendments to make potting soils and soilless mixes. Peat tends to break down after a crop and has special requirements for mixing, watering, and reusing.
Soilless Mix works well in top-feed containers. It is relatively inexpensive and lightweight. You supply all of the nutrients via the nutrient solution which makes control easy. Soilless mix is low-maintenance and can be irrigated by hand or automatically.
Rooting cubes and plugs are outstanding. Rockwool cubes, Jiffy cubes, and polymer-bound plugs save time and energy. Each one has specific qualities.
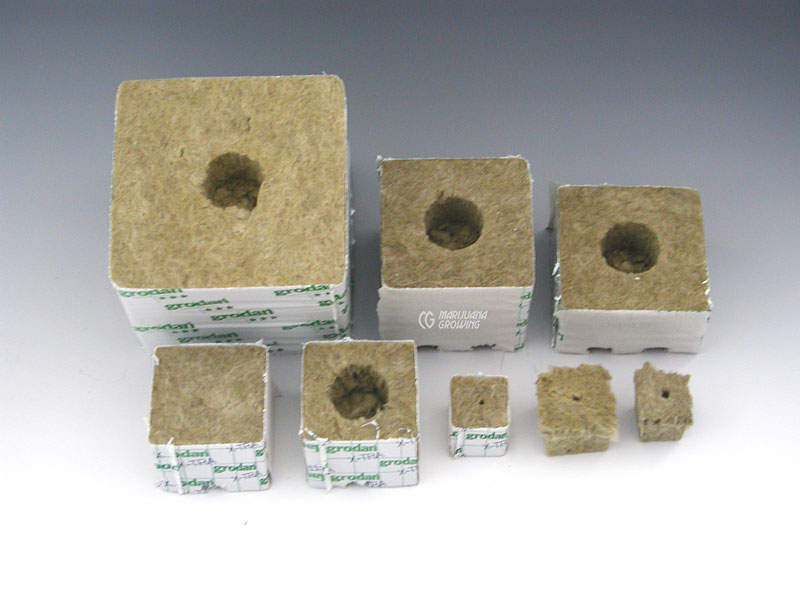
Rockwool, AKA stone wool and mineral wool, works great to germinate seeds and root clones. Small cubes are relatively economical and easy to maintain the proper root zone nutrient solution to air ratio. Cubes also transplant into other growing mediums easily with little or no root damage.
Available in cubes, slabs, and granules, this sterile substrate has the ability to hold 20% air and 80% nutrient solution. Rockwool must be conditioned and buffered, to lower pH and add a nutrient solution. Cubes are easy to hand-water, an automatic watering system – flood and drain, or top feed – must be set up to keep roots in large cubes, slabs and loose rockwool bathing in nutrient solution.
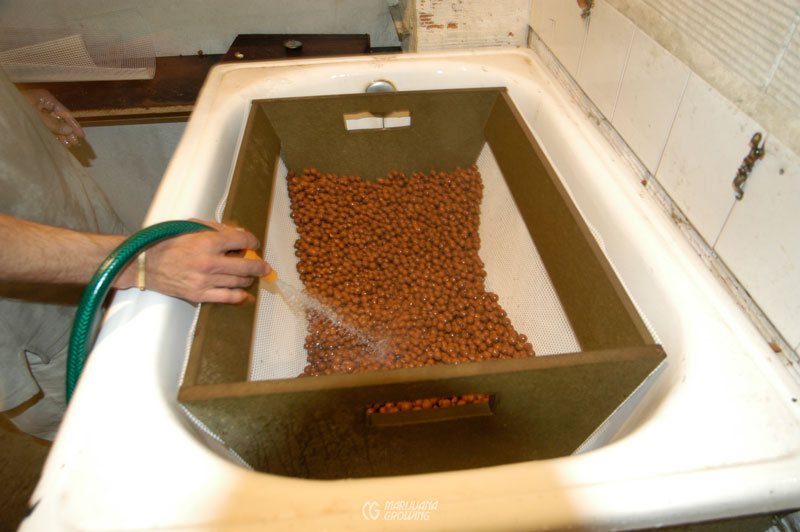
Expand Clay Aggregate (LECA) are porous clay pellets that hold air and nutrient solution on their surface and within it´s internal structure. They are pH-neutral and must be kept moist so that roots do not dry out. LECA can be mixed with other substrates including coco coir, soilless mix and potting soil to improve aeration. Reusable many times but washing away red dust that sheds and sterilizing is a bit of a messy job.
Potting Soil is great for top-feed containers. Although expensive, potting soil is naturally forgiving and requires less care than other substrates. Potting soil requires fertigation less often so that nutrients have plenty of oxygen in the substrate to become available.
Custom Potting Soil Mixes are made with grower Tender Loving Care (TLC). Please take a look at some successful soil recipes near the end of the chapter.
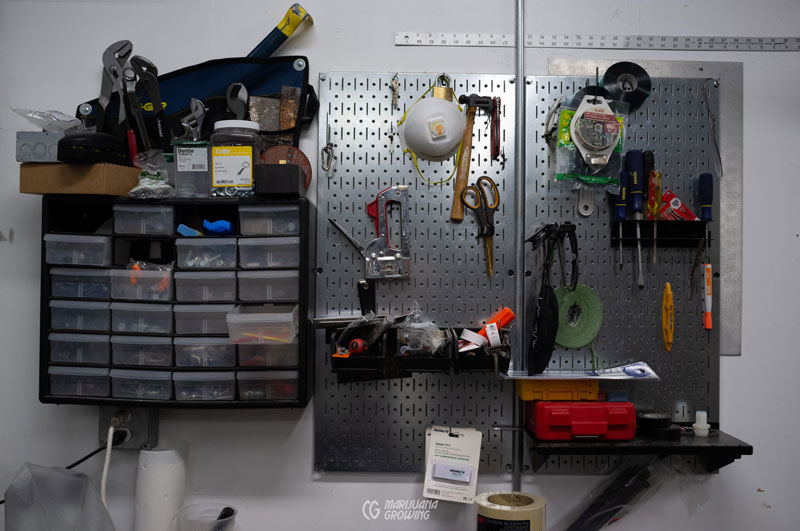
Grow Room Construction Tools & Supplies
Construction Tools
Measuring tape to layout garden
Electric drill and drill bits
Electric circular saw
Stapler + staples
Hardware (hooks, screws, chain, etc.)
Screwdrivers, hammer, wrenches
3-inch paint brush, paint roller and paint pan
Construction Supplies
White paint
White Visqueen® plastic
Ducting pipe Aluminum tape or duct tape for ducts
Clamps for ducts
Filters for intake ducts
Carbon Filter to clean air
Ratchets for rope
Security camera – battery-powered, time-lapse
Electrical Components
Air –Thermometer/hygrometer max/min
Air – Thermostat/humidistat – Timers – Number of timers
Controller (Controls Lights, temp, humid, CO2)
Air – Fans – Extraction –Inline, blower, propeller, CFM/metric, Number extraction fans
Air – Circulation fans –Oscillating, Wall-mount, Size – inch diameter, Number circulation fans
Container/Hydroponic Garden Setup
System –wick, fill/drain, top feed pots, top feed slabs
Containers – Size – gallons/liters, Number, Rootpruning, Plastic, Bags
Irrigation System – hand, drip, sprinkler, flood/drain, constant flow
CO2 – emitter, generator
Air Filter – size
Reservoir – Size – gallons/liters, Single reservoir, A and B reservoir, On/off valve, Autofill valve
Water pump – GPH/metric, Submersible, Exterior
Air pump – volume, Air stone
Timers – Water pump, Air pump
Substrate – Rooting cubes, Coco, Coco/perlite mix, Soilless mix, Rockwool, Clay pellets, Soil, Other
Garden Tools
Scale weighs up to 30 gms
Scale weighs up to 20 pounds
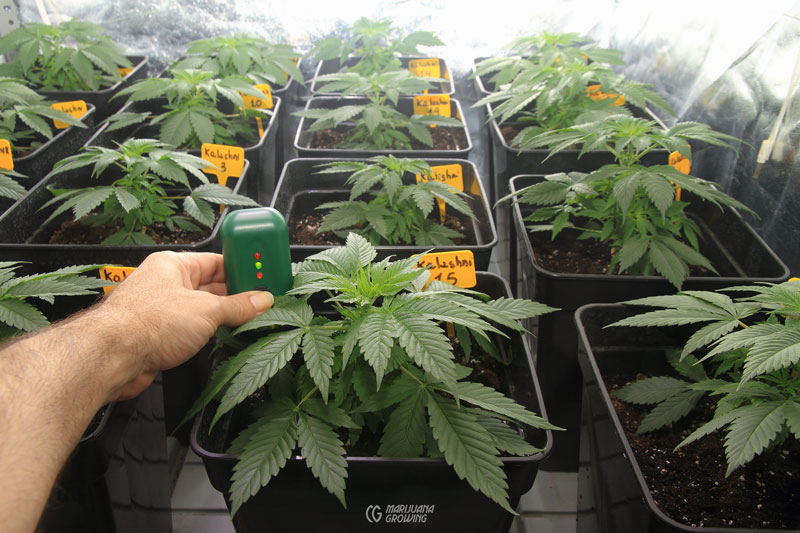
Moisture meter
Measuring cup & spoons – imperial/metric
Liquid biodegradable soap spray
Soap spray bottle, pump-up sprayer
Pruners
Hand trowel – plastic
Garden hose cut to length ½ inch or ¾ inch
Water wand with breaker/shower head
Water can with breaker/shower head
Automatic irrigation – drip, sprinkler, flood, gravity
Hose-end venturi sprayer
Security camera – battery-powered, time-lapse
pH meter
EC/PPM meter
Light meter
30X hand-held microscope battery-powered light
UVB flashlight to see slimy trails, poo, fluids
Leather gloves
Rubber gloves
Respiration mask
Protective goggles
Broom, dustpan, mop, bucket
Camera on smartphone
Growing Supplies
Cloning/seedling Supplies – Rooting hormone – powder, liquid, gel, humidity dome
Containers – Self-pruning, rigid, grow bags
Soil – Choose from list of popular soils
Substrate – Rooting cubes, Coco, Coco/perlite mix, Soilless mix, Rockwool, Clay pellets, Soil, Other
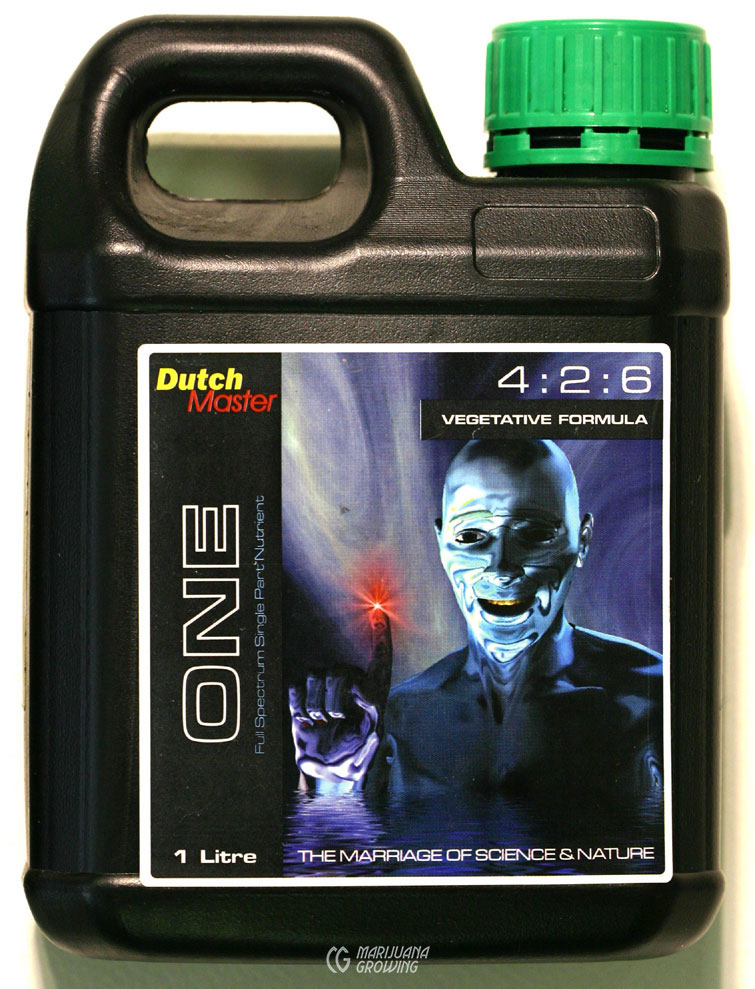
Nutrients – Organic or salt-base – vegetative and flowering formulas. Some brands sell micronutrients separately.
There are some tools an indoor gardener must have and a few extra tools that make indoor horticulture much more precise and cost effective. Procure all the tools before bringing plants into the room.
If you check your garden room daily and precision growing is not necessary, you will need few of the listed tools.
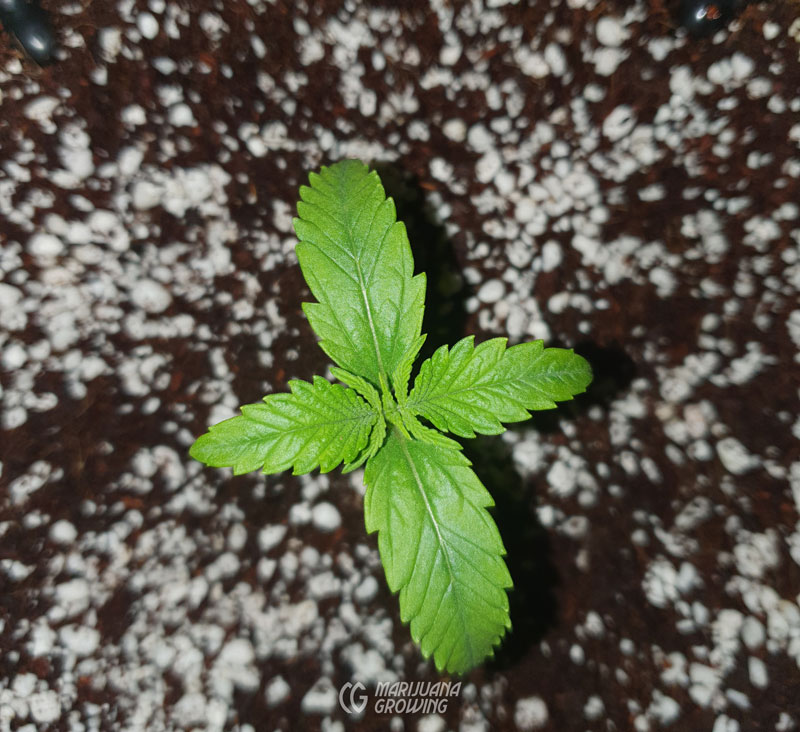
Move In Seedlings and Clones
Move in seedlings or clones once the grow room is set up with everything in place. Huddle them closely together under the lamp. Make sure that the grow light is the proper distance from tender seedlings. HIDs emit heat along with light. Position 400-watt lamps 18 inches (45 cm) above seedlings and clones. Place a 600-watt lamp 24 inches (60 cm) away and a 1000-watt lamp 30 inches (75 cm) away. Fluorescent, CFL and LED grow light fixtures can be placed much closer. Follow manufacturer’s guidelines for mounting height.
Gardens with elevated growing beds often waste light on walkways. Overcome wasted aisle space with rolling beds.
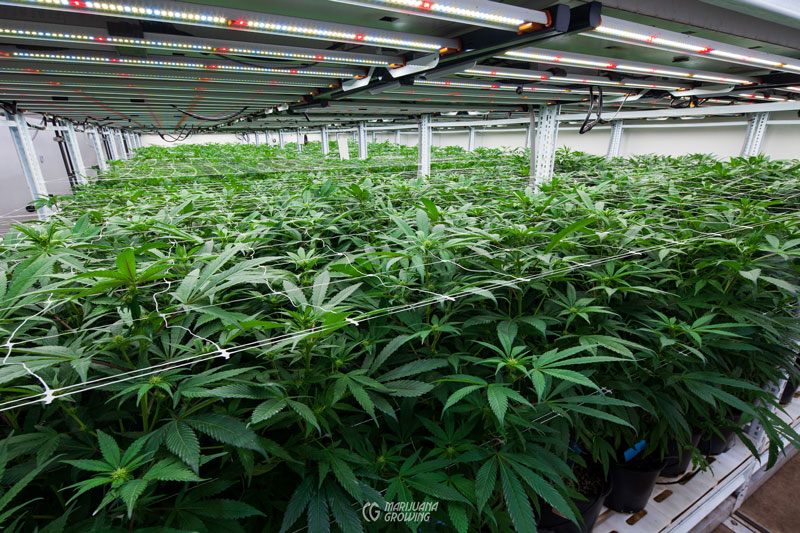
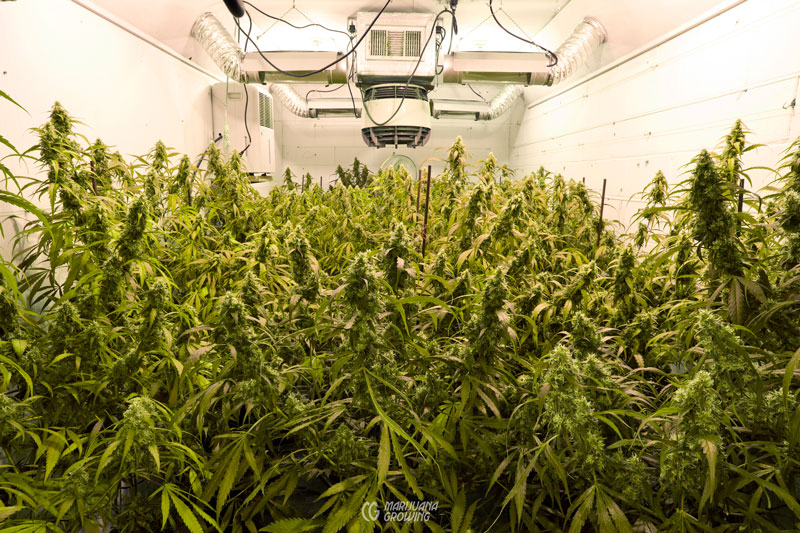
This grow room was set up with precision LEDs, climate, nutrients, and substrate.