Fresh air is essential to grow healthy gardens. Greenhouse and indoor gardens depend on a supply of fresh air. This precious resource often defines crop success or failure. Outdoor air is abundant and packed with the carbon dioxide (CO2) necessary for plant life. For example, the level of CO2 in the air is about 0.039 percent (389 ppm), but in a field of rapidly growing cannabis it could be only 250 ppm—approximately a third of normal on a very still day. Wind blows in fresh CO2-rich air. Rain washes air and plants of dust and pollutants. The outdoor environment is often harsh and unpredictable, but there is always fresh air. CO2- rich air is even more critical in indoor and greenhouse gardens. It must be carefully controlled to replicate the best of the outdoor atmosphere.
Air in a garden room or greenhouse must be moved either by natural currents or mechanically to simulate outdoor environments. Stale, depleted air is ventilated out and new CO2- rich air is drawn or forced into garden rooms and greenhouses. Air must be circulated to prevent stagnant air and stratification around leaves and within the structure.
Carbon dioxide and oxygen provide basic building blocks for plant life. Oxygen (O2) is used for respiration—burning carbohydrates and other foods to provide energy. CO2 must be present during photosynthesis. Without it, a plant will die. CO2 combines light energy with water to produce sugars. These sugars fuel the growth and metabolism of cannabis plants. With reduced levels of CO2, growth slows to a crawl. Except during darkness, a plant releases more O2 than is used and uses much more CO2 than it releases.
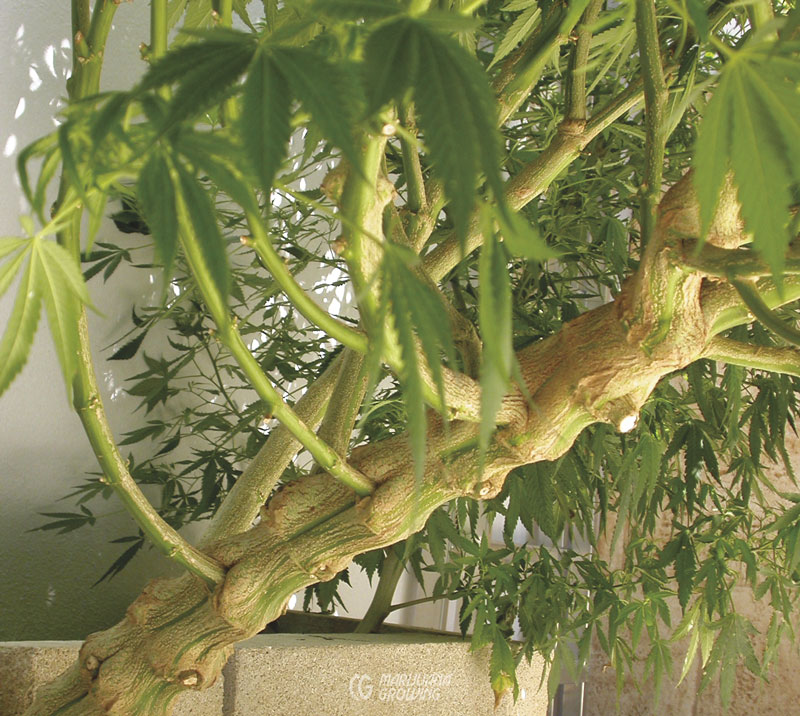
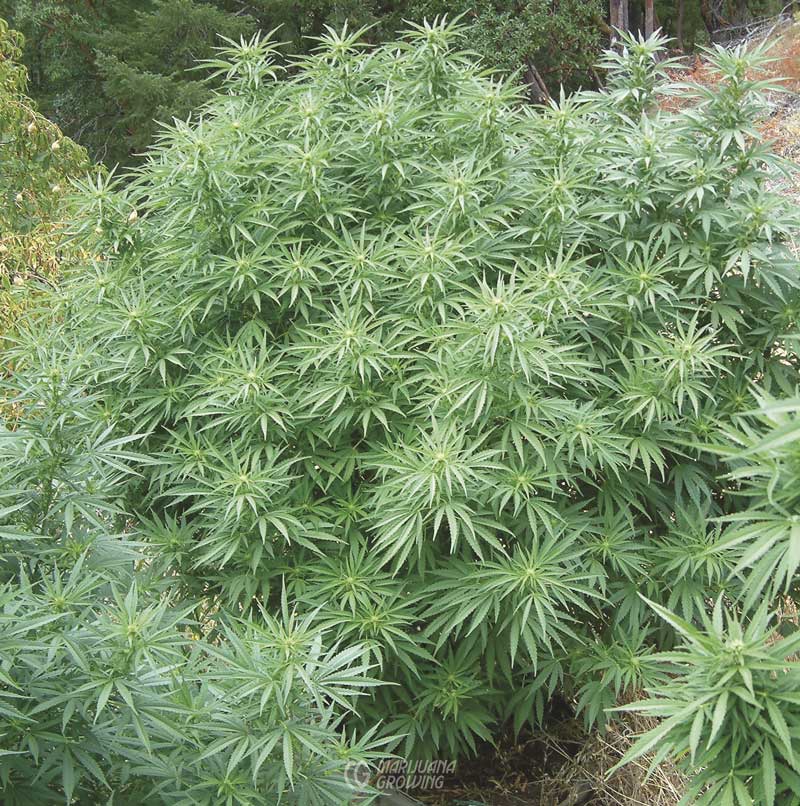
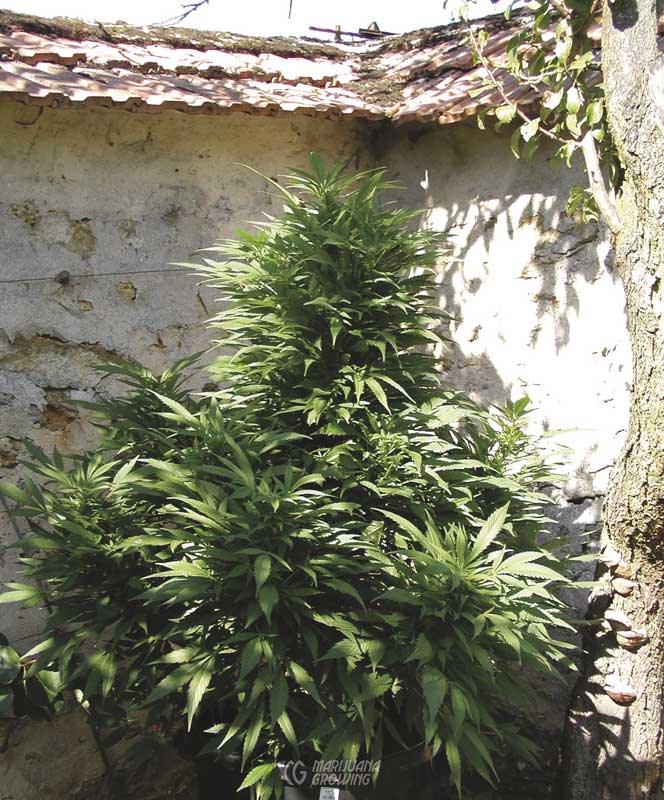
Bottom branches are pruned to allow for extra airflow under plants. Fresh air is essential to keep plenty of carbon dioxide available for plants.
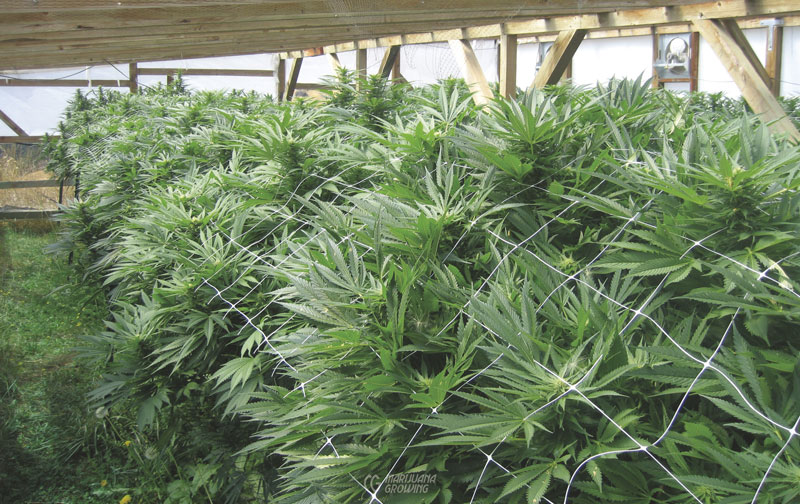
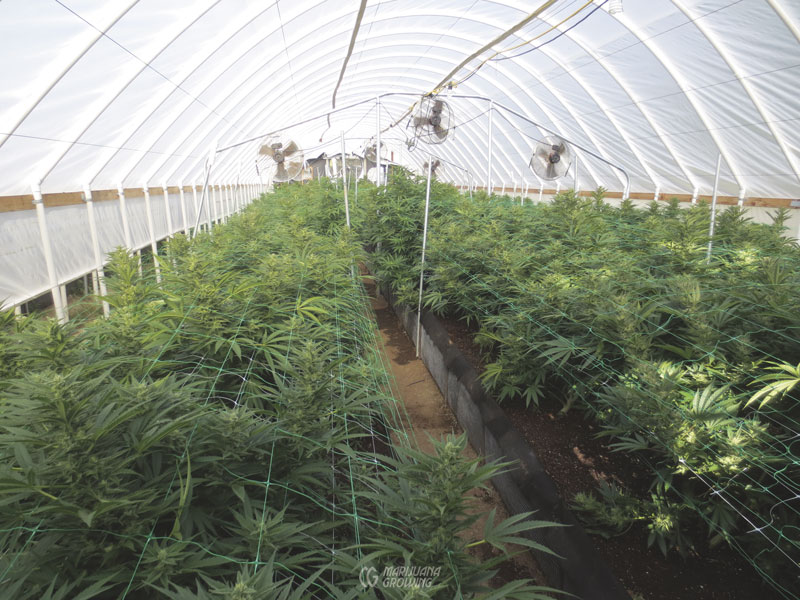
Extra airspace in this greenhouse will run out before harvest. The buds will soon touch the roof. The ventilation fans run full speed 24 hours a day.
Roots use air, too. Oxygen must be present along with water and nutrients for the roots to be able to absorb nutrients. Compacted, water-saturated soil has little space for the air that roots need, and nutrient uptake stalls.
Stomata
Animals regulate the amount of air inhaled and the carbon dioxide and other elements exhaled through the nostrils via the lungs. In cannabis, O2 and CO2 flows are regulated by stomata. The larger the plant, the more stomata it has to take in CO2 and release O2. The greater the volume of plants, the more fresh, CO2-rich air they will need to grow quickly. When stomata are clogged with dirt and filmy spray residues, they do not work properly, thus restricting airflow. Keep foliage clean. To avoid clogging stomata, spray foliage with tepid water a day or two after spraying with any pesticides, fungicides, or nutrient solutions.
Stomata function is rather complex and is controlled by many variables, including external triggers such as light; increased or decreased internal pressure based on supply and evaporative potential; and the presence or concentration of certain gases such as CO2. For example, a 40-inch (1 m) tall plant can easily transpire a gallon (3.8 L) per day when the humidity is below 50 percent. How- ever, the same plant will transpire about a half-pint (0.2 L) on a cool, humid day.
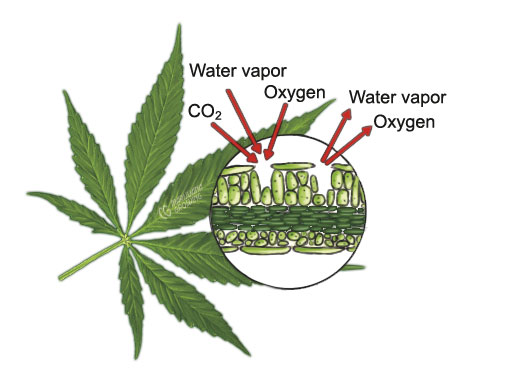
Stomata are microscopic pores on leaf under- sides that are similar to an animal’s nostrils.
Molecules—O2, CO2, H2O, etc.—are moved to the leaf surface in a mass flow situation known as the atmosphere. When the air is still, molecules migrate around under the energy of their own vibration—a slow process. When the atmosphere moves, molecules move more quickly. When they reach the stomata, molecules encounter their first barrier to movement, the one at the opening, and like a port on the sea with lots of ships, this slows the movement because the molecules diffuse under their own power into the stomata and out of the stomata; the opening is a two-way street. Circulation in the area moves away those molecules that have exited faster and brings new ones to the stomata faster. Once inside, they vibrate their way across the cavity to the next barrier, located at the cell membrane, and the crowding begins again. Ventilation brings new molecules in while flushing old ones out. Ventilation can also be used to distribute heat and to control humidity.
Temperature
Temperature is a dominant factor for plant growth as well as most life processes on earth. An accurate thermometer is essential to measure temperature in all garden rooms. Mercury or liquid thermometers are typically more accurate than spring or dial types, but they are ecologically unsound. An inexpensive thermometer will collect basic information, but the ideal thermometer is a day/ night or maximum/minimum type that measures how low the temperature drops at night and how high it reaches during the day. See chapter 15, Meters, for more information on thermometers.
Under normal conditions, the ideal temperature range for cannabis growth is 72ºF to 76ºF (22.2ºC–24.4ºC). At night, the temperature can drop 5 to 10 degrees with little noticeable effect on growth rate. The temperature should not drop more than fifteen degrees or excessive humidity and mold might become problems. Daytime temperatures above 85ºF (29.4ºC) or below 55ºF (12.8ºC) will slow or stop growth. Maintaining the proper, constant temperature in garden rooms and greenhouses promotes strong, even, healthy growth. Make sure plants are not too close to heat sources such as ballasts, heaters, and heating vents, or they may dry out, maybe even get heat scorch. Cold intake air will also stunt plant growth.
Cannabis regulates its oxygen uptake in relation to the ambient air temperature rather than the amount of available O2. Plants use a lot of O2; in fact, a plant cell uses as much O2 as a human cell. The air must contain at least 20 percent O2 for plants to thrive.* Leaves are not able to release O2 at night, but roots still need it to grow. A plant’s respiration rate approximately doubles every twenty degrees. Oxygen use by roots increases as they warm up, which is why fresh air is important both day and night. Temperatures above 85ºF (29.4ºC) are not recommended even when using CO2 enrichment. When it’s too warm, photorespiration occurs faster than the plant can compensate, the system short-circuits, and O2 takes the place of CO2; this in turn shuts down the Calvin cycle** and thus the conversion of light to carbohydrates and energy.
Stomatal function: Increased internal pressure from active roots, increased temperature, or a blockage in the exit pathway, along with suitable triggers such as a decrease in internal CO2 levels and appropriate light triggers (usually UV light), allow for the guard cells of the stomata to become turgid and thus open (through other sometimes- complex processes involving potassium shifts and so on).
Decreased internal pressure from low temperatures, decreased water availability in the root zone, high internal levels of CO2, lack of environmental triggers, or a faster demand at the exit pathway than can be supplied, cause a wilting or slacking in the guard cells, which partially or totally closes them. This limits the amount of water escaping the plant and provides some protection. Either case can cause an imbalance between water need and fulfillment.
Humidity is similar to the pipe in a water line. The temperature is the power to run the pump, which is the vascular system of the plant. The valve after the pump and before the end is the stoma. The other side of the valve is the container or sink—demand. As the power is increased to the pump, it pumps faster and more will flow. The larger the pipe, the more that will flow. The more open the valve the more that will flow. The larger the container at the end of the lines, the bigger the results of the system, because it can deliver more. Even though the pump may be pumping as fast as possible, the pipes have to be big enough to deliver the load. The valve has to be open enough to deliver, and the container has to be big enough to handle the load. If the pump is barely moving but the pipes are huge, then there is no pressure and the water will stop flowing or reaching all the containers (the valve is closed more and more to hold pressure in the system to keep water available for the life reactions in respiration, etc.).
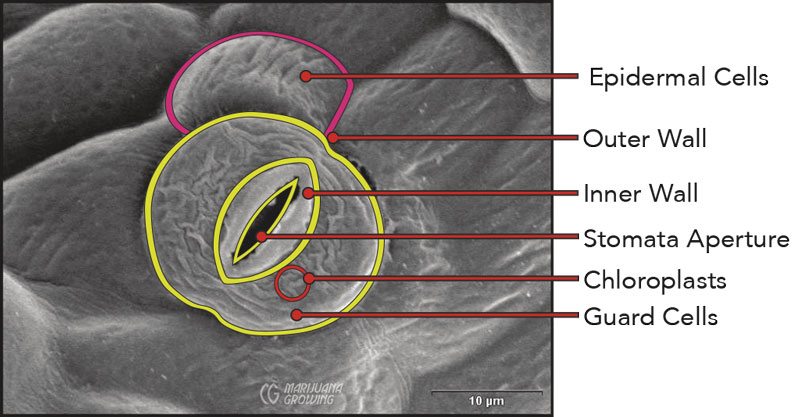
This photo of half-opened stomata, the mouthlike openings on leaf undersides, was magnified 2500 times.
The opposite is true when the pump runs rapidly and the pipes are really small: not enough load is delivered and the process stops. If the pump runs wide open and the pipes are really big, then pressure drops to zero again and function stops; the same is true the other way. The over- all system will deliver zero load at the extremes of these four situations. So, in a situation where water (load) was available, where the temperature (power) was normal, where the container (sink) was appropriate, and the pipes very small, the valve would be more and more open to get the load delivered.
*By volume, dry air contains about 78.09 percent nitrogen, 20.95 percent oxygen, 0.93 percent argon, 0.039 percent carbon dioxide (390 ppm), and trace amounts of other gases. Note the ambient level of CO2 has increased from 350 ppm 50 years ago; as CO2 rises, the earth gets warmer.
**The Calvin cycle [aka Calvin– Benson-Bassham (CBB) cycle, reductive pentose phosphate cycle, or C3 cycle] is a series of biochemical redox reactions that take place in the stroma of chloroplasts in photosynthetic organisms. The light-independent reactions of photosynthesis are chemical reactions that convert carbon dioxide and other compounds into glucose. Melvin Calvin, James Bassham, and Andrew Benson discovered the cycle at UC Berkeley by using the radioactive isotope carbon-14.
Photorespiration, is a process in plant metabolism by which RuBP (a sugar) has oxygen added to it by RuBisCO (an enzyme) instead of carbon dioxide during normal photosynthesis. This is the beginning step of the Calvin- Benson-Bassham cycle. This process reduces efficiency of photosynthesis in C3 plants.
Under proper conditions when the water supply is abundant, higher air temperatures step up metabolic activity and speed up growth. The warmer the air is, the more water it is able to hold. This moist air often restrains plant functions and decelerates growth rather than speeding it. Typically, as air temperature rises, humidity falls and plants use water faster; then later in the light cycle, because more water moves into the air, the air becomes more humid. When the lights go out or air temperature naturally cools, humidity levels begin to rise until saturation, at which point moisture condenses out of the air. Moving the air slows or eliminates this process. Night- time—when the lights go out—often causes complications; problems result from excess humidity and moisture condensation when the temperature drops.
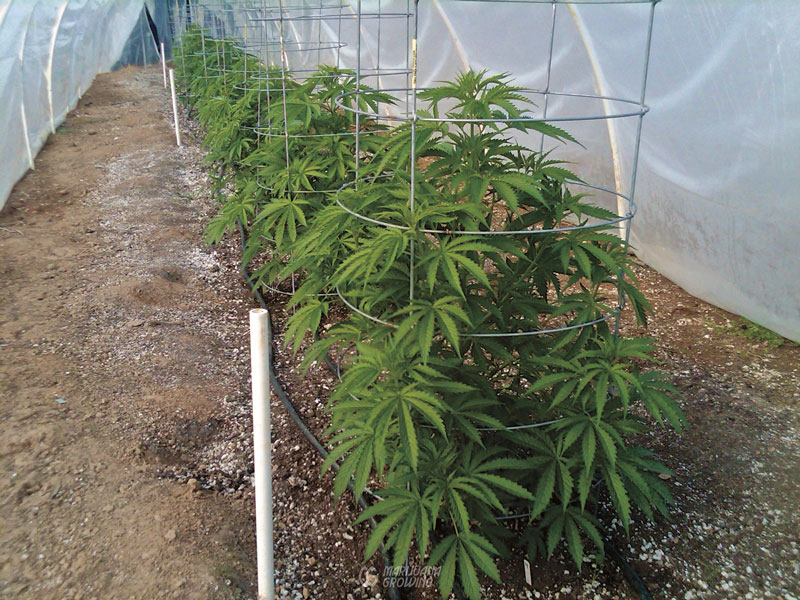
A plastic greenhouse helps regulate temperatures outdoors. Indoors, temperature regulation is accomplished in a variety of ways: air ventilation, air circulation, air conditioning, and more.
Heat buildup during warm weather can catch any gardener off guard and cause serious problems. Ideal garden rooms are located underground, in a basement, taking advantage of the insulating qualities of Mother Earth. With the added heat of the HID and hot, humid weather outdoors, an indoor room can heat up rapidly and greenhouse temperatures can soar. More than a few gardeners in the USA have lost their crops to heat stroke during the Fourth of July weekend, which is the first big holiday of the summer, and everybody wants to get away to enjoy it. Some gardeners forget or are too paranoid to maintain good ventilation in the garden room while on vacation. Temperatures can easily climb to 100ºF (37.8ºC) or more in garden rooms and greenhouses that are poorly insulated and vented. The hotter the air temperature, the more ventilation and water that are necessary.
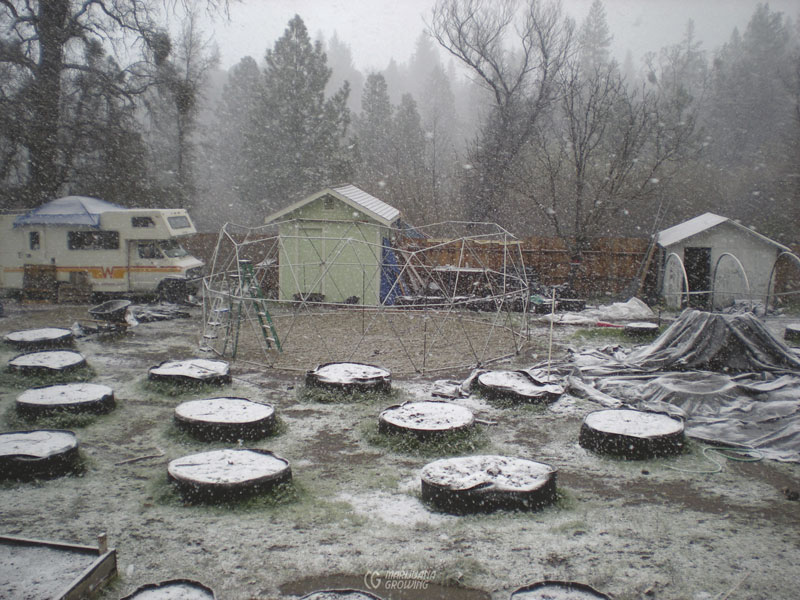
Winter weather comes early to some gardens. This gardener was able to harvest his crop a long time before the snow arrived.
The cold of winter is the other temperature extreme. Think back and remember past winter storms in your climate. Electricity often goes out in cities and surrounding areas. Water pipes freeze and heating systems fail. Some residents are driven from their homes until electricity can be restored, often days later. In such cases gardeners return to find their beautiful gardens wilted, stricken with the deepest, most disgusting green only a freeze can bring. Broken water pipes, ice everywhere! It is difficult to combat such acts of God, but if possible, always keep garden rooms and greenhouses above 50ºF (10ºC) and definitely above freezing, 32ºF (0ºC). If the temperature dips below this mark, the freeze will rupture plant cells, and foliage will die back or, at best, grow slowly. Growth slows or stops when the temperature dips below 55ºF (12.8ºC). Stressing plants with cold weather conditions is not recommended; it may yield a proportionately higher THC content, but it will reduce plants’ overall productivity.
A thermostat measures temperature and controls it by turning on or off a device that regulates heating or cooling, keeping the temperature within a predetermined range. A thermostat can be attached to an electric or combustion heater. Often indoor garden rooms can take advantage of individually thermostat-controlled electric baseboard heaters in each room.
A thermostat can be used to control cooling vent fans in all but the coldest garden rooms and greenhouses. When it gets too hot in a room, the thermostat turns on the vent fan, which evacuates hot, stale air. The vent fan remains on until the desired temperature is reached, then the thermostat turns off the fan. A thermostat-controlled vent fan offers adequate temperature and humidity control for many garden rooms and greenhouses. A refrigerated air conditioner can be installed if heat and humidity are a major problem, but such devices draw a lot of electricity. If excessive heat is a problem but humidity is not a concern, use a swamp cooler. These evaporative coolers are inexpensive to operate and keep garden rooms and greenhouses cool in arid climates.
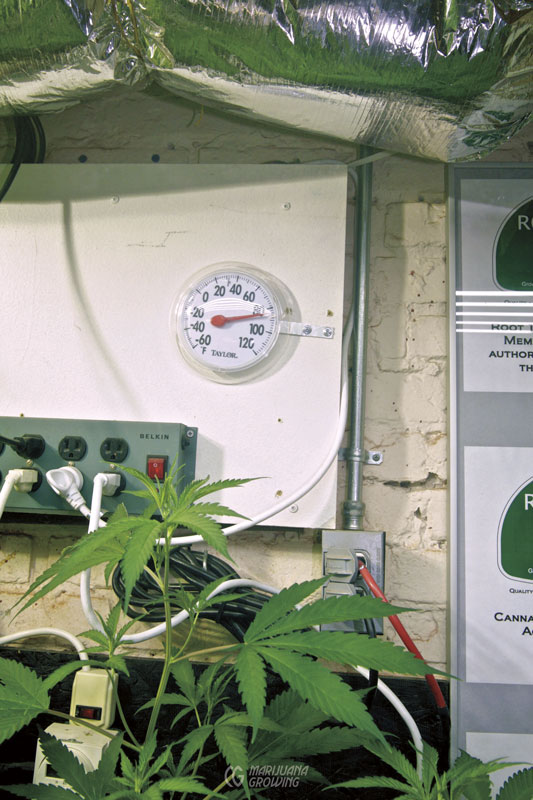
An accurate thermometer is necessary equipment for all indoor, greenhouse, and outdoor cannabis gardens.
Ambient temperature regulation is essential for healthy cannabis growth regardless of whether plants are grown indoors, outdoors, or in a greenhouse.
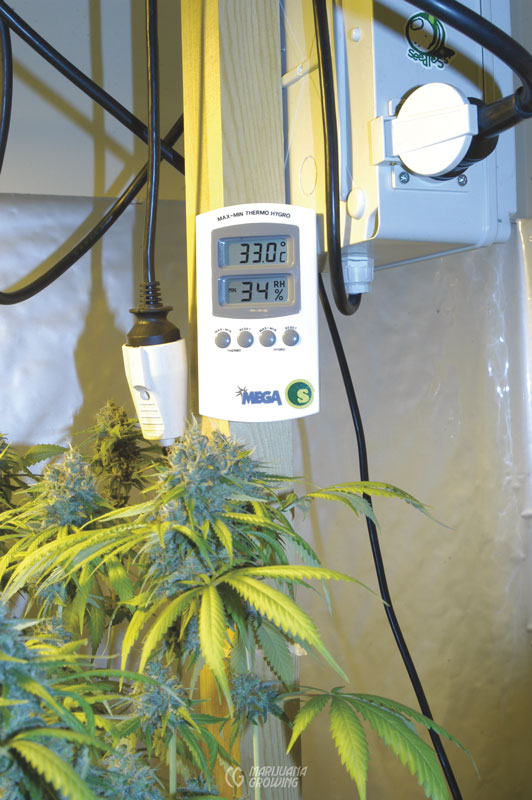
A combination thermometer/hygrometer that registers maximum and minimum readings helps keep the garden room’s atmosphere constant.
Common thermostats include single-stage and two-stage. The single-stage thermostat controls a device that keeps temperature the same both day and night. A two-stage thermostat is more expensive but can be set to maintain different daytime and nighttime temperatures. This convenience can save money on heating and provides exacting control over plant growth.
Note: Sometimes a slight day/night differential in temperature, even as slight as two degrees, can bring about physiological changes in plant growth, such as intense foliage coloration or an increased production of resin and other metabolites.
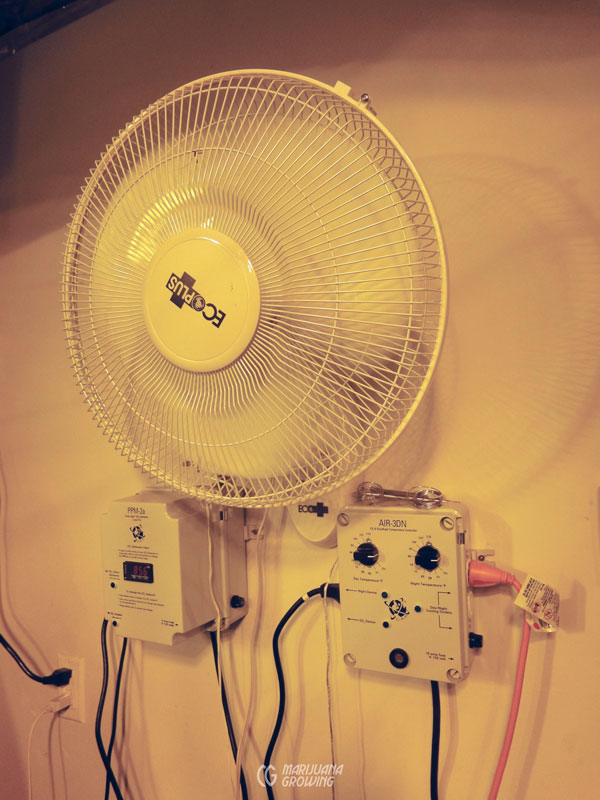
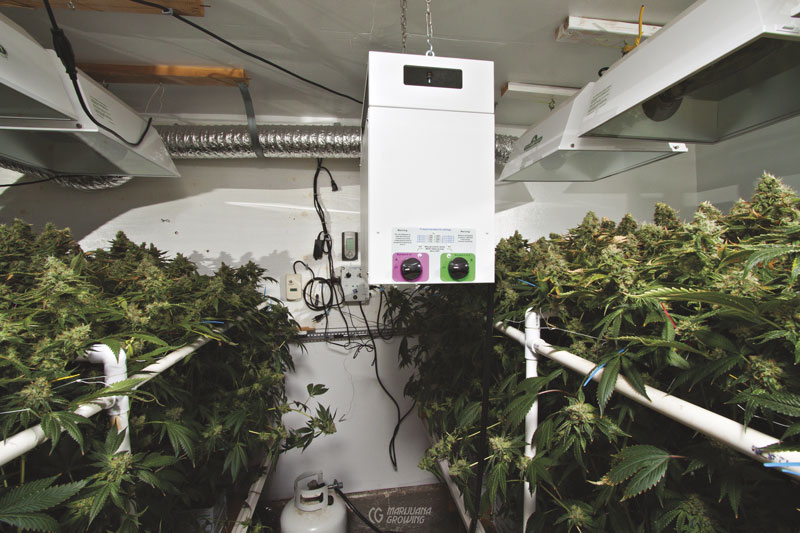
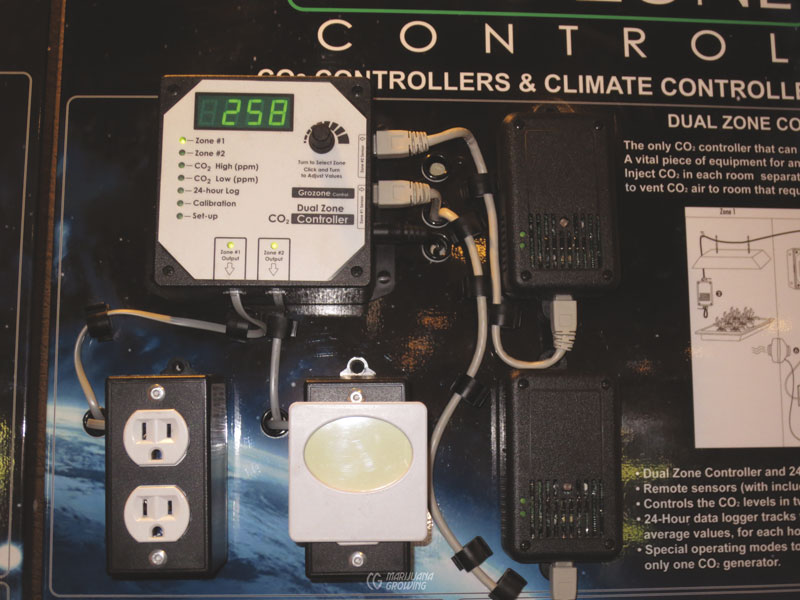
This garden room is equipped with a thermostat that controls both day and night temperatures. On the left is a CO2 controller.
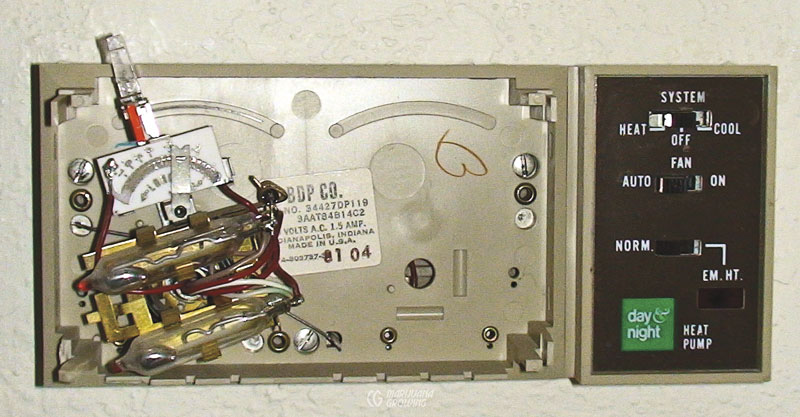
This thermostat is controlled with a mercury switch visible in the center-left of the photo.
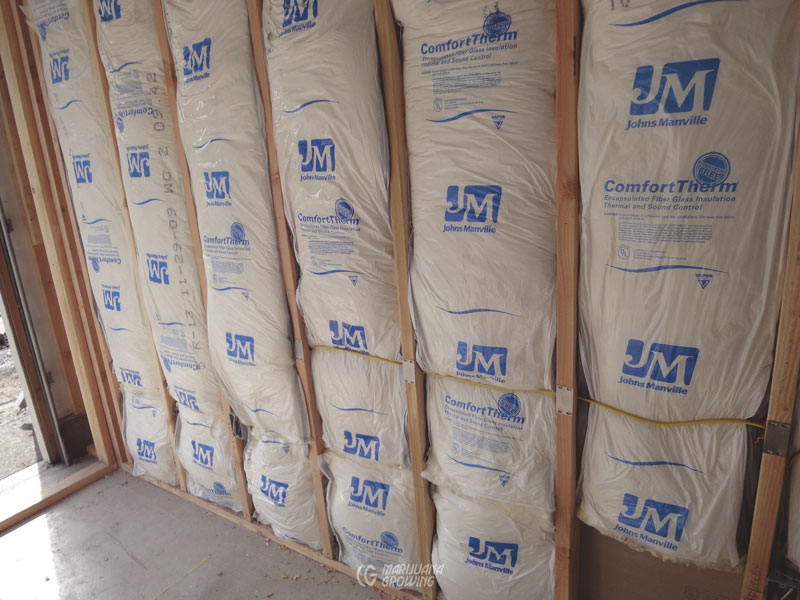
Insulated garden-room walls help immensely to keep garden-room temperature independent of outside atmospheric conditions.

A directional air conditioner directs cool air over the entire area of this garden room.
Many electronic garden room and greenhouse controllers have been developed in the last decade. These controllers can operate and integrate every appliance in garden rooms and greenhouses. More sophisticated controllers integrate the operation of CO2 equipment and vent and intake fans. If temperature and humidity regulation are causing cultural problems in your garden rooms and greenhouses, consider purchasing a controller.
Uninsulated garden rooms and greenhouses experience significant temperature fluctuations and require special consideration and care. Before growing in such a location, make sure it is the only choice. If forced to use a sunbaked attic that cools at night, make sure maximum insulation is in place to help balance temperature instability. Enclose the garden room or greenhouse to control heating and cooling.
When CO2 is enriched to levels of 0.7 to 0.9 percent (700–900 ppm), a temperature of 75ºF to 80ºF (23.9ºC– 26.7ºC) promotes faster exchange of gases. Photosynthesis and chlorophyll synthesis are able to take place at a faster rate, causing plants to grow more rapidly. Remember, this higher temperature increases water, nutrient, and space consumption, so be prepared. Unless in a functioning sealed room, CO2- enriched plants still need ventilation to remove stale, humid air and promote plant health.
The temperature in the garden room tends to stay the same, top to bottom, when the air is circulated with an oscillating fan or fans. In an enclosed garden room, HID lamps and ballasts keep the area warm. Placing remote ballasts near the floor on a shelf or a stand also helps break up air stratification by radiating heat upward, while protecting them from water splashes and floods. Garden rooms in cool climates stay warm during the day when the outdoor temperature peaks, but they often cool off too much at night, when cold temperatures set in. To compensate, gardeners turn on the lamp at night to help heat the room, but leave it off during the day. Sometimes it is too cold for the lamp and ballast to maintain satisfactory room temperatures.
A barrel filled with water (or a nutrient reservoir) will collect heat during the day. At night, when temperatures cool, the heat banked in the water slowly radiates to warm the growing area. This passive means of heating requires only a container and space to locate it. See chapter 11, Greenhouses, for more information.
Garden rooms in homes are usually equipped with a central heating and/ or air conditioning vent. The vent is usually controlled by a central thermostat that regulates the temperature of the home. By adjusting the thermostat to 72ºF (22.2ºC) and opening the door to the garden room, it can stay a cozy 72ºF (22.2ºC). However, using electric power is expensive and often wasteful. Keeping the thermostat between 60ºF and 65ºF (15.6ºC–18.3ºC), coupled with the heat from the HID system, should be enough to sustain 75ºF (23.9ºC) temperatures. Other supplemental heat sources such as inefficient incandescent lightbulbs and electric heaters are expensive and draw extra electricity, but they provide instant heat that is easy to regulate. Propane and natural gas heaters increase temperatures and burn oxygen from the air, creating CO2 and water vapor as by-products. This dual advantage makes using a CO2 generator economical and practical, especially in greenhouses. Make sure to properly vent all enclosed spaces when generating CO2 with fossil fuels.

Air conditioning is expensive but often already installed in many homes.
This propane heater is also a CO2 generator.
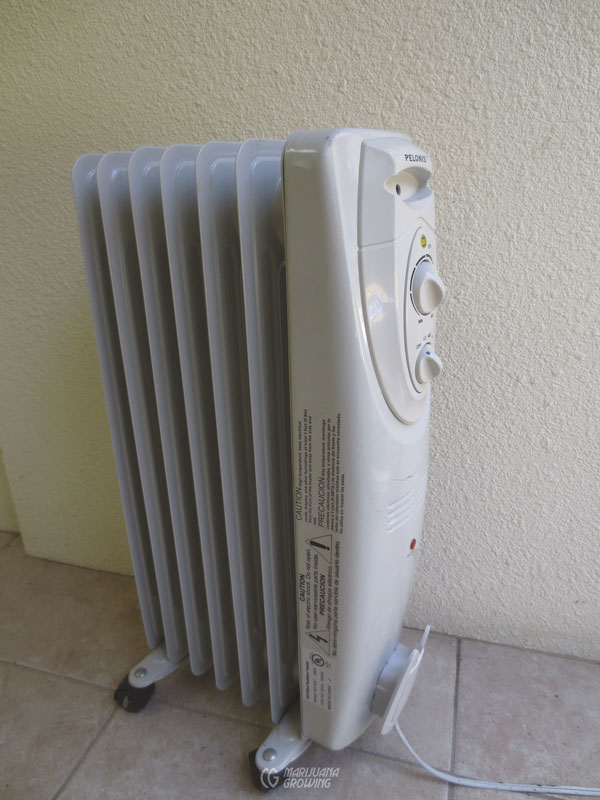
Electric oil-filled radiators are a good option for many small gardens. They can supply just enough heat during nighttime hours to maintain temperature levels and not let humidity get out of control.
Kerosene heaters with an open flame generate heat and CO2. Look for a heater that burns its fuel efficiently and completely with no telltale odor of the fuel in the room. Do not use old kerosene heaters or fuel-oil heaters if they burn fuel inefficiently. A blue flame is burning all the fuel cleanly. A red flame indicates only part of the fuel is being burned. I’m not a big fan of kerosene heaters and do not recommend using them. The room must be vented regularly to avoid buildup of toxic carbon monoxide (CO), also a by-product of combustion.
Diesel oil is a common source of indoor heat. Many furnaces use this dirty, polluting fuel. Woodstoves pollute too, but work well as a heat source. A vent fan is extremely important to exhaust polluted air and draw fresh air into a room heated by an oil furnace or a woodstove.
Propane and LP gas heaters are the most common way to heat greenhouses. Some of these heaters have an open flame, others do not. Combustion burns oxygen out of the air, which in turn increases CO2 levels in the greenhouse.
| WIND SPEED | WINDCHILL | ||
| MPH | KMH | °F | ºC |
| 0 | 0 | 50 | 10 |
| 5 | 8 | 48 | 8.88 |
| 10 | 16 | 40 | 4.44 |
| 15 | 24.1 | 36 | 2.22 |
| 20 | 32.2 | 32 | 0 |
| 25 | 40.2 | 30 | -1.11 |
| 30 | 48.2 | 28 | -2.22 |
Use an infrared heater to raise the temperature in enclosed garden rooms and greenhouses. Infrared heat energy is directed at objects to be heated. The energy does not convert to heat until absorbed by plants, pots, soil, and so forth. Temperature is easy to control and accurate because the temperature sensor receives the same infrared energy that the plants receive. Infrared heating allows the air in enclosed gardens to be 5 to 7 degrees lower than if air is heated with fossil fuels and electricity. Temperatures also vary less from the top to the bottom of the enclosed area. And leaf surfaces stay drier and are less prone to attack by airborne diseases, allowing more plants and denser foliage in the same area.
The heating system should be designed around the greenhouse or garden room. Hang the infrared heater high enough so that infrared pattern can cover the desired width. Outdoor gardeners can suspend infrared heaters 16 feet above growing beds for nighttime heat. See manufacturer recommendations for coverage.
Outdoors, temperature is more difficult to control. Planting in a location that remains warm, especially at night, is the easiest way to keep plants warm. Remember that cool air sinks and tends to stay in the bottom of canyons or low geographic spots. Avoid windy planting locations because windchill lowers temperature in relation to the velocity of wind. If wind is a factor, erect a permeable windbreak or plant next to a building or natural wind barrier to lessen the effect.
According to popular calculations at 50ºF (10ºC) the windchill factor drops the temperature ten degrees when the wind is blowing at 10 mph (16.1 kmh).
Cooling the great outdoors is even more difficult than heating it. The easiest way to cool plants outdoors is to plant in partial shade. Plant in a location that is shaded during the heat of the day so that plants do not get warmer than 86ºF (30ºC), at which point growth virtually stops. A shade cloth can also be installed above plants. A natural breezeway occurs between the canopy of plants and the shade cloth.
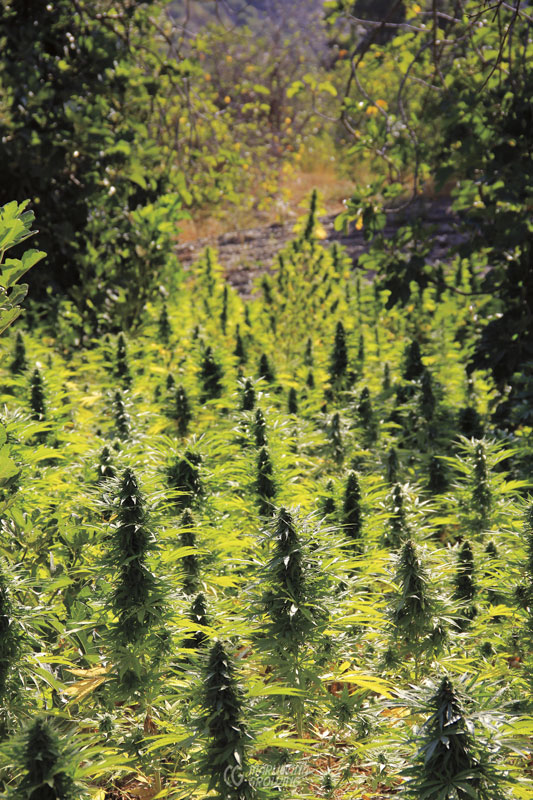
Note: Cannabis will grow better outdoors in higher temperatures than it will indoors or in a greenhouse at the same temperatures. Mother Nature is the best!
Disease, insect, and spider mite existence and survival are also affected by temperature. In general, the cooler it is, the slower the insects and fungi reproduce and develop. Temperature control is effectively integrated into many control programs for diseases, pests and spider mites. Check recommendations in chapter 24, Diseases & Pests.
Windchill is more difficult to control outdoors.
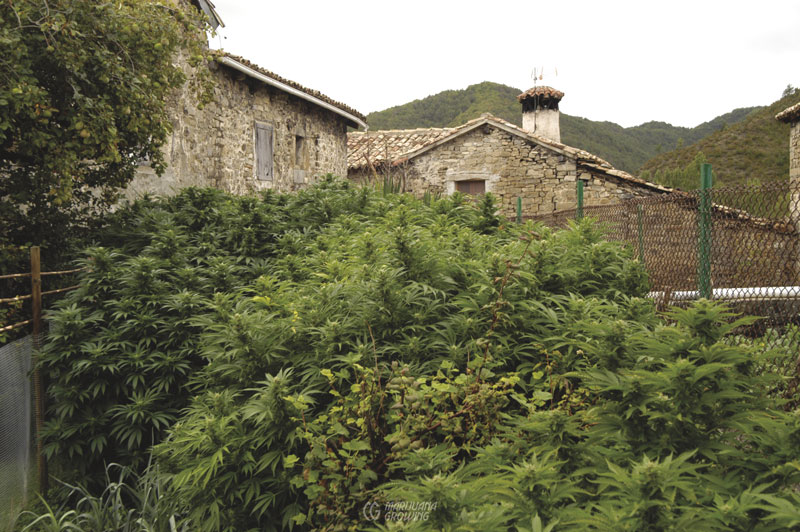
Planting next to or in between buildings protects plants from wind, which in turn helps keep them warmer.
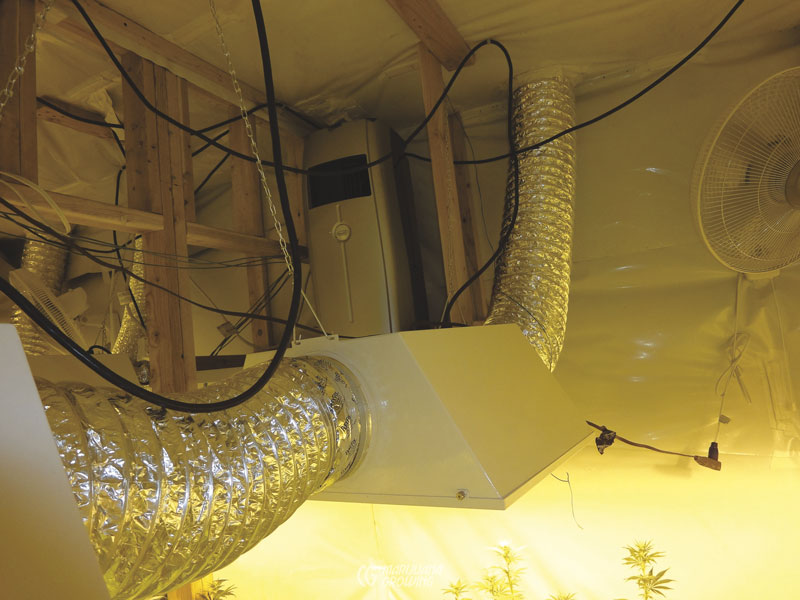
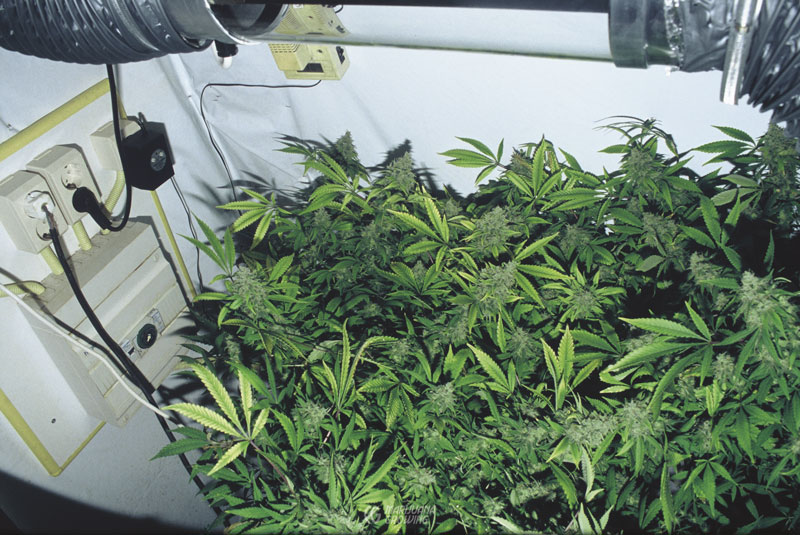
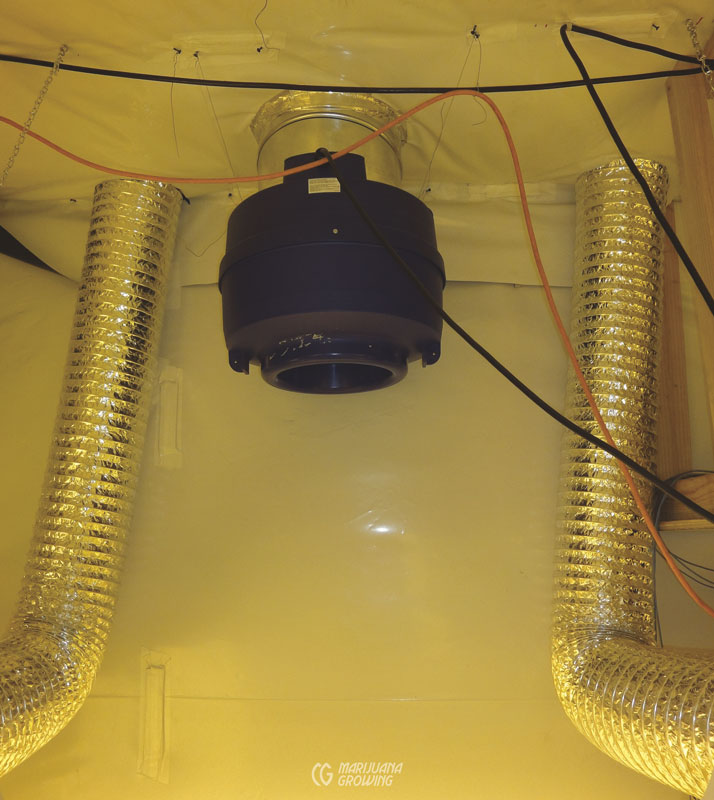
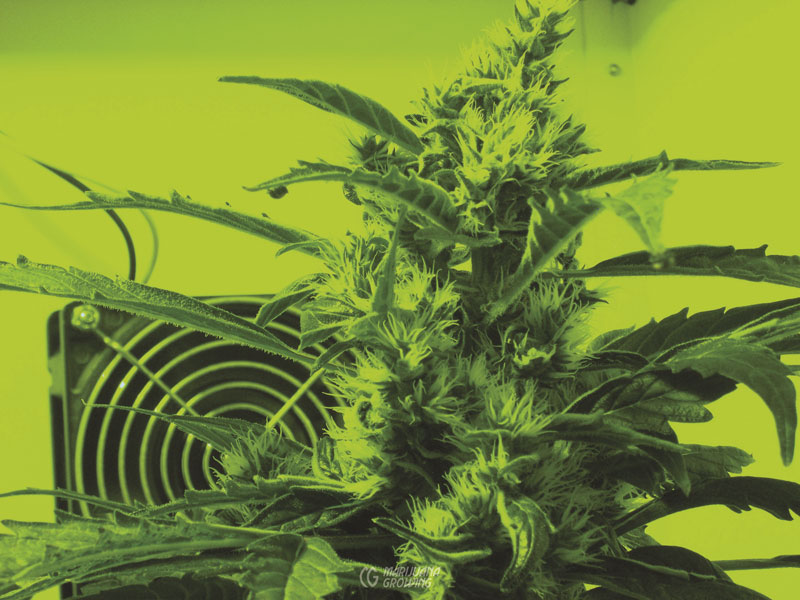
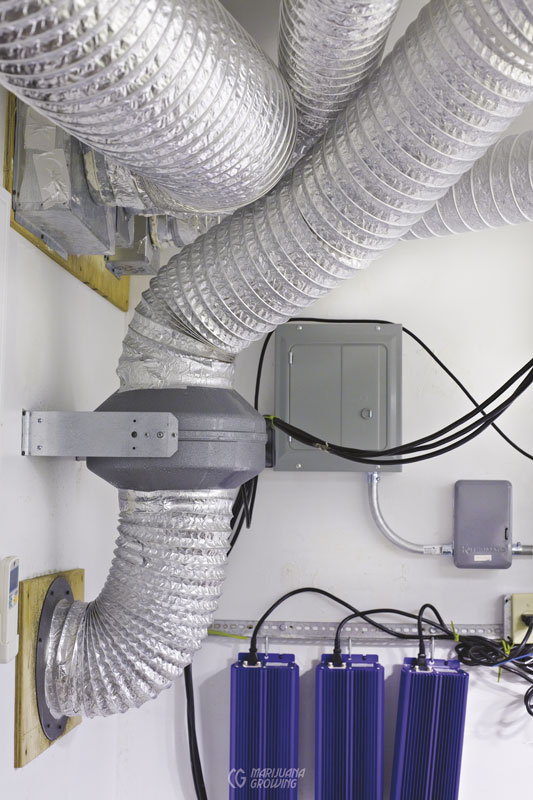
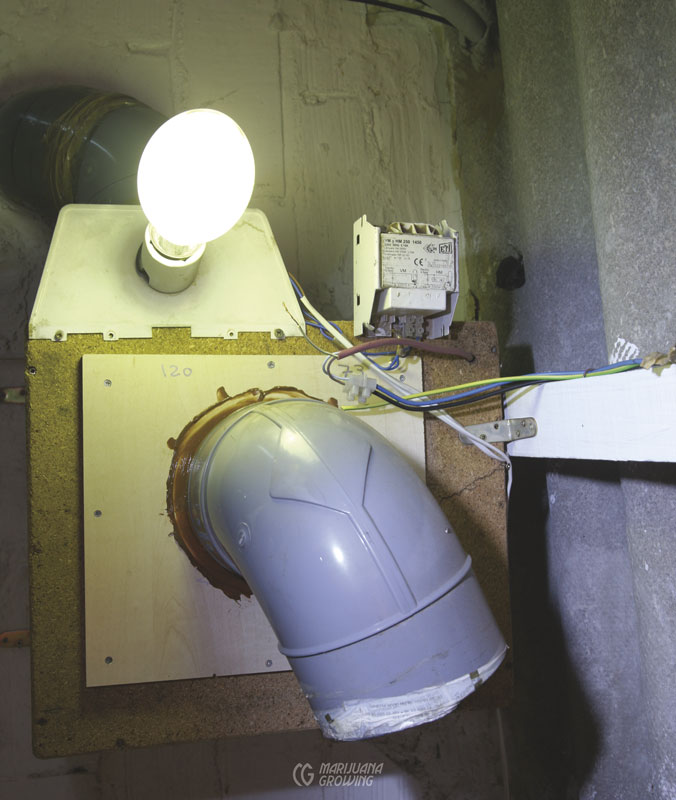
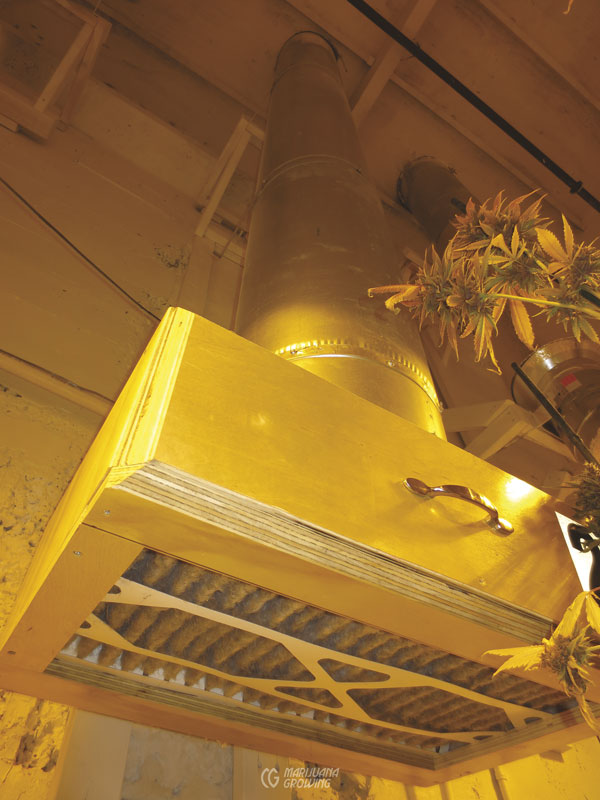
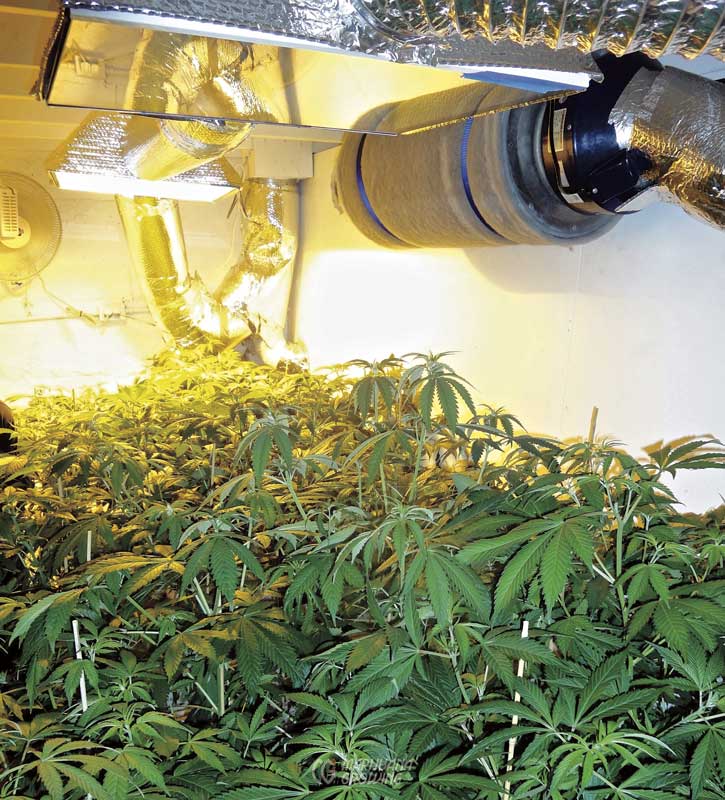
Heat generated by the HID bulb is evacuated before it affects the room’s temperature and humidity.
Humidity
Humidity is relative; that is, air holds different quantities of water at different temperatures. Relative humidity is the ratio between the amount of moisture in the air and the greatest amount of moisture the air could hold at the same temperature. In other words, the hotter it is, the more moisture air can hold; the cooler it is, the less moisture air can hold. When the temperature in a garden room drops, the humidity climbs. If humidity climbs beyond 100 percent, the moisture in the air condenses into water droplets. For example, dew forms on plant surfaces outdoors when the temperature drops at night.
For example, an 800 cubic foot (10 × 10 × 8 feet) (22.7 m3) garden room will hold about 14 ounces (414 ml) of water when the temperature is 70ºF (21.1ºC) and relative humidity is at 100 percent. When the temperature is increased to 100ºF (37.8ºC), the same room will hold 56 ounces (1.7 L) of moisture at 100 percent relative humidity. That is four times more moisture! Where does this water go when the temperature drops? It condenses onto the surface of plants as well as ceilings and walls, just as dew condenses outdoors.
Relative humidity increases when the temperature drops at night. The greater the temperature variation, the greater the relative humidity variation will be.
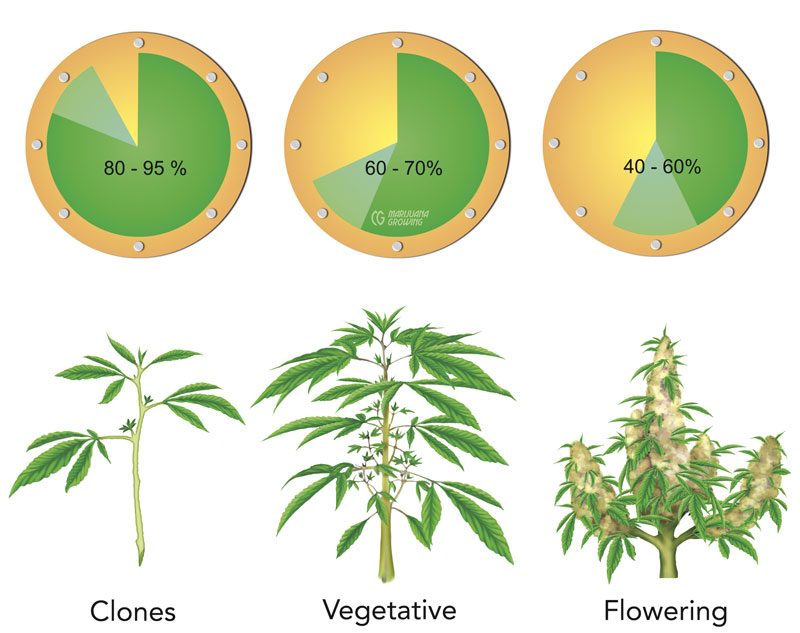
Supplemental heat or extra ventilation is often necessary at night if temperatures fluctuate by more than 15 degrees. Seedlings and vegetative plants grow best when the relative humidity is from 60 to 70 percent. Flowering plants grow best in a relative humidity range of 40 to 60 percent.
The lower humidity range discourages most pests and diseases. As with temperature, consistent humidity promotes healthy, even growth. Relative humidity level affects the transpiration rate of plants via the stomata (see “Stomata” above). When humidity is high, water evaporates slowly. The stomata close, transpiration slows, and so does plant growth.
Water evaporates quickly into drier air, causing stomata to open, thus increasing transpiration, fluid flow, and growth. Transpiration in arid conditions will be rapid only if there is enough water available for roots to draw in. If water is inadequate, stomata will close to protect the plant from dehydration, causing growth to slow.
When relative humidity climbs beyond 70 percent, the pressure slows the movement of gas molecules from solution to the air. This results in the increase in energy or temperature in the overall system because it is not used up in evaporation. The stomata typically lodge wide open.
| A 10 × 10 × 8-foot (800 cubic feet) (22.7 m3) garden room can hold: | |||
| Water (ounces) | Water (milliliters) | °F | ºC |
| 4 | 118 | 32 | 0 |
| 7 | 207 | 50 | 10 |
| 14 | 414 | 70 | 21.1 |
| 18 | 532 | 80 | 26.7 |
| 28 | 828 | 90 | 32.2 |
| 56 | 165 | 100 | 37.88 |
The moisture-holding capacity of air approximately doubles with every 20ºF (10ºC) increase in temperature.
Measuring and Controlling Relative Humidity
Measure relative humidity with a hygrometer. By knowing the exact moisture content in the air, humidity may be adjusted to a safe 40 to 60 percent level that encourages transpiration and discourages fungus growth.
Inexpensive spring-type hygrometers are accurate within 5 to 10 percent. They are adequate for most hobby gardeners whose main concern is to keep the humidity near 50 percent. More expensive psychrometers are very accurate. Today there are many exceptionally accurate high-tech gadgets; plus they are equipped with memory! See chapter 15, Meters, for more information.
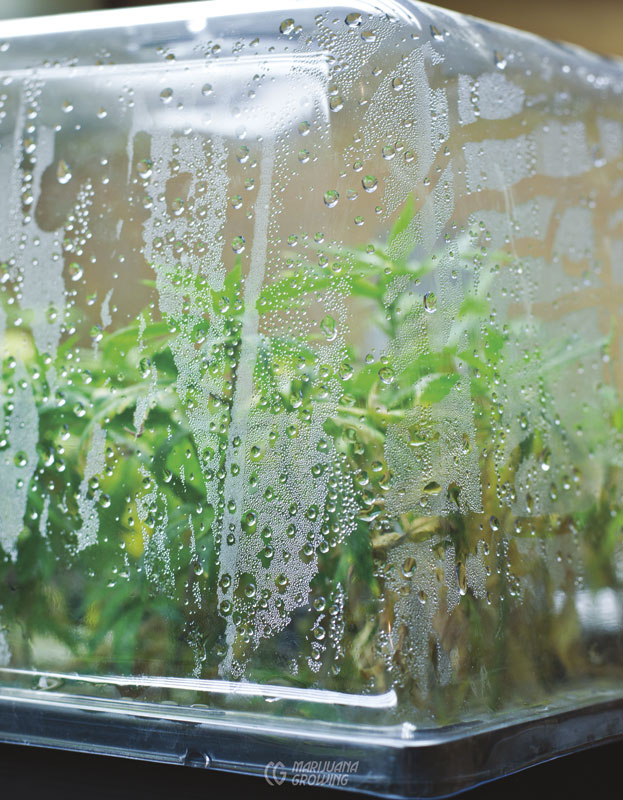
Moisture condenses inside this clone dome just as it can condense inside a garden room. Typically, the humidity inside a garden room rises when the temperature cools at night. If the humidity rises enough, moisture will condense on surfaces.
A humidistat is attached to a vent fan, air conditioner, humidifier, or dehumidifier to regulate humidity in a garden room or greenhouse. Humidistats are inexpensive (about $20 to $100 USD) and make controlling the environment very easy. A humidistat and thermostat or a combination unit can be set up to control a vent fan and other appliances. Each can operate the fan independently. As soon as the humidity (or temperature) exceeds the acceptable range, the fan turns on to vent the humid (or hot) air outdoors.
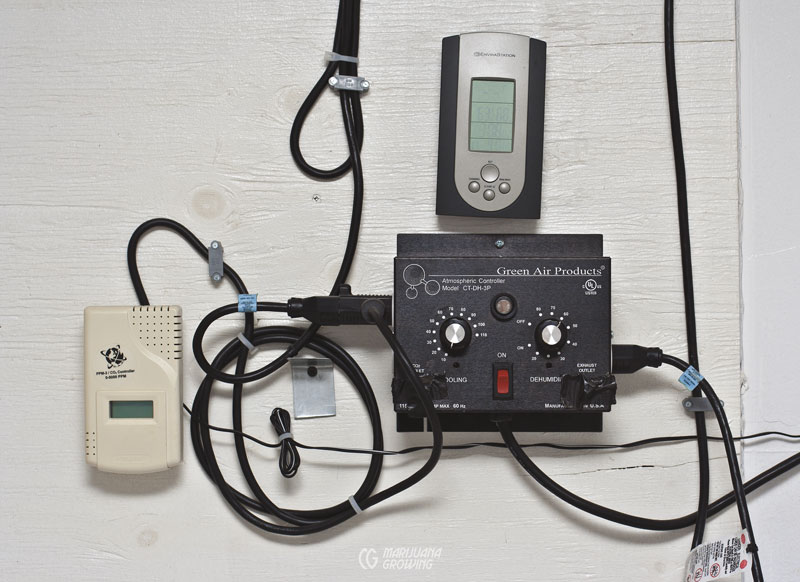
Sophisticated atmospheric controllers also control humidity with a humidistat.
The HID lamp and ballast radiate heat, which lowers humidity. Heat from an HID system and a vent fan on a thermostat/humidistat are all the humidity control necessary for many garden rooms. Other dry heat sources, such as hot air vented from a furnace or woodstove, dry the air and lower the humidity. But be careful; do not let piped-in, warm, dry air blow directly on foliage. It will rapidly dehydrate plants.
Increase humidity by misting the air with water or setting out a bucket of water to evaporate into the air. A humidifier is convenient and relatively inexpensive. Humidifiers evaporate water into the air to increase humidity. Just set the dial to a specific level and the humidity changes to the desired level as soon as enough water is evaporated into the air. A humidifier is usually not necessary unless there is an extreme problem with the enclosed garden area drying out. Problems seldom occur that can be remedied by a humidifier. All too often, there is too much humidity in the air because of irrigation and transpiration.
A dehumidifier is more sophisticated and expensive than a humidifier and will remove moisture from an enclosed garden area by condensing it from the air. Once the water is separated from the air, it is captured in a removable container. This container should be emptied daily. For example, when the temperature drops just ten degrees, about ten ounces (~300 ml) of water from the saturated air will condense in a 10 × 10 × 8-foot (800 cubic feet) (22.7 m3) room.
A dehumidifier can be used anytime to help guard against fungus. Just set the dial at the desired percent humidity, and presto! Perfect humidity. Dehumidifiers use more electricity and are more expensive and complex than humidifiers. But to gardeners with extreme humidity problems unsolvable with a vent fan, dehumidifiers are worth the added expense. Check rental companies for large dehumidifiers if only needed for a short time. Air conditioners also function as dehumidifiers but use a lot of electricity. Water collected from a dehumidifier or air conditioner has a very low electrical conductivity (EC) and can be used to water plants.
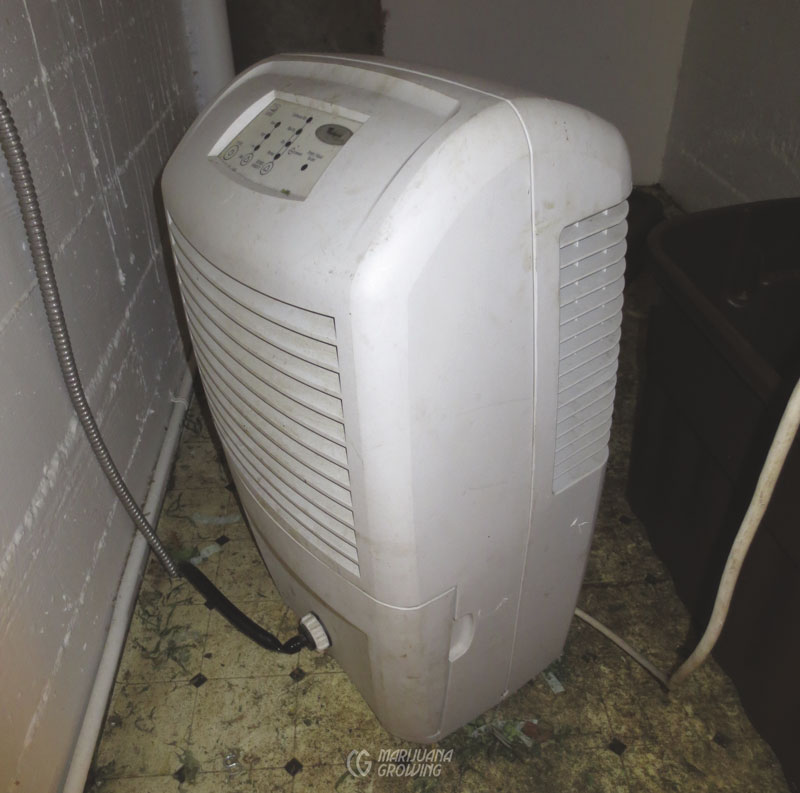
Dehumidifiers are less expensive than air conditioners. A dehumidifier is an excellent way to lower the overall humidity of a room if vent fans are unable to do the job.
Humidity tends to hang around this sheltered corner of the building in the morning and at night.
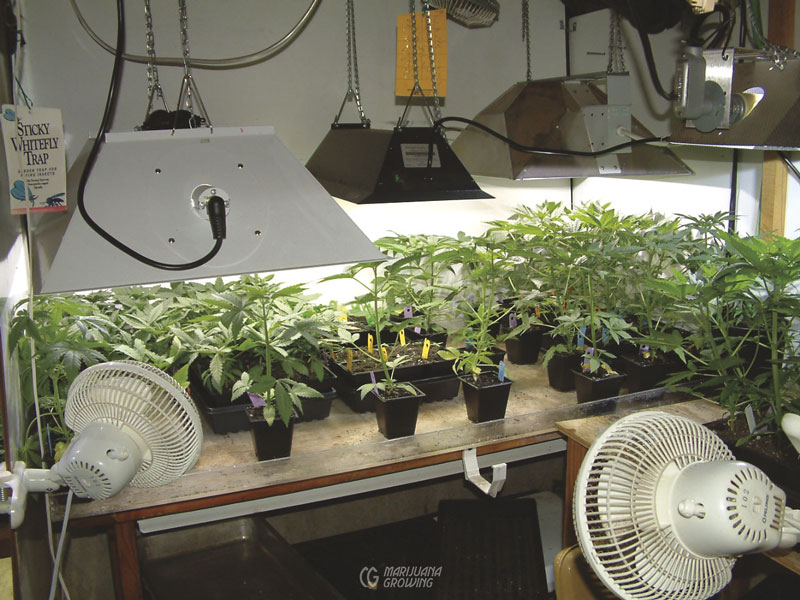
Oscillating circulation fans attached high on garden-room walls are essential to provide proper air circulation between plants.
Pests and diseases can also be prevented by controlling humidity. In general, humidity above 80 percent discourages spider mites but impairs growth and promotes fungus, as well as root and stem rot. Humidity levels below 60 percent reduce the chances of fungus and rot.
Outdoors, humidity is difficult to regulate. Lowering humidity in the wide-open outdoors is virtually impossible because it is impractical to enclose. Raising humidity outdoors is possible by installing windbreaks so that plants do not dehydrate. Air around plants can also be misted, which will increase humidity. However, the best way to control humidity outdoors is to plant in a climate with the desirable humidity levels.
Change or regulate humidity outdoors by planting in a microclimate that is less humid, such as on a hillside or in a natural breezeway.
Change or regulate humidity in a green house with vent fans and evaporative cooling methods, such as a swamp cooler that uses big evaporative cooling pads.
High humidity reduces the ability of the air to hold water, which slows evapotranspiration, reduces water movement in the plant, and diminishes the plant’s cooling ability. High temperatures demand water-cooling; and in the light, the inside of the leaf is 10 to 20 degrees hotter than the air. As a result, high humidity is a bigger problem during the day than it is at night for plant stress.
Note: Disease spores like high humidity, and they will attack both day and night!
Air Movement
Air ventilation and circulation are essential to healthy harvests indoors and in greenhouses. Fresh air is one of the most overlooked factors contributing to a healthy garden and a bountiful harvest. Fresh air is the least expensive essential component required to produce a healthy medicinal garden. Experienced, successful gardeners understand the importance of fresh air and take the time to set up an adequate ventilation system.
Air Circulation
Plants use all CO2 around the leaf within a few minutes. Outdoors, gentle
green breezes replace CO2; in greenhouses and indoor garden rooms, air must be managed. A dead air zone forms around leaves when no new CO2-rich air replaces the used CO2-depleted air. CO2-depleted air stifles stomata and virtually stops growth. If it is not actively moved, air around leaves and in the garden room stratifies.
Warm air stays near the ceiling, and cool air settles near the floor in enclosed areas. Air circulation breaks up these air masses, mixing them together. Avoid these would-be problems by opening a door, window, or vent and/or installing oscillating circulation fans. Air circulation also helps prevent harmful pest and fungus attacks. Omnipresent mold spores do not land and grow as readily when air is stirred by a fan. Insects and spider mites find it difficult to live in an environment that is constantly bombarded by air currents.
Improve air circulation in and around all cannabis plants by pruning out lower, spindly branches and foliage that do not receive much light.

This drawing demonstrates how leaves use virtually all the surrounding CO2 in a short time.
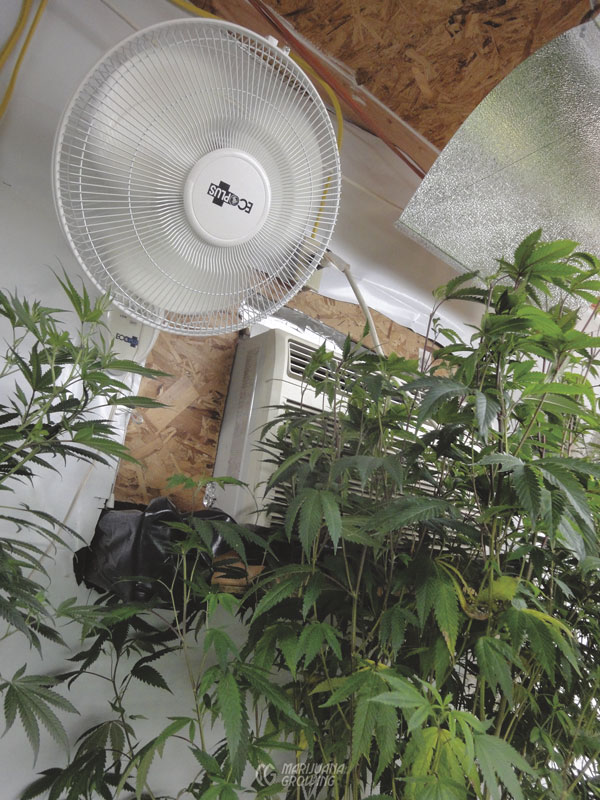
Small oscillating circulation fans move the heat generated by lamps away from the garden. Position circulation fans below and above the canopy of the garden. Do not blow heavy streams of air directly on plants or they will dry out quickly.
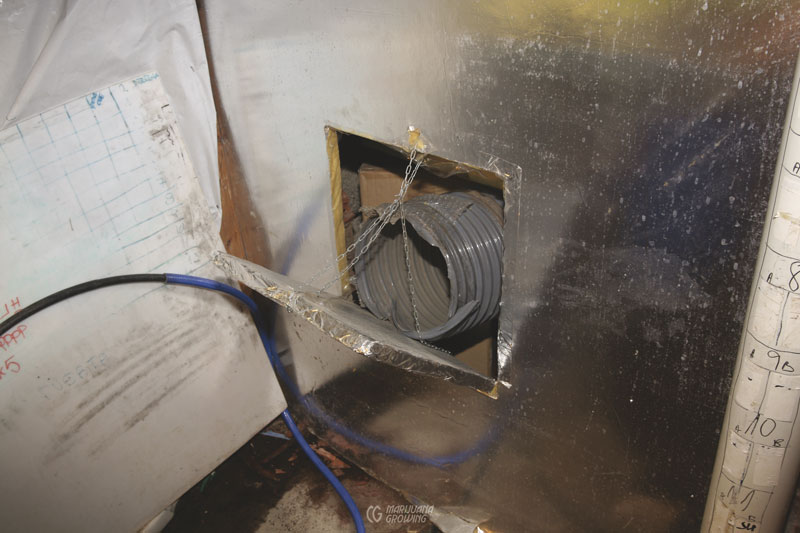
An inline fan attached directly to the ceiling removes any hot air near the ceiling.
Small computer fans can be used to ventilate small garden rooms.
Air Ventilation
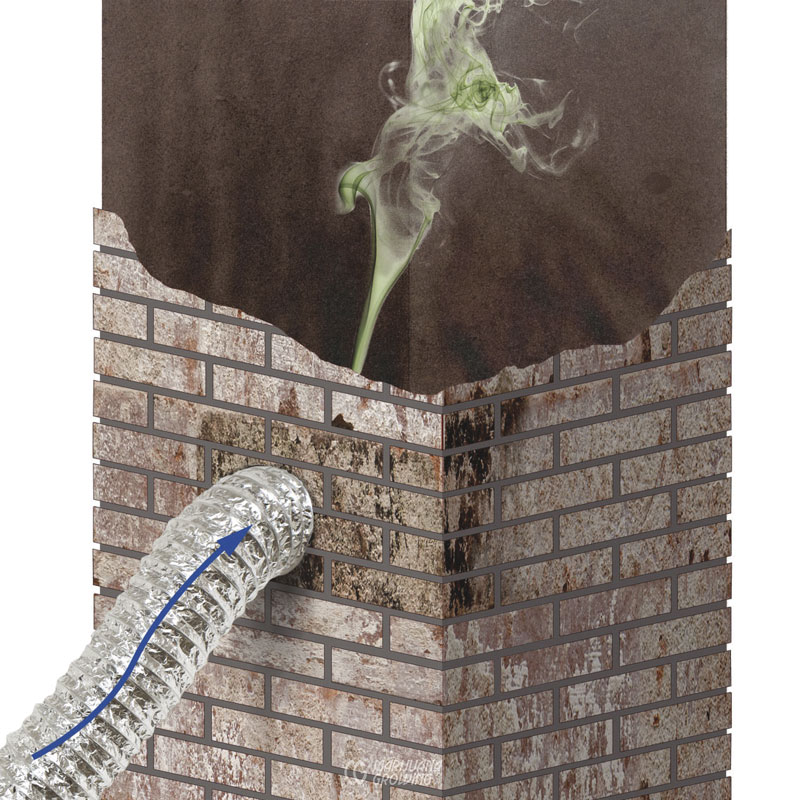
Fresh air is easy to obtain and inexpensive to maintain—it is as simple as hooking up and placing the proper-sized exhaust fan in the most efficient location of a garden room or greenhouse. An intake vent or fan may be necessary to create a flow of fresh air in enclosed areas. Outdoors, planting in a location that receives adequate air circulation is all it takes.
A 10-foot square (0.9 m2) garden will use from 10 to 50 gallons (37.8 to 189.3 L) or more of water every week. Plants transpire most of this water into the air. Every day and night, rapidly growing plants transpire more moisture into the air. If this moisture is left in the garden room or greenhouse, humidity increases to 100 percent, which stifles stomata and causes growth to screech to a halt. It also opens the door for disease and pest attacks.
Replace moist air with fresh, dry air, and transpiration increases, stomata function properly, and growth rebounds. A vent fan that extracts air from the garden room is the perfect solution to remove this humid, stale air. Fresh air flows in through an intake vent or with the help of an intake fan.
Ventilation is as important as water, light, heat, and nutrients. In many cases, fresh air is even more important. Green- houses use large ventilation fans. Garden rooms are very similar to greenhouses and should follow their example. Most garden rooms have an easy-to-use opening such as a window in which to mount a fan, but security or room location may render it unusable. If no vent opening is available, one will have to be created.
All garden rooms require ventilation. The ventilation system could be as simple as an open door or window that sup- plies and circulates fresh air throughout the room. But open doors and windows can be inconvenient and problematic. Most gardeners elect to install a vent fan instead. Some gardeners need to install an entire ventilation system, including ductwork and several fans.
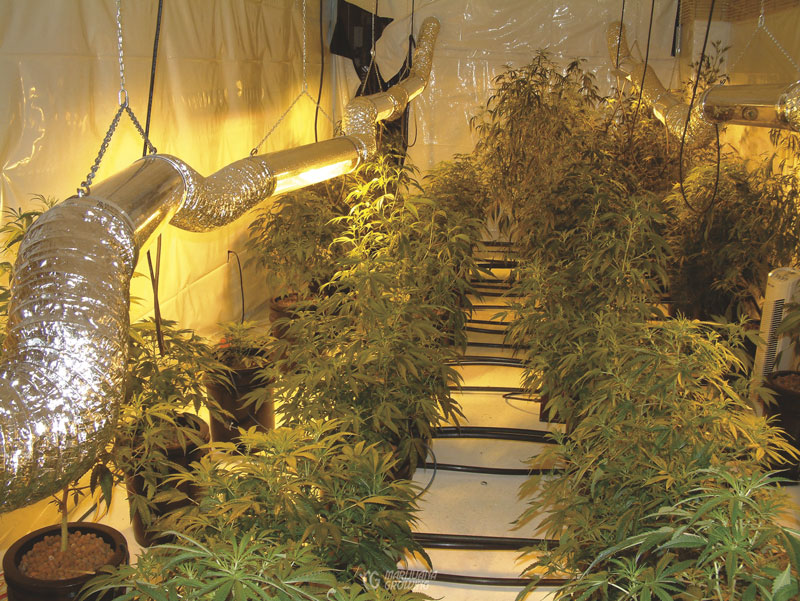
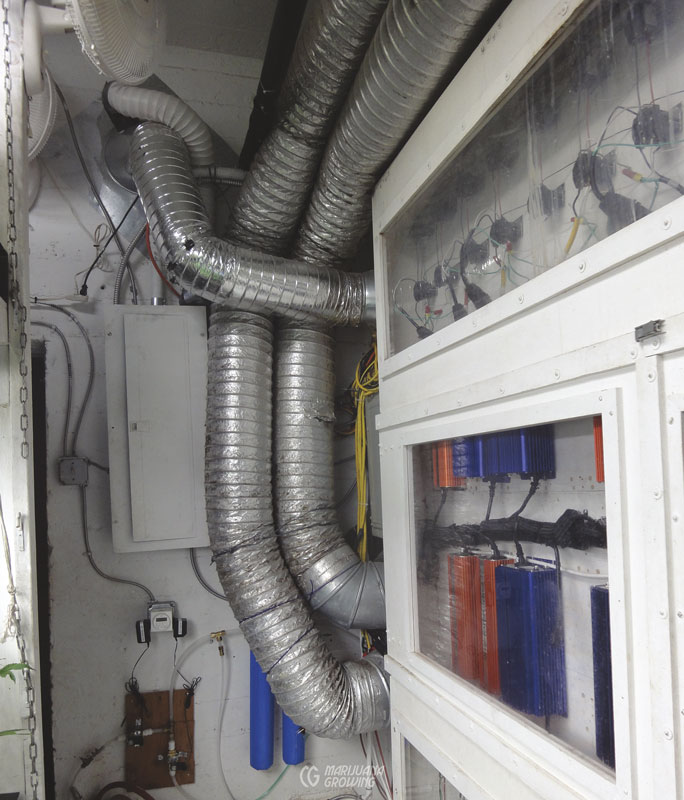
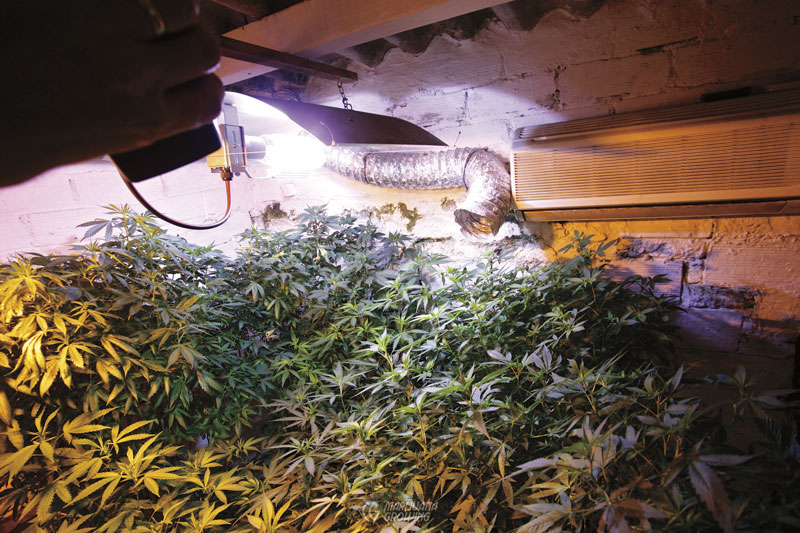
Connecting light refl ectors to a ventilation system removes hot air generated by lamps. Oftentimes, lamps generate the majority of heat in a garden room.
Squirrel cage blowers are efficient at moving air, but they are very loud. Blowers with a balanced, well-oiled wheel run most quietly. Felt or rubber grommets below each foot of the fan will reduce noise caused by vibrations. Run motor at a low rpm (revolutions per minute) to lessen noise.
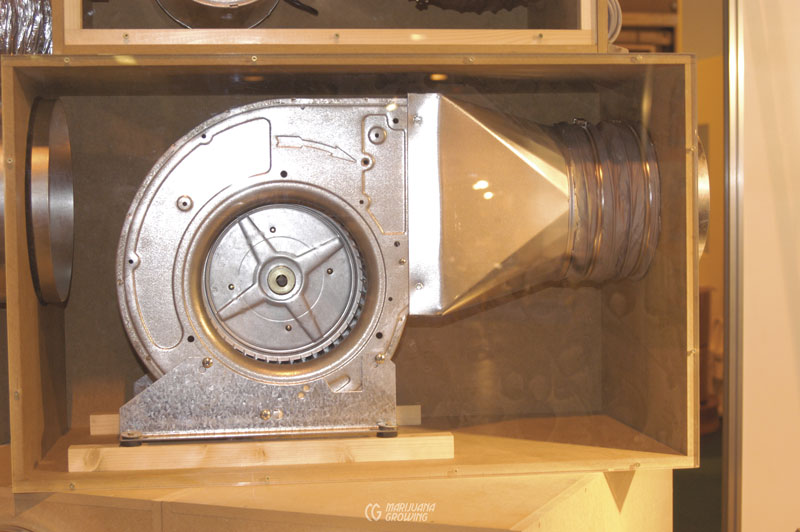
This squirrel cage blower has been set inside a box to dampen the noise it generates.
Inline fans are designed to fit into a duct pipe. The propellers are mounted to increase the airflow quickly, effortlessly, and as quietly as possible. Inline fans are available in quiet, high-quality models that run with little friction.

This inline fan is placed in the middle of ducting to speed air movement.
Propeller or muffin fans with large fan blades expel air through a large opening, and are most efficient and quiet when operated at low revolutions per minute (rpm). A slow-moving propeller fan on the ceiling of a garden room will quietly and efficiently move the air.
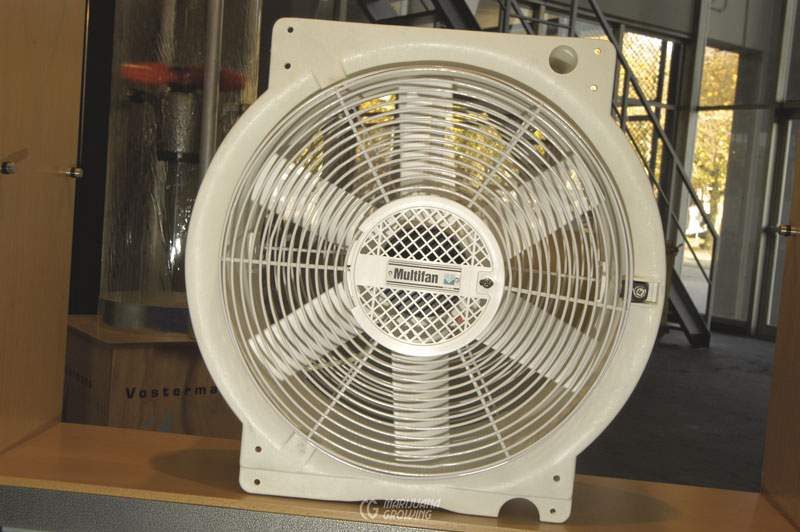
Propeller fans are very efficient and move a lot of air, but they are noisy when running at higher speeds.
A vent fan pulls air out of a room four times more efficiently than a fan is able to push it out. Do not set up a circulation fan in the room and expect it to vent the area by pushing air out a distant vent. The circulation fan must be very large to adequately increase air pressure and push enough air out a vent to create an exchange of air. A vent fan that pulls air out of the garden, on the other hand, is able to change the pressure and exchange the air quickly and efficiently.
A vent fan pulls air out of a room 4 times more efficiently than a fan is able to push it out.
Vent fans are rated by the amount of air they can move, measured in cubic feet per minute (cfm) or cubic meters per hour (m3/h). The fan should be able to replace the air volume (length × width × height = total volume in cubic feet or meters) of a large garden room in less than five minutes, and in a small garden room in less than one minute. Once evacuated, new air is immediately drawn in through an intake vent or via an intake fan. An intake fan might be necessary to bring an adequate volume of fresh air into the room quickly. Covering the intake vent with fine mesh silkscreen will help exclude pests. (see “Filtering Intake Air” below). Some rooms have so many little cracks for air to drift in that they do not need an intake vent.
Run vent ducting alongside walls and the ceiling so they are out of the way. Keep the vent ducting as straight as possible so air flows freely.
Inline fans move air very efficiently. Here, all four ventilation ducts are connected to inline fans.
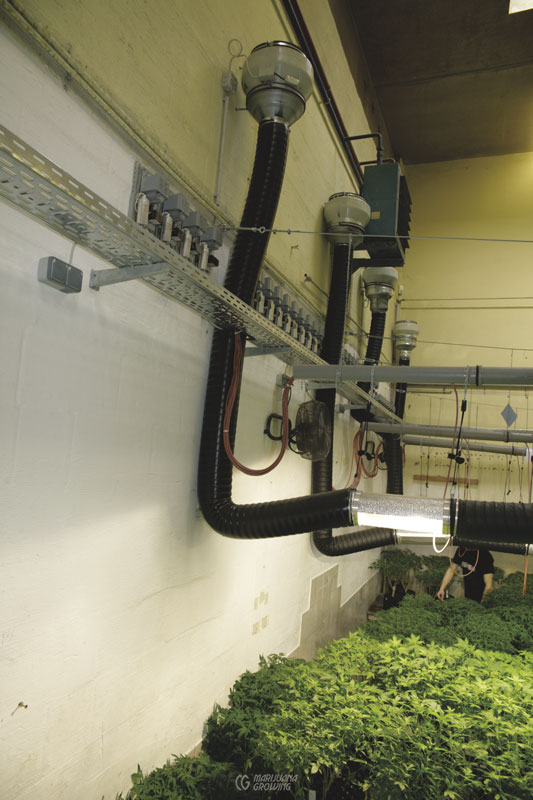
Inline fans can be placed at the end of ducting, where they are most efficient, or they can be placed in the middle of a run of ducting to pull and push air.
Ducting
Ducting should be as big as possible so that air can be moved passively whenever possible. Hot air rises. Adept gardeners locate air exit vents in the hottest peak of garden rooms or greenhouses for passive, silent air venting. The larger the diameter of the exhaust ducts, the more air that can travel through them. By installing a big, slow-moving vent fan in this vent, hot stale air is quietly and efficiently evacuated. A fan running at 50 rpm is quieter than one running at 200 rpm. Smart gardeners install 12-inch (30.5 cm) or larger ducting and inline fans whenever possible. Most often, the vent fan is attached to ducting that directs air out of enclosed garden areas.
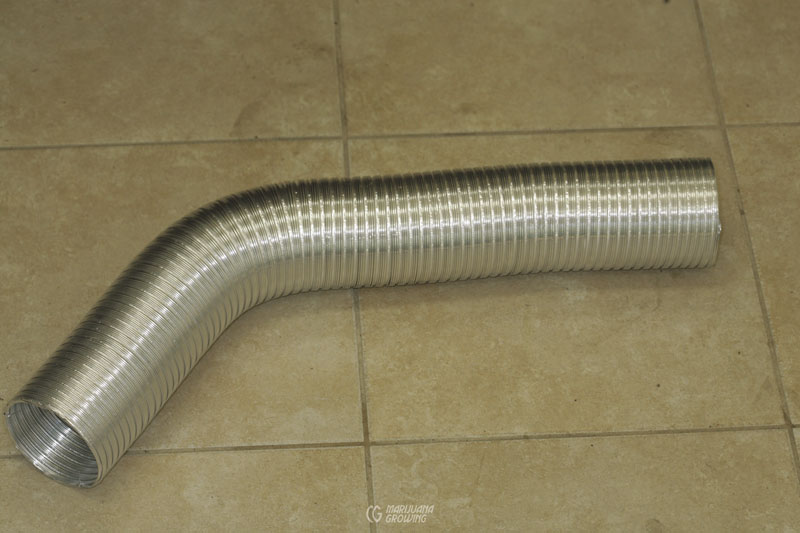
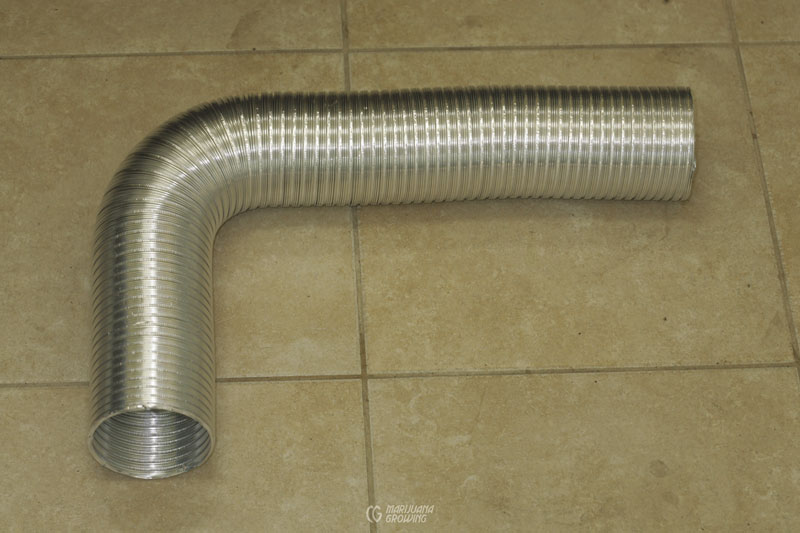
Airflow is impaired proportionately to the number and angle of turns ducting takes.
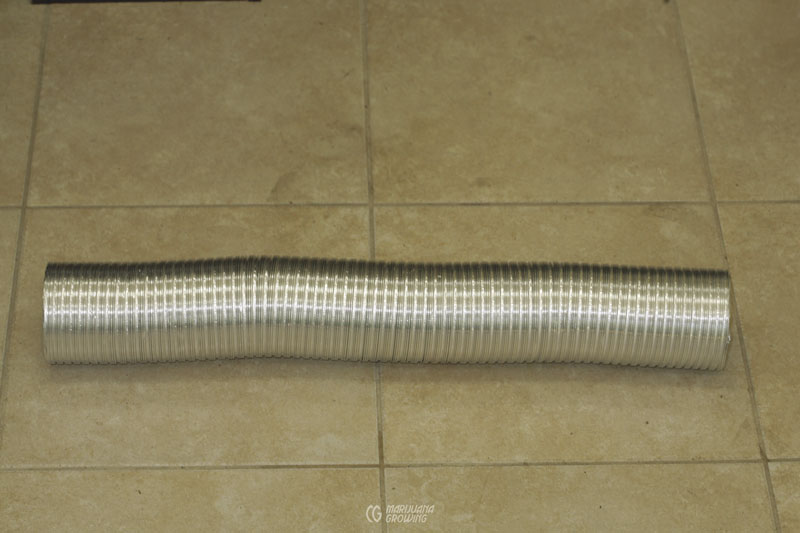
Flexible ducting is easier to use than rigid ducting. Insulated ducting will lessen noise. Run ducting the shortest possible distance, and keep curves to a minimum. When turned at more than a 30º angle, much of the air that enters a duct whirls into turbulence, restricting flow. Keep the ducting straight and short.
Intake Air
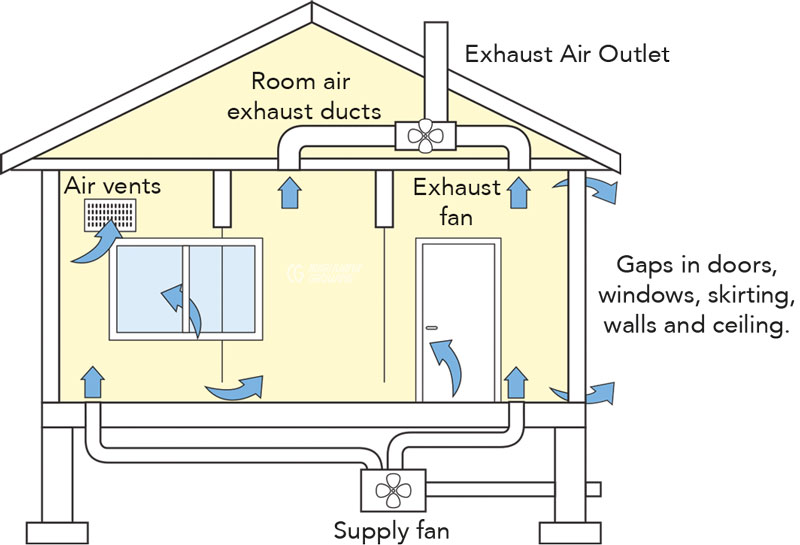
Some garden rooms and small greenhouses have enough fresh air coming in via cracks and holes, but most enclosed areas require fresh air to be ushered in with the help of an intake vent or fan.* An intake vent allows air to passively flow into an enclosed area. An intake fan blows fresh air into the garden room or greenhouse. The ratio of 1:4 (100 cfm [m3/h] incoming and 400 cfm [m3/h] outgoing) should give the room a little negative pressure.
An intake fan blows fresh air into the room. The ratio of 1:4 (100 cfm [m3/h] incoming and 400 cfm [m3/h] outgoing) should give the room a little negative pressure.
Indoor garden rooms can often take full advantage of the preexisting household heating, ventilation, and air conditioning (HVAC) system. The HVAC system often contains an adequate filtering system to keep air clean and fresh smelling.
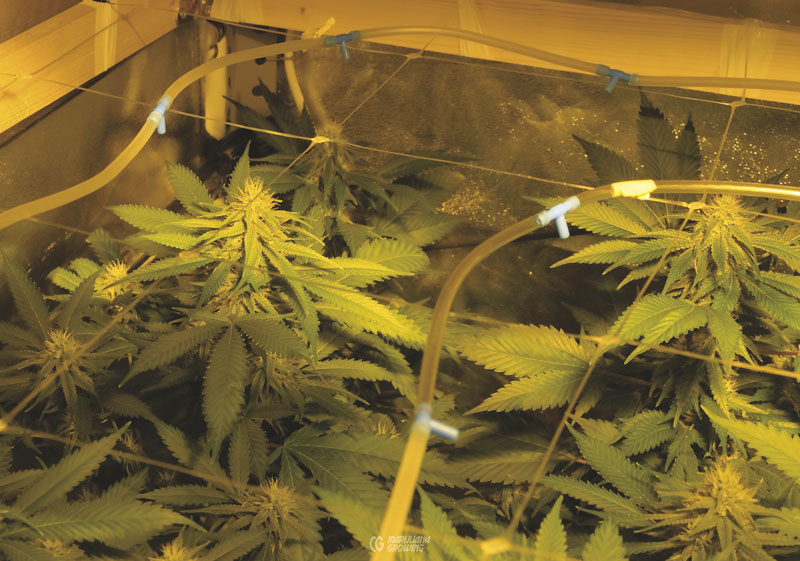
Delivering fresh air to plants ensures that they will have adequate CO2 to continue rapid growth. One of the best ways to deliver air directly to plants is to pipe it in via flexible ducting. Ingenious gardeners cut holes in the intake ducting to direct air where it is needed. The air is dispersed evenly throughout the room. Fresh air for each plant is essential for fast, consistent growth. Sealed rooms get all their air via the air conditioner exchange.

Always make sure fresh air is neither too hot nor too cold. Keep the temperature differential less than 10 degrees for intake air. And bring in cooler air to cause fewer problems in an overheated garden room. For example, one friend who lives in a hot, arid climate brings fresh air in from the crawl space under the house, where the air is a few degrees cooler than ambient air.
Filtering Intake Air
Covering intake air vents with a filter will help exclude pests and diseases from the garden area. Often a nylon stocking stretched over the intake vent is all that is needed. Some gardeners go so far as to put a superfine mesh screen over intake vents. Just remember, fine mesh screens will restrict airflow and put extra pressure on the intake fan, causing it extra wear and a shorter life.
CO2 Enrichment
Cost versus benefit: CO2 provides the biggest bang for the buck at a saturation point of 700 to 900 ppm.
The most common ways to introduce CO2 into garden rooms and greenhouses include:
- Combustion: burning fossil (hydrocarbon) fuels such as propane, butane, natural (LP) gas, and kerosene. Alcohols—ethyl, ethanol, methyl, isopropyl, and so forth—are too expensive to consider using for this purpose.
- Compressed (bottled) CO2
- Chemical reaction
a. Excellofizz
b. Co2 Boost
c. Dry ice
d. Fermentation
e. Decomposition of organic matter
Carbon dioxide (CO2) is a colorless, odorless, nonflammable gas that surrounds us all the time. Atmospheric CO2 content has increased rapidly in the last 60 years, from about 300 ppm to 380 ppm—more than 25 percent, as a conservative estimate. Today the air we breathe contains about 0.038 percent (380 ppm) CO2. Rapid-growing cannabis can use the available CO2 in an enclosed garden room or greenhouse within a few hours. Photosynthesis and growth virtually stop when the CO2 level falls below 0.02 percent (200 ppm).
Carbon dioxide enrichment has been used in commercial greenhouses for more than 40 years. Adding more CO2 to air in garden rooms and greenhouses stimulates growth by as much as 30 percent. Cannabis can use more CO2 than the 0.38 percent (380 ppm) that naturally occurs in the air. By increasing the amount of CO2 to 0.7 to 0.9 percent (700–900 ppm)—the optimum range widely agreed upon by professionals— plants can grow up to 30 percent faster, providing that light, water, and nutrients are not limiting. Carbon dioxide enrichment has little or no effect on plants grown under standard T12 fluorescent lights. However, brighter T8 and T5 lamps supply enough light for the plants to process the extra available CO2.
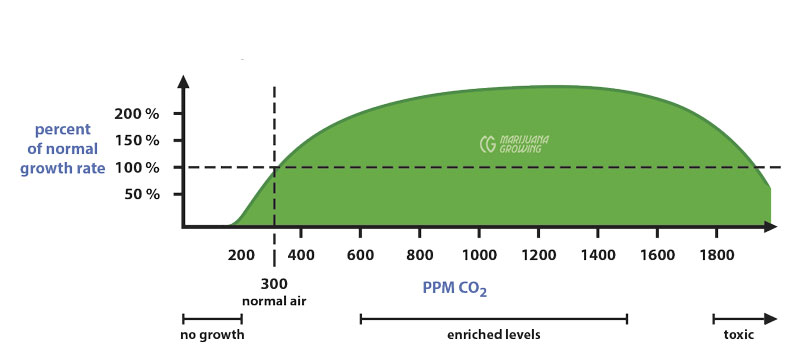
Caution! Carbon dioxide can make people woozy when it rises above 4000 ppm and can become toxic at higher levels. When CO2 rises to such high levels, it displaces oxygen, causing a lack of O2. In fact, high levels of CO2 (5000+ ppm) can be used for insect and spider mite control.
Carbon dioxide enrichment does not make plants produce more potent canna-binoids; it causes more foliage to grow in less time. CO2 provides more energy for their production and the basic building blocks from which they are made. And while the volume does increase in the entire plant, the concentration per dried weight unit remains the same.
Carbon dioxide-enriched cannabis demands a higher level of maintenance than normal plants. CO2-enriched plants use nutrients, water, and space faster than unenriched plants. A higher temperature, from 75ºF to 80ºF (23.9ºC to 26.7ºC), will help stimulate more rapid metabolism within the super- enriched plants. When temperatures climb beyond 85ºF (29.4ºC), CO2 enrichment becomes ineffective; and at 90ºF (32.2ºC) growth stops.
Carbon dioxide-enriched plants use more water. Water rises from plant roots and is released into the air by the same stomata the plant uses to absorb CO2 during transpiration. Carbon dioxide enrichment affects transpiration by causing the plants’ stomata to partially close. This slows down the loss of water vapor into the air. Foliage on CO2- enriched plants is measurably thicker, more turgid, and slower to wilt than leaves on unenriched plants.
CO2 at Night
Plants do not use CO2 at night or during a dark period. There is no extra O2 and this ratio should remain constant all the time. CO2 from outside the plant is used exclusively in the photosystem; without light, it is no longer used. Using CO2 at night wastes money and natural resources, and is harmful to plants.
Carbon dioxide affects plant morphology. In an enriched growing environment, stems and branches grow faster, and the cells of these plant parts are more densely packed. Flower stems carry more weight without bending. Because of the increased rate of branching, cannabis has more flower initiation (budding) sites. Plants are more likely to set flowers early if CO2 enrichment is used.
With CO2-enriched air, plants that do not have the support of the other critical elements for life will not benefit at all, and the CO2 will be wasted. Plants can be limited by just one of the critical factors. For example, the CO2-enriched plants will use water and nutrients much faster, and if they are not appropriately supplied, the plants will not grow. They might even be stunted.
To be most effective, the CO2 level must be maintained at 700 to 900 ppm everywhere in the room. To accomplish this, the garden room or greenhouse must be completely enclosed. Cracks in and around the walls should be sealed off to prevent CO2-rich air from escaping. Enclosing the room makes it easier to control the CO2 content of the air with- in. The room must also have a vent fan with flaps or a baffle. The vent fan will remove the stale air that will be replaced with CO2-enriched air. The flaps or baffle will help contain the CO2 in the enclosed garden room or greenhouse. Venting requirements will change with each type of CO2-enrichment system and are discussed on the next page.
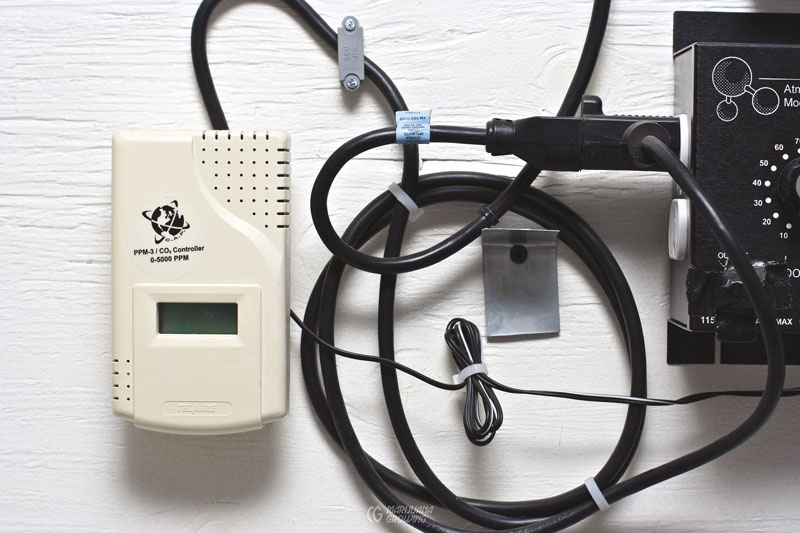
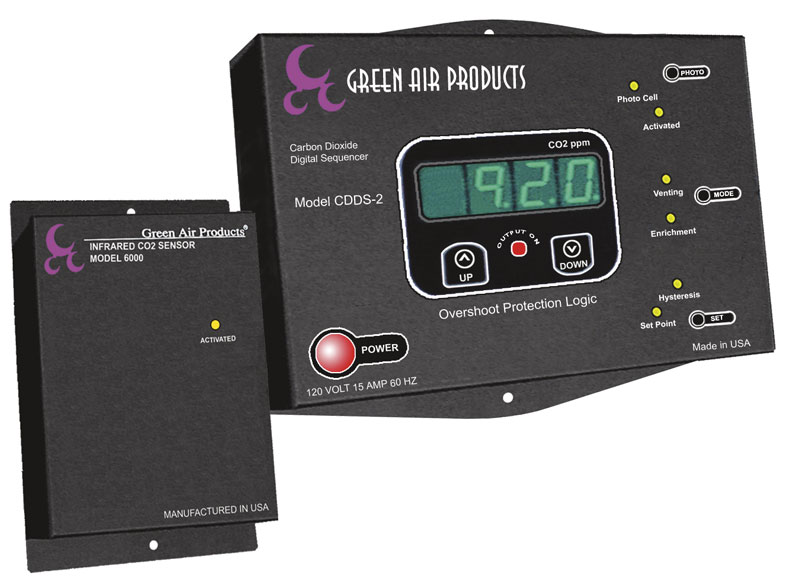
Measuring and monitoring CO2 levels in the air is expensive. Monitoring CO2 levels in greenhouses or garden rooms with six or more lights is economically feasible and helps keep the levels consistent.
Note: Anytime you vent any gas that replaces oxygen in a sealed environment that you might work in, you should definitely know and monitor the level of that gas and oxygen as well.
See chapter 15, Meters, for more information.
Stay Safe! Store bottled propane and other explosive gases outdoors.
The easiest way to calculate CO2 use in a garden room or greenhouse is to search “CO2 grow room calculator” in www.google.com. You will find several pages of calculators that give CO2 needed and flow-rate calculations for emitters and generators they sell.
At a concentration of approximately 2000 ppm, carbon dioxide becomes detrimental to plant growth: the stomatal guard cells become confused and quit functioning. Plants need a concentration of about 20 percent oxygen; adding CO2 displaces O2, and at a certain point these levels will begin to affect respiration in the plant.
Effects of Altitude and CO2 Enrichment
A CO2 monitor/regulator must be calibrated for altitude to provide the proper level of the gas. Air is much denser at sea level than it is at, say, 3,000 feet (915 m). Conversely, air is thinner at higher elevations, so if CO2 is added, it must be added in proportion to the available air. Too much CO2 will cause problems.
In fact, when using a CO2 generator at higher altitudes, incomplete combustion occurs, the result of which is the release of ethylene gas. At night in a sealed or semi-sealed room, both the plants and the CO2 generator (pilot light) are using oxygen, so more O2 is depleted, exacerbating the problem. In such situations, bottled CO2 with a calibrated monitor/ regulator used in conjunction with a little nighttime ventilation will keep the environment copacetic. Or use a CO2 generator that is kept outside the garden room and duct the gas into the sealed area. Make sure to place a CO2 monitor/ regulator inside the garden room.
If you are using CO2 and plants’ growth rate does not increase, check to make sure the entire garden room is running properly. Verify that plants have the proper light and nutrient levels, as well as the correct temperature and humidity, and that grow medium moisture and pH levels are appropriate. Make sure roots receive enough oxygen both day and night.
CO2 Emitter Systems
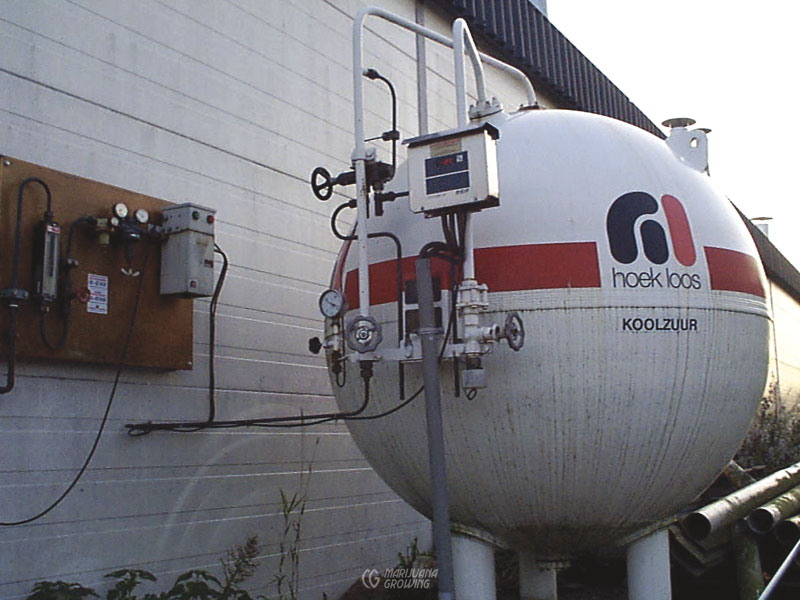
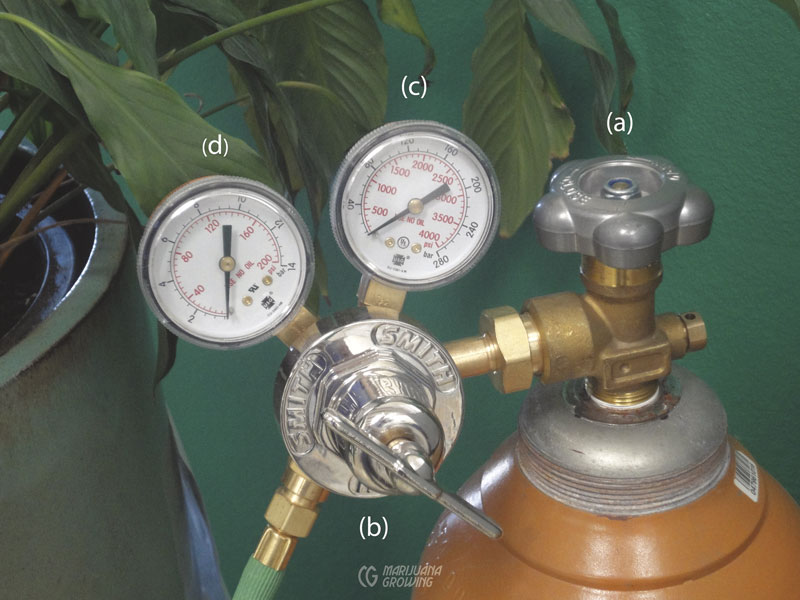
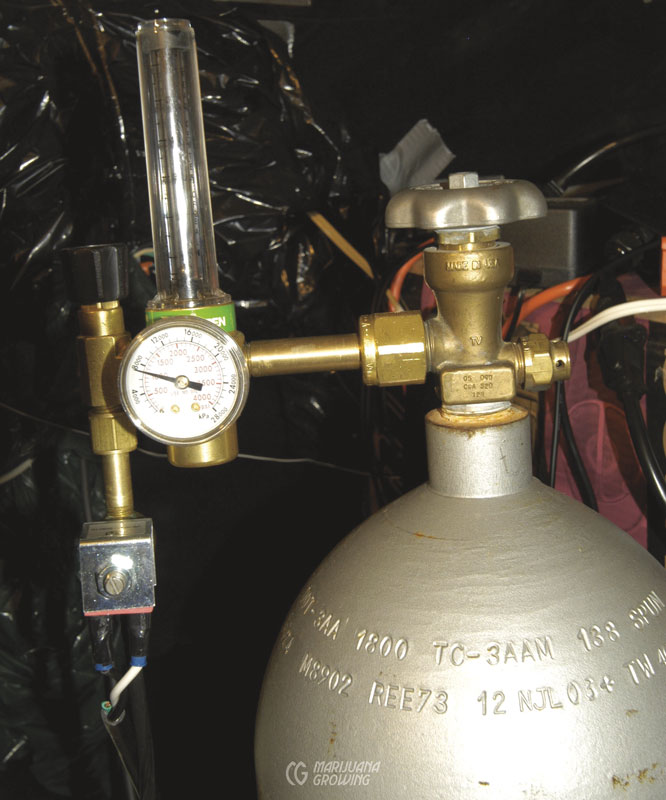
Compressed CO2 systems store the gas in a tank (cylinder) and meter it out into the garden room over time. Compressed CO2 systems are ideal for sealed rooms. They cost about $0.50 USD per pound (453.6 gm) of compressed gas and are virtually risk-free—producing no toxic gases, heat, or water vapor. Carbon dioxide is metered out of a cylinder of compressed gas using a regulator, flow meter, solenoid valve, and short-range timer. There are two types of compressed CO2 systems: continuous flow and short-range dispersal. Metal cylinders hold CO2 gas under 1000 to 2200 psi (68.9–137.0 BAR), depending upon temperature.
In North America, cylinders are available in four sizes: 10, 20, 35, and 50 pounds (4.5, 9, 15.9, and 22.7 kg). Tanks must be inspected annually and registered with a nationwide safety agency. The 20-pound (9 kg) tank is the most common and easiest to handle. Purchasing a complete CO2-emitter system at a hydroponic store is the best value for most small gardeners. Purchasing component parts—regulator, a flow meter, and a solenoid valve— is also an option. For more information, see Marijuana Horticulture: The Indoor/ Outdoor Medical Grower’s Bible.
Most hydroponic, beverage, and welding supply stores rent, sell, exchange, and refill tanks. The latter two often require an identification card. If you purchase a lighter and stronger aluminum tank, make sure to request an aluminum tank exchange. The tank you buy is not necessarily the one you keep.
Make sure CO2 tanks have a protective collar on top to shield the valve. If the valve is knocked off by an accidental fall, there is enough pressure to send the top (regulator, flow meter, valve, etc.) straight through a parked car!
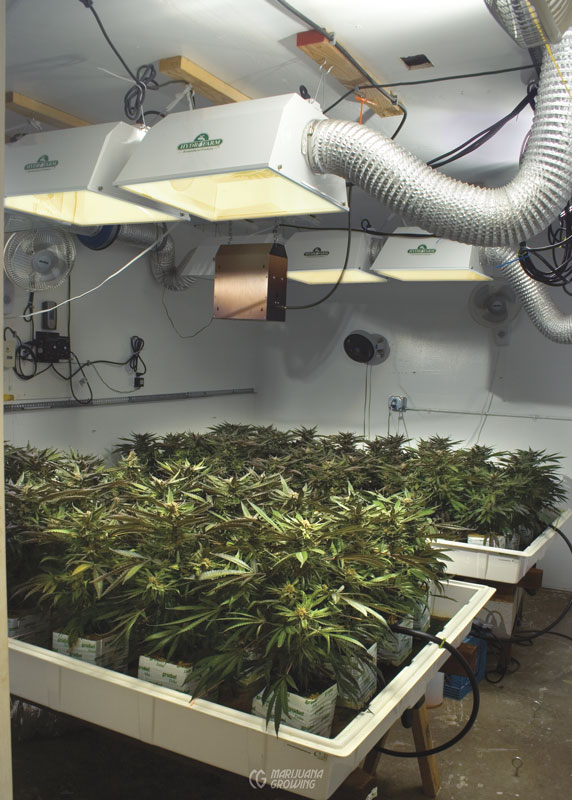
Distribute CO2 from the tank to the garden room by using a tube or fan. Suspend lightweight perforated plastic tubing from the ceiling to disperse the CO2. The tubing carries CO2 from the supply tank to the center of the garden room. The main supply line is attached to several smaller tubes that extend throughout the garden. CO2 is heavier and cooler than air and cascades onto the plants below.
To make sure CO2 is evenly dispersed from the tubing, submerge the lightweight plastic tubing in water and punch the emission holes under water while the CO2 is being piped into the line. This way you know the proper diameter holes to punch and where to punch them to create the ideal CO2 flow over the garden.
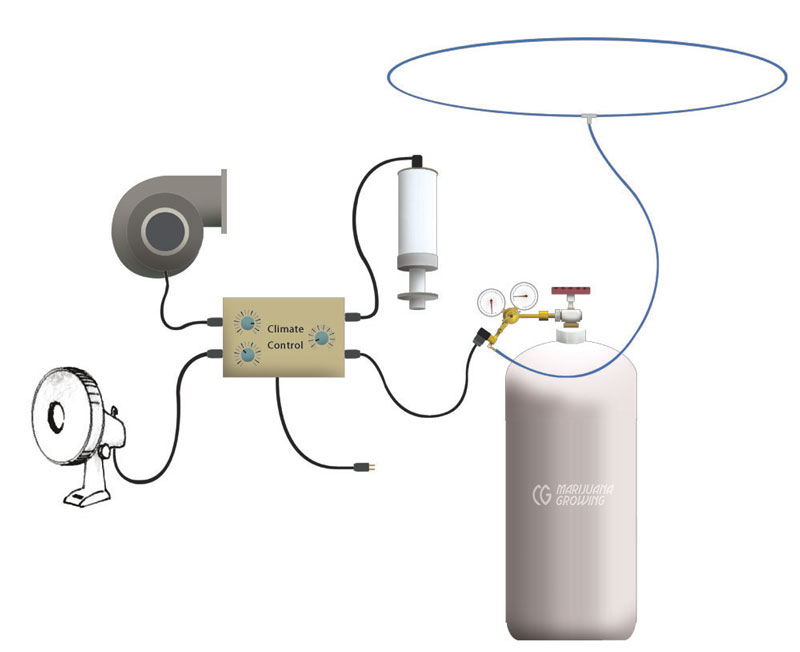
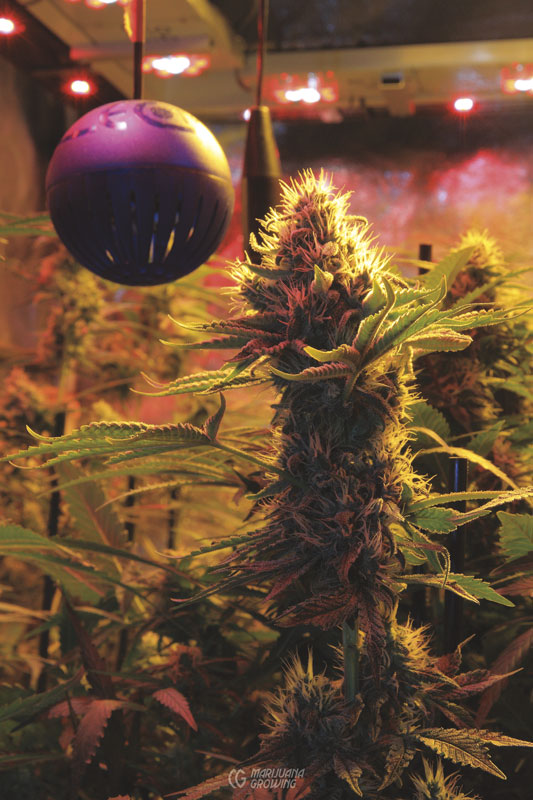
Overhead fans help evenly distribute CO2 throughout the room. The CO2 is released directly below the fan, into its airflow. This evenly mixes the added CO2 throughout the air and keeps it recirculating across the plants.
| TANK SIZE | TYPE | WEIGHT FULL |
| 10 lb (4.5 kg) | aluminum | 25 lb (11.3 kg) |
| 10 lb (4.5 kg) | steel | 35 lb (15.9 kg) |
| 20 lb (9 kg) | aluminum | 50 lb (22.7 kg) |
| 20 lb (9 kg) | steel | 70 lb (31.8 kg) |
| 35 lb (15.9 kg) | aluminum | 75 lb (34 kg) |
| 50 lb (22.7 kg) | ateel | 170 lb (77.1 kg) |
CO2 Generator Systems
CO2 production is dictated by the rate at which the fuel is burned. For example, one pound of fossil fuel yields about 3 pounds (1.36 kg) of CO2 gas, 1.5 pounds (0.68 kg) of water vapor, and 22,000 BTUs of heat. Amounts vary relative to fuels being burned.
CO2 generators use a pilot light with a flow meter and a burner with an open flame to burn oxygen from the air. When used in an enclosed area, excess CO2 is generated. CO2 generators burn fossil (hydrocarbon) fuels, including natural (LP) gas, butane, and propane gas. CO2, heat, and water vapor are by-products of the combustion process. The inside of the generator is similar to a gas-stove burner with a pilot light enclosed in a protective housing. The generator must have a cover over the open flame. You can operate the generator manually or synchronize it with a timer to operate with other garden room equipment such as ventilation fans that expel air at intervals so that less fuel is burned.
Even though CO2 is heavier than air, when generated via combustion it is hotter and less dense, and therefore rises in a garden room. Good air circulation promotes even distribution of CO2. CO2 generators can burn fossil fuels such as kerosene, propane, or natural gas. Low grades of kerosene can have sulfur content as high as one tenth of one percent (0.001%)—enough to cause sulfur dioxide pollution. Use only high-quality “1-K” kerosene even though it is more expensive. Maintenance costs for kerosene generators are high because they use electrodes, pumps, and fuel filters. Propane and natural gas burners are the best choice for most applications.
When filling a new propane (cylinder) tank, first empty it of the inert gas, which is used to protect it from rust. Never completely fill a propane tank. Propane expands and contracts with temperature change and could release flammable gas from the pressure vent if too full.
Note: In the USA, as of April 1, 2002, all new cylinders must be equipped with an overfill prevention device (OPD). It is illegal to refill old tanks that do not have this new valve. Check with your local propane dealer for current regulations on refilling tanks.
Hobby CO2 generators are generally priced from $250 to $500 USD, depending on size. The initial cost of a generator is slightly higher than a CO2 emitter system that uses small, compressed-gas cylinders. CO2 generators are about three times less expensive to operate than bottled CO2 emitters. One gallon (3.8 L) of propane, which costs about $3 to $5 USD, contains 36 cubic feet (1019.4 L) of gas and over 100 cubic feet (2831.7 L) of CO2 (every cubic foot [28.3 L] of propane gas produces three cubic feet [85 L] of CO2). For example, if a garden used one gallon (3.8 L) of propane every day, the cost would be $90 to $150 USD per month. In contrast, bottled CO2 for the same room would cost more than $250 USD per month.
One pound (0.5 kg) of fuel produces 1.5 pounds (0.7 kg) of water and 21,800 BTUs of heat. For garden rooms less than 500 cubic feet (14.2 m3), this makes CO2 generators very difficult to use. Even for larger garden rooms, the added heat and humidity must be carefully monitored and controlled so as to not affect plants. Gardeners in warm climates do not use generators, because they produce too much heat and humidity.


If fuel does not burn completely or cleanly, CO2 generators can release toxic gases—including carbon monoxide— into the garden room. Nitrous oxide, also a by-product of burning propane, can grow to toxic levels—not a laughing matter! Well-made CO2 generators have a pilot and timer. If leaks or problems are detected, the pilot and timer will turn off automatically.
A CO2 monitor is necessary if you are sensitive to high levels of the gas. Digital alarm units or color-change plates (used in aircraft) are an economical alternative. Carbon monoxide is a deadly gas and can be detected with a carbon monoxide detector/alarm available at most hardware and building supply stores. See “Carbon Monoxide Monitors” in chapter 15, Meters, for more information.
Check homemade generators frequently, including kerosene, propane, and natural (LP) gas heaters. Propane and natural gas produce a blue flame when burning efficiently. A yellow or red flame indicates unburned gas (which creates carbon monoxide) and needs more oxygen to burn cleanly.
Oxygen is also burned. As oxygen becomes deficient in a room, the oxygen and fuel mixture changes. The flame burns too rich and turns yellow. This is why fresh air is essential.
Leaks in a system can be detected by applying a solution of equal parts water and concentrated dish soap to all connections that are under pressure. If bubbles appear, gas is leaking. Never use a leaky system.
1 pound (453.5 gm) of CO2 displaces 8.7 cubic feet (0.2 cm3) of CO2.
0.3 pounds (136.1 gm) of fuel produces 1 pound (453.5 gm) of CO2.
Divide the total amount of CO2 needed by 8.7 and multiply by 0.33 to determine the amount of fuel needed. In our example, we found we need 1 cubic foot (28.3 L) of CO2 for an 800 cubic foot (22.7 m3) garden room.
You could either do the math or enter your raw data into a CO2 calculator such as the one available on Greentrees Hydroponics.net (www.hydroponics.net/learn/co2_calculator.asp), which does all the calculations for you.
It is best to use a CO2 emitter in a closed (sealed) garden room so that heat buildup is not an issue.
Turn off CO2 generators at night, since plants do not use CO2 at night. (See “CO2 at Night”.) They create excess heat and humidity in the garden room, and they need oxygen to operate. At night, roots need the extra oxygen in the room for continued growth.
Other Ways to Make CO2
You can generate CO2 using such methods as dry ice or other chemical reactions, fermentation, and burning ethyl or methyl alcohol in a kerosene lamp.
The Excellofizz puck (check out www.fearlessgardener.com) releases CO2 into the atmosphere. It is simple to use; just add a few ounces of water and a puck or two to cause a chemical reaction that will disperse enough CO2 to augment the air in a 10-foot-square (0.9 m2) room to about 1000 ppm all day. Excellofizz also releases a eucalyptus fragrance to help mask odors. Make sure to keep the fizz contained so that it does not splatter on plants and damage them.
Decomposing organic materials like woodchips, hay, leaves, and manures release large amounts of CO2. The company named Co2 Boost (www.co2boost.com) has a proprietary product that decomposes to make CO2. I have received numerous good reports about their method of generating CO2.
Although you can capture CO2 from this decomposition and direct it to a garden room, it is most often impractical for indoor gardeners. Piping indoors the CO2 and fumes from a compost pile is complicated, expensive, and more work than it is worth. Greenhouse gardeners can actually compost in the greenhouse, but it could also complicate matters with undesirable diseases and pests.
Norwegians are studying charcoal burners as a source of CO2. When refined, the system will combine the advantages of generators and compressed gas. Charcoal is much less expensive than bottled CO2 and is less risky than generators in terms of toxic by-products. Others are studying the use of new technology to extract or filter CO2 from the air.

Fermentation
Combine water, sugar, and yeast to produce CO2 via fermentation. The yeast eats the sugar and releases CO2 and alcohol as by-products. Mix one cup (23.7 cl) of sugar, a packet of brewer’s yeast, and three quarts (283.9 cl) of warm water in a gallon (3.8 L) jug to make CO2. You will have to experiment a little with the water temperature to get it right. Yeast dies in hot water and does not activate in cold water.
Once the yeast is activated, CO2 is released into the air in bursts. Punch a small hole in the cap of the jug, and place it in a warm spot (80ºF to 95ºF [26.7ºC to 35ºC]) in your garden room. A fermentation lock (available for under $10 USD at beer-brewing stores) prevents contaminants from entering the jug, and they bubble CO2 through water so the rate of production can be observed. The hitch is that you must change the concoction up to three times a day. Pour out half the solution, and then add 1.5 quarts (1.4 L) of water and another cup (23.7 cl) of sugar. As long as the yeast continues to grow and bubble, the mixture can last indefinitely. When the yeast starts to die, add another packet. Several jugs scattered around the garden room have a significant impact on CO2 levels.
Fermentation releases no heat, toxic gases, or water, and it uses no electricity. But it stinks. It is unlikely that a gardener could tolerate the stench of a large-scale fermentation process. And with this method, CO2 production is difficult to measure and keep uniform.
Dry Ice
Two pounds (907.2 gm) of dry ice will raise the CO2 level in a 10 × 10-foot (3 m2) garden room to about 2000 ppm for a 24-hour period. Dry ice is expensive, $3 to $4 USD per pound (453.6 gm). One chagrined gardener remarked, “I can’t believe that stuff melts so fast!”
Dry ice is carbon dioxide that has been chilled and compressed. As it melts, it changes state (sublimes) from solid to gas. Gaseous CO2 can be mixed into the air with fans that circulate it among the plants. Dry ice works best in small-scale gardens. It is readily available at supermarkets. Because CO2 has no liquid stage and emits no toxic gases as it melts, the transformation from solid to gas is clean and tidy. It’s also easy to approximate the amount of CO2 being released.
One pound (453.6 gm) of dry ice is equal to a pound (454 gm) of liquid CO2. Determining the thawing period for a particular size of dry ice will allow you to estimate how much CO2 is released during a particular period. To prolong the thawing process, put dry ice in an insulating container such as a foam ice cooler and cut holes in its top and sides to release the CO2. The size and number of holes allow you to control the rate at which the block melts and releases CO2. The melting can be slowed through insulation, but it cannot be stopped.
Because it is extremely cold, dry ice can cause tissue damage or burn the skin by freezing (frostbite) after prolonged contact. Dry ice sublimates at -109.3ºF (-78.5ºC) at atmospheric pressure. This makes the solid dangerous to handle without protection. While generally nontoxic, the outgassing from dry ice can cause asphyxiation due to displacement of oxygen in confined locations.
Baking Soda & Vinegar
Mixing vinegar and baking soda to produce CO2 eliminates excess heat and water-vapor production, and requires only household items. Create a system that drips vinegar (acetic acid) into a bed of baking soda.
The main disadvantage of this system is the erratic level of CO2 produced. It takes a considerable amount of time for the CO2 to build to a level where it helps plants, and once it reaches an optimum level, it can continue to rise until it reaches levels detrimental to plants, especially in small, enclosed gardens. If you have time to experiment, it is possible to set up a drip system operated by a solenoid valve and a short-term timer. With such a system, CO2 could be released periodically in small increments and coordinated with ventilation schedules.
Caution! Some recipes replace vinegar with muriatic (hydrochloric) acid. Use vinegar—DO NOT USE HYDROCHLORIC ACID! It off-gases Cl2, chlorine gas, which will kill everything! Hydrochloric acid is extremely dangerous. It can burn flesh, eyes, and the respiratory system; it can even burn through concrete.
Fragrance
A good exhaust fan, vented outdoors, is the first step in cannabis fragrance control and the easiest way to keep garden rooms and greenhouses from smelling of fresh cannabis. The exhaust fan simply carries away fragrances, dispersing them into outside air so that odors and other pollutants do not build up in the enclosed space. Seedlings, cuttings, and vegetative cannabis odors are much less pronounced than when flowering. Fragrance continues to build as flowering progresses. Often, minimal fragrance control is necessary until the last four to six weeks of flowering.
If strong fragrance in your indoor garden is not controlled by expelling air, follow the progression-control list on page 246.
1. Air conditioner
2. Negative ion generator (deionizer)
3. Deodorizing liquid, gel, puck, or spray
4. Ozone generator—keep it out of the garden and drying rooms!
5. Activated charcoal filter
Most gardeners skip the first four steps and move directly to efficient charcoal filters.
Air Conditioners
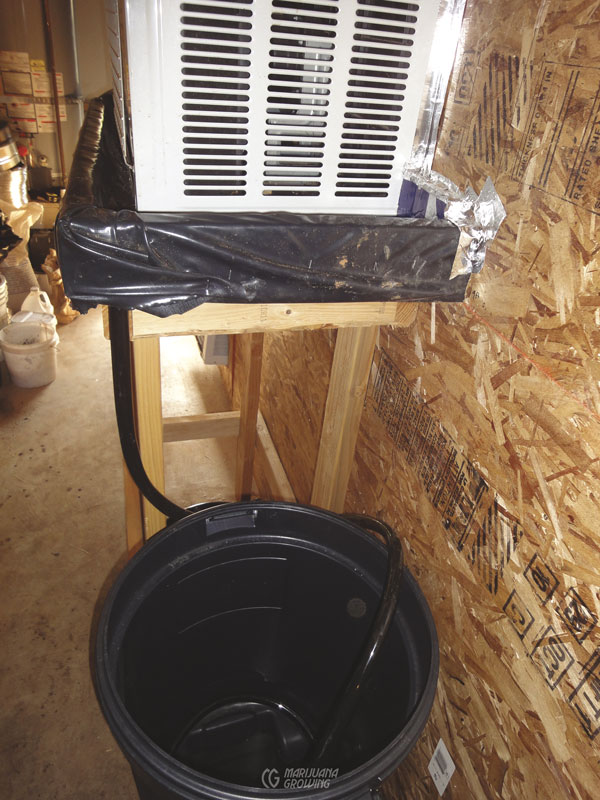
Classic air conditioners are mechanisms that extract heat and dehumidify air in an area. Humid air is condensed within the device into water, which is collected in a receptacle, removed, or directed down a drain. Much of the fragrance of growing cannabis is trapped within the condensed water vapor. Other air conditioners dehumidify the air without cooling it. Regardless of the air conditioner used, keep runoff (condensed moisture) inside the garden room so that fragrant water does not escape outdoors.
Air conditioners can contain only a portion of the fragrance, but it is often enough to minimize escaping odors.
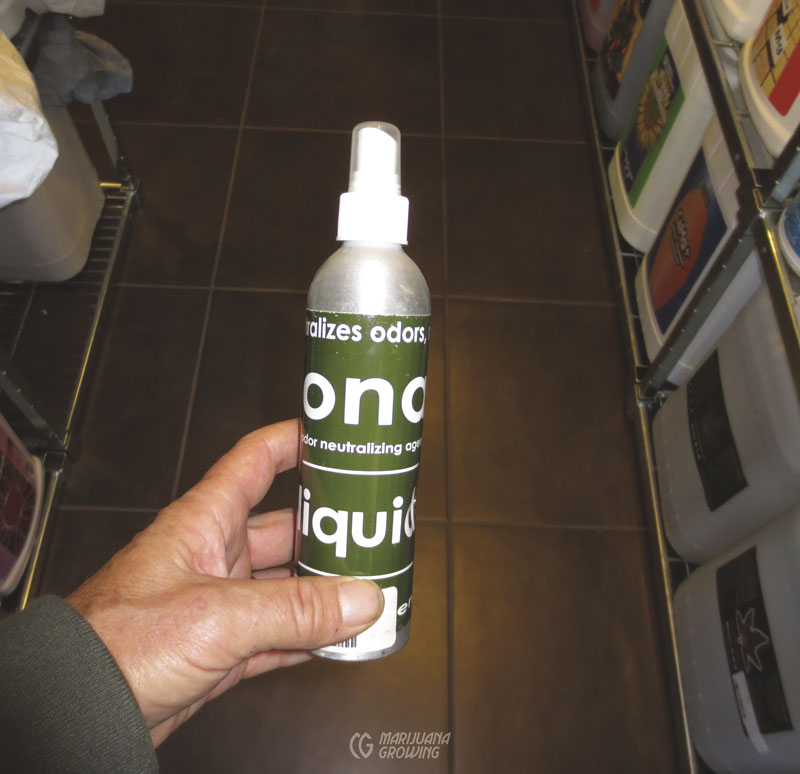
Deodorizers
Kill odors by changing their structure at the molecular level. Products such as Odor Killer, Ona, VaporTek, Ozium, etc. are made from essential oils that kill odors by creating a neutral atmosphere at the atomic level. Such products are usually available in gel and spray form. Many gardeners prefer to use gel over the long term and spray for emergencies.
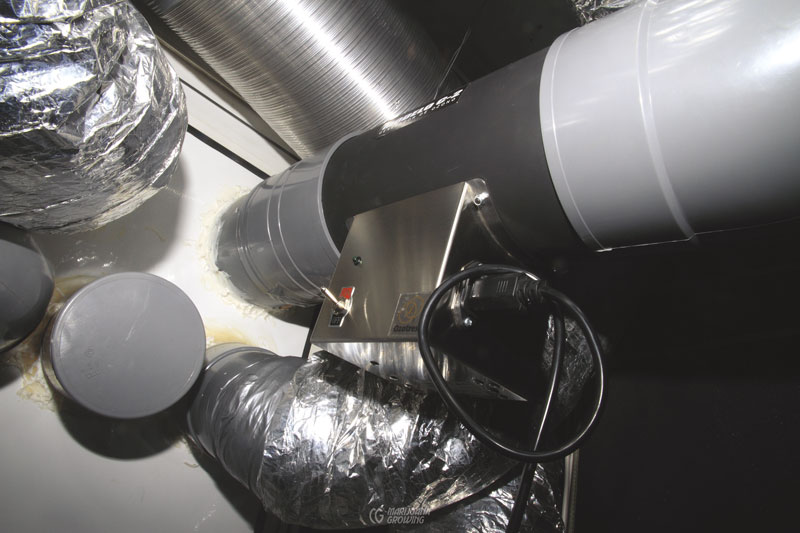
Deodorizers can be set out in the garden room, around the house, and near door- ways. Several companies offer products that affix to a wall or other surface. One ingenious gardener I interviewed stuck one such deodorizing puck to the inside of the front door, just below the mail slot, to keep the house fresh. Other products are designed to be attached to the ventilation ductwork system.
Often these products are used not only to alter the odor of cannabis, but also to alter the somewhat unpleasant odor produced by an ozone generator. Other companies offer aerosol spray cans with a dispenser that periodically meters out a burst of spray.
Negative Ion Generators
Negative ion generators are small and somewhat efficient in controlling odors, smoke, airborne pollen, mold, dust, and static electricity. They pump negative ions into the atmosphere. Negative ions are attracted to positive ions containing odors and other airborne pollutants. Negative ions attach to positive ions, and odor becomes neutralized. The particles fall to the floor and create a fi ne covering of dust on the ground, plants, walls, and objects in the room.
These devices work fairly well for small garden rooms with minimal odor problems. They plug into a regular 115-volt current and use very little electricity. Check the generator’s filter every few days, and make sure to keep it clean.
Ozone Generators
The presence of natural ozone in the atmosphere after a rainstorm gives the air a clean fresh fragrance. Man-made ozone has many applications including food and water sterilization and the removal of odors from the air at the molecular level. Some gardeners even use high levels of ozone to exterminate garden-room pests. See chapter 24, Diseases & Pests, for more information.
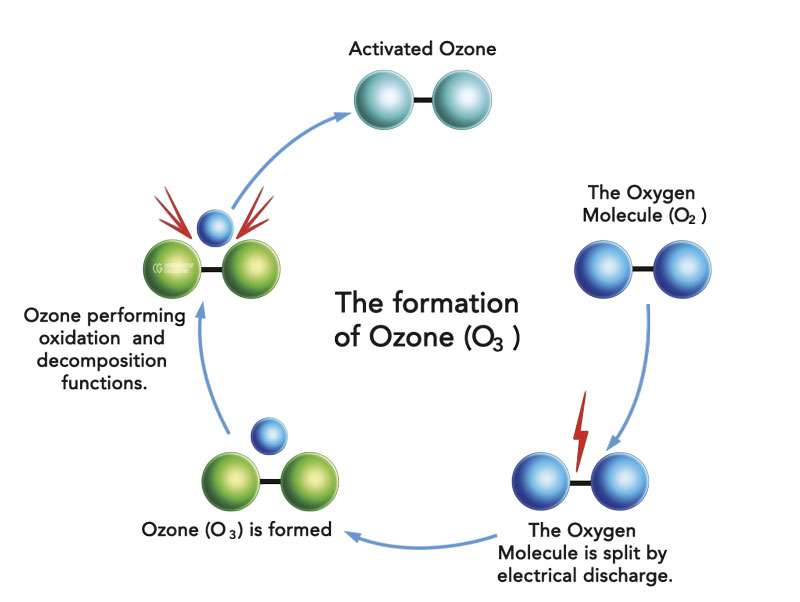
Ozone generators neutralize odors by converting oxygen (O2) into ozone (O3) by exposing the smelly air to ultraviolet (UV) light. Ozone is a neutral molecule that is bipolar: it has both an internal positive and negative charge that cancel each other out to become a neutral molecule. Ozone reacts with positively charged fragrance cations that are present in the air, neutralizing the odor. Once the extra molecule is shed, O3 is converted back into O2. The chemistry takes a minute or longer to occur, so treated air must be held in a chamber to be converted effectively.
Watch for important features such as “self-cleaning” (or easy to clean), and easy, safe bulb replacement. When UV light encounters moisture in the air, nitric acid is produced as a by-product. This white, powdery nitric acid collects around the lamps at connection points. This is an unpleasant, very corrosive acid that will severely burn skin and eyes. Before purchasing and using an ozone generator, verify that it has proper safety features such as a switch that turns off the lamp for maintenance, making it possible to work without looking at the retina-searing UV rays. Legal exposure to ozone for humans is about 0.1 ppm for a maximum of eight hours. Most garden-room ozone generators produce about 0.05 ppm at timed intervals. See chapter 24, Diseases and Pests, for plant symptoms of ozone damage.
Give ozone enough time to mix with smelly air to neutralize fragrances. Excess ozone exiting a building has an unpleasant and distinct odor. For this reason and safety concerns, many gardeners use a carbon filter to further scrub the air.
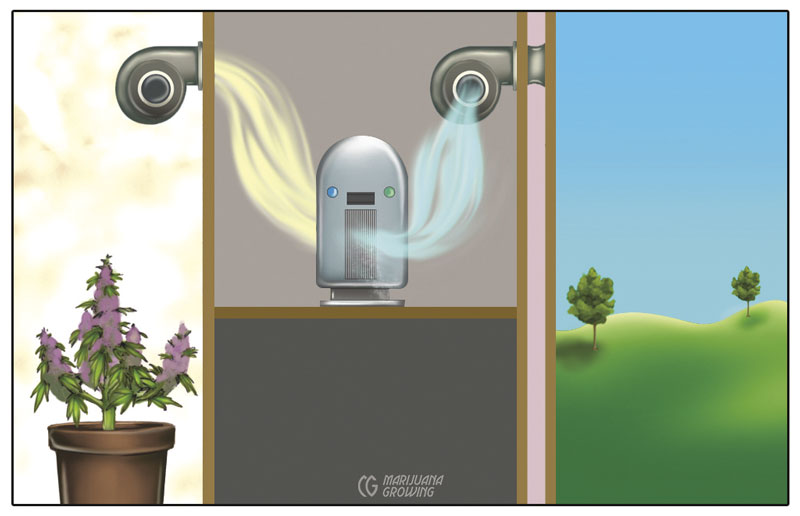
Ozone generators are rated by the number of cubic feet (m3) they are able to treat. (To figure cubic feet or meters, multiply the length × width × height of the room). Do not set up the ozone generator in the garden room and let it treat all the air in the room. It can diminish or remove the fragrance of flower buds. Set up an ozone generator in a spare closet, or build an ozone exchange chamber and route fragrant garden-room air through the closet for ozone treatment before being evacuated outdoors. Or set up the ozone generator in ventilation ductwork to treat air before it exits. Once generated, ozone has a life of about 30 minutes. It takes a minute or two for O3 molecules to combine with oxygen to neutralize odors.
Ozone generators do not enjoy the popularity they had 10 to 15 years ago. For best results, keep the ozone generator in another room or isolated from the growing plants. Ozone can cause chlorotic spots on leaves. Mottled spots at first appear to be magnesium (Mg) deficiency, and then increase in size and turn dark. Most often, the symptoms are found on foliage near the generator. Leaves wither and drop, and overall plant growth slows to a crawl.
Caution! UV light is very dangerous. In a flash, intense UV light can burn your skin and the retinas in your eyes beyond repair. Never, under any circumstances, look at the UV lamp in an ozone generator. Sneaking a peek can cost you your eyesight! Ozone is also capable of burning your lungs and other internal body tissue. At low levels, there is no damage, but at higher levels, danger is imminent. Never use too much ozone!

Ozone disrupts and changes various chemical compounds and can entirely remove fragrance from cannabis. The free radicals involved in ozone generation will take any organic compound they can find!

Air Filters
Air filters used by indoor medical cannabis gardeners fall into two basic categories: particulate air filters and activated carbon air filters. Particulate air filters are made from fibrous materials that are designed to remove solid particles such as dust, mold, bacteria, and pollen from the air. These volatile organic compound (VOC) particles measure from 10 to 100 nanometers (nm).
Particulate air filters found in home heating and air conditioning systems do not remove fine pollutants from the air. These filters are designed to remove some of the larger particles of dust and pollution but fail to remove fragrances.
Activated carbon filters remove fragrances (airborne molecular contaminants) by absorption. Activated carbon is the most common active ingredient in air filters used by medical cannabis gardeners. Fragrance must be filtered out at the molecular level. Passing garden-room air at a constant rate and pressure through an activated carbon filter will remove pollutants at the molecular level.
High-efficiency particulate air (HEPA) filters have been used since the 1950s in the medical, automotive, and aeronautic industries. These expensive filters are used by a few medical cannabis gardeners to remove extremely small particles including bacteria from garden-room air. Buyer Beware! HEPA-type, HEPA-like, HEPA-style, etc., filters DO NOT meet HEPA standards and are inferior to a true HEPA filter. The HEPA standard ensures quality.
Activated Carbon Filters
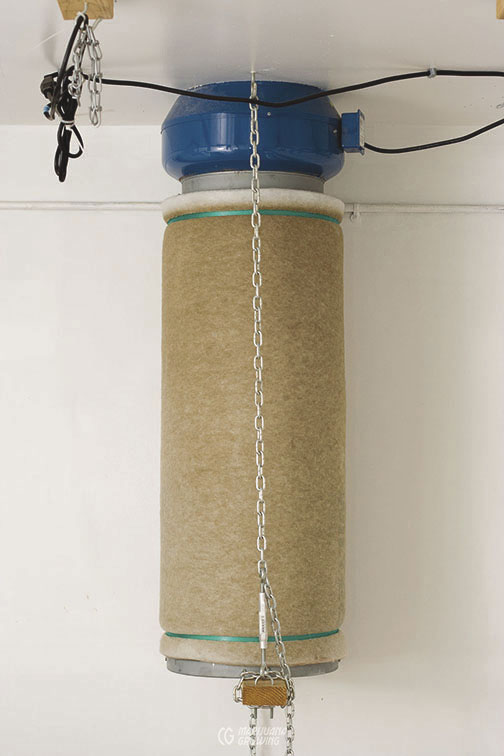
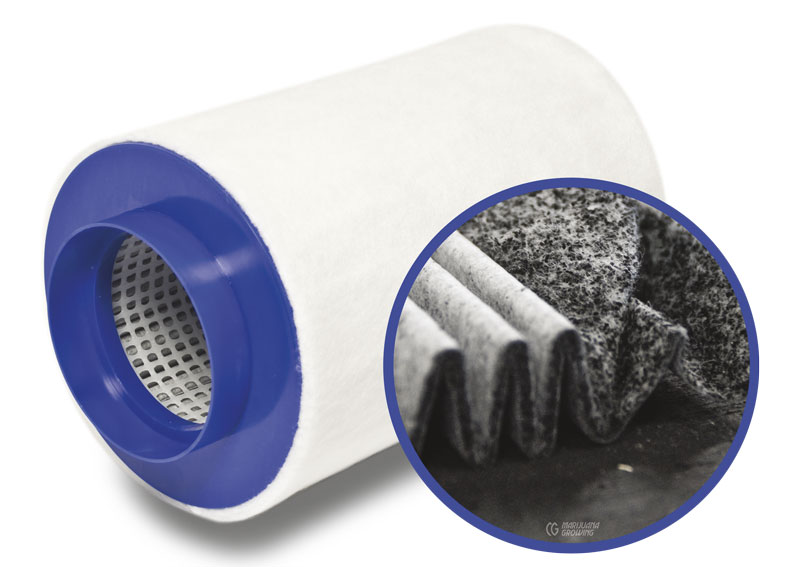
Activated carbon (aka activated charcoal and activated coal) filters are the choice of most gardeners to remove unwanted cannabis fragrance from garden room and greenhouse air before venting it outdoors. Activated carbon is contained in a perforated, flow-through metal canister or made into a carbon filter.
Look for filters that contain plenty of the proper activated carbon to clean garden air. Make your selection based on the filter’s efficiency in relation to the weight and absorption ability of the activated carbon. Some filters are so heavy that they are mounted upright in the garden rather than hung from the ceiling, where the warm, fragrant air collects.
Use duct tape to seal all joints when setting up the air filter. Accidental leaks may cause unfiltered air or an inefficient exhaust system.
Always follow the manufacturer’s filter and fan specifications. Filters are designed to work with specific fans. Most manufacturers include instructions to help set up the air filter for maximum efficiency. To calculate the proper filter and fan for a room, use CarbonActive’s online calculator, www.carbonactive.ch/calculator.
Many medical marijuana gardeners make their own activated carbon filters. Check the Marijuana Growing Forum (www.marijuanagrowing.com) for more information.
Activated carbon consists of at least 90 percent carbon and has an extremely porous structure. For example, a single gram of activated carbon has more than 500 m2 in surface area! Sources of raw carbon include wood, peat, coal, or coconut shells. First they are processed similarly to charcoal, and then they are “activated.”
Charcoal is activated chemically or with steam and pressure. The activation process opens millions of minute pores. These extra passageways increase charcoal’s ability to adsorb odor and pollution molecules. Extra surface area is also charged with positive ions that attract negative ions—odors and pollutants.
A charcoal filter needs:
• Relative humidity below 70 percent
• Enough time for charcoal to absorb fragrances
• A pre-filter, regularly changed to keep clean—dust blocks pores of carbon!
| (cfm) | (m3/h) |
| 0.588 | 1 |
| 59 | 100 |
| 147 | 250 |
| 294 | 500 |
| 589 | 1,000 |
m3/h = Meters cubed divided by hours
Activated Carbon Basics
Activated charcoal adsorbs odors but also absorbs moisture. At 65 to 70 percent relative humidity, charcoal absorbs moisture and starts to clog. At 80 percent or higher humidity, adsorption drops tremendously, even though carbon never completely stops working. Once activated charcoal is saturated with moisture (humidity), it will shed moisture back into the air as ambient humidity levels drop, and the filter will start to extract pollutants once again. But some moisture will still be trapped deep within the internal pores of the activated charcoal, which reduces efficiency and life expectancy.
Note: An ultrasonic water atomizer will produce lime and other salts. Retain lime with a pre-filter. Use only salt-free water for humidification.
Air must move slowly through charcoal filters to extract odors. The fan should let just enough air through the filter so the odors have enough dwell time to be absorbed by the carbon filter. Check with filter manufacturers or retailers about venting specifications. To ensure success, always buy a bigger filter than the fan’s maximum output. Employing a smaller fan will cause air pressure to drop, and the contact time between fragrant air and charcoal will increase. The capacity of the fan should be 20 percent lower than the capability of the filter so the activated carbon has enough time and capacity to neutralize the air continuously. Lowering fan capacity more than 30 percent does not make carbon more effective, and it restricts airflow. The overall lifespan of charcoal also increases when properly maintained.
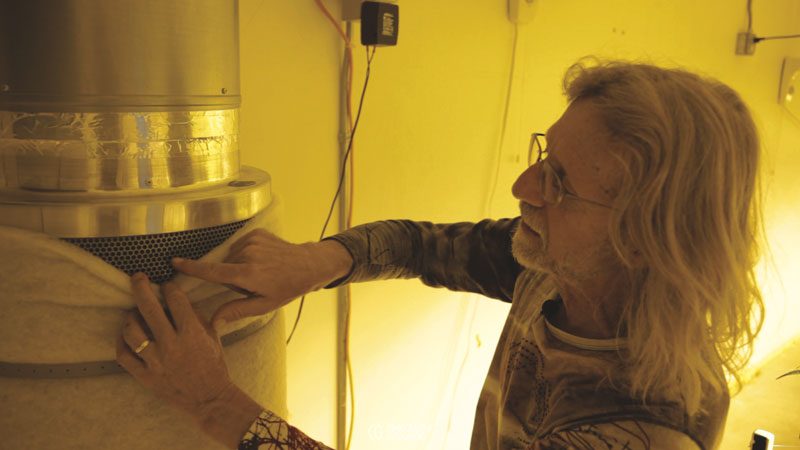
Use a pre-filter to remove fi ne dust and pollutants (100 nm or larger) and thus avoid damaging the carbon. A pre-filter is typically fitted around the superstructure of the carbon filter to remove larger particles so they do not clog the activated carbon. Use the pre-filter designed specifically for the charcoal filter.
Caution! Microparticles such as concrete dust and smoke pass through the pre- filter to the carbon. Tobacco smoke reduces the life of activated carbon.
Caution! DO NOT wash pre-filters with water. Clean them with a vacuum or a jet of high-pressure air. Water destroys the structure of pre-filters. Remove and clean pre-filters outside the room to prevent intake of microdust that could damage activated carbon. Replace pre-filters when dirty and difficult to clean thoroughly.
Types of Activated Charcoal
Activated carbon’s ability to adsorb fragrances is a function of the carbon’s hardness, regardless of its crushed or pelletized form. Harder carbon is less dusty and more expensive than semihard or soft carbon/charcoal.
Some gardeners prefer to spend the extra money on activated carbon made from coconut fiber. Coco carbon is very hard, with little dust and the highest charge of ions.
A volume of activated carbon is necessary to remove fragrances from the air of a garden room. Different forms of activated carbon react differently to filtering air. Granular activated carbon (GAC) is designed to absorb all gases and fragrances. This is the best activated carbon filter to use.
Activated Carbon Classifications
granular activated carbon (GAC)— absorption of all gases
powdered activated carbon (PAC)— water purification
extruded activated carbon (EAC)— gas phase applications
beaded activated carbon (BAC)— water filtration
impregnated carbon—water purification and chemical absorption
polymer coated carbon—human blood purification
Crushed or Particle Carbon
Particle carbon is highly active and heavily charged with ions. This type of carbon is the most efficient air-cleaning system. Particle carbon is used in light- weight, low-pressure systems that stir up no dust. Production is consistent, with less than 5 percent variation in batches.
Irregular granular and crushed activated charcoal disperses air, forcing it to travel farther through the filter. Its irregular surfaces give more contact between air and carbon, providing more filtering area, which in turn absorbs more pollutants.
Carbon Active filters have tiny particles of activated carbon (0.4–0.8 mm). Since these particles are much smaller than pellets, the odor-neutralizing surface is 10,000 times larger so that the effect is amplified enormously. Special fleece mats ensure an optimal arrangement of the activated carbon particles.
Granular Crushed Carbon
Granular crushed carbon is actively charged with ions. It is mostly used to purify water. MESH 4 to 12 filters are specifically for filtering water.
Carbon Pellets
Carbon pellets activate slowly and, by volume, contain fewer charged ions. Their low evaporative ability makes them perfect to clean paints and gases such as benzene and methanol.
Activated carbon pellets are smooth and cylindrical in form. The surface provides a short, direct path for air to flow through and out the filter, effectively lowering the filtering ability for minute odor molecules. Pelletized activated carbon is less expensive than other forms of activated carbon, with density per volume of 50 to 60 g/cc.
Extending the Life of Carbon Filters
Carbon filters typically last about a year when properly maintained. Active life depends upon maintenance, climatic conditions, and the total volume of pollutants that are filtered. The quality of carbon is directly proportionate to its ionic charge and filtering ability.
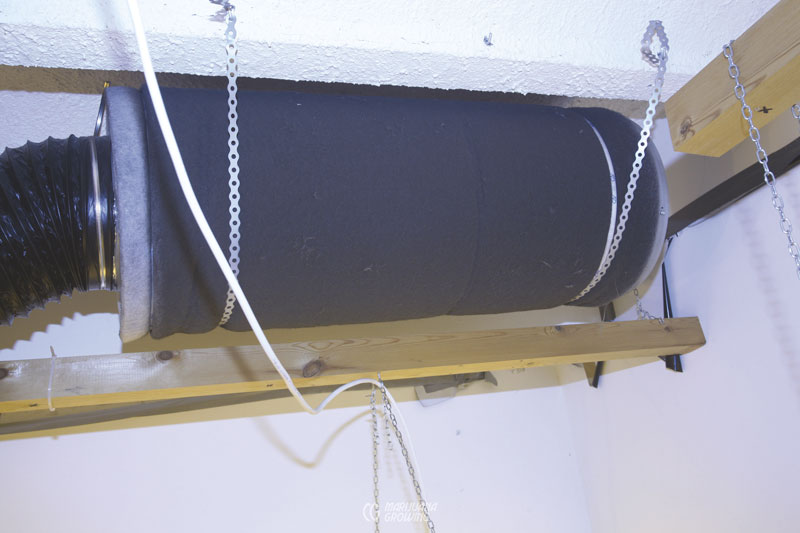
Many other factors affect the longevity of activated carbon. Plants have 2,500 different molecules, and each plant is unique. Controlling fragrance is relative to the microclimate— indoors, outdoors, greenhouse, and location— Canada, Switzerland, Argentina, and so on. Many other factors influence the air, including CO2, pre-filter maintenance, and even the fan being used. Changing the pre-filter is critical because this is where dust, dirt, heat, and humidity form a perfect environment for bacteria and insects to reside.
Caution! Clean the pre-filter monthly with a vacuum or jet of compressed air. Remove the pre-filter from the garden room to clean. Change pre-filter at least once every 12 months to avoid disease and pest problems.
Store activated carbon and filters at room temperature in a dry, airtight place.
Reactivating and Reusing Carbon
Spent, clogged carbon can be reactivated with chemicals or by exposure to very high temperatures 1,472ºF (800ºC) under controlled conditions. It is not recommended unless done by a professional. Furthermore, repacking carbon requires precision packing. When the carbon loses its filtering ability, it is much easier to purchase newly activated charcoal.
Dispose of used carbon along with normal household garbage. Or it can be broadcast in the garden to help sweeten the soil.
The following sites offer more technical information and setup instructions for activated charcoal filters:
CarbonActive, www.carbonactive.ch— an expert Swiss site, dense with information
Can-Filters, www.canfilters.com
Organic Air Filters, www.organicairfilter.com
Phresh Filters, www.phreshfilter.com
Phat Filters, http://phatfilter.com.au
Rhino Filters www.rhinofilter.com
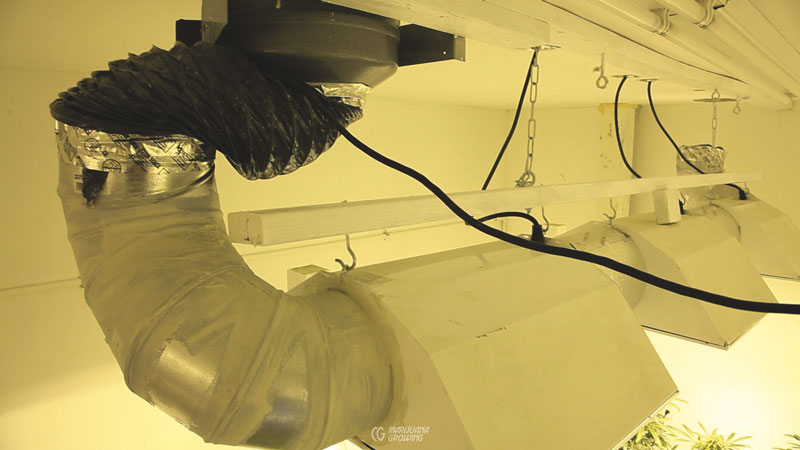
The Ventilation System
Construct a ventilation system that brings in cool air to the bottom of the room and expels hot air from the top of the room.
Locate the vent in the ceiling or near the ceiling, where hot air naturally accumulates. Carefully cut a hole in the wall or ceiling in the exact place you want it.
Filter incoming air to prevent insects, spider mites, diseases, and pollen from entering the room. Filter outgoing air to neutralize unwanted fragrances (and to avoid bothering your neighbors). Filtering incoming air requires a nylon stocking or a similar fine mesh stretched over incoming air sources.
The following sites offer exhaust fan calculators:
Ask the Builder, www.askthebuilder.com/B98_Sizing_an_Exhaust_Fan_. shtml
ACF Greenhouses, www.littlegreenhouse.com/fan-calc.shtml
Setting Up the Ventilation System: Step-by-Step
Note: Set up intake vents near the floor in a corner of the room. Install exhaust fan(s) in the opposing corner near the ceiling so that air is drawn through the enclosed area.
Step One: Figure the total volume of the garden room. Length × width × height = total volume. For example, a garden room that is 10 × 10 × 8 feet (21.5 m3) has a total volume of 800 cubic feet (10 × 10 × 8 feet = 800 cubic feet or 21.5 m3). A room measuring 4 × 5 × 2 meters has a total volume of 1,400 cubic feet (40 m3).
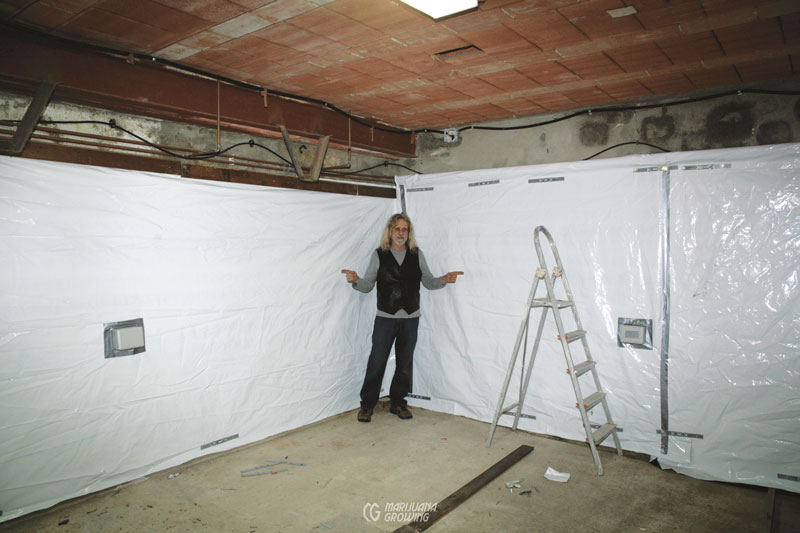
Step Two: Use a vent fan that will remove the total volume of air in the enclosed garden in less than five minutes for large rooms and one minute for small rooms. Warm garden rooms need more frequent ventilation. Figure one complete air change for the maximum temperature the enclosed garden will need to operate.
Divide the volume of the growing area by the number of minutes required to get one full air change:
A 640-cubic foot (18 m2) room / 4 air changes = 160 cfm (18 L2/hr) fan (640/4 = 160).
A 640-cubic foot (18 m2) room / 1 air change = 640 cfm (18 L2/hr) fan (640/1 = 640).
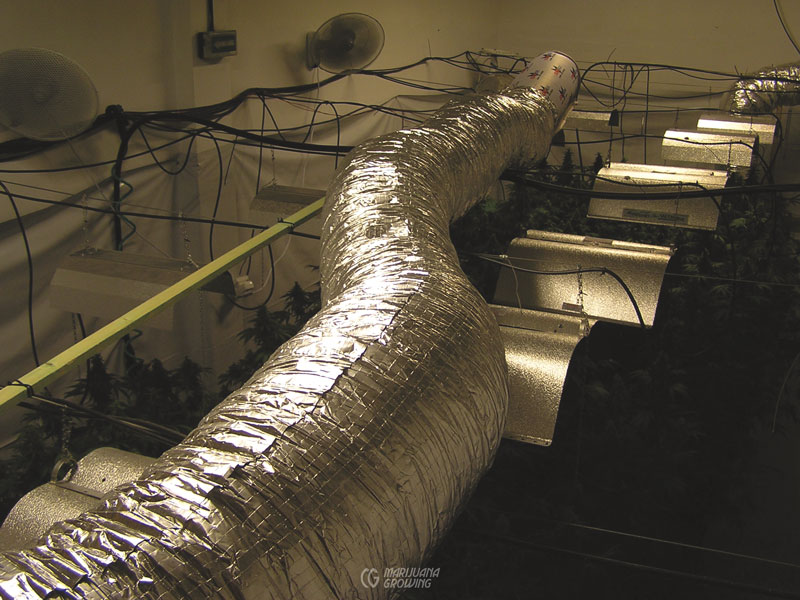
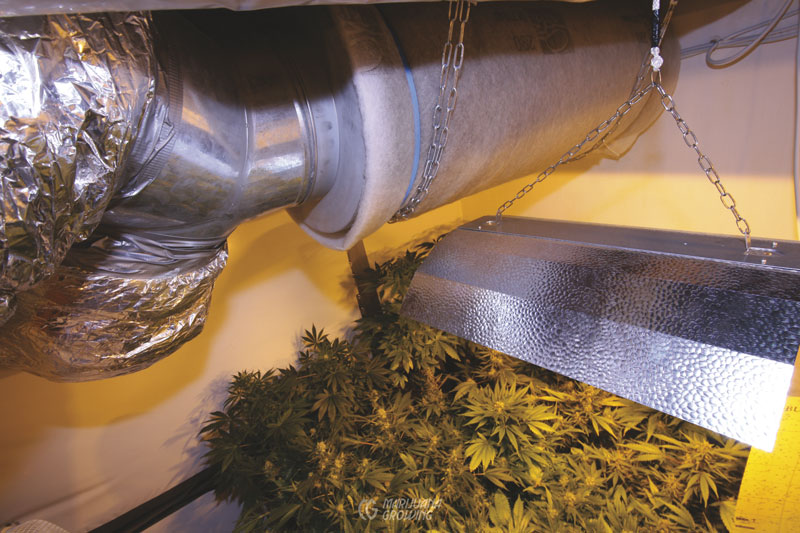
Step Three: Place the fan high on a wall or near the ceiling of the garden room so it vents off hot, humid air.
Buy a fan that can easily be mounted on the wall or inline in a duct pipe. Quality inline fans move much air and make very little noise. It’s worth spending the extra money on an inline fan. Small, enclosed areas can use a fan that can be attached to flexible 4-inch (10.2 cm) dryer ducting. Many stores sell special ducting to connect high-speed squirrel cage blowers with the 4 inch (10.2 cm) ducting.
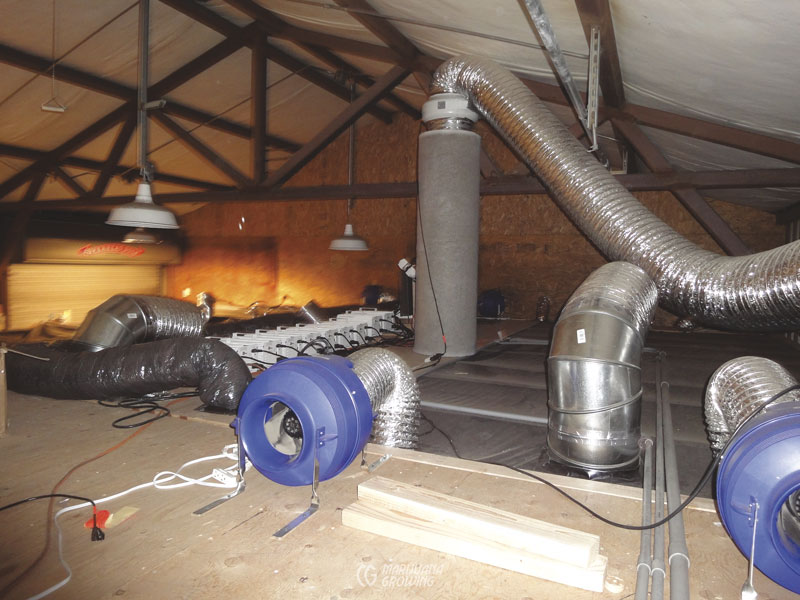
Step Four: If possible, use an existing window, chimney, or sewer vent to expel garden-room air. The last and most-involved option is to cut a hole in the ceiling or wall.
To place a fan in a window, cut a 0.5 to 0.75-inch (1.3–1.9 cm) piece of plywood to fit the windowsill. Cover window with a lightproof, dark-colored paint or similar covering. Mount the fan near the top of the plywood so it vents air out of the garden room. Secure the plywood and fan in the windowsill with sheet rock screws. Open the window from the bottom.
Make a lightproof vent using 4-inch (10.2 cm) flexible dryer ducting. Vent the hose outdoors, and attach a small squirrel cage fan to the other end of the ducting. Make sure there is an airtight connection between the fan and hose by using a large hose clamp or duct tape to fix the connection.
Use rigid ducting instead of flexible ducting, if possible. Air flows more freely and quietly in larger ducting. Choose between 4-, 6-, 8-, 10-, and 12-inch (10.2, 15.2, 20.3, 25.4, 30.5 cm) ducting.
Vent air up the chimney where fragrances are seldom a problem. First, clean the chimney of excess ash and creosote by tying a chain to a rope and lowering the chain down the inside, banging and knocking all debris to the bottom. There should be a door at the bottom of the chimney to remove the debris. If cleaning the chimney yourself is inconvenient, hire a chimney-sweep service. Tap ducting into an existing hole in the chimney.
Cut a hole in the ceiling and vent air into the attic. Often a hole can be cut in the ceiling and covered with a vent, then a fan is placed behind the vent.
If cutting into a ceiling with a crawl space, make sure you have a method to evacuate the garden-room air from the crawl space. Install louvers below the rafters on the outside wall of the house.
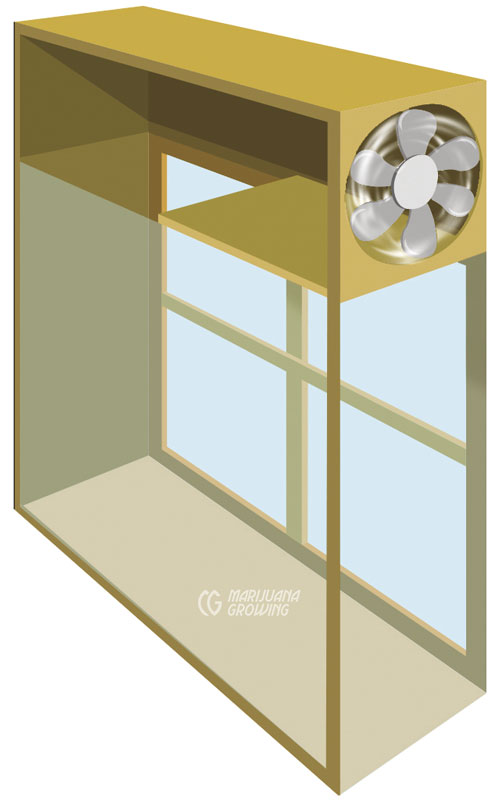
Step Five: Attach the fan to a thermostat/ humidistat or other temperature/humidity monitor/control device to vent hot, humid air outside. Set the temperature on 75ºF (23.9ºC), and the humidity on 55 percent in flowering rooms and 60 to 65 percent in vegetative rooms. Most control devices have wiring instructions. More sophisticated controllers have built-in electrical outlets, and the peripherals are simply plugged into the outlets.
Or attach the vent fan to a timer and run it for a specific length of time. This is the method used with CO2 enrichment. Set the fan to turn on and vent out used, CO2-depleted air just before new CO2- rich air is injected.