Light is essentialfor cannabis to grow strong, healthy medicine. All plants grow and evolve under Mother Nature’s sunlight and care. Plants are accustomed to natural sunlight and have adapted to her spectrum, intensity, and photoperiod. Light is comprised of separate wavelengths or bands of colors. Each color in the spectrum used by plants sends them separate signals, promoting a different type of growth.
Sunlight contains 4 percent ultraviolet radiation, 52 percent infrared (heat) radiation, and 44 percent visible light. Midday during the bright summer growing season, light intensity can top 8640 foot-candles (93,000 lux), but cannabis plants use about half the energy found in natural sunlight.
Sunlight energy arrives from the heavens as electromagnetic radiation. It is both wave and particle in nature. The smallest divisible particles of light are called photons. The brightness of light is equivalent to the number of photons absorbed per unit of time. Each photon contains a fixed amount of energy. The energy in each photon dictates how much it will vibrate. The wavelength is the distance moved by a photon during one vibration. Wavelengths are measured in nanometers.*
*One nanometer (nm) = one billionth (109) of a meter. Light is measured in wavelengths; the wavelengths are measured in nanometers.
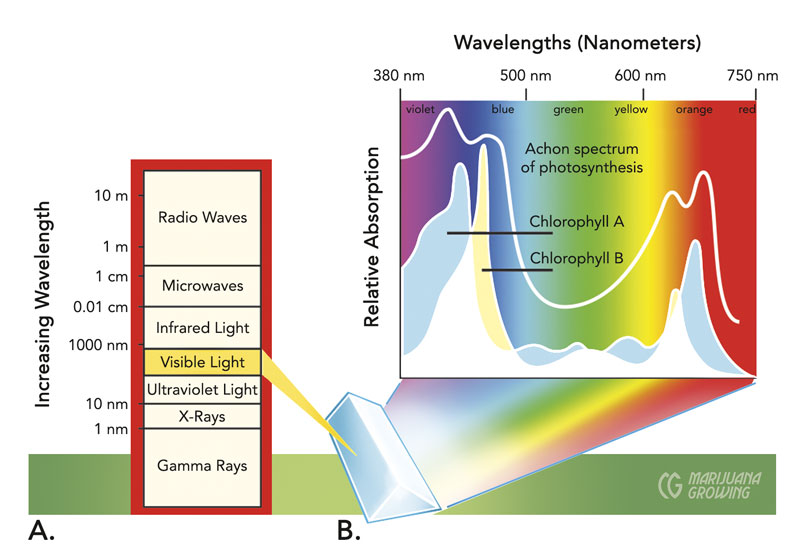
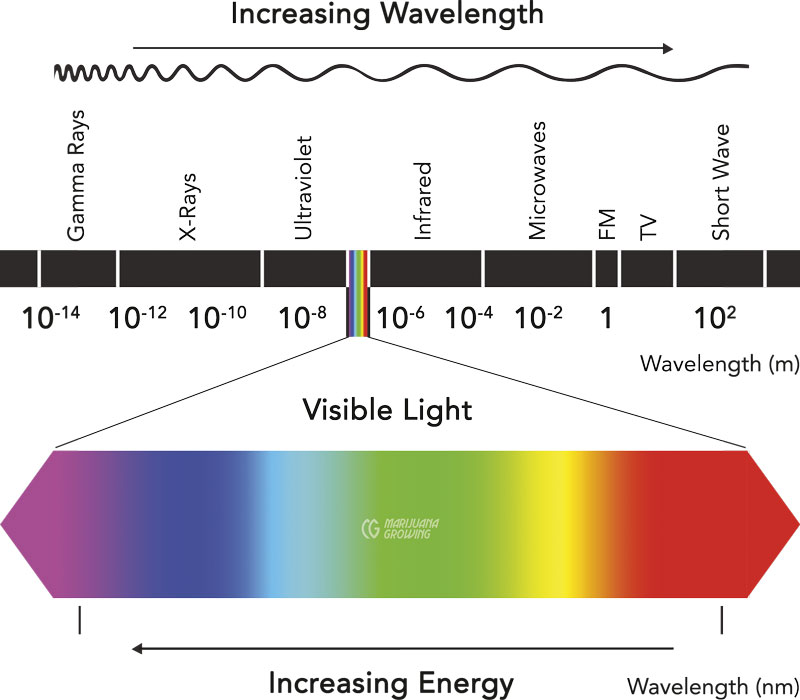
Electromagnetic radiation spans a broad range of wavelengths. Gamma rays with a wavelength of 105 nm are at the far blue end of the spectrum and radio waves with a wavelength of 1012 nm are at the far-red end. Red light has a longer wavelength. The photons vibrate slower and contain less energy. Photons in the far blue ultraviolet (UV) visible spectrum have shorter wavelengths and contain more energy. The human eye sees only “visible light” (wavelengths between 380 and 750 nm) a small part of the entire spectrum. Visible light wavelengths (light spectrum) appear to people as all the colors of the rainbow. Visible light is measured in foot-candles (fc) and lux (lx). Lumens are the measure of visible light emitted by a light source.
Lumens measure “luminous flux,” the total number of packets (quanta) of light produced by a light source. Luminous flux is the quantity of light emitted.
Use the lux measurement to know how many lumens to give the entire area for complete illumination.
Unlike lumens, lux measures the area over which the light (luminous flux) spreads. For example, if 1000 lumens were concentrated in one square meter, the illuminated square meter would have 1000 lux. If the same 1000 lumens spread over 10 square meters, a measurement of 100 lux is registered on the 4 square meters.
Plants “see” other parts of the light spectrum than humans see. They respond to wavelengths similar to those that humans need to see, but they use different portions of the spectrum. Peak needs to occur in the blue portion (430 nm) and red portion (662 nm) of the spectrum, where chlorophyll* absorption is at the highest levels. Light used by plants is measured in PAR (photosynthetically active radiation), PPF (photosynthetic photon flux) (μmol/s).
*Chlorophyll is the most important light-absorbing pigment in cannabis, but it does not absorb green light. Green light is reflected, which is why we see the color green. Other pigments include carotenoids (a group of yellow, red, and orange pigments) that absorb light energy. Other pigments (e.g. zeaxanthin [red] and phycoerythrin [red]) absorb different wavelengths. Each color of light activates different plant functions. For example, positive tropism*, the plant’s ability to orient leaves toward light, is controlled by spectrum.
*Phototropism is the movement of a plant part (foliage) toward a source of illumination. Positive tropism means the foliage moves toward the light source. Negative tropism means the plant part moves away from the light. Positive tropism is greatest in the blue end of the spectrum, at about 450 nanometers. At this optimum level, plants lean toward the light, spreading their leaves out horizontally to absorb the maximum amount of illumination possible.
PAR watts are a measure of light energy (radiant flux) used by plants to produce food and grow. PAR watts are the measure of the actual amount of specific photons a plant needs to grow. Light energy is radiated and assimilated in photons. Photo synthesis is necessary for plants to grow, and is activated by the assimilation of photons.
Ultraviolet (UVA, UVB, UVC) Light
UVA is the most common UV light. It has little energy and is least harmful of all UV light. Used in glow-in-the-dark black lights, UVA light is also used in phototherapy and in tanning booths.
Black-light fluorescent lamps emit ultraviolet rays through a dark filter and glass bulb, but they are not appropriate to grow cannabis. According to some sources, ultraviolet light is supposed to promote more resin formation on flower buds. However, all known experiments that add artificial UV light in a controlled environment have proven that it does not make any difference.
UVB is a very damaging form of UV light. It packs enough energy to destroy live tissues but not enough energy to be absorbed completely into the atmosphere. Destructive UVB can cause skin cancer. Be careful when outdoors, especially in areas with damaged ozone layers in the atmosphere that let more UVB light pass through. These are high-risk areas for skin cancer.
UVC light is absorbed almost completely, and within a kilometer of the atmosphere. The UVC photons crash into oxygen atoms, and the result is ozone. In nature, UVC is transformed into ozone and later oxygen so quickly that it is difficult to capture. UVC light works well as a germicidal water purifier and bacteria-killer in food. It also works well to kill bacteria, mold, and pests on plant leaf surfaces.
UVC light (100–280 nm) carries too much electromagnetic radiation, or energy (the hyper atoms are moving too fast), for plants to process; the energy is sufficient to force electrons away from atoms and rupture fragile chemical bonds.
UVC light is used in short, limited, regular applications to kill mold spores in growing and harvested cannabis. UV radiation is absorbed by oxygen in the forms O2 and O3 (ozone). The ozone layer of our atmosphere protects life on the planet from high levels of UV radiation.
UVA (315–380 nm) and UVB (380–315 nm) light help new branch growth and have a similar effect as blue light. Ultraviolet (UVA and UVB) light emitted by natural sunlight and plasma lamps has been proven to increase overall vegetative growth in cannabis by up to 30 percent.
In experiments, vegetative plants grown under plasma lamps that emit UVA and UVB light grew up to 30 percent more dry weight, and branching was much more profuse. Cells were stronger and the outer layer of cells was tougher, which discourages attacks from diseases and pests.
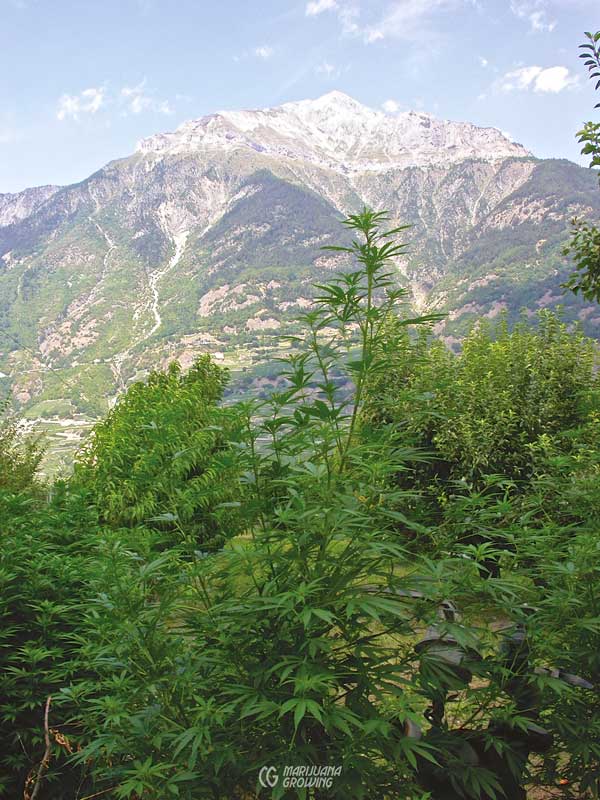
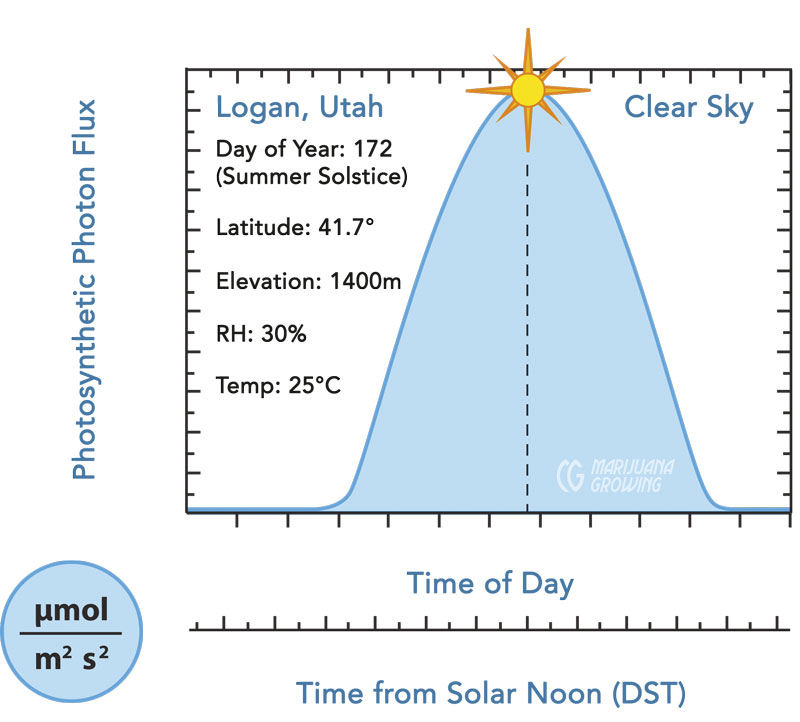
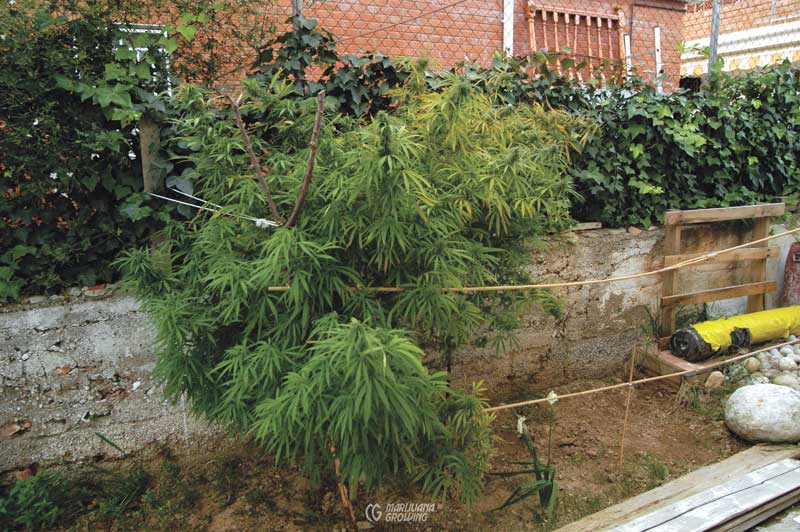
I have personally seen plants grown at 1000-foot (300 m) and 4600-foot (1400 m) elevation. The plants at 1000 feet (300 m) produced more and bigger flower buds. The plants at 4600 feet (1400 m) were smaller, with thicker, stronger stems and smaller buds heavy with resin. Afterward, both crops were compared. The plants grown at high elevation had more resin, but it is unclear if that was because of more UVB light. There are many different explanations for heavier resin production, including cold weather and wind.
Random photons of infrared light (750–1000 nm) on the other end of the spectrum do not contain enough energy to promote plant growth. Infrared radiation is not absorbed by plant cells, because it lacks enough energy to excite electrons found in molecules and is therefore converted to heat.
Gardeners who use infrared heaters do not have to worry about light affecting plant growth. Infrared radiation is absorbed by water and by carbon dioxide in the atmosphere.
Blue photons carry more energy and are worth more PAR watts than lower-energy red photons. It takes from 8 to 10 photons to bind 1 CO2 molecule.
PAR watts in photons-per-second became the standard to measure horticultural lamp spectrum output. This measurement is called photosynthetic photon flux (PPF), and is expressed in micromoles-per-second (μmol/s). Today PPF is the accepted lighting and greenhouse industry standard.
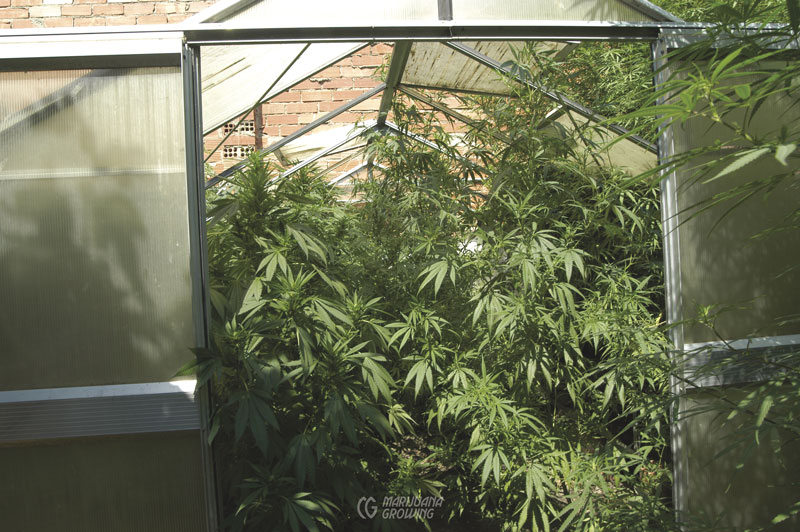
Outdoors, plants receive natural sunlight—100 percent PAR/PPF. Greenhouse and shade cloth coverings limit the amount of PPF. Look for the “light transmission” factor in greenhouse and shade cloth coverings to figure the amount of PAR/PPF light available to plants.
Most artificial lights deliver only a part of the necessary light spectrum that cannabis needs to grow. A higher PAR/ PPF rating guarantees that more photons will be available for healthy plant growth. Under artificial lights indoors, medicinal cannabis must receive enough intense PAR/PPF light to grow well. Gardeners report that medical cannabis grown under intense lamps with high PAR/PPF ratings is healthier and stronger, with fewer disease, pest, or cultural problems.
Light Intensity
Sunlight on a hot summer day when the sun is at the highest angle in the sky produces light levels of more than 93,000 lux—all the PAR light you could possibly need!
Outdoors, little can be done to change the PAR rating except to plant the garden in a sunny location, and to shade the plants as needed. Greenhouses can be illuminated with HID light, but outdoors we are compelled to work with Mother Nature during cloud-covered days. We can use greenhouse coverings and shade cloth to cool plants and decrease intense light.
| ILLUMINANCE (LUX) | EXAMPLE |
| 93,000 | Brightest sunlight at midday |
| 20,000 | Shade illuminated by a clear blue sky at midday |
| 10,000–25,000 | Overcast day at midday |
| <200 | Super dark storm clouds at midday |
| 400 | Sunrise and sunset on a clear day |
| 40 | Overcast sky at sunset or sunrise |
Indoors, artificial lightbulbs and tubes must supply intense light for medicinal cannabis to grow well. The lamp must have the proper spectrum and have a high PAR rating.
Indoors, generating intense light is expensive and requires knowledge to employ a bulb with the proper spectrum. Intensity is the magnitude of light energy per unit of area. It is greatest near the bulb and diminishes rapidly as it moves away from the source. High-wattage HID (high-intensity discharge) bulbs supply the most intense light efficiently, followed by T5 and T8 fluorescent, and CFL and plasma lamps. But remember that T5 and T8 bulbs can be placed four times closer to plants, which makes them much more efficient than HID bulbs, according to the Inverse Square Law (see below).
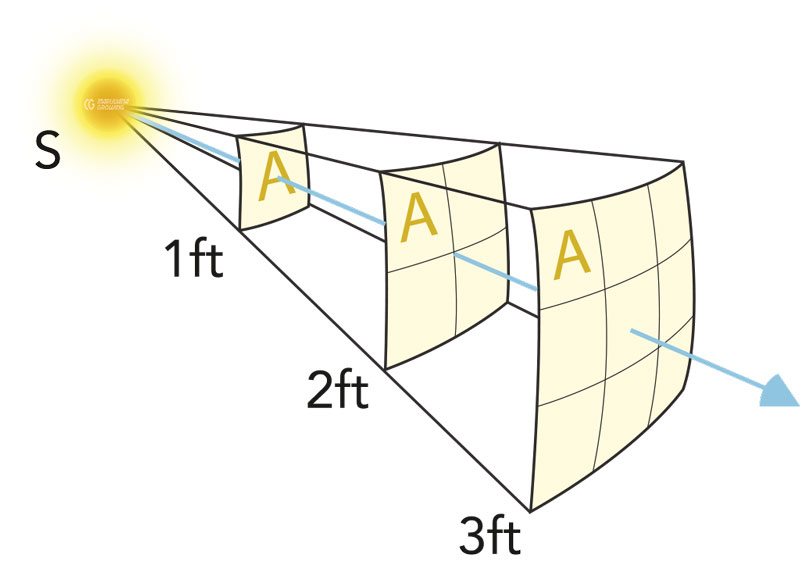
For example, plants that are 2 feet (61 cm) from a lamp receive one-quarter the amount of light received by plants 1 foot away (30.5 cm). An HID that emits 100,000 lumens produces a paltry 25,000 lumens at 2 feet (61 cm) away. A 1000-watt HID that emits 100,000 initial lumens yields 11,111 lumens at 3 feet (91.4 cm) away. Couple this meager sum with a poorly designed reflective hood that has lost its shine, and the garden suffers.
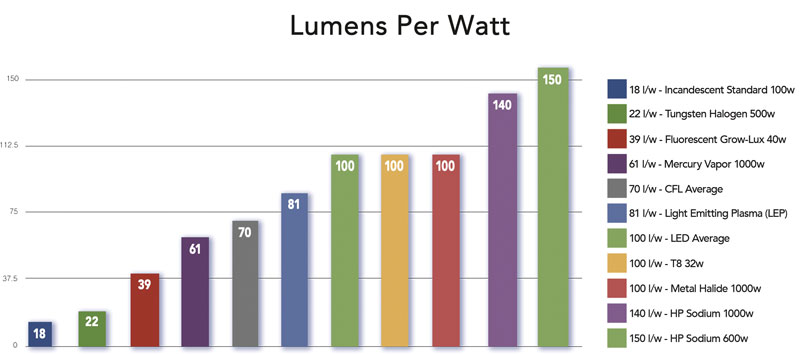
For plant growth, the brilliance of a lamp has a limited effect when it does not produce the proper spectrum. For example, the efficient 600-watt HP sodium lamps have the highest lumens per watt (lm/W) conversion, but a color rendering index (CRI) of 24 and spectrum of 2000 K to 3000 K. Even though these lamps produce more light per watt, plants can use only parts of it!

| LAMP | WATTS | INITIAL LUMENS | MEAN LUMENS |
| MH | 1000 | 100,000 | 80,000 |
| SMH | 1000 | 115,000 | 92,000 |
| HPS | 1000 | 140,000 | 112,000 |
| HPS | 600 | 90,000 | 72,000 |
Lumens emitted are only part of the equation. Lumens received by the plant are much more important. Lumens received are measured in watts per square foot or in foot-candles (fc). One foot-candle equals the amount of light that falls on 1 square foot of surface located 1 foot away from 1 candle.
Measuring Light
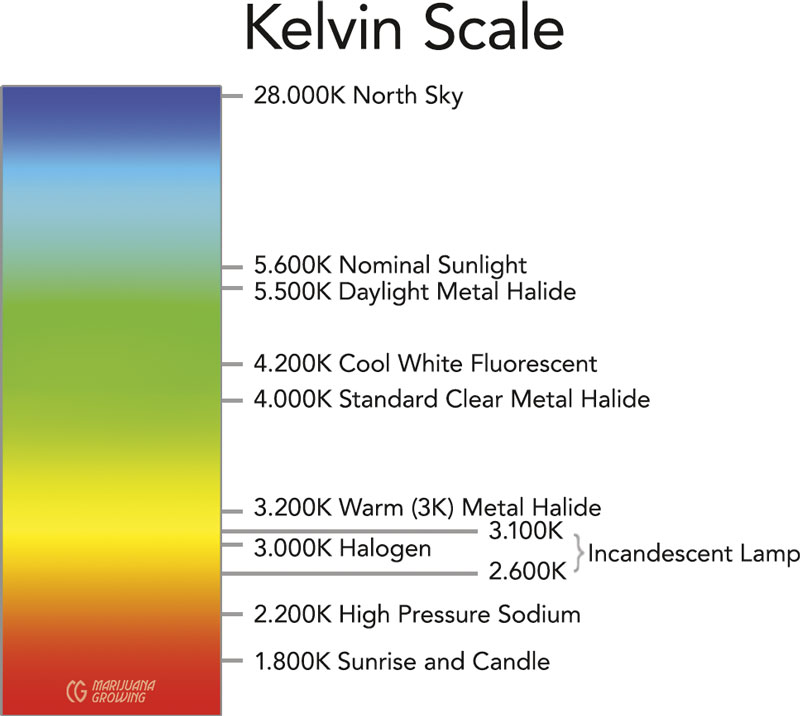
As explained earlier in this chapter, plants use the PAR portion of the light spectrum to grow. Artificial lights that produce the highest PAR rating with a high-intensity are the logical choice to grow medicinal cannabis. To find out which lightbulbs supply the most usable light for photosynthesis, reference their color rendering index (CRI) and the Kelvin (K) temperature ratings. The CRI indicates how close the lamp’s spectrum is to natural sunlight. The color temperature (spectrum) of the bulb is expressed in kelvins. Kelvin is an absolute measurement of temperature that indicates the exact color spectrum a bulb emits. Lightbulbs with a Kelvin temperature from 3000 to 6500 will grow medicinal cannabis. These two figures, coupled with lamp intensity expressed in lumens, can approximate a PAR rating for lamps that do not have one.
The color rendering index (CRI) is a scale used to measure the ability of a light source to reproduce the colors of various objects faithfully in comparison to an ideal or natural light source, which means how true to life these colors appear in the visible spectrum when they are being illuminated with anything other than natural light.
The color corrected temperature (CCT) of a bulb is the peak Kelvin temperature at which the colors in a bulb are stable. We can classify bulbs by their CCT rating, which tells us the overall color of the light emitted. It does not tell us the spectrum (concentration of the combination of colors emitted).
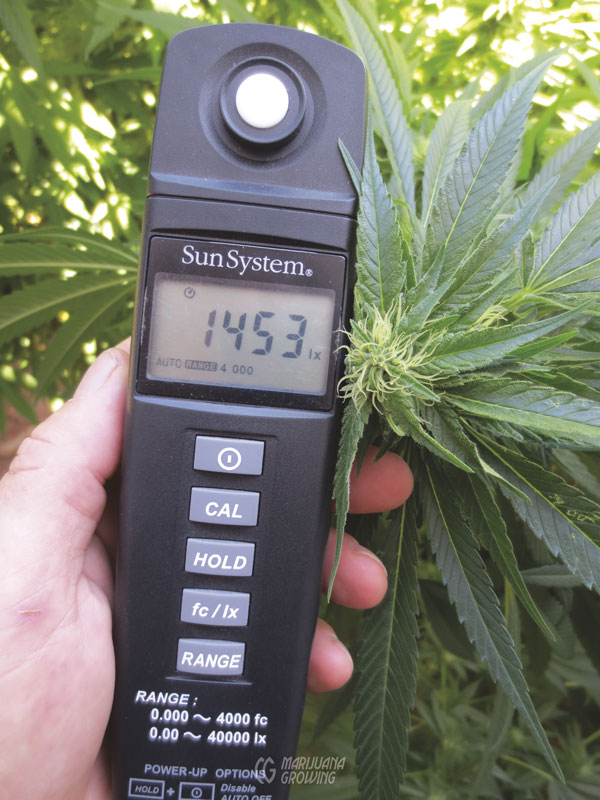
Light is commonly measured in foot-candles or lux, two scales that measure light visible to humans, but do not measure photosynthetic response to light in PAR or PPF. Lumens are a measurement of light emitted from the sun or artificial light. Light meters that measure in PAR or PPF are very expensive and seldom used by medical cannabis gardeners. Foot-candle and lux meters can also be used to achieve an approximate measure of light available to plants. The foot-candle and lux readings are still valuable, because they record the amount of intense (PAR/PPF) light spread over a specific area.
Using an inexpensive light meter to calculate lumens, foot-candles, or lux is a way to estimate the amount of light plants receive. But it does not measure how much light is available to plants.
The Inverse Square Law
The relationship between light emitted from a point source (bulb) and distance is defined by the inverse square law. This law affirms that the intensity of light changes in inverse proportion to the square of the distance. Light diminishes rapidly.
I = L/D2
Intensity = light output/distance2
For example:
Distance Intensity = light output/distance2
| Feet | Centimeters | Lumens | Lumens/Distance2 |
| 1 | 30 | 100000 | 100000/1 |
| 2 | 60 | 25000 | 100000/2 |
| 3 | 90 | 11111 | 100000/3 |
| 4 | 120 | 6250 | 100000/4 |
Once you know the PAR rating of a lamp, using a foot-candle or lux meter will measure light intensity at the foliage. The foot-candle or lux light meter measures the overall intensity of visible light over a garden. Use the most efficient lamp with the highest PAR or PPF (μmol/s) rating for the application: seedling/clone, vegetative, and flowering. Outdoors and in greenhouses, plants that do not receive enough intense light grow slowly. Lack of light during flowering keeps flower buds from filling out and putting on weight.
Light meter readings vary a lot as a result of orientation. To get the most accurate readings, orient the meter at a 90-degree angle from the garden canopy when taking measurements. Avoid pointing the light sensor directly at a bulb unless measuring directly below bulb.
*Light can be measured in many different scales: foot-candles, lumens, lumens/cm², lumens/ft², lumens/m², lux, phot, nox, candlepower, meter candle, nit, stilb, lambert, foot-lambert, millilambert, candela/m², candela/cm², candela/ft², and candela/in², watts, microeinsteins, millimoles, joules, photons, radiant flux, luminous flux, PAR, PPF, etc. To figure out conversions to different scales for measuring light, OnlineConversion.com will do the math for you: www.onlineconversion.com/light.htm.
According to lighting expert Theo Tekstra from Gavita-Holland, “Micromoles is the way to express photons.” Micromoles measure the number of photons per second, or irradiation of photons per second per meter. Micromole = μMol
To get an idea of how well a medical cannabis plant will grow under a specific greenhouse covering or lightbulb, three things must be known: (1) PAR, (2) intensity, and (3) hours of darkness.
Photoperiod
The photoperiod is the relationship between the duration of the light period and dark period. In nature, cannabis normally flowers in the fall, when nights grow long and days short.
In general, cannabis is a short-day plant that will flower when it receives short 12-hour days and 12-hour nights. (C. ruderalis, however, is a long-day plant.) Most varieties of cannabis will stay in the vegetative growth stage as long as an 18- to 24-hour light and a 6- to 0hour dark photoperiod are maintained. However, there are exceptions. Eighteen hours of light per day will give cannabis all the light it needs to sustain vegetative growth. Cannabis can efficiently process 16 to 18 hours of light per day, after which it reaches a point of diminishing returns and the electricity is wasted. (See chapter 25, Breeding.)
Flowering is most efficiently induced in most varieties of cannabis with 12 hours of uninterrupted darkness in a 24-hour photoperiod. When plants are at least 2 months old—after they have developed male and female sexual characteristics— altering the photoperiod to an even 12 hours, day and night, will induce visible signs of flowering in 1 to 3 weeks. Older plants tend to show signs of flowering sooner. Varieties originating in the tropics generally mature later, and more hours of darkness shorten flowering time. The 12-hour photoperiod represents the classic equinox and is the standard daylight-to-dark relationship for flowering in cannabis.
Some gardeners experiment with gradually decreasing daylight hours while increasing hours of darkness. They do this to simulate the natural photoperiod outdoors. This practice prolongs flowering and does not increase yields. Genetically unstable varieties could express intersex (hermaphroditic) tendencies if the photoperiod bounces up and down several times. If you plan to give plants a photoperiod of 13/11 day/night, stick to it. Do not decide you want to change the photoperiod to 15/9. Such variation will stress plants and could cause intersexuality.
Tropical gardeners that get 12 to 13 hours of light and at least 11 to 12 hours of darkness year round can grow plants with artificial light the first month or two of life and set them outdoors to induce flowering with the long nights. Such gardens can flower for two or three months, harvested and replanted year round. Other gardens in latitudes further north with good weather could grow autoflowering feminized plants during the long summer days to avoid having to cover greenhouses to induce flowering.
The photoperiod signals plants to start flowering; it can also signal them to remain in (or revert to) vegetative growth. Cannabis must have 12 hours of uninterrupted total darkness to flower properly. Dim light during the dark period in the pre-flowering and flowering stages prevents cannabis from blooming.
When the 12-hour dark period is interrupted by light, plants get confused. The light signals plants, “It’s daytime; start vegetative growth.” Given this signal of light, plants start vegetative growth, and flowering is retarded or stopped.
Cannabis will not stop flowering if the lights are turned on for a few minutes once or twice during the 2-month-long flowering cycle. If a light is turned on for 5 to 30 minutes—long enough to disrupt the dark period—on 3 to 5 consecutive nights, plants will start to revert to vegetative growth.
Less than one half of one foot-candle of light will prevent cannabis from flowering. That is a little more light than is reflected by a full moon on a clear night. Well-bred indica-dominant plants will revert within three days. Sativa-dominant plants take four to five days to revert to vegetative growth. Once they start to revegetate, it can take from four to six additional weeks to induce flowering again!
There are other photoperiods possible. For example, you can give plants 12 hours of HID light and the remaining 6 hours of incandescent light for a total of 18 hours to save on electric bills. But other light regimens that do not allow for 11 to 12 hours of darkness in 24 hours are going against Mother Nature. If sales people promise higher yields, watch out for disproportionate use of electricity. There are also some screwy photoperiod regimens that should not be followed!.
A relationship exists between photoperiod response and genetics. Little scientific information is available about which specific varieties of cannabis are affected by photoperiod.
Sativa-dominant varieties that originated in the tropics respond to long days better than indica-dominant varieties, even though both are short-day plants. On the equator, days and nights are almost the same length year round. Plants tend to bloom when they are chronologically ready, after completing the vegetative growth stage. For example, the pure sativa variety ‘Haze’ flowers slowly for 3 months or longer, even when given a 12- hour photoperiod.
Give ‘Haze’ varieties more darkness and less light hours to speed harvest time and make flower buds fill in faster. Start with the 12/12 photoperiod and change to a 14 dark/10 light photoperiod after the first month. Play around a little with the photoperiod on pure sativas to dial it in for specific varieties.
You can start ‘Haze’ on a 12/12 day/ night schedule, but it still must go through the seedling and vegetative stages before spending 3 months or longer flowering. Plants grow more slowly in 12-hour days than when given 18 hours of light, and inducing flowering takes longer.
Indica-dominant varieties that originated in northern latitudes tend to flower sooner and respond more quickly to a 12- hour photoperiod. Many indica varieties will flower under a 14/10 or 13/11 day/ night photoperiod. Again, the hours of light necessary to induce flowering in an indica-dominant plant is contingent upon the genetics in the variety. More hours of light during flowering can cause some varieties to produce bigger plants, but flowering time is usually longer and some gardeners have reported looser, leafier flower buds as a result.
Some gardeners have achieved higher yields by inducing flowering via the 12- hour photoperiod, then changing to 13 to 14 hours of light after 2 to 4 weeks. This practice works best with early-flowering indica-dominant varieties, but flowering might be prolonged. I spoke with gardeners who increase light by 1 hour 2 to 3 weeks after flowering is induced. They say the yield increases about 10 percent. Flowering takes about a week longer, however, and different varieties respond differently.
Horticulturists in the “green industry” state that once the bud is competent (after the juvenile stage) and will respond to flowering signals, it is determined (changed to a floral bud), which means it is going to flower. High stress by light levels, photoperiod, temperature, etc., can delay or cause abortion and maybe a shift back to adult vegetative growth. However, it is common practice that photo controls are dropped about a third to half of the time to harvest in most green industry production. They typically add or subtract an hour or two of light a day, just like cannabis growers. Nevertheless, this stress (longer days) could also be the trigger to shock plants out of the flowering stage.
Ruderalis-dominant varieties are autoflowering. Cannabis sativa and C. indica varieties are crossed with C. ruderalis. Some of the offspring contain the autoflowering genes. Autoflowering plants are often feminized. The seeds are planted indoors and grown indoors, outdoors, or in greenhouses. These varieties flower under 24 hours of light after about three weeks of growth. C. ruderalis crosses will flower under any light regimen. However, when growing indoors many gardeners report that a light regimen of 20 hours light and 4 hours dark will spur the most growth.
Some gardeners give plants 36 hours of total darkness just before inducing flowering with the 12/12 photoperiod. This heavy dose of darkness sends plants an unmistakable signal that causes a hormonal change to stimulate flowering. Gardeners using this technique report that plants normally show signs of flowering, such as stigma formation, sooner than normal.
Indoor and Greenhouse Garden Lamps
Medical cannabis can be grown indoors using exclusively artificial light sources such as fluorescent, compact fluorescent (CFL), light-emitting diode (LED), high-intensity discharge (HID), and light-emitting plasma (LEP) lamps. Each of the lamps has its strengths and weaknesses. The fluorescent, CFL, LED, and LEP produce less heat than HID lamps, but HIDs produce more lumens per watt (lm/W). Many of the lamps are available in a growing range of spectrums conducive to plant growth.
All lamps used for indoor growing require ballasts or some sort of extra circuitry to regulate line electricity before reaching the bulb. Old-fashioned heavy magnetic (analog) ballasts are losing popularity to ever-improving electronic ballasts and circuitry.
There are many different bulbs and ballasts, and there are many different setups for gardens. New manufactures have entered the market and most of the old-reliable manufacturers offer more products than ever before. Next we will discuss different lighting systems and all the pertinent gardening details. Find all the lamps in this chapter at local hydroponic stores and via Internet vendors.
High-Intensity Discharge (HID) Lighting Systems
Medical cannabis gardeners are compelled to employ high-intensity discharge (HID) lamps indoors in lieu of natural sunlight when they are unable to garden outdoors or in a greenhouse. Many medical gardeners start cuttings and seedlings indoors under lights before moving them into a greenhouse or outdoors. To date, some HID lamps outperform other lamps in their combined lumens-per-watt efficiency, spectral balance, and brilliance.
The HID lamp family contains mercury vapor, metal halide (MH), high-pressure (HP) sodium, and conversion bulbs (MH to HPS and HPS to MH). Metal halide, HPS, and conversion lamps have a spectrum similar to actual sunshine and can be used to grow cannabis.
Popular HID wattages range from 150 to 1100. Smaller 150- to 250-watt bulbs are popular for small gardens measuring up to three feet square. Brighter 400- to 1100-watt lamps are favored for larger gardens. The 400- and 600-watt bulbs are most popular among European gardeners. North American gardeners favor 600- and 1000-watt bulbs. Super-efficient 1100-watt metal halides were introduced in 2000.
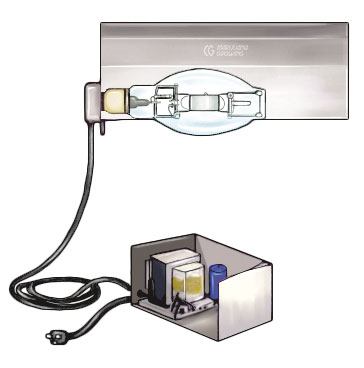
This simple cutaway drawing of a metal halide reveals the transformer and capacitor in a protective metal box. The bulb and hood are attached to the ballast with 14/3-wire and a mogul socket.
The brightest bulbs measured in lumens per watt are the metal halide and HP sodium bulbs. Originally developed in the 1960s, metal halides and HP sodium bulbs were characterized by one main technical limitation—the larger the bulb, the higher the lumens-per-watt conversion. For example, watt for watt, a 1000-watt HP sodium produces about 12 percent more light than a 400-watt HPS and about 25 percent more light than a 150-watt HPS. Scientists overcame this barrier when they developed the 600-watt HP sodium. Watt for watt, a 600-watt HPS produces 7 percent more light than the 1000-watt HPS. The “pulse start” metal halides are also brighter and much more efficient than their predecessors.
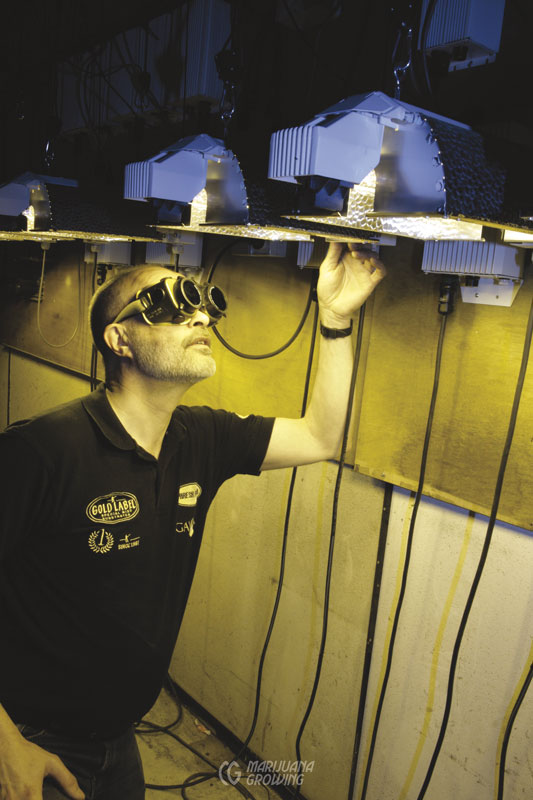
An HID light “system” consists of a ballast (transformer, capacitor, and starter) attached to an HID bulb and reflector. High-intensity discharge lamps produce light by passing electricity through ionized gas enclosed in a clear ceramic arc tube under very high pressure. The combination of chemicals sealed in the arc tube determines the color spectrum produced. The mix of chemicals in the arc tube allows metal halide lamps to yield the broadest and most diverse spectrum of light. The spectrum of HP sodium lamps is limited because of the narrower band of chemicals used to dose the arc tube. The arc tube is contained within a larger glass bulb. Most of the ultraviolet rays produced in the arc tube are filtered by the outer bulb. Some bulbs have a phosphor coating inside. This coating makes them produce a little different spectrum and fewer lumens. The outer bulb functions as a protective jacket that contains the arc tube and starting mechanism, keeping them in a constant environment, as well as absorbing ultraviolet radiation. Protective glasses that filter out ultraviolet rays are a good idea if you spend much time in the garden room.
Caution: To avoid serious damage to your eyes, never look at the arc tube if the outer bulb breaks. Turn off the lamp immediately.
An HID lamp requires a seasoning period of 100 hours of operation for all of its components to stabilize. If a power surge occurs and the lamp goes out or is turned off, it will take 5 to 15 minutes for the gases inside the arc tube to cool before restarting. Lamps last longer when started only once a day. Always use a timer to turn lamps on and off.
Typically, metal halides operate most efficiently in a vertical ±15degree position. When operated in positions other than ±15 degrees of vertical, lamp wattage, lumen output, and bulb life decrease; the arc bends, creating nonuniform heating of the arc tube wall, resulting in less-efficient operation and shorter life. There are special lamps made to operate in the horizontal or any other position other than ±15 degrees.
HID lamps may produce a stroboscopic (flashing) effect, making the light appear bright, then dim, bright, dim, etc. This flashing is the result of the arc being extinguished 120 times every second. Illumination usually remains constant, but it may pulsate a little. This is normal and nothing to worry about.
The number of HID lamp manufacturers has grown during the last few decades. Today HID bulbs are often made in China by unknown manufacturers. For example, go to http://www.alibaba.com/ and search for HID lights. HID bulbs made in different countries have diverse quality standards and laws or rules that are not always enforced. Substandard products result. General Electric, Iwasaki, Lumenarc, Osram/Sylvania, Philips, and Venture (SunMaster) continue to manufacture good-quality HID bulbs. Go to their websites and check the official statistics for each bulb.
Certain brands of bulbs may have better attributes than others. Indoor cannabis gardeners usually come to this conclusion because they purchase two different brands of bulbs and have better luck using one brand over the other. However, many manufacturers buy and use the same components, often manufactured by competitors.
The best way to ensure that bulbs emit adequate light all the time is to check the light output with a light meter.
Pulse-start metal halides operate in the same way as traditional metal halide bulbs, but their construction is slightly different. Traditional bulbs have an electrode at each end of the arc tube and an additional striker electrode close to one of the main electrodes. When the bulb starts, a short arc is formed between the striker electrode and the main electrode. This creates ionized gas that fills the tube and provides a path for an arc between the two main electrodes. A temperature-sensitive bimetallic strip acts as a switch and removes the striker electrode from the circuit when the light has fully lit. Pulse-start metal halides do not have a striker electrode; instead, their ballast contains an igniter circuit that provides a spike or pulse of electricity (1 kilovolt [kV] to 5 kV on a cold strike and up to 30 kV on a hot restrike) to start the arc.
HID Ballasts
A ballast wired in between the lamp and the electrical power supply is necessary for HID lamps to regulate specific starting requirements and line voltage. Purchase the high-intensity discharge system—ballast, lamp, reflector, and electrical cords and plugs at the same time to ensure that they all function properly and are designed to work together. Always buy the proper ballast for HID bulbs. A good rule of thumb is that ballasts can be used only with bulbs they were designed for.
A ballast converts and regulates electricity. Ballasts can be either the old-style magnetic (analog or inductive) type or the newer electronic (digital) type. Inefficient conversion and regulation of electricity will result in lost power in the form of heat. Heat is an excellent measure of efficiency. Digital ballasts “leak” about 2.5 British thermal units per hour (Btu/h). Analog ballasts lose about 3.5 Btu/h. The difference is small, but it adds up over time. More electricity goes to the bulb and less heat is generated in the room.
After all the hype of lower electric bills when using electronic ballasts, our www.marijuanagrowing.com forum member JustThisGuy converted 16 analog ballasts to 16 digital ballasts. With analog ballasts the electric bill was $1,100 USD per month, and with digital ballasts it was $1,000 USD, a savings of about 9 percent. See chapter 15, Meters, for more information on measuring electricity use.
Analog (Magnetic) Ballasts
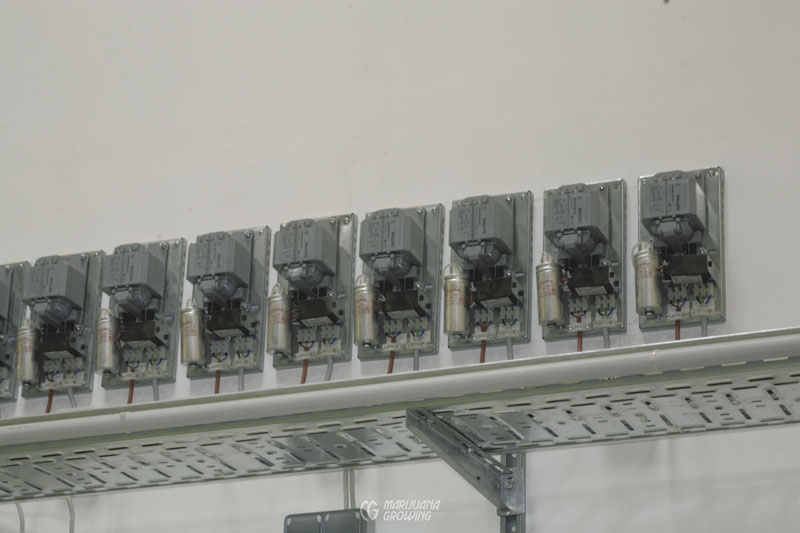
Analog or magnetic ballasts have been around for decades. They are available in wattages from 150 to 1100. Magnetic ballasts contain an inductor that consists of copper wire wound around an iron core (a series of metal plates stuck together by resin). This serves to regulate the current and voltage delivered to the lamp. A capacitor and (sometimes) a starter for lamps are mounted on a separate board. The ballast is wired in between the lamp and the electrical power supply. Magnetic ballasts weigh in at 30 pounds (13.6 kg) for a 400-watt and up to 60 pounds (27.2 kg) for a 1000-watt HPS.
Analog ballast kits contain a transformer core, capacitor (HPS and some metal halides), starter, containing box, and (sometimes) wire. You can purchase components separately from an electrical supply store, but doing so is often more work than it’s worth. If unfamiliar with electrical component assembly and reading wiring diagrams, purchase the assembled ballast in a package containing the lamp and reflective hood from one of the many HID retailers. Do not buy used parts from a junkyard or try to use a ballast if you are unsure of its capacity. Just because a bulb fits a socket attached to a ballast, does not mean that they will work efficiently together.
Analog ballasts generate noise and about 3.5 Btu/h of heat. As they age, the resin between plates in the core hardens and metal plates start to vibrate. Ballasts operate at 90ºF to 150°F (32.2ºC– 65.6°C). Touch a “strike anywhere” kitchen match to the side to check if it is too hot. If the match lights, the ballast is too hot and should be taken into the shop for assessment. Heat is the number one ballast destroyer.
Many types of ballasts are manufactured with a protective metal box. This outer shell safely contains the core, capacitor (starter), and wiring. Dampen noise by building another box around it. Make sure there is plenty of air circulation. If the ballast runs too hot, it will be less efficient, run more noisily, burn out prematurely, and maybe even start a fire.
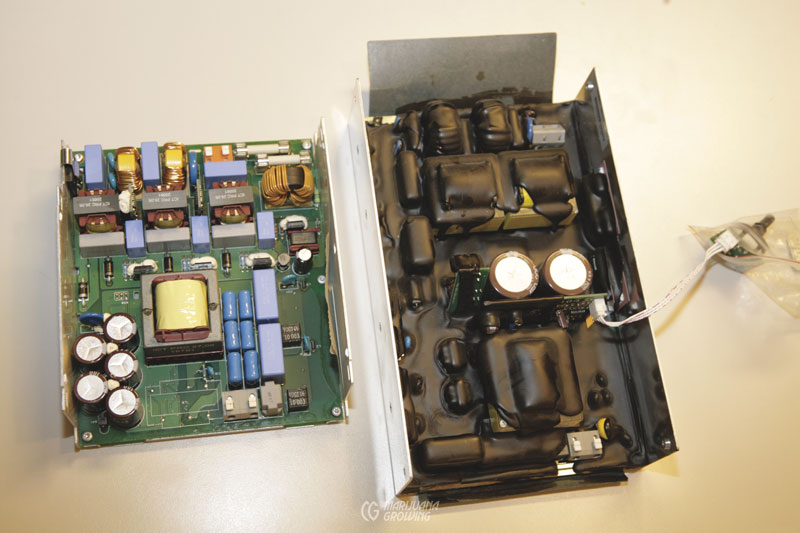
Electronic Ballasts
Electronic ballasts use a high-frequency oscillator circuit to provide a high-frequency current to drive the lamp. Electronic ballasts operate about 10 percent more efficiently than magnetic ballasts and consume a little less electricity to produce the same output. A microprocessor (CPU) that fine-tunes the electrical supply to the lamp can be found in some electronic ballasts, including those supplied by Lumatek.
High-frequency operation requires special “high-frequency” bulbs. Do not use a high-frequency lamp in analog or 50/60 cycle (hertz) ballast. And do not use a low-frequency bulb with a high-frequency electronic ballast. Operating requirements of each system are different, and interchanging bulbs or ballasts from digital to analog or vice versa will result in premature equipment failure.
The electrical input frequency, measured in hertz (Hz), to the ballast is 50 or 60 Hz. When the electricity leaves the ballast to go to the lamp, output frequency increases up to 4000 Hz. The high operating hertz virtually eliminates the stroboscopic effect and output does not fluctuate with input voltage. High operating frequencies prevent acoustic resonance and optimize lamp life. The result of the stable power supply is a brighter lamp.
HID lamps designed for digital ballasts also have stronger metals inside the bulb due to the higher operating frequencies and demands of a digital system. This is why it is so important to make sure ballasts and bulbs are designed to be used together.
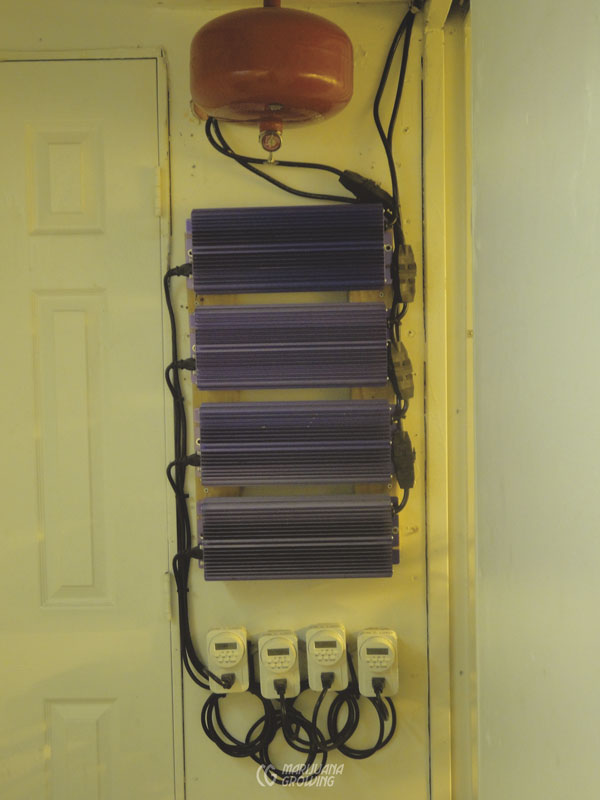
Electronic ballasts are lightweight and run cool, generating about 2.5 Btu/h. They are designed to operate in environments less than 104°F (40°C).
Solid-state electronic ballasts have no moving parts and make little noise. Manufacturers often cover components in resin (a process called “potting”) to protect them from water, humidity, and other damage. This is very important in a garden environment. Mount ballasts on a small pad or rubber feet to subdue any noise caused by vibration.
Available in 150- to 1150-watt models, many electronic ballasts are able to modulate in-between wattages. For example, a 1000-watt ballast could work at different settings: 600, 750, 1000, or 1150 watts.
The wattage on some electronic ballasts can be changed. For example, a 1000- watt electronic ballast could run at wattages from 600 to 1150. Dial settings are adjusted to change the wattage of the lamp. Underdriving lamps works well but is less efficient electrically.
Multiple power outputs from ballasts enable use for different bulbs. Electronic ballasts can be adjusted to operate at different wattages. The “soft dim” switch requires 60 seconds for each increase or decrease in wattage. For example:
1000-watt: 600, 660, 750, 825, 1000, 1150
600-watt: 300, 400, 600, 660
400-watt: 250, 275, 400, 440
Electronic ballasts can drive a wide range of electronic lamps (EL) and increase their output by 10 to 15 percent, but increasing output overdrives the bulb and shortens its life.
The world of indoor plant lighting is changing all the time. Keep up with new developments in plant lighting at www.marijuanagrowing.com.
Ballast Features
Avoid purchasing ballasts with enclosed fans or timers. They run too hot, and the extra appliances tend to break or cause problems.
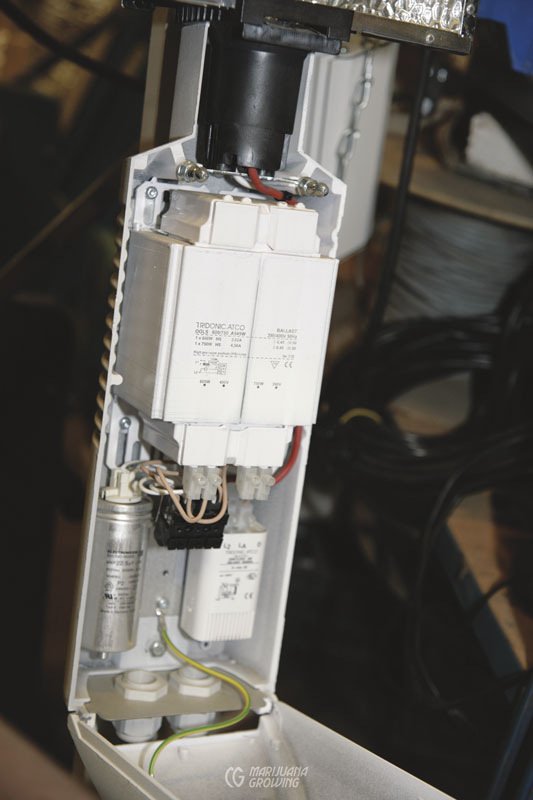
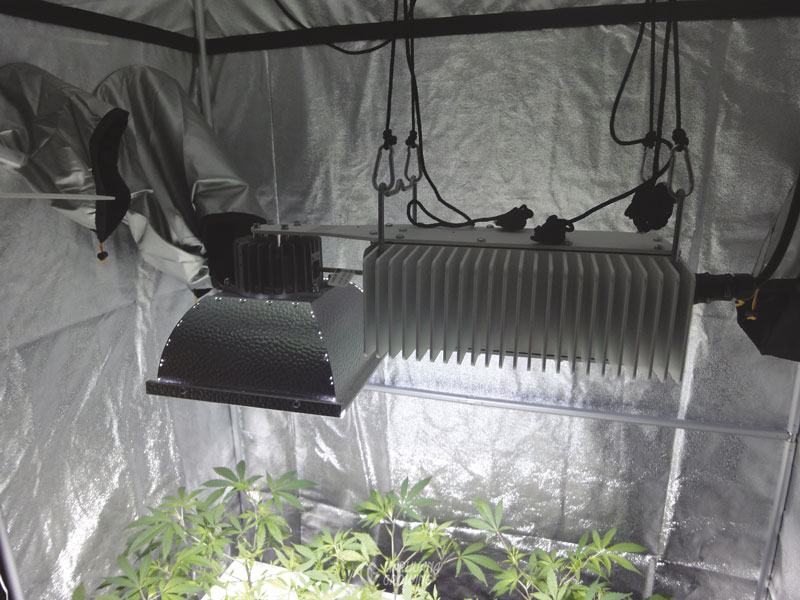
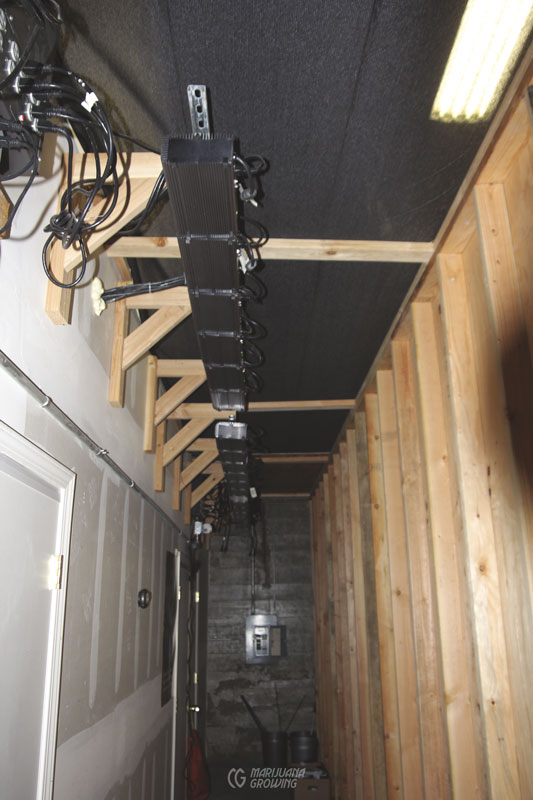
Ballasts can be attached to the light fixture or remote. The remote ballast offers the most versatility and is often the best choice for small HID gardens. A remote ballast is easy to move. Help control heat by placing a remote ballast on or near the floor to radiate heat in a cool portion of the garden room, or move the ballast outside the garden to cool the room. Do not place the ballast directly on a damp floor or any floor that might get wet and conduct electricity. Attached ballasts are fixed to the hood; they require more overhead space, are very heavy, and tend to create more heat around the lamp.
Attached ballasts have the benefit of using less electricity and creating a lower electronic profile around the garden. The electric cord between the ballast and the lamp consumes electricity, lowering lamp efficiency. It works like an antenna and emits a radio frequency signal that is very easy to pick up from afar. Thousands of luminaries can be operated in the same area.
A handle will make ballasts easier to move. A small 400-watt analog metal halide ballast weighs about 30 pounds (about 14 kg), and a large 1000-watt HP sodium ballast tips the scales at about 55 pounds (about 25 kg). This small, heavy box is very awkward to move without a handle.
Air vents allow a ballast to run cooler. The vents should protect the ballast’s internal parts and prevent water from splashing in.
Ballasts with a switch allow gardeners to use the same ballast with two different sets of lights. This wonderful invention is perfect for running two flowering garden rooms. The lights go on for 12 hours in one garden room while they are off in a second room. When the lights turn off in the first room, the same ballasts hooked to another set of lights in the second room are turned on. There must be a 10- to 15-minute pause between initiation of lights in each room.
There are also ballasts to run both metal halide and HP sodium systems. These dual-purpose ballasts are not as efficient as dedicated ballasts. They often overdrive the metal halide bulb, causing it to burn out prematurely after accelerated lumen output loss. If you have a limited budget and can only afford one ballast, it is more economical to use conversion bulbs to change spectrum. (See “Conversion Bulbs”).
Most magnetic ballasts sold by HID stores are “single tap,” and are set up for 120 volt household current in North America or 240 volts in Europe and other countries. Some “multi-tap” or “quad-tap” ballasts are ready for 120 or 240 volt service. North American ballasts run at 60 cycles per minute, while European counterpart runs at 50 cycles per minute.
European greenhouse HID lighting systems operate at 400 volts. Hobby lights were developed from professional lights that operate at 230 watts.
There is no difference in the electricity consumed by using either 120 or 240 volt systems. The 120 volt system draws about 9.6 amperes, and an HID on a 240-volt current draws about 4.3 amperes. Both use the same amount of electricity. Work out the details yourself using Ohm’s Law.
Ballast Safety
The ballast has a lot of electricity flowing through it. Do not touch the ballast when operating. Do not place the ballast directly on a damp floor or any floor that might get wet and conduct electricity.
Always place the ballast up off the floor, and protect it from possible moisture. The ballast should be suspended in the air or on a shelf attached to the wall. It does not have to be very high off the ground, just far enough to keep it dry.
Place the ballast on a soft foam pad to absorb vibrations and lower decibel sound output on analog ballasts. Loose components inside the ballast can be tightened to further deaden noise caused by vibrations. Train a fan on ballasts to cool them. Cooler ballasts are more efficient, and bulbs burn brighter. Always check with a qualified source such as a hydroponic store to ensure that the ballast is designed for a specific lamp. Do not try to mix and match ballasts and lamps.
Some industrial ballasts are sealed in fiberglass or similar material to make them weatherproof. These ballasts are not recommended for use indoors. They were designed for outdoor use where heat buildup is not a problem. Indoors, the weather-protection of the sealed unit is unnecessary and creates excessive heat and inefficient operation.
Purchase only quality ballasts that come with a guarantee. Read the fine print, and do not be tricked by misleading sales phrases such as “all components UL (or CSA, EMC, etc.) approved.” Each of the components could be UL, CSA, or EMC approved, but when the components are used together to operate a lamp, they are not UL, CSA, or EMC approved. Often components are approved, but not approved for the specific application.
To keep ballasts clean wipe them down with a damp cloth. Look for heat damage such as melted and burned wires. Take ballast to dealer immediately if signs of heat or malfunction occur. Often ballasts are sealed, and opening the ballast or breaking the seal will void the warranty.
When using a single ballast to light 2 lamps at 12-hour intervals, let it cool down before restarting. Run the lamp 12 hours then let the ballast cool for 15 minutes before restarting to operate the second 12-hour stint of light. Letting the ballast cool will help avoid burnout.
HID Bulbs
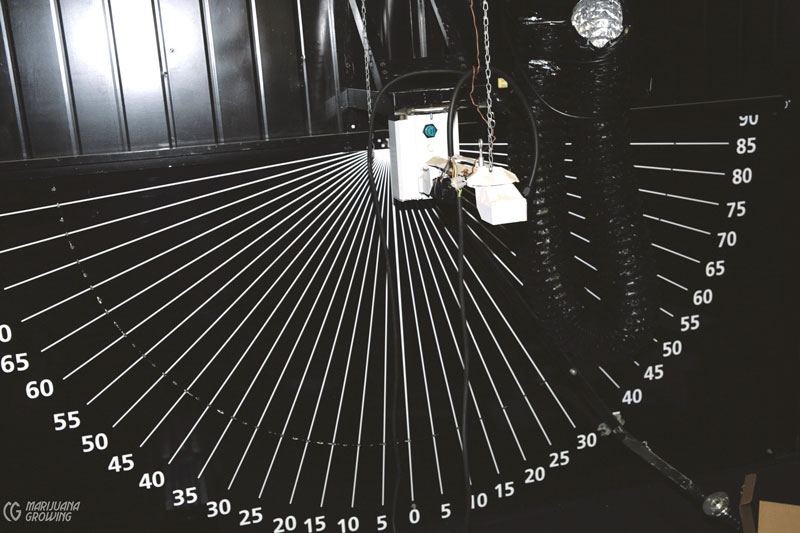
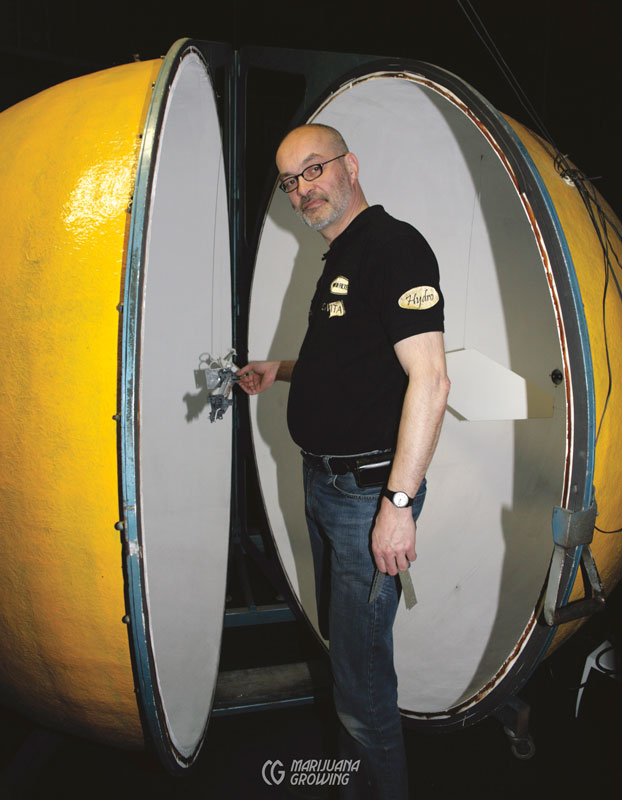
Ulbricht Sphere
An integrating sphere (aka Ulbricht sphere) is a hollow spherical cavity. The inside is covered with a diffuse reflective white paint. Its purpose is to uniformly diffuse or scatter light so that it is distributed equally to all points inside the sphere.
Measuring light in an Ulbricht sphere is the standard in photometry and radiometry. It measures light produced by a source where total (light) power can be acquired in a single measurement.
The number of new HID bulbs that appear on the market today is mind-boggling. Osram Sylvania, General Electric, Gavita, Philips, SunMaster, Fulham, and Venture are a few of the manufacturers that make and continue to develop new HID bulbs.

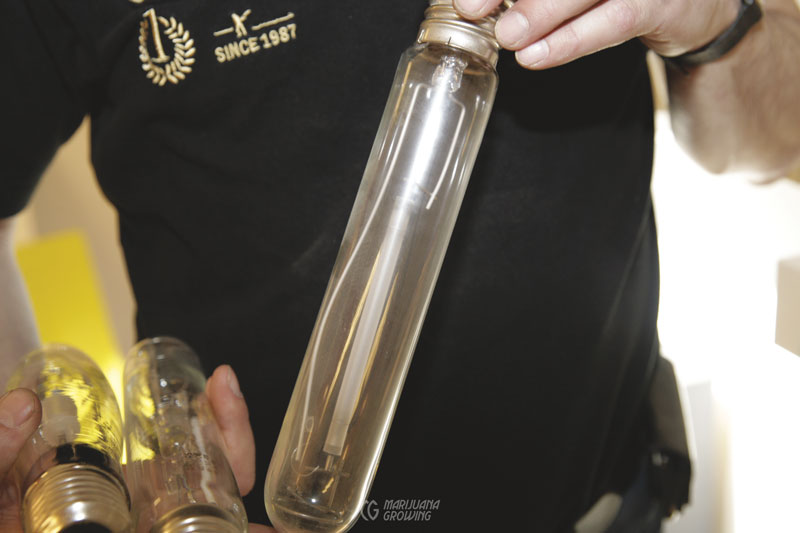
Not all HID bulbs are created equal. In fact, there are brighter brands that supply up to 15 percent more light than the closest competitor. The Philips Master GreenPower Plus TD EL 1000-watt lamp is the brightest lamp and emits more μmol than any other bulb. This exceptional HPS tubular lamp is secured at both ends, which allows a straight shot for the electricity to flow. Coupled with a bit longer arc tube, the free-flowing electricity makes the bulb generate more than 2000 μmol of light! Note that other bulbs, such as the Gavita Enhanced HPS 1000-watt, generate only 1750 μmols of light—12.5 percent less light.
Notable new bulbs have a high PAR rating and pulse-start metal halides.
High-intensity discharge bulbs are identified by wattage and by the size and shape of the outer envelope or bulb. They are further rated by voltage, ballasting requirements, lumen output, spectrum, etc.
Overall, HID bulbs are designed to be tough and durable, and new bulbs are tougher than used ones. Nonetheless, once the bulb has been used a few hours, the arc tube blackens and internal parts become somewhat brittle. After a bulb has been used several hundred hours, a solid bump will substantially shorten its life and lessen its luminescence.
HID Bulb Maintenance
Always keep the bulb clean. Wait for it to cool before wiping it off with a liquid glass cleaner and clean cloth, every 2 to 4 weeks. Dirt and fingerprints will lower lumen output substantially. Bulbs get covered with insect spray and salty water-vapor residues. This dirt dulls lamp brilliance just as clouds dull natural sunlight. Hands off bulbs! Touching bulbs leaves them with your hand’s oily residue. Baked-on residue weakens the bulb. Most gardeners clean bulbs with Windex or rubbing alcohol, and use a clean cloth to remove filth and grime; Hortilux Lighting advises cleaning bulbs with a clean cloth only.
Never remove a warm lamp. Heat expands the metal mogul base within the socket. A hot bulb is more difficult to remove, and it must be forced. Special electrical grease is available to lubricate sockets (Vaseline works too). Lightly smear a dash of the lubricant around the mogul socket base to facilitate bulb insertion and extraction.
The outer arc tube contains practically all the ultraviolet light produced by HIDs. If an HID should happen to break when inserting or removing it, unplug the ballast immediately and avoid contact with metal parts, to prevent electrical shock.
Pulse-start metal halide lighting manufacturers are required by the Energy Independence and Security Act of 2007 to meet certain efficiency standards. Effective January 1, 2009, standards require pulse-start metal halide lighting with a minimum ballast efficiency of 88 percent. Find ballast efficiency by dividing the lamp wattage by the operating wattage.
Lumen output diminishes over time. As the bulb loses brilliance, it generates less heat and can be moved closer to the garden. This is not an excuse to use old bulbs; it is always better to use newer bulbs. However, it is a way to get a few more months out of an otherwise worthless bulb.
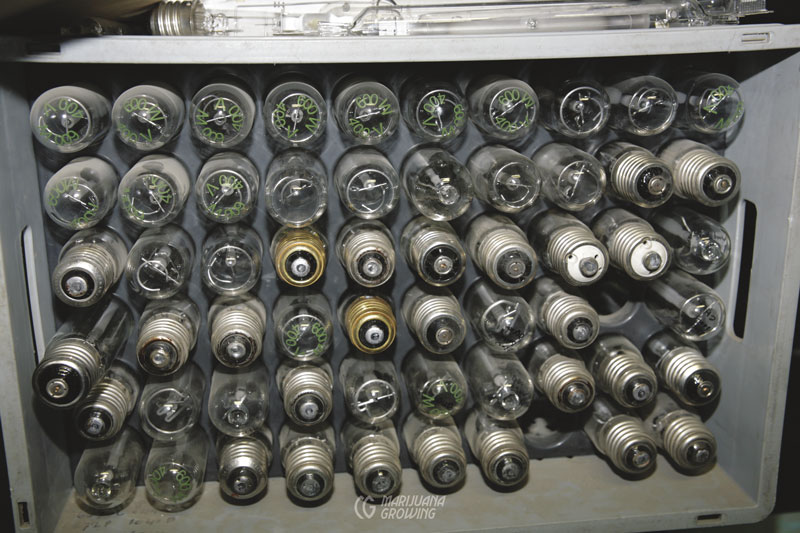
Write down the day, month, and year you start using a bulb so you can better calculate when to replace it for best results. Replace metal halides after 12 months of operation and HP sodium bulbs after 18 months. Many gardeners replace them sooner. Always keep a spare bulb (in its original box) available to replace old bulbs. You can go blind staring at a dim bulb trying to decide when to replace it.
You may prefer to change bulbs according to manufacturer´s recommendations. Some companies recommend as often as once every 8 months, others at 12 months. You are best to measure the light output; when it has diminished 10 to 20 percent, change bulbs.
Bulb Disposal
All fluorescent, compact fluorescent, plasma, HID, and any bulbs that may contain mercury or some other heavy metal that should not escape into the environment. Take spent bulbs to the proper hazardous materials disposal site in your area. Do not toss bulbs into the trash.
- Place the bulb in a dry container, and then dispose of it at certified toxic waste dump facility such as a HAZMAT disposal site in the USA. Most countries have specific agencies that dispose of toxic waste.
- Lamps contain materials that are harmful to the skin. Avoid contact, and use protective clothing.
- Do not place the bulb in a fire.
Mercury Vapor Lamps
The mercury vapor lamp is the oldest and best-known member of the HID family. The HID principle was first used with the mercury vapor lamp around the turn of the 20th century, but it was not until the mid-1930s that the mercury vapor lamp was really employed commercially. Today they are too inefficient to consider as a light source for medical cannabis cultivation.
Mercury vapor lamps produce only 60 lumens per watt—and a poor light spectrum for plant growth. Lamps are available in sizes from 40 to 1000 watts. Bulbs have fair lumen maintenance and a relatively long life. Most wattages last up to 3 years at 18 hours of daily operation.
Bulbs usually require separate ballasts. There are a few low-wattage bulbs with self-contained ballasts. Uninformed gardeners occasionally try to scrounge mercury vapor ballasts from junkyards, and use them in place of the proper halide or HP sodium ballast. Trying to modify these ballasts for use with other HIDs will cause problems.
Metal Halide Bulbs and Ballasts
Metal Halide Bulbs
The metal halide HID lamp is still one of the most efficient sources of artificial white light available to gardeners today. Grow plants from seed through harvest with metal halide lamps. They come in wattages from 50 to 1100, and 1500 watts. They may be either clear or phosphor-coated, and all require a special ballast. The smaller 175- or 250-watt halides are very popular for closet garden rooms. The 400-, 600-, 1000- and 1100- watt bulbs are most popular with indoor gardeners. The 1500-watt halide is avoided due to its relatively short 2000- to 3000-hour life and its incredible heat output. American gardeners generally prefer the larger 1000-watt lamps, and Europeans seem to almost exclusively favor 400- and 600-watt lamps.
| LAMP | KELVIN TEMPERATURE |
| AgroSun | 3250 |
| Multivapor | 3800 |
| Sunmaster Warm Deluxe | 315 PAR |
| Sunmaster Natural Deluxe | 315 PAR |
| Sunmaster Cool Deluxe | 315 PAR |
| SolarMax | 7200 |
| MultiMetal | 4200 |
Caution! Do not mix and match ballasts and bulbs! Ballasts are designed to be used with specific bulbs. Using bulbs with improper ballasts will shorten the life of both components and could cause excessive heat or catch fire!
More and more new metal halide lamps are being developed and marketed every year. New technology and materials have opened the door to new lighting products. The intention of this book is to show the basics of light and electricity, and how cannabis interacts with light rather than to keep up with all the new lighting developments. For more current information on new lamps, ballasts, and reflective hoods, see www.marijuanagrowing.com.
Clear halides are most commonly used by indoor gardeners. Clear super metal halides supply the bright lumens for plant growth. Clear halides work well for seedling, vegetative, and flower growth. Phosphor-coated 1000-watt halides give off a more diffused light (and produce less light) but they emit less ultraviolet light than the clear halides. They produce the same initial lumens and about 4000 fewer lumens than the standard halide, and have a slightly different color spectrum. Phosphor-coated halides have more yellow, but less blue and ultraviolet light. Phosphor-coated bulbs were popular among gardeners in the 1990s.
The 1000-watt super clear halides are the most popular metal halides used to grow cannabis in North America. Compare energy distribution charts and lumen output of all lamps to decide which lamp offers the most light for your garden. Typically, a home gardener starts with one super metal halide.
Universal metal halide bulbs designed to operate in any position, vertical or horizontal, supply up to 10 percent less light and often have a shorter life.
Base Up (BU) and Base Down (BD) metal halide lamps must be vertical to operate properly. Horizontal (H) lamps must orient the arc tube horizontally to burn brightest.
Metal halide lamps are available in a variety of spectrums.
AgroSun and Sunmaster Warm Deluxe emit low (3000 Kelvin) color temperatures. The enhanced orange-red component promotes flowering, stem elongation, and germination while a rich blue content assures healthy vegetative growth. Visit www.growlights.com for more information.
The average life of a halide is about 12,000 hours, almost 2 years of daily operation at 18 hours per day. Many will last even longer. The lamp reaches the end of its life when it fails to start or come up to full brilliance. Electrode deterioration is greatest during start-up. Do not wait until the bulb is burned out before changing it. An old bulb is inefficient and costly. Bulbs lose at least 5 percent of their brilliance every year. Replace bulbs every 12 months or 5000 hours.
Metal Halide Ballasts
Read “About Ballasts.” Different ballasts are required for each type of lamp. Use a magnetic ballast to operate metal halide bulbs designed for use with them. An electronic ballast is made specifically for electronic high-frequency bulbs. Ballasts must be specific to certain lamps because their starting and operating requirements are unique. Electronic ballasts are more efficient and produce less heat than analog or magnetic ballasts.
High-Pressure Sodium Bulbs and Ballasts
Approximately 60 percent of HP sodium light is infrared or heat. All lamp power and light will be converted to heat as bulbs degrade over time.
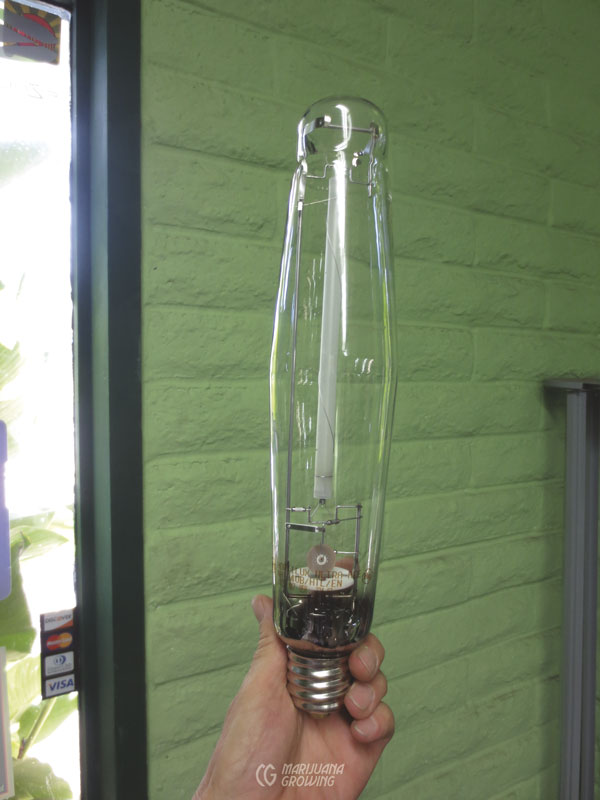
HP Sodium Bulbs
The high-pressure sodium (HPS) lamp is the most efficient source of artificial light available to medical cannabis gardeners today. HPS lamps come in wattages from 50 to 1000 watts. All require a special ballast. The smaller 175- or 400-watt HP sodium systems are very popular for closet garden rooms. The 400-, 600-, and 1000-watt bulbs are most popular with indoor and greenhouse gardeners.
HP sodium lamps emit a yellow-orange glow that could be compared to that of the harvest sun. Cannabis’s light needs change when blooming; it no longer needs to produce so many vegetative cells. Vegetative growth slows and eventually stops during flowering. The plant’s energy is focused on flower production so it can complete its annual life cycle. Light from the red end of the spectrum stimulates floral hormones within the plant, promoting flower production. In general, American gardeners use 1000- and 600-watt HP sodiums most often, while European gardeners use 400- and 600-watt HPS lamps.
Discount building stores often carry a good selection including 250- and 400- watt lamps. All HPS lamps will grow cannabis. Even though HPS lamps are brighter and will grow cannabis, the spectrum contains little blue and more yellow/orange. Lack of color balance makes plants stretch between internodes and experience more cultural and plague problems. But when grown properly, the lack of the proper spectrum does not necessarily diminish overall harvest.
Gardeners with small rooms often retain the 1000-watt halide and add a 1000-watt HP sodium during flowering, when plants need more light to produce tight, dense buds. Adding an HPS lamp doubles available light and increases the red end of the spectrum. This 1:1 ratio (1 MH:1 HPS) is a popular combination in flowering rooms.
The average life of an HPS lamp is about 24,000 hours, with about 5 years of daily operation at 12 hours per day. Many last even longer. The lamp reaches the end of its life when it fails to start or come up to full brilliance. Electrode deterioration is greatest during startup. Do not wait until the bulb is burned out before changing it. An old bulb is inefficient and costly. Bulbs lose at least 5 percent of their brilliance every year. Replace bulbs every 24 months or 9000 hours.

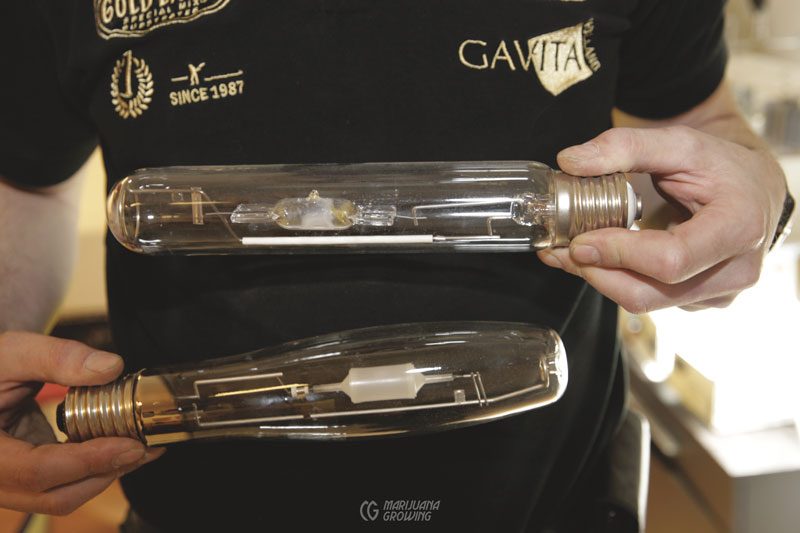
Double-ended 1000-watt HPS bulbs from Philips are the best grow lamp currently available. These bulbs are more efficient, and their arc tube is a little bit longer. Electricity flows from one end of the arc tube and out the other. This makes them inherently more efficient than bulbs that require electricity to travel farther. The new bulbs produce about 15 percent more light than single-ended bulbs. Since the bulb is attached at both ends, the arc tube is always mounted parallel to the reflector for maximum efficiency and reflection.
The 600-watt high-pressure sodium lamp produces 90,000 initial lumens. HPS lamps are available in wattages from 35 to 1000. The Philips GreenPower 400v, 600-watt EL (electronic lamp) has the highest PAR light output rating and more than 95 percent light maintenance.
The 430-watt Son Agro by Philips was designed to augment natural sunlight in greenhouses. The bulb produces a little more blue light, about 6 percent, in the spectrum. Adding a touch more blue light helps prevent most plants from becoming leggy.
High-pressure sodium lamps are manufactured by: GE (Lucalox), Sylvania (Lumalux), Westinghouse (Ceramalux), Philips (Son Agro), Iwasaki (Eye), and Venture (high-pressure sodium). Many more HPS bulbs are manufactured by others in China. Check out different Chinese manufacturers and their manufacturing standards. Chinese products are not necessarily bad; in fact, several of the above companies manufacture bulbs or components in China.
End of Life
HP sodiums have the longest life and best lumen maintenance of all HIDs. Over time the sodium bleeds out through the arc tube. The sodium-to-mercury ratio changes and the voltage in arc rises. The lamp warms up and goes out. The sequence is repeated, signaling the end of the lamp’s life, which is about 24,000 hours—five years at 12 hours daily use.
Dispose of bulbs in an approved hazardous waste facility.
HP Sodium Ballasts
Read “About Ballasts.” A special ballast is specifically required for each wattage of HP sodium lamp. Each wattage lamp has unique needs, including operating voltages during startup and operation that do not correspond to similar wattages of other HID lamps. Magnetic HPS ballasts contain a heavy transformer that is larger than that of a metal halide, a capacitor, and an igniter or starter. Electronic ballasts are much lighter in weight and more compact, and they consume less power than analog ballasts. They also require a specific bulb that is designed for high-frequency output electronic ballasts. Purchase complete HPS systems from a reputable source.
Self-contained units that have an integrated solid-state electronic ballast, a lamp, and a reflector in a single enclosed unit produce very little EMI (electromagnetic interference, aka radio frequency [RF] interference). Large greenhouses can use up to 10,000 lamps with no RF interference.
Conversion Bulbs
Conversion, or retrofit, bulbs increase lighting options on a budget. One type of conversion bulb allows you to utilize a metal halide (or mercury vapor) system with a bulb that emits a light spectrum similar to that of a HP sodium bulb. The bulb looks like a cross between a metal halide and an HP sodium. While the outer bulb looks like a metal halide, the inner arc tube is similar to that of an HP sodium. A small igniter is located at the base of the bulb. Other conversion bulbs retrofit HP sodium systems to convert them into virtual metal halide systems.
Conversion bulbs are manufactured in 150, 215, 360, 400, 880, 940, and 1000 watts. You do not need an adapter or any additional equipment. Simply screw the bulb into a compatible ballast of comparable wattage. Conversion bulbs operate at a lower wattage and are not as bright as HP sodium bulbs. Although conversion bulbs have less blue, they are up to 25 percent brighter than metal halide systems and their lumens-per-watt conversion is better than that of super metal halides. The 940-watt conversion bulb has a lumens-per-watt rating of 138. Similar to the HP sodium lamp, the conversion bulb has a life expectancy of up to 24,000 hours. Unlike most high-pressure sodium lamps which flicker on and off near the end of their lives, conversion bulbs go off and remain off at the end of their lives.
Although conversion bulbs are not inexpensive, they are certainly less expensive than an entire HP sodium system. For gardeners who own a metal halide system, or who deem metal halide the most appropriate investment for their lighting needs, conversion bulbs offer a welcome alternative for bright light. In the United States, CEW Lighting distributes Iwasaki lights. Look for their Sunlux Super Ace and Sunlux Ultra Ace lamps.
Venture, Iwasaki, and Sunlight Supply manufacture bulbs for conversion in the opposite direction—from high-pressure sodium to metal halide. Venture’s White-Lux and Iwasaki’s White Ace are metal halide lamps which will operate in an HP sodium system. The 250-, 400-, and 1000-watt conversion bulbs can be used in compatible HPS systems with no alterations or additional equipment. If you own a high-pressure sodium system but need the added blue light that metal halide bulbs produce, these conversion bulbs will suit your needs.
Many gardeners have great success using conversion bulbs. If you have a metal halide system but want the extra red and yellow light of an HP sodium lamp to promote flowering, simply buy a conversion bulb. Instead of investing in both a metal halide and an HP sodium system, you can rely on a metal halide system and use conversion bulbs when necessary, or vice versa.
HP Sodium to Metal Halide
Several companies make HPS to MH conversion bulbs, including the Sunlux Super Ace and Ultra Ace (Iwasaki) and Retrolux (Philips). The bulb emits an HP sodium spectrum with a metal halide system. These bulbs make it possible to use a metal halide ballast and get the same spectrum as an HP sodium lamp. Lumens-per-watt efficiency is traded for the convenience of using these bulbs. A 1000-watt HP sodium bulb produces 140,000 initial lumens. A MH to HPS conversion bulb produces 130,000 initial lumens. If you only want one lamp, a conversion bulb is a fair choice.
Metal Halide to HP Sodium
Metal halide to high-pressure sodium bulbs are manufactured by several companies, including the White Ace (Iwasaki) and White Lux (Venture). They have an MH spectrum and are used in an HPS system. The bulb converts from HPS to MH and produces 110,000 initial metal halide lumens.
Fluorescent Lamps, Ballasts, and Fixtures
Fluorescent Bulbs
Fluorescent bulbs (tubes) come in a wide variety of lengths, from 6 inches to 8 feet (15.2–243.8 cm). Two- and 4-foot (60–121.9 cm) tubes are easy to handle, readily available, and the most popular. Circular (T9) and U-shaped bulbs (B = bent) are also available.
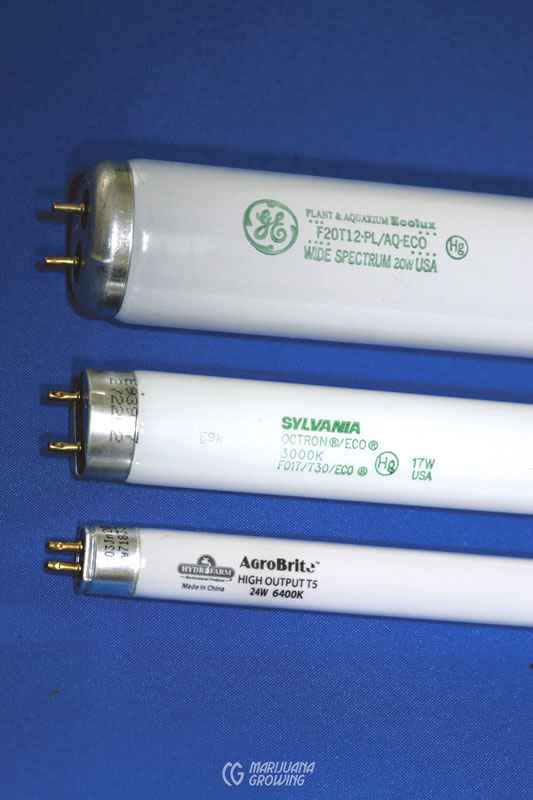
Fluorescent bulbs are available in at least 7 different diameters. T2 bulbs are the smallest and T4, T5, T8, T9, T12, and T17 (Power Twist) are each progressively larger in diameter. Many medical gardeners still use inexpensive reliable T12 lamps grow cuttings, seedlings and small vegetative plants. They supply cool, diffused light in the proper color spectrum to promote root growth. Other more brilliant fluorescents include T5 high output (HO), VHO and T8 HO, lamps. They are being used in gardens from seed through harvest.
HO = high output
VHO = very high output
XHO = extra high output
The average lumen output of a 4-foot (121.9 cm) 40-watt T12 is 2800 lumens per watt. A 32 watt T8 bulb yields 100 lumens per watt and supplies 100 average lumens. A 54 watt T5 throws 5000 average lumens, 92 lumens per watt.
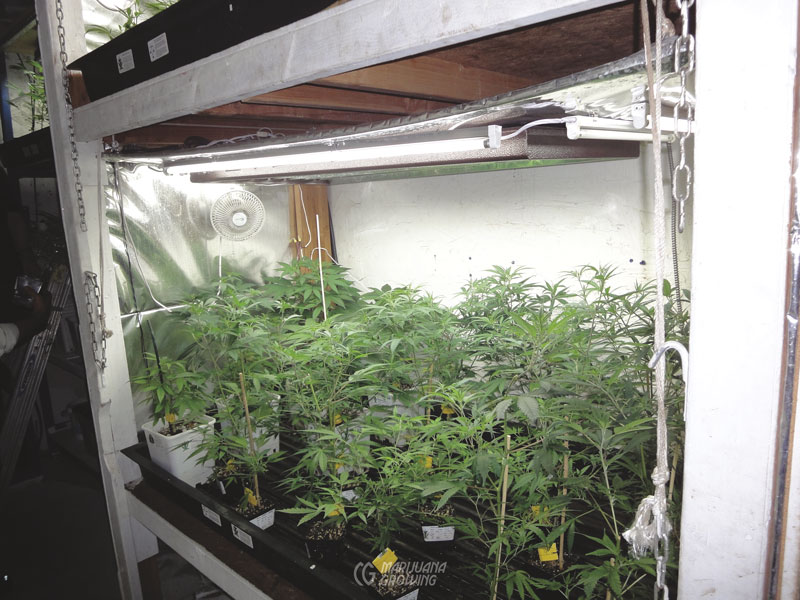
Fluorescents produce much less light than HIDs and must be very close (2 to 4 inches [510 cm]) to the plants for best results. The light emission is strongest near the center of the tube, and somewhat less at the ends.
Fluorescent lamps are available in a variety of spectrums, from 2700 to 6500 K, including Warm White, Neutral White, Cool White, Full Spectrum, Daylight, and so forth, as listed at left.
Fluorescent lighting manufacturers include GE, Osram/Sylvania, and Philips.
The three main fluorescent tubes used by gardeners include T12, T8, and T5. The T12 and T8 bulbs were developed in the 1930s. The T12s met with immediate success; T8s became popular in the late 1980s. Today, T5 and T8 bulbs are more efficient than ever and often used to grow cannabis from clone or seedling through harvest.
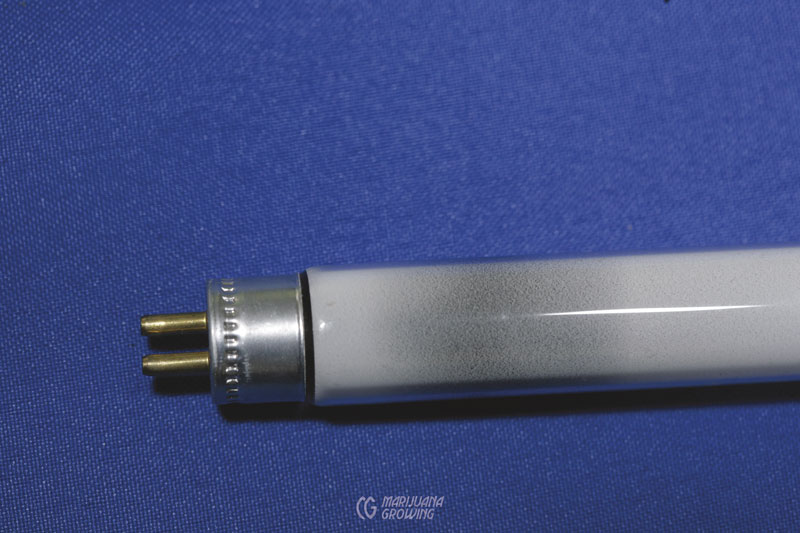
Designed in the 1990s, T5 bulbs are the brightest of the fluorescent lamps. The full-spectrum, high-intensity, fluorescent T5 tubes come in high output (HO, 54 W), very high output (VHO, 95 W), and extra high output (XHO, 115 W). The intensely bright new spectrum is designed specifically for plant growth. The VHO and XHO lamps produce more heat and are more difficult and expensive to manufacturer than lower-output bulbs.
The T5 tubes are smaller and will fit in narrow spaces. The size makes for more accurate control of light direction with a reflective hood. Tubes are also rated as high efficiency (HE) and high output (HO), but the latter has lower efficiency.
High-output lamps are driven at a higher current and are brighter. The ends on the connecting pins are unique so they cannot be used in the wrong fixture. High-output bulbs are labeled HO, or VHO for very high output. The T5 lamps render peak light output at 95°F (35°C). The T8 and the T12 lamps provide peak light output at a 77°F (25°C). The bulbs run most efficiently and last longest when operated within the proper temperature range.
A fluorescent lamp consists of a glass tube coated on the inside with light-emitting phosphors and filled with a low-pressure mercury vapor. An electric current is passed through the tube, exciting the mercury vapor and causing it to emit UV light. This UV light causes the coating of the tube to fluoresce, giving off visible light. The mix of phosphorescent chemicals in the coating and the gases contained within determines the spectrum of colors emitted by the lamp. The quality of the phosphors and manufacturing process are essential to a lamp that will maintain true brilliance for a long time.
Old-fashioned T12 and T8 lamps are inefficient halophosphate tubes that do not render colors well. Today tri-phosphor and multi-phosphor tubes dominate the marketplace, because they are much more efficient and retain their properties well over time. A simple test with a light meter showed that inexpensive brand-new VHOs produced 30 percent less lumens than the phosphor and multiphosphor tubes.
Be very cautious when purchasing inexpensive lamps that use phosphorous from China rather than quality phosphorus (tri-phosphorous) from Japan and a few other places. Phosphorous from China generally does not hold the lumen or blue of the 6.5 K lamps. Lumen degradation occurs rapidly. Controlled studies found that inexpensive lamps start with very high lumens but can drop off by over 30 percent in a few months. Check bulbs regularly to ensure they are up to full brilliance.
Using fluorescents along with HIDs is awkward and problematic. When using them in conjunction with HIDs, fluorescents must be very close to plants to provide enough intense light for plant growth. Fixtures may also shade plants from HID light and generally get in the way.
| LAMP | USA | LIFE HOURS | WATTS | KELVIN TEMP. | LUMENS |
| Warm White | T12 | 24000 | 40 | 2700 | 2200 |
| Neutral White | T12 | 24000 | 40 | 3500 | 2200 |
| Cool White | T12 | 24000 | 40 | 4100 | 2200 |
| Full Spectrum | T12 | 24000 | 40 | 5000 | 2200 |
| Agrosun T12 | T12 | 24000 | 40 | 5850 | 2450 |
| AgroBrite T12 | T12 | 24000 | 40 | 6400 | 2200 |
| Spectralux T8 HO | T8 HO | 20000 | 54 | 6500 | 2700 |
| Ecolux T8 HO | T8 HO | 20000 | 54 | 6500 | 2700 |
| Spectralux T5 HO | T5 HO | 20000 | 54 | 3000 and 5000 | 5000 |
| Spectralux T5 VHO | T5 VHO | 20000 | 54 | 3000 and 6500 | 5000 |
| GE Starcoat T5 HO | T5 HO | 20000 | 54 | 3000 and 6500 | 5000 |
| Philips T5 Alto HO | T5 Alto HO | 20000 | 54 | 3000 | 5000 |
| GE Starcoat T5 HO | T5 HO | 20000 | 54 | Warm | 5000 |
| USA | Inches | Millimeters |
| T2 | 0.25 | 7 |
| T4 | 0.5 | 12 |
| T5 | 0.625 | 15.875 |
| T8 | 1 | 25.4 |
| T9 | 1.125 | 28.575 |
| T12 | 1.5 | 38.1 |
| T17 | 2.125 | 53.97 |
End of Life
Fluorescents blacken with age, losing intensity. Replace bulbs when they reach 70 to 90 percent of their stated service life listed on the package or label. A flickering light is about to burn out and should be replaced. Life expectancy is around 9000 hours (15 months at 18 hours’ daily operation).
The end-of-life failure mode for fluorescent lamps varies depending on their ballasts and on how the lamps are used. A lamp that turns pink with black burns on the ends of the tube lacks mercury.
A main reason that a lamp flickers is as a result of poor electrical connections.
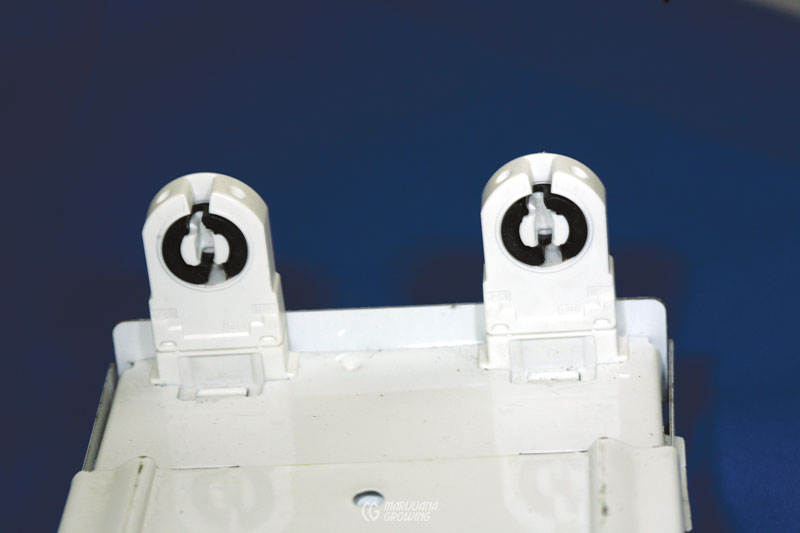
Change the starter on older fluorescent fixtures. The starter is the little round tube that sticks into the fixture at one end of the bulb. Starters are inexpensive and have about the same life as a bulb. A new bulb will last a short time with an old starter that is on its last leg.
Fluorescent Ballasts
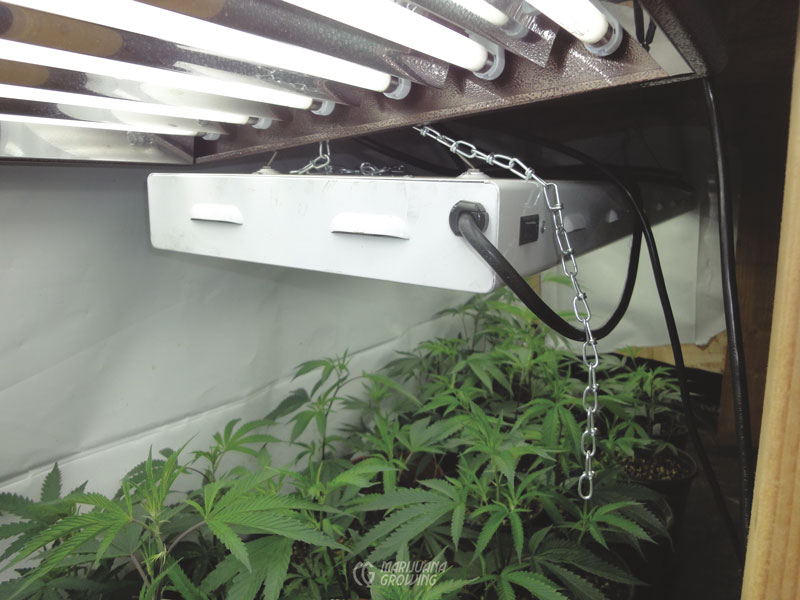
Each fluorescent lamp requires a specific ballast to regulate electricity before reaching the bulb. Fluorescents require an appropriate fixture containing a small ballast to regulate electricity and household electrical current. The tube type should always match the markings on the light fixture. Ballasts are rated for the size of lamp and power frequency. Ballasts can also include a capacitor to correct the power factor. The fixture is usually integrated into the reflective hood. The ballast is located far enough away from fluorescent tubes that plants can actually touch them without being burned.
Many of the T12 and T8 fixtures use old-fashioned magnetic ballasts. Newer T5, T8 and T12 fluorescents use electronic ballasts. Gardeners prefer slimmer T8 and T5 bulbs with electronic ballasts because they run cooler, electricity cycles faster, and lights do not flicker. Fluorescent light fixtures cannot be connected to dimmer switches intended for incandescent lamps.
Self-starting “rapid start” ballasts eliminate voltage spike when they are properly grounded. There are “instant start,” “rapid start,” “quick start,” “semi-resonate start,” and “programmed start” ballasts. The old-fashioned semi-resonate start lamps are the slowest to ignite; some of them even require a separate starter. All of the others strike and start lamps much faster. Programmed start ballasts are found in premium fixtures. Fixtures and lamps do take 5 to 10 minutes to warm up.
One of the main problems with fluorescent lighting is ballast incompatibility with the bulb. Some manufacturers use ballasts and lamps because they are the least expensive, not because they are designed for specific applications. Another example comes from gardeners: running a T8 tube with a ballast for a T12 will reduce lamp life and can increase energy consumption.
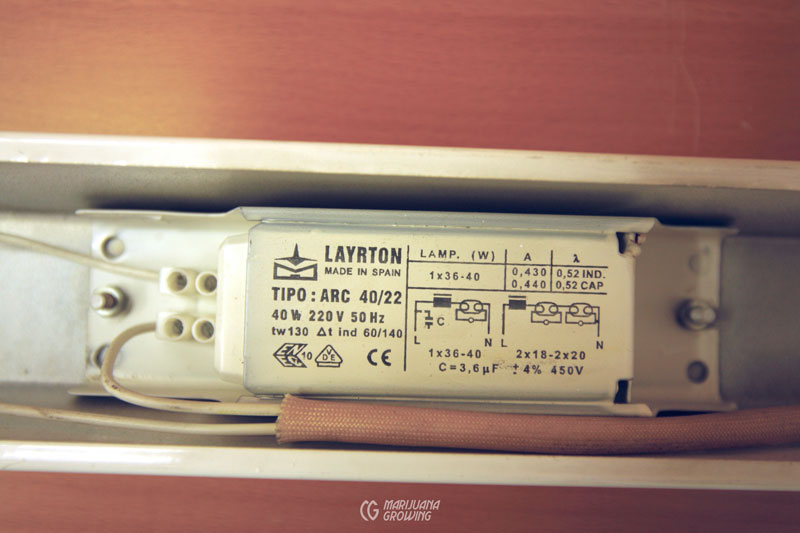
Analog Ballasts
Analog (magnetic) ballasts are simple, consisting of a copper wire winding on a laminated magnetic core. They are heavy and radiate almost all heat produced by the system. Analog ballasts consume about 10 percent of the system’s electricity. A wiring diagram is usually glued on the ballast. Simple wiring is also provided.
These ballasts will normally last 10 to 12 years. The end of the magnetic ballast’s life is usually accompanied by smoke and a miserable chemical odor. When the ballast burns out, remove it and buy a new one to replace it. Be very careful if the ballast has brown slime or sludge on or around it. This sludge could contain carcinogenic PCBs. If the ballast contains the sludge, dispose of it in an approved location for hazardous waste.
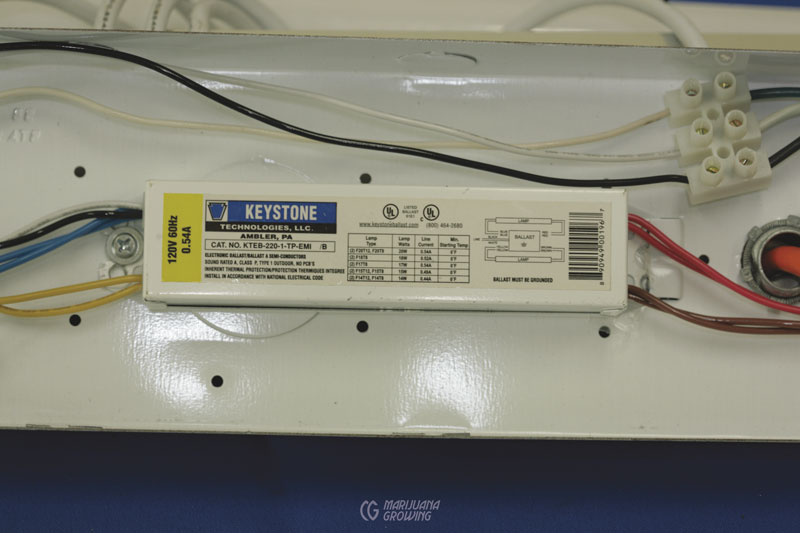
Electronic Ballasts
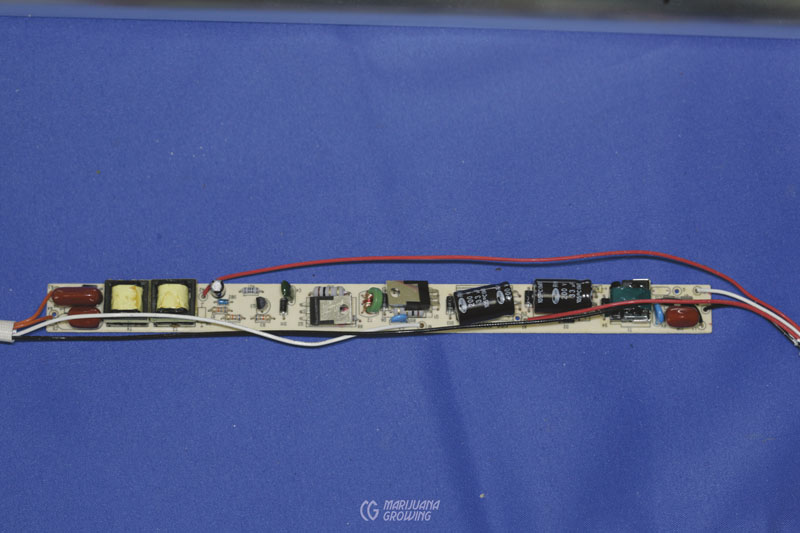
Electronic ballasts run much cooler, consume little electricity, and are lightweight. They are normally located within the lamp fixture. Electronic ballasts are very quiet, with no annoying hum. Electronic ballasts use transistors to alter incoming electricity into high-frequency alternating current (AC), and regulate the current flow in the lamp simultaneously. Efficacy of a fluorescent lamp rises by almost 10 percent at a frequency of 10 kHz, compared to efficacy at normal power frequency. Electronic ballasts are also called digital ballasts because they are controlled by a microcontroller or similar hardware. The electronic controller dims lights and maintain constant light levels—no flickering.
Electronic ballasts typically work in rapid start or instant start mode. Low-cost ballasts start slowly. More expensive ballasts use programmed start, which ignites the lamps quickly.
At the end of life, electronic ballasts simply stop. No drama. One of the most common causes of lamp failure is due to a lower voltage capacitor and other parts that cost less are installed. The stress causes premature failure. Always purchase quality equipment.
Most electronics failures happen early in life and diminish thereafter. High temperatures shorten electronic ballast life. Typically for every 50 degrees the temperature rises, the ballast life is cut in half. Keep the temperature range within the operating boundaries, normally at about 77°F (25°C) in most countries. Dispose of electronic ballasts in an approved hazardous waste dump.
Fluorescent Fixtures
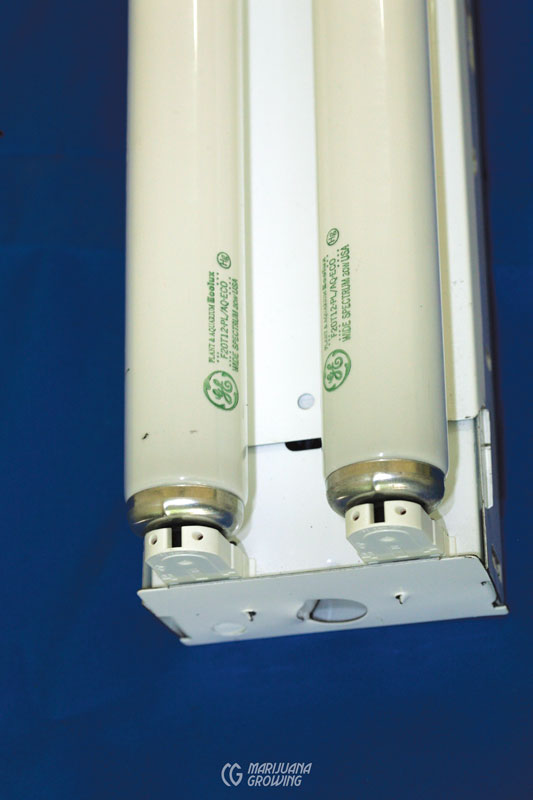
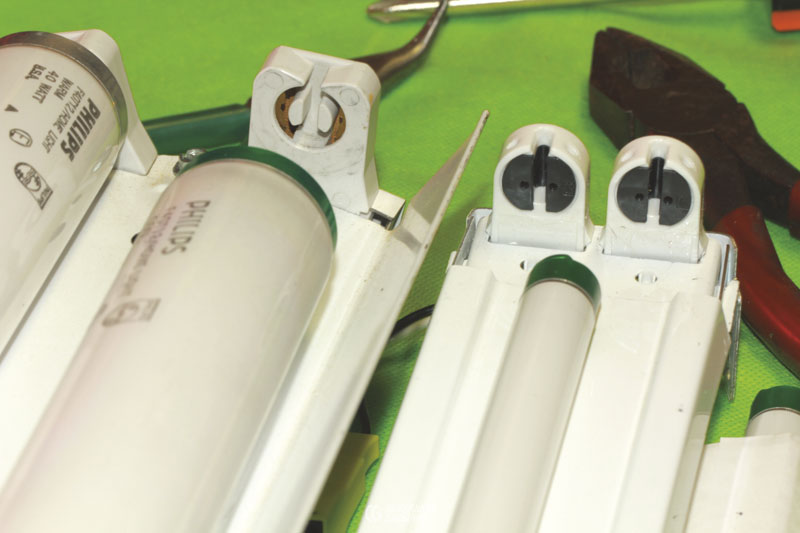
A “shop light” fixture/reflector that holds two 40-watt T12 fluorescent tubes and ballast available at hardware stores is perfect for growing cuttings and seedlings until they are about six inches (about 15 cm) tall. A more substantial fixture will be necessary for higher light output using brighter bulbs. Many used shop light fluorescent fixtures are generally available and usually acceptable to use.
If your fluorescent fixture does not work, first unplug the electricity. Next check all electrical connections to make sure they are secure. If you see any signs of burning or heat, take the fixture to the nearest electric store and ask for advice. Make sure they test each component and tell you why it should be replaced. It might be less expensive to buy another fixture.
Fluorescent Bulb Disposal
The US Environmental Protection Agency (EPA) and other similar agencies around the world classify fluorescent lamps as hazardous waste because bulbs contain mercury and ballasts contain other unpleasant stuff. They must be taken to a qualified facility for recycling or safe disposal of toxic waste.
Compact Fluorescent Lamps (CFL)
Most consumers know compact fluorescent lamps (CFL) as the new energy-efficient replacement for household incandescent lightbulbs, the ones that Thomas Edison invented. The characteristic helical spiral was developed in the mid-1970s for low wattage CFLs. By the 1980s CFLs with electronic ballasts were available. Other configurations—horseshoe, round and flat (butterfly) were later developed. For example, readily available 65-watt floodlights are configured flat so that light emitted is either direct or easily reflected. Larger wattages, 65+, can be used to grow medicinal cannabis from seed through flowering. Some of the smaller wattages fit into household incandescent lightbulb sockets. Larger 95-, 125-, 150-, and 200-watt bulbs require a larger mogul socket. Common wattages used for growing cannabis include 55, 60, 65, 85, 95, 120, 125, 150, and 200. Regardless of wattage, CFLs must warm up for about 5 minutes so the chemicals become stable before they come to full brightness.
| CFL | WATTS | K TEMP. |
| Warm White | 13 | 2700 |
| Cool White | 13 | 4100 |
| Daylight | 13 | 6400 |
| GE | 13 | 6500 |
| Sylvania | 14 | 3000 |
| Bright Effects | 15 | 2644 |
Compact fluorescent lamps are available in many spectrums, including Daylight, Cool White, and Warm White. Compact fluorescent lamps are perfect for gardeners with a limited budget and a small space. They run cooler than HIDs and require minimal ventilation. When CFLs were first introduced, wattages were too small, and bulbs did not emit enough light to grow cannabis. The new CFLs provide enough light to grow cannabis from seed to harvest. Beware of manufacturer and reseller websites making outrageous claims about CFL performance. Add up the actual lumens and watts to verify claims.
CFL lamps that work well for gardening are available in two basic styles and shapes:
- Bulb shaped like a long “U” with a two- or four-pin fixture (these lamps are designated “1U”). The 20-inch (50.8 cm) long “1U” 55-watt, dual-pin-base bulbs are common in Europe. Normally, two 55-watt lamps are placed in a horizontal reflective hood.
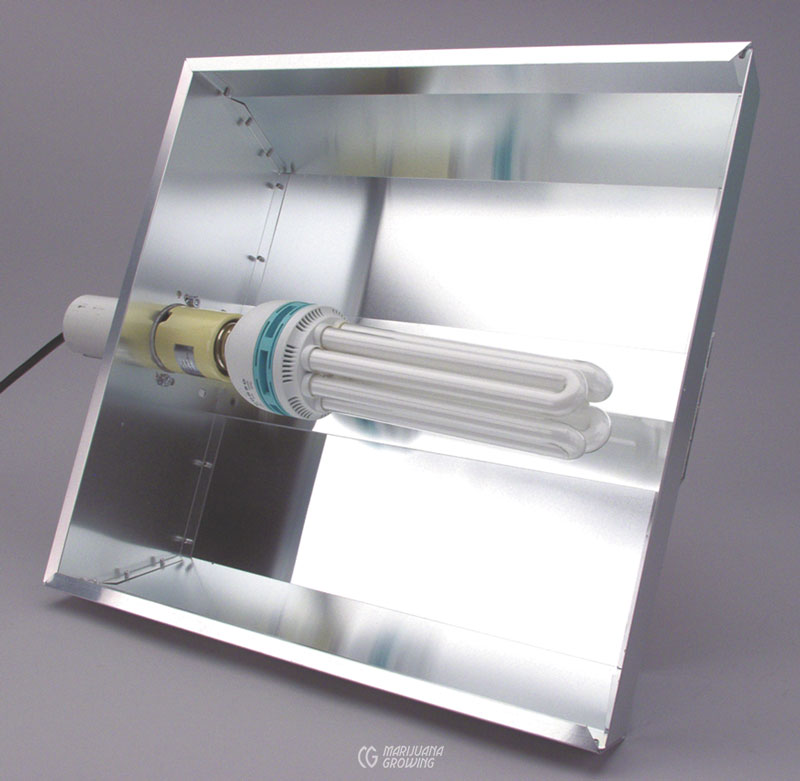
- The short lamps consist of several U-shaped tubes (designated 4U, 5U, 6U, etc., for the number of U-shaped tubes) that measure approximately 8 to 12 inches (20–30 cm) not including the 2- to 4-inch (5–10 cm) attached ballast and threaded base.
Short U-shaped bulbs are most efficient when vertically oriented. When mounted horizontally under a reflective hood, much light is reflected back and forth between the bulb’s outer envelope and the hood, which markedly lowers efficiency. Heat also builds up from the ballast. Both conditions lessen efficiency.
Two Types of CFL Sockets:
The first type of CFL socket is a bi-pin tube that is designed for conventional ballasts. A bi-pin tube contains an integrated starter that averts the need for external heating pins but causes incompatibility with electronic ballasts.
The second type of CFL socket is a quad-pin tube designed for electronic ballasts or conventional ballasts with an external starter.
CFLs emit light from a mix of phosphors inside the bulb, each emitting one band of color. Modern phosphor designs balance the emitted light color, energy efficiency, and cost. Every extra phosphor added to the coating mix decreases efficiency and increases cost. Good-quality consumer CFLs use 3 or 4 phosphors to achieve a white light with a color rendering index (CRI) of about 80. Running a compact fluorescent lamp base-up will result in hotter electronics and a shorter bulb life. Standard CFLs do not respond well to dimming. They are either on or off.
Normally, CFL bulbs have a life of 10,000 to 20,000 hours (18 to 36 months at 18 hours per day). Lamps with attached ballast burn out 3 to 6 times faster than the ballast.
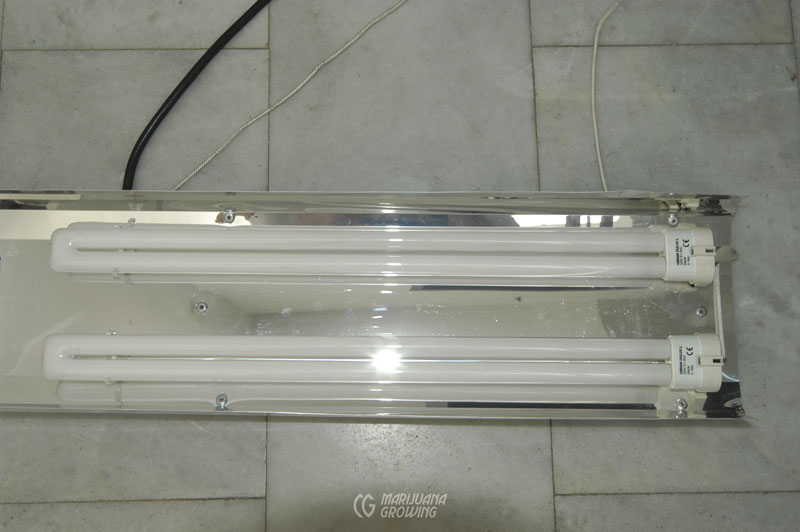
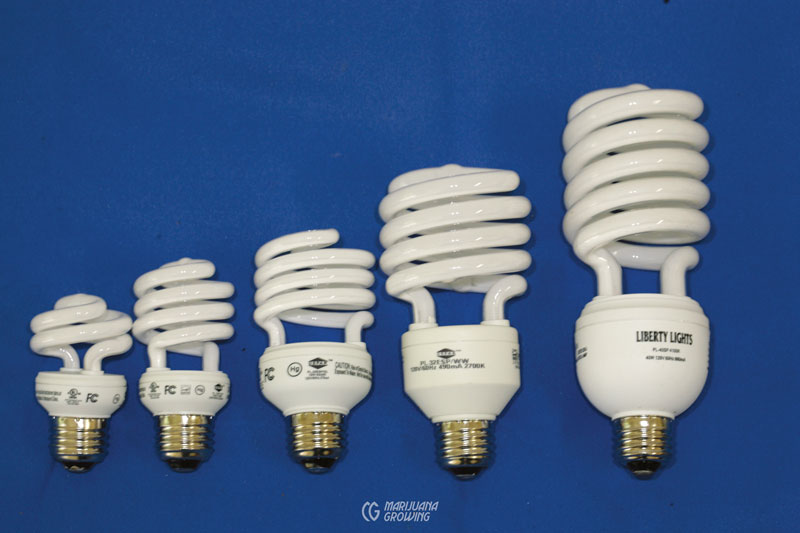
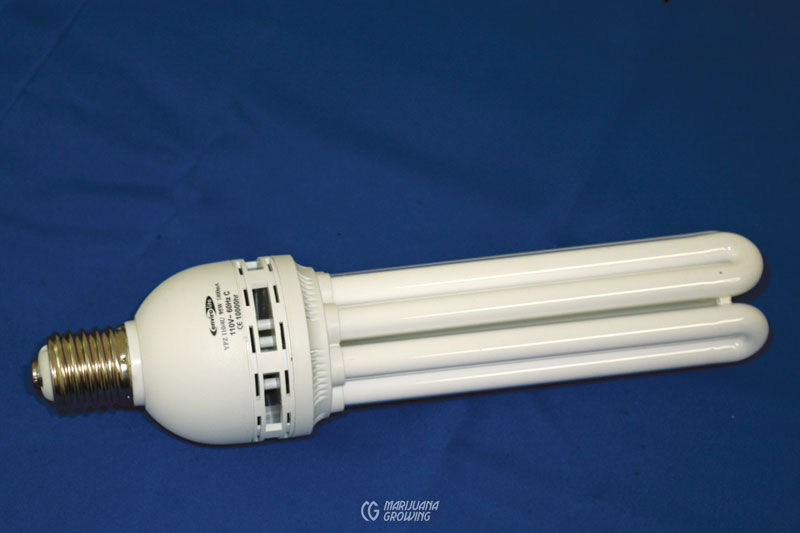
CFL Ballasts
The most important technical advance has been the replacement of analog (electromagnetic) ballasts with electronic ballasts—starting is much faster and flickering is almost gone. CFLs that flicker when they start have magnetic ballasts.
Integrated CFL lamps combine a bulb, electronic ballast, and a household lightbulb threaded connection or bayonet fitting into a single unit. When the lamp’s life is over, the lamp and the attached ballast are both thrown away, which means you are throwing away a perfectly good ballast. My preference is to use the long CFLs that are not attached to ballasts.
Nonintegrated CFLs have remote electronic ballasts permanently installed in the light fixture and are not part of the bulb. The bulb is changed at its end of life. Nonintegrated, CFL fixture-mounted ballasts are larger and last longer in comparison to the integrated ones.
The normal life of a CFL ballast is 50,000 to 60,000 hours (7 to 9 years at 18 hours per day). The end of ballast life is signaled when it stops. When the ballast burns out, remove and replace it. Dispose of the ballast in a hazardous waste dump.
End of Life
The lifetime of any lamp depends on operating voltage, manufacturing defects, exposure to voltage spikes, mechanical shock, frequency of cycling on and off, lamp orientation, and ambient operating temperature, among other factors. The life of a CFL is significantly shorter if it is frequently turned on and off. In the case of a 5-minute on/ off cycle the lifespan of a CFL can be cut in half. Leave them on for hours. At the end of life, CFLs produce 70 to 80 percent of original light output. Replace lamps when they are at 80 to 90 percent brilliance, after 12 months of operation.

CFL Bulb and Ballast Disposal
New CFLs contain half as much mercury as old bulbs. Compact fluorescent bulbs, old or new, must be disposed of properly. Place them in a sealed plastic bag and dispose the same way you should dispose of batteries, oil-based paint, and motor oil: at your local household hazardous waste (HHW) collection site or other authorized disposal site for hazardous materials.
When buying replacement bulbs, look for deals on CFLs at Home Depot and similar discount stores, or check the Internet. For example, www.lightsite.net is an outstanding site that also has a retail store locator. Philips is producing some of the higher wattage compact fluorescent lamps. Their PL-H compact fluorescent lamp is a 4U bulb available in 60, 85, and 120 watts with Kelvin ratings from 3000 to 4100.
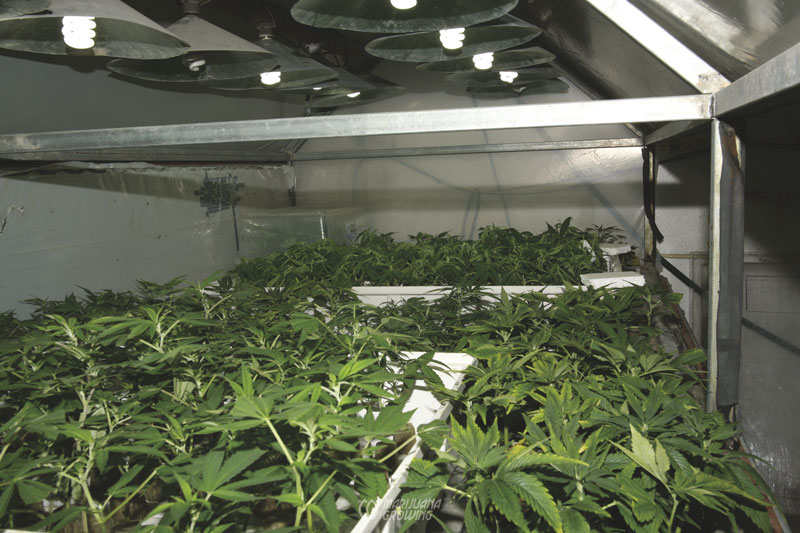
Plasma Lamps
Plasma lamps fall into two categories: (1) internal or light-emitting plasma (LEP) lamps, which use radio waves to energize sulfur or metal halides in a bulb, and (2) external or induction lamps, which use fluorescent induction, including a tube filled with fluorescent phosphors.
The light-emitting plasma lamp is the original and most widely used form of (internal) induction lamp. Radio frequency is used to excite gases inside a small ceramic envelope and produce a very bright light. The small lamps are about the size of a small camera storage chip.
The external inductor (plasma) lamps consist of round or rectangular tubes similar in diameter to T12 fluorescent tubes. The electromagnetic induction (plasma) lights are efficient and deliver 81 lumens per watt.
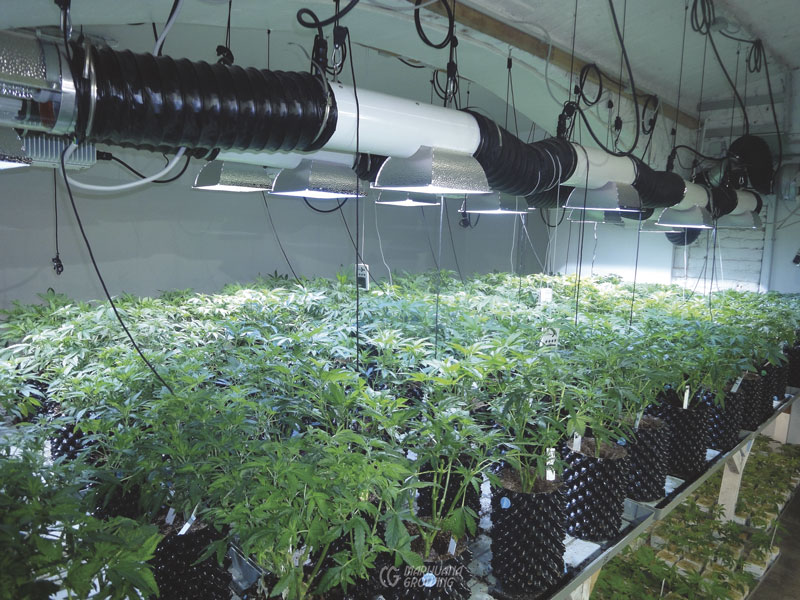
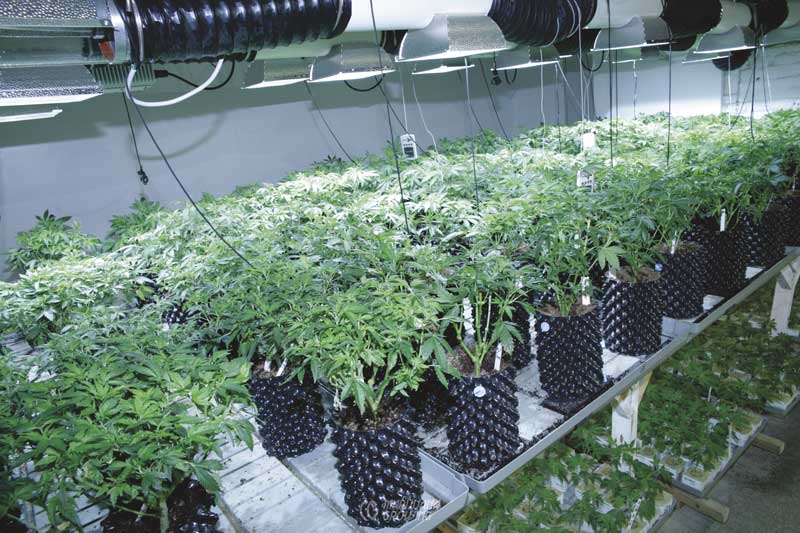
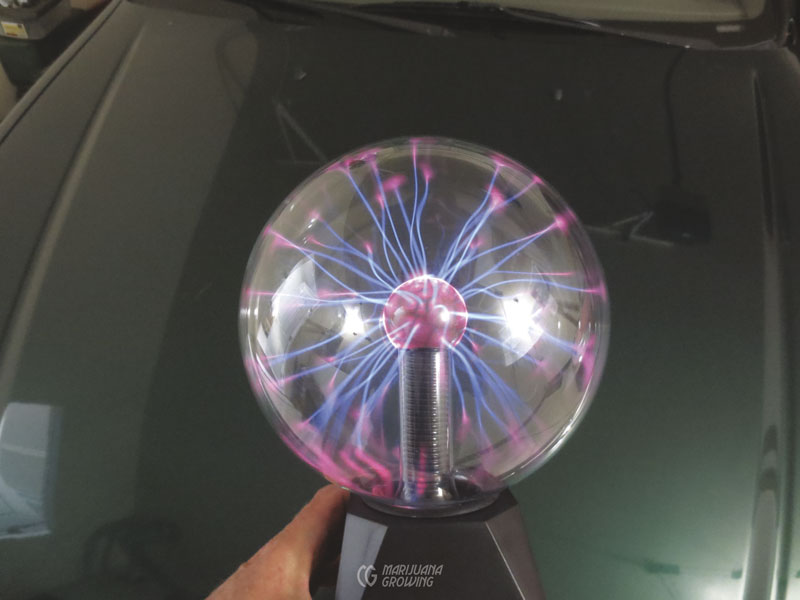
Light-Emitting Plasma (LEP) Lamps
Today’s light-emitting plasma (LEP) grow lights are much different than the plasma lamps popular in the 1980s. Invented by Nikola Tesla in the 1890s, the first promising plasma lamps were sulfur lamps developed by Fusion Lighting. The lamps had technical difficulties, and they were too bright and had a poor spectrum for plant growth. Today several companies are overcoming the technical problems and making the spectrum conducive to plant growth. Several high-efficiency plasma (HEP) lamps have been introduced to the market; these lamps, including models from Ceravision and Luxim, achieve 140 lumens per watt. Commercially available LEP lamps come in wattages from 40 to 300. Plasma International also manufactures a 730- watt microwave-driven sulfur plasma lamp. Gavita-Holland is the only known horticultural lighting company applying plasma lamp technology in the garden.
The plasma lamp family generates light by exciting plasma inside a bulb using radio frequency (RF) power. The small lamp is less than an inch (2.5 cm) square, and is embedded in a ceramic resonator. An RF driver, solid-state amplifier, and microcontroller are in a fully sealed lamp without electrodes and filaments.
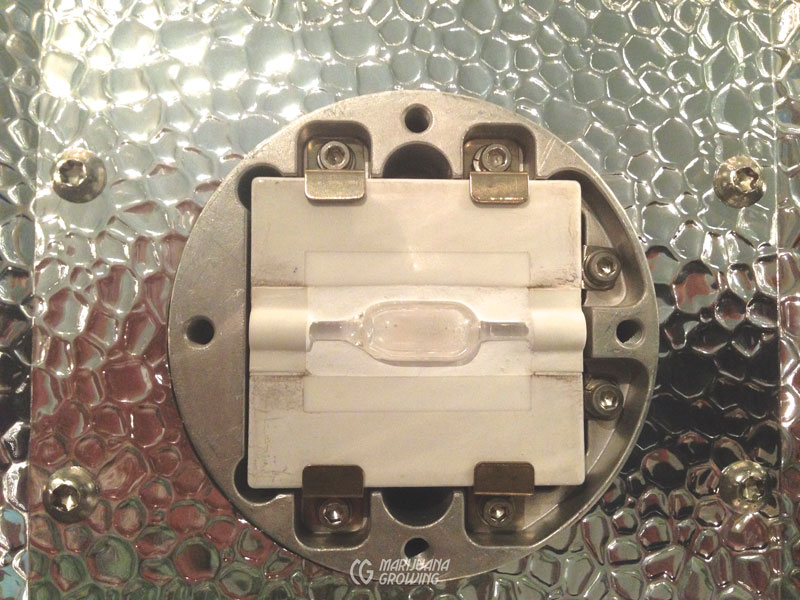

Lamps use a noble gas or a mixture of these gases and metal halides, sodium, mercury, or sulfur.
The plasma lamp does not have a ballast, but rather an RF generator (aka magnetron) and semiconductors that fulfill the equivalent function. It has more than 90 percent conversion efficiency, and the solid-state driver eliminates failure. And there is no noise.
Light-emitting plasma is the only high-intensity light source that can be dimmed down to 20 percent of light output, with both analog and digital controls. Dimming even increases longevity of the lamp. The cost is about $1000 USD for a 300-watt LEP lamp.
Solid-state LEP lamps use electricity to energize metal halides, and argon rather than sulfur. These lamps have no electrodes and no associated failures. Overall, plasma lamps have a long life— up to 50,000 hours (7.7 years at 18 hours per day)—and are rated for 70 percent lumen maintenance. LEP-lamp efficacy ranges from 115 to 150 lumens per watt.
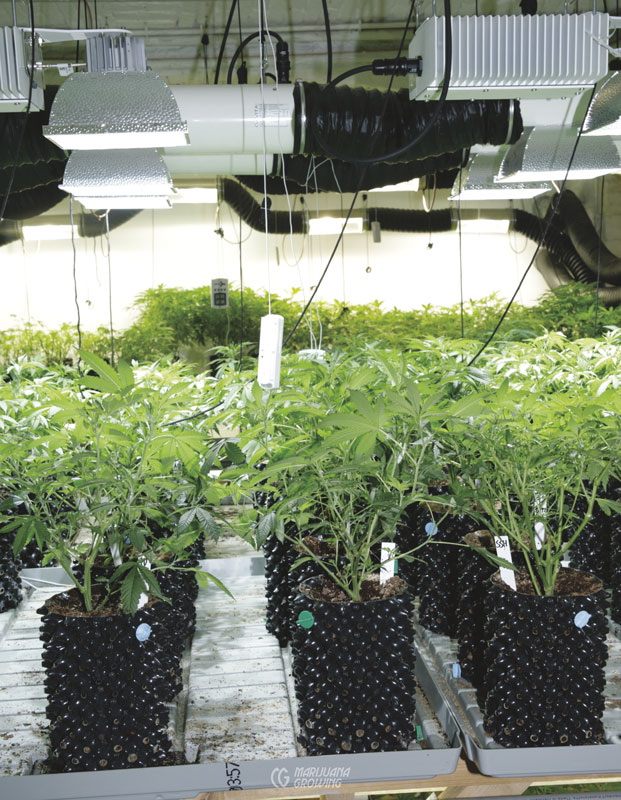
The directional nature of the light source means that no light is lost, trapped between the light and the reflector, and allows for the light to be spread evenly over the grow area with no overspill. The annual energy and maintenance costs are up to 45 percent less than for MH bulbs.
A solid-state electronic ballast with no moving parts is located in a sealed housing with a Gore-Tex ventilation plug. A square light pattern reflector with a UVC glass filter directs light at the garden. The Gavita lamp will last 30,000 hours (4.5 years at 18 hours per day).
Low levels of UVB light pass through a shield and UVC light is filtered out. UVB light is produced by natural sunlight and is essential for healthy plant growth. The overall light spectrum contains more blue light too. See “UV Light”.
Do not try to air-cool plasma lamps. When artificially cooled, the bulb is unable to reach full operating temperature and does not come to full brilliance or spectrum.
| LAMP | 460-WATT HPS | 280-WATT LEP | BENEFIT |
| bulb lumens | 50,000 | 23,000 | none |
| fixture efficiency | 65% | 85% | directional source |
| fixture lumens | 32,500 | 19,465 | directional source |
| light-loss factor | 75% | 80% | low lumen degradation |
| mean lumens | 24,375 | 15,572 | low lumen degradation |
| application efficiency | 48% | 82% | optical control |
Magnetic Induction Lamps
Magnetic induction lamps are similar to fluorescent lamps, but the electromagnets are wrapped around a section of the lamp tube. High-frequency energy emitted by an induction coil produces a very strong magnetic field and excites the mercury atoms inside the glass tube. The mercury atoms emit UV light that is down-converted to visible light by the phosphor coating on the inside of the tube. The lamps contain no electrodes, and failures caused by filament erosion, vibration, or seal breach are impossible. With no electrodes to degrade, the lamps are very efficient and enjoy a longer life.
Round or rectangular 300-watt magnetic induction bulbs have a daylight color temperature of 5000 K and produce 24,500 lumens, 81 lumens per watt, and have a life of 100,000 hours. A 300- watt induction lamp system costs about $300 USD. They come with attached or remote ballast. The 300-watt induction lamp is touted to be a replacement for 600-watt HID lamps. Small, 80-watt circular induction lamps with remote ballasts produce 6000 lumens of light with a color temperature (spectrum) of 5000 K. They have a life of 100,000 hours.
Magnetic induction lamps generate little heat, and ballasts have a life of 40,000 hours or longer.
Different color temperatures are possible by changing the composition of the phosphorous inside induction lamps. Plasma spectrums contain relatively little red light. At least one company has developed a bispectrum grow light to produce one half of the bulb at 2700 K and the other half at the other end of the spectrum.
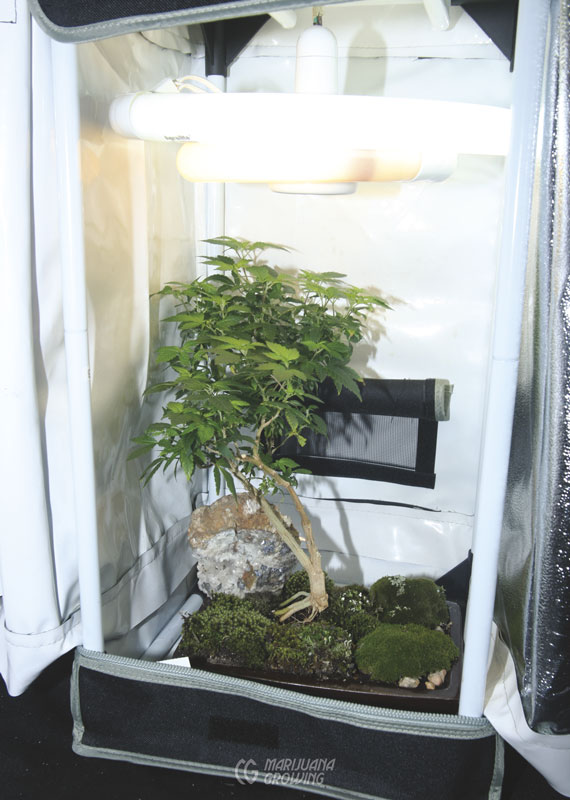
Light-Emitting Diode (LED) Lamps
About LEDs
Light-emitting diode lamps are everywhere. You see them in stoplights, flashlights, Christmas tree lighting, household lighting, and more. The technology has come a long way since it was developed in the early 1960s, when LEDs were found in appliances and generated a faint 0.001 lumens per watt. New LED technology is advancing rapidly and they are becoming much brighter and more electrically efficient. Light-emitting diode lamps are available across the visible spectrum, and from ultraviolet through infrared. Gardeners are successfully using LEDs to cultivate medical cannabis.
Light-emitting diode lamps can be used for pre-grow and propagation in horticulture, as well as some experiments with interlighting indoors and in greenhouses. At press time, LEDs are not an economically viable replacement for HID lamps in greenhouses or indoors. However, the horticultural industry has a very big interest in LEDs, and I suggest watching for bona fide advances in fast-changing LED technology.
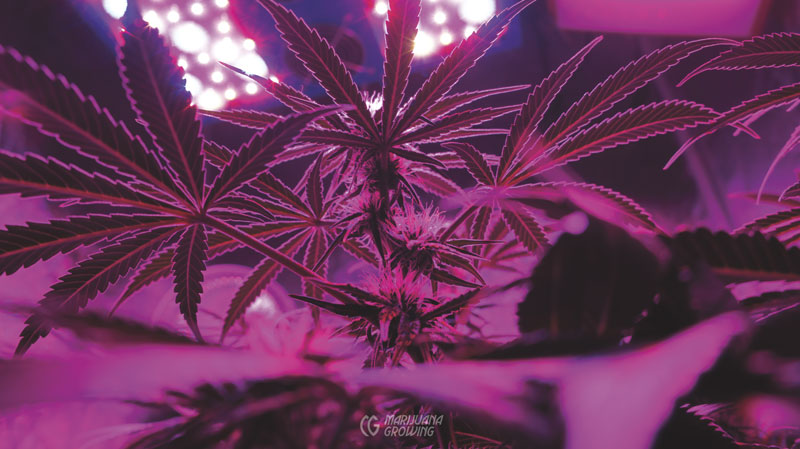
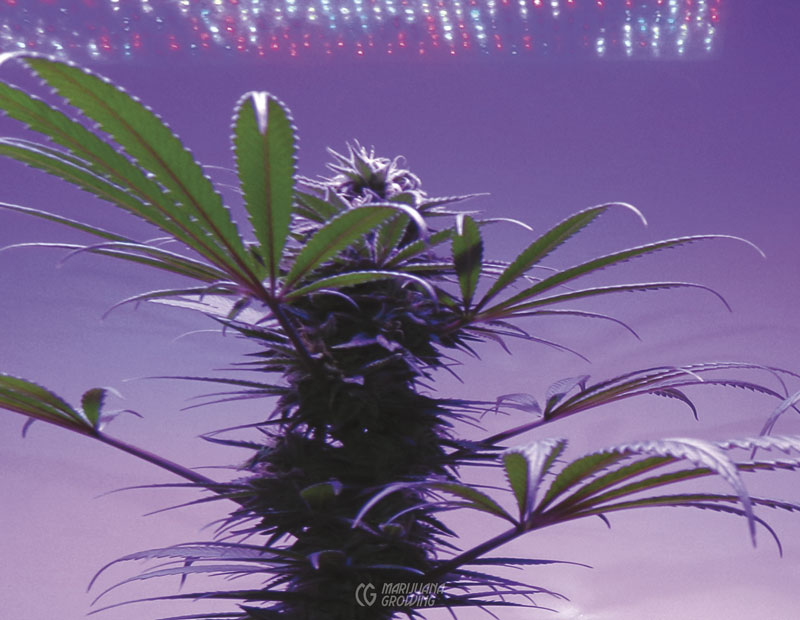
There are so many new and different LED types and so much sales information about them, that it is difficult to understand which specific LEDs work best as a light source to grow medical cannabis.
Light-emitting diode lamps use solid-state semiconductor energy to produce light. The technology is similar to that found in computer circuitry. LEDs do not use filaments found in incandescent and tungsten halogen bulbs, or gas used in HID, fluorescent, and compact fluorescent bulbs. LEDs generate less heat, and are rated for regular household current—120 V and 240 V. LEDs work in both 120 V and 240 V, 50 to 60 cycle electrical service. For this reason, LED fixtures often come with no plug.
| LAMP | WATTS | LUMENS | KELVIN COLOR TEMPERATURE | HOURS OF LIFE |
| induction | 300 | 24,500 | 5000 | 100,000 |
| induction | 80 | 6000 | 5000 | 100,000 |
Light output from LEDs continues to increase with improved materials and technological advances while maintaining the efficiency and reliability of solid state. Solid-state components are difficult to damage with external shock.
LED lamps are a promising replacement for HPS lamps because of their high-efficiency (up to 54 percent), very long life (they still produce at least 70 percent of their original output after 50,000 hours), small size, and low operating voltage.
Outdated LEDs that produce less than 1 watt are not as bright as new 1-, 2-, and 3-watt LEDs. Also, some LEDs of the same wattage are brighter than others. See “Brilliance”.
Rather than a ballast, a series of resistors or current-regulated power supplies is necessary to deliver precise voltage and current for LEDs to operate most efficiently. The power supply can be decreased to dim lights. Some LEDs have a dimming range of 20 to 100 percent. The necessary hardware is hardwired and soldered into a small (circuit board) fixture that is connected to a power supply. When purchasing a fixture, individual clusters of LEDs that can be replaced within fixtures are the most practical and economical.
Other types of lights are constant voltage—that is, they require a certain voltage to work, and they are usually fairly tolerant of slight variations in working voltage. For example, a normal incandescent bulb designed for European 230 volts of alternating current (VAC) will work fine from about 40 VAC to 270 VAC. LEDs are constant-current devices and require that voltage be controlled to maintain an exact current flow through the LED. Unlike other light sources, LEDs are nonlinear devices, which means that a small increase in voltage causes a large increase in current flow through the LED. This means LEDs have to be driven by special power supplies known as constant-current power supplies. They adjust their output voltage to maintain the current through the LEDs at a constant, preset level.
LEDs are often connected in series or string. LEDs are also unique; if they fail there is about an 80 percent chance that they will still conduct electricity (aka “slag down”) rather than “blow” like an incandescent bulb and no longer conduct electricity. This causes the voltage to the remaining LEDs to increase. The current can increase to the point of causing more LEDs to fail, or even cause a chain reaction that can destroy all the LEDs in the string. A constant-current power supply will detect the increase in current and lower its output voltage to compensate— and protect the remaining LEDs.
Another option is to use a less expensive constant-voltage power supply; the output is constantly adjusted to provide an exact voltage no matter what load it is driving. These are usually 24 volts of direct current (VDC), 36 VDC, or 48 VDC. If this type of power supply is used, the circuit boards on which the LEDs are mounted need to have a small current-regulator chip mounted on them. Some manufacturers do not use the regulator chips; instead they use resistors to adjust the voltage (and therefore the current flow) through the LEDs. This is not recommended because the voltage requirements of the LEDs vary depending on age and temperature, and can lead to all the LEDs receiving too high a voltage and then failing.
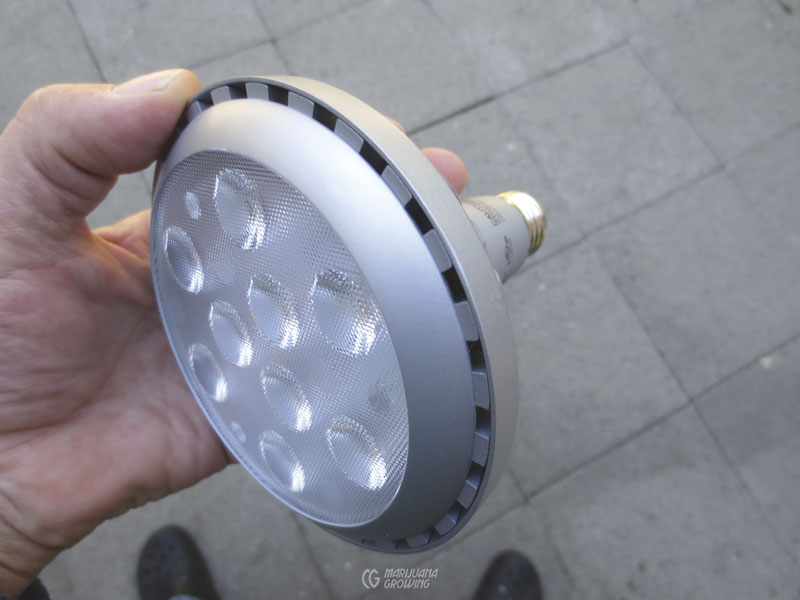
When you turn on an LED, electrons recombine with electron holes in the LED and release photons (light energy) in the process of electroluminescence. Peak performance depends on operating temperature. To date, the most efficient LED is 1 watt. Larger wattages run hotter and are less efficient, producing fewer lumens per watt. For example, a 3-watt LED produces only 35 percent more lumens than a 1-watt LED. The extra electrical energy is converted to heat rather than light.
If ambient temperatures in the operating environment climb too high, LEDs overheat and “droop,” producing substantially less light. Similar to solid-state computer chips, LEDs fail sooner when overheated over time.

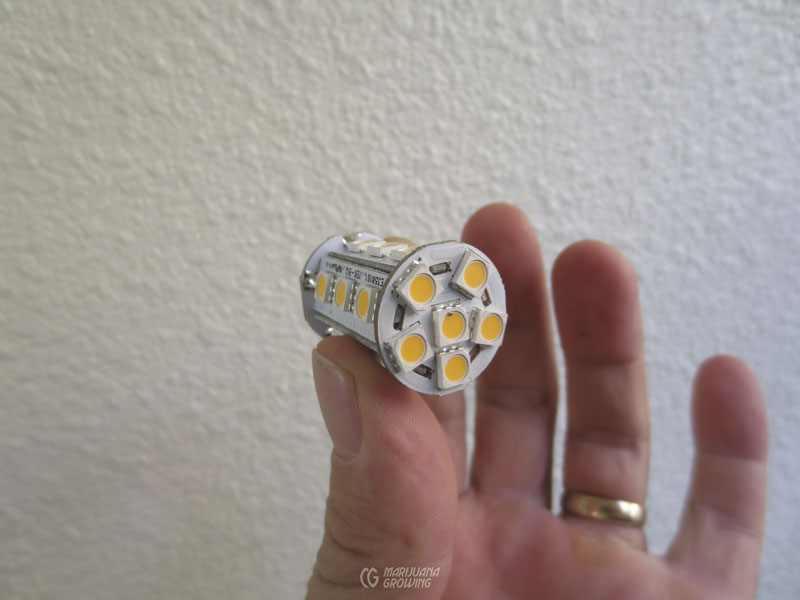
LEDs are driven in milliamperes (mA). Some LEDs are driven at lower mA to increase efficiency. The science and data behind all the circuitry is more complex than can be explained within the scope of this book. The best way for medical cannabis gardeners to discern the brilliance of an LED or a fixture full of LEDs is to measure light output with a light meter.
Overall, most indoor gardeners can decipher LED output with the following equation: amperes × voltage = watts (Ohm’s Law). Otherwise, light output can become quite complicated and confusing. For example, a 3-watt LED that runs at 350 mA yields 1-watt of light.
Small LEDs heat up quickly and lose efficiency; that is, light energy is converted to heat beyond a specific operating temperature. The operating temperature is a function of electric current (mA) input.
The optimal temperature for each color of LED ensures an accurate rendering of color spectrum. At maximum temperature or too high of a temperature the LED will fail. That is, if too much current is run through the little LEDs they get too hot, become inefficient (light energy is transformed into heat), and they fail (burn out).
Humidity is detrimental to circuits. LED circuitry is exposed and must be protected from humidity to avoid corrosion. The LEDs must be enclosed to isolate them from exterior humidity.
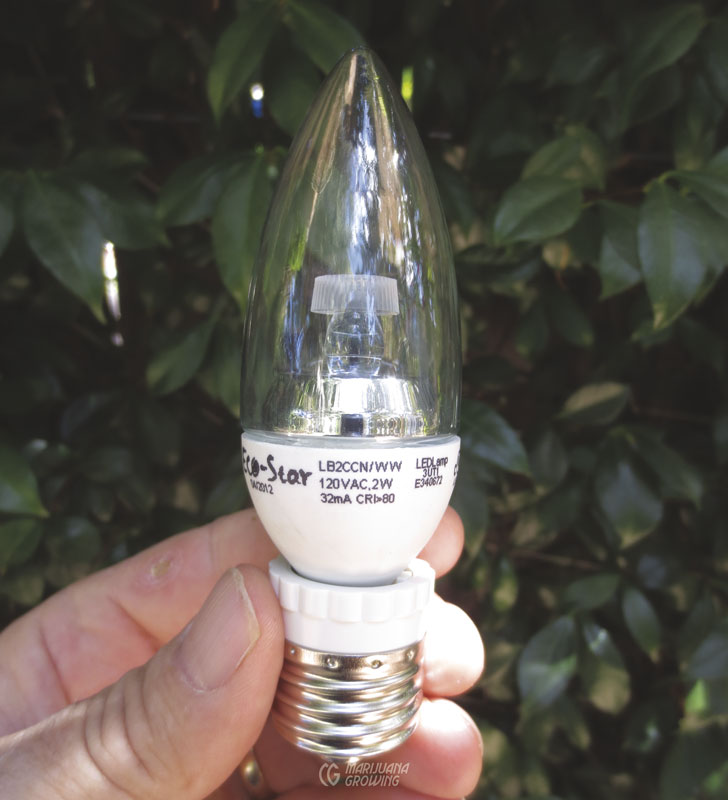
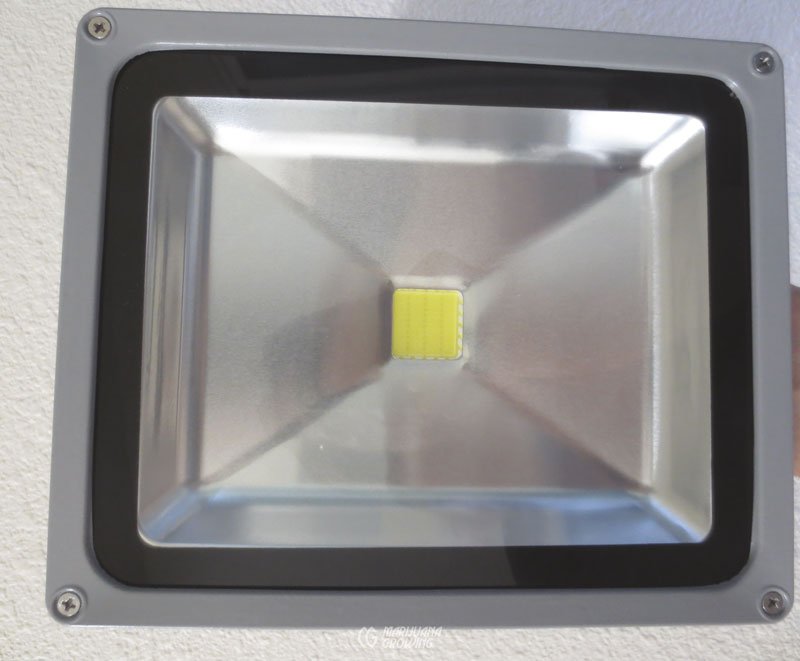
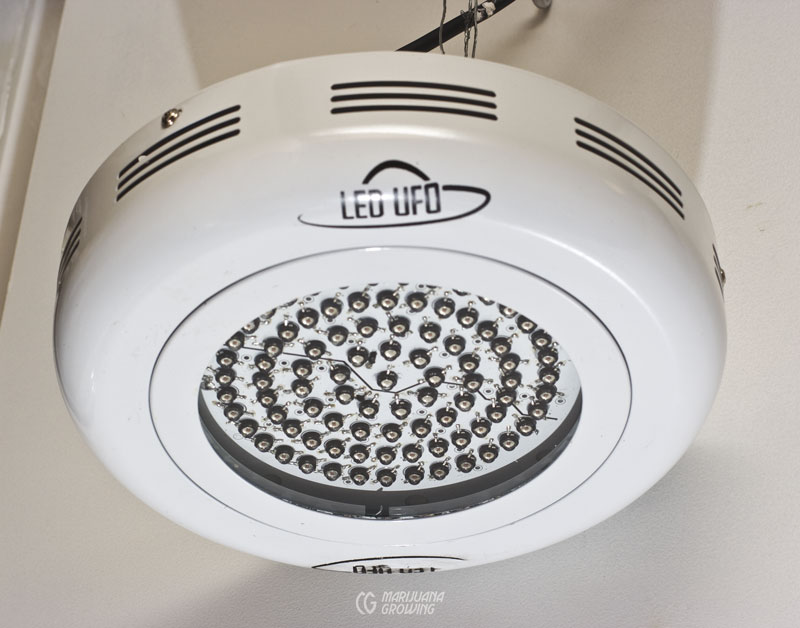
LED Manufacture and Binning
Producing LEDs requires growing a thin layer of crystal on a substrate (supporting layer) of synthetic sapphire or silicon carbide. The process must be very tightly controlled across a range of factors; in fact, much of the steady increase in LED efficiency/brightness comes from improved quality control in manufacturing, rather than advances in technology. Other efficiency increases have come from modifying the structure of the LED layer to help photons that get created but then are trapped within the structure of the LED layer. This happens because the materials in LEDs have a very high refractive index, which causes any photons that strike the surface of the LED chip at much of an angle to be reflected back into the chip and lost.
After the wafer is coated, it is cut into thousands of tiny chips. It is difficult to control the manufacturing process, so each of these tiny chips will have slightly different properties. That is, the voltage requirement, wavelength, and brightness will all be slightly different for each chip! The distribution of the brightness, wavelength, and voltage qualities of the chips from each batch follows a standard bell curve.
These chips are then individually tested by machine and sorted into “bins” according to their properties. Understanding “binning,” (and that all LEDs are not created equal) is super important, especially if you plan to build your own light fixture. For example, the brightness of the same make and model of LED can vary up to 100 percent, depending on the bin designation, and the voltage required can also vary by up to 50 percent. This means that the LEDs from best voltage/brightness bin put out twice the light for two thirds the power of LEDs from the worst bin. All quality LED manufacturers have the bin codes listed on their website.
LEDs are constantly improving in brightness and efficiency, but unlike the ever-increasing speeds of computer CPUs, these improvements will slow and eventually stop. This is because unlike computer CPUs, which can essentially get faster forever, LEDs will eventually reach very close to 100 percent efficiency; experts believe they will reach a maximum of about 90 percent. To achieve this percentage, chips must be individually tested by machine and sorted into bins according to their properties.
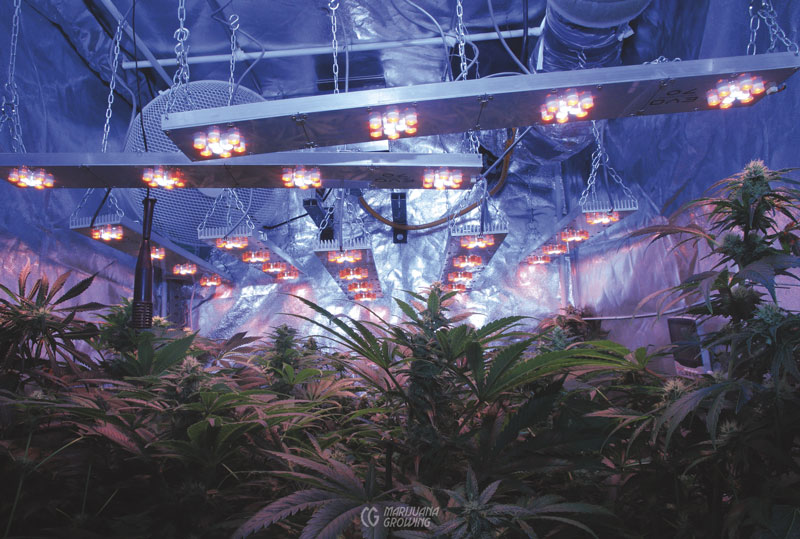

Cost
An inexpensive 30- to 50-watt LED fixture with emitter costs $0.65 to $0.70 USD per watt. HIDs cost less than $0.50 USD per watt. A 90-watt LED grow light costs about $300 USD when purchased at a garden store or from a specialty retailer. However, three 30-watt LED floodlight fixtures cost $66 USD when purchased at a discount retailer. Remember, all LEDs are not created equal.
LEDs have historically been more expensive than most other light sources due to complex manufacturing process, high rejection rate, the cost of both the material in the LED chip and the substrate the chip was based on— expensive synthetic sapphire. Improved manufacturing processes has reduced the reject rate, thin film technology has reduced the amount of material required to make the emitter, and many LEDs are now being made on low-cost SiC (silicon carbide) substrates. The efficiency and consequent brightness of the LEDs has also improved dramatically. Top-quality LEDs can now achieve over 50 percent efficiency. Now fewer LEDs are required to achieve the same brightness in a light, further lowering their cost.
There is a huge variation in the cost and quality of LEDs. High-quality, high-brightness LEDs from top manufacturers such as Cree, Osram, and Philips can cost 10 or 20 times as much as low-quality Chinese LEDs, and there is a large market in counterfeit LEDs.
LEDs and Heat
All electrical devices create heat, and LEDs are no exception. One of the difficulties of creating the first high-power light-emitting diode was to keep the chip from melting! All the energy consumed by an LED is converted into either light or heat. The more efficient the LED, the greater the amount of light produced and the smaller the amount of heat. For example, a high-quality blue or white LED that consumes roughly 2.4 watts, and converts 50 percent of its input into light, produces about 1.2 watts of heat. That may not sound like much heat. But the LED is concentrated into a super thin chip (1 mm × 1 mm). If the chip were 30 mm × 30 mm it would generate over 1000 watts of heat! A low-quality LED that converts only 20 percent of the electricity to light generates about 1.92 watts of heat.
The heat must be removed or the chip will overheat and fail. The cooler the LED stays, the more efficiently it will operate (produce more light) and the longer it will last. The emitter (LED chip) on high-end LEDs is mounted on a base made of a special heat-conductive ceramic. Less expensive LEDs use a small piece of metal known as a “slug.”
Next the LED is soldered to a special circuit board that is designed to transfer heat. The metal core printed circuit board (MCPCB) is made from a layer of aluminum covered with a thin layer of a material that conducts heat well but does not conduct electricity. This is the dielectric layer. The higher the thermal conductivity (measured in watts per kelvin [W/K]), the better. Inexpensive boards have a conductivity of about 0.5 W/K, better quality boards have a rating of 1 W/K, and the highest quality boards have a rating of 2.2 W/K. A bit of copper is placed on top of the dielectric layer to conduct electricity and provide solder pads for mounting the LEDs and a protective layer. These circuit boards are often mounted to a heat sink that could have a cooling fan.
Some lights have the LEDs mounted on conventional plastic circuit boards to save money. These plastic boards do no conduct heat well and will cause the LEDs to overheat and fail very quickly.
LED Power Ratings
Much confusion surrounds LED power ratings. LEDs are rated in watts. However, this rating is not the actual power consumption of LEDs in watts. The wattage rating of LEDs (1, 3, 5, 10 watts, etc.) is actually a class or family rating, and bears no real relationship to the actual power consumed by the LED.
1-watt LEDs operate at 350 mA
3-watt LEDs operate at 700 mA
5-watt LEDs operate at 1000 mA
10-watt LEDs operate at 1500 mA
Note: Larger LEDs require higher ,voltages and are less efficient.
The “wattage classes” were set to standardize power supplies, and so that LEDs from different manufacturers could be combined within the same fixture. The standards were intended for white and blue LEDs only. The name of each rating (class) was fairly accurate—a 3-watt LED did consume about 3 watts. But the efficiency of LEDs has increased dramatically, and the voltage required to drive the LED to 700 mA has dropped. Today the average 3-watt white or blue LED consumes about 2.4 watts. Different colors of LEDs of the same class consume different amounts of power, because different colors use different materials and require different voltages.
Wattage is calculated by Ohm’s Law. The formula is:
watts = volts × amperes (W = V × A)
Here is a breakdown of the actual power drawn by 3-watt-class LEDs of several different colors.
Red/hyper red—2.4 volts, actual wattage at 700 mA is 2.4 volts × 0.7 watts = 1.68 watts
Blue/royal blue/white—3.4 volts, actual wattage at 700 mA is 3.4 volts × 0.7 watts = 2.38 watts
Brilliance
When LEDs are “ganged,” or grouped together, they can produce enough light to grow medical cannabis. An LED fixture must be 12 inches (30.5 cm) or less from plants to be an effective light source for cannabis cultivation.
Depending upon manufacturer, modern LEDs produce from 40 to 70 lumens per watt (lm/W). New and experimental LEDs produce more than 200 lm/W. As of 2014, Cree Incorporated markets an LED that produces 152 lm/W. But, you will see below that lumens per watt are just part of the story.
The brightness of LEDs is rated in two different ways, depending on their wavelengths. LEDs between 640 nm and 460 nm are rated in lumens. LEDs with wavelengths longer than 640 nm or shorter than 460 nm are rated by their radiant power (radiant flux) in mW (milliwatts).
Lumens are not a good measurement system for measuring the output of LEDs. It is not a linear system, meaning that it does not measure all wavelengths/ colors equally. It was developed as a measurement for visible light and measures apparent brightness—how bright a light appears to the human eye. Lumens were developed to rate white light sources rather than to measure monochromatic LED light sources. Furthermore, human eye response to light is extremely uneven. Colors in the center of the visible spectrum such as green appear much brighter than an equally bright light or red or blue.
Lumens can be used only to compare (LED) light sources with the exact same wavelength. This explains why some LEDs with wavelengths of 660 nm hyper, near the extremes of human vision, are often rated as “dominant wavelength 640 nm.”
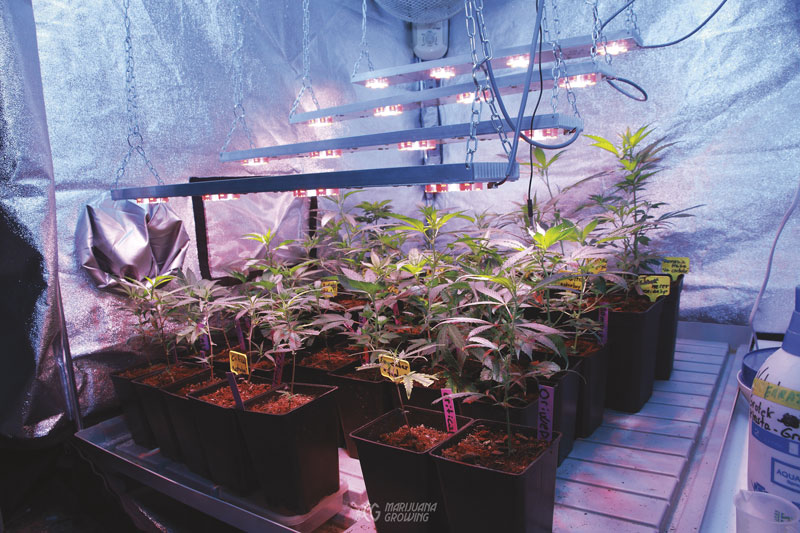
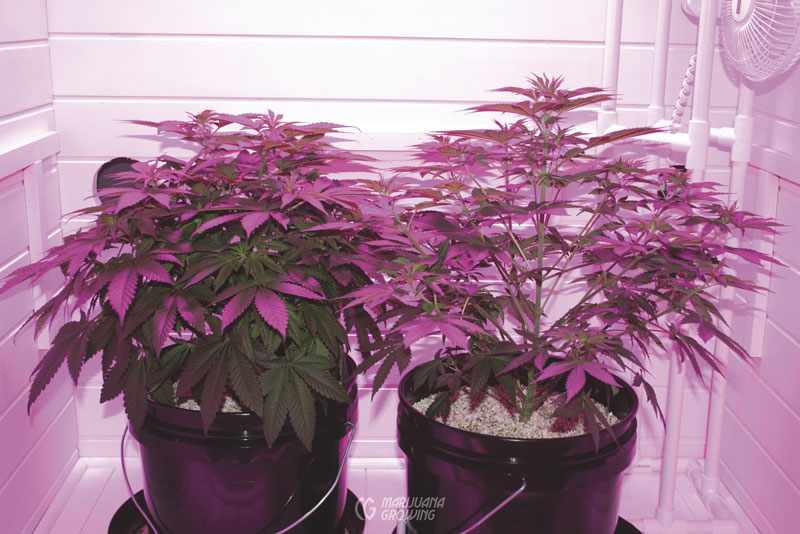
Spectrum
Note: The spectrum of each LED may also dictate brilliance and light output.
LEDs are monochromatic, unlike common CFLs, fluorescents, etc. LEDs produce a single color over a narrow range of wavelengths. White LEDs are actually blue, or sometimes ultraviolet. Some LEDs have a phosphor coating (aka downshift phosphor), which absorbs the blue light and re-emits it at longer wavelengths. The phosphor coating contains a mix of different phosphors, each of which emits a different color, which combine to create white light. The proper mix of colors causes different temperatures, and that creates white light. More red and less blue creates a warmer white. More blue and less red yields a cooler white.
Note: The human eye perceives cooler whites as brighter than warmer whites. This is why they have higher lumen ratings even though they may not actually produce more photons.
| MOST LED GROW LIGHTS CONSIST OF LEDS WITH THE FOLLOWING WAVELENGTHS: | |
| hyper red | 660 nm |
| red | 630 nm |
| blue | 470 nm |
| royal blue | 450 nm |
| THEY MAY ALSO INCLUDE SOME OF THE FOLLOWING: | |
| far red | 740 nm |
| orange (amber) | 617 nm |
| yellow | 590 nm |
| green | 530 nm |
| UV (technically near UV) | 390 nm |
White light is categorized by its color temperature. This is the temperature of a “black body” (an object that does not reflect any light) that has been heated until the light it gives off matches the hue of the white light source. The color temperature of the white light is equal to the temperature in kelvins of the surface of the glowing black body.
LED grow lights take advantage of the availability of LEDs of different wavelengths to make lamps that only create light at the wavelengths the plant can use most efficiently. In other words, the wavelengths match the plants’ photosynthetic absorption peaks.
LED technology allows manufacturers to literally dial in the spectrum of fixtures to produce incredibly high PAR ratings. This point alone makes them more efficient per watt.
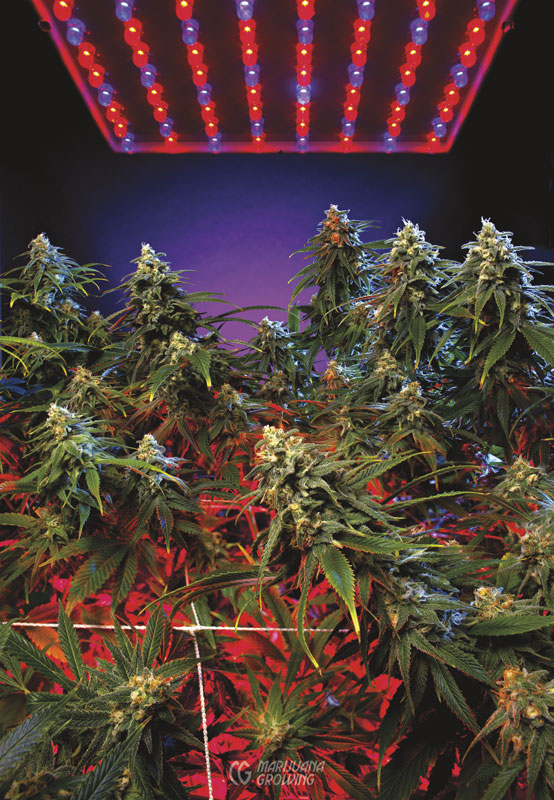
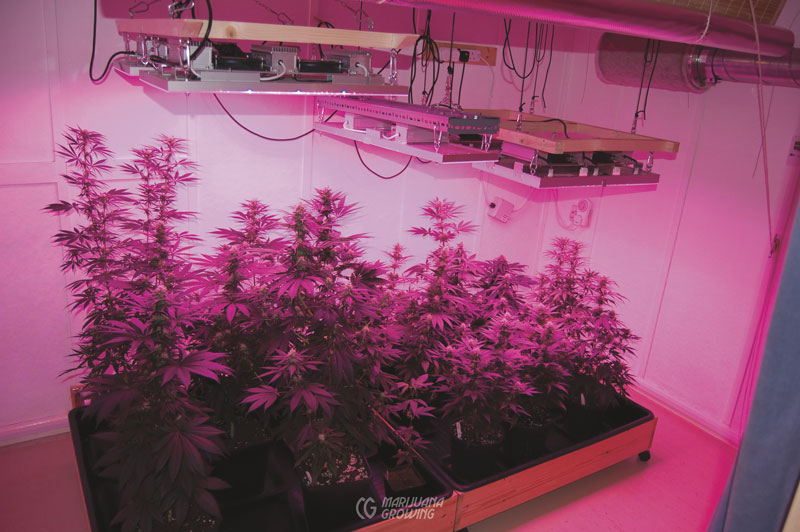
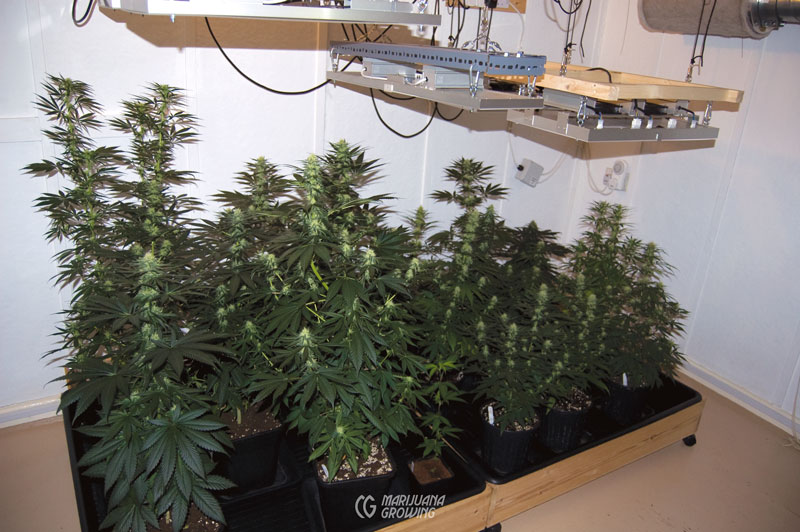
LED Bulbs and Tubes
A vast array of retrofit LEDs can be packed into a larger bulb that fits in a household incandescent screw fitting. Such bulbs cost from $15 to $30 USD and are generally not bright enough to grow plants well. They are rated in replacement terms for an incandescent bulb. For example, a 15.5-watt LED bulb replaces a 75-watt incandescent.
LED tubes are shaped like regular T12, T8, and T5 fluorescent bulbs, but the tubes are filled with LEDs. More than 200 LEDs will fit in a 4-foot (121.9 cm) T12 tube. But not all LEDs are created equal. LED tubes are filled with little LEDs. An energy-efficient 22-watt 4-foot T8 LED tube produces 1248 lumens. They do not fit in existing T8 fluorescent fixtures. The flicker-free tubes have a lifetime of more than 50,000 hours.
T8 red tubes are 660 nm and contain 288 LED bulbs. Spectrums can also be split into blue and white with a 50/50 split between LEDs of 420 nm/5500 K that contain 144 red and 144 white LEDs. Some fixtures allow LED tubes to be mixed with T8 fluorescent tubes to improve spectrum. The tubes run cool and can be placed within inches of plants.
LED Fixtures
Usually, different LEDs are combined in a fixture to achieve a specific light spectrum. A series of individual LEDs can be mounted and hardwired into a single fixture that is square, rectangular, or circular. Or the fixture can contain long T12 and T8 glass tubes loaded with LEDs.
The most practical fixtures allow individual clusters of LEDs packed in a bulb to be easily replaced. Such fixtures also make upgrading to LEDs inexpensive.
LED vs. HID Lamps
We can easily compare LED and HID wattage, lumen output, and lm/W output. But comparing milliwatts per square meter (mW/m2) and PAR watts are the true measures of the light plants need for photosynthesis. Comparing PAR watts makes the best comparison. However, LEDs have several qualities that HIDs don’t have. LEDs produce very little heat and can be placed closer to the canopy of the garden, which inherently provides plants with more bright light.* LED light is also able to be focused and directed through a lens, which intensifies the light. This factor can be compared when we look at overall fixture brilliance only.
There are also a few spectrum details that must be addressed. LED fixtures can contain a few to hundreds of LEDs. The LEDs can be of many different spectrums. Fixtures are manufactured to include LEDs of different spectrums to provide the highest ratings for plant growth. However, I have had a difficult time finding accurate brilliance tests for LED fixtures.
*See the “Inverse Square Law”, earlier in this chapter.
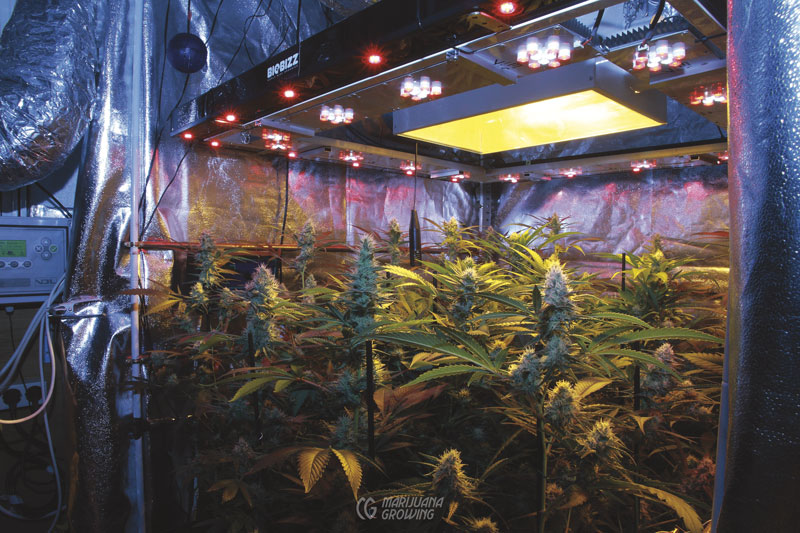
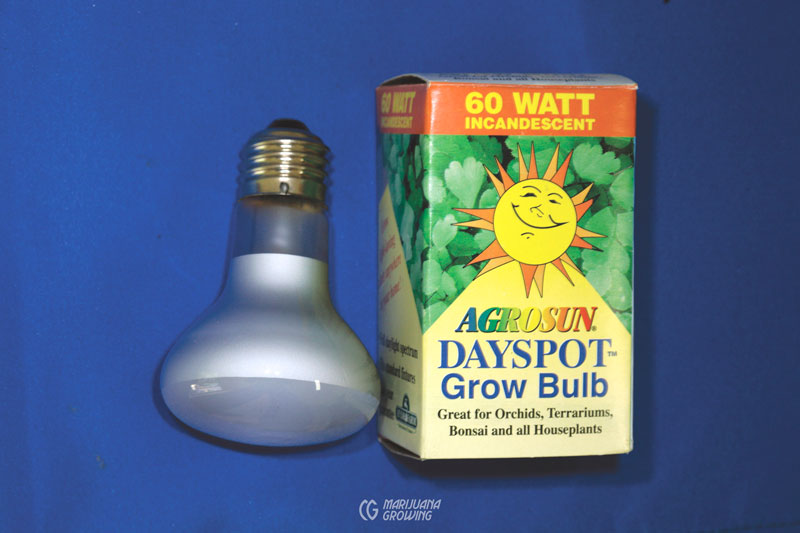
End of Life
LEDs have a life from 25,000 to 50,000 hours, and sometimes longer. They fail by dimming over time. LEDs are so new to gardeners that there is no specific information about when to replace them.
Many LEDs with a range of spectrums are packed together in fixtures. A single LED that fails or is not as bright as others may not affect the overall output of the fixture enough to warrant replacing. Overall, I can recommend replacing a fixture when it yields 85 to 95 percent light output.
Do not worry about tossing out hazardous substances when disposing of LEDs.
They contain no mercury to pollute the environment. LEDs and fixtures can be recycled.
Other Lamps
Several other lamps deserve a short mention, primarily so that they will not be used. Cannabis grows poorly under these lamps. These lamps produce more heat than light, and in a spectrum that is not compatible with plant growth.
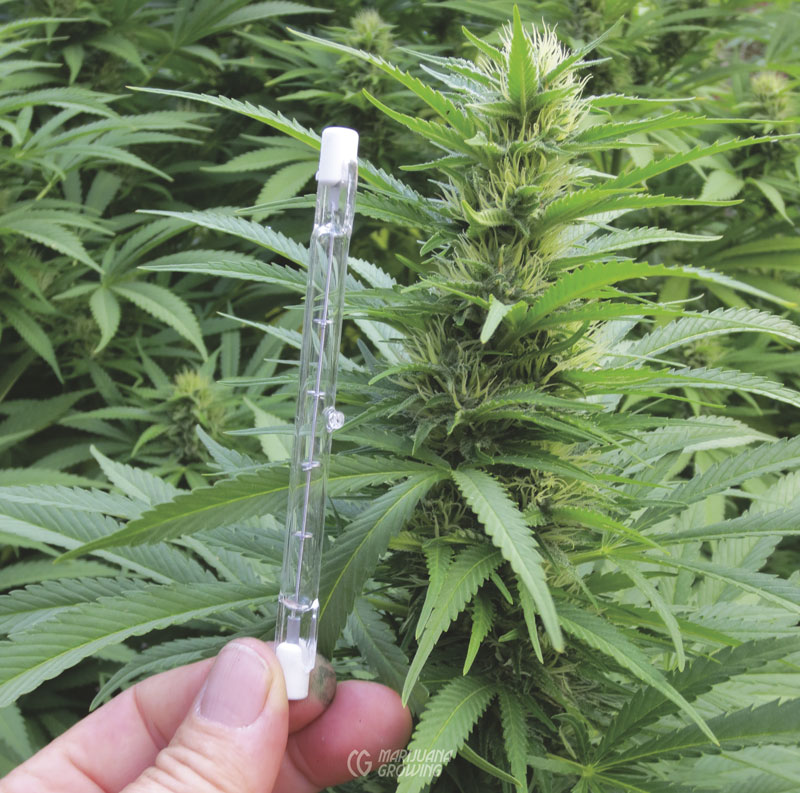
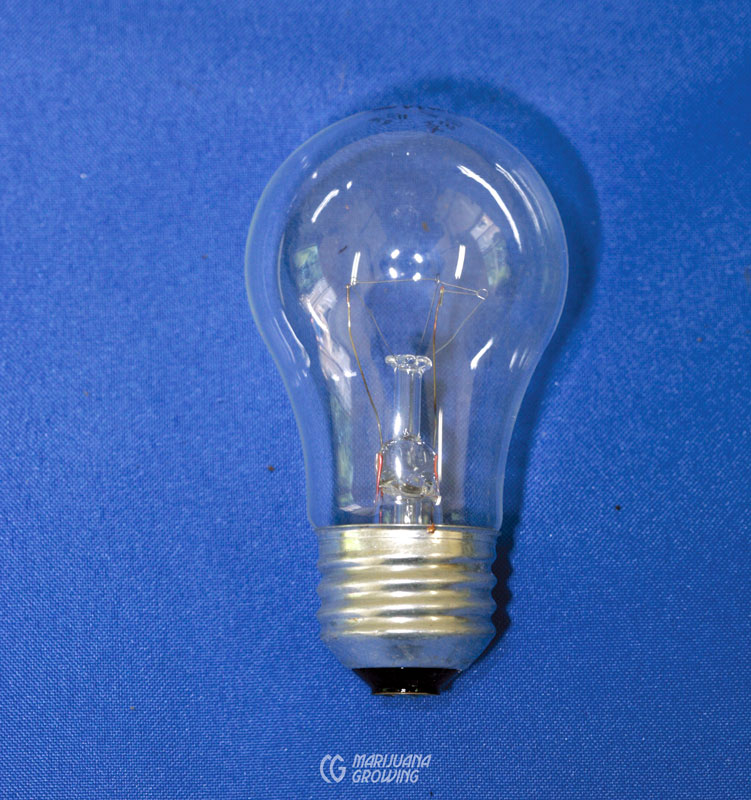
Getting the Most Artificial Light
A 175-watt HID yields enough light to effectively grow a 2 × 2-foot (61 × 61 cm) garden. Notice how fast light intensity diminishes more than a foot from the bulb.
A 250-watt HID will illuminate up to a 3 × 3-foot (91.4 × 91.4 cm) area. Keep the bulb from 12 to 18 inches (30.5– 45.7 cm) above plants.
A 400-watt HID delivers plenty of light to effectively illuminate a 4 × 4-foot (1.2 × 1.2 m) area. Hang the lamp from 12 to 24 inches (30–61 cm) above the canopy of the garden.
A 600-watt HP delivers enough light to effectively illuminate a 4 × 4-foot (120 × 120 cm) area. Hang the lamp from 18 to 24 inches (30.5–60 cm) above plants.
A 1000-watt HID delivers enough light to effectively illuminate a 6 × 6-foot (1.8 × 1.8 m) area. Some reflective hoods are designed to throw light over a rectangular area. Large 1000-watt HIDs can burn foliage if located closer than 24 inches (61 cm) from plants. Move HIDs closer to plants when using a light mover.
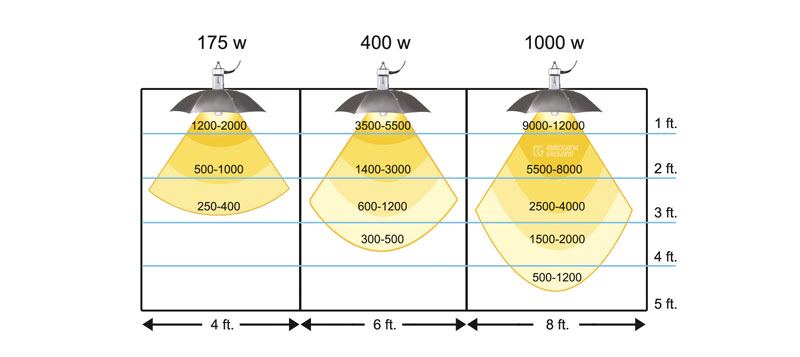
Lamp Spacing
Light intensity almost doubles every 6 inches (15.2 cm) closer an HID is to the canopy of a garden. When PAR light intensity is low, plants stretch for it. Low light intensity is often caused by the lamp being too far away from plants. Dim light causes sparse foliage and spin- dly branches that are prone to disease and pest attacks.
1000 watt: lm/W = 140
1 foot (30.5 cm) away 140,000 lumens
2 feet (61 cm) away 35,000 lumens
3 feet (91.4 cm) away 15,555 lumens
4 feet (121.9 cm) away 9999 lumens
1000-watt HP sodium @ 4 feet = 10,000 lumens
4 × 4 = 16 square feet, 1000 watts/16 square feet = 62.5 watts per square foot
1000 W/m2 = 100 W/cm2
600 watt: lm/W = 150
1 foot (30.5 cm) away 90,000 lumens
2 feet (61 cm) away 22,500 lumens
3 feet (91.4 cm) away 9,999 lumens
4 feet (121.9 cm) away 6428 lumens
600-watt HP sodium @ 3 feet = 10,000 lumens
3 × 3 = 9 square feet, 600 watts/9 square feet = 66 watts per square foot
600 W/m2 = 6 w/cm2
400 watt: lm/W = 125
1 foot (30.5 cm) away 50,000 lumens
2 feet (61 cm) away 12,500 lumens
3 feet (91.4 cm) away 5555 lumens
4 feet (121.9 cm) away 3571 lumens
400-watt HP sodium @ 2.25 feet = 10,000 lumens
2.25 × 2.25 = 5 square feet, 400 watts/5 square feet = 80 watts per square foot
400 W/m2 = 4 w/cm2
400 watt: lm/W = 100
1 foot (30.5 cm) away 40,000 lumens
2 feet (61 cm) away 10,000 lumens
3 feet (91.4 cm) away 4444 lumens
4 feet (121.9 cm) away 2857 lumens
400-watt metal halide @ 2 feet = 10,000 lumens
2 × 2 = 4 square feet, 400 watts/4 = 100 watts per square feet
400 W/m2 = 4 w/cm2

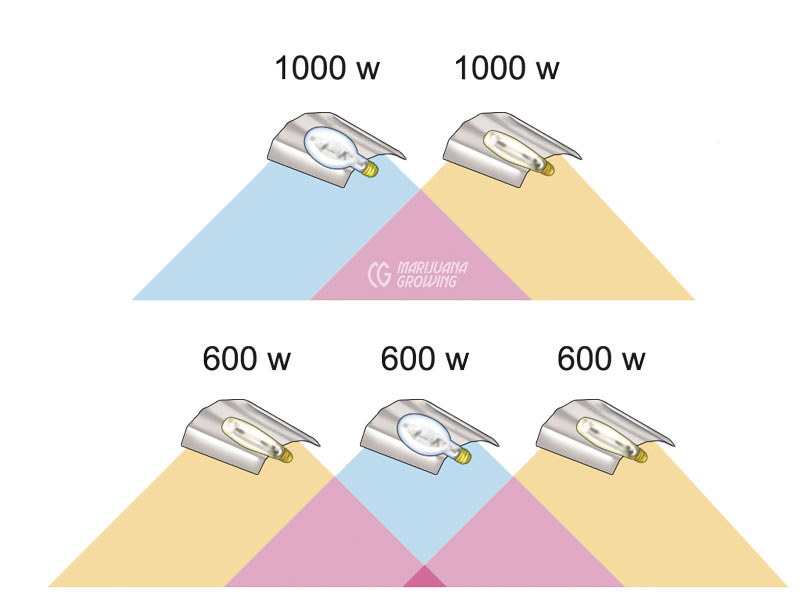
Increase yield by giving gardening area uniform light distribution. Uneven light distribution causes strong branch tips to grow toward the intense light. Foliage in dimly lit areas is shaded when light distribution is uneven.
Reflective hoods ultimately dictate lamp placement—distance between lamps and above the plants. Nearly all stationary lamps have bright (hot) spots that plants grow toward.
Gardeners prefer high wattage lamps— 400, 600, 1000, or 1100 watts—because they produce more lumens per watt and their PAR rating is higher than lower- wattage bulbs. Plants receive more light when the lamp is closer to the plants. Even though 400-watt lamps produce fewer lumens per watt than a 1000-watt bulb, when properly set up they actually deliver more usable light to plants. The 600-watt bulb has the highest lumens- per-watt conversion (150 lm/W), and can be placed closer to the canopy of the garden than the 1000- or 1100-watt bulbs—without burning foliage.
For example, the lumens-per-watt conversion is lower with 400-watt bulbs than with 1000-watt bulbs, but hanging fi ve 400-watt lamps over the same area that two 1000-watt lamps cover provides more even distribution of light, and minimizes shading. The lamps burn cooler and can be placed closer to plants. The 400-watt lamps also emit light from 5 points, where the higher wattage bulbs emit from 2. Overall, bright light coverage is increased with the 400-watt lamps even though their lumens-per- watt conversion is lower.
Three 600-watt lamps that produce 270,000 lumens from three point sources, instead of two 1000-watt HPS lamps yielding 280,000 lumens from two points, decrease total light output by 10,000 lumens but increase the number of sources of light. Lamps can be placed closer to plants, increasing efficiency even more.
Side Lighting
Lighting from the side is generally not as efficient as lighting from above. Vertically oriented lamps without reflectors are efficient but require plants to be oriented around the bulb. To promote growth, light must penetrate the dense foliage of a garden. The lamps are mounted where light intensity is marginal––along the walls—to provide sidelight.
Compact fluorescent lamps are not a good choice for side lighting when using HID lamps. (See “Compact Fluorescent Lamps”.
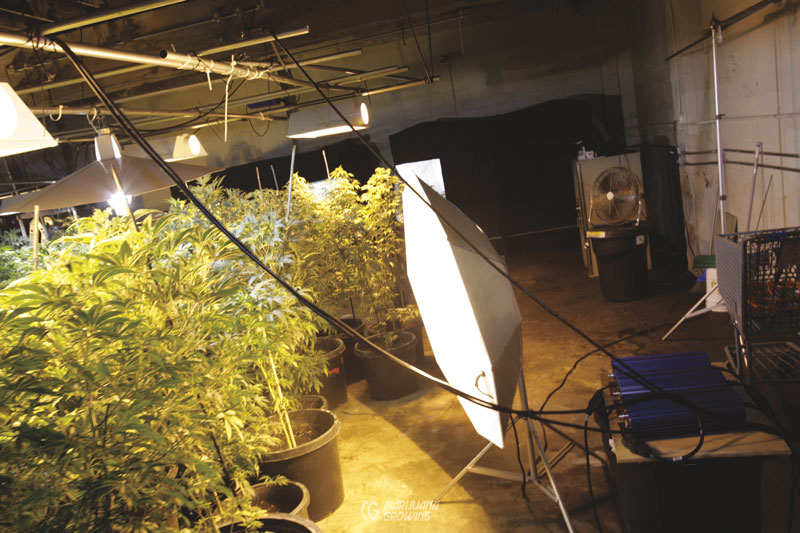
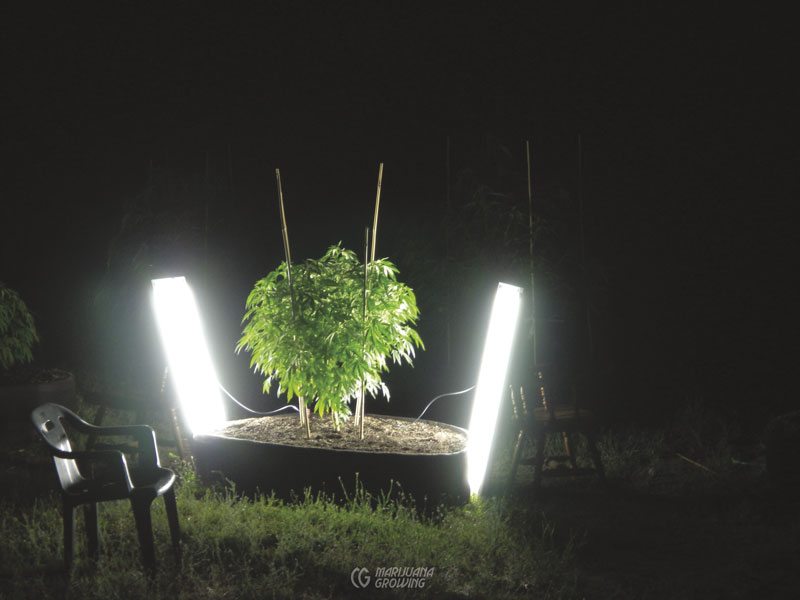
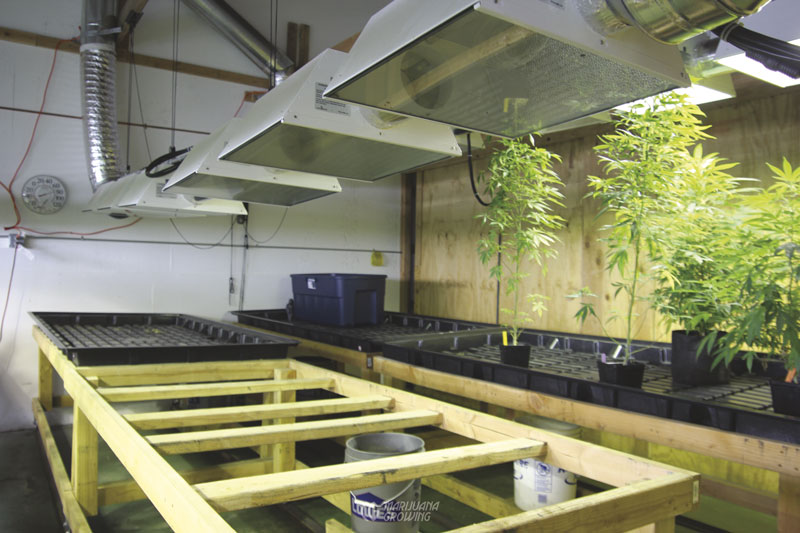
Rotating Plants
Rotating the plants will help ensure even distribution of light. When possible, rotate plants every few days by moving them one-quarter to one-half turn. Rotating promotes even growth and fully-developed foliage. Move plants around under the lamp so they receive the most possible light. Move smaller plants toward the center, and taller plants toward the outside of the garden. Set small plants on a stand to even out the garden profile.
The longer that plants are in the flowering growth stage, the more light they need. During the first 3 to 4 weeks of flowering, plants process a little less light than during the last 3 to 4 weeks. Plants flowering during the last 3 to 4 weeks are placed directly under the bulb, where light is the brightest. Plants that have just entered the flowering room can stay on the perimeter until the more mature plants are moved out. This simple technique can easily increase harvests by 5 to 10 percent.
Add a shallow shelf around the perimeter of the garden to use light that is consumed by the walls. This sidelight is often very bright and very much wasted. Use brackets to put up a 4- to 6-inch-wide shelf around the perimeter of the garden. The shelf can be built on a slight angle and lined with plastic to form a runoff canal. Arrange small plants in 6-inch pots along the shelf. Rotate them so they develop evenly. These plants can either flower on the short shelf or when moved under the light.
Installing rolling beds in greenhouses and garden rooms will remove all but one walkway from the garden. Greenhouse gardeners learned this space-saving technique long ago. Gardens with elevated beds often waste light on walkways. To make use of more gardening area, place two 2 inch (5 cm) pipes or wooden dowels below the gardening bed. The pipe allows the beds to be rolled back and forth, so only one walkway is open at a time. This simple technique usually increases gardening space by up to 25 percent.
Growing a perpetual crop and flowering only a portion of the garden allows for more plants in a smaller area and a higher overall yield. See chapter 4, Cannabis Life Cycle, for more information on “Perpetual Crops.”
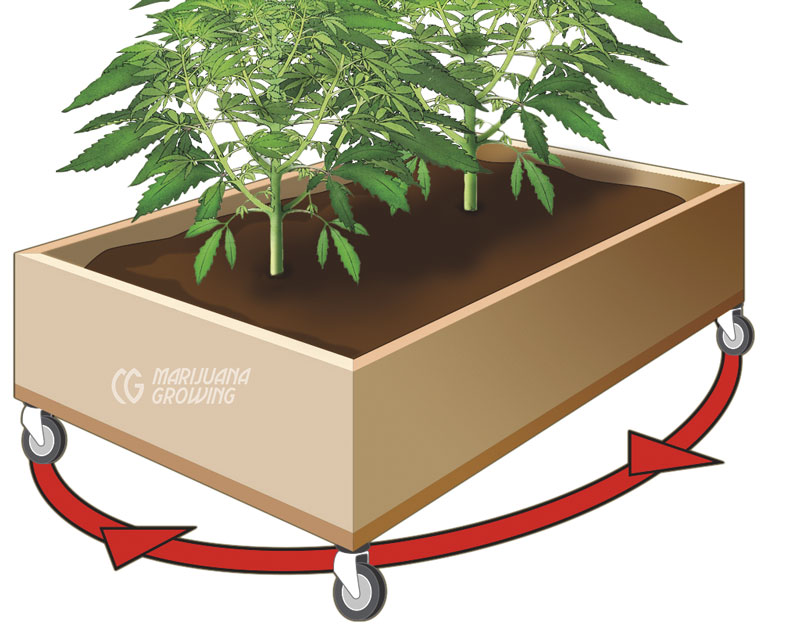

Plant Spacing
Outdoors and in greenhouses, medical cannabis gardeners must allow for rapid, robust growth. This requires extra space between plants. Greenhouse crops can be easily controlled with light-deprivation techniques. Outdoor plants that receive full sun and are able to grow for several months reach heights of more than 12 feet (3.7 m) and are 12 feet (3.7 m) in diameter. Proper planning requires that such seedlings and clones be planted on a minimum of 12-foot (3.7 m) centers to allow for adequate growth and ventilation. See chapter 12, Outdoors, and chapter 13, Case Studies, for more information.
When light shines on a garden, the leaves near the top of plants get more intense light than the leaves at the bottom. The top leaves create shade, making less light energy available to lower leaves. If the lower leaves do not receive enough light, they will yellow and die.
Six-foot-tall (1.8 m) plants take longer to grow and have higher overall yields than shorter 4-foot-tall (1.2 m) plants, but the yield of primo tops will be about the same. Due to lack of light, the taller plants have large flowers on the top 3 to 4 feet (91.4–121.9 cm) and spindly buds nearer the bottom. Tall plants tend to develop heavy flower tops whose weight the stem cannot support. These plants need to be tied up. Short plants better support the weight of the tops and have much more flower weight than leaf weight.
At least 99 two-week-old seedlings or clones can be huddled directly under a single 400-watt HID. The young plants will need more space as they grow. If crowded too closely together, plants sense the shortage of space and do not grow to their maximum potential.
Leaves from one plant shade another plant’s foliage and slow the overall plant growth. It is very important to space young plants just far enough apart so their leaves do not touch or touch very little. This will keep shading to a minimum and growth to a maximum. Check and alter the spacing every few days. Eight to 16 mature females that are 3 to 4 months old will completely fill the space under one 1000-watt HID.
Plants can absorb light only if it falls on their leaves. Plants must be spaced so their leaves do not overlap too much. Yield increases very little when plants are crowded. Plants also stretch for light, which makes less efficient use of intense light. The most productive number of plants per square foot or square meter is often a matter of experimenting to find the magic number for your garden. In general, each 40-inch square (1 m2) space will hold from 16 to 32 plants.
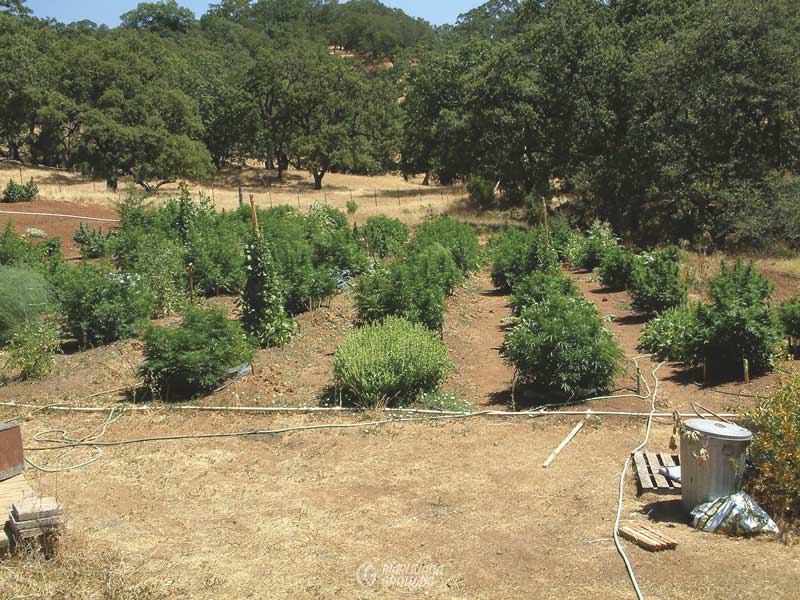
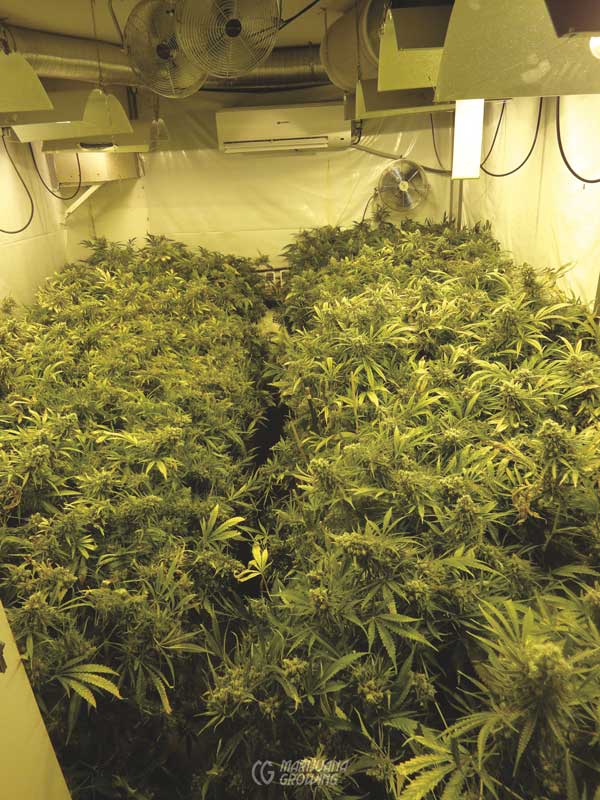
Reflective Hoods
Some reflective hoods reflect more light and more evenly than others do. A reflector that distributes light evenly— with no hot spots—can be placed closer to plants without burning them. These hoods are most efficient because the lamp is closer and the light more intense.
The farther the lamp is from the garden, the less light plants receive.
When used in conjunction with reflective walls, the proper reflective hood over the lamp can double the gardening area. Gardeners who use the most efficient reflective hoods can harvest up to twice as much as those who don’t.
Reflective hoods are made from steel sheet metal, aluminum, or even stainless steel. The steel is either cold-rolled or pre-galvanized before a reflective coating is applied. Pre-galvanized steel is more rust resistant than cold-rolled steel. This metal can be polished, textured, or painted, with white being the most common paint color. Hood manufacturers apply white paint in a powder-coating process.
Notes: There are different shades of white, and some whites are whiter than others. Flat white is the most reflective color and diffuses light most effectively. Glossy white paint is easy to clean but tends to create hot spots of light. Also, sheet metal hoods are less expensive than the same size aluminum hood, because of reduced materials expense.
Seedlings, cuttings, and plants in the vegetative growth stage need less light than flowering plants because their growth requirements are different. For the first few weeks of life, seedlings and clones can easily survive beneath fluorescent lights. Vegetative growth requires a little more light, easily supplied by metal halide or compact fluorescent lamps
Pebble and hammer-tone surfaces offer good light diffusion and more surface area to reflect light. Hot spots are common among highly polished surfaces. Mirror-like hoods also scratch easily and create uneven lighting.
Premium reflective hood manufacturers use a special process developed in Germany that puts a mirror-like reflective surface on aluminum so that it does not oxidize. The slightest bit of oxidation cuts reflectivity.
The bulb should also fit firm and straight in the reflector, at perfect parallel angle to the reflective hood. When the bulb does not stay parallel to the reflector, the light pattern below is out of whack and inconsistent.
Reflective hoods become dirty and may be scratched when cleaned, resulting in a loss of up to 5 percent of their reflective ability every year. If they are dirty and not regularly cleaned, reflective loss increases. Changing the reflective hood every year will ensure that the reflector provides the maximum amount of reflection over time. More than 65 percent of the light is reflected by the reflector.
Clean reflectors with a mild detergent and water. Use a soft dry cloth to avoid scratching. Do not touch the reflective part of reflector hoods.
Do not use sulfur vaporizers when garden lamps are on, and do not use sulfur vaporizers and misters close to luminaires. Sulfur and calcium deposits will damage lamps’ reflective surfaces and decrease the efficiency of reflectors.
Air-cooling high-frequency lamps causes them to run below peak operating temperature, which also lowers their efficiency and changes the color spectrum somewhat.
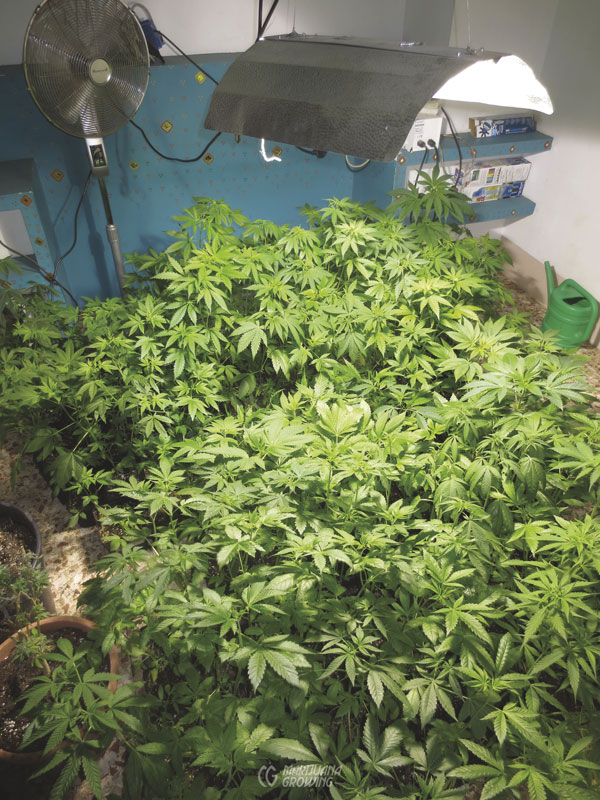
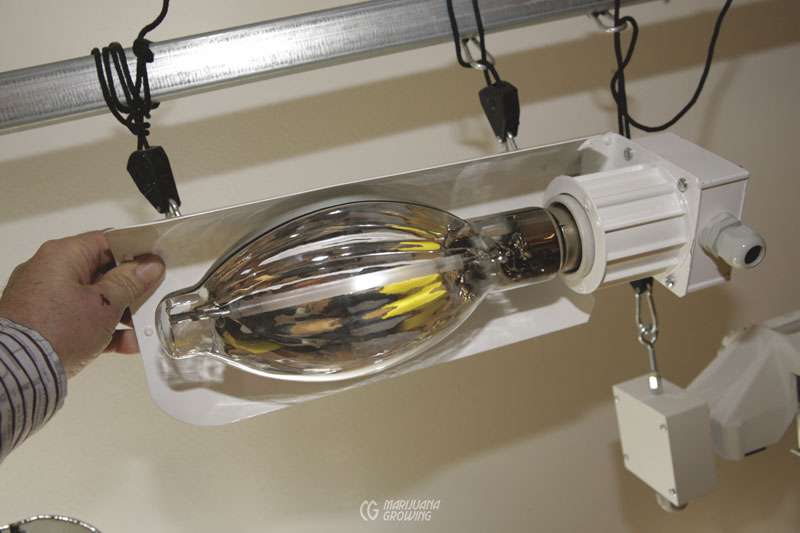
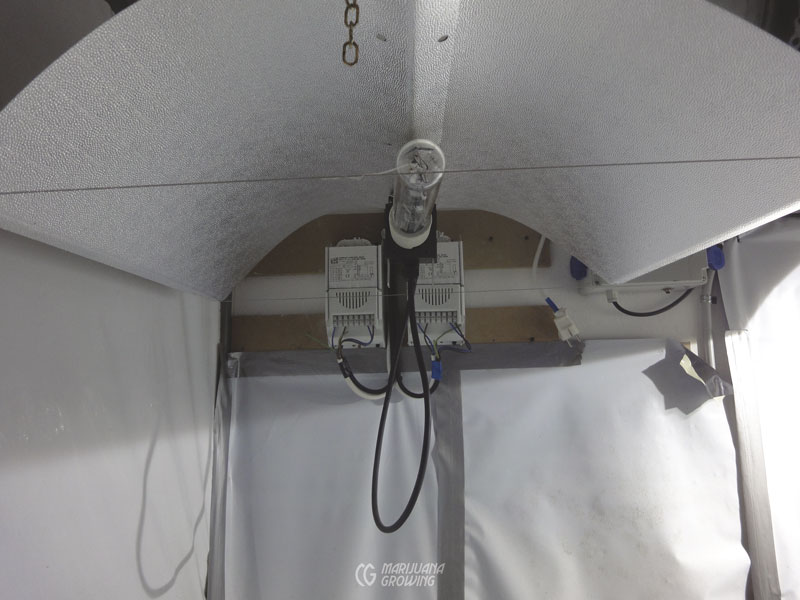
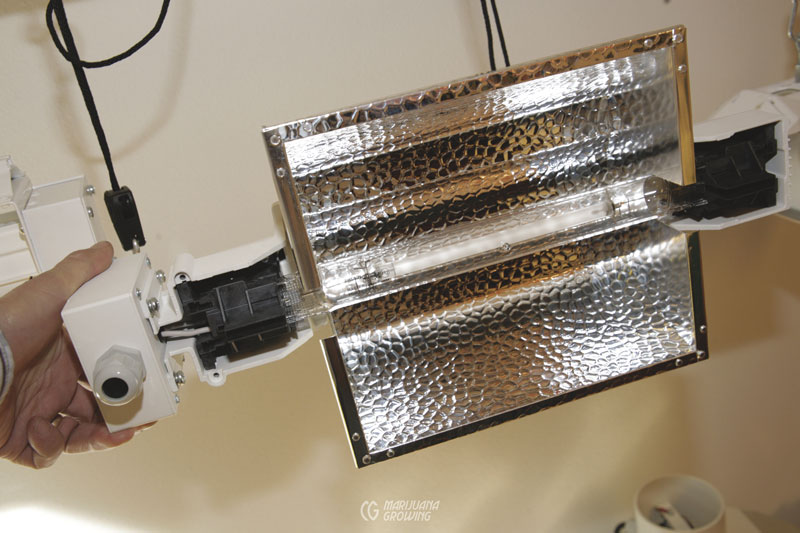
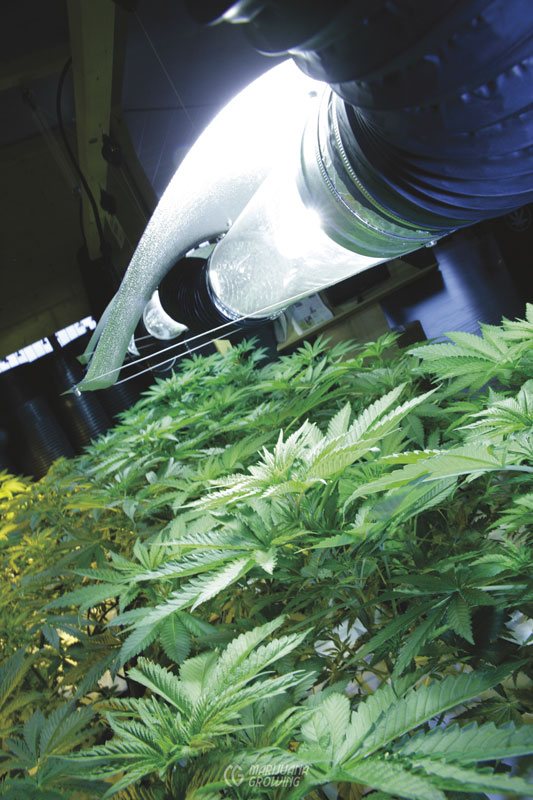
Horizontal Reflective Hoods
Horizontal reflectors are most efficient for HID systems, and are the best value for gardeners. A horizontal lamp yields up to 40 percent more light than a lamp burning in a vertical position. Light is emitted from the arc tube. When the arc tube is horizontal, half of this light is directed downward to the plants, so only half of the light needs to be reflected.
Horizontal reflective hoods are available in many shapes and sizes. The closer the reflective hood is to the arc tube, the less distance light must travel before being reflected. Less distance traveled means more light reflected. Horizontal reflectors are inherently more efficient than vertical lamps/reflectors, because half of the light is direct and only half of the light must be reflected.
Horizontal reflective hoods tend to have a hot spot directly under the bulb. To dissipate this hot spot of light and lower the heat it creates, some manufacturers install a light deflector below the bulb. The deflector diffuses the light and heat directly under the bulb. When there is no hot spot, reflective hoods with deflectors can be placed closer to plants.
Horizontally mounted HP sodium lamps use a small reflective hood for greenhouse culture. The hood is mounted a few inches over the horizontal HP sodium bulb. All light is reflected down toward plants, and the small hood creates minimum shadow.
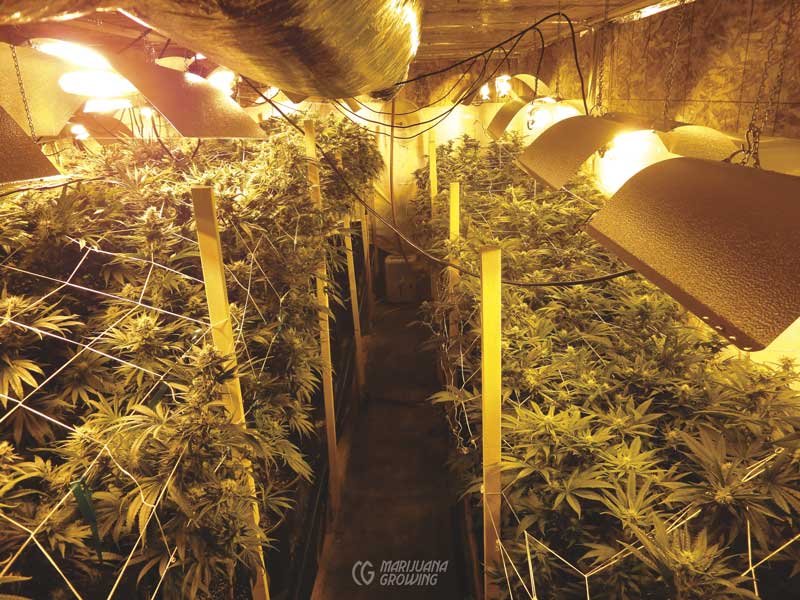

Adjustable Horizontal Reflective Hoods
An adjustable reflector allows light to overlap in the middle and less light to shine on the wall on its other side.
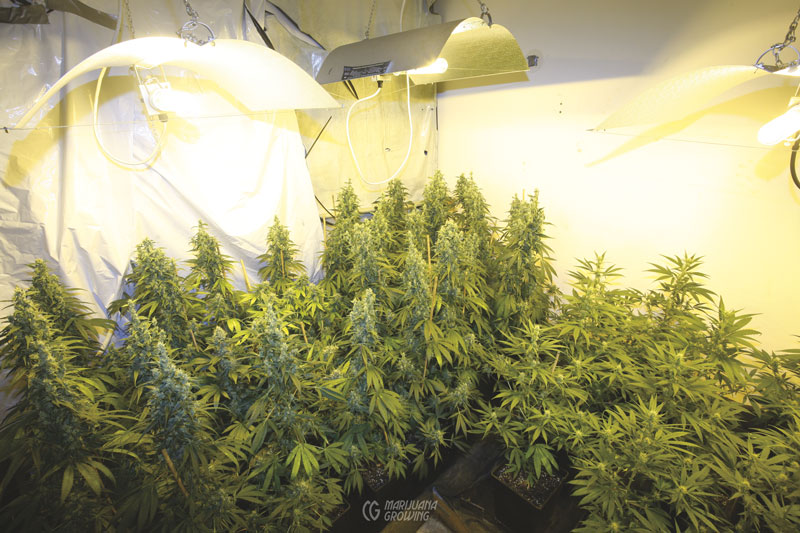
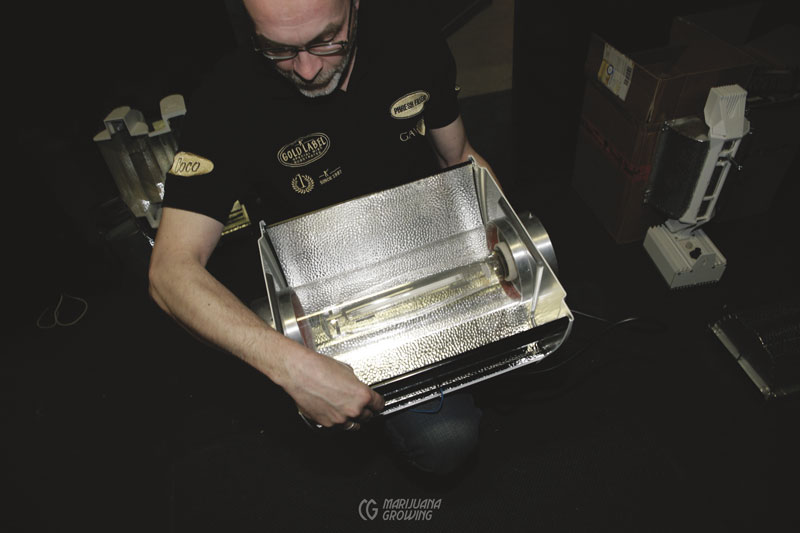
Vertical Reflective Hoods
Reflectors with vertical lamps are less efficient than horizontal ones. Like horizontal bulbs, vertically mounted bulbs emit light from the sides of the arc tube. This light must strike the side of the hood before it is reflected downward to plants. Reflected light is always less intense than original light. Light travels farther before being reflected in parabolic or cone reflective hoods. Direct light is more intense and more efficient.
Parabolic dome reflectors offer the best value for vertical reflectors. They reflect light relatively evenly, though they throw less overall light than horizontal reflectors. Large parabolic dome hoods distribute light evenly and reflect enough light to sustain vegetative growth. The light spreads out under the hood and is reflected downward to plants. Popular parabolic hoods are inexpensive to manufacture, and provide a good light value for the money. Four-foot parabolic hoods are usually manufactured in nine parts. The smaller size facilitates shipping and handling. The customer assembles the hood with small screws and nuts.
Lightweight reflective hoods with open ends dissipate heat quickly. Extra air flows directly through the hood and around the bulb in open-end fixtures to cool the bulb and the fixture. Aluminum dissipates heat more quickly than steel. Train a fan on reflective hoods to speed heat loss.
Artificial light fades as it travels from its source (the bulb). The closer you put the reflector to the bulb, the more intense the light it reflects. Enclosed hoods with a glass shield covering the bulb operate at higher temperatures. The glass shield is a barrier between plants and the hot bulb. Enclosed hoods must have enough vents; otherwise, heat buildup in the fixture causes bulbs to burn out prematurely. Many of these enclosed fixtures have a special vent fan to evacuate hot air.
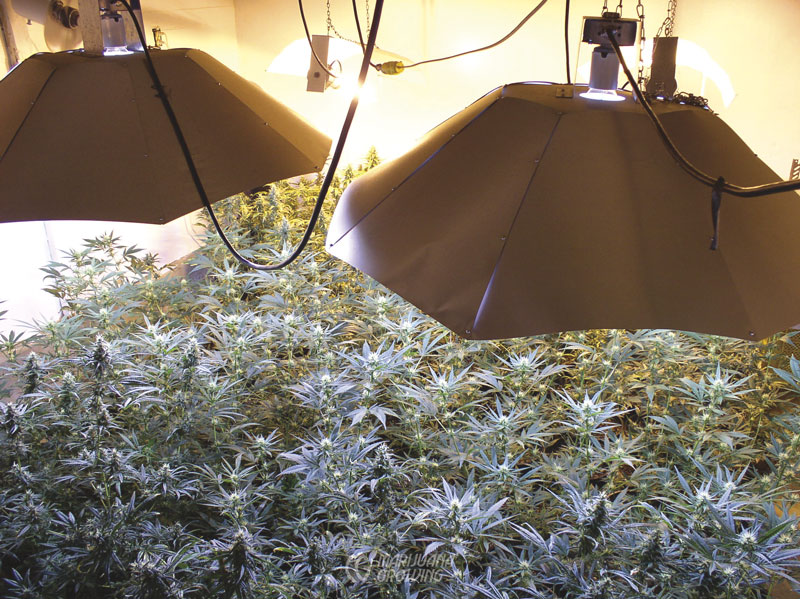
| MAXIMUM LIGHT REQUIREMENTS FOR PLANTS | |||
| Growth Stage | Foot-Candles | Lux | Hours of Light |
| seedling | 375 | 4000 | 16–24 |
| clone | 375 | 4000 | 18–24 |
| vegetative | 2500 | 27,000 | 18 |
| flowering | 10,000 | 107,500 | 12 |
Air-Cooled Lamp Fixtures
Several air-cooled lights are available. Some use a reflective hood with a protective glass face and two squirrel cage blowers to move air through the sealed reflective-hood cavity. The air is forced to travel around corners, which requires a higher velocity of airflow. Other air-cooled reflectors have no airflow turns, so the air is evacuated quickly and efficiently.
Air-cooled reflective hoods are not recommended for use with electronic ballasts and corresponding HID bulbs. Air-cooled reflectors lower the operating temperature of bulbs, which changes the lamp spectrum and lowers efficiency.
Air-cooled fixtures are inexpensive to operate and easy to set up.
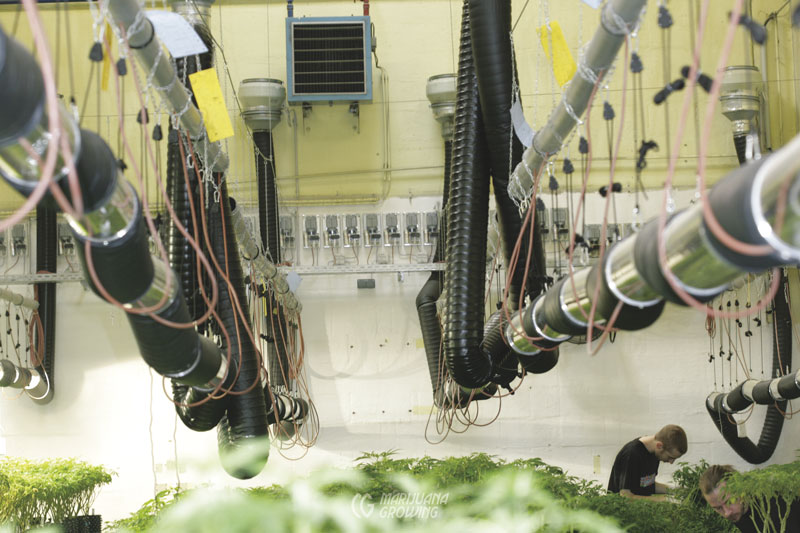
Water-Cooled Lamp Fixtures
Water-cooled lamp fixtures are expensive and impractical for environmentally conscious medical gardeners. I have never seen one being used in a garden room, even though they run cooler and can be moved closer to plants. The water and outer jacket account for a 10 percent lumen loss. On an average day, a 1000- watt bulb uses about 100 gallons of water to keep cool, if the water runs to waste. To recirculate the water requires a big reservoir. The water in the reservoir that serves a recirculating cooling system must also be cooled. Reservoir coolers can easily cost $1000 USD.
No Reflective Hood
Lamps burn cooler and emit only direct light with no reflective hood. Bulbs are hung vertically in between plants. Circular gardens use no reflective hoods so that no light is reflected and plants receive only direct light.
Reflective-Hood Light Distribution
Reflective hoods are designed to throw light over a specific area. Mounting height affects the effective light coverage and intensity.
The light reflected and the overall light emitted using specific reflective hoods are scientifically measured with a 108-degree arc divided into 5-degree increments from the center of the bulb’s base. Light measurements are taken along the arc and plotted on a graph to show the light output of specific luminaires.
Reflectors are responsible for about 66 percent of all light plants receive from specific luminaries. For example, Gavita rates their lamps as 96 percent efficient, and their figures are based on 33 percent direct light from the bulb and 66 percent reflected light.
Measure the light output from reflective fixtures when the room is being set up. Make sure each square inch (cm2) receives adequate light.
You can make your own light tests; all you need is a light meter and a room with no ambient light. Hang a lamp 3 feet (91.4 cm) from the floor. Make sure the bulb and arc tube are parallel to the floor. Mark a grid on the floor, putting dots every 12 inches (30.5 cm). Mark 12-inch (30.5 cm) increments on the walls, starting from the floor. Center the grid under the bulb. Position the bulb parallel and exactly 3 feet from the floor.
Warm up the lamp for 15 minutes before taking measurements.
Take foot-candle or lux readings every 12 inches (30.5 cm) and post the results to a spreadsheet program such as Microsoft Excel. Spreadsheet graph programs have a graph button that converts the spreadsheet tabulations into several different kinds of graphs.
You will learn that all bulbs and reflective hoods are not created equal!
Check out International Light Technology’s “Light Measurement Handbook” available free on the Internet. The 64- page technical book answers endless light questions. Download the book in a few minutes—drawings, graphs, charts, and all—at www.Intl-Light.com/handbook.
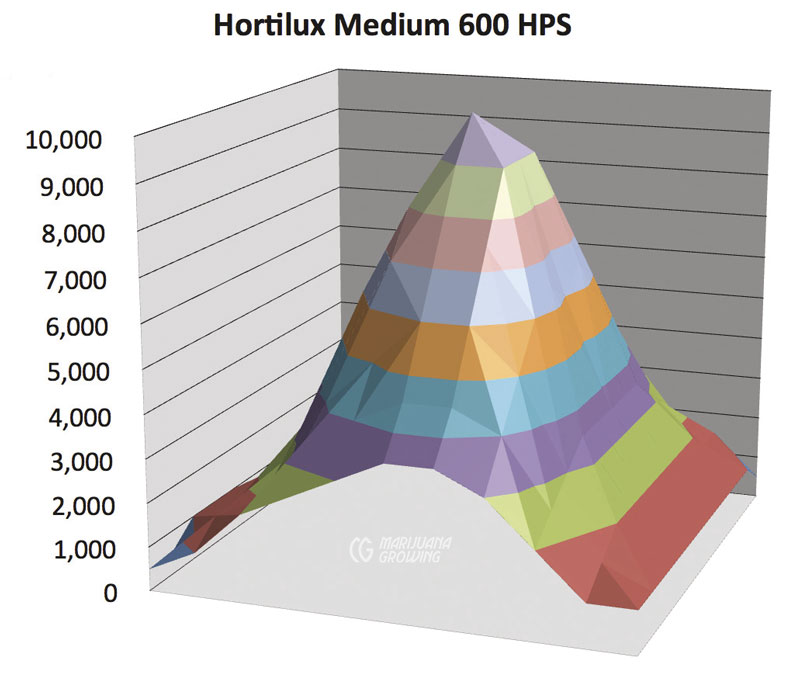

Reflective Light
Reflective walls increase light in the gardening area. Less-intense light on the perimeter of gardens is wasted unless it is reflected back onto foliage. Up to 95 percent of this light can be reflected back toward plants. For example, if 500 foot-candles of light is escaping from the edge of the garden and it is reflected at the rate of 95 percent, then 475 foot-candles will be available on the edge of the garden.
Reflective walls should be 6 to 12 inches (15.2–30.5 cm) or less from the plants for optimum reflection. Ideally, take walls to the plants. The easiest way to install mobile walls is to hang the lamp near the corner of a room. Use the two corner walls to reflect light. Move the two outside walls close to plants to reflect light. Make the mobile walls from lightweight plywood, Styrofoam, or white Visqueen plastic.
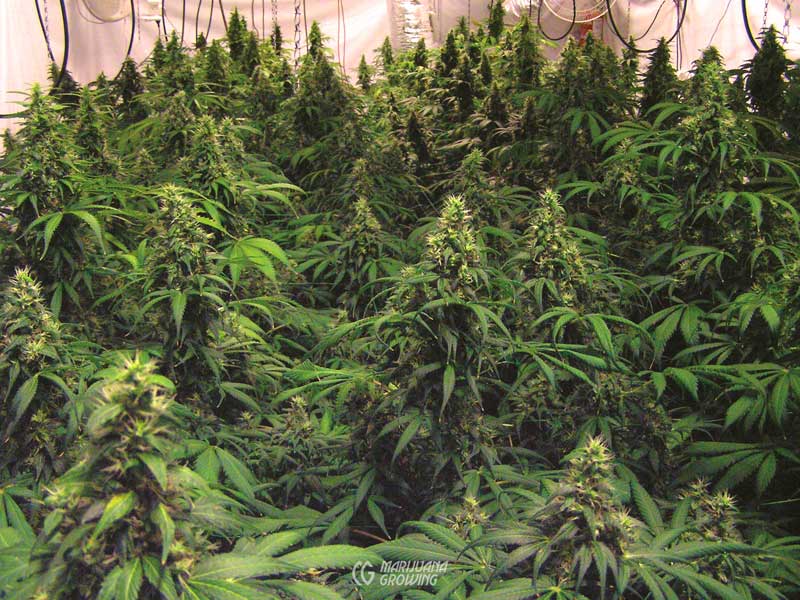
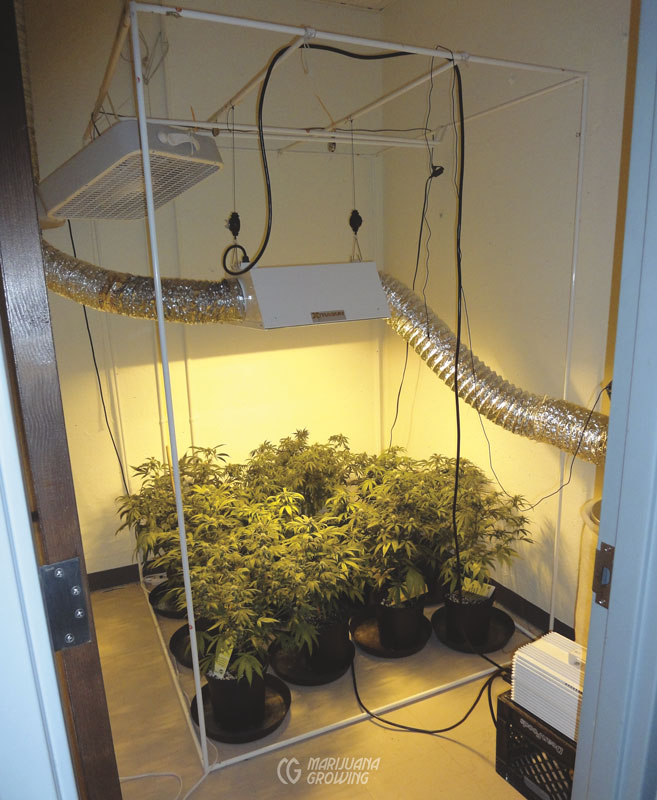
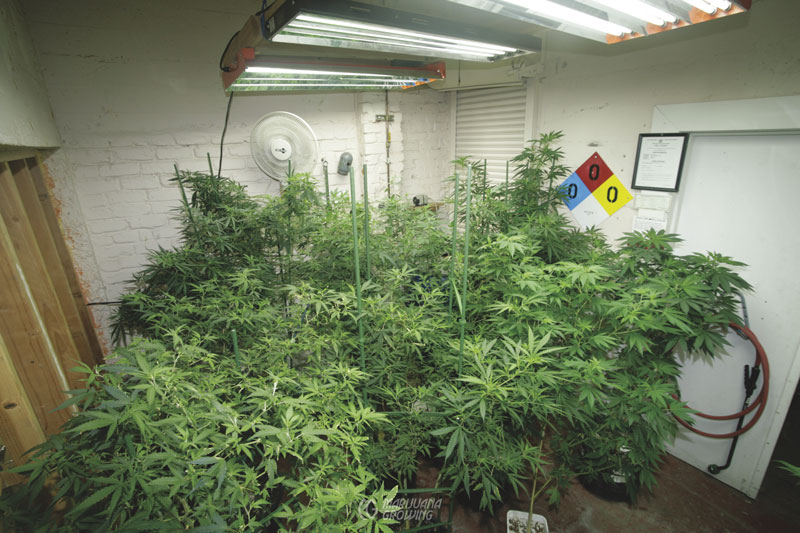
Using white Visqueen plastic to “white out” a room is quick and causes no damage to the room. Visqueen plastic is inexpensive, removable, and reusable. It can be used to fabricate walls and to partition rooms. Waterproof Visqueen also protects the walls and floor from water damage. Lightweight Visqueen is easy to cut with scissors or a knife, and can be stapled, nailed, or taped.
To make the white walls opaque, hang black Visqueen on the outside. The dead airspace between the two layers of Visqueen also increases insulation. The only disadvantages of white Visqueen plastic are that it is not as reflective as flat white paint, it may get brittle after a few years of use under an HID lamp, and it can be difficult to find at retail outlets. Using flat white paint is one of the simplest, least expensive, and most efficient ways to create reflective walls.
While easy to clean, semigloss white is not quite as reflective as flat white. Regardless of the type of white used, a nontoxic, fungus-inhibiting agent should be added when the paint is mixed. A gallon (3.8 L) of good flat white paint costs less than $25 USD. One or two gallons should be enough to “white out” the average garden room. Use a primer coat to prevent bleed-through of dark colors or stains or if walls are rough and unpainted. Install vent fans before painting. Fumes are unpleasant and can cause health problems. Painting is labor-intensive and messy, but it’s worth the trouble.
Reflective Surfaces
| MATERIAL | PERCENT REFLECTED |
| aluminum foil | 70–75 |
| black | <10 |
| C3 Anti-detection film emergency blanket | 92–97 |
| flat white paint | 75–85 |
| Foylon | 94–95 |
| Mylar | 90–95 |
| Styrofoam | 75-80 |
| rubberized white paint | 75-80 |
| Visqueen (white) | 75-80 |
| white paint (flat) | 85–93 |
| white paint (semigloss) | 75–80 |
| yellow paint (flat) | 75–80 |
Aluminum foil is one of the worst possible reflective surfaces and no more than 55 percent reflective. The foil tends to crinkle up and reflects light in many directions—actually wasting light. It also creates hot spots and reflects more ultraviolet rays than other surfaces.
C3 Anti-detection film is a specialized type of Mylar that exhibits the same properties as the 2-mil-thick (0.002 inches) Mylar, but in addition to reflecting approximately 92 to 97 percent of the light, it is also 90 percent infrared proof and virtually invisible to infrared scanning and thermal imaging.
Emergency thin polyester (camping) blankets are constructed of a single layer of polyester film that is covered with a layer of vapor-deposited aluminum. These blankets are not very effective at reflecting light because they are so thin and permeated with countless tiny holes. They can also create hot spots when wrinkled or not attached flush to the wall.
Flat white paint is a great option for large grow rooms or for people who are interested in a low-maintenance wall. Flat white paint has the ability to reflect between 75 and 85 percent of the light, and it does not create hot spots. Glossy white is easier to clean but contains light-inhibiting varnish. Semigloss paint provides a more reflective surface and is easy to clean. Adding a fungicide is recommended when painting. Paint that has lead pigment—banned in the USA in 1978—is toxic and not to be used.
Paint concrete walls with elastomeric paint to provide a tough and thick coating that also waterproofs most surfaces, including stucco, masonry, concrete with cracks, and concrete blocks. Some elastomeric paints are compatible with wood.
Foylon is a reflective material that reflects light and heat in an evenly dispersed pattern. It is durable, and it reflects about 95 percent of the light that hits it. The material is plied with ripstop fiber and is thick enough to act as an insulator. It is also heat and flame resistant. For more information on Foylon, see www.greenair.com.
Foylon is a more durable version of Mylar, made of spun polyester fabric and reinforced with foil laminate. Foylon is resistant to most solutions, won’t tear or fade, and can be wiped or washed clean. More expensive and more durable than Mylar, Foylon reflects about 85 percent of heat energy and requires good ventilation. Attach Foylon to walls with Velcro, so that it can be easily removed for cleaning.
Mirrors also reflect light, but much less than Mylar. Light must first pass through the glass in the mirror before it hits the “silver” or metal amalgam. Light is lost when it is reflected back through the same glass.
Mylar, a thin (1–2-mil [0.001–0.002 in.]) mirror-surface sheeting in a roll format, provides a very reflective surface—up to 95 percent. Unlike light-absorbing paint, reflective Mylar reflects almost all light. To install reflective Mylar, simply tape or tack it to the wall. To prevent rips or tears, place a piece of tape over the spot where the staple, nail or tack will be inserted. Although expensive, Mylar is preferred by many gardeners. The trick is to position it flat against the wall. When loosely affixed to surfaces, light is poorly reflected. To increase its effectiveness, keep reflective Mylar clean.
Polystyrene foam (Styrofoam) sheeting is reflective and serves to insulate too. Light reflected from Styrofoam is diffuse, with no hot spots. Purchase rigid foam sheets to use as freestanding walls, or else tape, glue, or nail sheets to walls.
Rubberized roofing paint reflects up to 90 percent of the light that hits it. It is mildew resistant, high viscosity, and rubberized to form a rubberlike blanket that expands and contracts. It adheres to most surfaces, wood and metal alike. Rubberized paints are available at most hardware stores.
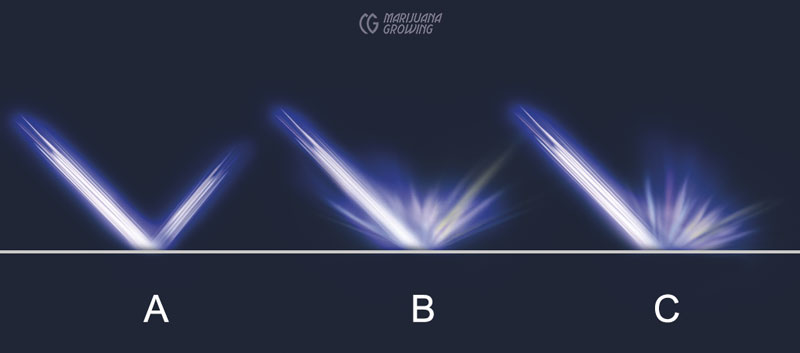
B. Diffuse: Equivalent to a non-shiny (matte) surface
C. Spread: Flat white surface that is diffuse with reasonable spread.
Visqueen plastic, in both white and white/black, is easy to clean and is perfect to use as walls or to cover walls of garden rooms. Attach white Visqueen to existing walls with screws, tape, or glue, or hang white/black plastic from ceiling to form garden-room walls. The black side does not allow light to penetrate. The white side is 75 to 90 percent reflective. Always use heavy, 6-mil Visqueen.
Increase light without adding more watts of light
Use several 400- or 600-watt lamps instead of one or two 1000s.
Manually rotate plants on a regular basis.
Add a shelf around perimeter of garden. Install rolling beds.
Grow a perpetual crop. Use a light mover.
Move small plants closer to the light.
Movable reflective walls are easy to remove for maintenance, and they give maximum reflection. Insulated green- house mobile blankets also make great garden room partitions.
Light Movers
A light mover is a device that moves lamps back and forth or in circles across the ceiling of a garden room. The linear or circular path distributes light evenly. Use a light mover to get lights up to 12 inches (30 cm) from plants. The closer a lamp is to plants without burning them, the more light plants receive.
Uniform light distribution makes canna- bis grow evenly, but it is not a substitute for more lumens from an additional lamp. It is a more efficient way to use each HID, especially 1000-watt lamps.
Slower-moving light movers are usually more reliable. Some fast-moving light movers can cause lightweight reflectors to wobble or list. Some light movers spin at a fairly rapid rate. I’m not sure if this makes a difference or not.
Gardeners report that light movers make it possible to use fewer lamps to get the same yield. And at the same time, I have never seen a light mover in a garden in Europe. Light movers increase intense light coverage by 25 to 35 percent. According to some gardeners, 3 lamps mounted on motorized light mover(s) will do the job of 4 lamps.
Motorized light movers keep an even garden profile. If the 1000-watt HID is on a 15- or 20-amp circuit, you can easily add a light mover that draws one more amp to the circuit, with no risk of overload.
Benefits of a light mover:
Bulbs can be placed closer to the canopy of the garden
Increases bright light to more plants
Delivers light from different angles, providing even lighting
Increases intense light coverage by 25 percent or more
Light is closer to plants
Economical use of light
Watch out for the following:
Stretched or leggy plants
Weak or yellowing plants
Foliage burned directly under the bulb
Uneven lighting
Light mover binding or getting hung up
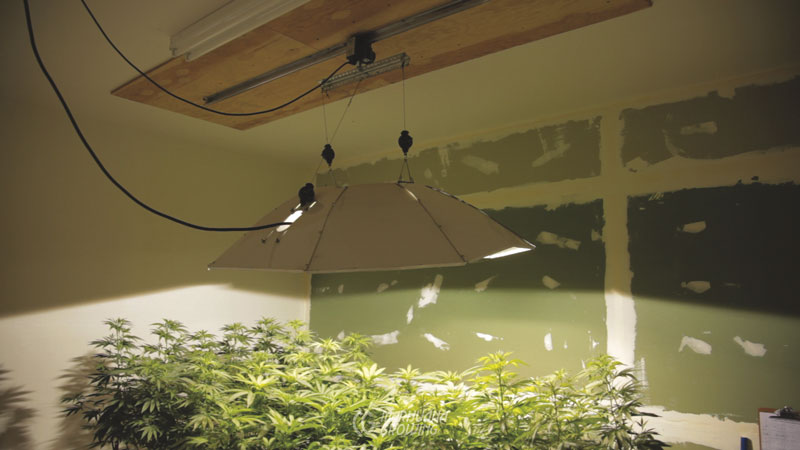
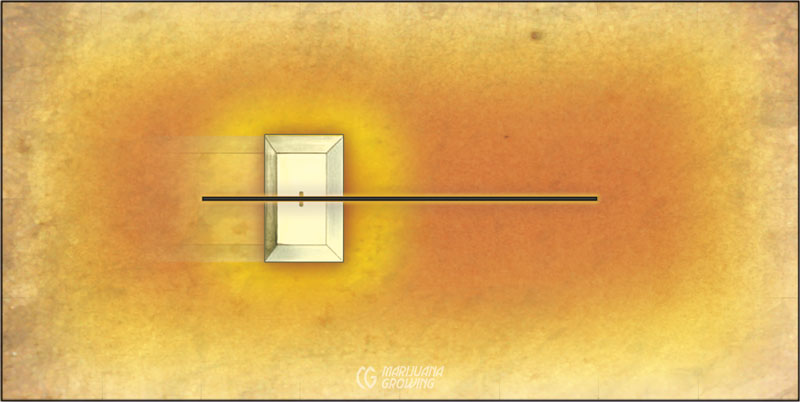
Electricity and Safety
Before you touch anything electrical, always unplug from the electrical outlet. Work backward when installing electrical components or doing wiring. Start at the bulb, and work toward the outlet. Always plug in the power cord last!
Purchase a current ABC fire extinguisher rated to put out wood, paper, grease, oil, and electrical fires. Some fire extinguishers are smoke-activated. Place them over heat sources such as ballasts. Place regular fire extinguishers alongside the exit door. You can see it every time you enter and exit, and if there is a fire in a room, the tendency is to go out the door! Make sure the ABC fire extinguisher is UL, CSA, or EMC approved.
Study the overload table on page 298 see the definitions for ampere, breaker switch, circuit, conductor, fuse, ground, GFI (ground fault interrupter) outlet, hertz, short circuit, volts, and watts in the following glossary. You will need to understand these terms to gain full use of the information in this chapter.
Keep electrical service about 4 feet (about 120 cm) above the floor, and keep all water and liquids on or near the floor. Electricity and water do not mix!
To learn more about electrical safety, check out the Occupational Safety and Health Administration’s website: www.osha.gov/Publications/electrical_safety.html
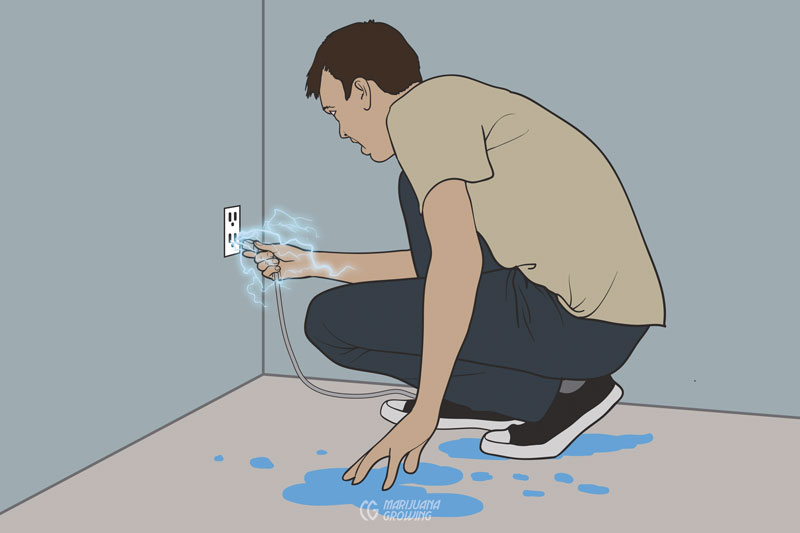
Ampere (amp) is the measure of electricity in motion. Electricity can be looked at in absolute terms of measurement, just as water can. A gallon is an absolute measure of a portion of water; a coulomb is an absolute measure of a portion of electricity. Water in motion is measured in gallons per second, liters per minute, etc. Electricity in motion is measured in coulombs per second. When an electrical current flows at one coulomb per second, we say it has one ampere.
Breaker box is an electrical circuit box that has on/off switches rather than single application fuses. The main breaker box is called a “service panel.”
Sub-breaker box (aka a subpanel) is attached and located just off the main service panel. The subpanel controls specific circuits. The power to the sub-breaker box must be shut off at the service panel.
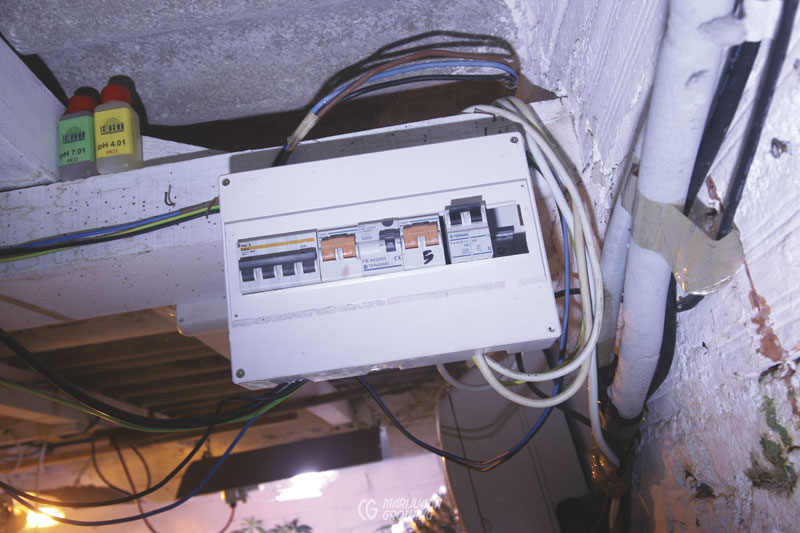
Breaker switch is an on/off safety switch that will turn the electricity off when the circuit is overloaded. Look for breaker switches in the breaker panel or breaker box. Breaker switches are rated for different amperes—10, 12, 20, 25, 30, 40, etc.
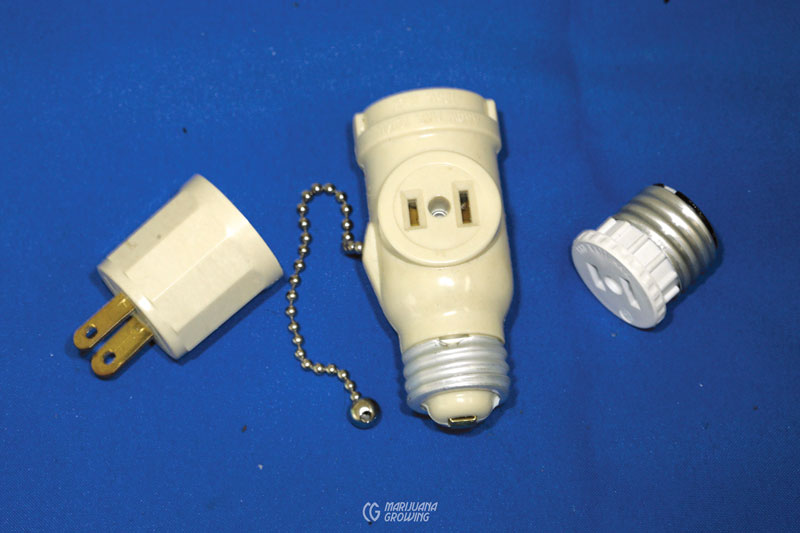
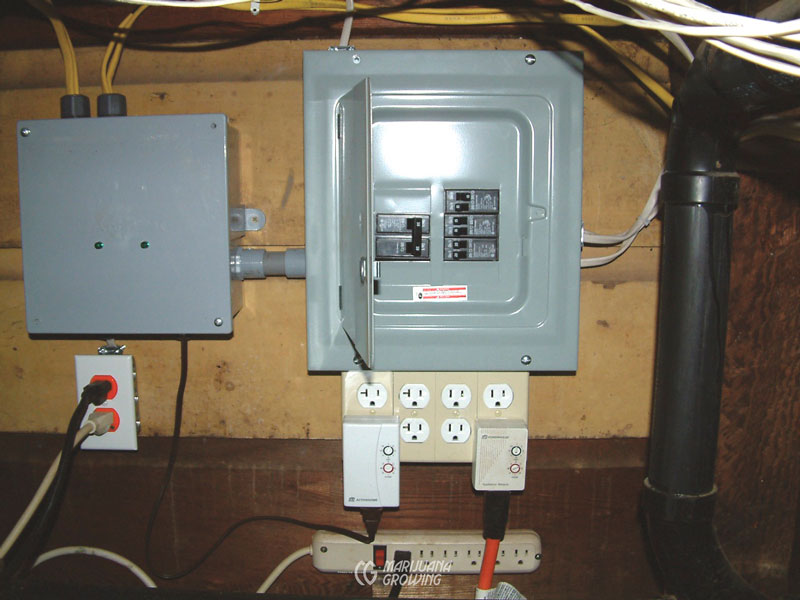
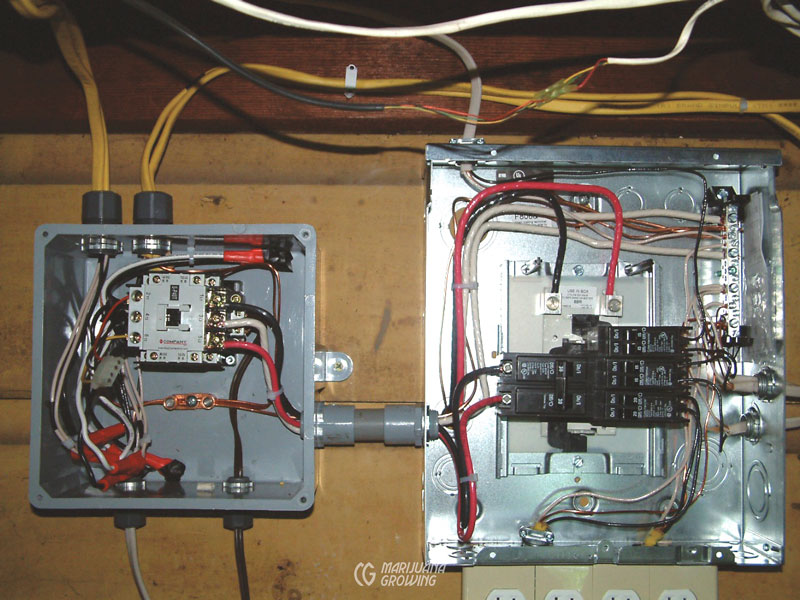
Circuit is the circular path that electricity travels. If this path is interrupted, the power will go off. If this circuit is given a chance to do so, it will travel a circular route through your body!
New circuits: Powering any more than 4 to 6 lamps usually requires adding new incoming circuits, or else the use of present circuits will be severely limited, possibly prone to fire. Employ a certified electrician to install more than 3000 or 4000 watts of indoor garden light.
Conductor is something that is able to carry electricity easily. Copper, steel, water, and the human body are good electrical conductors.
DC (direct current) is a continuous electrical current that only flows in one direction. Batteries run on DC current.
Fuse is an electrical safety device consisting of a fusible metal that melts and interrupts the circuit when overloaded.
Never replace fuses with pennies or aluminum foil! They will not melt and interrupt the circuit when overloaded; doing so is an easy way to start a fire. Fuses are virtually obsolete.
A fuse box is an electrical circuit box containing circuits interrupted by fuses.
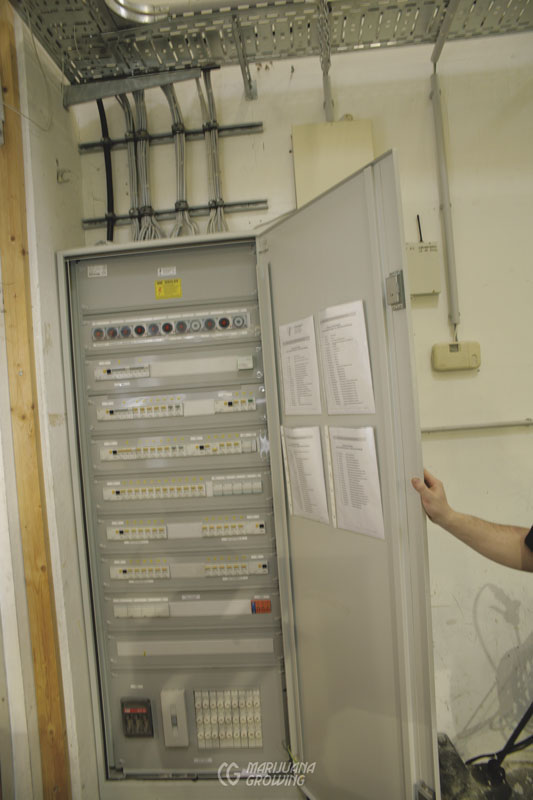

GFI: Ground fault interrupter outlets are required anywhere water is used in a home or business. Install GFI outlets in all garden rooms to provide an instant, safe, electrical shutoff when necessary.
Ground means to connect electricity to the ground or earth for safety. If a circuit is properly grounded and the electricity travels somewhere it is not directed, it will go via the ground wire into the ground (earth) and be rendered harmless. Electricity will travel the path of least resistance. This path must be along the ground wire.
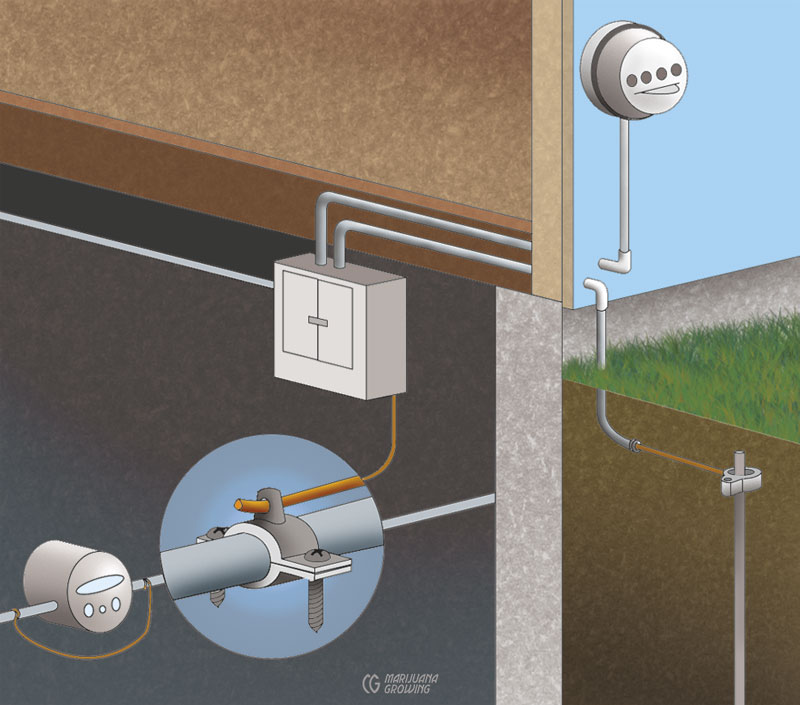
All electrical outlets, fuses, and connections must be grounded. Inspect electrical connections for signs of heat-blackened wires, melted connections, and smelly wiring.
The ground is formed by a wire (usually green, brown, or bare copper) that runs parallel to the circuit and is attached to a metal ground stake. Metal water or sewer pipes also serve as excellent conductors for the ground. Water pipes conduct electricity well and are all in good contact with the ground. The entire system—pipes, copper wire, and metal ground stake—conducts any misplaced electricity safely into the ground.
The ground wire is the third wire with the big round prong. The ground runs through the ballast all the way to the reflective hood. High-intensity dis- charge systems must have a ground that runs a continual path from the socket through the ballast to the main fuse box, then to the house or circuit ground.
Heat: Use a laser thermometer to inspect electrical connections for signs of heat damage; institute repairs immediately.
Ohm’s Power Law
volts × amperes = watts
115 volts × 9 amperes = 1035 watts
240 volts × 4 amperes = 960 watts
An HID lamp that draws about 9.2 amperes × 120 volts = 1104 watts.
| Amp Rating | Amps Available | Amps to Overload |
| 15 | 13 | 14 |
| 20 | 16 | 17 |
| 25 | 20 | 21 |
| 30 | 24 | 25 |
| 40 | 32 | 33 |
Wire size is important! See “Electrical Wiring and Circuits.”
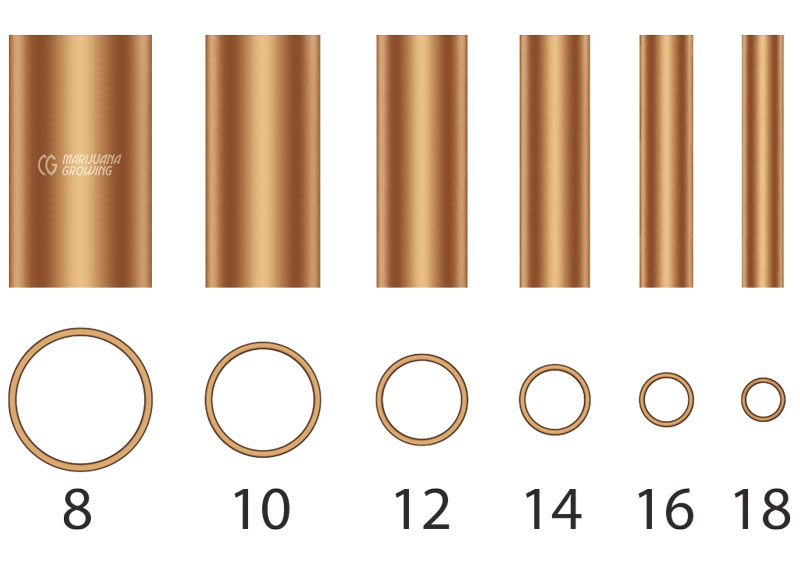
Watts measure the amount of electricity fl owing in a wire. When amperes (units of electricity per second) are multiplied by volts (pressure), we get watts. 1000 watts = 1 kilowatt.
Watt-hours measure the amount of watts that are used during an hour. One watt-hour is equal to one watt used for one hour. A kilowatt-hour (kWh) is 1000 watt-hours. A 1000-watt HID will use roughly one kilowatt per hour, and the ballast will use about 100 watts. Electrical bills are charged out in kWh.
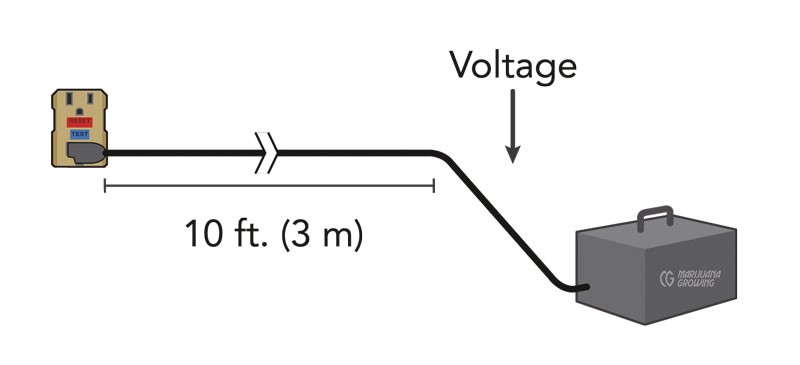
Electrical Wiring and Circuits
Electrical wire comes in many thick- nesses (gauges) indicated by number. Higher numbers indicate smaller wire, and lower numbers indicate larger wire. Most household circuits are connected with 14-gauge wire in the USA and Canada. Wire thickness is important for two reasons—amperage and voltage drop. Amperage is the amount of amperes a wire is able to carry safely.
Electricity flowing through wire creates heat. The more amperes flowing, the more heat created. Heat is wasted power. Avoid wasting power by using the proper thickness of well-insulated wire (14-gauge for 120 volt and 18-gauge for 240 volt applications) with a grounded wire connection.
Using wire that is too small forces too much power (amperes) through the wire, which causes voltage drop. Voltage (pressure) is lost in the wire. For example, by forcing an 18-gauge wire to carry 9.2 amperes at 120 volts, it would not only heat up, maybe even switching off breakers, but the voltage at the outlet would be 120 volts, while the voltage 10 feet away could be as low as 108. This is a loss of 12 volts that you are paying for. The ballast and lamp run less efficiently with fewer volts. The further the electricity travels, the more heat that is generated, and the more voltage drops.
A lamp designed to work at 120 volts that only receives 108 volts (90 percent of the power intended for operation), would produce only 70 percent of the normal light. Use at least 14-gauge wire for any extension cords, and if the cord is to carry power over 60 feet (18.3 m), use 12-gauge wire.
When wiring an outlet or socket:
The hot wire attaches to the brass or gold screw.
The common wire attaches to the aluminum or silver screw.
The ground wire always attaches to the ground prong.
Caution! Keep the wires from crossing and forming a short circuit.
Plugs and outlets must have a solid connection. If they are jostled around and the electricity is allowed to jump, electricity is lost in the form of heat; the prongs will burn, and a fire could result. Periodically check plugs and outlets to ensure they have a solid connection.
If installing a new circuit or breaker box, hire an electrician and purchase Wiring Simplifi ed by H. P. Richter and W. C. Schwan. It costs about $15 USD and is available at most hardware stores in the USA. Installing a new circuit in a breaker box is very easy but could turn into a shocking experience. Before trying anything of this scope, read about it and discuss it with several professionals.
A circuit with a 20-amp fuse, powering the following items:
1400-watt toaster oven
100-watt incandescent lightbulb
+ 20-watt radio
1520 total watts
1520 total watts ÷ 120 volts = 12.6 amps in use
OR
1520 total watts ÷ 240 volts = 6.3 amps in use
The above example shows that 12.6 amps are being drawn when everything is on. By adding 9.2 amps, drawn by the HID to the circuit, we get 21.8 amps, an overloaded circuit!
There are three solutions:
1. Remove one or all of the high ampere-drawing appliances, and plug them into another circuit.
2. Find another circuit that has few or no amps drawn by other appliances.
3. Install a new circuit. A 240-volt circuit will make more amps available per circuit.
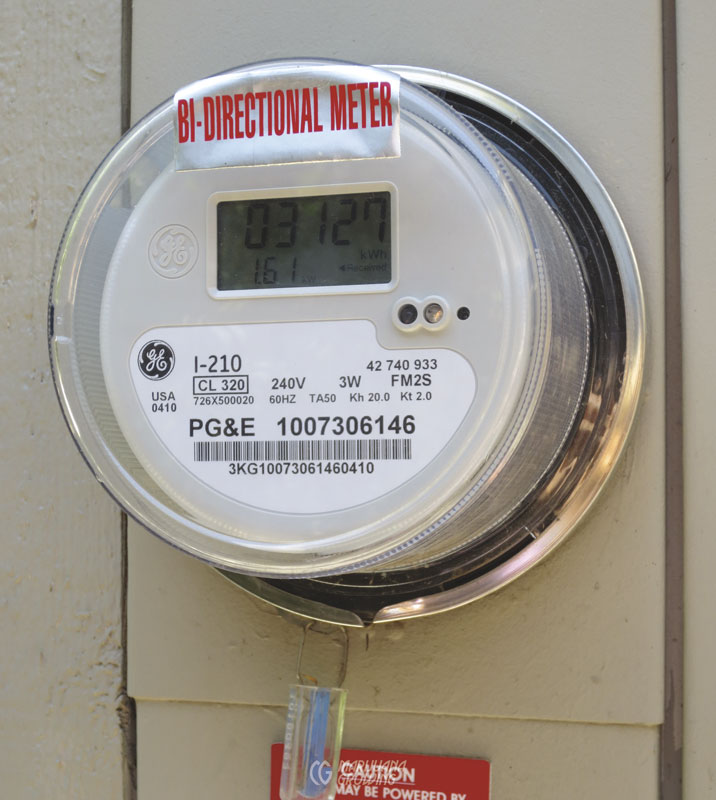
Electricity Consumption
The average electric bill for a small apartment that uses about 200 kWh per month is $40 to $70 USD. A large house with a hot tub and many electrical appliances can use 2000 kWh at a cost of $200 to 400 USD per month.
Most gardeners in the USA can safely use one 1000-watt lamp per room to grow medicinal cannabis. The tables on page 300 will give you an idea of the efficiency of each type of lamp, its “cost per watt,” and its “value per watt.”
Electrical records are considered to be in the public domain in some jurisdictions; anybody—including disgruntled friends, thieves, and law enforcement—can access them with the touch of a computer keyboard. In some communities, judges are easily pressured or bullied by law enforcement into issuing search warrants.
There are many legitimate reasons for unqualified “suspicious” electricity consumption that are not investigated. Armed searches based upon electrical records are a recipe for failure and for law enforcement budget shortfalls.
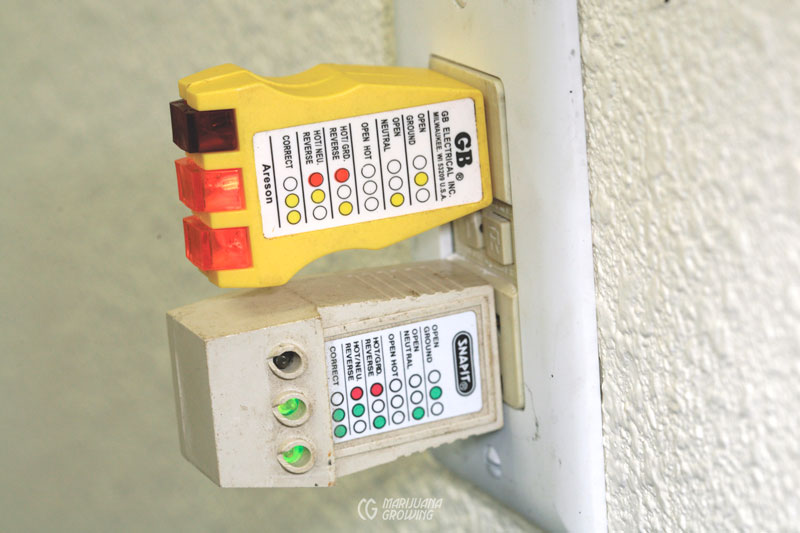
Conserve Electricity
Lower the carbon footprint of indoor and greenhouse gardens. Avoid using diesel generators. Use energy-efficient appliances, refrigerators, water heaters, and so on. Monitor and minimize electrical consumption. To avoid electricity draw, unplug appliances when they are not in use.
Use alternative energy sources such as solar and wind energy, or any non-fossil fuel, to decrease your carbon footprint. Alternative energy sources are often more expensive at startup, but they pay for themselves many times over in the long run. Check into rebates and tax credits offered by local, state, and national governments.
To limit electrical consumption, move into a home with a basement, all-electric heat, and a woodstove. HID lamps installed in a basement garden also generate heat. Disperse excess heat with a vent fan attached to a thermostat/ humidistat. Turn off the electric heat, and use the woodstove as needed.
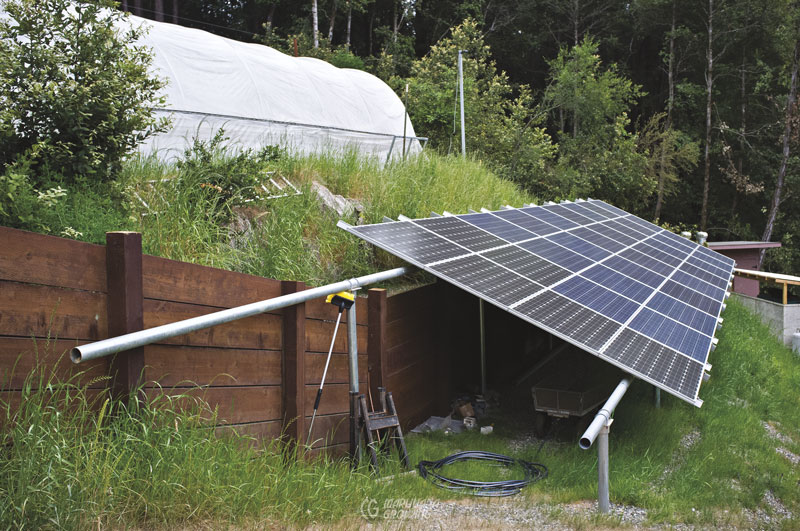
Set the water heater for 130°F (54.4°C) instead of 170°F (76.7°C). This easy procedure saves about 25 kWh per month. But do not turn the water heater any lower than 130°F (54.4°C). Harmful bacteria can grow below this safe point. An alternative would be to install an “on demand” water heater.
Human electric meter readers are disappearing, falling victim to smart meters. Human meter readers often use high-tech telescopes to read the meter dials that store the readings in an integrated digital entry device. The information is then dumped into the larger computer at the central office. Evidence of the DEA sending instructions to electric companies in the past exists, but it is uncommon.
Electric companies often replace meters that show a major change in electricity consumption. The first step is to change the meter. It is upgraded to a smart meter where the technology exists.
| LAMP | COST PER WATT IN USD | LM/W | VALUE PER WATT IN USD |
| metal halide (MH) | $0.5 | 100 | $200.00 |
| high-pressure sodium (HPS) | $0.5 | 140 | $280.00 |
| T5 compact fluorescent lamp (CFL) | $0.5 | 100 | $200.00 |
| T12 fluorescent | $0.27 | 22 | $81.48 |
| light-emitting plasma (LEP) | $3 | 82 | $27.33 |
| light-emitting diode (LED) | $0.7 | 90 | $128.57 |
| COST OF ELECTRICITY (IN USD) | ||||||
| Cost per | 12-hour days | 18-hour days | 24-hour days | |||
| kWh | Day | Month | Day | Month | Day | Month |
| $0.10 | $1.20 | $36.00 | $1.80 | $32.40 | $2.40 | $72.00 |
| $0.15 | $1.80 | $54.00 | $2.70 | $48.60 | $3.60 | $108.00 |
| $0.20 | $1.80 | $72.00 | $3.60 | $64.80 | $4.80 | $144.00 |
Smart Meters
Smart electric meters record electricity consumption in intervals of an hour or less and send this information back to the central office at regular intervals. Electricity consumption is therefore constantly monitored. Electric companies are replacing old analog meters with more efficient digital smart meters that do not require an employee to physically read electric meters. Utility customers can monitor electricity use via the company’s website from a computer or a handheld electronic device. However, smart meters have been under increasing scrutiny by those who cite a high degree of inaccuracy, invasion of privacy, and extraordinary electromagnetic activity. Some communities have taken measures to ban smart meters altogether.
Timers and Controllers
A timer is essential to turn lights on and off at the proper times. This inexpensive investment can also turn other appliances on and off at regular intervals. Using a timer ensures that your garden will receive a controlled light period of the same duration every day. Purchase a heavy-duty grounded timer with an adequate amperage and tungsten rating to meet your needs. Some timers have a different amperage rating for the switch; it is often lower than that of the timer. Use a timer with a two-pole contact switch. The sudden rush of electrical current is not compatible with household timers. Timers that control more than one lamp are more expensive, because they have to be able to switch a very high current. Many prewired timers are available at stores that sell HID lights.
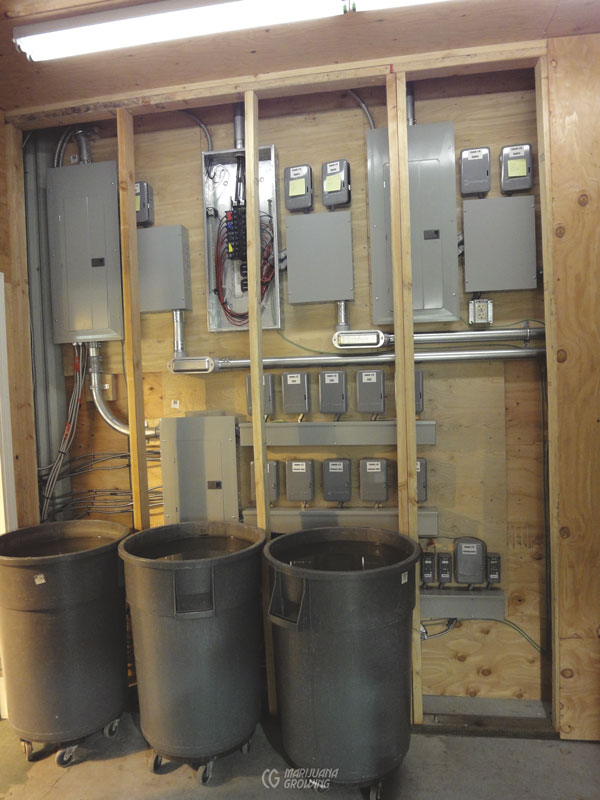
If running more than 2000 or 3000 watts, attach the lamps to a relay, and control the relay with a timer. The advantage of a relay is that it offers a path for more electricity without having to change the timer. There are numerous sophisticated timers on the market that will solve every timer need you have.
Digital controllers can turn lights on and off and control fans, air conditioners, irrigation cycles, and more. Many cannabis gardeners prefer to use a controller to keep the environment in the room stable. For example, the humidity rises when the lights go out. The vent fan must be activated to evacuate the humid air; using a controller assures consistent timing.

Electric Generators
Diesel and gasoline generators are noisy, messy, and expensive to operate. More importantly, they are extremely polluting to the environment.
Gardeners in Northern California and Oregon have related many stories of diesel generators, all of which lacked glamour and reeked of petroleum and noise. Imagine a big heavy fuel truck arriving to your rural home on a gravel or dirt road. The truck spills and splashes gas or diesel fuel on the road, leaving a “footprint.” The diesel pollution can seep into groundwater.

Check out the Livingston Survey, which claims that indoor cannabis gardeners account for 1 percent of electrical use in the USA, $5 billion every year. See “Cannabis Carbon Footprint” in chapter 10, Garden Rooms.
Medical gardeners who use gas and diesel generators might not be carefully considering environmental impact. These generators can supply all the electricity necessary for an indoor garden to grow “off the power grid,” but carbon footprint, reliability, and noise are serious considerations.
Auxiliary generators are essential when a power-outage emergency arises for a few days. A couple of small generators can save an indoor crop. If the lights go out for a few hours, no problem; but if they go out for 3 to 4 days, plants suffer. A generator that will supply enough electricity for a skeleton crew of lights will keep harvest dates on track.
Buy the generator new. Larger generators should be water-cooled and fully automated. Start it up and check its noise output before purchasing. Always buy a generator that is big enough to do the job. A little extra cushion will be necessary to allow for power surges. If the generator fails, the crop could fail. Allow at least 1300 watts per 1000-watt lamp to be run by the generator. The ballast consumes a few watts, as does the wire. A 5500-watt Honda generator will run four 1000-watt lamps.
Honda generators are among the most common generators found in garden rooms because they are reasonably priced, dependable, and quiet. But they are not designed to work for long periods. Generators also guzzle a lot of gas. Diesel motors are more economical to run, but noisy, and the toxic fumes reek. Always make sure gasoline- or diesel-powered generators are vented properly. Their exhaust produces carbon monoxide, which is toxic to plants and fatal to humans.
Diesel generators for truck and train car refrigerators are fairly easy to acquire and last for years. Once set up, a “Big Bertha” generator can run many lights. Big gasoline generator motors can be converted to propane, which is a cleaner-burning fossil fuel.
Generators are usually moved to a belowground location covered by a building. With a good exhaust system and baffling around the motor, the sound is soon dissipated. Muffling the exhaust and expelling the fumes is a little more complex. The exhaust must be able to escape freely into the atmosphere. The generator will need fuel, and must be monitored regularly. Maintaining a generator that runs 12 hours per day is a lot of work. If the generator is left alone and shuts down prematurely, plants stop growing.